Transcripts
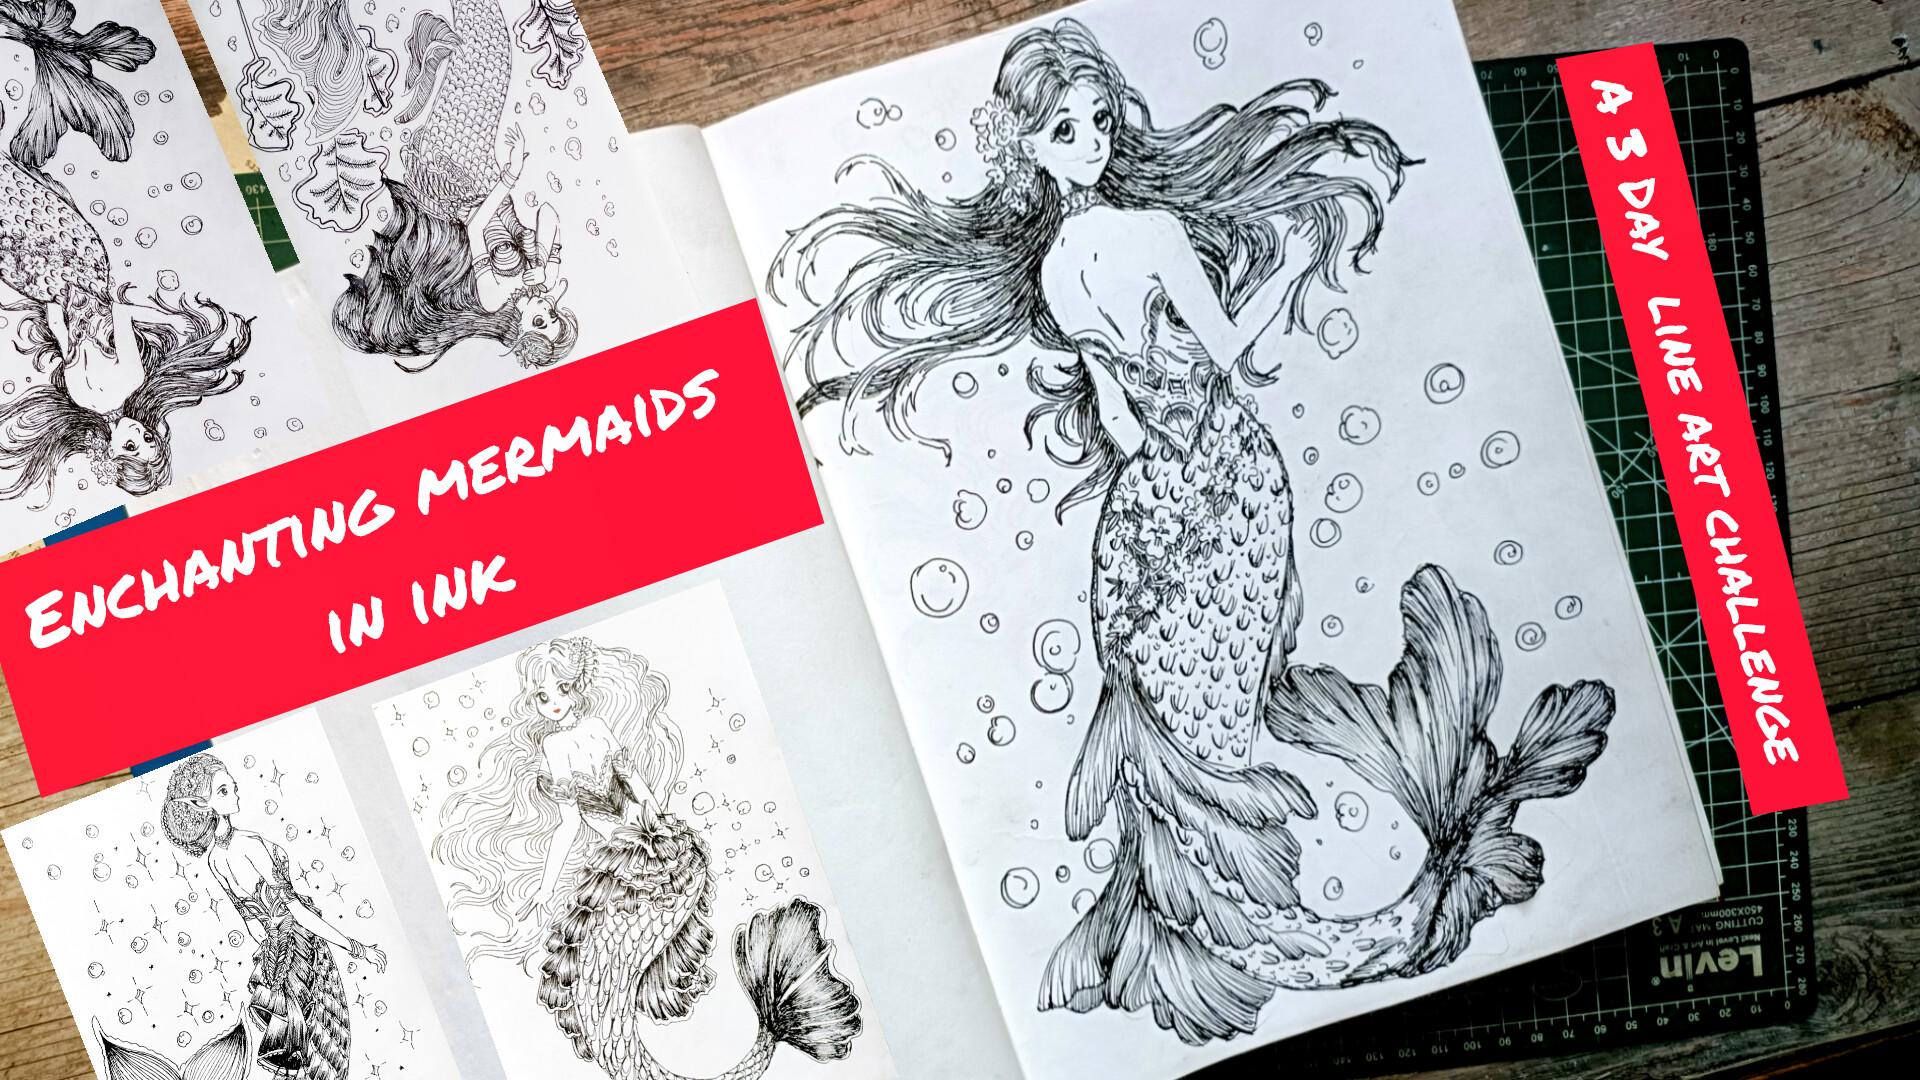
1. Welcome and Introduction : Hi, everyone, and welcome to my new class enchanting
Mermaid in Ink, a five day line art challenge. In this class, you will
learn how to create beautiful and detailed line art illustration
using Fine liner. We'll focus on flowing for intricate pattern and
expressive details to bring each mermid to life. We'll be working on
three main projects. The first one was a
glance from the deep. The second one is this
Oceans grease ful bloom, followed by Echos Beneath
the star, the third project. Along with this, we also
have a bonus project, Seaweed Serend in which we'll
be using more supplies. Hi, everyone. My name is Vishal. I'm an artist from India. On Skillshare, I teach g
friendly classes on oy, Piston, watercolor, ink
illustration, and more. You can also find more of my work on my
Instagram and YouTube. In this class, we'll start with the basics where I'll
guide you through essential techniques
like line control, hatching and detailing. I'll also show you how to construct mermaid form,
including the body, piece and flowing tails along with few
decorative elements. All the legions
are in real time, so you can always
follow along with me comfortably at
your own piece. I'll be uploading one project
each day of the class. This class is perfect for anyone who enjoy detailed line art and wants to explore creating elegant and expressive
mermid illustration. So join me in this class and let's create something
beautiful together.
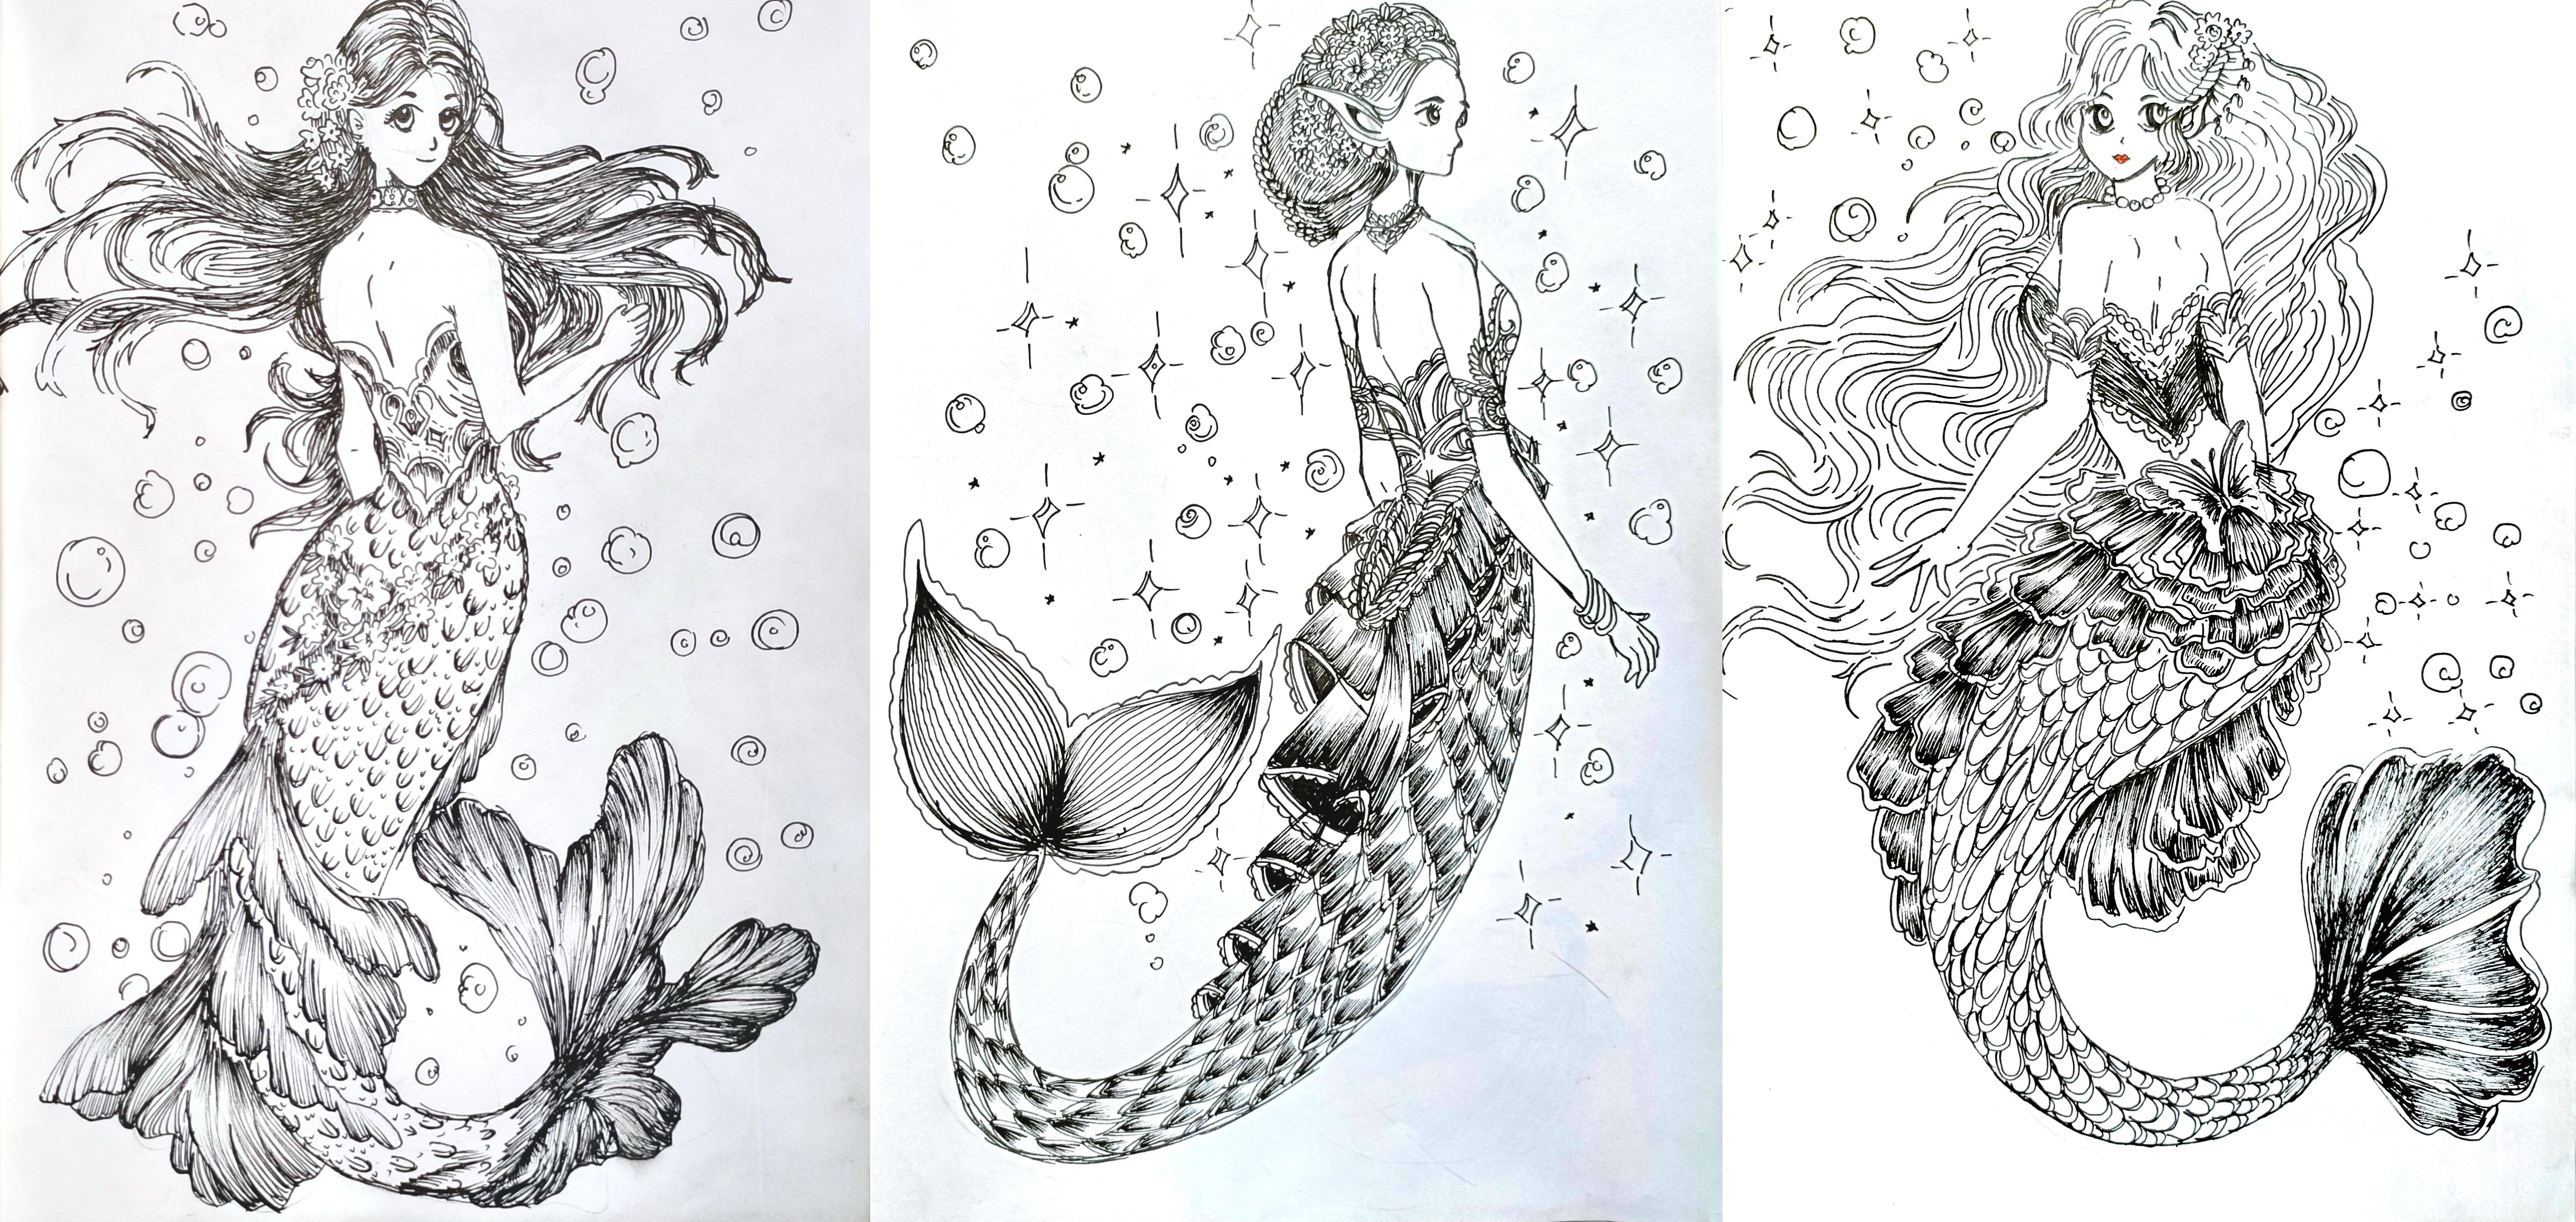
2. Class Project : For this class, we have got
three main illustration. For the first one in here, we have a glance from the team, followed by Ocean's
Graceful Bloom. Then we have the echos
beneath the stars. And here's the bonus
one Seaweed Serenade. I'll be uploading one
project each day so you can follow along step by step and build your
skills gradually. For your class project, you can choose to
complete all the project or simply pick your
favorite one to work on. Along with your
final illustration, I also encourage you to
see your practice seeds. This includes your hatching, line exercises, fees, studies, and mermaid
construction sketches. Once you are done,
don't forget to upload your work in
the project gallery. I'll be personally going through your project and
sharing feedback. I'm really excited to see
your beautiful mermaid. So take your time,
enjoy the process, and let's get started.
3. Supplies: For this class, I'll
be using a pencil and as it to do the
basic pencil sketching. Then we have got Sakura
micron fine linear. For most of the project, I'll only be using
it apart from it. I also got this Tombospespin. Instead of it, you can also use other supplies you can use. You can use JL pen sketch pin
or normal boil point pin. You can also use
white jelly pen to add highlights or a little
bit more detailing, masking tape to
secure the paper. In here, I'm using 180
GSM, white colored paper. Any paper of more than
150 GSM will do the work, and I'll also be
using tissue paper. You don't need all the supplies to create the illustration. You'll only need a
simple fine liner or a normal Wallpoint queen
will do the work too.
4. Basics : Welcome to the second
part. In here, we'll explore some
additional technique that will help you
add more depth, texture, and visual interest
to your illustrations. Let's start with
the cross hatching. This cross hatching
builds upon the hatching. In case of hatching, we only use one set of parallel lines. In here, we are using two sets of parallel lines, one
on top of the other. The first example one was
with vertical and angle line. In here, I created vertical
and horizontal lines. Here's the third example
with both diagonals one. Like the hatching
lines, we can also do the seeding using
the cross hatching. We'll just increase the
number of the lines. That is increasing the
number of layering. In here, I'm going to
make the top section, the top left side, bit darker, so I'm adding more lines in that region
to make that region darker. Generally for the
cross hatching, we use two sets of the line. Instead of it, you can use
three or more sets like this. I here I'm using three
sets of the line. For the final example,
I'll be using four sets of the line
like the hatching, here is piecing line
weight also matters. Be using crosshatching
for any of my project, but if you want to include it, you can include in some of
the sections of the project. With the cross hatching,
you will get a bit more darker and deeper shadows. You can use it to create her texture and to
create fabric folds. Next in here, we have got a
stippling or dot technique. Stippling uses dots instead
of lines to create sating. This simple dots like this. This is a very
versatile technique. The main disadvantage is
that it takes a lot of time. I won't be using it, but
you can use it to add minor details or create a different kind of texture
for some of the sections. Right now in here, I'm doing sading using the
hatching technique. We are going to make the
left side a bit darker, so I'll be adding more dots. Like the hatching and the
cross hatching here too, fewer dots leads
to lighter area. With denser dots,
we get darker area. You can also use it
to create seeps. Again here, I'm going
to use the stepping to create the circular
seeps and then I'll be using stippling dots to do a little bit of sading
for this spherical sail. Apart from this,
you can also use strippling to create
a little bit of skin tracture and you can also use it for creating
bubbles or stars. And as I was mentioning, you can use it to create
outlines like this. Using this kind of
simple dots to create outlining in this manner
with the stippling. The stippling is not all about
this kind of smaller dots. You can create varieties
of dots like this, simple circular seeps
like this in this manner. And as I was mentioning, I'll be using this
kind of stippling. Instead of smaller dots, I'll be using this kind of larger circular seeps to create the bubbles
for the background. Some of the oval some of the bubbles will be
circular and seeps, some will be somewhat oval and a little bit
distorted like this. So in this manner, I'll be using the
stippling in some of the sections of our
project for the mermaids. Next in here, we
have got stippling. Scribbling is a very free
and expressive technique. It creates loose texture. Generally, I'll be using this
kind of free flowing lines and you don't have
to use this kind of curve lines to
do the scribbling. You can also use this kind of angled line or this
point of pointed lines, this angle curved or
straight lines like this. I like strippling hatching
and cross hatching, you can also do the seeding
using the scribbling. The main advantage
of this scribbling is that it is very
time effective. It does not take that much time. You can use it to
do he or create background shadows or create organic texture like see plants. Section, we have got a small
line pattern and mark. This includes sort lines, random strokes, radiating
lines, and clustered mark. The first one was
random sort lines. Then we have got a little
bit organized one. The third example that I
created, radiating lines. And here's another one, clustered arrow like marks. Random marks like this. This can be used to
add texture quickly. It also gives motion and
energy to the illustration. Mostly, I'll be using it to fill empty spaces without
heavy seating. Can take it a step further and create
this kind of tiling. Here are a few more
examples like this, simple curved lines,
small lines like this. You can use to
create this kind of small curve B saves or somewhat smaller scales of
the scallops like this. Moving on to a little bit
more sting like this. So somewhat similar
to what we did with the hatching and here instead of applying low presser,
I am applied. I applied more
pressure and flick my arm to get this
kind of hatching line. You can use it to create a little bit of this kind
of grass like texture. Some of the background
elements that I'll be using simple star
like sees like this, four pointed or five
pointed stars like this, you can make it larger, smaller. I'll be using it along with the bubbles for the background. Here smaller version
of the stars. Apart from it,
I'll also be using this kind of broken lines. For some of the sections, I'll be using this kind
of broken lines to give a little bit of more
details to the background. Then we have this kind of
organic swirls and curve lines. This can be useful to
create water currents, here, movement, and
stylized design elements. So that's all for this section. I'll be seeing you
in the next one. Oh.
5. More Techniques : Welcome to the basics, and this lesson we'll go through the essential line technique that we'll be using
throughout the class. This basics will help
you create flow, texture, depth, and details
in your Mrmtillustration. In here, I'm using Tombos
Busbin to create simple lines. Right now, I'm using different
supplies that I have. Feel free to taste
out your supplies and what kind of supplies
you are going to use. For most of the
project, I'll only be using the Sakura
micron fine liner, but with a different
kind of supplies, you will get different
kind of line. With the breastbin you will get a little bit more
density of the line, or you can see
increased line weight. With the ski pin too,
you can use it to do a little bit of outlining
and create darker tones. You can also use el pin or
normal wall point pain. So I would recommend you to try different supplies and see what kind of lines you
can get with that. Let's start with a
very simple hatching. I hatching, we use
parallel lines like this, simple straight parallel
lines like this. Here's another example of
angled hatching lines. For most of the project, I'll be using a lot of hatching. Hatching is not only
parallel lines. We can add a lot of
varieties to it. Like in here, we are wearing the spacing
in between the lines. With evenly spaced lines, we can create light tones with closer lines like this here, we can create darker tones. In case of diagonal
or angle lines, we can create variation
and change the directions. The closer the lines are, the darker the area will appear. In here, I created four boxes, you can see how layering
lines build up. Me layers leads
to darker shadows and fewer lines lead
to lighter areas. Like in here for
the bottom section, the bottom right corner, I added more lines to make
it a little bit darker. Seeding using this
kind of hatching line. I'll be mostly using this for her hair, for
the mermaid's hair, for some section of
the mermaid's fin or some section of
the mermaid tail. For the second example in here, I'm using straight
lines and we are going to make the left
side a bit darker, adding more hatching
lines like this in this manner to
make it more darker. I'll be using seeding using the hatching lines to
make some sections of our here or some section
of our tail a little bit darker to add a little bit of
contrast and to heat sados. Mostly, I'll be using
curved hatching lines. The setting that I'm doing is somewhat similar to
what we did with the diagonal lines in here
we're creating straight lines. Next in here, we have got a different kind of seeding
using hatching lines. Instead of using
larger lines in here, I'll be using smaller lines, smaller hatching lines, and
we'll be using rows and rows of hatching lines like this in this manner to
do the seeding. Basically, we are going to fill the entire section
with this kind of simple seeding lines, simple hatching
lines like this in this manner to get a little
bit of darker region. I'll be using this kind of seeding for some of the
smaller section for the scallops on top of the mermits fin and on
top of the mermittil. Only using a small amount
of this kind of sading. Apart from this,
we'll also be doing the seeding in this
manner like this. This kind of seating is somewhat similar to pencil seating. You'll have to just
click your arm to get this kind of lighter seeds. If you apply a little
bit of heavy placer, you can get a little
bit of darker tone or you can just do two
layers like this in here. For the second
section, I'll be doing two layers to make it
a little bit darker. I'll be using a lot of
this kind of seeding, particularly for
the mermaids fin and a little bit for
the mermaids hair. I'll also be using
it for some of the section for the
mermaid's clothing. This is going to be a very versatile
seeding that we'll be using You've got a rough idea how we'll be using hatching
lines to do the seeding. This will simple straight
angled on diagonal lines. Apart from this, we'll also
be using curved lines. These curved lines are extremely important for the mermid. We'll be using it to
create hair flow, tail movement, and to
create water current. We can use simple curve
to sew gentle flow. We can use layered curve to
sew volume and direction, and we'll also be using spiral curves to give
dynamic movement. You can consider it somewhat similar to the hatching lines. So we'll be using
hatching technique along with this kind
of curve lines. The curve line that
we are creating in here will come handy. We'll be using this to follow the seeps and fill a
lot of empty spaces, like we'll be
following the seeps of the strands of the here
that we'll be creating or we'll be using it to
follow the seeps of the scales that we'll be adding on top of the mermaids tail. For some of the sections
of the mermaids clothing, we'll be using the kind
of curve lines to do the outlining or to add
decorations on top of it. Here's a simple example
of how we using the curved lines to create
strengths of our hair. We'll be making the ends a
little bit darker like this. In here I showed you
how you can follow the seeps or the fw when
drawing the curve lines. This will make our drawing look more natural
and more alive. Next, we have got scallops. Scallops are basically
seps that are repeated in curve pattern,
generally curved patterns. We'll be using it to create
mermaid tail scales. Also we'll be using it to
create decorative pattern or to create fabric or
ornamental details. These are some of
the simple kind of scallops that I'll be using. You can also create the scallops further apart or
separate it like this. We'll be adding
more details to it, and apart from that,
we'll also be doing the seeding using curved
line or hatching lines. And you can also use
the pointed variations to get SAP designs. In case of the scallops, keep spacing consistent
for knee patterns, and you can do the overlapping to create a natural
scale effect. For our main project, we'll be using all these
techniques together. We'll be using lines
to create a structure, we'll be using hatching
to create depth, curves to create movement, and scallops to create texture. The more you
practice the basics, the easier it will be to create detailed and elegant
environmental illustrations.
6. Mermaids : Welcome to the final tutorial. In here, I'll be showing
you the simple guidelines that I'll be following for
all the projects in here. For all the mermds
that I'll be creating, I'll be following the
simple guidelines. I'll be dividing the mermts
body into two parts. For the first part, we'll have the humanoid form of the mermid
and for the second part, we'll have the Cl
creature, the fist part. For the upper part,
we'll be dividing into four equal sections. Lower part will
have four sections or more than four sections. Generally for most
of the section, I'll be increasing the
sections for the lower part. Instead of the four equal part, I'll be creating six or seven. For the face of the mermaid, I'll be using this
simple tide line, circular and curved
see for mermidpace. Then we have got this kind of rectangular see for
the upper section, the chest of the mermaid. And for the remaining
1.5 section, we'll be creating her stomach. I'm going to make the stomach
a little bit thinner, and for the lower section,
we'll have the mermd's tail. Mermit's elbow will
be lying in here, this beside her
stomach like this. And for the mermaid's
tail in here, we'll be making this
section, the torso, we'll be making
the mermid's torso at the waist a bit thicker, comparatively thicker
than the mermaid's chest. By thicker, I mean the width of the mermid's tail will be comparatively larger as compared
to the mermaid's taste. So this is the simple guidelines that will be following
for straight mermid and now a
little bit curve or mermid in
different directions. As I mentioned, for
the upper part, we'll be dividing
into four sections. Simple straight line
for the upper section, and as for the mermid tail, you can create any kind of
sep curved see like this. Usual guideline, circular
seams for the top. Then we have got this
kind of conical sea or rectangular seam for the
chest and the stomach. I'll be dividing the arm
into two sections so that it will become
easier to sketch it out. And we'll be creating very simple hand gestures so that it will be
easier to create it. I won't be making it
that much complicated. As for the mermit
tails and the pins, I'll be showing you
different example for all the projects we have created very simple yet very different kind of
pens and mermt tail. Here's another one. So in here, I'll be changing the direction
of the head like usual, starting with a
straight line like this for the upper section
of the mermt's body, any kind of curve cheap
for the mermt tail. Here for the mermaid head, this will be shifted
a little bit towards the upper
direction like this. For the first three section, we have this kind of straight line and for the fourth section, we are just going to
change the angle of the straight lines and create the head in
the same manner, the same kind of proportion. But for the torso and
the remaining portion, we'll have to sift
it accordingly. We'll have to make it a
little bit curve like this. Her arms and the
remaining section, the upper part will
remain somewhat similar, and we'll be changing the direction of the
hand and placement of the hand depending upon
the curve of her body. You can create any
kind of MermdT, any set or any curve. These are the simple guidelines that I'll be following for all the four projects that I'll be creating for this class. As for the mermaids phase. Start with the simple
straight lines and divide into three sections. For the first two section,
we have got circle, and for the remaining section, we have got this kind
of triangular scene. We have got here in here
for the upper section. Simple guidelines like this for the eye socket and just below the circular CP nose and albicleting very simple
nose and mouth like this. Now you can play with
these guidelines. You can make it a little
bit over like this. In here, I just increase
the width of the face. The guidelines for the eyes, the nose and the mouth
will remain similar. But in here since
I have increased the width, accordingly, we have to set the eyes and nose and the mouth a
little bit further apart. The first phase that
I showed you was somewhat similar to real human. The second one is
somewhat anime. Mostly we'll be using
somewhat of combination of first and second one to create
a phase for our mermids. Let's create a few
more examples. This is the kind of pace that I'll be using for
two of the mermids, this kind of anime life piece. A bit larger circle and then we have a small elliptical s. For all the mermid, generally, I'll be creating large eyes
like this, anime like eyes. You don't have to follow
the same instruction. You can create human like eyes. But to make it a little
bit more animated, I'll be creating larger eyes, smaller nose and mouth. As we separate the
difference lines accordingly to the
position of her body, we can do the same
thing for her face. We'll be sifting the acessine
vertical lines accordingly. Like in here for
this two example, I'll be shifting
her face toward, left or up or down. In here, her face
is tilted towards this direction towards the left. For this phase, let's
shift it towards the left. So accordingly, we'll be shifting the eyes,
nose, and the mouth. The horizontal line has also been shift
ined a little bit. In here, for this pace, the
piece is tilted downward, so accordingly, the height of the piece has decreased
a little bit. And in here for this face, it's facing towards the lab. So only one side of our face
will be visible like this, only one eye, the nose
will be visible like this, we'll be creating
sharp nose like this. For one of the project,
we'll be creating the side view for the
mermit like this. The pieces that we'll be
creating will be more detail. These are just draft
demonstrations so that you can get a
rough idea how you can easily create paces in
different proportions and different sizes and in
different direction. This face is similar. This
face is looking towards up, and it's a little bit shifted, and it's a little bit
tilted like this. So accordingly, I septate
the placement of the eyes, nose, and the mouth like this. The hair that we'll
be adding on top of the head will be a
little bit thicker. So on top of the circular save will be increasing its thickness a little bit by adding the
layer of hair on top of it. As for the eyes,
I'll be creating this kind of larger eyes. Inside this somewhat
elliptical seams, we'll be adding eyeballs
and the pupils, large eyeballs like this. As for the eyebrows, I'll be
creating quite smaller one, and for all the eyes,
I'll be adding eye lass to give it a little bit
more characteristics. Instead of this larger eyes, you can also create
this smaller eyes. You can create this
smaller or slanted eyes. Here's one more example
of human like eyes. Simple elliptical seeps like
this to eyes like this. Three or four elases. The eyes, the nose
and the mouth that we'll be creating won't
be that much ditty. We'll be keeping it quite
simple and quite easy. Here's another
example of large eye. For the larger eyes, I won't be creating the complete outlines. I'll be leaving some of
the pieces like this. I'll be leaving some section of the outlines empty like this, and for the insights, we'll
be adding large eyeballs, pupils, and IVs like this. Let's put the nose
and the mouth. I'll be using very simple Als for the nose and for the mouth, very simple straight line
like this or curved lines. Here's a very simple
demonstration for the nose, simple ALS that's a
simple guidelines that I'll be following
for all the mermaids.
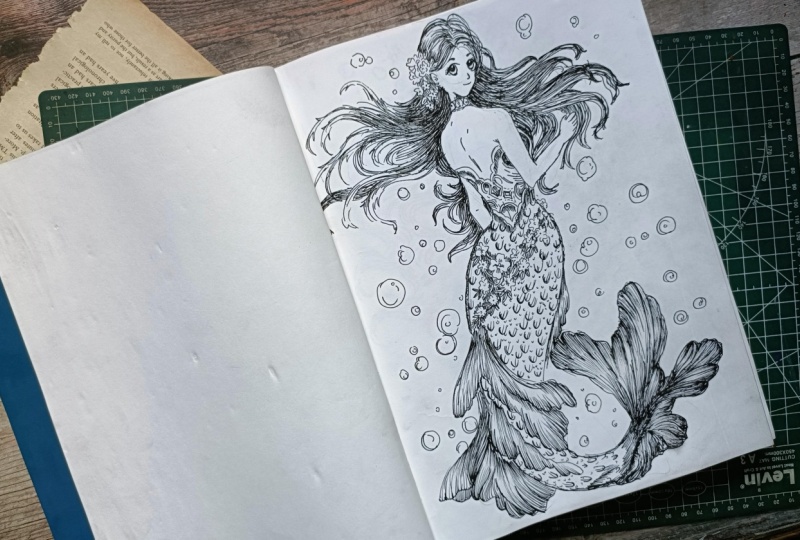
7. A Glance from the Deep : Welcome to the first project, a glance from N D. Starting with simple outlining
the same kind of guideline that
I showed you in the earlier demonstration
with you, a straight line. Now we are going to divide
into eight equal section, first divide into
two equal halves, then further divided into four equal halves and
finally into eight section, the first four sections will
be for her upper part of the body and for the remaining four sections
on the lower sections, we'll be using it to
create the mermaid stay. For her face, starting
with the circular C. Now we are going to
extend it a little bit, the lower section of her face. You will be facing
towards the right, and she will be looking
towards us a little bit. A curved line like this, this will be the seep of her body. Her body is a little
bit towards the right. Extending it a little bit
like this for her face. We are going to create
a bit thinner neck. Now for the neck, two
simple lines like this. Since our face is towards
the right a little bit, and it's a little bit
tilted using this kind of angle line for the
middle section of our face. Now, for that in the upper part, we are going to create
somewhat of rectangular C. You can consider it to be somewhat of
conical or rectangular C, a combination of both
following the curve see, the as see that we have created. Making her waist bit thinner,
comparatively thinner. This is more similar
to the conical see than to the rectangular see. This will be the back
of the mermaid in here. This will be her right hand. He left hand will
be beside her body, so it won't be visible. Only a small portion
of it will be visible. If you want to
change the placement of the hands, you
can do that, too. For this mermaid, I won't be adding any ornaments
on her hand. But if you want
to add ornaments, bangles or accessories to
it, you can do that, too. I'm just going to create
simple hands like this. She won't be holding anything, but if you want to
add any objects on her hand, you
can do that, too. This is going to
be a rough sketch. When we'll be doing the
inking using the fine liner, we'll be making changes
in adjustment so you don't have to stick
with the pencil sketch that you have created. Feel free to make changes in
adjustment as you see it. Now for the mermaids tail, we are going to make this
section a bit thicker. Following the as seed
that we have created and making the mermaid tail a little bit thinner as we move. Only a small section of this hand will be
visible like this. Simple guidelines
like this to create the rough outlines for
the placement of eyes, nose, and the mouth
for our mermaid. I'm going to create flowing
here for this mermaid. Lots of he on both the sides. Rough outlining for the top
of the mermaid's cloth. This is simple see for
the mermaid's body. We are going to define it, make more adjustment,
add more details to it. I'll be creating lots
of flowing pins for the mermid tails like this. This is just a rough outlining. We'll be making adjustment when we'll be doing the outlining
with the fine liner, increasing the thickness
of the upper part of the mermt tails just below
her torso like this, creating small projections
like this for the fingers, her arm is folded, only a small section of her
fingers will be visible. Here as I mentioned,
if you want to add anything on her hand,
you can do that too. Putting the part of the
mermaid tail a little bit. And here, this is the
outlining for her body. If you want to make changes and adjustment, you can do that. These were done with
the pencil sketching. Now going with the sakura micron fine line to
do the outlining. In here, I'm starting
with the phase. As I mentioned, you
don't have to stick with the pencil outlines
that you have created, feel free to make
changes in adjustment. As I showed you in
that demonstration, I'm going to create
larger eyes for the mermaid anime like eyes, small nose, C for the
nose and a small mouth, very simple curved
line for the mouth. Following the guidelines
that we created for the eye socket and creating
outlines for the eyes. Let's add the small
eyeses on her eyes. Somewhat of spherical
see for the insides, creating the eyeballs
in this manner. I'm going to create
two concented circles, one for the iris and
one for the pupil. I'll also be leaving
a little bit of white space for the
highlights of the eyes. Create small projections
like this for the eyebrows, small cap for the nose, small curved sap like
this for her mouth. One of her ear will be visible, simple, small ear like this. Instead of this, if
you want to create other kind of ear,
you can do that too. Now the other side of
her neck for the neck, I'm going to create a very simple ornament simple necklace. Instead of this, if
you want to keep it plain and simple, you
don't have to do this, or you can create any
other accessories for her neck. For her back. As I mentioned, this arm be
visible only a small section, the elbow will be visible. The other portion
of her arm will be lying behind her body. For this arm, everything
will be visible like this, going over the outlines of the cylindrical see for
the upper part of forearm. In here for this project, I'll only be using the Sakura micron pile
to do that outlining. Instead of it, if
you want to create a little bit of dynamic lines, you can always use
breast paints or the sketch pins to make some of the sections of the outlines a little bit more darker by dynamic lines Iiming lines
of varied thickness. It adds more interest
to the illustrations. You can get more dynamic lines while using the breast pins. Simple outlining like this
for her fingers and hand, the front of her body, the chest, G over the outlines
of the mermaids tail. H. Let's sip the mermod's tail a little bit below like this. Make it comparatively
thicker somewhat of same thickness as of her
upper part of her body. In here, for the upper
part of her tail, I'll be creating a garland of flour and I'll be using
lots of scallops. In here, we are doing the
outlining for the pins. As I mentioned, I'm going to create numerous pins in here. You can always download the
image of the mermet from the project section and
use it as reference. Feel free to make changes to the number and the placement
of the pens in here. Instead of this kind
of pin, if you want, you can create other
variations of the pen, or you can keep it a little
bit simpler and don't create pins in here only
for the Mermt style. The end of the Mermttail you can only create
the pens there. I'm also going to create
small fins in here, only a small section
of the fence will be visible in
the front like this. The first layer of
the fins, below it, I'll be creating multiple ones, mostly two or three
more layers like this. We are going to give it a little bit of flowing or you can see, we're going to add a little
bit of movement to it. I'll be using lots
of sading lines and simple hatching lines to do
the inking in here later on. Following the outlines that
we created with the pencil sketch earlier for the
rest of the Mermt style, we're going to make this secon a little bit thinner the
end of the mermid style. And in here, too,
we'll be creating the same kind of pens that
we have created so far. But in here, the side
will be comparatively larger and we'll be dividing
into more sections. Create this kind of simple
curve flowy seeps like this. The aim for this kind of
pins that I'm creating in here is to give it a
little bit of movement. Continuing on with the
remaining sections in here for the remaining fins. I'll be creating
two or more fins in here for this portion. And as I mentioned,
you are free to increase or decrease
the number of the fins you can play
with the seeps in the sizes or instead
of this kind of fin, you can create other
variations of it. So these we are done
with outlining for the mermaid tails and
the mermaid fins. Now let's do the outlining
for her clothes. I'm going to create
a very simple clothing in here for her. You are free to add
more detailings, add more accessories,
create other variations, pattern and designing for it. Right now, just do
the outlining for it. Later on, we'll be doing the designing and
adding patterns. Now moving back to
the mermaids here. In here, we are going to
create lots of flower simple, small flowers like this. Here, too, instead of
this kind of flower, if you want to add as the series here pins, you can do that, too. You can also incorporate. You can also incorporate some C cells or other
secretes in here, you can add a star face
or see cells or conch. Small flowers like
this in here for her he just beside her ear. If you want, you can
also add flowers on the other side, put the insides, and in between the flowers, we are going to use lots
of hatching lines to make that section a little bit different from the
wrist of her hair. Doing the outlining for
the other arm in here, only a small section. The elbow will be
visible like this. Let's do enough outlining
for the mermaid's head, and then we'll be adding that detailing for the mermaid'she. We're going to use lots of hatching line curved
hatching lines to add the detailing and do the inking for the remaining
portion of our hair. And with these, we are done
with the upper section, the upper part of our
head for the hair. And as I mentioned, we are going to create
flowing hair in here. I'm going to create lots of flowing strends
of hair like this, large strengths like this, and then we'll be connecting
them all together. You don't have to strictly
follow how I'm doing it. Feel free to make changes in adjustment to the
seas in the sizes as well as the placement
of the strengths of the hair that we are
creating in here. Create this kind
of simple curves, and then we'll be adding more details by
making this kind of outlines a little
bit more details with two or more lines
to do the outlining. Or you can say that we
will be going to give a little bit more volume to the strengths of here that
we have created in here, doing the same
thing on this side, large strengths of
flowing here like this. Simple outlining like this
in here for her clothing. This project is a
little bit larger, so I have divided
into three sections. This is the first
section. In here, I'll only be doing
the outlining. And then in the
next two section, we'll be adding more details
and doing the inking. Simple outlining and simple patterns like this
for her clothing, the upper part of her clothing. Instead of this kind of
designs and pattern, you can create other kind
of designs and pattern. In here, I'm going to create
a garland flower garland, the same kind of flower
that I did for her head. But in here, the sizes of the flowers will be
comparatively large, and I'm also going to create smaller leaves. This is optimal. If you want to keep
it clean and simple, you can just create
the mermaid's tail and use the scallops later on. Or you can just
follow along with me and create this kind
of flower garland. And you don't have to create
the same kind of flower. You can create other
kind of flowers. Or instead of the flower, you can also add accessories. You can add chains or you can add necklace tied
around her tail. Adding more flowers like this. Lightly ase the pencil mark so that we can add
more detailings. Here, for now, I have
only created the flowers. I'm going to add small
leaves around it, and I'm also going to
do a little bit of hatching to make this
section a little bit darker, comparatively darker than
the rest of her torso. For this section, I'm only
going to do the outlining like this and add a little
bit more detailing. But in the next section,
we are going to add more detailings,
add scallops, add more volume to her hair, and do the seeding for the pins. And yeah, that's all for
this section of the video. I'll be seeing you in the
next part of this project.
8. Fins and Hair : Welcome to the third and
final part of the project, a glance from the T continuing
on where we laptop. And here we are going
to add more details to the scallops and create
smaller scallops too. In here, I'm increasing the line weight for the bottom section of the scallops and dividing the scallops into two sections for the divisions
of the scallops in here, the lines that are cating in the middle, for
some of the lines, I'll be increasing
the line weight, for the others, I'll be
creating simple lines. By doing this, we are
creating a little bit of variation between
the different scallops. This is optimal. Instead of adding a single line, you can keep it simple
with only the Up for this scallop or can add
a little bit of sading. Do the seeding for
the individual scallops that we have created. In here, as I was mentioning, creating smaller scallops
in between the larger one, very small usps like this. And for the section, you
want to make it bit darker, increase the number
of smaller scallops and to keep it a bit lighter, just add fewer scallops
for those sections. Numerous tinyus scallops in between the larger
ones like this. Instead of this kind
of sap scallops, you can create other variations or other kind of scallops. You can also create
pointed scallops too. Adding the lines
for the scallops in between the fins like this. In here, as I was
mentioning that I'll be doing another layer of
sading for the fence, but I was satisfied with it. So if you want to do a
little bit more sading to make some of the sections
of the fence a bit darker, you can do that, or you can
just leave it as it is. You can also add a little
bit of other color. So you can do the layering
using red, green or blue. You can also do
the layering using the white hail pin that will
make it more interesting. Let's make this
region the end of the Mermaid steel
bit more darker. I'm moving back to the upper section, making the clothing, this part of the clothing
a bit more darker to sow the Sadowscast it by her hand is making that text
and bit darker, doing the same thing on this
side, making it darker. Making some of the sections of the eyes a little bit darker. Adding the black for
the eyes of the eye. A little bit more fine and detailing for some of the
sections of her hair, increasing the line
weight a little bit. With this, I'm done
with my mermid. If you are not satisfied, you can add more details to more seeding
or more hatching. Now for the additional detail
for the background in here, I'm going to create this
kind of bubbles present in the background.
This is Jobson. If you want to only create the mermaid, you don't
have to do this, or you can just
follow along with me and create numerous
bubbles like this, simple circular seeps like this. Not all the saves that I'll
be creating will be circular. Some will be a little
bit different like this. I'm also wearing the sine of the bubbles
that I'm creating. On both the sides,
I'll be creating numerous smaller
and larger bubbles. If you want to create other kind of background, you
can do that, too. You can add more lements
for the background. You can add some
smaller phrases. You can add few
smaller plants or algae present in the background that will be interesting too. Now, moving on to
the right side, the same kind of thing,
simple bubbles like this. For this mermtin here, I did not add more accessories, but for our next two mermaids, I'll be adding more
accessories for her hand, for her necklace
and a little bit of more decorations for her
tail, mermaid's tail. More larger and
smaller bupers like this, don't oversaturate it. Now, for some of the sections, I'm just going to add
few more final details. If you're satisfied
with your project, you don't have to do anything. In here, for some
of the sections, I'm making it a bit more darker, especially the outline section. In here, it's not visible, but I'm making this section, the lower part bit
more darker supression in between the fence and the permit still more clear by adding more
darker tones in here. And with these, we are
done with our project, a glance from Nadine. I had a lot of fun
painting this. I hope you enjoyed
painting this one, and I'll be seeing you
in the next project.
9. Background : Welcome to the second part
of the glance from the team. Here we are going to
continue where we left off, starting
with the face. I reached the transil mass. Now let's make the upper section of our eyes a little bit darker. We are adding more
weight to the line. By line weight, I mean the
thickness of the line. As for hair, we are
going to use this kind of curve hatching lines
and do the seeding. For the entire
section of our hair, we are going to add
lots of hatching lines, lots of curve hatching lines to give the hair a little
bit of flowing look. Put all the strends of the here, let's do the
outlining like this. I'm also going to
add a little bit of more detailing
in this manner by creating these kind
of small projections on the sides of our
strands like this, small projection of some
small hires that is coming out from the different
strands of here like this. This is optional. Instead of this kind of small projection, you can keep it plain
and simple with only the curved lines without
any additional detailing. For all the strands of hair
that we have created in here, we are going to do
the similar thing. And to keep a clear
separation in between the different strands of hair that we have
created in here, we are going to increase
the line weight for the outline
sections a little bit. To increase the line, you can
always use other supplies, other fine liner or
the breast pans, or you can just add more
layers of the fine liner on top of each other to make it
a little bit more darker. We're going to do the inking in here in two or three layers. This is going to be
the first layer. And later on, we'll
be adding more layer, but for now for all the
hairs on both the sides, just add more curved lines, create more strengths of hair and give it a little
bit more volume. Lots and lots of curved
lines like this in here. Instead of only using the black, you can always use other color. Instead of this, you can go
with the blue colored hair, or you can go with a pink
colored or red colored here. That will be interesting too. So you have got the
rough idea how we'll be doing the hair for the merit. We are going to do the exact same thing on the other side. But for her forehead and here are a little bit
different like this, since her hair is divided
into two sections. Adding the curve line on both the sides in
different direction. In here, too, we'll be making
it bit darker but later on. Moving on to the right side, the same kind of curve lines. So for all the flowing
strands of her hair in here, we are going to do
exactly the same thing like we did for the other sign. In here, still, if
you want to increase the number of the strands of
hair, you can do that, too. You can change the direction of the flow of her
hair a little bit. But for now, just continue onward doing the
same kind of thing, adding more curved
lines like this. Since this is a
repetitive process and a little bit time consuming, I have increased their
speed a little bit. If you want to follow
along with me, you can pause the video or
you can reduce their speed. Lots and lots of hatching lines like this, curved
hatching lines. Right now, we are not doing the seeding using
the hatching lines, but later on we'll also
be doing the sting. Add more volume to each strengths of hair
that you have created. Try to keep a little bit
of clear separation in between each strengths of
hair that you have created. In here, right now,
it's in normal spin, a bit of more detailing
for her clothing in here, beside her arm in here. This section will be
a little bit darker, so I used more hatching
lines to make it bit darker. Feel free to create
other variations, pattern and designing
for her clothes. To depict shadows or
create darker regions, we are just going to use more black by doing more hatching or cross hatching if you prefer. But mostly in here
for this project, I'll only be using the hatching. Not mostly, but for
the entire project, I have only used the hatching. Now, adding detailings
for the garland in here, creating this kind
of small leaves, simple leaves like this and adding the mid ribs
on the inside, two or three lines like
this for the leaves. Instead of this kind of leaf, you can create other
variations of the leaf too. Still if you want to incorporate other accessories in here,
you can do that, too. Now, let's create
scallops in here. I'll be creating these
kind of simple scallops like this. Saved scallops. This will not joined together. I'll be creating
distinct scallops, a bit apart from each
other like this, numerous scallops of somewhat
of same length like this. If you want to vary
the seeds sizes or if you want to
change the placement or create other variations or joint scallops, you
can do that, too. You can also create
punted scallops, a bit more details
for the flower just beside the center using
simple hatching lines, straight out hatching
lines like this. Continue on with creating scallops for the entire section. This is the first kind of scallops that I'm
creating in here. Then I'll be creating the second kind, not
the second kind. It will be a similar
kind of scallops. Use it a scallops,
but the sizes will be comparatively
smaller, far smaller. You can always use them that I provided in the
project section, and feel free to make
changes in adjustment to it. Continue on with
creating more scallops. For the regions that
you want to sow a little bit of sadose or to
sew a little bit darkness, you can add more scallops
for those regions. And for the section
with fewer scallops, those section will
be a bit lighter. So more scallops will
create darker region, and with fewer scallops
will get lighter regions. So accordingly,
add the scallops. In here for the pens, we
are going to divide into different sections like this
and then do the sading. Simple lines like
this, the same kind of lines that I showed you
in the demonstration video. Flick your hand to get this
kind of sading effect. Change the angle of the pain and change the angle of the pin a little bit and
flick your arm like this to get this kind
of seating effect. For the entire section,
we are going to do this for all the fins
that we have created, and to create a
little bit of clear sepreen between different
sections of the fin, we'll be increasing the line weight for some of the sections. F now just a rough
detailing in this manner. And you can also create
a clear separation using smaller hatching
lines like this in here. For the fins that are
adjacent to each other, but one lies behind the other, you can just increase the darkness by using small
hatching lines like this. And we're going to create
separations in this manner. For the curve, create a bit larger lines and then
for the remaining section, simple sating using
simple hatching lines. For both the upper and
lower section of the pins, we are going to do
the same thing. Simple sating using
simple hatching lines. Also, as I mentioned, you can
always use other supplies, other ras pins or the fine lines to make the outlines a bit more darker and to create
a clear separation liteen different sections, few scallops in between for the empty spaces in
between the fins. In here, the lines that I'm
creating will be creating a clear separation between the different
sections of the fins and in here for those lines, as you can see, I have
increased the line weight. No, for the remaining section,
simple shading like this. Instead of this kind
of simple sating using this kind of
hatching lines, you can create
other variations of the hatching lines and
feel the entire region with simple hatching lines or just follow along with me and do the sting in this manner. This process is a little bit repetitive and
will take time. So be patient and do the
remaining section on the fins. For the fins, too,
we'll be doing the coloring or you can see the inking in
two or three layers. This is our first layer. After doing this,
we'll be adding another layer on top
of it to make some of the sections bit more
darker by adding more lines and for the remaining section to keep
it a bit lighter, we won't be adding
any details for it. Put this section, the
start of the fin, making it completably darker. More sting in here
in this manner. You have got the rough idea. So I have increased the
speed a little bit. If you want to follow
along with me, you can always pause the video or you can reduce the spin, the same kind of sating using
the simple hatching lines, flick your arm to get
this kind of sdingeffect. For the larger section
or the larger fins, add comparatively
larger lines for the smaller section,
create smaller lines. And some of the empty regions in here for the upper section, adding more lines to increase
the sading a little bit. For some of the sections
where more fins are situated, we are going to
make those section bit darker with more lines. With this, we are done
with the first layering for the fence in here. If required, we'll
be making some section bit more darker
with more siding, moving on to the larger fence in here for the mermaid tail, the end of the mermaid tails. In here, the separon between different
sections of the fence, we are going to make
it more apparent. So increase the line
weight a little bit more by making the outlines a
bit more darker like this. Use two or three
lines in here in this manner to get a clear
separation like this. And for this section, we are
going to do a little bit of larger sading using the
same kind of technique by flicking your arm to
get a bit lighter seeds of the sading Now let's do the seeding. For the entire pin in here, we are going to do the sading but do the sading in
such a manner that different sections will remain a little bit different and a bit more distinct
from each other. For this section to
inhe the smaller pins, the same kind of sading. We are not going good to cover the entire section with a little bit of white
squeeze in whiten. Now in here, once again, I have increased eye speed. This is quite repetitive process and you have got the
rough idea how to do it. So for the entire section in here to follow along with
me, you can pause the venu. Layers and layers of
sding like this in here. Create tear separation
for some of the section by increasing the
line weight a little bit. Right now it's in real time. This is the second
part of the project, and in here, we'll mostly be doing her here and the fence. And in the last section,
we'll be adding more details in the
form of bubbles and add more finite details and a little bit of more
adjustment for the mermaid. With this, we are done
with one section of the mermaid spin and here for the bottom section for
the remaining sections, the same kind of outlining, increasing the line
weight a little bit, dividing into different sections and then we'll be
doing the seeding. And here for the bottom section, we are going to make it
comparatively darker. So we are going to do lots of sading in here using
hatching lines. Now for this section of the fin, once again, I have increased
eye speed a little bit. Simple sading using this
kind of lighter lines. To make it a little
bit interesting, you can always use
other colors too. Still, if you want to add a
little bit more interest, you can add a little bit
of blue, green or red. What I mean is that you can do another layer with those colors. Now for the final sections of the fence in here,
the third section, to create a clear separation the mermaid fins and
the mermid tail, I add a little bit of small
sading lines in that section, the upper section of the fence. And for the remaining section, this following the curved shape of the different sections we have created and creating
these kind of sading lines, curved sading lines for
the entire section. More curved lines like this. A little bit of more siding in here for the lower section, the bottom part of
the mermaids tail. Let's add more scallops for the remaining
section of her tail. You said the scallops for
the remaining sections. If you want, you can increase
the number of scallops. You can add more scallops
whenever you want. Now, moving back to
the mermaids here, another layer of
seeding in here. This is somewhat
similar to the seeding that we did for the
fin, but in here, I'm applying
comparatively more presle and the lines that
we are creating are comparatively darker. So just beside her neck
and this beside her face, we are going to
make two section a little bit more darker
with more lines, and for the remaining section, we'll be keeping it
comparatively lighter. But try to create a gradient from darker seeds to
a bit lighter, say. For the strengths of the hair to get a clear
distinction between them, you can increase
the line weight. I won't be doing it
for all the section of the strands of hair, but for only some
of the sections, I'll be increasing the
line weight a little bit. For the others, I'll be
keeping it plain and simple. And for some of the
strands of the here, I'll be keeping it plain and
simple and won't be adding any seeding or doing any hatching technique
for those sections. Like this strand of
the here in here, I won't be adding any detailing. We are making some
section darker while keeping other
sections bit lighter. For her forehead, the
hair on her forehead, doing a little bit of seeding, the same kind of
sading that we did for the pens small sding
lines in here like this. Increasing the volume of line
in here for her forehead. More lines on the other side, adding it just beside
her eyes like this. In here, just beside
her face to create a clear separation in between her face and the remaining
portion of her hair, add more lines to make
it comparatively darker. Thus by doing this,
we are increasing the contrast between her face and the remaining
portion of her hair. As you can see, just by
adding more lines and increasing the contrast
between her face and the hair, her face looks more clear
and bit more contrasting. The same kind of hatching and
sading like this in here, layers and layers and rows and rows of hatching
lines like this. Once again, I have increased the speed for the remaining
section of her hair. This beside her body, increase the sading
and hatching to make it comparatively
darker to sew the shadows cast by
her bodies making those section of her hair
a little bit darker. O few smaller projections like this for some of the
section of our strands of here. Now, for some of the sections
in here for her clothing, I'm going to do a little bit of sading like this to
sew a little bit of shadows cast it by
some of the patterns and decorations that
is present in here. This is optional if
you want to keep it lighter, you don't
have to do this. Simple design like this
in here for her necklace, flower like pattern making this section of her
neck bit darker. Smaller finer entities like this put some of the sections
of our clothing in here. Using the kind of
broken lines to do the outlining for some of
the sections like this. Now to create a clear separation in between her
clothing and the tail, using small hatching lines to do the seeding like
this in this manner. And in between the garlands, we are going to make
this region bit darker so small seeding so
small hatching lines in between the garlands. Tiny strokes with a fine line and feeling it in between
the flowers like this. To make it more darkened, you can also use the
cross hatching technique. Small hatching lines in between the flowers for the
remaining sections. When you are adding the
small hatching lines between the leaves, seeing the direction
of the hatching lines so as not to confuse
it with the leaves. And I'll only be covering up to here for this section
of the project, and I'll be seeing you
in the third part.
10. Rough Pencil Sketch : Welcome to Ecos
beneath the star. This is our second project. Let's start with a
simple guidelines. For the upper half of
the mermid's body, we'll be following
the same guideline, starting with straight
line and we'll be dividing into four equal
sections for the upper part. And in here for the lower half, I made it a little bit
curve towards the left. You are free to change the
direction of the mermaid tail. Now we are going to further divide into four equal sections. This mermaid will be
piecing towards the right, so only a side view of a
piece will be visible. For this mermid, I am going
to create smaller here, start with the circular
C for the freeze. Now, since our piece is shifted towards the
right, accordingly, I separate the middle line, the excess line in here. If you want you can make the
piece a little bit larger, bit longer or bit thicker too. For her neck, just one third of the ports in the
second division in here. As for her torso and
the chest, in here, I'm going to create somewhat
of conical curved sea. This will be her
chest and the torso. We are going to increase
her thickness a little bit, but this will be the back view of her and this
will be the front. For this marmot, one of her hand will be lying
on the other side. Only one hand will be visible. A rough outlining like this
for the mermaid's tail. This is just a outlining. If required, we'll be making
changes in adjustment. Instead of this, if you want
to increase the side of the mermaid tails and make it a little bit curved like
this, night like curve. In here for this section,
this will be her hand. Somewhat of large cylindrical seep like this for her hand. Um The length of the cylindrical see for her upper part of the
hand will be up to here, up to her waist. If you want to change
the direction and position or placement of
the hands, you can do that. Moving to her face in here, I'm going to create this kind of elf like here for the mermaid. If you want to create flowing
here, you can do that too. But in here, I'll be
creating salter here. This is going to be our
rough outlining in here. Let's make it a little
bit more detail. This section, the
chest and the torso. Okay. Use the same sketch that you created earlier and just define it a
little bit more. In here, this will be her arm. It's towards the right, so a
little bit sifted like this. You can change the
placement of the arm too. Right now, it's looking
a little bit chaotic, but when we'll be doing
the outlining and redefining the sketch
a little bit more, it will become more
clear a bit more distinct moving to her face. Since the face is
towards the right, only the side profile will
be visible like this. Curve shape like this for
the nose and the mouth. In here, I'll be creating
large eyes for the mermaid. I've divided this project
into three sections. This is the first section and I'll only be
covering up to here. And I'll be seeing you in the next section where we'll
be doing the outlining.
11. Echoes Beneath the Stars : Welcome to the second
part. In here, we are going to do the outlining for
some of the features. We have not defined
her tail through purlin or her waist
and the chest. But for now, I'm
just starting with outlining her face and a
little bit of her hair, and then accordingly, we'll
be making a little bit of change and defining her torso and chased a little bit more. In here, as you can see, I shifted the face a little
bit towards the right. You don't have to follow the exact outlines that
you have created. Elf large ear for our mermid. Instead of this kind of ear, you can create humanoid ear too. Coloring this region black. In here, I decided to
create multiple earrings. You can create other variations, designs or patterns
for the earrings, or you can just keep
it plain and simple. Creating the outlining
for the hair. This is going to be the
hair line for her head. Let's create her eyes. I separate the eyes a little bit towards the
right accordingly, since we separate her nose
and mouth a little bit. I'm going to create large eyes that is looking
towards the right, only the side view of the eye
will be visible like this. For the other eyes in here, only a small portion like
this will be visible. Adding the pupils and
Iris for the inside. A small section of the eyebrows on the other side
is visible too. For here in here, I'm going to create
lots of larger and smaller flower
and flower garland. Instead of flowers, you
can add other accessories or create other patterns
and designs for her hair, or you don't have to even add
the flowers or accessories, you can create plain and
simple hair for the mermid. I'll be creating only two or
three simple flowers like this and for the outlining
regions of the flowers, I'll be adding few smaller
lamsF the larger flowers, I'll be adding a little
bit more detailing, small hatching lines coming
out from the center. For the remaining
sections in here, I'll be creating this kind of detailing using this
kind of small scallops. We are going to fill the entire
section with this kind of small scallops as well as
hatching lines if required. Filling the remaining section
like this inside like this. Just below here too, we are going to create
something similar with variations of
flowers and petals. A few additional layers of scallops for the upper
section like this. Now, as I was mentioning,
few leaves like this. If you want to do the
coloring for the flower, using the colored ballpoint pen or the fine liner,
you can do that too. Now in here, just below here, we are going to
create the same kind of flower and same
kind of pattern. If you want to make
it a little bit different, you can do that too. After doing this, just below it, we'll be using lots of
hatching line and then do a little bit of seeding for the remaining
portion of her here, followed by two more
layer of scallop, the same kind of scallops that we used for
the upper section. We're now continuing
on with creating small flowers like this
and connecting them and connecting the flower
with each other using this scallops and creating this kind of chain
like appearance. Adding additional layer of scallops in between the
leaves for the upper section. Now as for a hair,
I'm just going to use curved lines
like this set of curved lines and put some of the section where we
meant to make it bit darker. We'll be increasing the line
wet as well as increase the line density by adding
more lines like this. Now in between the
leaves and the flowers, I'm going to create
this curve lines to create the resemblance
for the hair in here below her ear
and beside her need, a little bit of hair like this. Make this region bit darker by doing a little
bit of shading. We'll coming back to
the here later on. We now creating the outlining
for the neck on this side. In here, I'm going to create a small necklace
around her neck. You can create di
pattern on design, or you can just follow
the seams of pattern and designing that we did with
the flowers and the leave. I'm going to create very simple designs like this in here, set of scallops and
this kind elliptical seat to create the
necklace around her neck. Now, this is going
to be the outlining for her arm, the left arm. This arm will be
visible only up to her elbow since this lies on
the other side of her body, doing the outlining
for her back. This section, I made it a
little bit more curved, try to make it a bit
straighter. This section. Now, the middle of her back. Adding the curve like this. Now, for this arm in here, we'll have to shift
it a little bit. Accordingly, shifting the arm a little bit towards the right. Just follow along the outlines
that you have created for her arm and shift it a little
bit towards the right. If you are not that confident, you can erase the
pencil sketch and redo it by shifting the arm a
little bit and go over it. For her arm in here, I'm going to create
this kind of sleeve. Adding this kind of accessories for the upper
section of her arm. If you want to add
more characteristics to your mermid figure, feel free to add your kind of
designs and patterns to it. You don't have to
create or follow exactly what I'm doing in here. Add your own personal
touches to it by creating your own patterns
and designs in here. This kind of simple design
accessory in here for her arm. Now, in here, pour
here for the back. In here, I'm going to create simple pattern like
this for her clothing. Moving back to the
left arm in here. For this arm to only a small
section of the accessories on her arm will be
visible accordingly, creating the same
accessories in here, curves for the top. Now, another set of
circular seed in here, extending it a little bit, and this is going
to be her elbow. Beyond this, I'll be
creating the mermaid tail. The rest of her arm
on this side won't be visible doing the outlining
for the chest in here. Now, adding the
clothing in here. Using the scallops to create simple pattern like this on top. Simple pattern and
designing in here. If you want to do
the seeding or do the coloring using the
black, you can do that. Filling the entire region with numerous
scallops like this. Now continuing on with this arm, standing the sides a little bit. This is going to be a the remaining section
of our arm in here, I'm going to create a
set of three bangles. Instead of the bangle,
if you want to create other accessories,
you can do that too, or you can keep it
plain and simple without any accessories
or any bangles. Simple curved seat like
this, put the bangles. I'm creating very simple
and plain bangles. Instead of it, if
you want to add more characteristics or pattern or designs to it,
you can do that too. Now, let's create simple
palm and fingers for her. In here for this, I did not
dit anything on her hand. If you want to add anything on her hand or something you she is holding,
you can do that. Since this mermaid look a little bit stoic and a
bit warrior like, you can add a staff or
a trident on her hand. For her mermaid tail in here, I'm going to create
simple pattern and designing in this section. I'll be using a lot of curve
line for this section, and for the outlining in here, we are going to
create this kind of simple designing using
set of elliptical shape, smaller elliptical
shape like this. For the middle region in here, another set of simple
elliptical shape. On both sides, I'm going to fill it completely with
the curved lines. You don't have to
create the same kind of pattern or design. You can change it, add add
more characters to it. You can convert
into more scallops, feel free to experiment on your own and add your own
personal touches to it. Doing another set of
outlining in here for this region using this
kind of broken lines. Final outlining in here using
set of scallops like this, doing the outlining in this
met with two set of scallop. After doing this, we
are going to create a different kind of pin or you can see clothing
material in here, somewhat similar to
clothing material. The fin that I'm going to
create in here will be. I'm not able to properly
communicate it, but when I'll be creating it, you will get the rough idea, and you also have the
final image that I have provided in the
project section. You can download it from there
and use it at reference. In here for the back, I added more pattern and
designing like this, creating this kind of eye
shape for the clothing in here on top of
our Mermaid style. Now for the fin that I'm
going to create that will look somewhat similar
to the clothing material. Just create this
kind of simple line, a little bit of parallel
lines like this. And as we are moving, I'm increasing the
sizes of the lines. We are going to add a
little bit of curves to it, the same kind of curve that the clothing materials have
like skirts and the gowns. Extending the mermaid
tail on this side. In here, it's not visible, but I just extended the remaining portion of
the mermaid tail. We're going to add this
kind of curved shape to it. Scree this kind of somewhat of conical curved shape for the
lines that we have created. Instead of it, if you want to just keep it plain and simple, you can just create the
mermaids day without any films or this kind
of clothing materials. Try to avoid doing the
mistake that I did. In here, I did a
little bit of mistake. I overlapped one line on top of the other for
the largest section. In here on this side, I changed the direction but created
the same curve like this. For the sections, we are going
to do lots of sading using simple sading lines.
Just below it. I'm going to create a few
more layer, but for now, let me show you how I'll
be doing the seeding, the same simple seeding using the hatching
lines like this. I to sew a little bit of
folds in different section, increase the line weight
for some of the sections. For the insides in here, I'm going to completely fill
it with the black like this, and I'll be creating a
little bit of outlining or you can see boundary using
the scallops like this. For all the sections,
do the same thing, filling the insides
with the black, and for the remaining
section scallops and a little bit of
white sees like this. Adding the scallops and
the designing like this. For the larger one, I'll be adding the scallops
on both the side. For the smaller one, I'll only be adding it
for the one side. Adding the black for the inside. Since this is quite larger, I'm going to make it
cooperatively darker. Just rows and rows
of hatching lines to completely fill
it with the black. Now, let's do the seeding. Simple seeding using
the hatching lines. Just flick your arm to get
this kind of seeding effect. We are making the bottom
secon comparatively darker. We're going to repeat the
same thing on this side. On this side, comparatively
larger section is visible. So I'll be doing the seeding on both the top and the bottom. Right now, I've created
simple patterns in designing. Now I'm going to feel
the remaining section. For this one in here, I made
a little bit of mistake. So let's cover it a little
bit with bit of designing and black using the mystic line that I created and
transforming into fold like this and now covering it with
hatching lines like this, doing the seating,
simple sating like this. And in here for this section,
as I was mentioning, since a larger
portion is visible, we are going to do the sading on both top and the
bottom like this. For this section, I'll only
be covering up to here, the clothing materials
and a little bit more detailing or outlining
for the mermaids trail. And then in the next section, we'll be adding scales, creating ground and adding final touches for
the mermaids here. Biding the folds into
different sections like this and now adding more
seating lines like this. For the remaining section, we are going to do
the same thing, adding this seating for
the entire section. Make the middle section
comparatively lighter. Now on this section, I made
a little bit of mistakes, so I'm going to cover it
with the scallops later on. But for the remaining section, I'll be adding a few more
layers of the clothing material on the wins like structure that I have created
for the upper section. You are free to add any kind of curve chip to the mermaid tails. You can make it larger,
smaller, more curved. Feel free to add your
own pshon touches and create the mermittail
in your own way. In here, I'm going to
create this kind of mermaid tail end like this. I'll be dividing
into two sections. Now, going back with the file to go over the pencil outlining. Just increased a
little bit like this. For the bottom
section, we have got thinner mermittail and
for the upper section, we have got
comparatively thicker. Creating this kind
of elliptical shape to large elliptical shape, you can create other kind
of mermaid pens and tails. For the entire section, I'm going to use
simple hatching lines, curved hatching lines, doing a secondary outlining likeness with the curved lines. Simple curve lines like
this to do the outlining. I see that the ink has dried up properly and lightly
release the pencil marks. Right now in here for
the upper section, I'm going to add
a little bit more detailing and extend the
here side a little bit. Then for the back in here, I'm going to add another
layer of the clothing on top. As for the fins and the
remaining section in here, I'm going to add three more
layers of it just below it. For the mermaid tails, I'm going to add multiple
larger and smaller scallops. Oh extending the side of the mermaid's clothe
in here a little bit. Simple as scallops like
this for the designing. Making this region a bit darker with more hatching
lines like this. And I'll only be covering up to here in this section
of the project. I'll be seeing you
in the next section. H
12. Scales and Scallops: Two welcome to the
third and final part of the echos beneath the star continuing
on where we left off. In here, I'm going to create three more additional
layers like this. As I'm moving, I'm decreasing
the size a little bit. If you want to create
few more layers, you can do that too. The mistake that
I ended in here, I'll be covering it
with scales later on. Creating the same simple
pattern and designing, scale up on the edges like this, then we'll be doing the
seeding and for the insides, we are going to
fill it with black. Creating secondary
outlining like this. Now dividing into few section. For this region extending
it a little bit like this, filling the insides
with the black. Now, let's do the seating
for the remaining section. Outlining for the insides and now filling it
with the black. In this section, after
completing this, we'll have to create
the background, add more detail for her here, create lots of scallops for the scales of the mermaid tail, and for the two fins
of the mermid tail, we are going to use
lots of curve lines. As for the background,
I'm going to create four pointed distrs and large bubble, large
moall bubbles. These we are done
with this section. Now in here for the fins, I'm going to create lots of curved lines
following the seat. I'm going to make both
the ends comparatively darker since all the lines
will be concented in there. Now doing the same thing
on the other side. Simple curved lines like this. Instead of this, if
you want to create other variations for the
pens, you can do it. You can do the seeding, you can use rows and rows
of hatching lines. You can also use a little
bit of cross hatching. You can use stippling
and you can also use the scribbling to make it bit darker and do the
sading using that. Now making the ends quite darker by doing a
little bit of seeding. Doing the same thing
for the upper section, a bit of seeding. Making the outline a
little bit more darker, increasing the line
weight a little bit. Since for this print, I only
using a single fine liner. Instead of it, if
you want to make some of the section a
little bit more darker, you can use other supplies, you can use sketch pen
on the fine liner or the breastpan darker
lines or a bit more line densitty that
will make it a little bit more interesting and
make the outlines a bit more crisp and
a bit more bolder. And continuing on with filling the remaining section with more curved
lines like this. With these we are done
with the curved lines. Now, let's do the simple sading. Moving on to the bottom,
more seeding like this. With these we are mostly
done with both the fins. If you want to still add a little bit of texture
or detail into it, you can add multiple
smaller scallops in between the hatching lines. You can also do a little bit
of coloring using a red, blue or green color and do another layer on
top of the fence. Now let's create
multiple scallops in here for the main part
of the mermaid tail. To make this process
bit simpler, I'm starting with
a pencil sketch. Following the curve sip in here and create multiple
lines like this, try to maintain the distance
in between the lines. And as we move towards the end, decrease the distance
a little bit. A few more lines like this. Dividing into more sections, so a little bit of cross
hatching like this. And the polygonal
shapes that we have created for the insides,
for those ships, we'll be creating the scalums multiple large and small scalums change the direction
of the lines a little bit along the
curve of the mermid tail. Changing the direction
a little bit like this to follow
the perspective, the curved shape
of the mermt tail. Now, I'll be using
this as the guideline and create this kind
of angled scallops, rows and rows of angle scallops. I'll be doing two
layering like this for the scallops and then for
each individual scallops, I'll be doing a little
bit of siding later on. In here for the upper section, I created bit smaller scallop. But as we progress, I'll be increasing the
size a little bit. The middle region will have larger sides of the scallops
and then once again, for the bottom region, we
have bit smaller scallops. You don't have to create
the same kind of scallops. You can create other
variations of the scallops. You can make it
carved, you can create uses scallops or you can create a combination
of scallops. This is a little bit
time consuming process. I'm also making a
little bit of changes. I'm not strictly
following the guidelines. As you can see in here
for this middle digi I'm increasing the sides of
the scallops a little bit. Instead of creating
a single scallops or a single polygonal s and using two boxes to create
a single scallops. O now as I'll progress, I'll be decreasing the
side a little bit. For the upper section,
I did the outlining for both sides for the
insides of the scallops. But in here, as you can see, I'm only doing the
outlining for one section. I'm doing this to add a
little bit more interest and a little bit more
variation to the scallops. If you want to keep it
uniform and consistent, you can do the outlining
for both the sides. We are halfway there
with the scallops. As for her hair, just
below the flowers, I'll be using hatching lines and add a small
portion of the he and then I'll be encircling it another small garland of flower. I'm going to create a
smaller here for her. And instead of it, if
you want to create large blowing here,
you can do that too. Continuing on to the scallop. In here, I have to
decrease the size of the scallops a little bit and I'm making it quite thinner. As we progress,
I'll be decreasing the number of the
scallops for each row, I'll be creating two or three and for the bottom
section or at the end, I'll be creating
only two or one. Here, if you want to make it
a little bit more smaller, the size of the scallops,
you can do that. And with these, we are mostly
done with the scallops. If you want to do a little bit more outlining, you
can do that, too. Now, ensure that the
ink has dried up properly and lightly
erase the pencil mark. For the insides,
we are going to do a little bit of sading
for the bottom section of each individual scallops like
this, Sading on one side. Particularly, I'll be
doing the seeding on the side in which I
created the outlining. For some of the scallops, I only created the
outlining for one side. So for those section,
I'll have to be wet causes and do the
sading on only that side. But for the rest of them, I can do the sading on either side. Go. Instead of doing the seeding like this for the inside of each
individual scallop, if you want to create
pattern or other kind of designing for the inside of each individual scallops,
you can do that, too. You can also create
multiple mini scallops for the insides of
the larger scallops. I would recommend you to add
your own personal touches to the scallops and come up with your own
unique patterns and designing for the scallops
or for the insides of the scallop And one more thing that you can do is you can
use the colored paint. You can use red, blue. You can use the red,
blue or green colour to add a little bit of more
interest to the scallops. Continuing on with
doing the seeding for each individual scallops
in the same manner. This is a little bit time
consuming process since we have got lots of scallops and we'll have to create
small hatching lines. We'll have to be a bit
cautious not to overlay the hatching lines on top of the outlines that
we have created. After this, we only have to do her hair and her background. I'll be creating
four codint stars and use a little bit of broken lines
surrounding the stars, and I'll be creating
multiple bubbles. If this whole project
is in real time, the earlier project,
the first project was a little bit of speed up. Some of the sections
were speed up. But for this project, the
whole video is in real time. You can always follow
along with me. In here, I did the
mistake in the beginning, so I'm going to cover it with a hatching lines like
this in this manner. Continuing on the
hatching line and doing the seeding for the
remaining scallops in here. We have got six or seven
more rows of scallops. Even after doing the
sading with the black, you can still add
more colors to it. I would recommend
you to use blue or red to do another
layer of sading for the upper section
of each individual scallops to add a little bit more interest
in the mermaid. You can use the same color blue or red for the prints
of the mermaid too. You can do the coloring for the mermaid here a
little bit with the red, and you can use blue
coloring for her clothing. That will make it more
vibrant and more colorful. Continuing on with the
remaining scallop. We have got four more
rows of the scallop. And finally, moving to the
last row, doing the seeding. And with these, we are done with all the scallop for
the mermaid tail. If you are not satisfied
with some of the section, you can increase the intensity of the seeding a little bit. Now, moving on to
the mermaid here, small hatching lines in here, extending the side of the
mermaid hair a little bit. I'll be doing two rows of hatching like this
in this manner. Oh. It is going to
be the final dope, the hatching for
the mermaids hair. If you want to increase
the sides a little bit or create flowing hair
or other hair design, you can do that too, making the ends a little bit darker with smaller hatching
lines like this. Making the lower region in here more darker,
comparatively darker. Now I'm going to use small
scallops or you can see small elliptical see to create garland
surrounding her hair. Simple small seeds like this encircling the
hair like this, the hatching lines that
we created for her hair. Bing it for the
bottom section too. Now, one more layer of the
same kind of shape like this. If you want, you can
also incorporate few flower in between
it and a few leaves. You can also include C sails or starfish or or few other
C elements or C creates. With these, we are done
with a mermaid here. With these we are done with
the main illustration. I'm going to create
the background. This is optional, you can create any kind of background
as you see fit. In here, I'm going to
create multiple stars like this and then multiple
small and large bubbles. And adding it in here too, just below her hand like this. You can add as many
stars as you want, but don't just oversaturate it. A little bit of more detailing for each individual star in the form of this kind of
simple lines for each corner, adding the lines like this. This is optional if
you want to keep it clean and simple, you
don't have to do this. Oh Now, let's create bubbles. Simple seeps like this,
simple oval seeps. Simple oval seeps
and a little bit of distorted oval seeps like
this for the bubbles. For the insides of
some of the bubbles, I'll be adding a
little bit more detail in the form of curved lines and a little bit more smaller seal and a few more small
bubbles inside it. Distorted oval
seeps like this for the bubble and a little bit
of detailing for the insides. Apart from the larger saps, I'll also be creating
smaller bubbles and smaller stars adding in here
for the bottom section. I'm moving onto this side. Creating smaller stars.
Very small star, five pointed star like this. If you're satisfied
with your project, you don't have to create this. In here, this region
was bit empty, so I decided to add
few stars in here. Smaller star in between it. One more star in here. And with these, we are done with this project echoes
beneath the star. I hope you enjoyed
painting this. This was quite fun and
a little bit different. I'll be seeing you in the next and the final project
of this class. After that, we'll
have a bonus one.
13. Oceans Graceful Bloom : Welcome to Ocean's
Graceful Bloom. For this project, I was not
able to record the beginning, but you have got the
rough idea how I did it. I followed the same
guidelines that I showed you in the
demonstration video. Started with this
kind of simple Sep a street line and curve
seep for the mermaid tails. Then I divided into four section for the upper
section, I created hand. For the head, I sept it the
upper line a little bit. Then on both the
sides, I created simple outlines like
this for her hand. One of her hand lies
behind her body. So only a small section
will be visible. The other hand
lies in the front. So this is the simple
outlines that I created. And after doing this,
I added a little bit of volume to it and
defined it a little bit. So you can pause the
video and just create this kind of simple
outlining for our mermaid. Now let's do the
outlining going in with the sakura
micron fine liner, and we are going to do the
outlining for her head first. I'll be creating the
same kind of eyes, nose in the mouth
for the mermaid. In here, I'll be grating very large and flowing here
for this mermaid. So we'll be using
lots of curved line. Simple and large oval seep like this for the mermaid's eye. As for the nose and a very small curved sap
like this for the mouth, a little bit defined
lips for this mermaid, increasing the line
weight for the eyes, adding tiny eyes like this. Adding the pupils and
iris for the inside. Let's make it a
little bit darker, filling the insides with
the black like this. Adding the eyebrows
and with these, we are done with the fecal
feature for our mermaid. Flowing here of the mermid. Creating the ear elf like ear. For the here in here, I'll be creating this kind
of simple accessories. Apart from this, I'll also be adding few flour,
two or three flour. You can create
other variations or other kind of accessories
for her hair. Or instead of it, you
can keep it plain and simple without any
accessories or any flower. Simple pattern and
designing like this, a little bit of seeding for the upper section using
small hatching lines. Few flowers at the top
like this, simple flower. One more flour in here, but smaller one, adding a
few more petals for it. Continuing on with the
remaining section of her hair. We are going to use lots
of curve lines in here. And for the reasons besides
her peas and nick we'll be making it comparatively darker by adding more
curved lines there. Small beads like this in
here for the accessories. In either if you
want, you can create a small projection
for her other ear. Little tour of outlining for
her hair using this kind of curved lines to give her hair a little bit
of flowing appearance. For her neck in here, I'll be creating a very simple necklace. Simple oval saves like
this for the necklace. One more pearl in here, and with this, we are done
with a simple necklace. Instead of this, if you want
to create other kind of variation or other designs for Na necklace, feel
free to do that. A bit more detailing
for her eyes. For her arm in here at the top, adding another accessories,
detached sleeve in here. Once again, I would recommend you to create your
own pattern and designs in here to add your own personal
touches to the painting. Simple pattern
like this in here. And for the top,
making it a little bit curvy and adding
more hatching lines, curved hatching lines like this. So this is going to be
the simple accessories that I created in
here for this arm. Doing the outlining for the
upper section of our clone. A bit more defined back in here. Go over the outline
for the other arm, the same kind of pattern. It will be a bit different since it's facing in other direction. Same pattern and same designing
in here for this arm. Now for her clothing in here, another outlining like this, same kind of outlining
with curve line. Mostly for the clothing in here, I'll only be using rows and rows of hatching
line for the inside, and for the outlining,
I'll be using scallops and create simple curve lines or
simple patterns like this. The same kind of pattern
I'll be creating for the bottom section. In here. In between it, if you want to
create a bit more designing or pattern or embedded
gems, you can do that, too. I kept it simple with
elliptical shapes like this. Extending the clothing in here
for the remaining section. Once again, using the
curved lines in here. Another set of curved lines. Simple scallops like this. And on both the sides in here, I'm just going to fill it completely with
the hatching lines, rows and rows of hatching lines to make it comparatively darker. Instead of it, if
you want to create any pattern or designing,
you can do that. I'll be coming back to it
later on for now for now, doing the outlining for
the clothes in the front. Simple pattern and
designing like this. The remaining portion of
her torso, the stomach, the front part of her stomach, continuing on with the hand. I'm going to create very
simple hand in here. I won't be adding
any accessories or bangles if you want to add accessories or bangles or if you want to hold something on
your hand, you can add those. Simple open hand like this. The pencil sketch that I have created in here is
not that defined, so I'm going to make
a bit of changes to it to make it a
bit more defined. So simple open hand like this. Continuing on with the
remaining portion on this side. This is going to be her
elbow of the other arm. And in here for
the mermaid tails, we are going to decorate it with butterflies and lots of frills. Frock like frills, I'll be
creating multiple ones. To make this process
a little bit simpler, you can always use the
image that I provided in the project section and accordingly create this
kind of simple seeps, starting with the butterfly like seep for the mermaid tail. Now I'm going to create multiple layers of the
frills like pattern, clothing pattern in here and beside the mermaids
tail on both the sides. We are going to create
simple structures like this, and we'll be doing
simple seeding and hatching in this manner for the upper and
the bottom section. Numerous simple saps like this. Instead of this, if you
want to keep it simple, you can only create
the Mermid style. You don't have to add
this or if you want to make it a little
bit more interesting, you can also include
other kind of fins or you can
just transform this into different kind of larger fins alongside
the mermid tail. I'll be wearing the seeps
in the sizes a little bit, but I'll be trying to keep the composition or the
seep somewhat similar for all the additional elements that I'm creating in here. Just simple rows and
rows of seeps like this. Then we'll be doing
the outlining for it, another set of outlining. And for the insides, we'll be
creating folding and we'll do both sading and hatching for both upper and
the lower section. Doing the outlining
for the mermaid tails on the other side. I have also divided this
project into two sections. This is the first section. Continuing on with the
remaining section. Let's do enough outlining for the mermaid tail in here,
and then on top of it, we'll be creating
multiple elements, the same kind of elements that I created, simple
seeps like this. You don't have to
worry about it. The outlining that you did for the mermaid tails since we'll be covering it with
lots of hatching lines. Mary the seeps in the
sizes a little bit. Extending it on
the other side and overlaying it on top of
the mermid tail like this. A few larger one in here. For the other side,
I'll be creating a bit smaller one and just
below the mermit tails, I'll be creating
few larger ones. It's not visible in here, but I'm just simply going over the outline of the mermid
tail that I have created. Now we are going to create
bit larger ones like this, comparatively larger
but thinner ones. As I move up, I'm decreasing
the size a little bit. So these are the numeral fin like structures that
I have created. This will be similar to the
frills that are present in the clothing, adding few more. If you're satisfied
with the numbers, you don't have to add more. The remaining section
of the mermaid tails. Standing it on the other side. Simple outlining. The width a little bit and
creating a large fin at the end of the mermid tails like this, comparatively
larger fin. Give it a little bit of flowing appearance with this
kind of outlining. Now going back to
the mermaids here. Let's continue where we laptop. We are going to create
multiple curved lines in here for the mermaids here. The goal in is to give it
a little bit of flowing appearance and add a
lot of volume to it. By volume, I mean, to
make it look bit denser. I'm going to create
multiple strengths of her hair and then I'm going to add multiple curve lines inside and beside
it in this manner. Just follow along
with me and create this kind of curve
for the flowing here. You don't have to
worry about it. Just create multiple
flowing strengths of her hair and then just add multiple curved
lines following that c. If you want to
keep it bit simpler, you can just reduce
the side of her hair. Just follow along with
me and create this kind of curve C for the flowing hair. This is going to take
a little bit of time since we are going to
make it lot denser. If you want to do a
little bit of coloring, you can also use
other color red, green or blue colour. I'll be adding the hair just below her
hands a little bit, and on the other side, I'll be just making it
comparatively thinner. This is going to
be the last strand of her hair on this side. Create a few more
additional flowing strands. Creating a few more additional flowing strengths
on the upper part. Now for the insides, just
add multiple curved lines in this manner and then add few more smaller curve
lines following those saps. And this beside her body, her arm, and her stomach, we're going to increase
the line density a little bit and increase the number of lines
to make those section a little bit darker to
sew the shadows cast it why her body is making those section
comparatively darker. Like what we did for the region this beside
her face and neck, we added lots of line there to make that region
comparatively darker. Just add multiple lines
wherever you think it's necessary or for the regions
where there are less lines. Just don't oversaturate
it with more lines. And if you want to
do a little bit of seating for certain region, you can do the seating too. I'll be keeping some
regions a little bit lighter like this
region in here, so I won't be adding that
many lines in that region. A few more lines
for the upper part. You can increase the
line weight of some of the sections to make it
a little bit distinct or to sew a clear separation and distinction in between different
strengths of our here. In here for the fence like a structure that I have created, we are going to do the
second outlining like this and then use
this kind of sading. Just flick your arm to get this kind of lighter
sading effect. Make the ends
comparatively darker and the other section
quite lighter. For the smaller fins
like structure in here, I'm not creating the folds, but for the larger ones,
I'll be creating folds, and then I'll be
adding the sading. Also, I'm not created the
hair on the other side. After doing this,
we'll be moving back to the hair
on the other side. Creating few folds like this
for the bottom section like this with lines of a
little bit more volume. We're going to do the same thing for the remaining section, a bit of sading in this manner, a little bit of sading
in this manner, as well as creating folds using a bit darker sades of the line. This process is going
to take a little bit of time since we have created a
lot of structures like this. And for each
individual's structure, we'll have to do the outlining, create folds, and do the sading. For the butterfly
that I have created, adding a little bit
more detailing, making the outlines
a little bit darker, creating antennas in
here for the butterfly, a little bit of sading in here. And for this region to, making this region quite darker. For the larger fin like
structures that I have created, a bit of more sading
for the bottom section. So for both the top and
the bottom section, we'll have to do the sading
For the smaller ones, do a little bit of
smaller hatching lines to do the sadingF
the larger one, increase the sizes a little bit. Also keep in mind,
we are keeping the middle section a
little bit lighter, so don't add that
much lines in there. Now doing it from the bottom. For this section of the project, I'll only be
covering up to here. And in the next ston we'll
be creating the scales for the mermaid tail and also
doing the mermaid fin. The bottom section
of the Mermaid fin, we'll be creating her here
on the other side as well as sparegrowd the whole
video g in real time, so you can always
follow along with me. Continuing on with it,
two or three folds for the lower section and then simple hatching lines like
this to do the seating, click your arm to get
a bit lighter seeds. For the starting point, apply a little bit
of heavy place it to get a bit darker lines. Doing it for the
last one in here, creating a bit larger folds in here with more line weight. More sding in here for
the bottom section. I decided to create
a few more in here just beside
the mermaid tails. I'm not overlaying
this one on the top of the mermid fin, but
if you want to do that, you can do that,
doing the same thing, creating folds and
doing the seeding. Now, for the remaining ones
in here for the upper part, repeat the same thing
for the remaining fin structure that
we have created. For the smaller ones, you won't be able to do the seating. Just create small hatching
lines for those sections, or you can keep it plain and
simple for the smaller ones and don't add any hatching
line for one of the side. In here for the upper
part, we have go one, two, three, four, five, six, seven, eight, eight more. I'll only be doing the same
thing for the remaining ones. For the ones that are present just below the Mermaid tail, I'll be doing it in the
next part of this project. Adding it in here. I'm also going to cover the outlines of the mermet tail
that I created with a little bit of darker lines. And we'll have to do the same thing for the remaining ones. Let's create the outlining in here as well as a
little bit of folds. And then in the next section, we'll be doing the same thing, doing the sading using the
hatching lines for the ones. Making some of the folds a
little bit larger like this. Folds that I'm
creating in here is a little bit different
from the folds that we created for the upper part with a little bit more line weight. So I'll only be covering up
to here in this section. I'll be seeing you in the
next section of this project.
14. Mermaids Tail: Welcome to the second part of the Ocean's graceful blue continuing on where we left top. We are going to do the sading for all these sections in here. Starting with the upper part, simple sading using
the hatching line, flick your arm in this manner
to get a bit lighter seed. We're going to keep the
middle section quite lighter, but both the top and
the bottom section will be comparatively darker. Now moving on to the
larger one in here, increase the sides a little bit. After doing this, we'll have to create the scales
for the mermid. So we'll be using the scallops
to create the scales for the mermidt and then I'll also be adding a little
bit more detailing. Then I'll also be moving
back to the mermaids here. On the left side, we'll be increasing the volume
a little bit there. And after that, we'll have to create the background,
which is optional. Small hatching lines in here for the smaller sections and doing the seeding for the
bottom parts like this. For the smaller regions where
you can't do the seeding, you can just create simple
small hatching lines there. Adding it for the
last one in here. If you want to add few
more, you can also do that. And with this, we are done
with all the elements in here. I decided to create
a few more in here. I'll also have to do two
more that I forgot to do just beside the butterfly
that I created. Now for the clothing in
here, as I was mentioning, I'm going to completely cover
it with the hatching lines, rows and rows of hatching lines, broken hatching lines
in this manner. Doing the same thing
on the other side. Rows and rows of hatching lines like this, broken
hatching lines. On the side, too, simple, small hatching lines like this. Simple, small hatching
lines like this. Now, let's make it a
little bit darker, adding a few more lines, overlaying it on top of it. This is another layer in here to make it comparatively darker. Doing the same thing in here, two or three more rows of small hatching lines to make this region
comparatively darker. Now, I forgot to
do the outlining and adding detailing
for this one. And with these, we are
done with the clothing and this kind of fin like structure
that we have created. Moving on to the
mermaid tail in here, I have already divided
into different section with the curved
horizontal lines now, adding another set of
lines in here and I'll be following the guidelines to
create multiple scallops. I'll be creating varieties
of the scallops. I'll be using simple Up scallop but I'll be wearing
the size a little bit. Another set of lines to
make it a little bit more easier to create
the scallops later on. You don't have to
create the same kind of scallops that I'm
going to create. You can create other
variations of the scallop. For the scallops, the UCP scallops that I'm
creating in here, I'm using two
outlines like this. I'm not going to strictly follow the guidelines
that I have created. I'll only be using it as a
reference and as required, I'll be changing the sieves
and the sizes a little bit. Like in here, increase
the size a little bit. So as I move, I'll be increasing the sizes as well as decreasing
the thickness. You don't have to strictly
follow what I'm doing. Feel free to make it uniform, add more detailing,
more texture to it, change sieves and direction. These are the larger
ones that I mentioned. You don't have to make
this this much larger. Apart from it, if you want to add a little bit
of detailing or do the sading for the inside of the scallops, you
can do that, too. You can also add more
scalps for the inside. So smaller scallops
inside the larger ones. This is going to be the
largest one in here. Continuing on with the
remaining section. At the end, we are going
to do a lot of seeding. I'll be dividing into
different sections and then I'll be doing the same kind of seeding that
I did for the upper part. We'll be making it
comparatively darker. But for the entire section, we are going to do the seeding. The upper and the lower part will be comparatively darker, while the middle section
will be a bit lighter. Adding a few lines in
here to cover this one. We are halfway there, continuing on with the remaining portion. Now I'm going to
change the direction a little bit for the scallops
that I'm creating. I'm going to shift it a
little bit towards the right, following the curved
sip of the mermaids steel and shifting it
towards the right. Some of the scallops that I'm creating will look quite large, so I decided to add some
smaller ones for the insides. Now continue on with
the lower section. Simple scallops with two
outlinings like this. Now, we just have to create seven or eight more
rows of the scallops, then we'll be done
with this section. The whole process
is in real time, so you can always
follow along with me. Only the first video has some of the section
that will speed up, but for the other two, but
for the other two projects, the second and the third one, the whole video is in real time. And with this, we are done
with the scallops in here. I'll be covering the
bottom section of those scallops with
the seeding later on. And in here for
some of the larger scallops that I have created, I decided to add
few small nerves for the insights like this. And with this, we are done with the scale creation with the scallops with
the mermaid tail. Let's divide into
different sections and then we'll be
doing the sading. I'm using broken
lines in here like this to divide it into
different sections. If you want to divide it using a bit darker lines with more line weight,
you can do that, but that won't be that
much visible and it won't be able to create a clear separation
and distinction. So that's why I decided
to use this kind of simple white lines in
between the sading region. Simply dividing in this manner, the curve save, following
the curve save to divide it. For the entire section, we
are going to do the seating. I'm also going to cover
the bottom section of the scales that we have
created with lighter seating. Simple sading like this, you'll have to create bit larger lines, and we are going to make the end region comparatively darker. Adding it for the
upper part too. We're just going to keep the middle section quite lighter, but the remaining
section, the upper and the bottom part will be darker. We'll have to do the
seeding in two layers. This is the first layer
with quite smaller ones. And after doing this,
I'm going to add another layer on top of it
with a bit larger size. Oh Now let's do the second layer
with extended side, large strokes with the pen, and covering the entire
section with it. This process is going to take a little bit of time
since we are making it a little bit lighter from dark to light and we'll have
to create larger strokes. So we patent and feel the
entire section in this manner. In here for this region, the outline is not that clear, so we are going to cover it completely with the black,
the bottom section. Whereas in this section,
the outline is clear, make the bottom section darker and the remaining
section lighter. Let's do the seeding
for the end of the mermaid tail
and then we'll be continuing on with the
remaining section. Moving back in here and
extending the sides, doing the second layering
for the seeding. Instead of doing
seating in this manner, you can do the hatching lines, or you can also use the rows and rows of hatching lines
to do the seating. You can also use cross hatching to make this region
comparatively darker. Apart from that, you
can also include a steeping typed nike or
a scribbling technique. Making this region more
darker with more lines. Let's make the con
part more darker. I'm also changing the directions of the seeding a little bit, follow the curve
shape of the fin and then do the seeding
in that manner. Another layer of
hatching lines in here to make this region bit darker. Doing the same thing in
here, another layer. Oh You can use this sting technique to
make the distinction between separate parts more
clear and more distinct. Now with this, we are done
with the three sections. We have four more
sections to do. This process is bit time consuming continuing on with the seating for the
remaining section. After doing this,
the remaining things is comparatively easy. We'll have to only
create the here. Mostly we'll be using flowing
lines to create the here. We don't have to
create that much separated strands for her here. Simple curved lines
will do their work, and then we'll be using curved shape to create
floating bubbles, large and small ones, as well as a little
bit distorted sieves to create more bubbles, and then we have four corner starts that we'll be creating. Now, making this region more darker with more lines in here. I also added more lines for the bottom section
of the scales. Now, doing the seeding
from the opposite side. Adding the seeding lines
for the metal region. For the middle section, apply
light presser and cover the entire section with the
lighter side of the lack, making the ends more darker. You'll just have
to set the angle a little bit to get lighter sand. And with this, we are done
with all the sections, different sections in here. Now moving back to the
mermaid here in here, adding more black in here, put this region in between
her hand and her body, completely filling it
with the hatching lines. Let's do the remaining
portion of our hair. I did the outlining like this. So I'll be covering this entire section
with the curved lines. Apart from this, we are
also going to create few smaller strands of hair
flowing here like this. The water current is
flowing from right to left. So the flowing strands of hair will be forcing
towards the left, adding more curved lines following the sip
of the strengths, the larger strends
that we have created. And with this, we
are done with it. Is that the ink has dried and lightly raising
the pencil masks. I erased it a bit more
detailing for the ear. Now final detailing
for her eyes, making the outlines more
darker and more pronounced. Lightly raising the pencil marks in here for the mermaid tails. And with these, we are done with the Ocean's graceful gloom. I decided to extend the side
of the here a little bit. So another layer of
curved lines in here for the bottom part of
our here on this side. Adding few more strands of hair here on the
upper section too. Now, this is optional
and additional. I'm going to create background. You can create background
of any kind using any patterns and designing or you can keep it
plain and simple. Simple oval and distorted oval seeps like this
to create the bubbles. You can also use the
spiral seeps to create the bubbles and also creating four pointed
stars like this. Now adding it on this side. I'm not going to cover the
entire section with it. I'll only be adding for
the top left cornon and on this side in here only. Don't oversaturate it. Adding this kind of
small detail beside the corner stars with
simple lines like this. Few more bubbles in here. A few more stars
on the side, too. And yeah, I'm satisfied with the number of the
stars and the bubbles. Don't oversaturate it. And yeah, with this at with
the Ocean's graceful blow. I hope you enjoyed
painting this. We did a lot of seeding and a lot of hatching
for this one. And this mermaid
has got the largest here for all the projects
that we have created so far. And I'll be thinking
in the next project, the bonus one, happy painting.
15. Bonus Sketching : Welcome to the bonus
project C d serend. Let's start with a simple
guideline for the mermaid. In here, the mermid that I'm going to create will
be facing towards the left and we are going to create this bit curved
set for her tail. You are free to
change the set side and direction of
the mermaid tails. You can also change the angle of the upper part of
the mermaid's body. I'm going to shift her
head a little bit, shifting it like this, dividing it into four equal sections. Now we are going to create oval and conical s for
the mermaids face. For this mermit in
the background, I'm going to create large
leaf like seaweeds. And apart from this,
I'll also be using other paints to make the
outlines a little bit darker. And the here for this mermit will be a little bit different, bit larger here with
lots of seeding. In here, creating this kind of rectangular sap in here
for the upper section of her body and this kind of conical sap for the
remaining section. Also changing the
angle of her body a little bit to give it a little bit of more
three dimensional form. On one of her hand
will be in the front. So this hand, the right
hand will be in the front, and on the left
hand, she will be holding three petals
flour or seaweed. Earlier, my plan was to keep the hands simple
without anything. But later on, I added three
petals seaweed or you can consider it to be flour or
you can add any other thing. M giving it a
little bit of mose, the upper section of
her body, the chest. We are going to
create folded hand in here just beside her neck. Here, if you want to
change the direction of her hand or the movement,
feel free to do that. I'll be creating arnal plate
like top for this marmoid. This is going to be
the rough sketch for the upper
section of her body. Plain and simple hand
like this, open hand. For this mermaid, I'll be
creating three sets of the fin. The first set of
the fin will be for the upper section of
the mermaid tails then for the middle section, I'll be creating two seats and then for the lower section, we'll have set another
set of two fin. Then we'll have one
more set at the bottom, followed by the largest
fin at the bottom. Curve cheap like this
for the mermaid tail. Outlining her soljer.
On this side, if you want to make
anything, you can add it. In here, as I was mentioning, I'll be creating simple
seaweed that she'll be holding elf like here
for the mermaid. P her here in here, I'll be creating too
simple flour and Album going to create
large flowing here. It will be occupying a large section on this
side, the right. This project is a
little bit larger, so I'm divided into
four sections. This is the first section
in which I'll only be covering the pencil
outlining and sketching. And in the next section,
we'll be doing the outline. Let's make the fece a
little bit more detail and create the guideline for her
eyes, nose, and the mouth. A bit curve shape in here. I'll be using this to
create the eye socket for the mermaid since her face is shifted a little
bit towards the left. So accordingly, I septate
the eyes a little bit, and I'll only be covering
up to here in this section, and I'll be seeing you in the
next part of this project.
16. Seaweed Serenade : Welcome to the second part
of the Seaweed serenade. Let's continue on
where we left off. And here the feces that we created a little bit confusing. Erasing the pencil marks
and then we'll be using the Sakura micron file
liner to do the outlining. I did not erase it completely. I left a little bit
of the pencil g. So I'll be using it
as the difference and doing the outlining. And if required, I'll
be making a little bit of changes to the
piece features, creating in for the mermaid
for the other side in here. I'm going to create
flowing here, so I'm going to create flowing here like this to
curve shape like this. This is going to be
the mermaids ear, creating small projections like this for the mermaid's eyebrow. Small set for the
nose and curve seep like this for the mermaids lips. Eating large eyes
for the mermaid. The eyes on the left side
won't be visible completely. Increasing the line weight a little bit for the corner
section of the eyes, creating tiny elases, creating tiny eyelasF the pupils and
the Iris for the inside. Simple osape like this, filling the insides with black while leaving a little bit of white space for
the highlight. I decided to fill
it entirely with the black and later
on if required, we'll be using a little bit of sakura microno to create a bit of highlights
for our Mermaid eyes. This tiny dot like this to add the highlight for
the mermaid's eye. It's not working that I'll have to wait a
little bit and apply another layer white pona continuing on with the
remaining portion of her body. In here for the neck, I'm going to create very
simple necklace. If you want to create other
kind of pattern designing or other kind of accessories around her neck,
you can do that. You can make the
necklace simple too, creating a simple pearl necklace around her
neck or you can just completely avoid it without any necklace or any
accessories for her neck. Now, put the soldier in here. Once again, I would like to remind you that you don't have to strictly follow the
outlines you have created, use it only as the
reference and make changes and adjustments
as you see fit. I'm going to create simple
accessories in here for her arm curve shapes like this to create
simple pattern inside. The whole video is in real time, so you can always
follow along with me. Now for the remaining section
of R in here at the bottom, in here, I'll be creating set of two bangles. This is optional. Let's do the outlining
for her fingers in here. Creating the last finger, the thumb will be
visible on this side. Two simple bangles will
court seeps like this. One more bangle in here. You can decrease the
numbers of the bangles. You can change the bangles
into other accessories around her arm or you can
just keep it plain and simple without any bangles
or any accessories. For this end, starting with her elbow, outlining the elbow. In here, too, we are going to
create the same bangles and same set of accessories for
the upper section of her arm. In here, I made a
little bit of mistake. I increase the line we on this side of
the arm a little bit. I'll be trying to cover it later on when I'll be
creating her clothing. Simple clothes palm
like this. Seaweed. In here, I'll be
creating three seaweeds. The same kind of accessories
on this arm cube. Curves it to create
simple pattern inside. Now for the clothing in here, I'm going to make a top somewhat similar to
the armor plate. For now, just follow along
with me and do the outlining. And I'm going to
create this kind of repetitive pattern like this
for the entire section. This concentric half
circle like this for the entire section to give it a little bit of
armor plate like look. We're also going to do a
little bit of seeding on the sides and a little bit
for the middle section too. In here for the top, I'm just doing simple hatching
lines to make this region bit darker using simple scallops like
C for the upper part. Now for the remaining
portion in here, I'm going to just
extend it a little bit. I'm just going to extend it
and cover the entire section, the entire portion
of our stomach. Set of curve lines like this. And using the curve
lines to make the middle section
comparatively darker, you can create other variations, other pattern or designed
for her clothing. I'm going to make
some of the section a little bit darker by adding a few additional
lines in between the smaller and the larger ones. With these, we are
done with her top. In here creating three petals seaweed or you can
consider it to be three petals flour or simply holding three petals.
This is optional. Since I'm overlaying it at
top of the earlier outlines, I'll have to increase the
line density a little bit so that the earlier layers won't
be that much distracting. Increasing the line weight
of the top a little bit. One more layer in here now. Just below her
elbow on this side, I'm going to create her tail. Simple circular sieves like this to sew the accessories
around her waist. Heart, like seep and
curved sheep like this. Small circular bead like chin
wrapped around her waist. Extending the side
a little bit more and making it a little
bit more detailed. In here, I'm going to create three or four simple small fins. Before doing that,
let's do the outlining. Creating this kind of curved
shape to do the outlining for the fins in here for the
upper section of her tail. I'll be creating three
or four if you want to increase or decrease the
fins, you can do that. You can also play with the
same in the sines or you can keep it plain and simple without
any fins or accessories. One more in here in the front. For all the pens
that I have created, I did two layers of outlining. Now for the mermaid tails, give it a little bit
of organic look, I'm using two lines and making some of the sections
a little bit broken. Using this bit broken lines to do the outlining
for the mermaid tail. Here's another set of fins, two set of pin on the side, one in the front and
one at the back, outlining the front
of the mermid tail. In here, apart from creating
her tails in the fence, I'll also be creating her here and doing the
seeding for it. This is the second
part of this project. In here, I'm going to
create large fins, large flowing fins and we'll be using curved
lines to follow the seeps of this pens that we have created and entire
section with it. Creating a larger fin in here. Large flowing seeps like this
for the fin at the back. Here we'll be using two sets
of line to do the outlining, extending the
smaller pin in here. Most of the section of this pin is covered by this larger one. Now for her ear, a bit of
detailing for the insides, flowing strand of here
just above her ear, simple flowers on her hair. I'm going to create two or three simple flowers like this. Instead of this,
if you want, you can include other accessories, something related to CGH
that will be interesting. A bit detailed flower like this. We're going to create her here. This is going to be the partisan between the left and the
right side of her here. Making this region bit darker with lots of
hatching lines and doing a little bit of
sading On this side, on the left side, only a small
section of her he will be visible for the top and few
strands of floating here. Most of her he will be
concentrated on the right side. Screen this simple
guidelines for her here on this
side and make it a little bit darker
using lots of curved hatching lines and a little bit of
sading if required. These are going to be the
flowing strands of her hair, curved sees like this with the flowing strands
of mermaid hair. Making this section a little bit darker by doing the seeding, increasing the line weight for the outline of the hair
on top of her head. Let's create a rough
outlining for her hair. I'm going to create
numerous strengths of hair, comparatively
thicker strengths of here and we'll be
completely peeling with sading and curved
hatching lines or down cret rougher outlining like this with numerous
strengths of here. Doing a seeding in here, the region just beside
her neck and below her ear and a little
bit just above it, we are going to make
this region bit darker by doing the seeding to sow
the sadocast by the face, the neck and the ear has made this section
comparatively darker. For the middle regions in here, we are going to create a few
more additional strengths. And for the entire section, we are going to fill
it with the curve hatching lines and to make a clear spreon between different strengths of the here, we'll be increasing
the line weight a little bit and accordingly
doing the hatching, following the different
curve shapes of the strengths of here
we have created. This is going to be a bit time consuming process
since we are going to create numerous
different strengths of her with different
directions of flow. So be patient and just
follow along with me. And for some of the section, especially for the
curve part and to sew a bit of clear separation between different
strengths of arraar, I'll be doing the
seeding in this manner. Adding rows and rows of hatching lines to make
those section bit darker. You start with a bit farther apart lines and then
for the inside region, be more curved lines like then. You can also do the seeding
a little bit like this. Can use the same sding technique that we used for
our earlier video by clicking your arm and getting two different
seeds of the sketches, starting with a darker and turning it into a
bit lighter seed. Creating numerous
thicker strands of hair for the inner region. This beside her body, what we did earlier with
her face, neck, and ear, we are going to do
the same thing in here making those
sections a bit darker so that the cinder
casted by her body has turned this region
a little bit darker. We are going to do the sading in this manner rows and rows of hatching lines and doing
the sading like this. As you can see, I made
this region bit darker by adding more lines and doing more hatching with
the carb line. For some of the section, I'll
be doing the same thing, doing two or three layers
of the hatching lines, do the sating or just make
it a bit more darker. Just extend the hair by flicking your arm to get this
kind of sating effect. And we are going to extend it by doing rows and rows
of hatching lines, one layer on top of
the other like what I showed you in the
demonstration video. This is going to be one of the floating strengths of
here for the top section, completely filling with the hatching lines and
doing a little bit of sading for some
of the sections of this strand of here. We are going to
repeat the same thing for the remaining
strands of here, first filling it with
curved lines and then increasing the intensity of the lines a little bit by increasing the number of
the hatching lines and to create a clear separon between different
strengths of here, we are going to do a
little bit of sading. I'll spsial doing the sading for the tip of the strands
of here like this. Me seating and curve
lines like this. Making this region
comparatively darker. Now moving in here for the lower section, more hatching lines, more seeding and creating this kind of bit different
sides of the color, different sides of
this fine line, and by using this clicking
your arm method to get this kind of various
tones of the black For the second part of this
project, seaweed senate. I'm only going to cover
our hair in this section. In the next section, we are
going to create scallops, do a little bit of detailing
for the background, create seaweed in the background,
use scallops scaling. In here for this region, we have changed the
direction of our hair, making this strand of
the hair that lies beneath it comparatively darker. Increasing the line
density in here and filling the remaining section with more curved hatching lines. For the smaller section, use rows and rows
of hatching lines otherwise create this kind
of larger curved lines. Continuing on with
this upper section. So we have only got this larger or thicker
strands of here, and then we'll be moving on to the remaining
portion of our here. Doing a little bit of sading in here to make this region darker. Now for the last streak of hair on the strand
of hair in here, filling it entirely with
the hair like texture, rows and rows of hatching
lines like this. I'm also doing a little bit of shading for the curve regions to add a little bit more volume for those regions,
the curved sections. Adding the hatching
lines for this region. Add more lines to more seeding
where think it's required. We are going to create this
kind of here for our mermaid. In here, I'm making
the outlines for this strand of here and this
curved section a bit darker. I used more ink in here
to make this darker. We have got four or five more
strands of hires in here. We are going to repeat
the same thing. In here for the
strengths of here, I'm going to make that tip of the strands of hair
comparatively darker. We are going to add more
black on those regions, and it will naturally
become quite darker since all the lines
will be ending there, so the intensity of the black will be decreased
a little bit there. But in here, apart from this, I'm going to intentionally
make that region more darker. What I did in here, I'll be doing the seeding
and hatching to make the tip and the side
region a little bit darker, comparatively darker like this. The smaller region just two rows in the rows of patching line. Otherwise, for the larger areas, just follow the seep
with curved lines. Filling the remaining portion
of this strand of hair, making this region darker by doing more sating
just below it. And for the final
strand of here, just repeating the same thing. Rows and rows of hatching line to feel the entire section, we are going to make the tip and a little bit of outline regions bit more darker by adding
more sating effect there. Simple curved lines like this for the entire
section of our he And I'll only be
covering up to here in the second part of
the seaweed serenade, and I'll be seeing you in the third part of the sweet hue.
17. Numerous Fins: Welcome to the third part of the project seaweed see in it, continuing on where we left off. We have completed the
outlining as well as did the sading for the
entire section of our hair, lightly erase the pencil mask, ensure that the ink
has dried up properly. Since we did a lot of
sading for those regions, ensure that it has
dried up completely. Otherwise, the ink might get smrged adding another layer of white for the eyes
of the mermaid to make the highlights a
little bit more lighter. It's not working
properly in here. I'll have to wait a
little bit, I think. I'll be coming back
to her eyes later on. For this section, we
are going to create numerous scales for the entire section of
the mermaid tail, and then for three or
four different kinds of prints we have created, we're going to cover
it entirely with the hatching lines
or seeding lines. In here for the top,
as I was mentioning, giving it a little
bit of almond like look by doing the seeding
using these kind of small curved hatching
lines. This is optimal. You can keep it plain and
simple without seeding. Now for the different kind of fins that I have
created in here, I'll be using this to create different kind of pattern
and designs for the inside. Instead of this, if you want, you can create or fill it with curved lines or use
the hatching lines, or you can just fill it with the scallops and create
a little bit of scales. Or you can just
follow along with me and create this kind of random and different
kind of pattern for each individual fins
that we have in here. In here for this section, I'm using this kind of cross hatching lines
with two outlines. This is the largest of all the four that we have
created in here. Now, for this one,
I'm just going to use parallel curved lines like
this for the entire section. In here, discriminating
symbol small lines like this. For the remaining two, I'll be adding the detailing later on. But in here, I decided
to use the pencil to create a guideline
that I can use to create multiple smaller
scallops using this kind of simple lines to do a
cross hatching and then using those cross hatching
lines to create the scallops. I'm just going to
create simple US scalars for the entire
section with two outlining. Instead of it, if
you want to create other variations pattern or scales for the insides,
you can do that. Continuing on with
creating more lines. We're going to do
the cross hatching. When we'll be adding the
scallops for the inside, I'll be making a little
bit of changes to the outlines that we
have created in here. The cross etching
reference we have created, is not that curve or does not follow the curve
shape of her tail. But for the scallops
that we'll be creating, we'll have to adjust it and
follow the curved shape of her tail and add those
scallop in that manner. Continuing on with
the remaining portion in here for the bottom
part of her tail. With these, we are done
with the pencil sketching. Now for each individual
sections that we have created, I'm going to use it as
the reference and create, and I'm going to create scallops
for the entire section. Start with the simple
usps for the scallops, layers and layers
of the scallops, and then we'll be
doing another set of outlining for the scallops. You don't have to create
the same kind of scallops, PLP to create other variations
or other kind of scallops. You can create pointed scallops. You can create broken scallops or you can use a combination so the scallops can also do larger and smaller
scallops alongside. You have got lots of
options to choose from. Experiment on your own and add your own
personal touches to it. Continuing on with it.
And as you can see, for the side region of her tail, I'm changing the
direction a little bit following the curt
shape of her tail. This is yet one of those
time consuming processes. We patient and peel the entire section with
multiple scallops. I'm keeping the the sins of the scallops
somewhat uniform. If you want to vary it a little bit, you
can do that, too. For the fins that I
have created in here, the two smaller and curved fins, I'll only be using
the curved lines for the entire section in here. After creating the scallops, I'll be coming back to it and the other fins that
we have created. In this section of the project, the third part, I won't be
creating any background. I won't be creating any
elements for the background. I'll only be covering the
mermaid tails and the fins. Then in the following part,
the fourth and the final one, I'm going to create
the background using large and smaller distorted
seams for the bubbles, and I'm going to create three or four large
seaweed plants, simple leaves for
the seaweed plants. In here, I change
the direction a little bit just beside the fin, and in here, too, once again, I am changing the
direction a little bit. We have got on a small
section for the scallops, decreasing the numbers of
the scallops a little bit, once again, increasing a bit, the number of the scallops. And with these plea done
with the first layer of the scallops creation
with single outlining. Now for the fin in here, doing another set of outlining like this, following the seed. As I was mentioning,
I'm just going to use this kind of curved sap
and following the sap, I'm going to cover the
entire pin in here. You don't have to follow
what I'm doing in here. You want to create other
variations, patents or designs, or if you want to include the scallops in here,
you can do that, too. Can also do a little bit of sading like what we
did for her here. But in here, I'm going
to keep it uniform and consistent with the
simple curved lines. And with this, we are done
with a fin in the front, repeating the same thing
for the second fin. This rows and rows
of hatching line like this for the entire
section of the fin. And with this, we are
done with these two fins, creating another
outline which I forgot. For this smaller fin in here, just using simple hatching lines to make it comparatively darker. Now for the two
larger fins in here, I'm just going to follow the
curve sheep and completely fill and completely fill it with these kind of
curved hatching lines. Once again, if you want to add more variations pattern or
designing to this section, you can do that, or you can just follow along with me and fill
it with the curve lines. In set that the ink has properly dried up and lightly
erase the pencil marks. The guidelines that we created
with the pencil marks, the cross hatching lines
for the entire section, the bottom part,
doing the same thing, filling it with the curve lines. Try to maintain the distance
in between the lines, keeping this piecing consistent. Now for the larger fence
in here at the bottom, we are going to
do another set of outlining and then for some
of the dividing sections, I'm going to use hatching
line for the other section. We are just going to fill it entirely with
the curved lines. Simple outlining,
secondary outlining like this for these lines that
I have created in here, giving it a little bit of volume by creating another
outlining like this. Now for the last one, for the insights of the
outlining regions, I'm just completely going to fill it with the hatching lines. Simple hatching lines like this. The spacing in between the hatching lines in
here are quite small, so the whole region looks
comparatively darker. And with this, we are
done with the second one, adding it for the third one. Also making this region, the connection between the tail and the fin are bit darker, simple hatching lines like this. As you can see, I have
changed the direction of the hatching lines for
each individual strengths that I have created in here. For all the outlined region, I changed the direction
a little bit. I was not able to
record a small section, but you know what I did just filling the entire section
with the curved lines. For the remaining
portion in here, I'm going to do the same thing, falling the curved shapes like this and filling the
entire section with it. Completely filling
this region too. Now extending the
lines like this and filling the remaining
portion, the other half. In here, since we
have a little bit of different shape in
here, accordingly, creating this kind
of curve line for the inside region,
the inner region. And now for the remaining
section, once again, following the curve
and feeling the remaining and filling the
remaining portion with it. And with this, we're done with the bottom section, once again, coming back to the eyes and adding the iris and
making it a bit lighter. It's still not working, so I'll have to apply another layer of the black
like this and then once again, add white on top of
it when this dries off I added the white earlier when it
was not dried up. That's why it's not worked out. You can just keep it like
this, eyes like this. I believe it has dried up, so adding a little bit of detailing with a
white ailpin like this, simple circular see
for the highlights. And I'm going to only cover up to here for this
section of the project. You can keep the
mermid like this without any background element. And with these, we are done with the full body illustration
of the mermid I'll be seeing you in
the next section with a little bit more detailing
for the backgrounds.
18. Seaweed and Bubble : O. Welcome to the fourth in the final section
of the seaweed see in it. We have completed a Mermaid
full body illustration. Now we are going to
create simple background. Port this one in here,
I'm using toombosbrsman, since it has a little
bit more darker lines. Oosing it to create this kind bit organic see for the leaves, seaweeds in the background. Instead of this, if you want to create other variations
or other seep or kinds seaweed or grass
you can do that too. Or you can just follow along
with me and create this kind of curved and flowing
organic sees like this. Three on this side and
three on the other side. So this is going to be the
larger one in this side. A bit smaller one in here beside her fin and one more in here
that lies behind the fin. Let's do the secondary
outlining in here. Now, adding the mid
rips for the inside, dividing into two sections, and doing a secondary outlining following the curve
sweep like this. You don't have to switch
the paint in here. I just wanted to create a clear separation event the
background and the mermit. That's why I use
this brusse paint since it has a bit darker tone, since it has a bit darker
tone and more line density. Dividing the leaves
into two sections and creating secondary
outlining like this. Now for the last leaf in here, Now, a little bit
more detailing, creating mid drips
like structure. So further dividing into
different sections. And then we are going
to add more lines, simple small hatching lines
for each individual sections. But now just divide all the
leaves into more sections, creating this kind
of mid drips like structure for the seaweeds
that we have in here. I'm just skipping it a
little bit farther apart. If you want to make it more
closer, you can do that, too. I forgot to add
the detailing for the scallops in here for
the scales of the mermaid. So we are going to do
the secondary outlining for each individual scallops. Increasing the line
density a little bit for the end region and making it a little bit thicker for
the middle region, for each individual scallops. This is apnal if you're satisfied
with your mermaid tails and the scallops that you have created, you don't
have to do this. Or you can make it
a little bit more distinct and bit more different. Use the other supplies
that you have. In my case, I would have
used the Tombos bras paint to make the different section of the scallops a little
bit different. Thus creating a little bit
more contrasting effect for the mermaid's tail. So if you want to include other supplies,
you can do that. You can also use
the colored paints that will make it
more interesting. This is a little bit of
repetitive process, so this is going to take a
bit of time since we have got numerous scallops and we are doing the same thing
for all the scallops. After doing this, I'll be
moving back to the background. I'll be creating
numerous bubbles. I'll be using oval seams and distorted oval seams
for the bubbles. And then for the leaves that we have created seaweed leaves, I'll be using small
hatching lines. And apart from that,
if you want to add more elements for the
background, you can do that. Try to make the
individual scallops a little bit uniform and
consistent throughout. So we have got only
a small section continuing on with
the outlining. We are all the way there
a bit more detailing for some of the
remaining scallops in here for the bottom part. In here for this two fins, you can make the outlines
a bit more darker. For this section, this in here, I decided to make it a
little bit more detailing, creating this kind of inverted creating this kind of inverted
three figure like this. And with these, we are
done with the Marvet tail. Instead of this, if
you want to create other variations pattern
design, you can do that. For each individual lines, I am going to repeat
the same thing, adding the hatching lines up opposite direction
on both the sides. Now, we going to the other side in here on this side,
we have got two. And with this, we are
done with the first one. We have got five more. Still, if you want to
increase the numbers, you can do that. You can use the rust paints
and create few more lines to make it a little
bit more denser and increase the
volume a little bit. In here, these are a
little bit smaller ones, so it's quite easy to do this. Creating additional one in here. Now moving on to the right side. And with these, we are
done with this one, two more to go, moving
on to the larger one. In here for this one,
we have got one, two, three, four, five,
six, seven, eight, 19. And with these, we are done with this side moving
onto the other side. Three more to go.
Let's create one more. The last one. Nodding
it for the last lead. Simple small hatching
lines like this. These are a little
bit smaller ones. And with this we are done
with all the leaves. Finally, moving on to creating
distorted saves like this, distorted oval saves like
this, for the bubbles. For the insights
to, I'll be adding a little bit of detailing,
more detailing. F now just create numerous
sees similar to this. For the outer section, I'll be decreasing the numbers, but for the middle section
and the lower section, I'll be increasing the
number a little bit. I'm not going to
oversaturate it with it. And in between the leaves,
I'm going to add fewer ones. One more in here, just
below the mermaid tail. Now, a little bit of detail
with more curved lines and more curved seeds
for the insides of the distorted bubbles. If you want to include
star like seeds that we have used for other
projects, you can do that, too. You can also increase the
numbers of the leaves. If you want, you can create smaller sins or few other
types of smaller leaves. And with these, we are
done with the bubbles. Once again, going
back to the ice, I was not satisfied
with the ice. I'm not satisfied with the ice. That's why I'm going back
and forth with the ice. Hi, right now, I'm using
ail pin since I can easily overlay it on
top of the white and using it to give the
white a little bit more seem making the outlines a
bit more distinct and bolder. Create a clear separation
between the petals and hersola making the eyebrows a little bit darker
and doing the same for upper part of her hair. I forgot to add it
in this section, hatching lines, adding
it in here too. And with this wee turn with the final and bonus
project C weeds in it, I hope you enjoyed
painting this, and I'll be seeing you
in the last video.
19. Class Conclusion : Congratulations on completing
enchanting Mermaid in ink, a three day line art challenge. I hope you enjoyed creating the glowing and detailed
mermaid illustrations and learn new techniques
along the way, from hatching and
ding to line control, texture and mermaid
construction. Over the course of
this challenge, we completed a glance from
Nadi Ocean's graceful bloom, echos Beneath the star, and the bonus project
Seaweed serenade. I also hope the practice set
and the basic exercises help you feel more confident with ink illustration and
line art challenges. If you have not already, don't forget to
upload your project and practice seats in
the project gallery. I'd love to see your
beautiful mermaids and creative details
you added to them. If you enjoyed it, feel
free to leave a review and follow me for more
classes on ink illustration, watercolor, and oil pastel. Keep practicing,
keep experimenting, and I'll be seeing you in my
next class. Happy painting.
 Vishal Munshi