Transcripts
1. About the Class: Welcome to my new class
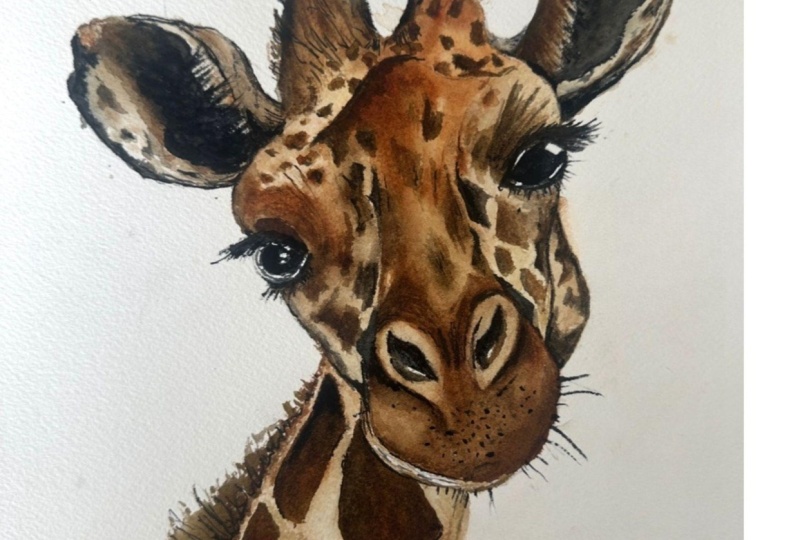
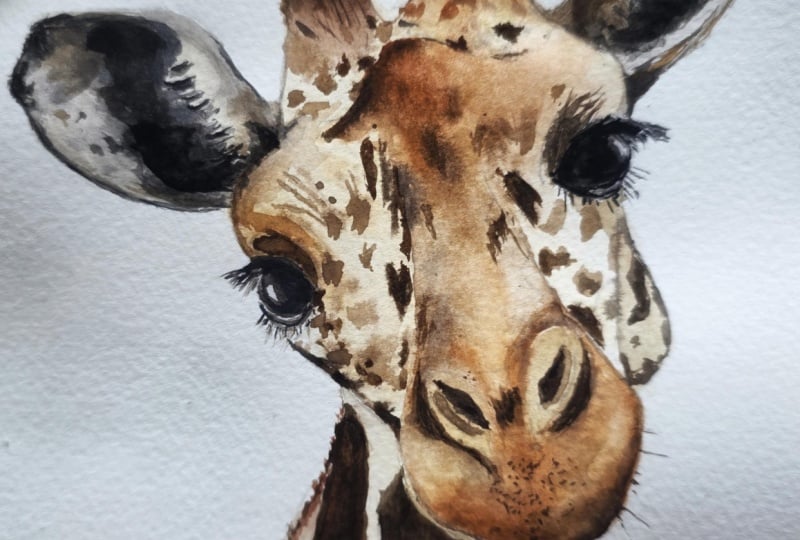
with Animal portraits. In this class, we will
paint this cute giraffe. Hi, my name is Alexandrna. I'm a watercolor artist, and I paint everything from landscapes to
animal portraits. I invite you to explore this beautiful world
of watercolor with me. I love painting because it
helps me to ease my mind, focus on myself, and to
dissolve in the present moment. It's quite affordable medium as you don't need a
lot of materials. All you need is just a
few colors, brushes, and a watercolor paper, which is actually the
most important one. As a class project, you will paint a giraffe
portrait using just four colors. I will guide you through
every step starting from art materials and sketch
to the final details. I always choose up to
five colors for each of my lessons so everyone could find the necessary colors
in their watercolor set. This class is suitable
for the beginners. However, it is
better if you know some basics about watercolor
and have some practice. Please leave a review. It helps me to improve my future classes based
on your feedback and for other students to understand if this class is
suitable for them. Grab your brushes, open
your watercolor set, and let's dive into
the creative process. I hope to see you in the class.
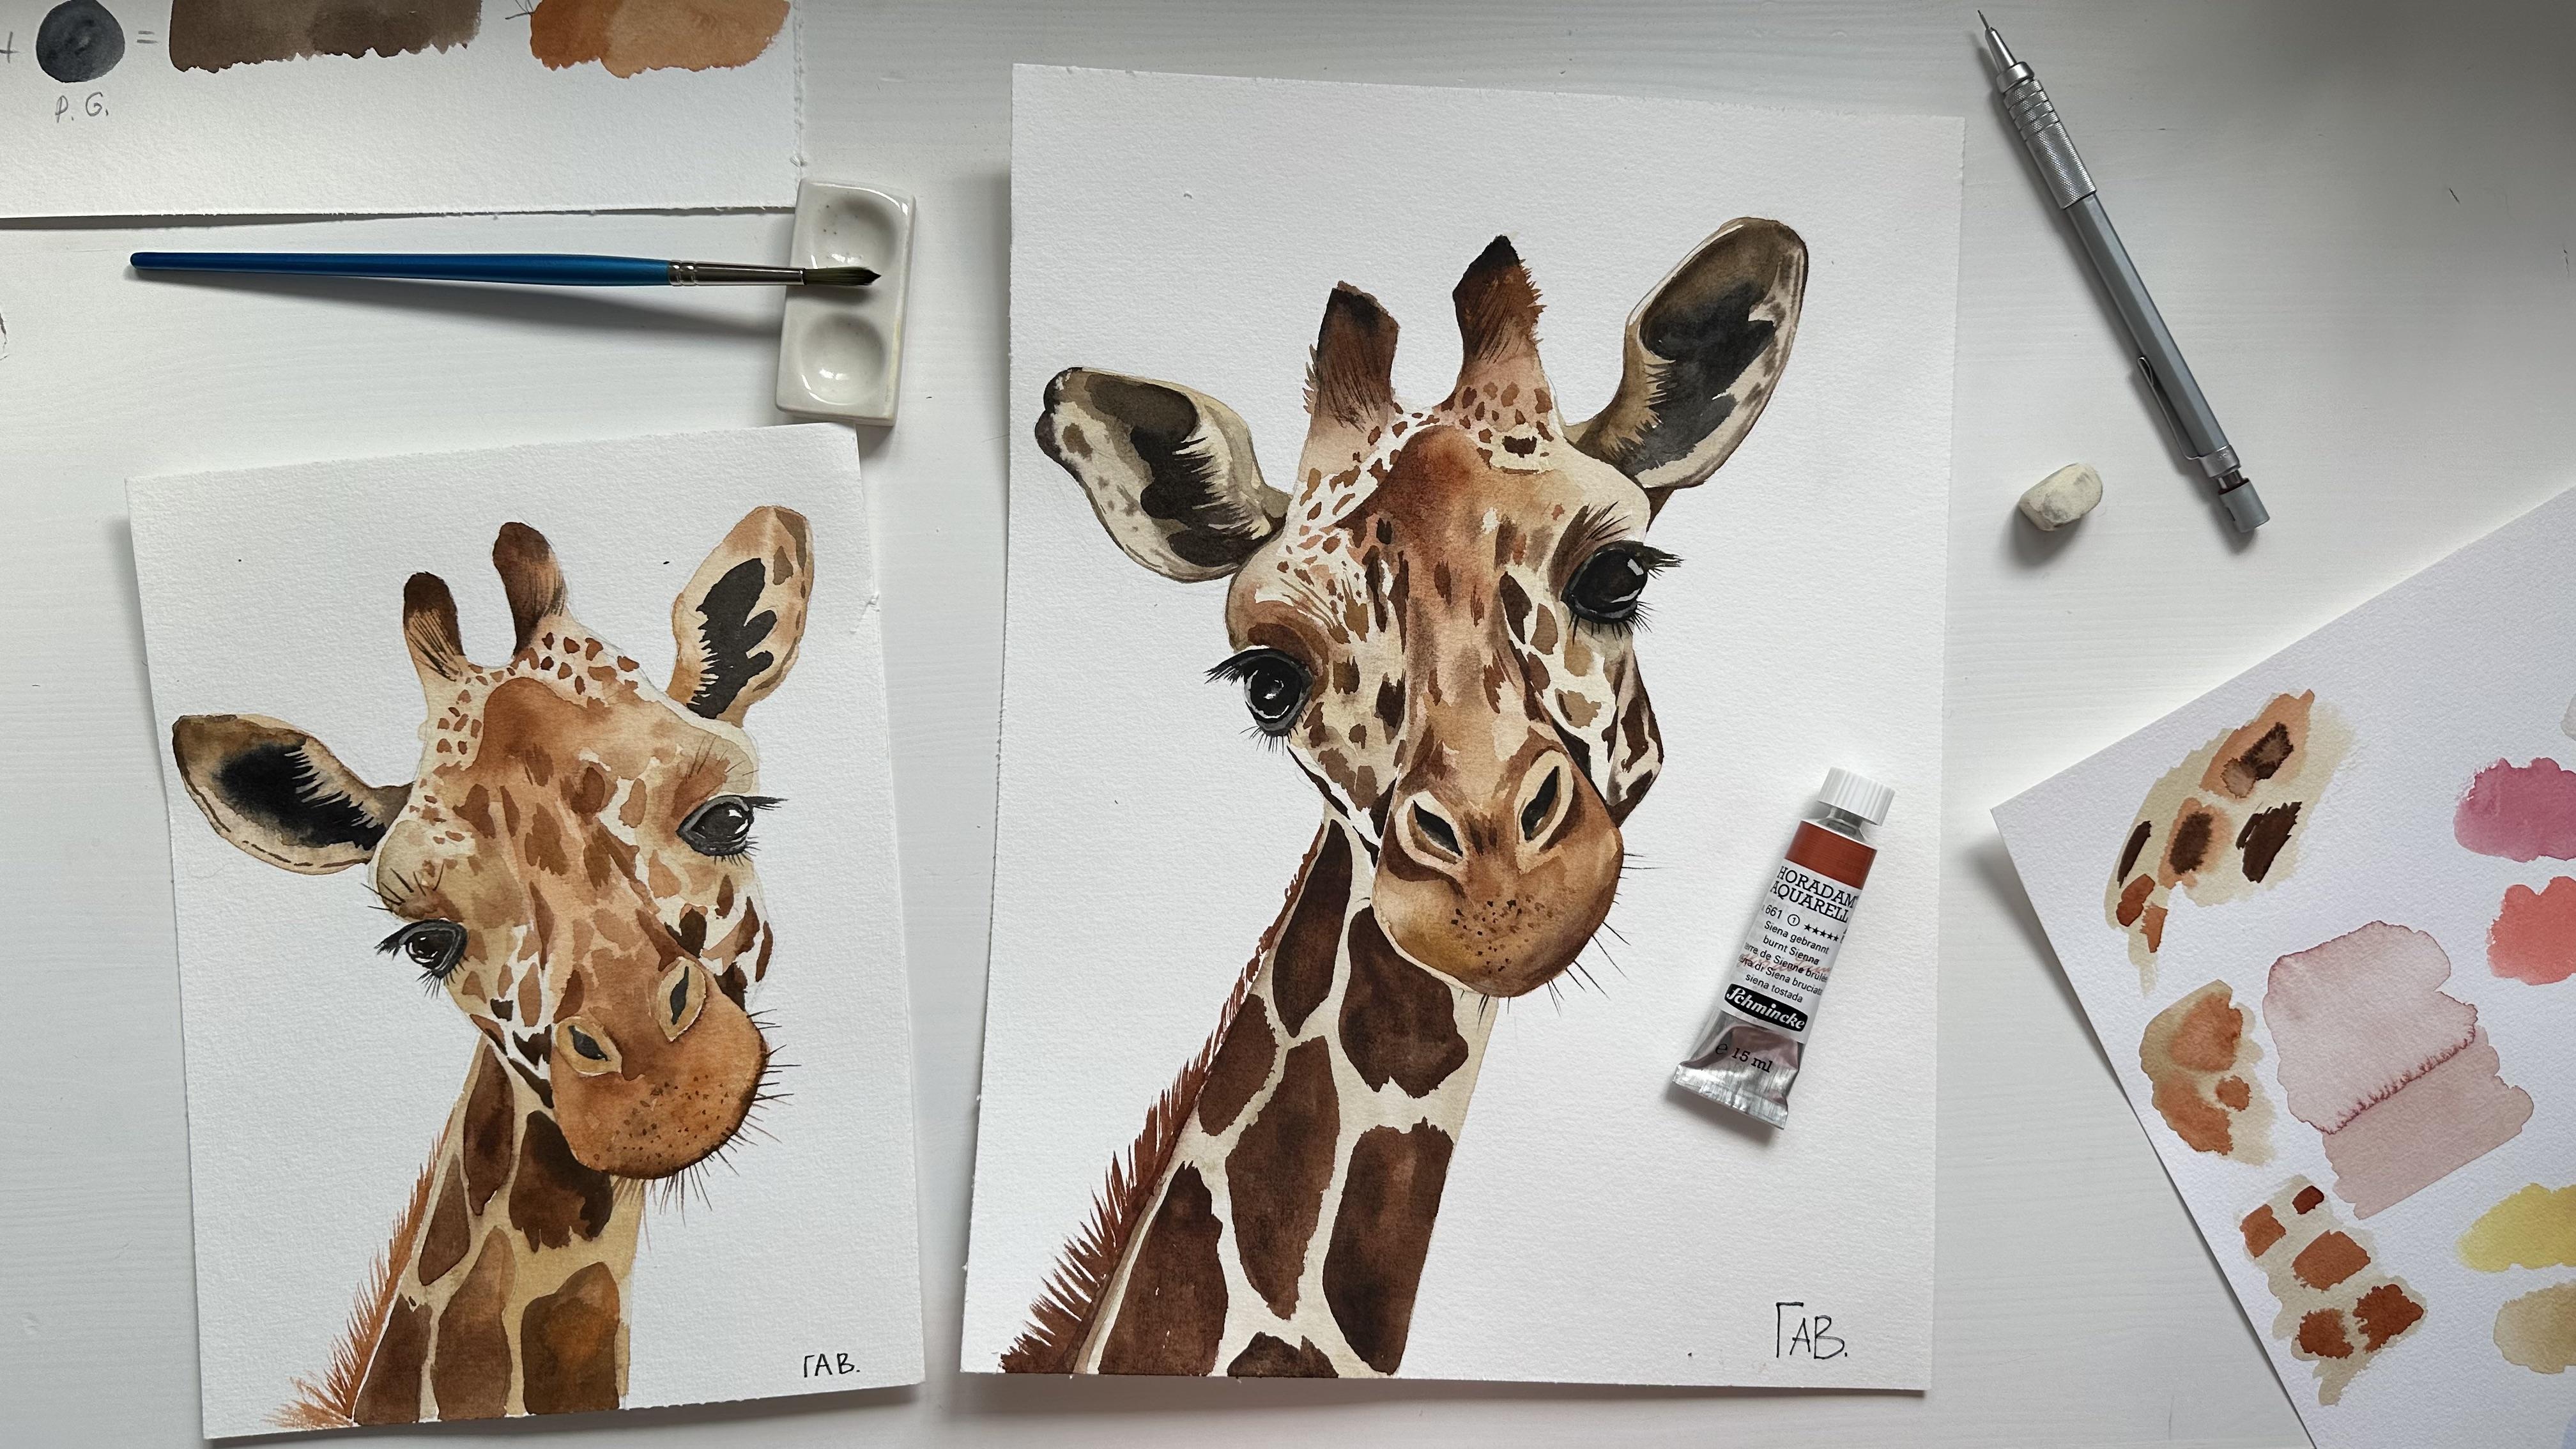
2. Art Materials and Color Mixes: Hello, and welcome to the class. Let's start with art materials. For the giraffe painting, I will use forward to colors. Burn Ciena by Schmin Ke. Yellow ker by Shinhan Art, green Umber by Schmin Kem, and paints gray by Van go. I will use 100% quotin
paper by Polish print. It has called press texture, and you can use your
favorite paper. Just make sure that
it's 100% quotin. For the whole painting, I
will use just one brush, it's round synthetic brush, number six, by
Windsor and Newton. It has a pointy end, and it allows me to paint
even small details. Before we move to color mixes, you can also see that I
have ceramic palette. I have some paper towels, and I have a glass
of clean water. And usually I actually have two glasses of clean water
to keep my mixes clean. And let's start
with color mixing. First, I will show
you the swatches of four main colors
that I will use. I will start with yellow ocher. I'm sure that you have it in your palette because
it's a basic color. Like Burn Siena, it's also very basic color that are
used for a lot of mixes and in a lot of
different types of paintings from landscapes
to animals portraits. I always clean my brush before
I apply new color to keep the colors on the
palette pure and to keep my swatches true as well. Now I will move to green umber. If you don't have green umber, you can use also raw umber or even try to mix yellow
ocher with paints gray. I think it will be
almost the same. The last one is one of
my favorite colors that I use in almost every
painting. It's paints gray. Now when you have
all the swatches, you can find some similar
colors in your pallet or just prepare these colors
to start painting. And before we move to that part, let me show you some of the
color mixes that I will use. And the first one is mix of yellow walker
and green umber. This mix allows to create
this perfect shade for the light parts of
the skin of the giraffe. I will use a lot of water in this mix to create a
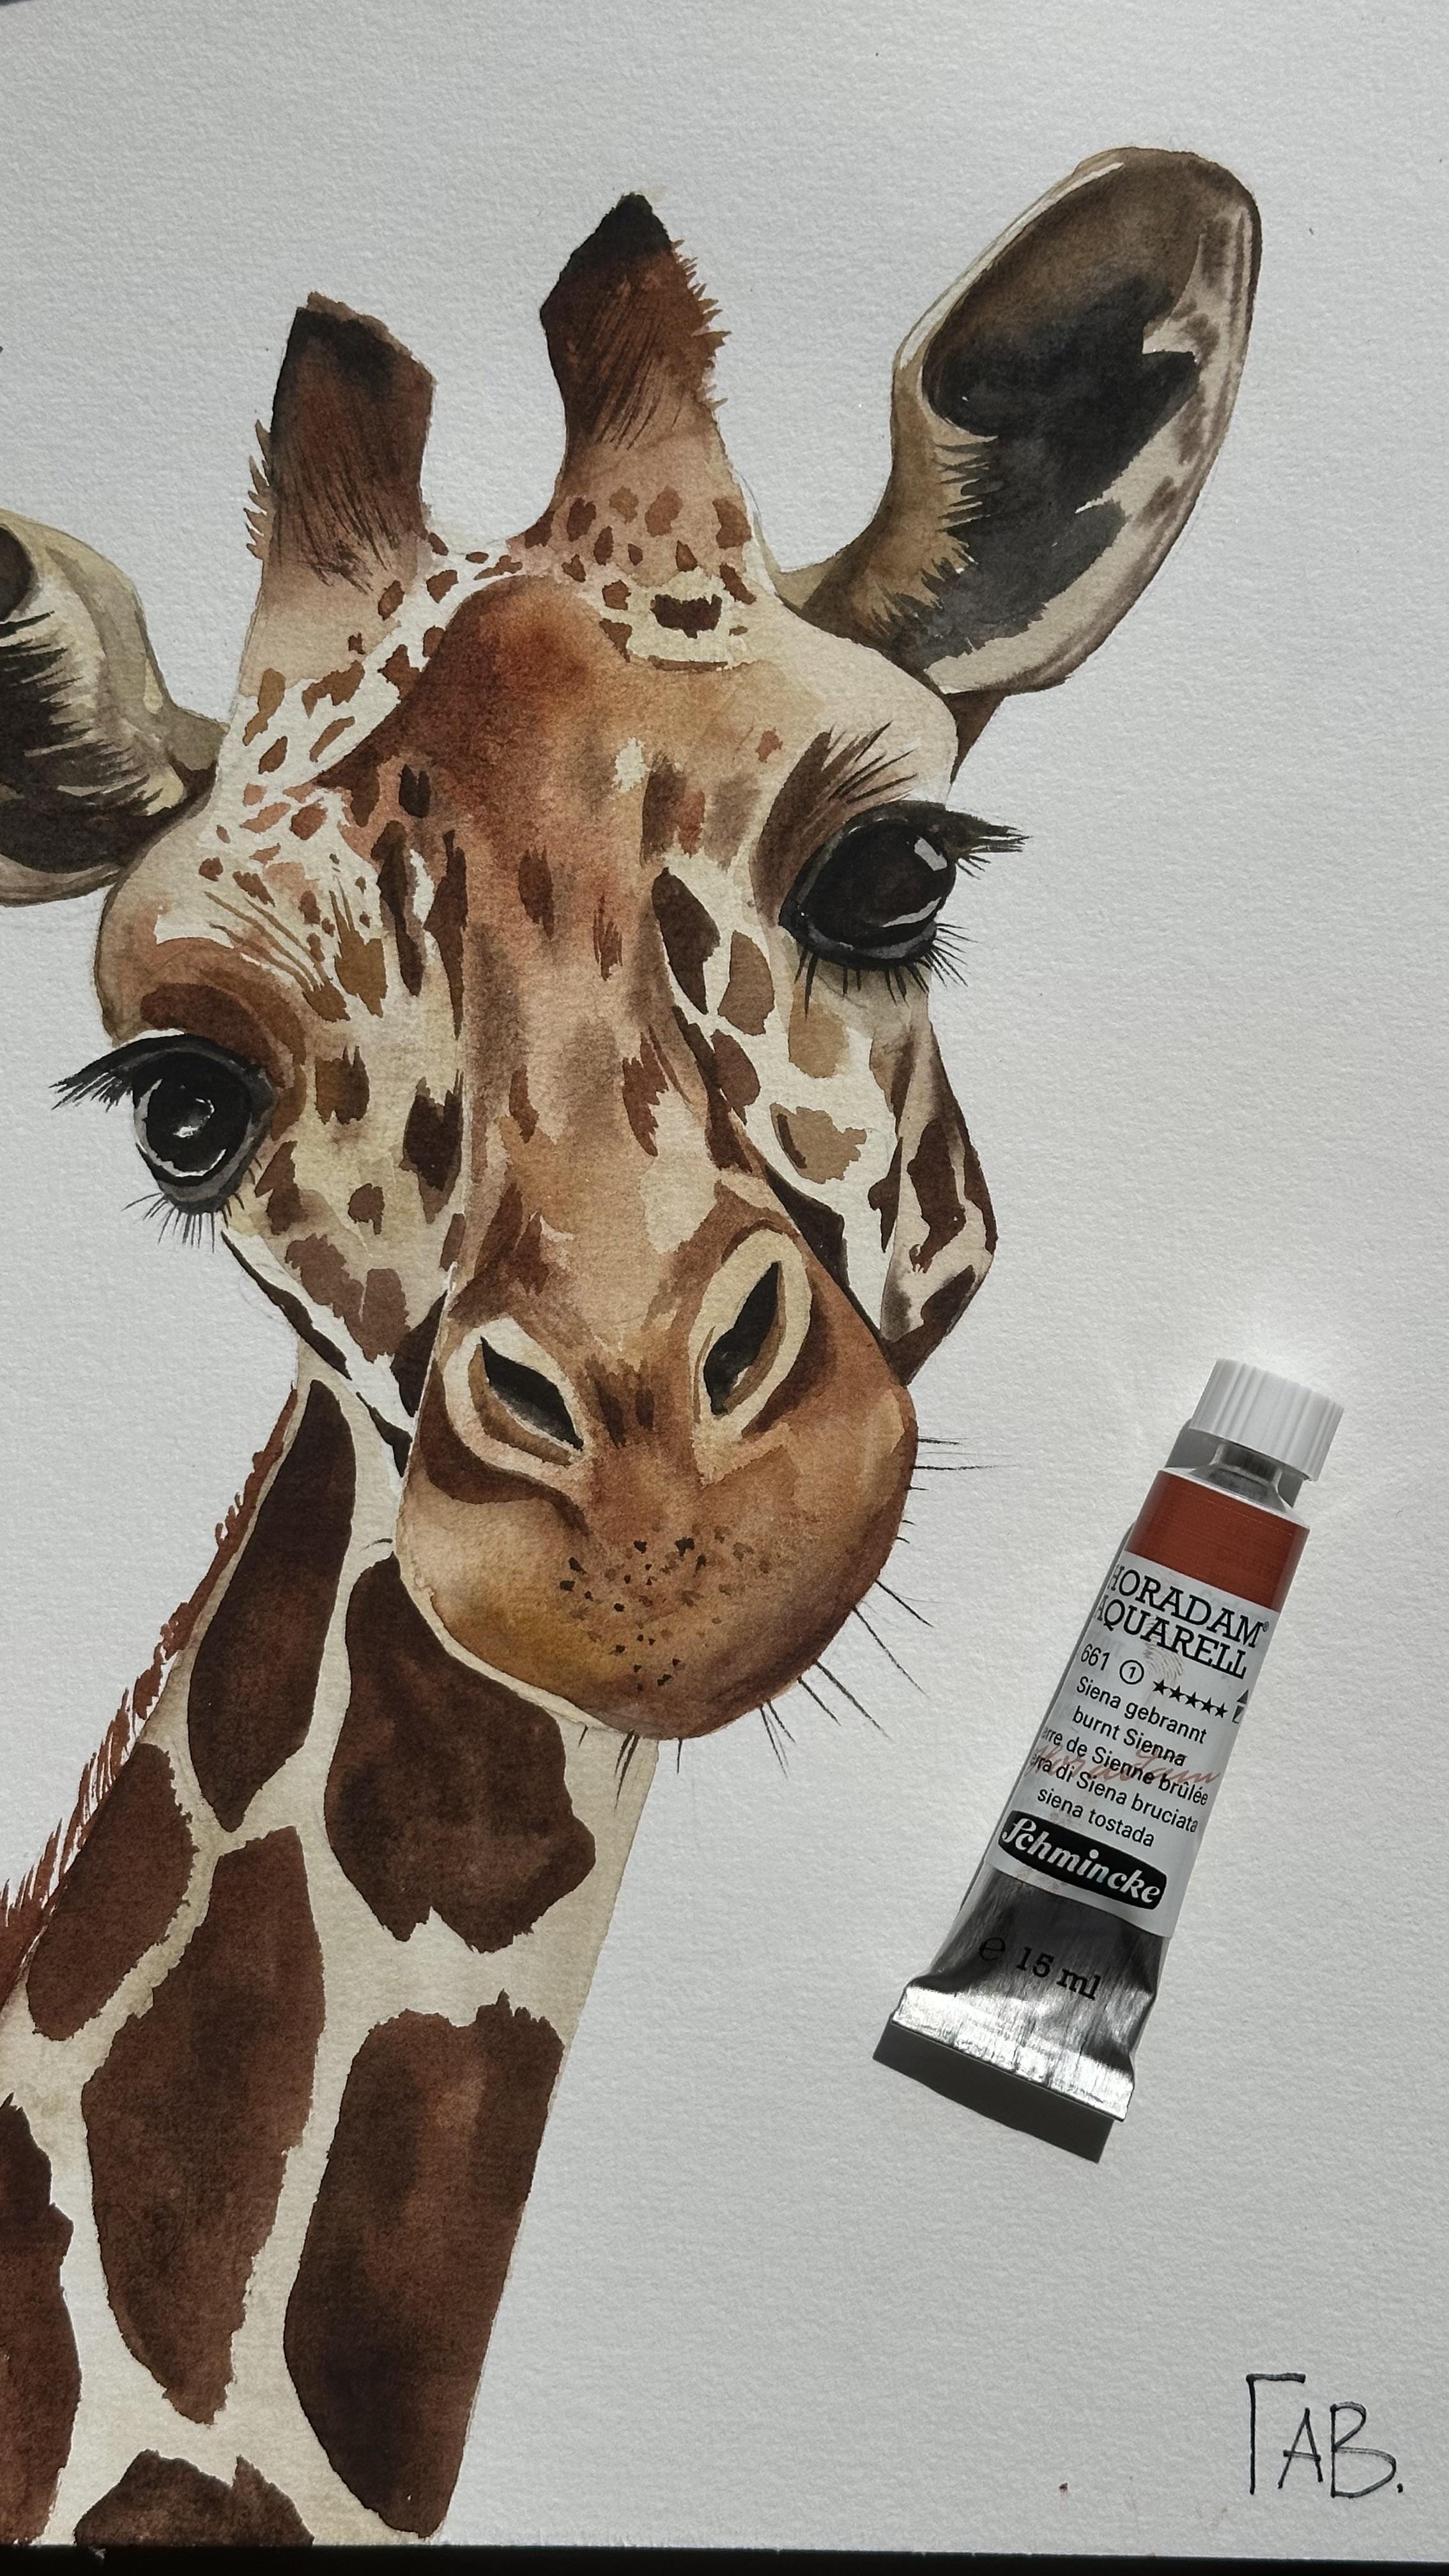
very neutral shade. The next mix is burn
Ciena and paints gray. It will create a very nice
brownish shade that I will use for painting
these dark spots on the skin of the giraffe, like the pattern off. The last mix is yellow
walker and burnt sienna. I will use this mix
for the light spots on the skin of the graff
pattern, as I said before. Actually, I suggest
you to try mixing all these colors that I
mentioned because I will just use them on the palette and sometimes I will
add a little bit of one color to the
existing mix just to create this diversity
of colors in painting. That's it with color mixes, before we move to sketch, I will show you some tips on
practicing before painting. First of all, before,
I started painting. I always take scrap paper, and I try out my colors and color mixes
to see how they look. Also, I need to pick the perfect technique
for this painting, and I will try wet on wet
technique and wet on dry. First, I will apply the dark color to the
light surface right away. I see that the color transfers
too much on the paper. Even if I use this technique, I will need to create
the next layer when the surface will get
dry because I will need some dark spots on
the giraffe skin. Wet and wet technique
can be also very different
depending on amount of water you have in
your color mix and how paper is wet or dry. For the second attempt, I will try to leave
paper a bit dryer, and I will apply Burnsena later. So the color won't travel
so on the wet surface. It's quite difficult to
understand when the paper is ready to the second
color is being applied, but you will get
there with practice. You will understand
how it works. You see now I apply Burnsen
and it doesn't blend with the first color so much
as when I showed you before. Practice a bit on scrub paper if you don't have a lot
of experience with watercolor and LC in
the next lesson. So
3. Sketch: Welcome to the
second lesson where we will draw a sketch
of the giraffe. I will just show you my process. I'm using siting
method to measure the proportions of the object and to transfer it to the paper. You can also download my s of my sketch and transfer it
to the paper straightaway. There is an iPad with reference
photo in front of me. So I'm measuring the proportions in units using my pencil. So I'm basically comparing different elements of the
giraffes phase in units, for example, how many ears, like if the ear is one unit, how many ears will
be in the nose of the giraf or in the
height of the face. You can use any
units that you like. You can choose the
one small object like I or nose I don't know
anything basically. And to compare how many of these units are in other
element of the pace. Now, I will try to create the lines and to repeat the shape that I see
on the reference. You to The eyes of the giraffe are
very far away, and they have this
specific shape that also deers and goats. They also have same eyes. And when you an eye, try to create an outline, like I'm doing right now
because The middle of the eye the pupil will be
the part and this area. It will be like eyelid or something like that. It will be. But if you will take a closer
look at the reference. Photo, you will see that
it's like dark gray, more than just black. So we'll make it lighter. Oh. I will sketch not only the
main elements of the face, but also I will draw some areas of darker
color or light areas. So I would keep in
mind when I'm painting that I have to leave this
areas light or dark. It's really helpful, especially
if you are a beginner. And around the eyes
on the upper side, I see that there
is a darker area. So I marked it on my sketch. Same as with ears. H Oh I won't draw this pattern on the face because it's a spot, and I will paint them
right away with water. If it's easier for you, you can draw them
while you sketch to just have an idea where you will put your spots on the
face of the giraffe. My sketch is ready. I will remove the dark pencil
lines with the needable as, and I will see you in the next lesson where we will start painting
with watercolor.
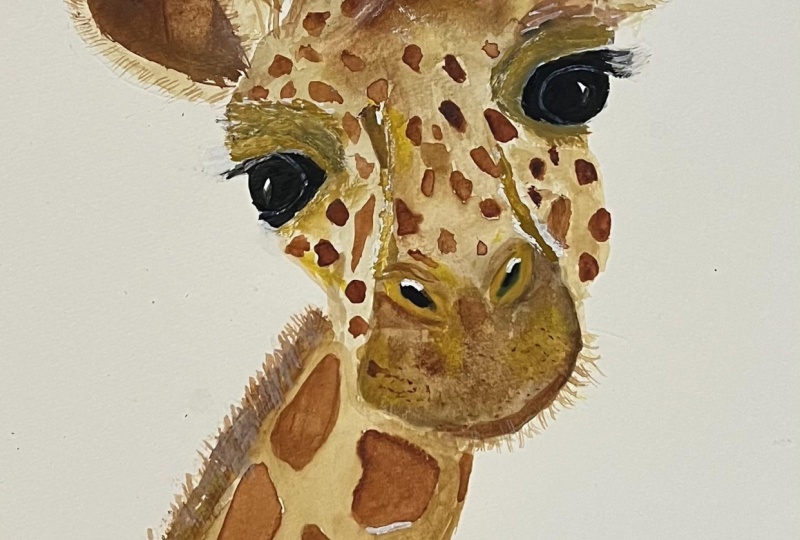
4. First Layer: Before I start painting
with watercolor, I will remove the pencil
lines with netable eraser, so I can see the
shape of the object, but the painting will
look more clean. I will prepare my color mixes that I showed you in
the first lesson. First one is yellow
ocher and green uber. I will add a lot of water, and I will use this color as a first layer for the whole
phase of the giraffe. I'm using scrub
paper to test out my color on the paper before
applying to painting. Two other mixes I have
just pure burncena, and Burcana, plus paints gray. I will use these mixes for the spots on the
skin of the giraffe. Once my clear mix is ready, I can move to the painting part, but before I do that, I have to clean my brush with
a clean water and dab it on the paper towel to reduce
leftovers of the dark color, and only then I can
start painting. And I will start by covering the whole face of the
giraffe with clean water. I started with the right
ear, but actually, I understand that we
can paint ears later because they are different
from the shade of the face, so you can paint them later. But for now, I won't
cover the left ear. I will just leave it dry, and I will paint it later. Sorry for inconvenience. But if you cover
the left ear with clean water, it's not bad. You can just paint it just like I will do
with the right one. Don't worry. It will be fine. I won't cover the
surface of the neck yet. But if you did, don't worry, it's not that b as well. Once the surface is wet, I will apply this very
light mix of yellow ocher and green umber with
a lot of water in it. I will just go with this color all over the face
of the giraffe. Oh, I didn't cover the bottom of the face with the color because I
want to paint it later. And I also avoided painting
the eyes with this color. But if you didn't, it's okay because we
will paint it later. Now we have to paint very fast, and I apply burn Ciena to the little horns
of the giraffe, which are actually called ccs. I just Googled it. So I apply this pure
burn Ciena color. And I will add even co, the mix of burn Ciena and pins in the upper
part of the horns, and even pure paint
cray will do just fine because the upper
part is pretty dark. And the main challenge is
here to paint very fast, as I already told you, because this is wet
and wet technique, and the colors will blend
only until the paper is wet. We have to apply all the
needed colors where I want to in the first layer
while the surface is wet. You see there is no rough
edge of this painted area, and that's what we need. That's why I love wet wet
technique because you can blend the colors and
it looks very smooth. Now I will add a bit of yellow
ker and a little bit of Bersan to make the color
intense and yellow. I will apply this
darker color the eye, and on the left side
closer to the edge, it will be even darker. I will use this dark and will darken this
area above the eye. Oh The colors are
nicely blending. And if you see on the left
side, it's already dry. So I will work on the
wet surface right now, and I will imply some of the spots already on the
face of the giraffe. We will paint it later. Don't worry, but we can already add some darker
shades into the wet surface. And now I will blend and lift some color to make this
edge not so rough.
5. Painting the Nose: I will move to the
middle part of the face to paint in the nose, and if your paper is fully dry, you can re wet the surface with clean water and big brush, barely touching the
surface of the paper. And now I will use
the mix of burns and yellow ker and
different amount of water. The more water I have
the lighter mix will be. This area in the middle of
his face is pretty dark, so I start to apply
some dark color. I used a very light mix for the bottom part of the face
because there is a highlight. And now I will move to my dark mix of Barcena and some colors
that I have on the palette, yellow ocher and green umber. The nose will be more intense
than the rest of the face. Now I will use dark color, but you have to keep the
nostrils light for now. So we are very carefully avoiding painting them
with darker color. I'm painting only the
bottom part of the face. It can be quite
challenging because the colors are still wet
and the paper is wet, so the colors are blending, but you can just reduce the water from your
brush and lift the color if you see the colors uncontrollably
blend and you don't want that. Now, I'm switching to the dark color mix of paints
gray and burnt sienna. And be careful because
we apply this color only on the right side of
the bottom of the face. And on the left side, we will leave this very
light thin area of highlight that will help us
to divide neck and the face. To. If your light area and dark area blended, you can clean your brush and reduce the water on
the paper towel and just lift the color off the surface like
this and like this. And that's it. This is how
you can create highlight if the area is too
dark but still wet. Now I will add a bit of yellow
ocher on the left side. Trying to blend the edges because we don't need
this rough edges. It is better to work on different areas
simultaneously with one color because this is how your painting
will be connected, and you won't create some objects elements
that doesn't seem connected with other
objects on the painting. So I will use this
dark mix to paint this dark area above the eye and some maybe spots on the face The paper got so I can continue working on
the face on the nose. I want to darken the
areas a the nostrils. When I want to smooth the edge, when I'm painting with
wet on dry technique, I can just clean my brush
and with water just lift the color and create this very smooth
edge and then apply, so it will blend on
the wet surface. I stop working on the
nose for now and I will move to paint in some
spots on the head. Also, I can see that the first layer gets
lighter when it dries. Normally it happens
with the cotton paper. It absorbs the color. We need to reapply the dark areas and the small horns are
needed to be darken. But I will start with
these little spots, and then I will move
to paint in the horns. I'm moving from the
dark part at the top to the lighter and smooth
edge at the bottom. I add more Bersan and more
water to the mi because I will need to blend this
color with the existing one. Now I have this pretty rough
edge of the dark area, and what I will do, I will clean my brush and I will load
it with clean water. And I will move from the
light area to the dark area, dub in my brush on
the paper towel, removing the excess of water. And I will just smooth this
edge with the light area.
6. Spots on the Face: I renew my mix on the palette, mix of Paints gray and arciana, to move to painting these
spots on the face of giraffe. Before you move to this part, make sure that your
paper is fully dry. When painting these spots, I use different amount
of colors in the mix, making the spots
darker and lighter. Sometimes I will
add more bursiana. Sometimes I will
add yellow ocher. These spots shouldn't be round. They have this very
chaotic shape, but at the same time, they are repeating the shape
of the face of the giraffe. Make sure to analyze the
reference before you painting. Now I can add some spots on the part of the giraffe because it's the darkest
part of the face. I finally darken the area below the nostri and to
make this edge, I will again brush
with clean water, and I will just smooth. I can add this middle tone
into the nostrils themselves. As I told you earlier, the nostrils inside
will be almost black, and on the outside
veal will be light. But between this
light and dark area it's better to have to. That's what we are
doing right now. Now, I will move to paint in
the right part of the face, and I will start by adding this very light shade to
the surface at the top. Then I can add some shade the eye just like we did
before on the left side. Now I can move to painting
the spots on the face. I'm using wet on dry technique, so the surface is and the spots
next to the nose will be. And then moving to the
right side of the face, it will be lighter and er. These spots, they are not only light because I use
more yellow ocher, but I also use more
water in the mix. So the color looks
more transparent. And I will mix green umber
and paints gray to create this dark and shade to
paint it below the eye. On the right side,
we have a jaw, and our task is to make it
look different from the face. And to do that, I will just
cover it with a bit color. I will mix colors that I have on the pallet
with a lot of water, and I will just cover
this surface with this light than the face color. I also want to darken
the area above the eye. I will add some dark
color and I repeat this shape like eyelashes or
some fur that giraffe has. The area of the jaw is dry, so I can apply some
spots over there too. Even if it's a bit wet, it's okay because the colors
won't transfer a lot. I will add some dark spots and highlight the nose
with a dark color. And I think we are done for now. I will see you in
the next lesson.
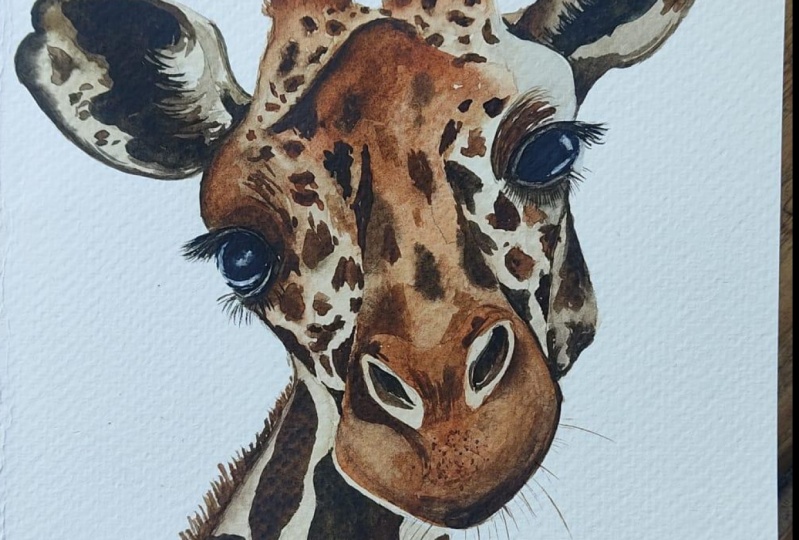
7. Eyes: In this lesson, we will
paint the ice and I'm mix and paints gray with some colors that I have on the palette, just because it's
not very good to paint with just black color. I'm using this dark color to paint this outer
line around the eye. With the deep of my
brush, I band eyelashes. I mix in burn Siena Wiss gray, and I will repeat the
same with the left eye. O W W W I also paint a very thin lines. Eyelashes on the bottom eyelid. If it's difficult for you because I'm using
brush number six, but if you are using it vertically and on
the tip of the brush, you will be able to create
these very thin lines. But if it's difficult to use just smaller brush like
number zero or number one. What Now, I will cover the inside of the eye with a very light gray. I will leave it dry, and I will mix some paints gray with burn Ciena
to paint the inside of the nostrils because it also has a very dark,
almost black color. Now, I will load my
brush with a dark color, and I will paint the
inside of the eye moving from the inner
corner to the outer. On the outside where we
have this light grey area, I will keep the high
light because the eye is and we need to
show it with con. O. With this dark color, I will paint an eyebrow. I just realized that it's eyebrow above the
eye of the giraffe. It just has a very funny shape. So our eyes are done. I think they look very e. And I'll see you in the next lesson where we will paint the ears.
8. Right ear: Let's paint the ears, and I will start by mixing some cold color on the palette. I will mix colors that I have. I'm preparing the color
mix of paints green and Burn sena because
I use it a lot, and I will prepare some
mix with green umber for painting the ears because
the ears the right ear, particularly the one
that we are going to paint it will be than the heat. So I'm using yellow ocher,
I'm using ernciena, and green umber and a
bit of paints green. So basically all the four colors that I have on the palette. First, I will apply
this darker color on the border of the heat and the ear to separate
these two parts. To highlight that the
ear is behind and it's. Then I'll use a bit lighter mix, and I will drag the color
towards the middle of the ear. I will leave a very
light thin line, so I won't cover it with color because on the
very edge of the ear, it has a very light area, so I will leave it. No. Now, when I painted the
light part of the ear, it's time to move to the
darkest inside part. But it's very important to
have not too wet paper. So let the paper be dry. Otherwise, your black color will just travel towards
the light areas, and it will be hard
to separate them. So you see when I
apply the black color, it doesn't plant a lot with the light color
that I applied earlier. On the left side of the ear, it has a bit fur and I need to highlight it with
the black color. It's really important that this light area on
the left is fly. I'm just repeating the shape
of the hair with my brush. The right ear is done, and now let's move the
paint in the left one.
9. Left Ear: Now we will paint the left ear, and we will do
basically the same. Except for one difference, I haven't covered this ear
with the color at all, but it's not very important because I will do it right now, and I'm using the mix that
I have on the palette, and I will paint it in
wet on wet technique. Once I'm done with covering
ear with the light color, I will load my brush
with a dark color, and I will apply it on
the very edge of the ear. The color will nicely blend
with the initial one. And using less dark color with more burns a ten pins gray, I will outline the
ear on the left side, letting the colors blend. I can slowly start
applying some spots on the ear because if you will take a closer look
on the reference, you will see that Giraffe has the spots not
only on the face, but on ears as well. And while the surface is wet, I will darken the
inside of the ear. I hope that you are not too
tired with this painting, but the good news
is that you can stop and renew your painting in a few days because these parts are not
connected with each other, we're not painting the
whole piece in wet on wet, and you can paint the neck
and the ear next day. I'm separating the ear just like we did
with the right one, making it a bit
der than the hat. G I will continue building up the color. It means that I will apply even darker color
inside the ear, but I won't use pure paints gray color yet because
the surface is, and I just need to
create a bit areas Before apply and paints gray, I want to let the ear
get dry a bit more, and meanwhile, I will
change the water. I already have clean
water in my glasses. Make sure that you also change the water because when you are painting light area
like this ears, it's very important
that the water is. While the ear is getting, I will cover the surface
of the neck with a very light color that
I have on the palette. It's basically the
same color that I used for painting the
first layer of the ear. This color will be slightly
darker than the color that we painted first layer
off the face of the giraffe. I will outline the left side of the neck with a
burnt sienna color. So the colors will blend. We will paint hair
and the spots, and now we can come
back to the ear. I repeat the shape of the shadow like I see
on the reference, and I also will paint this hair on the
right side of the ear. We're down with the left ear, and I will see you
in the next less and where we will be in
the spots on the neck.
10. The Neck: Let's paint the
spots on the neck. The surface of the
paper is almost dry, and I start applying
this dark mix of paints gray and Burnsena from the
left side of the neck. It's actually doesn't matter, so you can start
from the right side The neck will be
darker than the face, so it's a good way
to highlight that with dark spots that will get closer to the
face of the giraffe. I And again, I'm trying to make some
chaotic edge of the spots, not very straight, and
the shape so be natural, not like round shape or triangle
or something like that. If you remember, I
told you that at the bottom of the face
on the left side, we will keep the highlight. This very thin and light line. Right now, you see that I needed this line to highlight
the contrast between this dark spot on the neck and a very light
area on the face. We need to add this dark
brown shade to some parts of the face so the neck wouldn't look separated
from the face. Point. We will continue painting the spots on the
neck of Giraffe, try to use different shades
of the brown color that we next to maintain the
diversity of the colors. I will leave some light area on the left side because I
see that on the reference, it's a light area between
the hair and the dark spot. But if you don't
keep it, it's also. I don't think it's
very important. W, w Now, I want to darken
some area below the nose. And basically, this is the
time for the final details. Like if you see that you want
to add or to create a area, it's good time to do it. Now I want to paint
some final details, whiskers or hair on the
face of the giraffe. I'm loading my brush
with dark color, and using the very
tip of my brush, the sharp end, I will
paint these thin lines. And foo. I want to paint some fur texture on the small horns
of the giraffe, and this will be the
last thing to paint. I'm twisting my brush
on the palette, creating this very strange
shape of the brush, which allows me to
paint the fur texture. Our painting is done. I hope that you like this class, and thank you for
painting with me. Please don't forget to leave
a review about the class and share your painting on Instagram and on class
project section. I hope to see you in
my other classes.
 Aleksandryna Gromyko, Watercolor tutorials for everyone