Transcripts
1. Introduction: The final module. We arrived at it, and we're going
to work with this. Right, you're going
to say, what is that? Well, you may recognize it. It's easel, a sent
for an artwork. And we need an artwork on it. It's a really small
one, isn't it? We're gonna create some fun
miniature canvases together. And let me put one on. I got to put it right. There you go. This is what we're going
to do. We're going to do a practical application of all that we've learned in
the previous modules. Bring it together into
some fun artworks. Alright, now, I'm not going
to make this a long one, but we're just going
to have some fun. And as you can see,
probably from all of these, we're actually going to
use all of the materials we've used before created
these little guys. Now, these little guys
were really fun to create. You're going to have the
same fun creating them. They make great
gifts, by the way. You can put them on your
desk. They just look great. So I'm not going to
say more about this. We're just going to
have some fun creating some fun miniature
canvases together. All right. See you
in the next lesson.
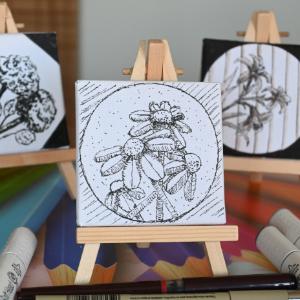
2. Chamomile miniature Canvas: Let's start our mini
canvas creation. Now, they're really mini,
aren't they? They're small. These are seven by 7 centimeters or is that free by
three inch about that? You can, of course,
buy larger ones. Own by smaller ones than this, but a bit larger ones
would work, too. But I'm going to use these. We're gonna make
a couple of this, and we're going to start
with the first one, and we're going to
do some amamle. Now, what you're going
to need Obviously, you're gonna need
that little canvas. You're gonna need
some cardboard. I'll show you what
to do with that. You're going to need a pen, pick whatever pen you like. If you still want to draw with
your pencil, then do that. Maybe you need an
eraser and a sharpener. And you're going
to need photos I'm going to do the first one
I'm going to do Caomil. So I've got some
photos of amamil. Of course, these are in the
book of notes and references. You don't have to print
them out. You can just use them on your phone or
whatever your computer. Yeah. Look from there. Alright,
do we need anything else? No. Well, let's have fun
with this, and let's start. I've got the materials ready. Now, this little canvas, as you can see,
it's really nice. But what it does, see, it's kind of wobbly, and that is a bit hard to draw and it will go up and
down and up and down. And that's why you
need the cardboard. So what I've done
with the cardboard, I've cut it in
little pieces like this that exactly
fit in the back, and this one doesn't have it. But to show you, this one
does have either two layers, and then you get a
nice sturdy, see? And that doesn't move as much, so it's a nice,
sturdy underground, and I'm going to use this one. If you need your
pencil, please do so. Draw out whatever you want, and it works fine on the canvas because you're going
to ink later on. Now, working on
canvas is slightly different because it has
a bit of a rough texture. So I wouldn't use a fountain pen on this because it might get
stuck in the little holes, and I just wouldn't go for that. I'm going to use brush pens
and irregular pen like this. I'm going to start
with the regular pen. Put the brush pens away for
now, just a fine liner. Okay, now, this
is a nice square, but what I want is really
I want something round. I want to round on this one for this to create an
interesting creation. And for that, I just have
something that is round, a box that fits neatly nice on it so that
I can make a round. So I'm going to start
with that first. Well, I've got
everything I need. The first thing I'm
going to do, I'm just going to trace this round. I'm going to put whatever this
box on it, the round box. Make sure I touch the edges. And what I'm going to do,
I'm gonna press on the box. And I'm just going to trace it. Okay. Slightly tricky. Make sure you just
don't move the box. I want to move positions. And there I go. Alright, and now I've
got this circle. Okay, now, that looks
quite different. So what am I gonna
do with this circle? Make sure. It's a bit
thicker than what it is now. And my drawing will go inside this circle to make it
look even more interesting. Now what we could do we could
do something with the ends. We're going to do
that in the end. But let's start
drawing, first of all. So I want to have a
scene of cam mouse, so I'm just going to
draw the cammils on it. And what I want, I want
a couple of on them. Let's say I want one here. I want one there.
I want one here, one here, perhaps, and
I want one down there. Now, camomle are
different from daisies, as the amamle has this
big rounded part, and while Daisy is more flat, Yeah, not even flat
like this one, but a lot flatter. I'm just going to start drawing. If you need your
pencil for that. Yeah, please draw your design. You could even draw
your design on a paper first and then transfer
it to the canvas. But let's start with the
first. I'm going to start with the first camamle and I'm going to
put it right here. And make that top nicely, and I'm going to put some stipples in it,
like the camomu has. If you look closely, and there's a pretty
camamu well, part of it. And now it needs some
leaves, of course. I'm going to do a leaf here. I'm going to do a leaf there. Let's go with a leaf there, and then it needs a bit
smaller leaf there. And let's see I want a
leaf in this corner, and I pretty much want
one behind it there. So that will be my basic cammle and I'm just going to draw in those leaves and look at
the camomu a little bit. It's a bit flat at the end, almost like a daisy. That's the second one. This one. Bit shorter under there, and then the last one, what I'm going to
do with this one. Pretty much gonna go
behind with that one. And with this one, I'm
going to start at the end, draw that in and with this one, make it a bit flat
and there we go. Well, that would be my first
cute little camo mile. Now, I got to decide where I want the shadows and
light to come from. Going to go from the top. Let's go from the
top with this one. That means down there, there would be a lot of
shade up there to bit there. And now under here at the
bottom. There you go. Down there. There we go. Now, on these sides since the light is coming
a bit from the top, I would go with these sides and I would
do pretty much the same. With this one, there you go. And this one I
would shade again. Just all the way and
that one. Right there. That one still needs a heart. There's my first camaml. Okay, that's the first one. Looks cute, doesn't it? Let's continue
with the next one. Well, no, almost the next one. I'm missing something, the stem, and that would go the stark
stem lay right in the middle. So around there, I'm just
gonna do it straight. And here I want quite some
shadow and then on it. Bit like that. Alright. That is the first
cute little camomle. Let's do a second one. I want that behind here a bit higher. Let me do that. Around
there, And again, that now the light is
coming from the top, so I'm going to stipple that
part in and there you go. Now I've got to decide. Since I put this on an angle, I might do it a bit
like this here, so you would get a bit of some
of the petals right there, then this petal would be longer. This petal would
definitely be longer. That goes there, and I want
to have a petal right there. All right. And now I'm
going to start with these small petals,
these small ones. And now you get that idea of a tilted amamo and
I'm going to do now, let's see, this one,
the big one here. I want a big one
there. Big one there. Smaller one there. And
a smaller one there. There we have this petal. All right. So that would
be our next petal. I want to probably extend
those slightly. Okay. Now we've got a shade
the same as here. On the here, they're shading. They're shading. There's
a little bit there. There's definitely some there. And there's some there. Okay. And now I'm going
to just hatch it. Now, this one would be
hatched all the way. This one on that side, There's one hatch there and this one want to hedge
a little bit there. And that one there.
Let me hedge that one. Now you can see my canvas
is slightly damaged, so it just takes a bit too
much ink on that side, but we're okay with that. Okay, that's I have no control over that,
a damaged canvas. There you go. Okay.
I got two of them. Now, that stark would
go right down here. Follow it with my pen. It comes right there. And there you go.
And that's duck. Shadowing shadowing. Lots of shadow,
and there you go. That would be number two. Extend that one. A little bit. There you go. Alright. Okay.
Now I've got two of them. Let's do a third one. We can fit in a third one here. A nice big one that
goes behind everything. Let's do a nicely bigger one. Light still comes a bit from
the top. So there you go. And with this one, just couple in it there. Okay. Let's do this
one would be having. Let's go straight
This leaf that leaf. And let's not do a third leaf. Let's do one here. And then I want one there. I'm starting with this one. Then there's this one. Here you go. And that
one goes like that. Same here. But you
wouldn't see much of that. Alright, that would be this one. And let's see, light
comes from the top, so definitely lots of
shade here. Shade there. This one shading there. This one would be all the way in shading and that one
pretty much in shade. I'm going to leave that this
bit shading at the bottom. That's that. Now, the stalk, I'm not going to do like that. We're going to let it go
a bit straight like this. There you go. Now look at that. All right. Now, I've
got three of them, but I've got some room
left here in the side, so I'm guessing I'm going
to do one more there. Not up there. I'm
leaving that open. Let's do one there,
too. All right. Okay, so one more here? Just a small one. Let's see. Behind here, I'm going
to let it go behind this one and just let one leaf go there
and a leaf go there. And then a leaf comes out
here and a leaf there. Let's do this one like that. Not going to do more leaves. And then this would
be in shadow. This would be in shadow. Now, this would be totally
in shadow and this one. Let's see, light comes
from top to top, be in shadow a bit like this. Now this one needs stark too. Though, that would be very
small. And there you go. Okay. Just extend that
stack a little bit. Okay, so now I've got
all of my caamlin, but I want to do something with that light
background there. I want to do
something with that. So let's go for that now. Okay, what I want
to do with this? This is nice.
Little cute canvas, but this is all empty space. So I'm just gonna
stipple here and add randomly, add some stipples. Look, now it looks not so white and empty
anymore. There you go. Now, with the sights, what I'm going to do
with this one, the side? I'm going to hatch
it, and I'm going to put this in the
middle right there. When I htcht that
would be heating like this and I
just keep on going. Here, too, I need
longer hatching there. Keeping that angle. Same here. So yeah, that looks
very interesting. Now, let me turn it so that
I won't work in my own ink, but I'm just keep on going
getting my angle back. There you go. Alright. And that's what I'm
gonna do with it. Now, this one, extend and add just a little
bit more there. Okay. And some see I
forgot. Some here. Make these a bit taller than
they are, and there we go. Okay. I'm done. It on the pen, and there's my first
little canvas creation. Miniature Canvas looks
really cute, doesn't it? Well I'm going to
create a couple more, I'm going to do one
with a brush pen, and I'm going to do one
with alcohol markers, too. But that will be for
the next videos. I'm not gonna talk
you through those. I'm just going to do
them. You can watch them. You can either create your
first miniature canvas now and then watch the rest or watch the rest now and
then create a couple. Yeah. I wouldn't do one. I would do a couple because
they're really cute. You could put the mineral Yeah, that will be fun somewhere. Okay. All right. Well, enjoy it. If you're gonna create,
enjoy watching or enjoy creating and at the
end, I'll see you back. Alright, let's go for
the next ones then.
3. Small Scabious miniature Canvas: Welcome to this next lesson. We've done one miniature canvas, but I want to create
a couple more, and I want to use this
flower, the small scabius. Now, it's called small scabius, but even on this little canvas, it just might fit. Alright, now, this is at the end of stage of its blooming. That's why it's nice and round. I'm going to just
use a brush pen? I've got everything in my hands, a brush pen for this,
and I'm going to create this flower,
put it on there. See how I'm going to arrange a little bit of a composition. Think about that while
I'm going. Alright. So you need a brush pen. You may need a pencil et
cetera for this. I have put the cardboard
in it already, so it's nice and
sturdy. So let's go. I really like this effect, but with this one, I want
to try something different. I'm pulling this side. I'm going to take my canvas. What I'm going to do? I'm
going to take a second canvas. I'm going to put it
on there. Let me check if that is
pretty much right. And I'm going to create
an effect like this now. Put my line there.
Put a line there, put a line there, and
put a line there. There you go. Now, that I like what I'm going
to do with this? Since I got a brush pen anyway, I'm going to color this in All right. I think you get the idea
what I'm going to do. I'm going to do all
of the corners. The rest will be sped
up, demonstrating how I did this.
Create this effect. Now I'm going to do all the
corners and then I'm going to draw the small scabs
inside of this. All right. Alright, now I'm done with this. So I've got all the edges done. Now we need the
small scabus in it. Now, with the small
scabus as you can see, there's a lot of details in
these little plans, yeah. So the trick is now with
quick sketching, of course, to ignore most of it and just create a quick sketch
on a canvas with this. Okay. Rest will be, of course, sped up again. Alright, that is my
second miniature canvas with the small scabus on it. I use some of those
leaves on it, too, and a little bit of the grass to create a little
bit of a composition. All right, so I'm
putting this pen away, and we're done with
the second one. Let's move to the next one. Where are we going to use some alcohol markers
with it, too? Okay. I'll see you
in that next video.
4. Hyacinth minature Canvas: This will be the last
miniature canvas creation. I'm going to use this one. And what I'm going to
do with this one, I'm going to use the
alcohol markers, and I'm going to draw
with the same pen I did. The first one. You
can use a fine line of brush pen that's up to you. And I'm going to use these ones. I've got four warm gray colors. Now the one, the darkest, warm gray I'm going to
use to create a frame, and then the rest I'm
going to use to color in. And the flower I need,
of course, here it is, is a hyacinth, hyacinth wherever you're from,
however you pronounce it. I'm going to use this
one, really nice, delicate flower, and I'm
going to put that one on it. Okay, well, let's go. So I've put my
cardboard in it again, and I'm going to use
this round one again. And I said I'm going to use
my dark marker for that. And I'm going to
put this one on it. Try to do it nicely and evenly. Create a circle around it. Who? That's tricky. All right. There you go. And
I'm gonna color this in with this dark marker, which isn't totally black, but gets close to black. And if you put I got to put that up so
that you can see it. If you put this next to black, you would notice this
isn't totally black. Alright, so you get the idea
what I'm gonna do with this. Well, let's keep
going. Get going. All right. Almost there. Some color here. And I want some more there
because I can see light there. All right. Okay, and that's it. All right, my canvas is prepared. The rest
will be sped up. I'm just going to
draw it straight away with my pen, then
use the marcus. You can use, of
course, the pencil if you need to, and
then work over that. Now, I might use the marcus
more as just regular marks, alcohol marks without the
blending because I don't think the canvas will really take the blending as well as paper. We'll see, but we're
going to try that. And if it works, great. If it doesn't work,
then no problem. Then we're just gonna color. Alright, let's start coloring. So this will be sped up again. I'll see you at the
end when I'm done. Okay, that would be it, but slightly boring
somehow, too much white. So what I'm going
to do, I'm going to create a little bit of
a background on it, and I'm going to do
that quite simple. I want to take my
pen, draw lines bit like a fence behind it
here, a wooden fence. So let's go for that. I
need a ruler for that. So I'm gonna use
a ruler for that. I'll show you how I'm
going to do this. And I'm going to talk
you through this, so I'm going to put it straight. I'm gonna get that ruler. Get that pen. And just draw my lines. Try to get about the same angle, about the same width, roughly. But since it would, it
wouldn't matter that much. Okay. Put it straight. And the last one, I might
just as well, turn it around. That's not going to
be the last one. I'll do one more
pretty much straight. And carefully do one at the end. Alright. Oh, down
there. Let's see. Do I need to extend it? No, I'm fine with that. I'm gonna check. Let's see. Do I have it
everywhere? Yes, I do. Now, I want to do a bite a bit wood so I'm gonna get
that dark really dark one. Now, let's not do. Let's
get the light one. Where is it? There it is. No. Alright, got the light one. Gonna go just on the edges. Alright, so I'm gonna
let it go like this. I missed one here. Got it there now. That looks a lot better. I might do one just on the edge. Oh, let's get that ruler. One on the edge here. Just to make it a little
bit more interesting. There you go, letting that
dry just for a few seconds, get that lightest one
again and do that. Now, that is much better. I'm
going to do it like that. Let's see if I have everything. I think I do a little bit there. Alright. Now, that makes it a lot more interesting
than it was before. A little bit of wood behind it. Okay, well, now it's done. Now it looks a lot
more interesting. Just a simple background. So lines slightly gray on it, and it suddenly looks a lot more interesting than it was.
Okay, now we're done. Now one thing we
need to do is get this stuff out of there. It's gonna be tricky,
but should work. Yep, there it goes. Pulling these out. Don't
forget to pull those out. Okay, so now I've
got all of them out, and now I can put them on these
stands. And there you go. Looks great, doesn't it? Well, let's put the
other one on it. Here's another
one. Nice. I'm not sure if I manage three of
them. Let's give that a try. Now, there was one
of them already. Okay, I actually managed
to hold three of them. So there they are, all three of them to use the
camera a little bit. All three of the
miniature canvases I create. Really cute. And that's it. That concludes this module with the
mini Canvas creations. Now it's your turn.
Pick some flowers. Pick some photos if you
don't want to pick flowers. Take photographs yourself. Go to a flower shop.
Get a book, yeah. Use my book of references and just create something
pretty with the flowers. Small, challenging, but
it's really fun to do. Alright. Well, that's it. Enjoy it and create your own beautiful creations
with all the knowledge that you have now and
all the skills you have and use those pens
and have fun with them.
5. The Final Project - design your own Canvas: Welcome to this last
video The Project. Now, as you can see, I've got the free canvases here from the class we've created
together in the class, and perhaps you have also
created the three of them. But you see a fourth
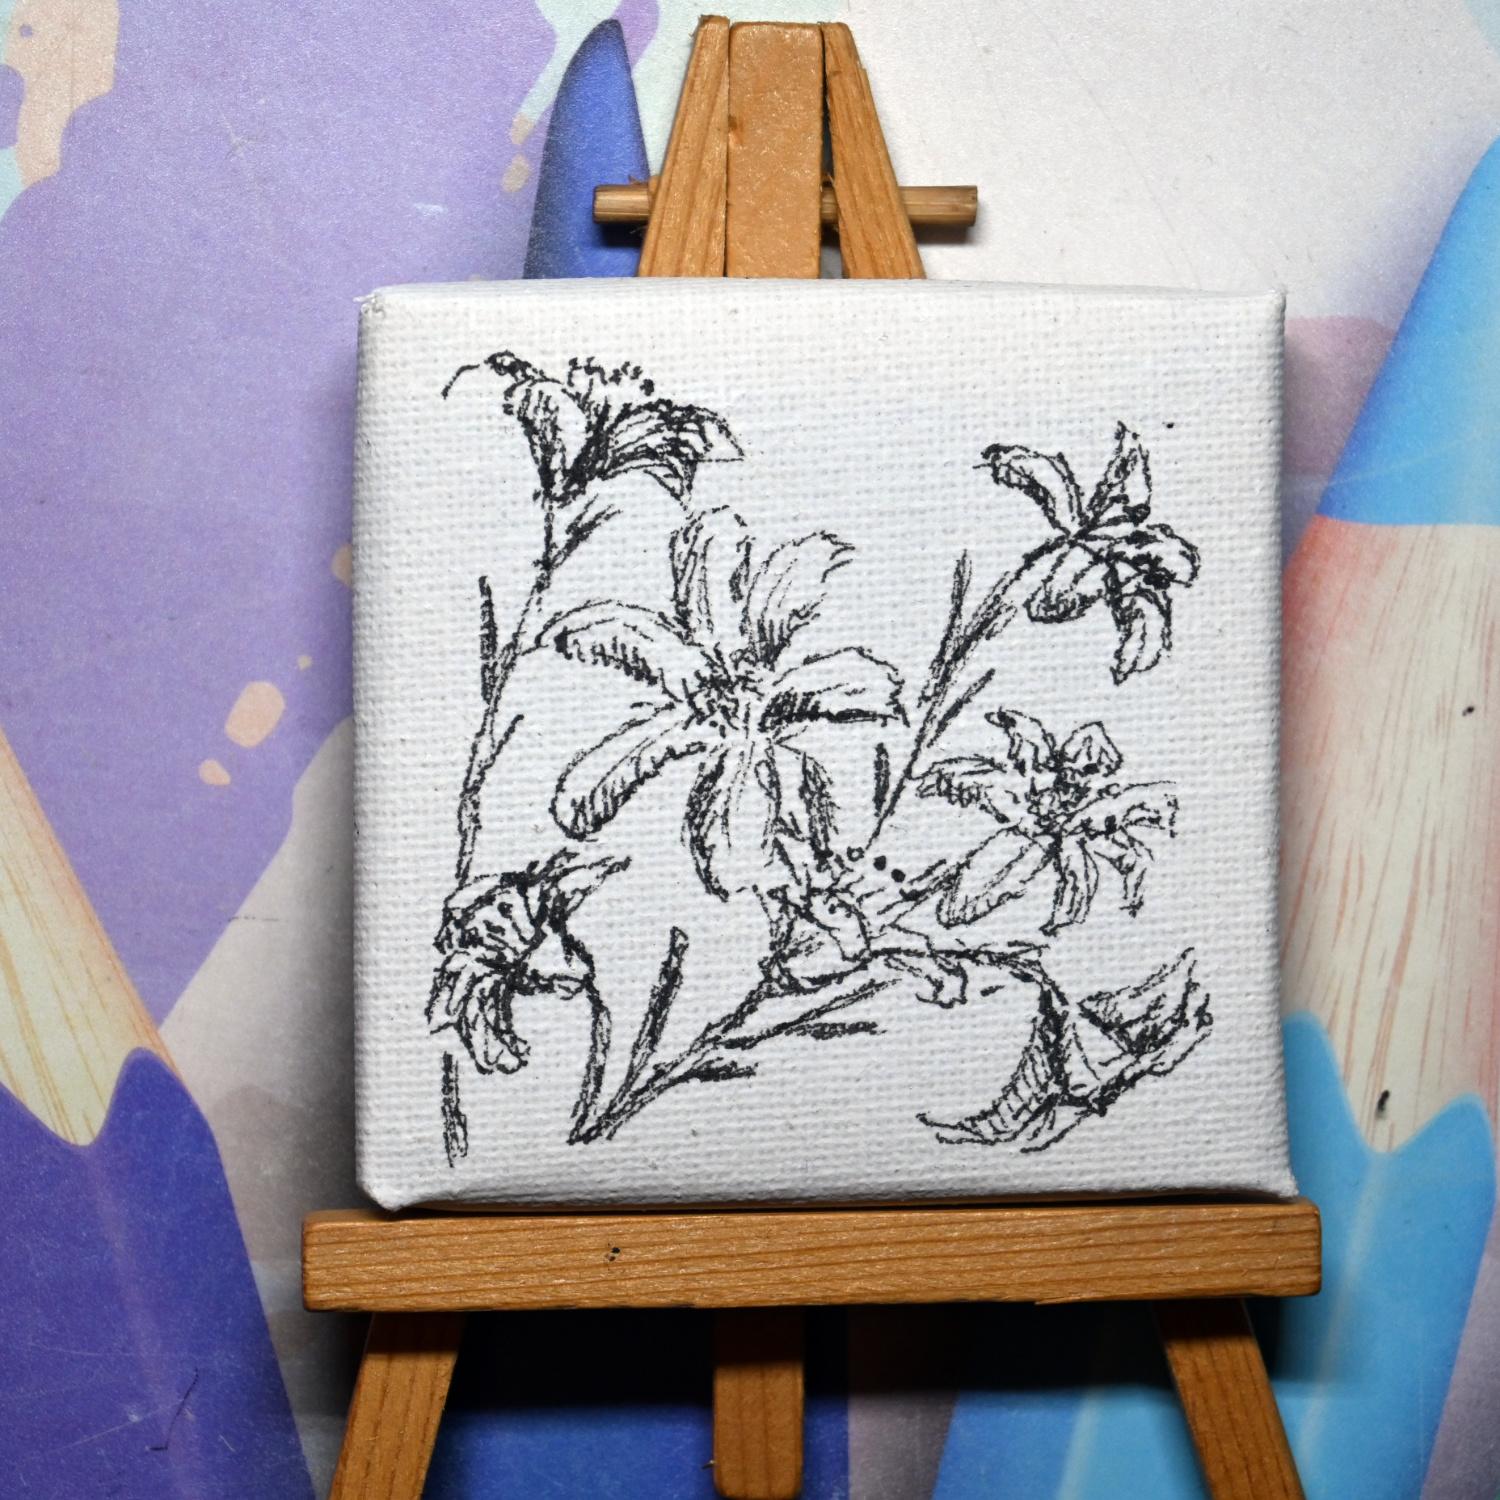
one here, too. Let me pick that up.
This is the fourth one. I created separately with
a very fine fine liner, so a really fine one and had some fun with just
a different flower. And that is what the
project is all about to have some more fun
with a different flower. Now, you may have created
the free already, and that is really great. But what I would challenge
you to do is just to get a different flower to pick
it, get some photographs, just go in the field and life if it's the
weather for that, and just create another canvas
or perhaps more canvases. Now, these look
great on your desk, but they also make great gifts
to give to somebody else. And, well, if
they're pretty good, you could even sell
them if you wanted to. So for the project,
I would challenge you to create some
more canvases. And once you've done
that, then take some photographs and
post them here at Skill Share so we
can all enjoy them. With all that we've learned in the previous lessons already
and all the modules, you should be able to create some beautiful
canvases yourself. And with all the materials, we've been using that
work on canvases, too, you can create
something pretty. Now, this is very simple, and it still is a quick sketch, and that just took a
couple of minutes to do, and that is what I would
really love to see you do to create your own canvases and
share them with all of us.
 Benjamin A, Art Teacher, illustrator Art by Benjamin