Transcripts
1. Introduction: Frame worthy. Now, that sounds
interesting, doesn't it? We're gonna create an artwork together that is
worthy of a frame. We're going to
frame our artwork. We're not just going
to do some artwork. Until now, we've
done single flowers. What we're going
to do now, we're going to go into composition. I'm going to show you how
to create a composition of various flowers that
are perhaps not even related to each other
from different photos, or you're in the field
seeing different flowers or you have a book with
different flowers, and you want to
say, I pick this, pick that one, put them
together in a composition. How do you do that?
How do you get from those first
step to an artwork? I'm going to show you
thumbnail sketching, going to show you
how to work out your rough composition and
how to create a final work. Now, that may not mean anything
to you at this moment, but once we get to the
end of this module, you're going to
have this artwork. We're going to create
this composition. And as you can see, that is quite advanced from
what we've done so far. This module is going
to show you how to create your own
original artworks, starting with a simple idea and ending at a pretty artwork.
Alright, let's go.
2. The basics of Composition: Welcome to this lesson. We're going to dive
into composition. Now, composition can
be very complicated, but I'm going to try to make it really easy and understandable. And so far we've only
done single flowers, but now we want to
make a composition, so an arrangement
of various flowers. Now, for that, I've got
a number of photographs, and I'm going to show
you them later on. These are all in
the book of notes. I'm going to use them to
create a composition. So put them in a nice
arrangement where the viewer will enjoy the
artwork we're making. Later on, we're
going to frame it. So now, the first thing with composition is then to decide, how am I going to frame it? What will my frame be like? Now, let me get my
frame. All right. So I've got my frame. It's a rather large frame, but I don't want to
use the whole frame. I'm going to use what we
call in Europe a passport, so an extra frame around it. And in there, the size will
be an A four size for meter, so that's 21 by 30 centimeters. So for my final work, I need to take that
into consideration, and I'm going to use it
like this in landscape. Now we could use it portrait. I'm going to go for landscape. So I'm going to create a
composition in landscape. Now that I know my size, I got to decide what will
my composition be about? Now, my composition will
be about filled flowers. Now, of course, you can make
a totally different No, begin again. Now begin. Now, of course, you can create a totally different
composition if you want to. All kinds of flowers.
There's so many flowers, but I'm going to do field
flowers. So let's go. Okay, let's begin with this. So I've got an empty page. And what we're going to do is something called thumbnails. And thumbnails are
relatively easy. I'm going to draw imaginative. This is imagine This
would be my A four size. This is roughly an A four size. So that would be my A four size. And I'm going to draw
a couple of them. I want to create some
little small images and make some arrangements in those and then make
a choice later on. So let's go for four, around this, let's
number them two. And that would be number four. Alright, so I've got
these four frames. And in these four frames, I'm going to decide where
my flowers are going to be. Now, so then I need to decide which flowers
I want to have. So I'm going to make a little
list here of the flowers. Now, I do want this
flower with it. So that is a giant daisy. Alright, I want that one, definitely. Let me see. You see some grass here. I'm going to use the grass
for a filler, put that aside. And this flower here, I'm
going to use as a filler, too. Now, I've got a beautiful rose. I want the rose in it. And
I want my favorite flower, the corn flowers in it, too. Now, these I want in it,
too. These are pretty. I would say they are clovers. And then let's see here. So more fillers, puppies, now. But I want this one, that one, too. So the sunflower. And I want the dandelion, too, but the dandelion
is already bloomed, so I'll call it a dandelion. But it's already at
its later stages. I want to draw that in. Okay, so I've decided
which flowers I really want and
some fillers, too, because if you draw
these flowers, you're going to end up probably with a lot of empty space, and you want to fill
it with something. Okay. So I know now what to do. So the next thing
is, I'm going to just try some compositions. Now, with these compositions, I need to keep in mind what the size of the
flower is because if I made huge clovers and little sunflowers,
that's not gonna work. It has to be a little
bit believable, so I need to know more or
less what the size is. Okay? So I'm going
to keep that in mind and start with my compositions. Now, the sunflower
will obviously be the largest flower
in my composition. Now, cornflowers are
pretty tall, too, so I need to take that
in consideration. Now with a composition,
what you want to avoid is to have something
in the middle. You don't want something to be drawn in the middle because then our eye is focused on the middle and
forgets about the rest. We want to take the eye a little bit around
the composition, so we want to make
use of the side, something outside of the middle. Let's say I want the
sunflower to be there. Now, see, I'm just throwing
that really quickly in here? That is what
composition is about. I want my sunflower to be there. Then let's say I want my
corn flour to be there. And I want a couple of corn
flowers and close corn flour. Let's say, I do that. And
what would I have more? I would on this side,
I want a Dandelion. Now, hopefully I remember that. That would look
pretty good. Now, I need something in between. I can leave a gap
there, or I can go in between and the little
these little guys, the little clovers
could go nicely there. And the rose, let's say, I want the rose behind
here. The rose is told to. So then I get the rose
And what do I miss still? I said I did want some
other flowers, too. Yes, I did want the daisies. I'm gonna put a daisy there. This is a giant daisy. Let's go with a daisy here. And let's go with a
closed daisy there. That would be a
nice composition. The focus would be
these two flowers, and then my eye
would go around in a nice shape. That
would be good. And the rest, what is empty, I would just fill with
all kinds of fillers, but I do that while I'm drawing. Let me try something else. So let me just for a little
bit, determine the middle. Don't want to go in the middle. Let's say, I'm going
to place my sunflower. Right there, I'm going to
make it rather large in this one. All right. And let's say, I'm going to
put that rose behind it. Okay. And on this side, I want my cornflowers to be
that could work, too, a? And then, let's say, the Daisies would go here, and I'll have the
little clovers. Put in a few of them. No,
that would work, too. Wouldn't it a bit of a gap here? That would be interesting, too. Did I forget the flower? No, I think I got everything. Oh, yeah. I've got one
flower in this one. I want that dandelion. Put it right here. Make
it small like that. Now, that would be an
interesting composition. Not too high points as here, but a bit of a flow right there. Now, that
could work, too. The next one. See, I'm just thinking of all kinds of
situations. The next one. What I'm going to
do is I'm going to create that sunflower, not in the middle,
but I'm going to make it really huge in this one. There you go. Now, the rose, I would probably
do then behind it. Also a bit larger, the rose. There you go. Sunflower,
rose, and the rest. Clovers there, for example, the Daisy is there, and I would go the cornflowers I
would go a bit higher. There you go. And I might put a couple of dandelions there
to make it interesting. Now, see, now you get a
really big focal point and the rest will
support the focal point. That would be working
interesting too. Now, the last one,
let me go with that sunflower bit out of focus. Yeah. And let me put
that rose right here. That's the rose. Now,
that could work, too. Sunflowers summer leaves here. And I'll get my
cornflowers there you go. Get that giant daisy right
there with a second one. And one going there, let me put those clovers here a little bit, and then the lions there. Now, that could work, too, perhaps even a few more
clovers in between here. Now, that could work too. See? We got some interesting
composition. Now I got to choose
which one I like. Okay, so now I got four
interesting compositions. Now I've got to make a
choice which one I want. So I'll take you fu
my fourth process, which one I choose and which
ones I'll just let go. Alright, looking at
this, I'm going to say these two are definitely
the more interesting ones. These are great, but
then I would need something around
here to fill it up. Lots of empty space. Now here you've got
some space, too, but because there's
larger elements, your eyes are drawn
towards them, so it's not a big issue. But I think looking at it, I'm going to work with this one. I want to try to create
a big sunflower, create that rose probably even slightly bigger perhaps,
and then work with that. Right, I made my choice. I'm going to go
with number four. I'm going to work on
that in the next lesson. Now, your assignment
is find some flowers. You can use the book notes
and references for this, find your own flowers, pick some flowers, go outside and photograph some
flowers, find them online. Great resources like Pixabay and OsplashH unlimited photos
of probably not unlimited, but a lot of photos of
all kinds of flowers. Pick a few flowers and make an arrangement
and see what you like. Alright, so if you've done that, I'll see you in the next lesson.
3. Working out the Composition: So I've got my composition now. I'm going with the fourth one. And in this lesson, I'm going to work it out into a drawing. And that drawing
I'm going to use as a base for my final artwork. So I'm going to still
use my pencil for this and a clean sheet of paper. That's it I need,
and, of course, my reference photos, and, of course, my composition. Okay, let's go. So I've
got my little thumbnail. This is what I want to create. And I need a new page for it. Now, you could, of
course, do this on a scrap piece of paper or rip it out of your
sketchbook and start there. What I'm going to do, I'm just going to get a
second sketchbook, and most likely I'll
find an empty page. I see. That's some
stuff we worked on. There's a sunflower.
Look at that. And there's my empty page. And I'm going to use this
empty page, too. Side drawing. So I'm putting my fubnail aside that's out of sight
where I can still see it, but you probably can't
because I want to show you the photographs I'm using. Okay, let's go. So now suddenly this becomes
my whole playing field. My whole drawing field is going
to be this whole drawing, and I'm going to roughly
draw in the elements before I'm going to transfer
them to my final paper. Okay, so I'm going to
start with the sunflower. Now, I've moved the
sunflower over to this side, but my sunflower
here is like that, so I want to flip it over. So in my mind, I need
to flip that over. Now, if you have a
computer or on your phone, you can actually flip
over the drawing. I'm just going to do it on here. And what I'm going to
do, I'm going to draw that large Part
of the sunflower. Right there. Let me get an overview
of the total page. Oh, yeah, definitely here. I want my sunflower really
to be large like this. Looking at this, probably now
my sunflower is too high, so I might move it down a
little bit. Let's do that. So do that again. That's why we've got erasers. And this is not a final piece, so we can play with
this as much as we can. So what I want, much as we can, no as much as we want it. Right, I want my sunflower
really to go there. There you go. And I'm going to draw some of these petals in, to get an idea. This is indeed a
sunflower. There you go. Big sunflower, then I
know now what space I need for this sunflower
has that heart in it. And that would be my rough. See now, this takes up a whole space chunk of
my composition already. Alright. Now, on
this side, I said, I want that rose,
and with the rose, I probably have
the same problem. The rose is probably
the wrong way. Yep, wrong way around,
as you can see, and there's two pictures here of the rose and then some of
the starch and the leaves. The rose, I said, I
don't want this high, but let's say I want the rose the heart of
the rose right here. And remember, was
still quick sketching, so I don't really
care about accuracy. I care about believability
and doing it quick and creating just
a beautiful drawing. And let's see, then I would need some of these
petals to go in front. Kind of tricky, doing it
the other way around. Big one here. So in between, and let's go for one there. Okay, now that will
do for the rose. I think that is
pretty big enough. And then the rose
goes like this, and I'm going to need
some of its leaves. And again, we're
doing them rather quickly and still don't
care about accuracy. I'm just one I have
a convincing rose. And there we go. Now,
okay, there's my rose. Alright, that already makes
two large sides of my canvas, the right and the left
side where I'm going to work with. So let's continue. Okay, so most of the space
is taken up already by this beautiful big
sunflower, the rose. I might actually go slightly
bigger with the rose. Right. All right. And that gives me because now this sunflower is pretty big. But compared to a rose, a sunflower is pretty big. Alright. Sound good. Now they're making
a nice composition. Now I need to fill this in. I said, I want
some clovers here. And I've got these on
this page there they are. Putting them under a bit
of an angle, this one. Clovers are relatively
easy to create. There's one. And let's
go with another one here and create some interesting
thing composition, huh? That's what we're doing. Alright, now, that's
interesting already, see? And what we're doing now,
I'm gonna play with that. Cornflower. That's here. Alright. And I have no problem that it is almost as
large as the rose. Let's say I want that's one pot the cornflower
pot right there. There you go. And I want my
cornflower itself to be here. There you go. And I said
I wanted a second one. So let's go with a second one right here towards
the sunflower. All right, good. And some these have
not really leaves, but really small branches
that makes up for the leaves. Okay. Now, that looks nice. Now I want to go here. And what I do want is let's think I wanted
the daisies right here, but I'm going to move
those daisies down. Now, here's the daisies. I've got them here. Alright, I'm going to
move one of the daisies. Right there. I'm going to draw my daisy then first and let that go
in front of the sunflower, then I want that second daisy to be higher and just pointing out to that side. All right, that's
a bit too small. I need to go bigger with that. It's a giant daisy. Then I want that final one that's still budding.
There you go. Around there and
with the daisies, some little No branches. Leave there and there. Okay, that's good.
Alright. Now I think I've got one more
left and that is that. I wanted the dandelion in it. Now I can put one here. And then the lions are straight. So we got to remember
that not under an angle. Then the lions are
really straight, and I can go create that
dandelion right there. And there you go. And then
I want some of the already. Now, the ones who have bloomed, but are not yet turning
into the seed pods, there you go next to it. And there you go. Now,
I've got some space here. What are we going to do here? Might just add a filler there. No, I'll probably do
some clovers here, too. Let's go for three cloves. One is large. There you go. One is smaller. And the last one
is really small. There you go. And I need to create this
one slightly larger. And there you go. Now, now we've got an
interesting drawing, see? That looks pretty, doesn't it? Now, for the rest, I'm gonna look at these
fillers like that one here. I'm gonna faintly throw them in. And when I use my pen, I am actually faintly going
to do that like that. So don't pay much
attention to them. Leaves. Alright, I
like that filler. Let's put one behind here, too. Straight. I'm letting
it go the other way and for these fillers, yeah, I'm not paying
much attention. They are what they are
filling up my composition. All right. I like it. Now, let's see. That's
good. That's good. All right. I've got
that. Now, I've got a nice, interesting
composition. I'm going to that grass. And what I'm going
to do? I'm going to make a bit of a flicking
motion like that. I'm going to add some
grass to it here too. There you go. That's
outside of my frame. And when I look at that grass, some of it gets some seeds. There you go. Right. Now, and that would be basically
my composition. All right. Good. With
the big sunflower here. It's the main interest. The rose there is the second interest, and then all the
field of flowers, basically in between, we'll
leave this space open on purpose to get a nice
composition flowing like this. There would be you could
do anything behind. What you could do if you want to create some
more interest, go back to that sunflower when just create really
faintly behind it. Like that. Do a second and even one here. All right. There you go.
And then with some leaves, of course, this one
doesn't get leaves, but these would get some leaves. But they would be drawn less detailed because we can't
go softer with ink. They would be drawn
less detailed. So then you get more
the idea of a field of sunflowers and just other
flowers in front of it. How about that?
Let's go over that. So I'm adding a little
bit of interest since I think it was
a bit too empty here. So there you go. Now, okay, that is my rough
sketch of my composition. So that would be
the big sunflower. I'll start with these
front flowers first. Do the rose, get everything, then put this
sunflower behind it, but still as a focal and
then add these sunflowers. But these will be in the back. So I've got my
drawing ready now, my composition is ready
the way I want it. Now I need to transfer
it to the next paper. I'm going to do that
in the next lesson. And what I'm going to do,
I'm going to start right away with drawing a
speed up drawing. I'm not going to explain
everything to you, but you can still follow along a little bit and see how
I'm setting that up. Now, I most likely won't
use my pencil for that one, but if you need your
pencil for the final work, please, of course, do so. Ah, there will be
one difference. I'm not going to use
this sketchbook paper. I'm going to use
mixed media paper. So the multi technique paper, B, put it up right side up. By Claire Fontaine,
I'm going to use a sheet out of this
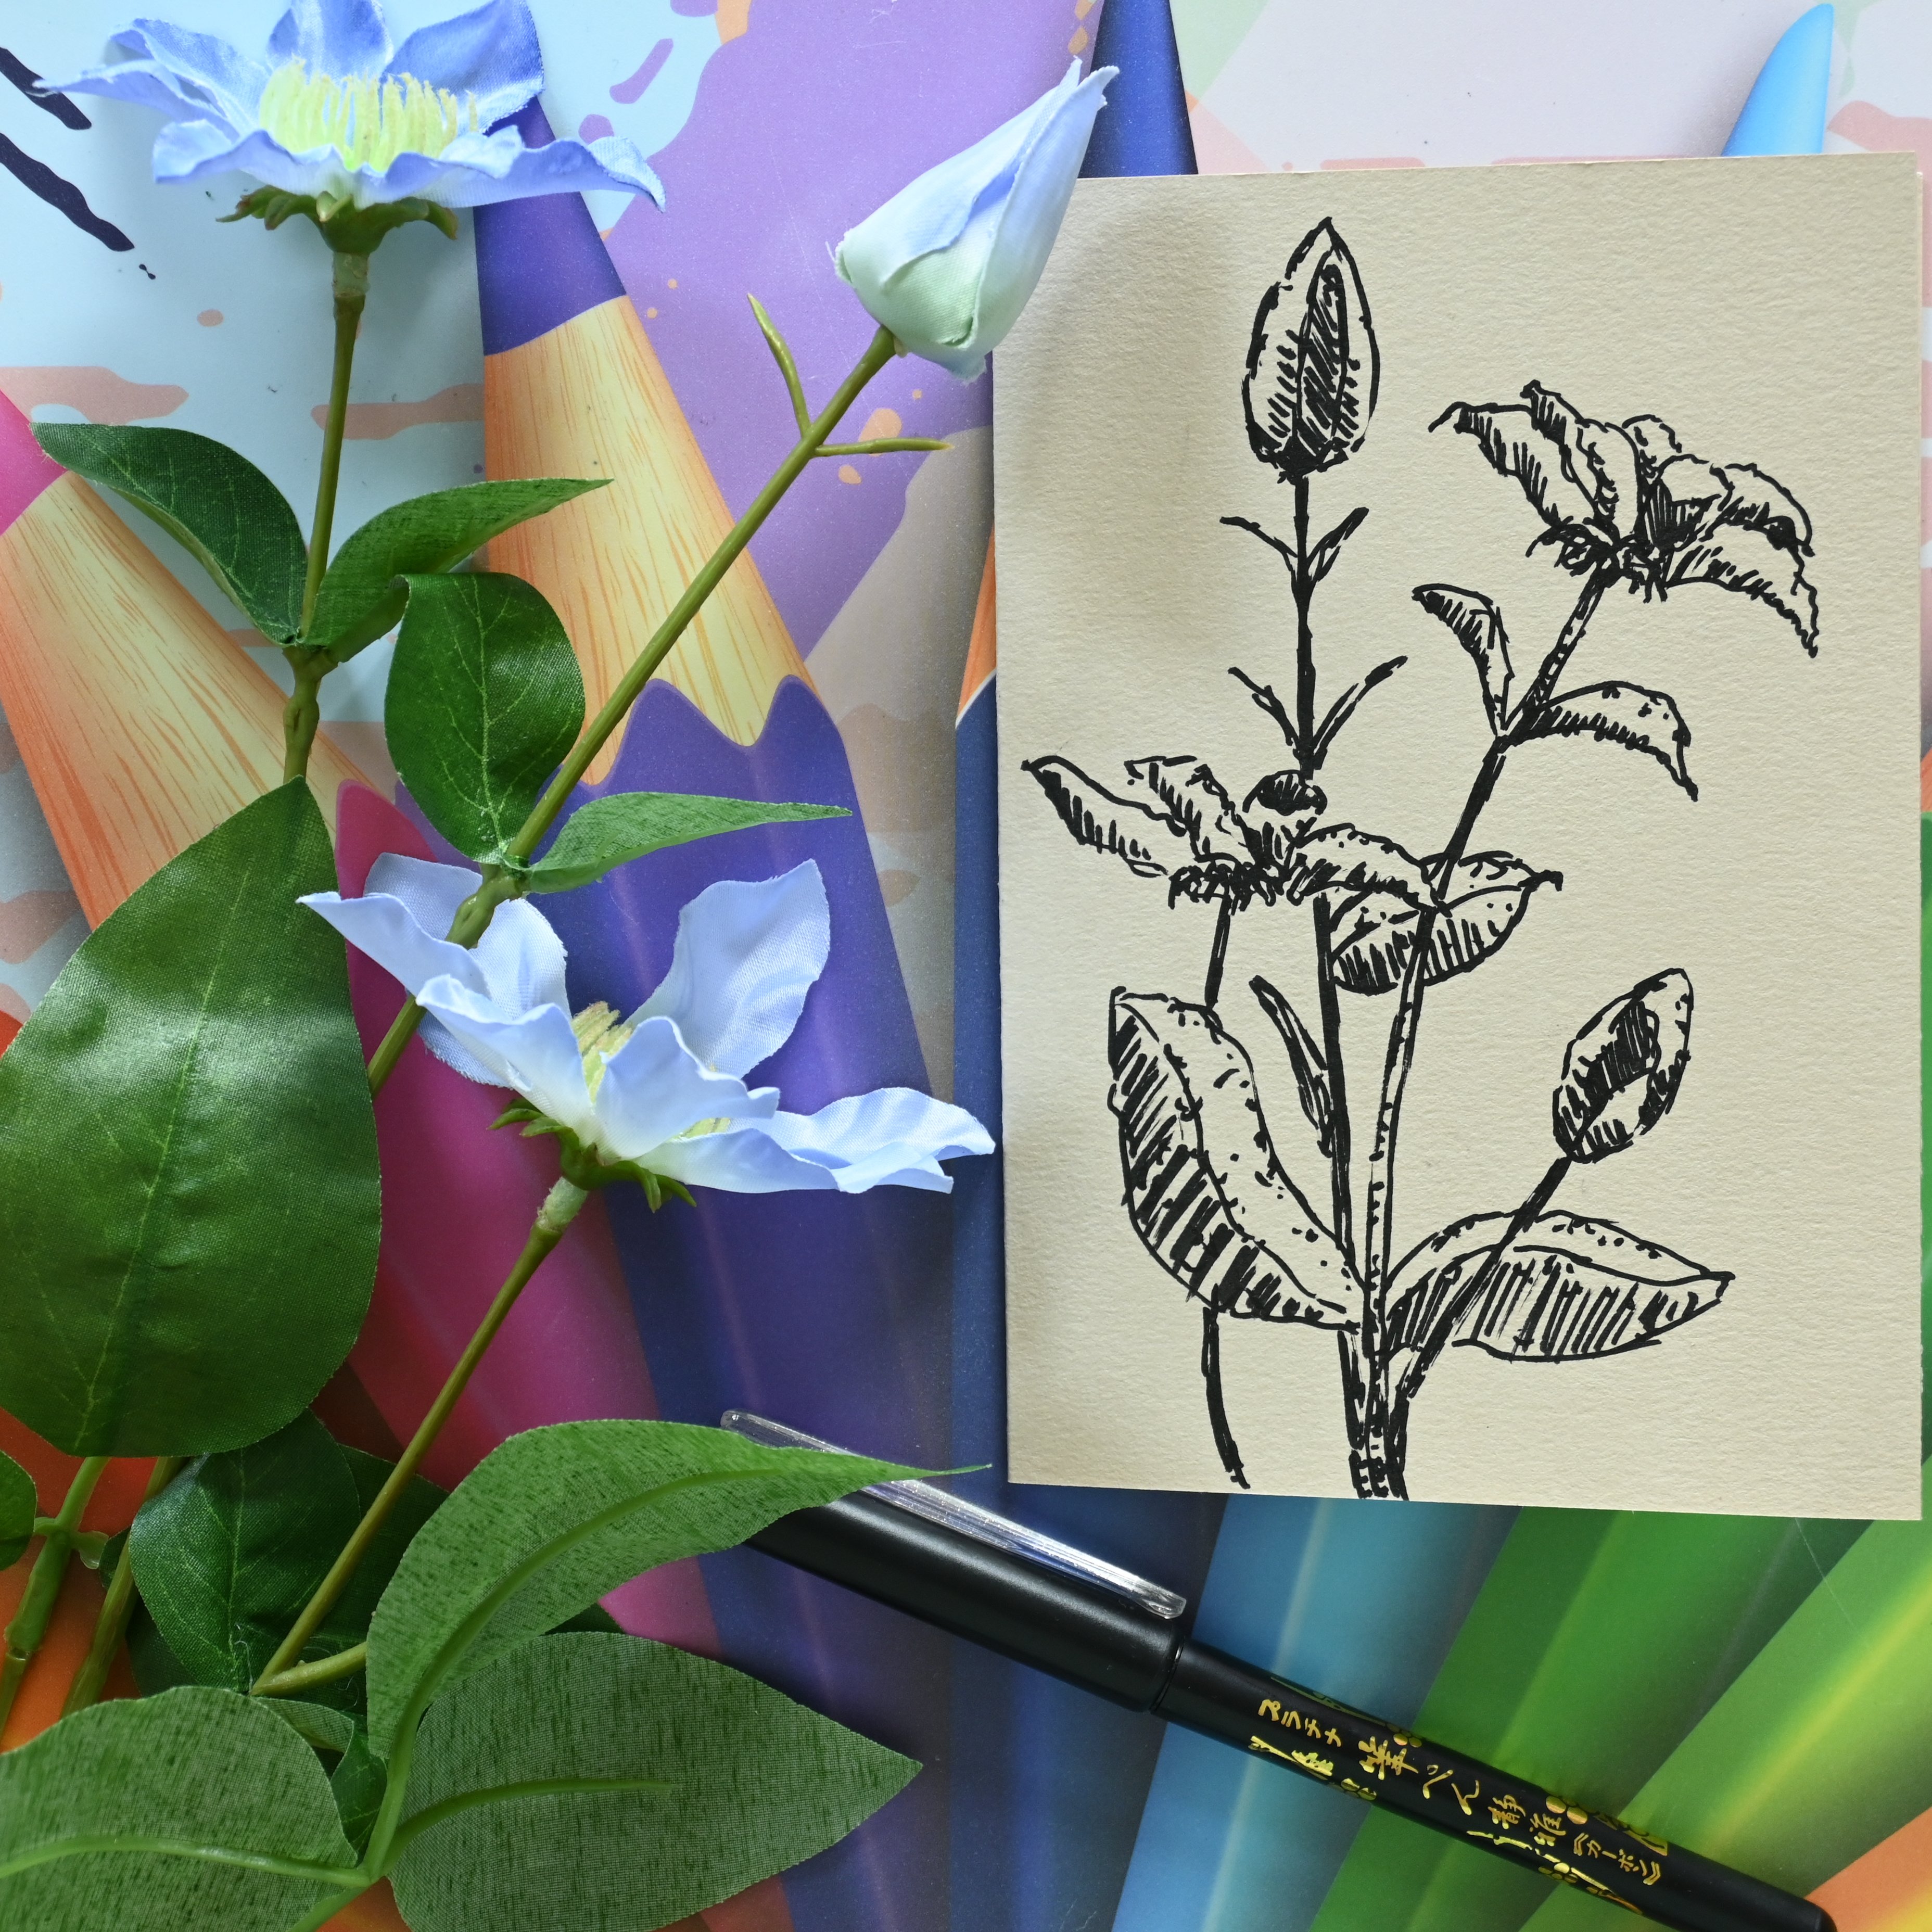
and for a pen. What I'm going to
use, let me see. Any Mini minimo Fountain
pen, I will go. I'm going with a
blue fountain pen. That will create an
interesting drawing. Okay, one blue fountain pen. And while I'm drawing,
I'm going to work out the light if
I even need that. Probably very
minimalistic because I don't want to spend
hours on the drawing, but still want to make a beautiful drawing
that I can frame, hang on my wall, convincing, but it will be a quick sketch. Okay, so in the next video, you will see what I'm making. Alright. And then at the end, I'll be back and talk
a little bit about it. Okay, right. Well, you better, of course, do the same as I did. Take your composition and create a drawing of it that you can use and
transfer to the next paper. Alright. See you in
the next lesson.
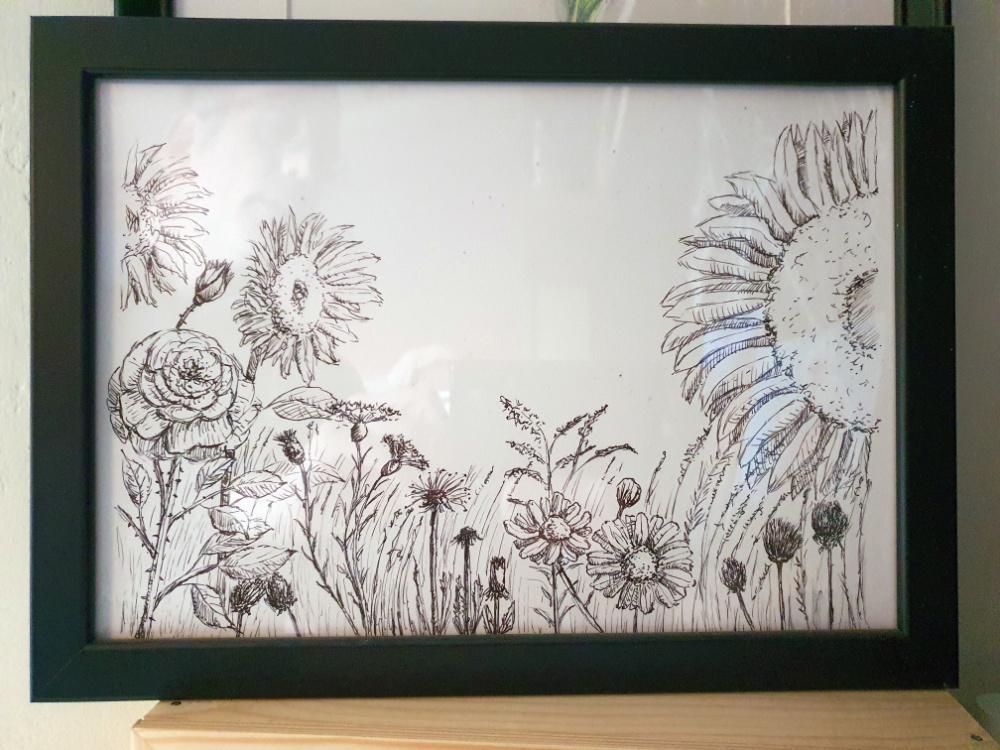
4. Project - Quick Sketching and framing the Artwork: Okay, that's it. We've gone
from simple thumbnails, playing a little bit
of the composition to creating a really
quick sketch, placing every object
where we wanted it, and eventually I've inked it
into a beautiful drawing. Now, we're not done
with this, of course. There's a next step. I'm
going to frame this. Okay, the first thing
I'm going to do is take this paper
out carefully. I definitely. Don't want to rip it. And there we go. It's
out of the paper. So I've got my frame. This will be my frame, and I'm going to make
use of the inner frame. Well, let me unpack this. And while unpacking, let me make sure I'm not gonna
touch the glass. So let me do that the
other way around. Unless this glass is
protected, I don't know. No. One thing I got to make sure if I want to hang
it, I want to hang it here. So the picture goes the
frame goes like that. And depending on your frame, I'm sure you've framed
a picture before. If you've never done that, well, you open it up with
these little things. And if you buy a frame, Oh, pick something you like. I like these black ones. They fit nice in my gallery
with the rest of them. Alright, there's always this
extra piece of paper in it. Giving you the
instructions what to do, and I can already
see with this frame. Carefully lift that out. And this glass has a sheet
of protection on it. And there you go.
That's nice and shiny. Alright. Now, so now
I've got my frame ready. I'm going to put in
the inner frame. And now all I have to do
is put this paper on it, and if I picked the right size, it shouldn't be a problem. The only trick is to get this pretty much as
straight as possible. So now I'm going to
just hold it like that, turn it, and I'm going
to say, Well, I like it. That looks good. Might see
if I can put it slightly up. It's kind of static. Right, that's too much. But that's perfect. Let's see. Look, I like that. All right. And now I'm gonna
get that back panel. And where I hang it, it's got to go on top now. Put that in. Lock it. And there you go.
Turn it around. And there is my framed image. Alright. Now, this looks
great, doesn't it? So my picture is framed. I'm done with it. There it is. It looks beautifully framed. Yes, I can do some
more work on it. I'll do that another day, but we're closing
the lesson here. And now it's your turn. Create
something beautiful too. If all is well, you already
have a thumbnail sketch. You do have a rough sketch, and I'll bring that rough
sketch to the paper you like. And that can be
any paper you like and any pen you like
to use fine liners, fountain pens as said
before, pick one. And then once you've done that, frame it and you end up with a beautiful framed
image like that. That will look great on
your wall in your bedroom. In the hallway. Perhaps
give it away to somebody. It's up to you. Well, enjoy it, creating a framed image. And once you've done that,
then the next lesson, we're going to work
with these little guys. We're going to make
miniature drawings. Okay. I'll see you in the
next lesson where we're going to have some more
fun together with ink.
 Benjamin A, Art Teacher, illustrator Art by Benjamin