Transcripts
1. Introduction: Now, we've done
some drawing with the pencil in the
previous module. Now it's time to
switch to a pen. We're gonna start
with a brush pen. And a brush pen makes it easy to ignore details and just
work very quickly. Now, let me show you something.
What we're going to do? We're gonna do a little bit
of practice, of course. And then we're going to create this beautiful flower
with a brush pen. Now, this is not
our greeting card. Oh, let me show you
those right away, too. I've got the
greeting cards here. We're going to create free
pretty greeting cards. And the brush pen has
a few advantages. As I said, you're going
to ignore details, but you can also work
really quick with them. So if you need a quick sketch, a quick card, something pretty, you can use a brush
pen for that. And in this module,
I'm just going to show you how to use that
brush pen effectively. Now, the brush pen is one of my favorite tools to work with, and I hope you come
to love it, too. Alright, let's find
out if you're gonna love it as much as I
do in the next lesson.
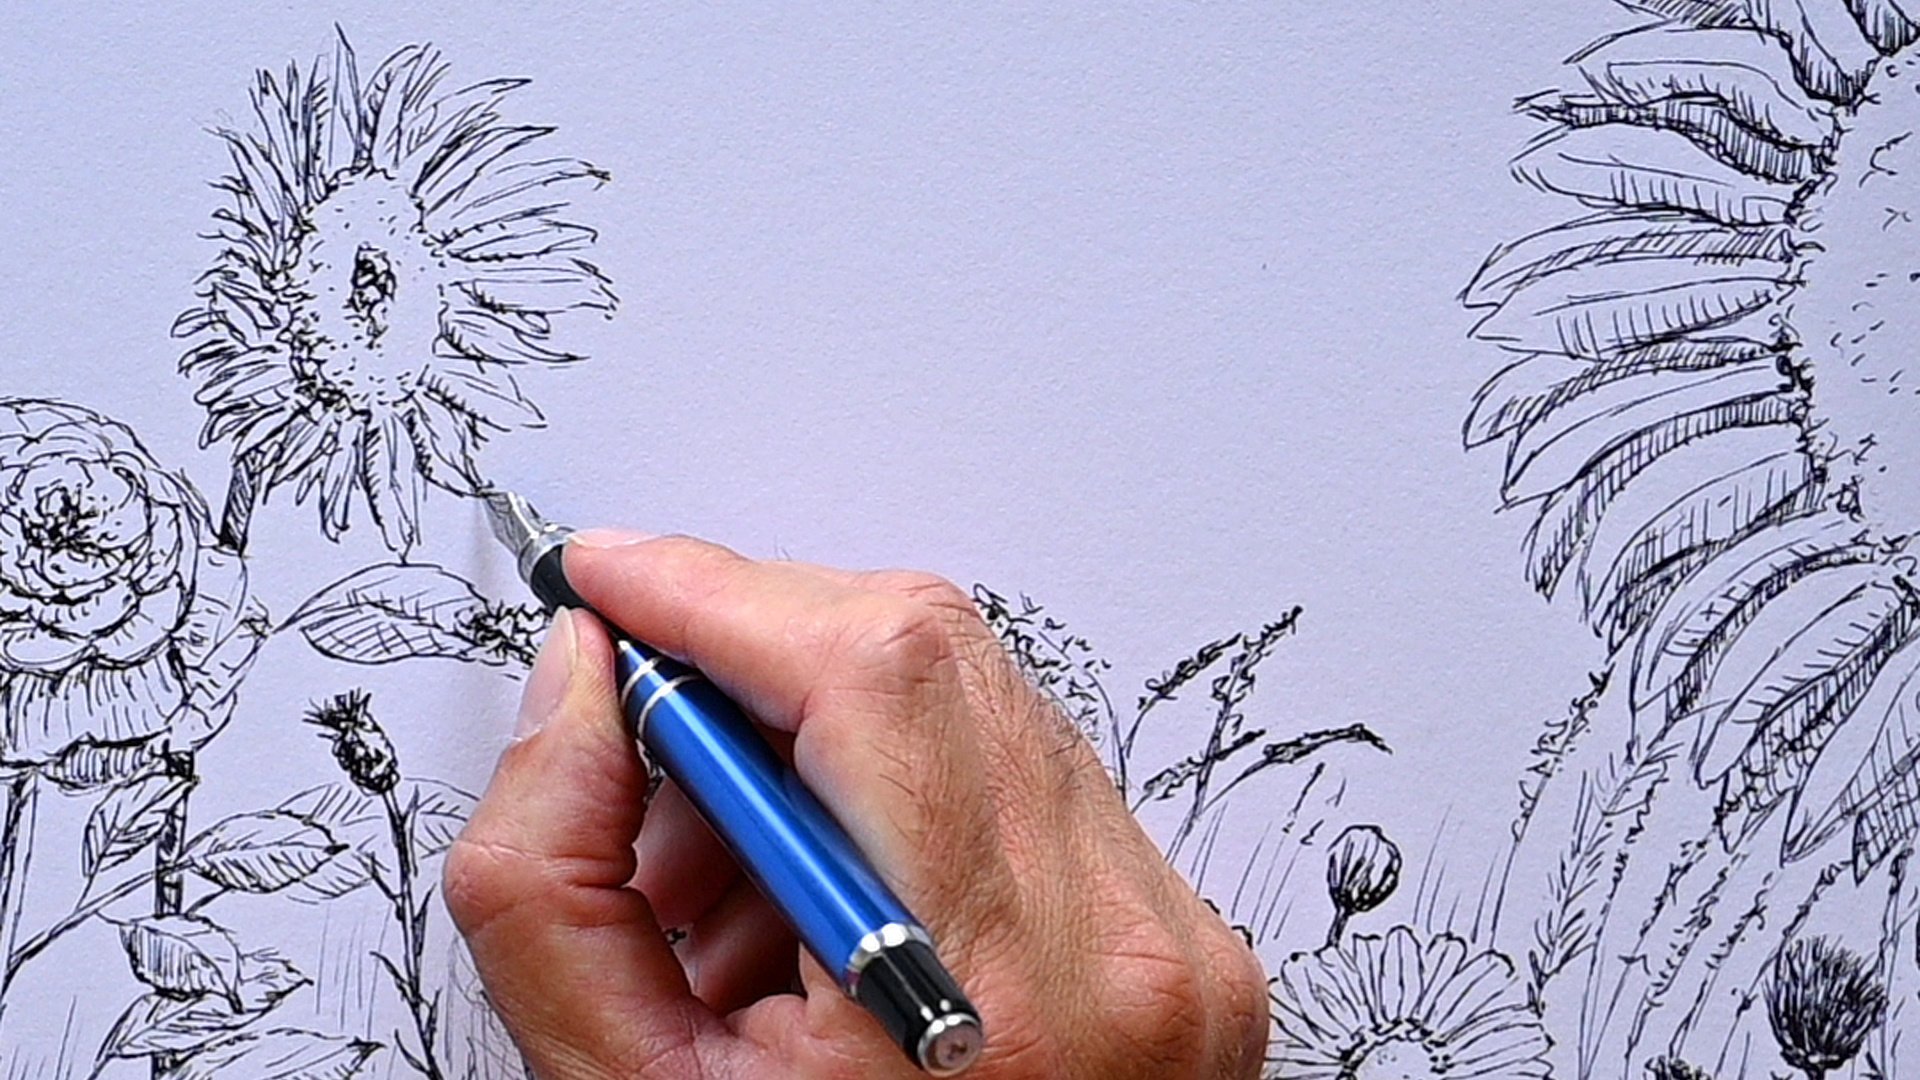
2. How to use a Brush Pen: Welcome to this lesson. We're going to work
with a brush pen. Now, the brush pen is one of my favorite tools in
ink to work with. Yes, we're going to move on
from the pencil to ink now. And a brush pen, let me find
one. Just a pen like this. And as the word says it you may have seen them,
there's a brush on it. Instead of a fixed tip, there's a brush a bit like a paint brush, and
we're going to work with it. Why are we going to
start inking with a brush pen instead
of, let's say, something like this,
fountain pen or a fineliner. We're going to do
that for a purpose. If we start with a fine liner, not a word already says it, a fine liner is very fine. Now, the same counts a bit for a fountain
pen, they're fine. A brush pen has a
huge advantage, and the advantage is that it's not as fine as a fine liner, so it helps you
to stay away from the details and focus on
the whole object instead. That is what we
want to do first. So that's why we're
starting with a brush pen instead
of a fine liner, which would perhaps
make more sense to you. But because we're starting
with a brush pen, it will help us to focus
on what is important. Okay, now, I've shown
you brush pen already. What can you use for
this? Need a brush pen. Now, I've got one like
this is a Kuretake. I think it's number 13. I think the number eight is
pretty much the same as this. It has a very soft brush pen, but you can also use
something like this. A lot of people like it. It's the Pigma brush pen. It's a bit more firm, or if you want to even have
something more firm, Pit artist brush works
too, very firm brush. Now, I'll demonstrate them in the lesson to show you
also a bit of a difference. And a lot of people
like this one, too, the pocket brush by pento, but it's quite soft and hairy. Good for quick sketches.
Really good too. All right. Good. The
other thing you need, of course, for now, this lesson, we're going to go for
the sketchbook again, pencil, eraser, sharpener, little brush
to get rid of the rubber. The other thing you're
going to need are the photographs supplied in the book of notes
and references. I'm going to use a
couple of flowers, and we're starting with
this one for this lesson. Okay, well, let's get going. Okay, right, let me show you first how to
use a brush pen. Now, I got a few here, several, and the difference
is mainly the tips. This is a soft tip, and
this is a very hard tip, so it works a bit different. And brush pens, you can
get them in colour too, really cool, and then you
have a different color. Alright, let's start
with the brush pen. I'm just taking
this one for now, the Pigma Brush pen
and it works a bit as a pencil and somewhere between a
pencil and a paintbrush. Now, the thing is, if you're going to draw with a brush pen, and I'm sketching my box
again and you use the tip, you get a reasonably fine line depending on your brush pen. Now, that is great for doing the outline and
drawing the subject. Now, with a brush pen,
you could do some hetching for your Shading, but what you can also
do with a brush pin, and that's the cool
thing about brush pin. I like to put it
then the same as we did with the pencil on its side, and then you see what happens. Now, some people
will put it more straight like this and
then press really hard, but the disadvantage
of that is that you will damage your tip if
you do that too often, especially if you have
something like that, demonstrate it, then your
tip will be gone in no time. So quite easy, isn't it? You hold it more upright, and as you can see, I'm
not doing it like this. You could do that to
get a really fine line, put it up straight. But since quick sketching, I like to tilt it a little bit, a little bit thicker line, and that will have the
advantage that it will not get me into all
kinds of details. I just don't want to do details because it's not
a detailed plan. Alright, I'll take
that pit brrush pen and just demonstrate that too. This has a reasonably tip
still on it when they're new. They got a nice, fine tip, but not fine fine. And by tilting it, I can use
it more or less as a marker, as a paintbrush and
shade in one go. We're going to use that. So we're going to shade
in a really quick way. We could also do some hatching with it, even combine them. Do some hatching and combine
it with some shading. You can also go a second time, and as you can see, you
get some nice nuances. All right. Good. The brush pen. That's basic brush pen. Now, if you have
one like this or the pentlePocket
brush, they're soft. These are soft. So if you want to have fine
line with these, you really need to control. And again, don't
put it at the tip, but let it rest relaxed
in your fingers. And by til putting up right, see, this gives you
a nice, fine line. And the advantages if I press
a little bit, I can shade, but if I put it really flat, I can shade really quickly. A huge area. Now,
a disadvantage of this pen is that it needs some time to dry
because this one, you can't fill ink, it's
stuck. It's like it is. It's more like a fine
liner with this pen. There's a cartridge in it, and
you need some ink with it, a bottle of ink, and
you need to fill it. So it's a bit more wet. And that's the thing to keep in mind if you use a brush pen, you want to work from left to the right because if you
work the other way around, you're going to smear this and your fingers will be black. And once your fingers are black, you're going to smear
your paper too, and you can't erase this. An eraser won't work on this. This is permanent
ink, and that's it. Now, some of them
have water ink. So if you add water, you can still use it and paint
a little bit with it, but it's still more
or less permanent. You can't erase it
contrary to your pencil. So keep that in mind. And
again, if you're left, then of course, you have to
work from the other side. Yeah. Now, if you're left, you see me shading
from this side. If you're left, you could just flip everything around them. So if I have the flower here, if I paint it like this and
then shade it on one side, you could just flip
the whole flower around if you want to and
shade it from this side. Yeah. So then you would use your brush
the other way around. And You would shade. If you would shade,
you could go from the top like that
your left hand, or you could just
flip it around. Then I'll make a second box. What really straight box, is it? And instead of shading
what I do from that side, you just start on
the other side, you start shading here. Now, you need to get it in the right position
and shade this way. Well, as you can see, I'm
not doing left often, but kind of works. Yeah,
for the demonstration. So you would flip
everything around. You can do that, or then shade from this side
and move that way. Again, then work from the
right towards the left. Yep. Okay. But make
sure wherever you work that you start on one side and move away
from it or this way, yeah, so that you
don't smear it. Okay. Well, that's the most important thing
about the brush band. Now, which one you want to use is totally up to you, yeah. And I've got a couple
here also like this. So there with a fixed point, but this has a fixed
cartridge in it. You can pull in it. You
got brush bands like that. It's a bit thicker. This one works a bit
more like a marker. And allows me to shade really nicely because
it has a firm point, but it can also do
the same technique. Now, the advantage
of a firmer point is that it's easier to control. But you can do this one, too, because this is reasonably firm. Yeah. But maybe when
you're beginning, avoid the ones
with the bristles, the really bristles,
the hairy bristles. You can't see it, but these are really halves
opposed to this one, which is one more felt tip. Okay? All right, that's
it on the brush. Yeah. So that's what
we're going to make use. We're going to make
use of this brush, and this helps us to ignore certain parts on the flour
and just draw really quickly. And the drawing really quickly, we're going to do
in the next lesson. Alright, so I would say, find yourself a brush pen if
you don't have one already. Practice just very
little bit with it, draw some boxes,
do some hatching, and do some shading, and even see if you can get
some nuances in the shade, let me see if I manage
that with the Pigma. So if I have this Pigma, which is really
black, there you go. And then very carefully shaded, so not pressing too hard. See, and that gives you a bit of what's called dry brush effect. And so this would
be my light area. This would be my
less light area. And if I now go over it, see, I can get a little
bit of tones with it, so I can get this nice nuance in shading from light to dark. Alright, that's the explanation on how to use a brush pen. Now, this will take a little
bit of time to get used to. But once you get used
to it, I would say, go to that next lesson where we really going to start drawing, shading, creating something
pretty with these brush pens. Alright, enjoy it, and I'll
see you in the next lesson.
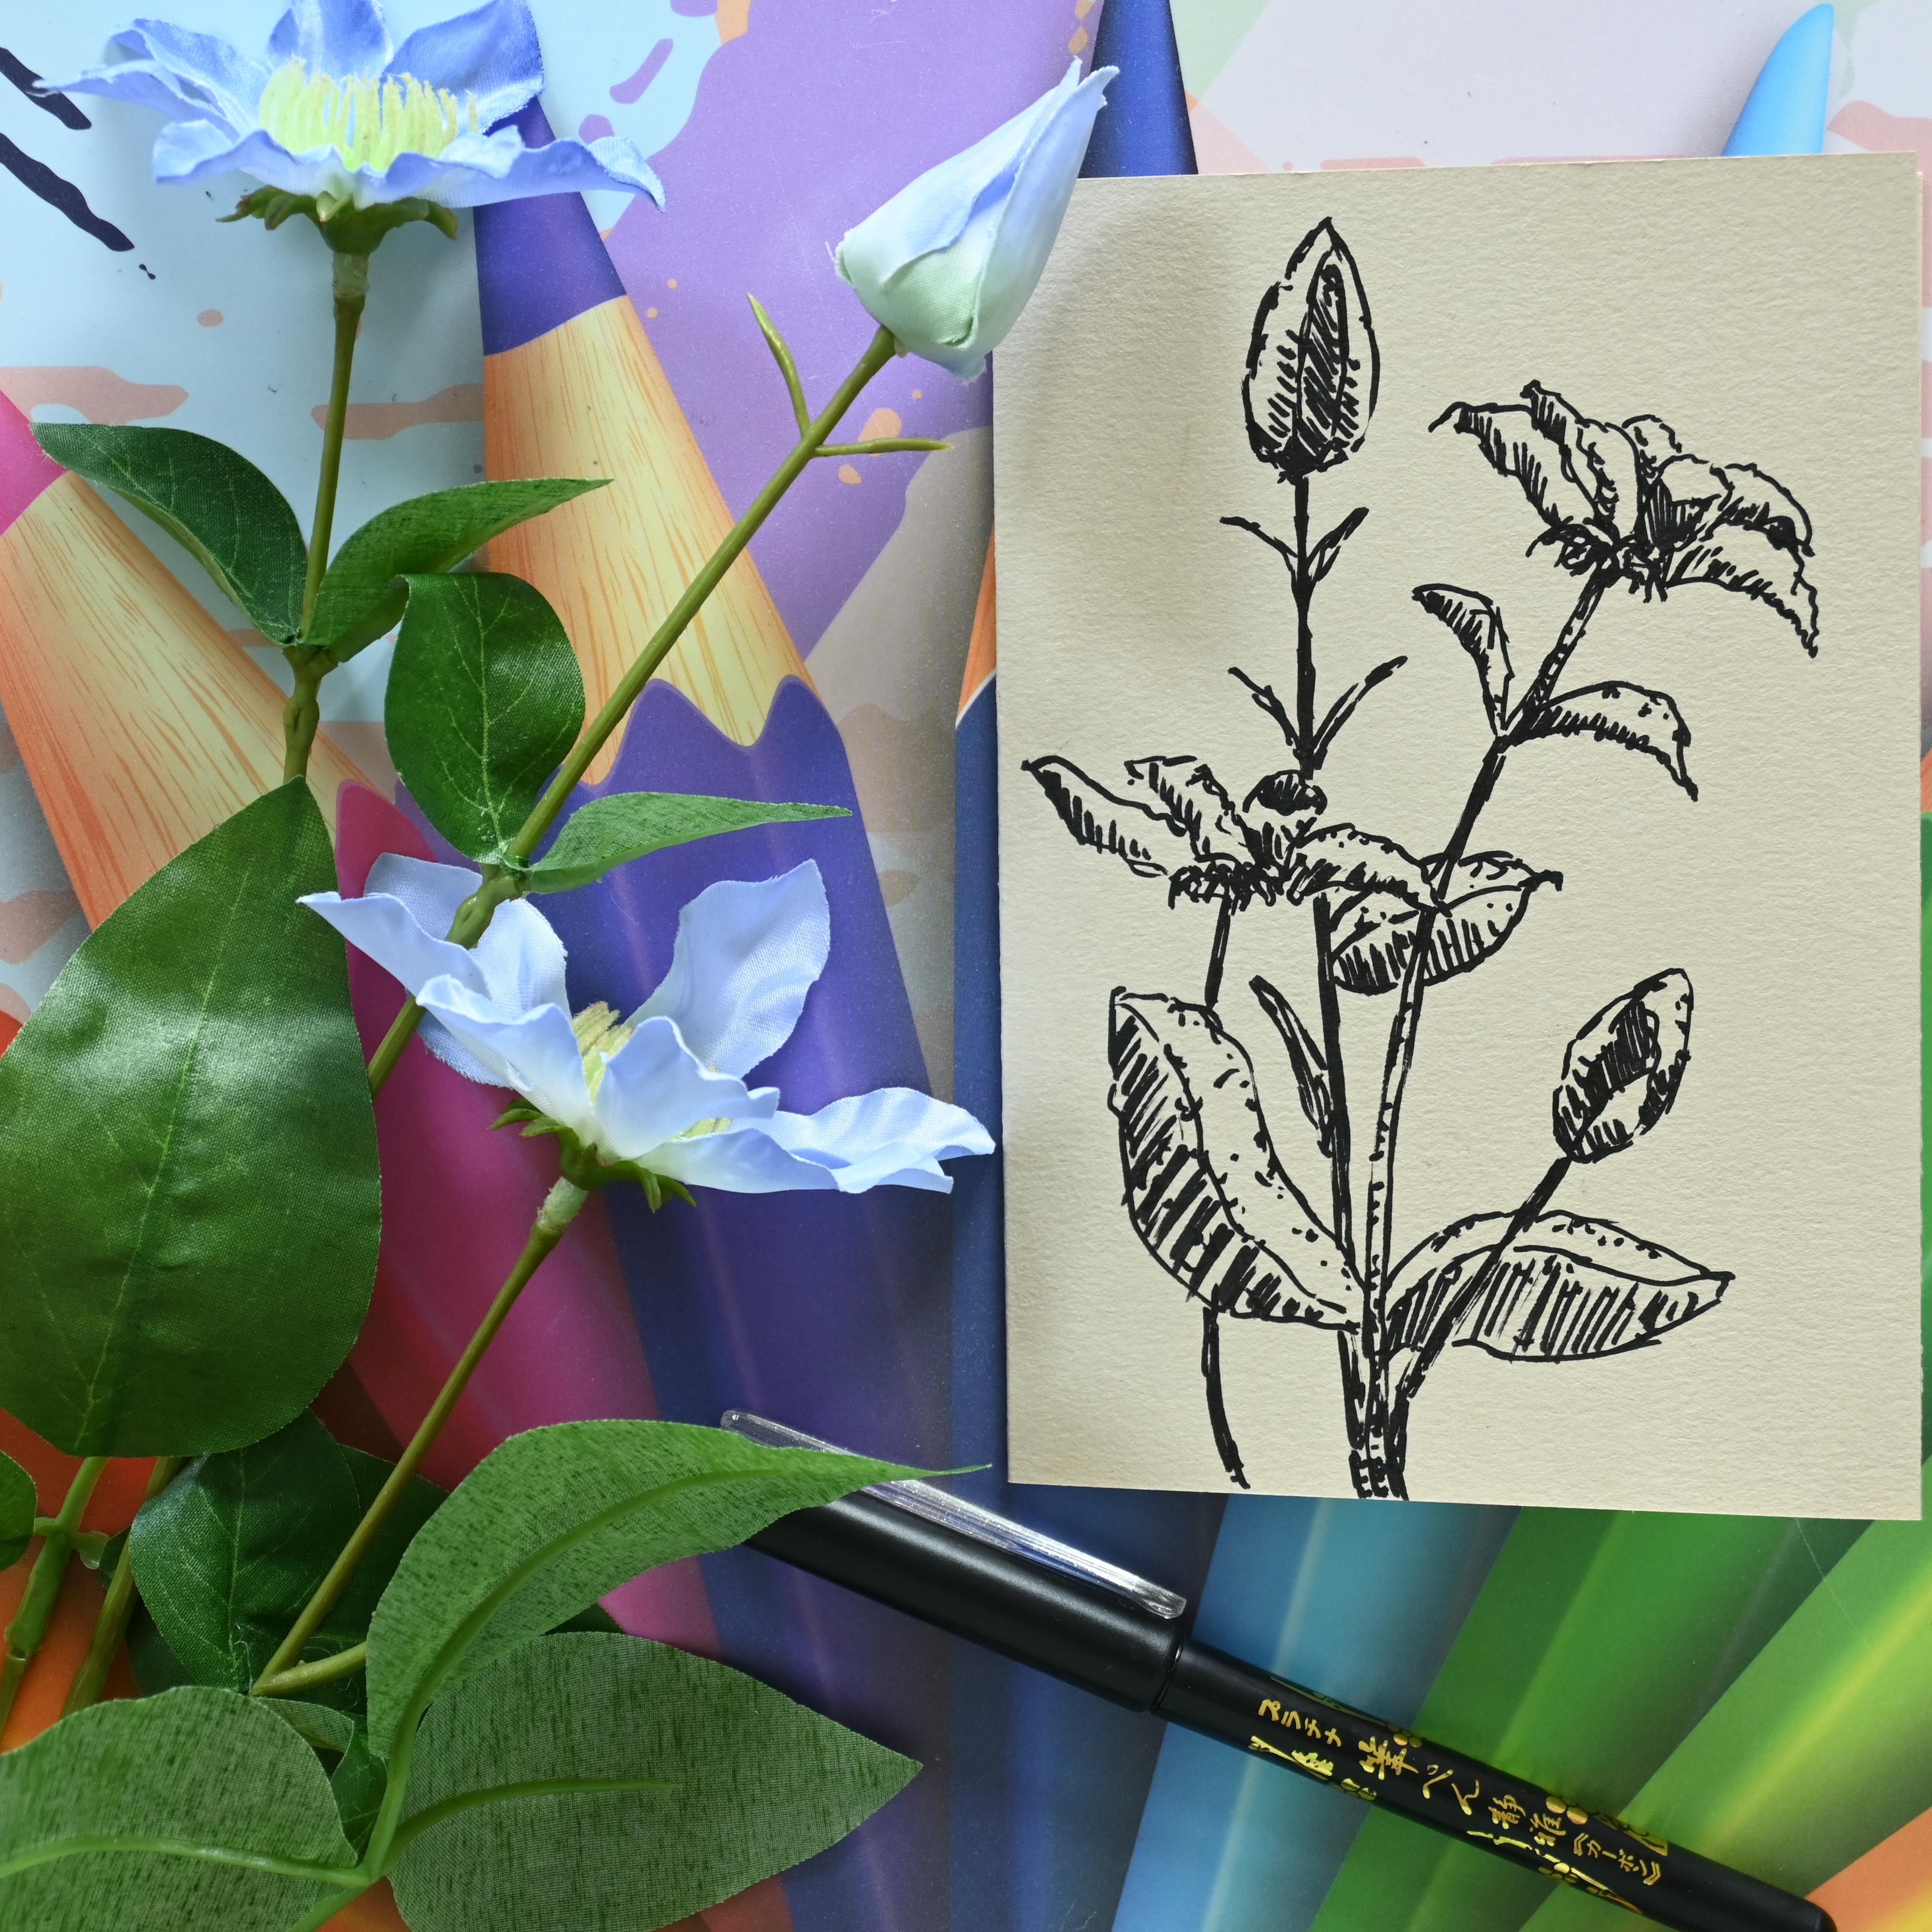
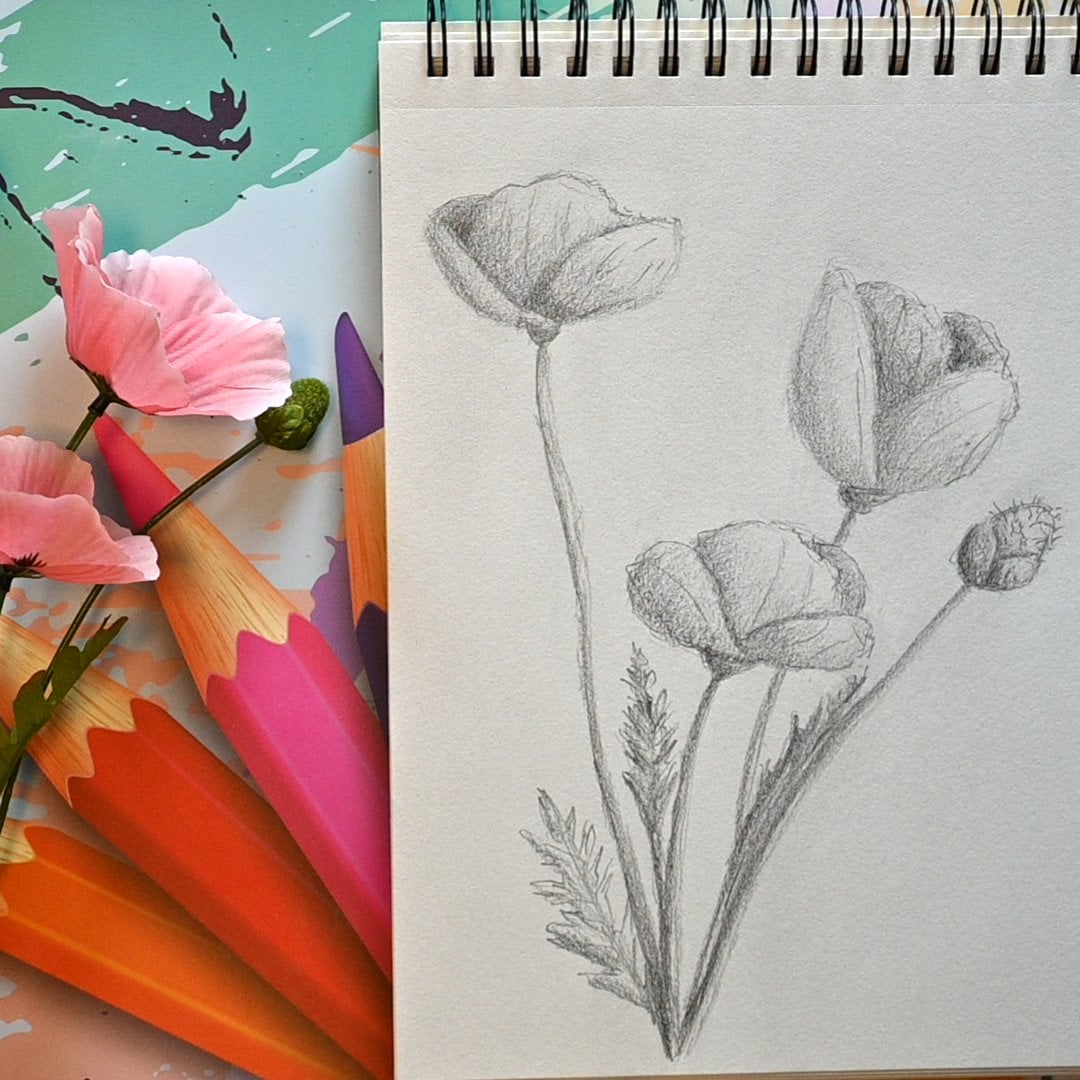
3. Sketching a Flower: We're going to do the next
step with our brush pen. Now, if all is well,
I assume you picked a brush pen and you've
practiced a little bit with it. So we're going to
now draw with it. What do you need
for this lesson? Obviously, you need
your brush pen, whichever one you want. You're gonna need
pencil, perhaps eraser. Sharpener is sometimes
handy to have. And, of course,
you're going to need some just regular
sketchbook paper is fine, nothing fancy. And you're going to need some
photographs of the flowers. Now, what we're going to
work with is this flower. So you need to find
the photographs of this flower in the
book of notes, and let me move that flower
out of the way so that you can see me again.
We're going to use it. We're going to sketch
this. We're going to sketch this quickly
with a brush pen, and I'm going to show you
how to do that quickly. And then once we've done that. So this is our practice round. Yeah, let's call it that
way, the practice round. And once we've done that,
in the next lesson, we're going to
create some pretty greeting cards with
the brush pen. Lots of fun. But before we
go there, let's practice. Okay, I got some room
left here still. So to draw. Yeah, so I might
just draw on this side here. Okay. I'm going to
get the pencil. We're going to start
with the pencil. Right. And we need, of
course, that flower. The flower is handy to have. So let's put that flower here. And you've got a photograph. I'm going to use the
live flower for this. And I'm just going to point
out what I'm doing with this, why I'm doing it, and how
we're going to do it. Now, this flower,
we're going to draw it from the side as we see it. We're gonna make it
ourselves pretty easy. And in other lessons,
we're going to tilt it and do some dimensions
and other things. But for now, we're sticking
to it, making it easy. So what I want to draw
is this part here. So if I look at this part,
I'm going to say, Okay, I'm going to need a rectangle, almost a square, but a big rectangle to
fit all of this in. So I'm just going to
draw my rectangle. And let's say I want the flower
to be in this rectangle. It's not gonna fit, so I'll have to adjust the dimensions
of what I'm seeing. We're having a
couple of elements. We have the free flowers, and we have some leaves. What we're going to
do with this one, we're going to sketch
it really roughly and then do the rest
with our brush pen, and we're making use
of the brush pen. So I see that one is straight, one is straight, and this
one is under an angle. So what I'm going to do, I'm going to start
with this one first. I'm going to say, Okay, that
is pretty much down here. So I want it. Tomor or
less go in this box. I like that. Right. Then I have the second one that
goes right behind it. And I want to have that on
the top in its own box. There you go. And then
we have the third one. Now, it's down at the same line. If I put an invisible
line there, it comes right here, but that one is definitely under an angle, and there we go. Might make it slightly larger. Okay. And then the
stark would go. Like that, the stack of this one is in the
middle goes right there, and this strle goes behind
and meets up with this one. So that's my basic drawing. I've defined where
I want everything, and now I can just
roughly draw it in. Now, I'm going to totally
ignore details for this. I'm going to start with this
one. That's the easy one. It's a bit rounded slightly, and it goes to a
point right there, and I'm drawing that in. So quickly sketching that
in right. There you go. And that looks
really convincing, but it has some folded leaves, so I'm drawing in those
folded leaves, there you go. Now, see? That looks pretty. That's it. Now, it has some
leaves under here, and I'm just gonna just
draw them in like that. And that's already
something, isn't it? Okay, the next thing I
see here is this flower. Now, I move this up. This should have gone down a little bit, but minus moved up a little bit. Since I don't want anything
on the bottom here, that makes just for
a nicer composition. Instead of having
something really on the bottom, I want
it to move up. That gives me less
room for these leaves. So what I'm going to
do with these leaves, I'm just going to put
them up a little bit, and the easy thing to do is I'm going to draw the back
line of this leaf. So I want it there,
and I'm going to draw that middle
line of this leaf, and that goes
behind this flower. Now, this one I only have to draw in like that, very easy. And this one, I'm going to try to mimic that shape a
little bit like that. I'm giving the impression.
Now, look at that. Looks nice, doesn't it? So you play a
little bit with it. Now if something goes wrong
and you don't like it, just get that eraser
and erase it and just do it again until you have
it where you want it. Now, as you can see
with my drawing, I'm not putting everything in the exact order where it is
and the exact dimensions. I want a quick
sketch, so I'm just giving a rough overview
of what I'm sketching, but not going into all the
details and exact dimensions. We're just estimating
a little bit, playing a little bit
with the composition and make something nice. Alright. So we've got
that first flower. Let's do this, this one here, I don't want to move
with my hand over that. Now, what do I see
with this one? Now, probably, again, since I'm looking from
a different angle, you see a little bit
differently than what I do, but I see a leaf coming
towards me, bit tricky. So let me start with
the bottom first. Now, if you can
see the bottom has some of these leaves coming out, and I'm drawing
them in like that. There you go. And from there, I'm going to do that
leave what I see, and basically what I see is
coming towards me and I'm just drawing it in quickly
give a quick impression of it. Now, the second leaf,
that one is there, and it goes all the way there, and it's a bit like that. Again, quick impression. That one here is
moving up right away. So I'm giving it that curve a bit and then drawing
in that leaf. There you go. And that's it. More or less, Yeah, I'm
happy with that. Okay. Then I can see the heart
coming out a little bit. All right. And I'm seeing
a bit of a leaf behind it, so I'm just drawing it
in here too in the back. I can see that leaf, a
little bit, those two. So I'm drawing them
in fairly quickly, and then there's a
leaf behind there. Now, that is that quick
impression of the flour here. Right. I'm not gonna worry about I mentioned
everything exactly. I might just add stalk to it, do it a bit thicker. There you go. All right. Now, took between this one
here is a little flour? Not starting to grow,
what I'm going to do it. I might as well add that here and move this
out of the side. Needs to go a bit
thicker on the bottom. Right. And it has some
lines. There you go. Now, see, that makes it
right away interesting. So that's it for this one. And now let's do this one. Okay. And the last flower here. Now I'm going to put that down. And what I see is, let's start with
that bottom again. Okay. These coming out, then I see the petal, sorry, the stark, I need to do this stark a bit figurative. And now I can extend this stark. Now, I could have
brought these leaves down a bit since I
have the room here, but I'm going to
leave them like that. Now, this one has
those leaves here. I'm going to go drawing that backline again and
drawing that underline here. Like that, and then I'm going to do basically the same
what I've done here. Go up and then go in. So make a bit of an angle with that here too big and
then go small again, create a nice leaf. There you go. Alright, and now I'm going to do
the last part in. Now, the easy ones are
these petals there, straight and up
straight like that. And then go like that. And same I'm doing right there. And then I have these
two petals towards me. They're a bit tricky, but
I'm just going to draw them in really
roughly like that. And then I see some of
that heart coming out, and I'm going to leave
this like that, see? That looks nice. Don't
need those back petals. You don't see them
because they're straight. Alright. Now, that's
it for this one. Good. That would be
my first step then. Now, there's some
leaves, big leaves here. Yeah, you can make the
choice to either draw them there or just
totally ignore them. You could draw a big leaf in
front of it, this one here, even tilt it a little
bit and say, Okay, I want that in front
of it or to the side. We could do that. And if we have them like that, we're going to follow this
line, the middle line first. So let's curve that out a little bit and then do that
first part on it, and then do the back part on it, which more or less follows. That one, and there you go. Now, that looks
good, doesn't it? More? Well, let's
do one leaf here. Let's just pick a leaf. It doesn't matter which
one. Anyone will do. This one tucked in, will do, and I'm just
going to draw that in. Big leaf like that.
All right. Good. Now, look at that.
Good. I'm going to put the flower aside,
and that's it. See? That's my flower. Okay, now, that's the
basic setup of the flower. The next thing we need is
a little bit of shading. We're going to play with
light and shadow, of course. And for that, we're
going to just roughly mark the areas where we
want the shadow to be. Okay, let's do that now. Now, we got to choose where
the light comes from. We can go from this side,
this side, top, whatever. We make it With these
quick sketches, you want to make
it yourself easy, and probably picking a corner is always the easiest.
I like this corner. So my son would be there
casting its sun rays there. So pick this corner. That means that for
this flower and I'm going to make it myself
easy, I'm going to hedge. This would be the darkest part and in here would be
a less dark part, and I'm letting that
in the full light. Same with the leaf, it would be hedge there. Now, this one would
be shaded there. This one, we could go like this, leave the top a little bit. This area a bit non shaded. This one if the light comes
from here, we shade it there. The big leaf, this part
here would catch sunlight, so this will be shaded
a little bit and this opposite side
would be shaded a lot more. There you go. This, what we're going to
do this flower is good. This would be dark because
it looks towards me. If I pick that flower with it, the sunlight comes from
here, this will be lighted, that part there, but this
part will be dark because the sun comes like
that a little bit, doesn't light up that part. Same for the opposite side
here, that's gonna be dark. This is going to be a lot dark. And the back flowers, those, I'm going to let the
light shine on those. So I'm not going to
do anything for that. This leaf pretty much the same as this leaf. Here's
the dark part. And this is the less dark part. And the stark we do these
sides of obviously, of course. This one light comes from here. The sun is not, of course, in this corner, but further away, then that would be dark and the rest will just
leave in light. Okay, last flower here, bit as the same as this one. So this would be in dark. And the bottoms, we're going to make really dark.
This will be dark. And mostly this would be dark. That would be all dark,
this flower pretty much. And then this side,
we would make dark. Okay, so we've got
our drawing now. We've got our shading now. We know where we want
the shadow to be. We know what we need to draw. The next thing is, of course,
we need our brush pen. I'm going to use the pick
my brush pen for this, and we're just going to
draw it and then shade it. Alright, let's get into that. Okay, let me get the brush pen. And I'm going to work from
this side to this side. I might start at the top and
then do the bottom part. So then I would
start with this one. Now, with a brush pen, it's basically really the
same as with a pencil, we're just going to make
these short lines like that. And I'm not pressing
really hard. I'm just pressing a little bit. And as you can see
with this now, this already totally stops me
from getting into details. I don't want to do details now because it's way too rough. So I want to work rough. So I want this line
to be in there, and as you can see, I'm
not doing it continuously. I'm not even
connecting everything. I'm doing it really roughly. Let me do these leaves
right away and a bit there. That's all I'm going to do with this leaf and let me
do this leaf too. And this leaf Right. And I'm not going to shade yet. I'm just going to draw. Okay.
Now I've done this part. I can close this, do the stack on one side and do the stack on
the second side. Now, there you go, see? That
is already the first setup. Now I'm going to do this one here starting with this leaf. And since I have everything
already ready with my pencil, it's just basically easy tracing it This one needs a bit fringe. And once in a while I have
my flower still here. So I could look once in
a while to it and say, Oh, how I want some curves
in it and things like that. It's just off camera. I can see it. So
you could do the same once in a while still look at the image and then say, Alright, I want that with it. Okay, that's the heart.
Here's those leaves. Now I'm going to do a stark and my pencil stack is
slightly too thick, so I'm going to
make it a bit thin. And I want this one. Now I'm
going to look at this one. It's really has a pointy part, so I'm not having
that in my drawing, but let's see if I can get
that in, there you go. There, that's better. And it just had some lines
going like that. There's that one. So leave I'm starting with
the middle part. I'm doing it like this. Okay, we've got that
one. Now I'm going to extend this Stark here. And there you go. Make it a little bit thinner
than what I had. Alright, the next flour, I'm going to work
this one from top to the bottom so that I
don't smear anything. All right. And I'm going to do this
one first. There you go. Then I had another
one in front of it, and I had that one
in front of it, and there it is. Now, as you probably
notice what I'm doing is sometimes I'm hardly
even touching my paper. I'm more or less letting this brush dense a
little bit on the paper. So it's just touching it. I'm definitely not pressing it, but I want to make loose
lively lines with it. And you get this
whole pretty idea. And there is this
one that we have this leaf at the point to it. And then we have this leaf here. I'm doing that
middle line again. And there you go. This
is really fun to do. Really fun to work with
a brush like this. Now I bring in the stark. And the bottom star part, this one is slightly thicker. There we go a bit thinner. And there you go. Alright,
that's the drawing. Now, of course, there's
more than the drawing. We need the shading
in it. And for that, we're mainly going
to use the side of the brush and just do some
areas really quickly. Now, this is looking
nice already, but we need some shading in it. So what I'm going
to do, I'm going to use the side of this brush, and we're going to do the
really dark parts first. And I'm just painting those in. This one is really dark, too. So you get this light
and shadow effect. Very interesting. Idea,
light and shadow. Alright, I'm not touching
that top part for now. This one I need to
do. And there you go. No, this leaf I need to do this one I want to do
on this side a little bit. And there, I want to do the
bottom of this one too. And of this one, two, and of that one, I want to play a little bit more with
the light in here. This one, the same roughly
at the bottom and that one. There at the bottom, and
I want to do this one. And there you go. Now, the stock I want to do. On the edge is just a
little bit here and there. I'm waiting just a little
bit for this to dry. Now, this pen dries reasonably quick, so
I could go in again. But if you have a pen
that needs more time, then give it that time. So as you can see, I'm
just doing little dots, little dots and stripes. On this one, this
needs a bit more. There you go. Same
here on the bottom. All right. Good. Now, you could already leave
it like this, but that will just
be light shedder. We have these in between parts. So what we're going to do? We're going to
hedge a little bit, and I'm going to
just roughly hedge these parts there too. Let's see. I might just
add a little there. I want a little bit of
hedging here. Same here. And that is all light. That is all light.
I think I'm fine. Right. Oh, no, I want
some hedging on this one, and I want it there
a little bit. Okay. So more. Now, that will be it. All right. I think this one is
slightly too strong. There you go. Okay,
I'm just going to have just a couple more of
those leaves going down here. And then I'm going to say, Alright, that's it for now. Okay, now I got to wait. Yeah, we're going to
use the eraser to get rid of all the pencil
markings, but for that, you have to wait
and make sure that your drawing is really dry. A couple of minutes, 10 minutes, 5 minutes, now,
just a few minutes. Yeah. So I'm waiting. And then once it is dry, we're going to erase all
of the pencil markings, and we're only left
with a pretty drawing. Let's erase a little bit. I'm going to erase that. I can safely do these borders. Now, with erasing, too, don't press hard hard
hard because then you might wrinkle your
paper or even tear it. So do it carefully. You, of course, need
to apply pressure, and as you can see, I'm
holding my paper firm. Alright, good. And now, I'm getting
towards what I've drawn. So let's try a little area
and see if it is dry. Yeah, because if it
would smear here, that wouldn't be a huge problem. So now I'm doing it
quite carefully. Erasing it all decide to Okay, let's get the brush. And there you go.
Now, look at that. Isn't that a pretty
ink drawing. See that? There's a bit more pencil there. There's a little bit
more pencil there. Now, if you are left
with just a little bit, that's not even a big problem. Alright. That's it. Now, good. And there is our
first beautiful ink drawing. Okay, we've got our
first ink drawing done a lovely scene of
flowers with a brush pen. Now, the brush pen helped
us to really work quickly, ignore details, and
really get going with a quick sketch because
this went pretty quick. Now, your turn, I
would say practice with your brush pen
and do a scene and do a couple probably just find some other photographs or
look in the book of notes. There's quite some
photographs in it. And once you get comfortable
with using the brush pen, we're going to move to the next lesson
where we're going to make some pretty greeting cards. Alright, enjoy it, and I'll see you in the next
lesson when you're done.
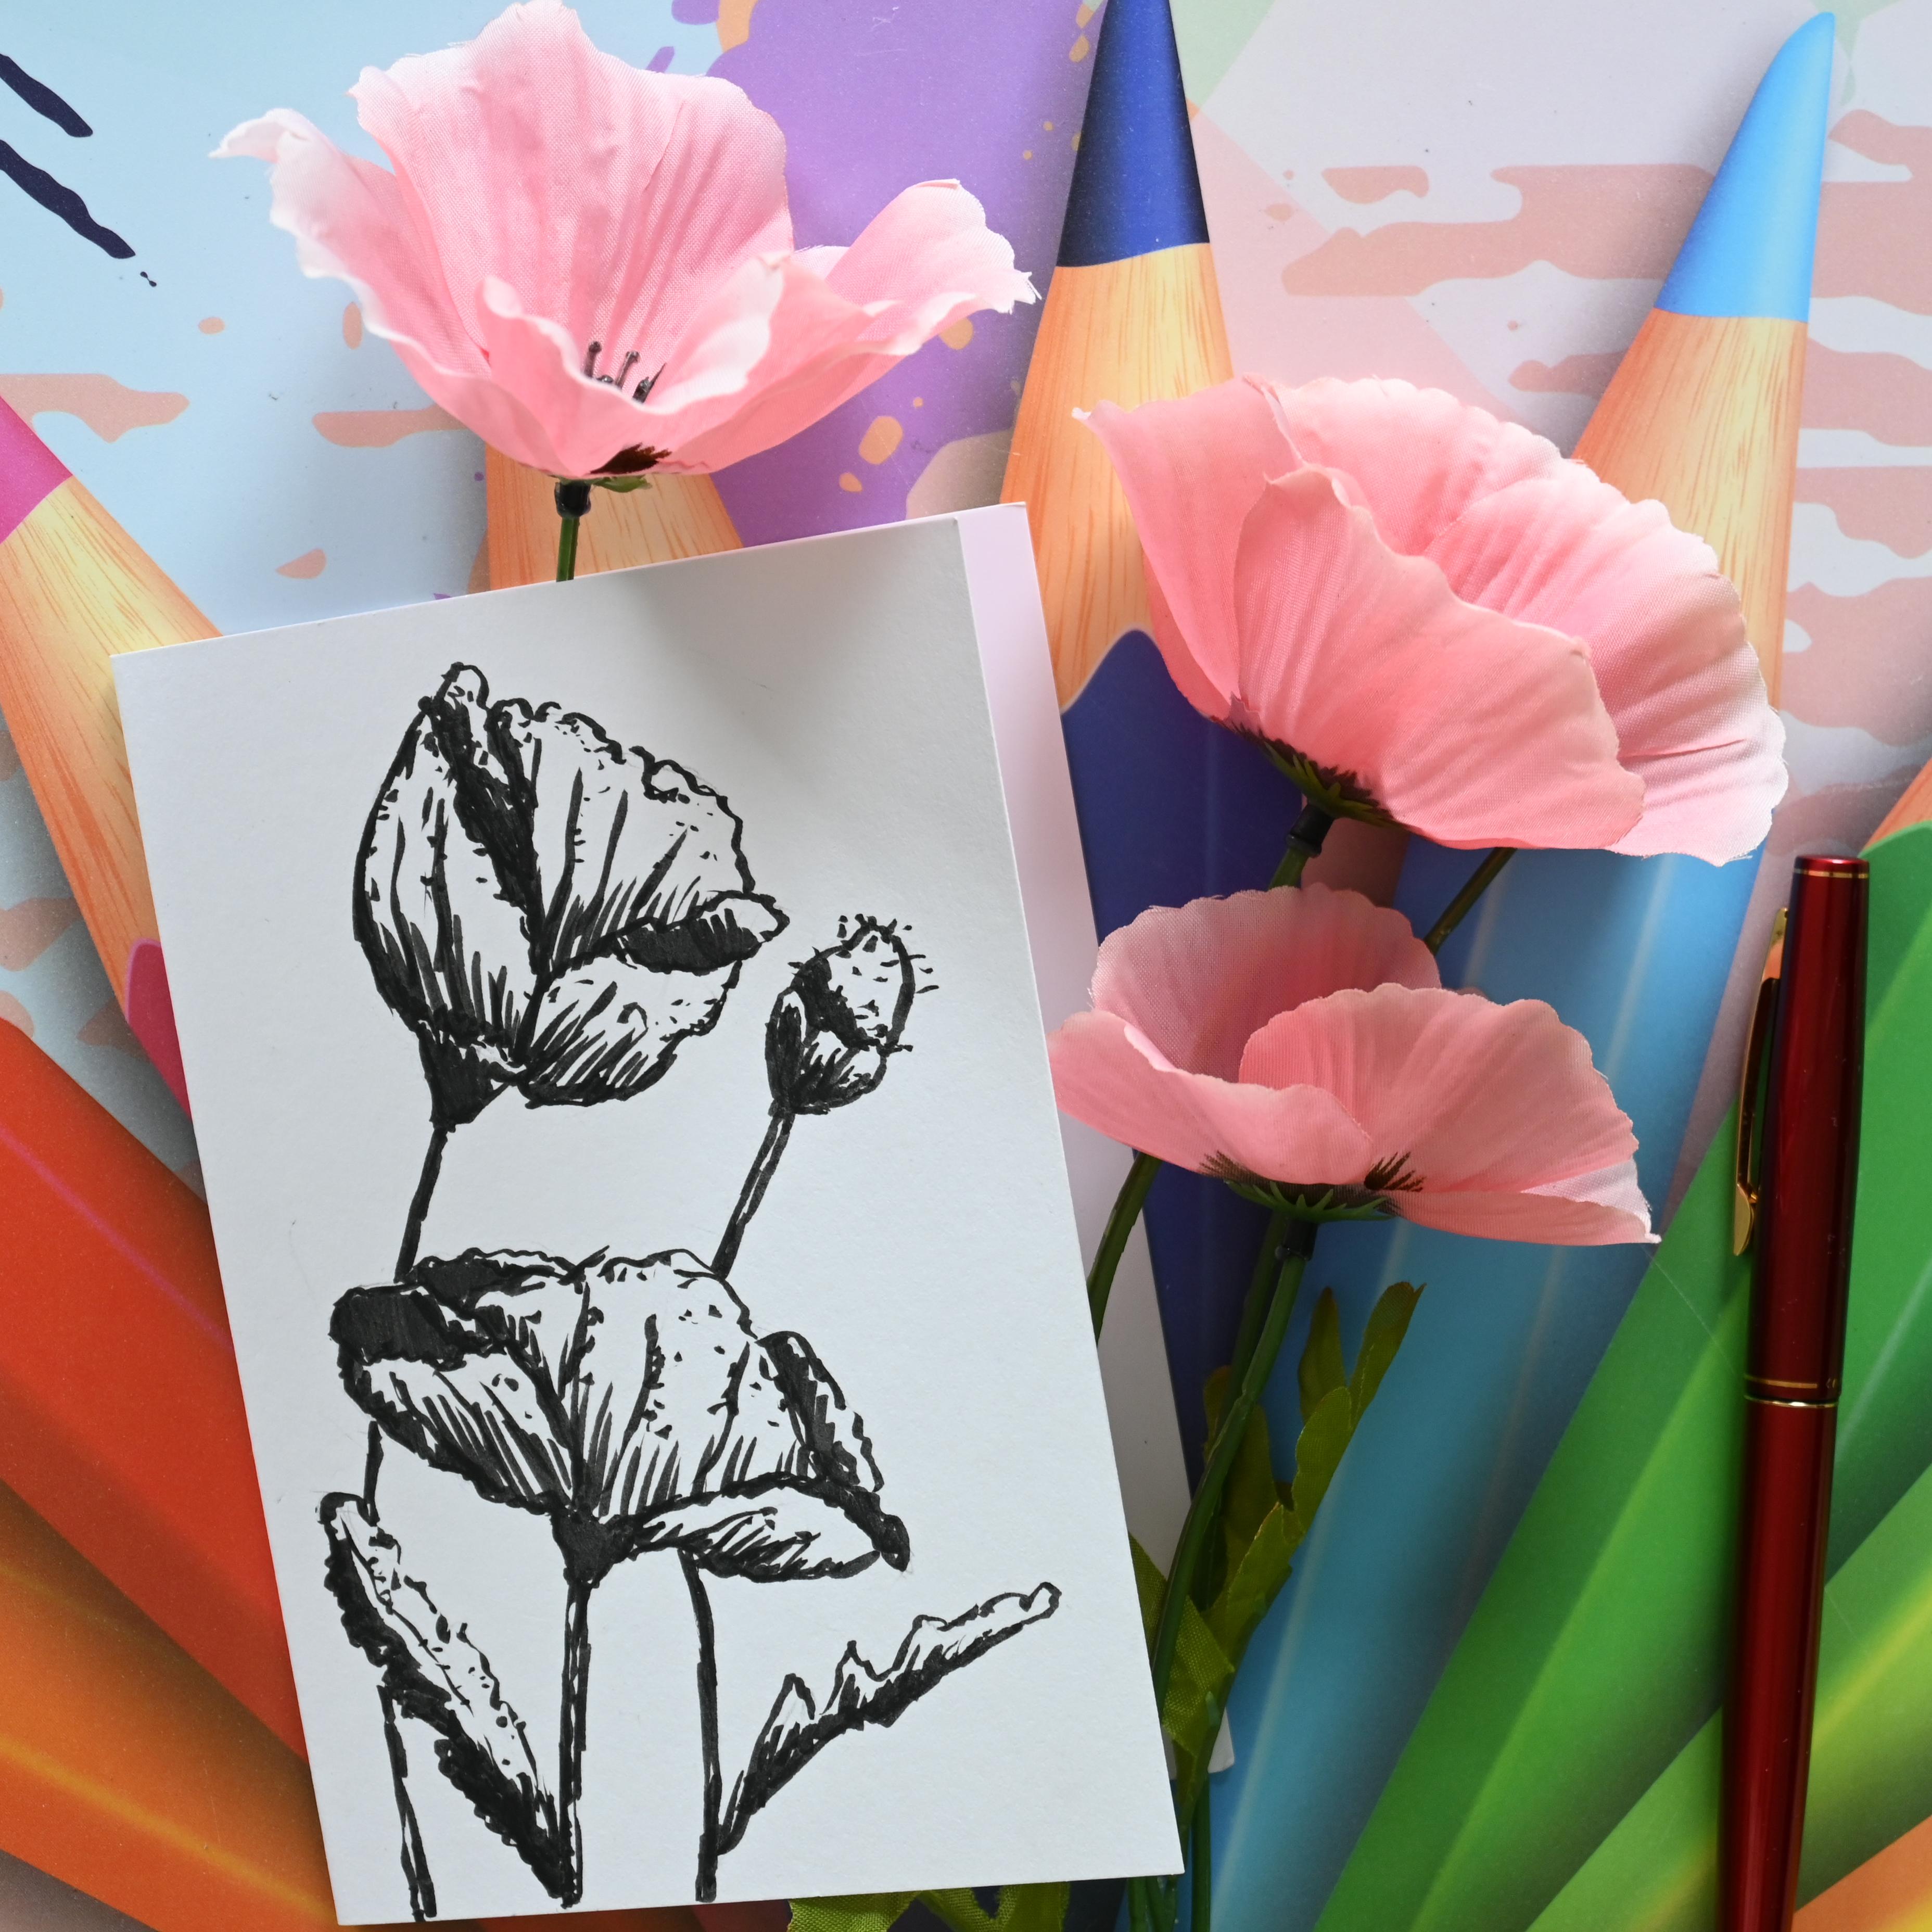
4. Project - Creating Greeting Cards: You know what a
great thing is about sketching and especially
quick sketching. It's not only fun for yourself, but you can make some pretty
things for others, too. And that's what we're going
to do in this lesson. We're going to create some greeting cards using
the brush pen. I've noticed that people
really appreciate it when you create a card,
especially for them. It's not a big time consuming
thing with quick sketching. You can do it really quickly. Just make a pretty
card and give it to somebody too for his birthday, encourage them for a thank you card or whatever
you want to do. You can use this for
a lot of things. Okay, we're going to
do that together. What do we need
for this? Now, we have used a
sketchbook until now, but the sketchbook won't
do for a greeting card. So I'm going to put
my sketchbook away. Close it. We'll get to that
in the next lesson again. Right? I'm going
to put that back and see if it doesn't
fall on the ground. No, it's, it's safe. Okay, what do we need instead? We need some papers
that work for a card. These are great for
greeting cards. What is This is
what color paper? Nice, sturdy, and it's set
up as a postcard already. You can buy these
at various places. You don't have to buy a
really expensive one. You can buy them. Like, it doesn't need
to be watercolor paper, mixed media paper, even
just card stock works. So you could use that.
Another thing you could use is just
regular card stock. Yeah, and we're going
to work on that, too. Just card stock works
great with ink, too. Oh, no, that one goes away. If you want to have
some color, Now, look. Nice. Different colours. You can use different
colors too. This is something called
paint on Clairefontaine, sturdy paper, really
great for inking. And I've got some various
versions of that. Now, perhaps you can
see it on the camera. This has a pattern in it, more like a canvas. Really great for a card, or you just can get a
big sheet like this. A big block. Just cut up the pieces you want
and just fold them. We're gonna do that,
too, by the way. You need some thicker paper, card stock, watercolor paper. They're all work well. Yeah. Okay. Color, no color.
That's up to you. Yeah. I like to just use white or perhaps a toned tan like
I've shown in this one, a bit of a natural
color, and that's it. Okay, we're not going
to work with color. We're just going to do
black and white sketches. Okay. That's it. Now, obviously, aside from that, you're going to
need your pencil, eraser, and so on, and you need a brush pen. I'm going to do a couple, so
I'm going to demonstrate a few of them with some different pens so you
can see the difference, too, in the pens. Alright. Do we need more? You need reference photos. Now I got some flowers. I still got that puppy
from the first one. I got an oriental puppy
that's quite different. And I have, of
course, that flower from the previous lesson. But you can find your own
flowers, find them online, and just start using them and create some
pretty cards with them. Okay, well, let's go. Okay, you're looking
at an empty space. Okay. That's not what we want, of course. Let's
get start going. What are we gonna do first? I'm going to use this
watercolur paper. Now, the difference with
watercolur paper is huh? This is quite rough. Now, you have different
kinds of watercolor papers, but there is a nice
texture on this, and that makes the cart already pretty in itself without
putting anything on it. So what we can do
is we can use it. Landscape. We can
use it like this. That's totally up to us how
we're going to do that. We're gonna do a
landscape first. That is probably a bit more tricky than portrait,
but let's go for that. What I'm going to
do, I'm not going to use the same flower
that we used. Let me take this oriental puppy. And yeah, that would
work great, see? I'm going to make it
really big on this. What I'm going to
do with this, I'm going to put that flower here, and then I'm going to put
this flower somewhere here. I'm gonna play with that
a little bit, yeah. So cards, you can create
however you want. You can play a little bit
with the composition, put just one big flower on it, several little flowers on it, use the card, and yeah,
just have fun with that. So you don't have to copy one on one what can
create your own thing, and that makes a
more creative card. Alright, so I'm going to do
this really big, I said. And I want it under an angle
because that is pretty. Now, what I'm going to
do is I'm just going to sketch in and I'm going
to put this flower aside. I want the flower
to go in this box. Now, there you go. And then I can put the
other one somewhere there. Okay. And now I'm going
to look at the flower. Okay, now I see that under
it just in the middle. I'm I'm turning it like that. The pretty side. Ah,
that is good enough. Good. There's a
stark somewhere in the middle that goes here,
and then it blooms out. I like that. That's the
part there, that underpar. And then there's some big
leaves towards me also, and I'm tilting
them a little bit. It's making them
interesting. There you go. Now, that already
is a good start. Don't you think so. Alright, now we're going to put
in the big one. And let's see. I've put my
rectangle way too small, so I might go outside
a little bit. And let's see you go here. And I'm doing it like that. Then there's one here. Now that has a fold there, I'm going to bring that
fold in this fold here. Alright, that will
look interesting. Now we've got that big
one. Let me check. That is one big one
starting there. And now gradually moving down, disappearing into the
other one. That's nice. Now, on the back, I see a
little bit coming on top of it, so I'm going to
make use of that. Put one behind it, put one in this corner and
put one behind there, just a little bit to get
a nicer composition. That will be my first one. There you go. And the next one, I'm just gonna doesn't matter
how I turn it. I'm just going to
put it right there. Yeah. Might do it even behind the other one a little bit to get an interesting composition. So I'm going to create a box, and I'm going to do this one just it's moving around.
Stay where you are. Let's put it up a little bit. I want it to get into this box, and then the stock comes
right there. There you go. Yeah. So that is
wrong. It's this box. So I'm going to
start with this bit. And you could have drawn
a little box here, too. There you go. Now,
that looks better. Trying to make it a
little bit more natural. Okay? And then it just goes out to the I'm just drawing
that in quickly. It goes behind that flower. And now, I'm gonna
fold it like that, give it a bit of an angle here. There we see, I can see the heart coming
out of it a little bit, moving this one under an angle and adding a
fold here and there. Now, that's pretty, isn't it? Put that one up a little bit. There you go. Now,
that's the second one. Now, that in itself,
this composition already makes a pretty cut. Now, we could draw
a little bit of the leaf in it. We
could do that here. And then we would
draw the leaf right there and only do this part
there, and that is good. Alright? Now, for
composition size, there's a nice leaf here. This one, we're going
to add just here, okay? Bit like that. Again, just part of the leaf. This one is a bit
bigger. There we go. Okay, now you can
see quite roughly. Alright, so I got my
basic sketch down now. I need to define where I want
my light and shadow still. So let's do that now. Now, the nicest side
is this so that this gets a lot of light
and that gets shade other way around
would be less nice. So this is behind there. So most of that except for
the top would be in shadow. And I'm just doing that there, there going the opposite, so I know there are sites there. Okay. And I'm just
once I get to the pen, I'll decide what is going to be dark and really dark and not. Now, sun coming from
here somewhere, that means there's shade here. This one is in shade too. There's some shade there. Some shade on that one. Now, this would be in shade two. This one would be in shade two, and this one would
be shaded, too. And here would be some
shade and on the bottom. But I'm not doing that side. There's some shade under there. Alright. And for the leaf, I'm just doing some
shade on the bottom, and this leaf on this side, just a little bit. Alright, that would
be good enough. Then we have quite
some shade in here. And we need those
petals to be in shade, but I'm not going to shade
them too much because then I can't see them
anymore. All right. Good. Now we're done with this, and now we need to decide
which pen we're going to take. I'm going to take
this brush pen with a more firm tip so I can show
you how to work with that. Alright. Alright. We're going
to begin with drawing it. And I'm again doing
the same as before. I'm going to do lively loose lines Like this. Alright, that's the first
one. I'm going to add some. As you can see now
with the sketching, some more curves to it so that it looks a
bit more convincing. Now here, too. And these
leaves I knead in. There's my stark.
Okay. I'm doing the leaf now. There you go. That's the first leaf. Then I'm going to work on
the flower again. There's this big one here. And there's the fold on it. And that would be
the basic drawing. Not yet. There you go. Now I've got the
basic drawing done. Okay. No one line. Forgotten. Okay, now
I can start shading. And for this, I'm
going to start here. Now, this part here, I'm going to do with
the side of the pen. Basically, I'm going to
color this in. There you go. And with the stark, I'm more or less
going to do the same. Right, that would
be the first one. Now, since I've colored this in, I don't want to
color the rest in. So the rest, I'm going to use some hetching
Hetching there. And here I can go paint again because that is
far away from this site. I forgot to do the
heart of it and this. I'm going to shade like
that a little bit here too, and I'm going to thicken
these lines a little bit. And there you go. That
will be the first one. Now, let's go to the flour. These ones, I'm going to do the same as with the other one. I'm more or less painting
these completely in, blocking in the whole area. Right, and there you go. And now, do the stark. There you go, leaving
some white in it. This one. I was going to do
quite roughly, same here. There we are. And
now I need this part here. Let's do it like this. Hedging but relatively close to each other than
the fold here. I'm going to paint in again. This one, doing the
same as there, Alright. And now here we
need some hedging. I'm going to follow
the same part. I'll wait just a little
bit for this to be dry. And we need that here, too. See, and now the
hatching comes in. Quite useful when
we do that here, too. And there we go. That would be our
first little cart. It's a little bit of
shading on this bottom, and there is that's it. And let's go with
this one a bit more. Okay, but not too
much there too. This one is in need of some more because it is behind there. I
would look weird. Alright. Good. Now, that's nice. Uh, yeah, cut that part. Okay. Well, okay. That's nice. Got to erase that, but we're gonna do one little
more thing to it. I'll show you that to make
it a bit more lively. Alright. What you gonna do now? This is all now white. We're gonna add some spots. Let's do first
this on the edges. We're going to add just
a little bit of lines, random lines here too, there. So stipple stip yeah, stip. How do that points, some marks. Yeah. And we're going
to do that here too, just bit like this. See that? And here, too. Now the technique we're
using is called stippling. But normally you would stipple
a whole flour or wholeing. But for this, it just
makes it look a bit more interesting also on these edges a little
bit here too, see and that makes
it look more lively. Alright. Good. That's it. Now we're done. Okay? Now we
got to wait for it to dry. Okay, so while I'm talking
to you, wait for it to dry. See? That looks
pretty, doesn't it? Now, that is our
first little card. I'm going to let this dry. I'm gonna move into the
next one straightaway. Alright, well, our first card is drying, we're gonna
make a second one. I'm gonna do it on card stock. Now, this card stock
is too big. Yeah. This is gonna be a folded cart. So what I want to do
is I want to fold it, and to fold it, we can
do that in two ways. We can use just a
ruler and a scissor. I'll demonstrate it or
what you can also use. Is Oh, this is a big. Something like this,
called a score pal. It has all these
lines, and it will help you fold a card easily. I'll show you that
on the camera. Right. I'm going to use the score pal first to
show you how that works. There's a little bit. There's my score pale
to make a score. Now, here's my total
length of the card. Now, that depends on
your card, of course. I'm using what's
called in Europe, an A five size, and I want to just fold
that to the middle. So it's 21, so I need 10.5, and they made it easy. That's where the star is. Yeah. Now I'm thinking that
if you are in the state, but I'm not sure
you will probably fold your card
right at the arrow. But hey, that is for
you to find out. This is a site I'm
going to draw on, but I don't want
to fold it there. I actually want to
fold it on the inside. I want to put that scorpel
there, I'm gonna press, Andev is well, it just follows in automatically,
and there we are. And let's see if
we done it right. We can easily fold a card, and it's really neat. Alright, so that is a
really nicely folded card. Now, I understand not everybody
has a tool like this, so let's demonstrate
it a different way. For that, you need
scissors and a ruler, yeah, or some blond metal. A pen that has worn
out would work, too, but make sure
it's really worn out. Otherwise, you get lines. Let me demonstrate
how that works, too. Alright. Well, I'm
putting this one away. I'm gonna get a different
piece of paper. And let's go for this
toned ten paper. I'm going to just
cut out the piece. Now, this is too large to. And what I'm going
to do with this, I will need a pencil for that. I'm going to measure it. Now,
I know it's 21 centimeters. So what I'm going
to do on the top, I'm just gonna find 21. I'm going to find half of it. That's 10.5. I'm going to
just put a little dot there. And I'm doing exactly
the same on the bottom, 21, finding my 10.5 there. Now I'm going to get my
ruler on the put them ends. You can do the stripe. Now, you can do it without the stripe. You can just pick
up your scissors and with the back
of the scissor, so not the sharp points, yeah. But the back of the scissor, what you're going to
do move this right. I'm going to keep my ruler
there. I'm going to press. So I have my fingers
on the card, on the ruler as well, spread them out
as much as I can. Really press firmly,
and I'm going to just whit the blunt side
of the scissors. Do that a couple of times. And if all is well, what I get is before I do that, let me get the eraser. Get this line away so you
don't really need to have Oh, probably my camera
shaking a little bit now. You don't have to do the line. You could do with only the dots. That will work, too. All right. Good. But just to demonstrate and that you
see what's going on. So I've got a score if
all as well. I'll be few. Yep, it's definitely there, and I can now easily folds
my card. And there you go. Now I've got a folded
card, too. All right. So that's one. Now I've got
two nicely folded cards. You can draw on it.
Landscape, I can draw on it. Portrait. That's my choice. So what I'm going to do next, I'm going to draw two flowers on it. I'm going to film this. But as with the previous module, I am not going to talk
you through it because I've demonstrated that
now, you can play with it, but I'm just going
to show you how I'm just using these cards and making two extra
cards so that in the end, we have three pretty cards. Alright. Yeah, so I'll be drawing and then once
I'm done, I'll be back. Two. Alright. I'm done. I've created three
pretty cards now. The first one, I just walked
you through it and showed you how to do it with that
sanguine colored pen. Really nice one, looking great. Then I created a second one with these puppies and with
my favorite brush pen, and I set it up
with pencil first, but then I did the
third one, and I just didn't do the pencil. I just did it free hand. And once you get
comfortable with brush pen, you just don't need
that pencil anymore. But you can do it right away. Now, of course, that
takes some practice. You're not going to wake up one day and just
do a pretty card. No, you need to practice
with the pencil first, and then slowly taking the pencil away and just
giving it a try, okay? Well. But if you're not
comfortable drawing free hand, hey, the pencil that
works great, too. No problem. Well, okay, that's it for this lesson. I got some nice cards. Now it's your turn to
create a pretty card. Use photo references, use the photos in the notes in
the book of notes I have, and create your own
beautiful cards. And you might create them
with somebody in mind. What is their favorite flower? And just take that
favorite flower, go outside, sketch live, buy it at the store, or take
photographs and just create it and just give the person their favorite flower
as a lovely card. Okay, many ideas, many things
you can do with a card, and you don't have
to stop at the free, of course, you can do
as many as you like. Well, enjoy it.
Have fun creating quick sketch greeting
cards with a brush pen.
 Benjamin A, Art Teacher, illustrator Art by Benjamin