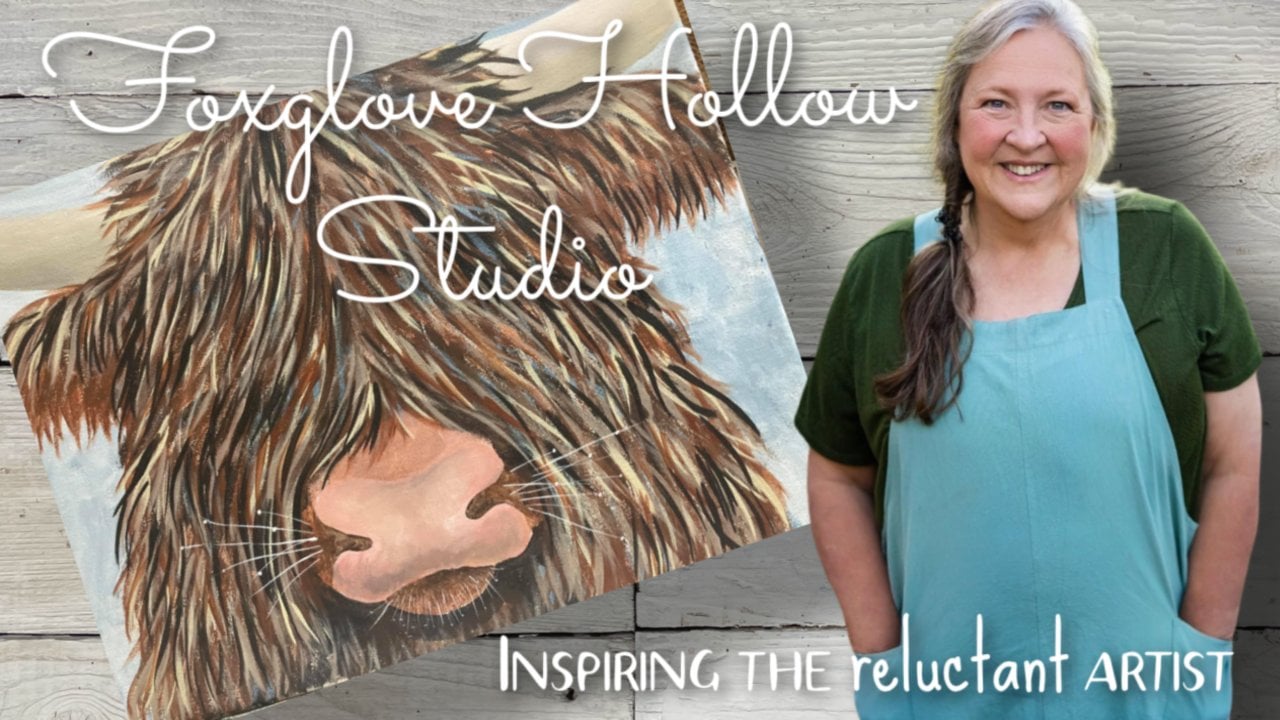
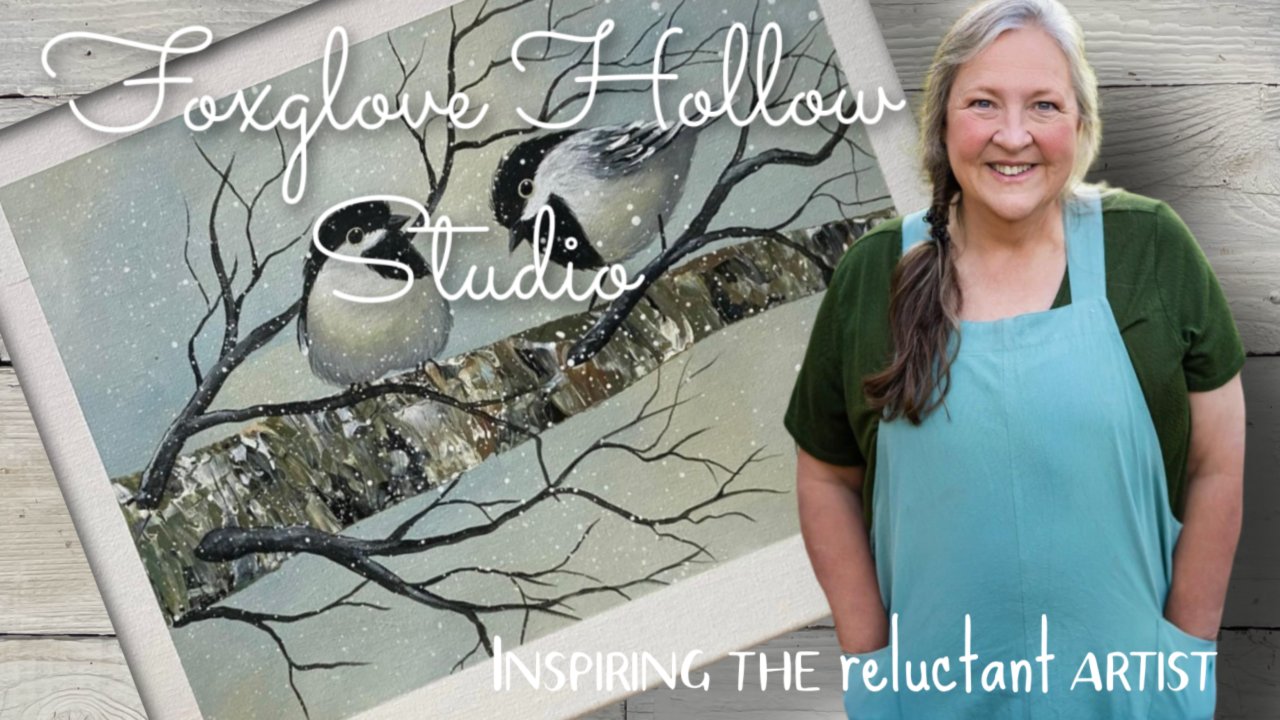
Transcripts
1. City Lights Intro: Hi everyone. Welcome to
foxglove hollows studio. My name's n, and
I'm painting from the beautiful Karl
Marx Valley on Vancouver Island on the
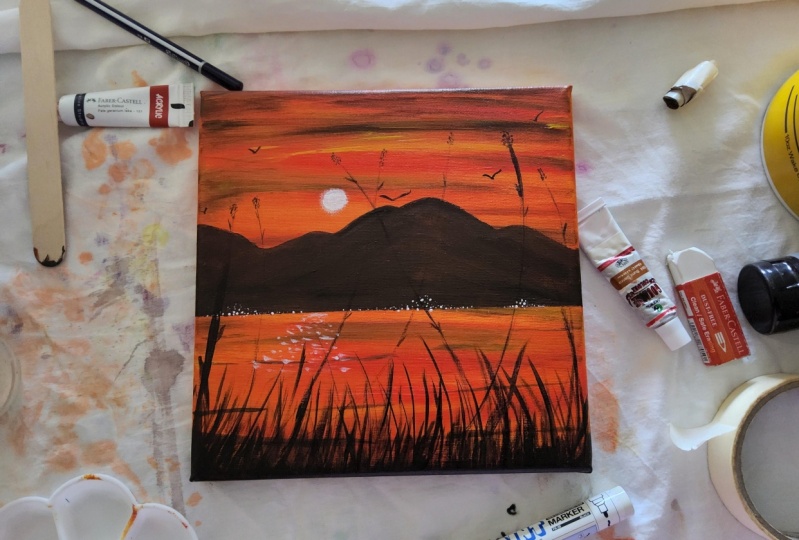
West Coast of Canada. This painting, the packs are really big punch with minimal
supplies and minimal tools. It's perfect for the beginner. You will need black, brown, yellow, red, and
white acrylic paint. Craft paint is just fine. A palette, clean water, paint, break, a fine
round liner brush, a small flat brush, kitchen sponge, blow dryer, Canvas, and masking tape. I've painted this one
on an 11 by 14 Canvas. Or you could paint it
on any size you like. Teach you how to paint a stunning sunset using
a simple kitchen sponge. How to paint a moon
using your finger. And an easy way to
get a nice fine line. When you're all done. Don't forget to
post your painting. I love to see my students work. Let's get painting.
2. Sea and sky: We're going to
start off with some yellow and some
red. There we go. This is acrylic paint.
It's not fancy paint, It's just acrylic craft paint. Use this sponge, which is just a kitchen
sponge that's been cut up into eight pieces. Just synthetic kitchen
sponge, nothing special. I'm going to soak
up some yellow. I'm going to dip into
a little bit of that red, just like that. And I am going to, in horizontal strokes, I'm just going to put
this on the Canvas. This is going to be different
every single time you paint it because it's mixing on the Canvas. A
little bit more. Cover the whole canvas with it and see how I'm going right from a tape. All the way over. This is such a quick
paintings there. Now we're going to want
to put two coats on it. Don't get too, too
fussy with this. In fact, too fuzzy on
the whole painting. I'm good enough. I'm going to blow dry
that now blow dry really well because we're going to put another coat on here. Do that again. Load up with a yellow. A little bit of the red
across our painting with it. More red will leave this streaky three key, streaky sunset. We go. Good enough. Now I'm gonna take a
little bit of brown paint. Just a bit like that. I'm going to put
it on my sponge. You can always put
more on, take it off, and I'm going to streak
some of that into the top. This is going to be like
our night sky coming in. Constricted couple of
streaks through here. We don't want to do this at
the beginning when we're mixing the red and the yellow on the sponge because
it takes over. When I get down here where
my water is going to be, I'm just going to put some
horizontal strokes as I can get maybe a bit more. It's leaving these streaks here. Put a little bit more yellow
and red up here, I think. I think I want a little touch more red or yellow in there. Totally up to you. You build your sky
the way you want it. Kind of nice having
that street going through a little
bit more over here. Maybe. This point I'm just
using the edge of my my sponge down here too because it
wouldn't be reflected. Maybe not quite as bright. Okay, that's good enough. Now, I'm gonna give
that another blue tie. Gonna put tape on it next. So you want this really dry. Let's do that again. Load up with yellow. Well, a little bit of the red across our painting with it. More red will leave this streaky three key, streaky sunset. We go. Good enough. Now I'm gonna take a
little bit of brown paint. Just a bit like that. I'm going to put
it on my sponge. You can always put more on. It's hard to take it off and
I'm going to streak some of that into the top. This is going to be like
our night sky coming in. Streak, a couple of
streaks through here. We don't want to do
this at the beginning when we're mixing the red, the yellow on the sponge because it takes over when it get down here where
my water is going to be, I'm just going to put some
horizontal strokes as I can get maybe a bit more. It's leaving these streaks here. I'm going to put
a little bit more yellow and red up here. I think. I think I want a little touch more
red or yellow in there. Totally up to you. You build your sky
the way you want it. Kind of nice having
that street going through a little
bit more over here. Maybe. This point I'm just
using the edge of my my sponge down here too, because it would be reflected. Maybe not quite as bright. Okay, that's good
enough. Now, I'm gonna give that
another blue tie, gonna put tape on it next. You want this really dry.
3. Masking the horizon: All right, that
should be dry enough. Going to find my horizon line, which I think going
to run along there. Make that as
straight as you can. Anchor it down and then just put that sponge that have
the same color on it. Just a snippet along there too. And that should help us
get a nice clean edge for that as well. You've got a week blow dry, and then we can put
our mountains in.
4. Painting the mountains: I swear there's more blow drying in this painting and
there is painting. Here we go. I've got a flute, just a flat brush here. I'm going to take
a little bit of black on my palette,
not a whole bunch. And I'm gonna take some
of my brown scoop, my red little scoop, my yellow mix that all together. Take a little bit of
black. And the goal here is to get something
darker than our sky. Not really super, super dark. We want it to show
up against our sky, but we don't want to
tell you very black. There we go. That should
do it right about there. Let's say it was quite see how dark it looks
when you put it here. Better, close the curtain
a little bit more. Ashamed to block the sun out. But now I'm going to make
ourselves some mountains. You can make mountains that are pointy or you can
make mountains that are more rolling whenever
you like your world. That's what the
mountains look like. Here. This is kind of like
we look at our window. If you made these rounder, it looked like maybe up
around a Soyuz in a lake. When you're doing this, try to keep this top edge of
your mountain here. Try to keep that good and clean and crisp against
the background. We go Pretty good. Now you'll see that
there's some bits of Canvas still showing. So I'm going to give
that another coat. But first, you guessed it,
we have to blow dry it. I think that looks
like I'm probably gonna have to mix up
some more paint here. I'm not going to last me. Just close. If you
have to mix up more. It doesn't have to be
exactly the same color. Something closest good. I'm deeming that close enough. Be very careful
along that top edge. Nice and clean and sharp. Good, good thick coat on there. And now we're gonna
cross our fingers and we feel this tape off.
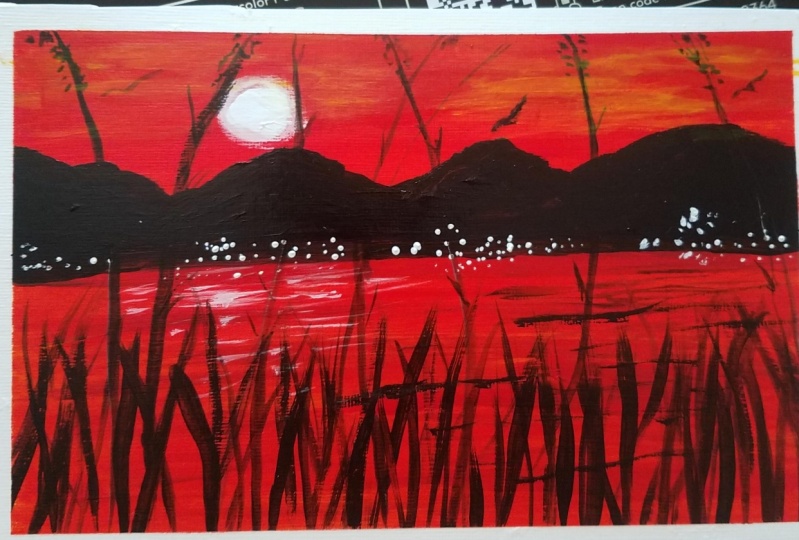
5. City lights: Now what we need to do, find a tiny down with white. We'll put a little
dab right here. Just like that. With your pencil or a toothpick would work. Just put a little bit of white paint on the end
of my pencil here. Dragging my hand through here, I'm just going to lightly
put a few dots here. And this is going to look like little town on the
other side of the water. Put some some lights
in the water as well. Look like things have been
reflected from the town. It'll have big
lights and lights. And of course, as
you get farther and farther out of town, the lights get farther
and farther apart. Easiest way to build
a little town. This a little bunch there. Let's say that there
was a bunch of trees along the shore there and then another little bit of us, maybe it's subdivision
or something in here. Some pink dots and some
little dots. There we go. Don't forget to get some in the water because they
wouldn't be reflected. The same over in this
sort of vicinity here. Maybe this is just a
little little community just down the shore, a little bit in the water. And then maybe along here. There was a few houses lined up. There we go. A few
more than water. There we go. There's our little
village or town, I guess it got quite big easy as pie just
with your pencil. Some dots of white moon in here.
6. Ripples: All right, so might as well, while our paintbrush is
still dirty with this color, we're going to put a little
bit of waves in the sea here. I would like to turn it, turn my painting when I'm
making a straight line. I'd like to turn my
painting sideways, but you don't have to do that
if you don't want to load my paintbrush up here and
it's still that flat one. Load it up with
this mountain color we used stuck the bristles. I've kept the Bristol stuck, stuck together like that. Going to be painting
not this way, not broad with the chisel edge. So it's going to
make a thin line. I'm going to keep it
as straight as I can. I'm going to come across
here in a thin line. I'm just lifting my paintbrush up every once in awhile
and pressing down a little bit hard or every once
in awhile. Just like that. The closer I get to the, to the foreground is painting fat or my lines are going to get
comes from fat ones. Stagger them. I don't want it looks like
it might have gotten a little bit crooked, so I'll just make fat are there that should
straighten it out. Then maybe one down in here and this
one's really fat one. To make them fat, I'm just pushing pushing down
on my paintbrush so it spreads those personal zone. Here we go. 21 more, probably not. Let's take a look. There we go. Now we've got some
waves coming in. Which is quite nice. I think I want to fix
that right there. Not really, really thick. Just come in from this
side, press down a bit. There we go. That's good enough.
7. The moon: Might as well do it while we've
got the white paint here. I'm going to take
my white paint, different finger into it. Dab it off a little
bit so I don't have a whole bunch of my finger. And I'm going to put
my moon right here. Put a dot down, and
then I'm just making a little circular motion
with my finger like that. Dhap it off so you don't have a whole bunch of paint on it. And it's going to make a sort
of hazy outliner around it. Then I can get right
back in again. And I can put a
dot in the center. Might've been a bit
too much paint. Just so it's a
little bit brighter in the center of that moon. There we go. A little bit, a little bit
of atmospheric haze on it.
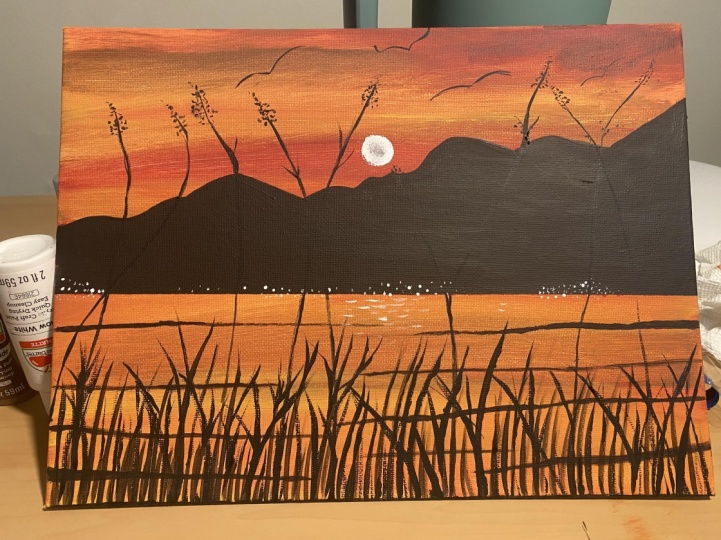
8. The foreground: This painting just nips
along speed of light. Go right back to my back, to my flat brush. Some black on the tray here. I'm going to mix a
bit of water into it like that and flip my
painting upside down like that. And now we're going to
work on the foreground. I like to flip my painting
upside down because I like to pull my grasp this way. I'm using that same chisel
edge of my brush like we used with the waves. I hope my brush really close to the end gives me more of
a reach with my brush. That's harder to be fussy. When you're holding your
brush like this because you don't have quite
as much control. Good when you're painting
grass because for some reason, very often, I just want to make it look like it's all the same length. Ends up being the same length. Even if you are telling yourself don't make
it the same length. Crossover, coming from
different directions. Little bit of water
and our paint makes the makes it easier to get a nice thin
mine or thinner line. We go because we're using
straight black which is darker. The mountains, hills,
whichever we've painted, because we're using
straight black, it's going to look closer. And so we've got
even more dimension in our painting to make a few
of these little bit higher. Not the same. Not
the same length. Boring if they're
all the same length. There we go. Now when I flip this,
you'll see how much that has pushed the
background back. There's our grass,
There's our background. Now what we're going to do is
dry it. Fairly well-known.
9. Orchard grass: Let's put out that little
pointy brush again. Some black paint with some
water in it. What's inky? Need it to be. Because we're gonna make
some long skinny grass. Drawing that off. The
flip this upside down. Like that. The, I am going to rest my hand on my canvas and as I do holding my paintbrush
straight up and down. I'm going to give
myself some grass. Nice long orchard grass.
That's a long way. Try to be random about this. It's hard to be random and
quite often because you just automatically want to make
everything even patterned. Know why that is. Random is probably one of the
hardest things to do. All right, so we've got all of these nice little blades of
grass or stems or grass, maybe I'll put a few more
short ones down in here. Now we're gonna do is
just take a little bit of that paint on our brush and we're going to
make little dots. Very ends of our
grass like that. Like it's gone to seed. The ends of all those graphs, bits that are sticking up there. Such a warm, warm painting. The last of the summer. Dots are just insert
a triangle shape. We go quite nice that dark against the
brightness of the sky. Going to run down
with a little flick. The sides. These
grasses, just like that. Just a little flick up black little leafs sticking off
the side of the stem. Ok. Now take a look right here. See, maybe I can hold this
up so you can see it. See that, and that some dots in here from
where I splattered, this is your opportunity. If you splatter in your sky, your opportunity to put a
little bit of wildlife into it. So here is coeval. I got to put one
on this one too. I start from the center
of my seek ulcer. Serve them mustache shape. Let's start from
the center of them. Then work out so that the point my my brush ends
up as the tip of the wing flying around
their lovely 1234. I'm going to put one more.
You can't just have four. There we go, five seagulls all happily flying
around in the dark. In the almost dark.
10. Sparkles: Let's take a little
bit of white. Little bit of white.
Add some water to it. Just still using your
little tiny brush. I'm just gonna put
some little dashes. The water here. Like the moon is shining
in different places. Water. Just a little dashes. Dots in 12. Sparkles. Quite nice. There we go, Just like that. Guess what? Paintings done?
11. The grande reveal: Super easy, super fast. Now let's see what it
really looks like. I'm going to peel the tape off. Loved this part. This is like framing, painting. Having to buy a frame. Sticking myself to myself. There we have it. Lovely little. Last of the summer scene. Down here. I got a little
bit of paint under there. But when it's dry,
I can pop over with my paintbrush and just touch
that up with some white. All that's left
to do is sign it. Sign mine right here. There we go. There's our
beach grass painting. When this is completely dry. If you have any pencil marks on it from your marked
for your tape, you can erase those. Anything that needs
to be touched up like that, little spots. Maybe that needs to be touched
up with white as well. You can just tape it
and then touch it up. Put a good coat of a
classy varnish on it, and you will be so, so happy and proud of yourself. Thanks for painting with me.
 Anne Clarkson, Inspiring the reluctant artist