Transcripts
1. Intro: You landed on this course. It most likely means that
you have a new ipad. Congratulations, by the way that you want to get
creative with it, but don't know where to start. Well, you landed on
the perfect course. Because this course is made for the traditional artists
who are going digital. But need to learn the
ABC of procreate, the best digital art
software for any ipad. By the end of this class, you will not only learn the most important
things in procreate, but I will also guide you
step by step towards creating your first digital illustration with as much ease as possible. All you need to get
started is a charged ipad, an apple pencil, and one
of your old sketch books, because we will take
inspiration from that. Hi, Hello, I'm Lara. I'm a digital artist and a
children's books illustration. With over six years
of experience in creating professional
work in procreate, you can find me on Instagram, at Lara, underscore Artistcape. And I would love it if you
tag me on your stories. So I know that you are
watching this course. You can also tag
me if you're post your art inspired by
any of my courses. And I will definitely
give you a boost. Okay, let's not
waste any more time and jump into the actual class. I will see you in
the first lesson.
2. Preparing the iPad: Hello and welcome to the
first lesson of this class. I'm sure that if you are
watching this course, you probably have a new ipad. And that in itself
is so exciting. I would love to see or know
which tablet you have. So feel free to
mention the model or post a picture of it in
the discussions below. But I also know a
secondary feeling after such a big
purchase like this. You probably don't even know
how to start to use it. And you start
feeling guilty about the pricey purchase
that you just made. Been there, and
I've done that and I've got a shirt. No worries. It's actually a
psychological feeling called the buyer's remorse. If this is your first
ipad and you got it because you want to start
tapping into your creativity, the good news is that there's a lot of opportunities
to do that. The bad news, however, is that you don't know
what you don't know. And I'm here to help you
to get to know your ipad and what it can do for you
from a creative standpoint. I promise that once you realize the potential
of your device, you won't want to stop creating. I don't want to overwhelm you. So we will take it step by step. It's easy to follow and
no one is rushing you. Take your time and learn
everything you need to simply enjoy the process of creating in a different medium from
what you are used to. You need to get started
is obviously an ipad, which I assume you
already have if you are watching this
an Apple pencil. Otherwise it will be
pretty difficult to control your strokes
and procreate, which is the best app
for drawing on an ipad. You can find and download
it in the app store. It's only 12, 99. It's a one time purchase. And you get all the updates for free whenever they happen. After you finish
installing procreate, I will see you on
the next lesson, so we can get started with it.
3. Using Procreate: Come back to this course. In the last lesson, we got the Procreate app
from the app store. Hopefully we have our
tablets and pencils charged. It's time to get started. In order to use procreate
for the first time, you will first have to learn how to navigate the interface. If this is your first
ever drawing software, you might not know where to
look or what to look for. In this lesson, we will
cover a few basic things. You will need to know how
to create a new canvas, setting the dimensions,
the resolution, choosing the color profile. And I will show you the menus, the brushes, and the layer
menu. Let's get started. Let's take a first
look inside the app. When you first open it, you will have some default artworks that come with the app after
you use it for a while, you will have lots of
artworks to scroll through. Up here on the right side, we have a few buttons that
help us organize our files. Right now, you don't
really need any of these since you don't have any
artwork of your own. But what you do need is
this plus button here. Whenever we want to
create a new canvas, we will tap on this plus icon here and the menu will pop up. This is where you
can choose from pre existing canvas formats or from recent canvas formats
that you have used. Again, this is your first
time using the app, so you will only have the
recommended default sizes like square four, k four, and so on. You can see that each canvas has the dimensions mentioned and another information like
P three, SRGB CMYK. I will explain what
those are shortly. Now let's make our
canvas from scratch so you can see everything
there is to choose. When opening a new canvas, tap on this icon on
the top right corner next to the new canvas. Next to new canvas. Our screen will now change
and prompt us to choose the basic info about our canvas respectively
what size we want it. If I'm just drawing for myself, I usually go for 3,000
by 4,000 pixels. You can see that next to
your number pad on the left. You can change the unit that you want to print
your canvas in. You can use whatever is more comfortable to you,
and of course, if you know you will
want to print your art, it's easiest to go for an
inch or centimeter unit. Pixels are more for artworks that you
intend to keep on line. By the way, if you want
to post on Instagram, the dimensions for
a portrait size are 3,250 by 4,050 pixels. Okay, so we have our dimensions. Let's also choose the DPI. Dpi stands for dots per inch, and the more DPI you have, the better quality
your artwork will be. Generally, a DPI of 300
will be more than enough for artworks to post online
or that you want to print. Now, depending on your
ipad model and on the size that you want to make and the DPI
that you select, the layers number will change. That means this is the
most that procreate and the ipad can do for you with the type of
tablet that you have. Now let's go to
the color profile. You see that you can choose
between RGB and CMYK. Rgb stands for red,
green, and blue. And it's the color profile
that allows you to have more vibrant colors that can be seen really well on screens. If you want to keep your art
digital and not to print it, this is the profile to go for. However, if you want to print, you will need to use CMYK, which stands for C and
magenta, yellow and black. And this is the color profile that printers know how to read. If you make an artwork in
RGB and decide to print it, you might be surprised
by how your colors are dulled on paper and how a
lot of detail can be lost. Depending on what you
want to do with your art, choose one of the
two color profiles and stick to the first
option in the list below. I will stick to RGB
for this course, since we will only
use our drawing on screen that we worked hard
on building a canvas. Let's create a
template out of it so we will be able to
access it fast. The next time we want
to create an artwork, tap on untitled canvas
and give it a name. I will call my
Skill Share canvas, then tap on Create.
This is our canvas. If you have used
smartphones before, you should already
be familiar with the hand motion of pinching and dragging around
with your fingers. This is also how you zoom
in and out of your canvas. Two fingers on the screen, tap and play around with it. Now let's start exploring
the menu on the left. The first one is
the Actions menu, which also has a few sub menus. Below on Add, you can find all the basics
like inserting a file, ora photo, adding text cut, copy, copy canvas and paste. I think they are all
self explanatory and we will end up using
some of them later on, so no need to go into
too much detail now. Then we have canvas
where you can find various settings
related to your canvas, such as cropping and resizing, flipping horizontally
or vertically. Reference and some
assist modes and guide options won't be using the assisted
versions in this course, but I will be making
another one that will cover everything you need to know about all of
these functions. Moving on to the
sharing submenu. This is where you
will go when you will want to export your
final artwork. To export it, you will choose one of the options
from Share Image. I mostly recommend you
save your artworks as PNG's if you want
to share them online. That way they will
be bigger files, but the details will show better on PNG's rather than Jpeg. One great thing is
that you can also save your artwork as
a Photoshop file, as a PSD, in case you
want to send it to a client or a merchant who will need to see
all your layers. But they might not
be using procreate. They will, however, be able
to open it in Photoshop. All right, then we have
the video sub menu. This is where you can come
back to see your time lapse or export it as long as you have the toggle
button turned on. Then you have the
Preferences sub menu, where you can change
the aspect of your workspace from
light to dark. I personally prefer
the light version. You can change to a
right hand interface, and this menu will move
on the other side. I like to keep my
brush cursor visible so I can see how big the brush
is compared to the canvas. You can see here what it's like with and without the
brush cursor visible. Ultimately, it's up to you, but I find it easier
to have it turned on. You also have all the
gesture controls here, but I personally never really
touched these settings. Okay, moving on to
the adjustments menu. This is where we will come
later in the drawing process. This is where we will adjust colors or add various effects. The Liquefy option towards
the end of the menu is one that I use often even
during the sketching process. Next is the lasso tool, we will use this in
the next few lessons. It basically allows
you to select areas of your layer so you can do
different stuff with it. You can select things on
the canvas manually with the free hand option or in a
rectangle or ellipse shapes, I use the free hand the most, but we will exemplify later. The last option on the menu
here is the selection tool. Which won't work for now
because our canvas is empty. Let me scribble something
really fast so I can show you. Okay, so you can see that it now selected my
whole scribble, which I can resize fit
to canvas and so on. Let's reset. This is how
our layers menu looks. You have a background
color always, which I tend not to touch. Maybe at most, I will
hide it at the end. Then we have the
layer that we just drew on that has the
pink scribble on it. Okay, now let's undo so we can have the fresh canvas again. In the next lesson, I will show you the brushes
that you get for free from procreate and how to use them. I
will see you soon.
4. Brushes: Welcome back. The last
lesson was very technical. I know for anyone who never touched procreate or any
drawing software in general. But in this lesson,
we will start making our mark on the canvas. Now in order to do that, we will start using brushes. Unlike other softwares,
procreate does not shy away from giving you for
free tons of good brushes, which is great, but I know
it can be overwhelming. In the beginning,
I used to spend hours trying to find a brush that I could
feel comfortable with. Again, comfortable, not the brush that does
everything for me as a beginner who watches
may be reels and shorts of artists and
their drawing processes. You might be tempted to
believe that you only need those really good
brushes to really get good. As an artist, that finding
them is the real quest. It is important to find brushes
you are comfortable with. But before you end up downloading 100 brushts
from the Internet, let me tell you that the best brushes are the simple ones. Most of the time, I
use one sketch brush, one line art brush, and one round brush
to color and render. Very rarely will I use texture brushes or the kind
of brushes that make flowers, leaves, trees, and whatnot. I'd rather draw everything
myself most of the time. I will show you
which appropriate standard brushes you can
use at first so that you don't have to try
them all out and shorten the time before you
create your first artwork. Then if you want to buy
some really good brushes, I will recommend a few in the next few lessons
of the course. Of course, you can download for free my own essential brush set, which you will find in
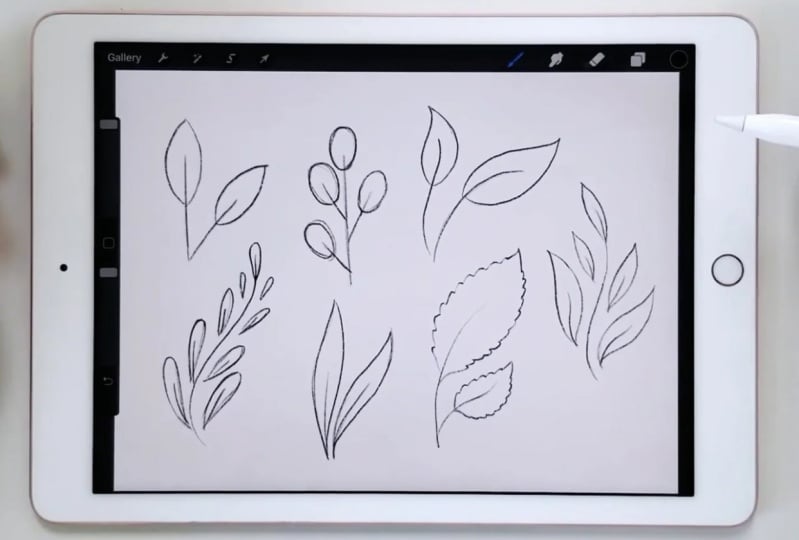
the resources section. Okay, so as I said, let's make four categories of brushes and test out a few of them
to get you started. We will have sketch brushes, liner brushes, coloring
brushes, and others. Let's start with the sketch. Brushes procreate, literally has a sketch section where you can find some really good brushes. A fan favorite is the
six B pencil brush, which imitates really well the texture of a
real six B pencil. Let me adjust the size of the brush and here's
what it looks like. See, it's very
granular and you can almost fell the texture
as if it were a pencil. And speaking of which, procreate has a really awesome feature. If you use the apple pencil, just like real drawing, you can get different textures depending on how
you hold a pencil. Drawing with a tip
will get you this, but drawing with the
side will get you this. I found it really cool
when I was starting out, even if I never
really get to use this awesome picture in
my current workflow, but knowing it's
there is great in case I just want to
sketch away some day. Now let's try the HB pencil, which is lighter in both
density and texture. Let's also try it on the side. Now let's try the
Narinder pencil, which I think I like
the most so far, it somehow feels
creamy when using it. Now, another sketching brush you can use is the one
that I offer for free, which is lighter and softer. It doesn't have as much
texture as the other ones, and it's easy to start creating big shapes and slowly
add details with it. Let's move on to the
line art brushes. There are a lot of
line art brushes you can use from
the default ones, you have an inking section and the calligraphy section
that you can choose from. Let's test out a few from the inking section and
see what we like more. As you can see, the linear
brushes tend to be really sensitive depending
on the pressure that you apply on the pencil. Which is good because
line art needs to be precise and needs
variation and line weight. But don't worry, we have a
dedicated lesson for that. Okay, we tested a few brushes
from the inking section. Now let's try calligraphy. I like the stabilization
and precision from the calligraphy
section more than I like the ones from
the inking section. But let's choose a few brushes to add to the line art section. The first one is mono line, which I think is perfect
for when you need a stable brush with no line
weight and no texture. There are times when you
might need one of these, I'm adding it to the list, then I want to add the chalk. One. I really like the texture and the
stabilization level. If you want to
create textured art, this will be perfect for you. Next is the shale brush, which has a similar
stabilization as the chalk, but with a less texture. I also want to add a Gelsinki
brush from the Inc section because this is what a lot of Inc artists use with real tools. It's a bit difficult to master, but it's a really good brush. Finally, my own line art
brush, which I always, always used to
create my line arts, the one that you
can download for free from my essentials package. It is a creamy brush with great stabilization and
only a bit of texture. Now for the coloring part, coloring is usually done
with large brushes. I will start with a round brush with a bit of opacity variation. That means that the harder you press, the more opaque it is. We can compare it with
a hard blend like this that has less
variation in opacity. As you can see, if you
want a texture brush, I highly recommend a damp brush. I used it a lot when I wanted a more painterly look
in my drawings. Now from my own brush set, there are two brushes
that I offer for coloring and, or rendering art. One is like this with opacity variation and
a bit of texture. The other one has less opacity variation
and less texture. You can find both of
them in my brush back. Now, to show you a
few other brushes from pro grade that
I occasionally use, depending on what I'm drawing. One of them is this square grid, which I sometimes use as simple background decor
for my product packaging. Another one is
this wood texture, which I sometimes use
if I have a table that I need texture on
or something like that, then this now texture is really nice as a detail
on the background, not necessarily as snow but more like debris or
stuff like that. The clouds brush is also nice for a quick,
lazy background. This flare is really nice
when you want to add a bit of shine to materials like
metal in your art. If you want to
watercolor effect, you can use this wash brush. It's not the best
on water colors. Malen has the greatest
watercolor brusht, if you want to try those out. I might even make a class on how to use them if
you are interested. Okay. That wraps
up brush testing. I will arrange this
sheet to look a bit more aesthetic so you can download it from the resources
section as well. Now that we have a few
brushes at our disposal, let's get to the sketch part.
5. Start sketching: One thing that I
remember so clearly, when I first got my
ipad a few years ago, I was really worried
that I spent a ton of money and that I
wouldn't use it fully. Not because the
tablet wasn't good, but I was so accustomed to drawing with a pencil on paper, I was becoming better at
it with every new drawing. I was learning new tricks for myself the more I drew on paper, starting on a
tablet, basically on a glossy slippery screen with a plastic pencil tip
instead of a rough pencil, Everything would change and I would have to start from zero. Starting from zero is scary, especially when it feels
like you are discarding a skill that you worked
really hard on developing. However, I pushed myself
to do it because I knew that traditional
art had limitations. Especially for me for once, I had a limited desk space for all the different
supplies. Two, it was money. Believe it or not, it hurts a lot more
on the long run to keep spending money on a lot
of different art supplies, especially when you want to
buy good quality materials. By comparison, the ipad was a one time purchase that
had everything integrated. Free coloring would
be much easier on the tablet compared
to traditional art. An four drawing full color that I would make in
pencil would take me up to a month of drawing whenever I had the time
for a few hours in a day. It was hard to start,
took a lot of space, and then I wouldn't stop
for a few hours only to cover a small part of the
drawing with digital art. However, you have the whole
color wheel at your disposal. You just need to learn
to use it for me, the biggest issue when
I started was getting to feel natural while
sketching digitally. And I wasted a lot of
time trying to do that. And I was getting frustrated really fast that it didn't feel natural to do it on a screen as opposed
to doing it on paper. I could keep forcing myself to sketch digitally until
I got better at it, but as someone who
works a full time job, I don't have that much
free time to draw. I decided I would
rather go with what I felt rather than what I wanted and basically eliminate
all roadblocks and find a solution to
make digital drawing easy. Method was to start
a sketch on paper, take a photo of it, and
continue digitally. It's that easy. I knew that if I got to
do that enough times, my hand would eventually
learn to adapt to a new medium while working with a style that I already
had developed. It's muscle memory after all. Nothing more, and nothing less. If you are already drawing or sketching quite often on
your sketchbook or on paper, you should have no
problem training yourself to do the same on a
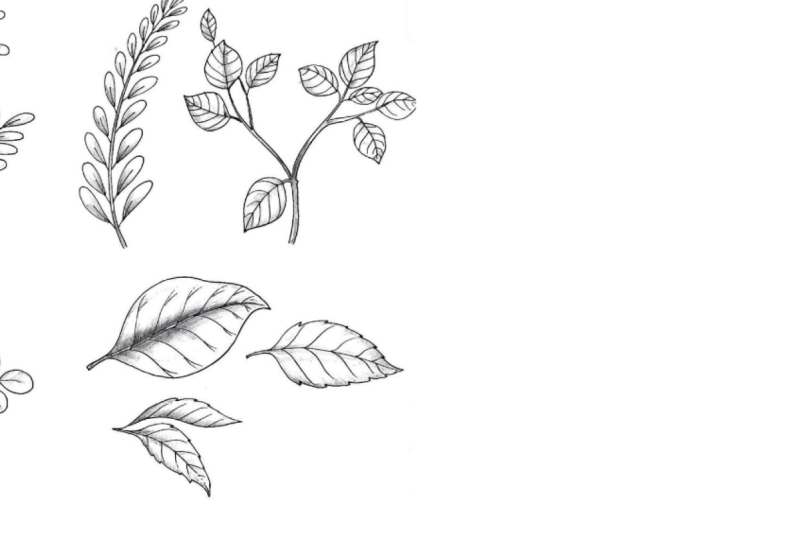
tablet, but do it smart. For this lesson, I will take
a look in my sketchbook and see what inspires me from
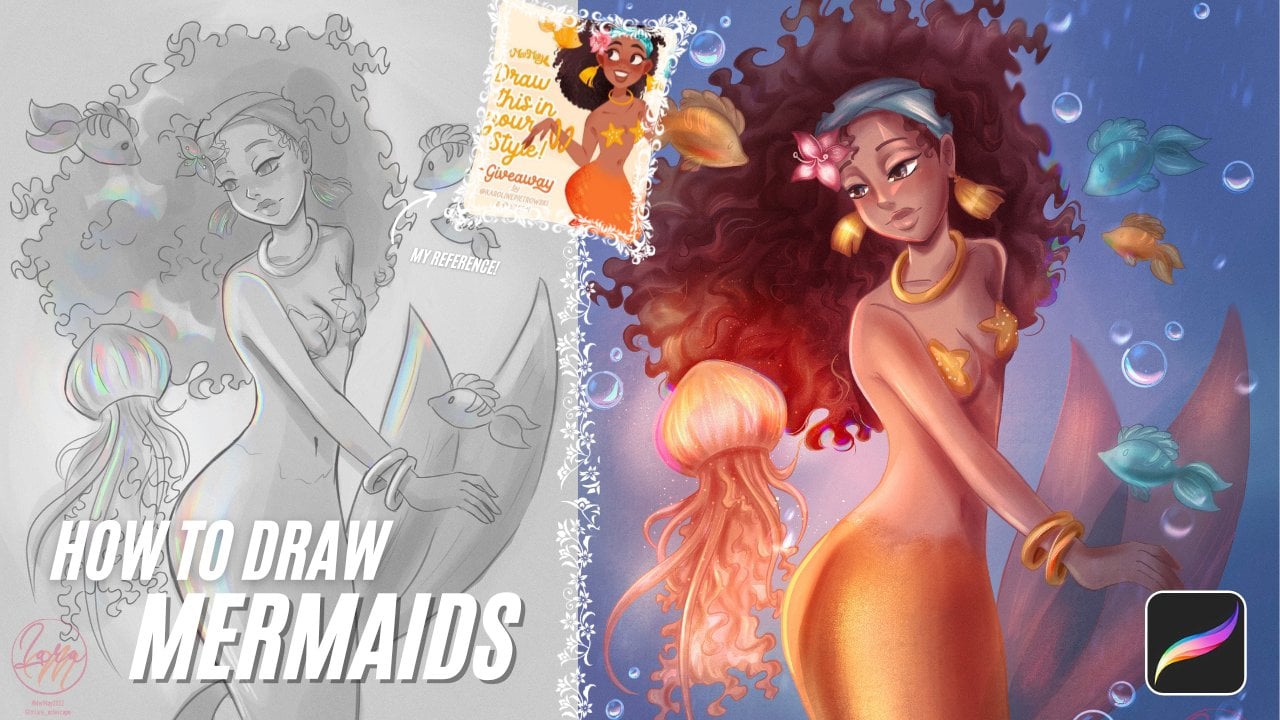
what I have already drawn. I will probably go with this nice lady that I
sketched quite a while ago. Now all that's
left to do is take a picture of this
with my phone or tablet and have it ready on my ipad photo library
on your side. If you would like to start a new sketch or use one
of your older ones, it's absolutely up to you. Just make sure you have a photo ready for the next lesson.
6. Importing pictures: Last lesson we took a
photo of our sketch, and now we can start the real work and
import it in procreate. We already have
our canvas ready. Let's just go to this menu here. We will choose Import. And we will have to allow
procreate to access our photos and then just tap on our earlier
photo to import it. It will automatically
fit to your canvas as long as the imported photo is at least as big as your canvas. Now you can resize the photo
to your liking so that your drawing will take as much of the space
as you needed to. Once you are done with that, I will see you on
the next lesson where we will start drumming.
7. Lineart: In the last lesson,
we decided upon a traditional
sketch that we took a photo of and imported
them procreate. Now let's get started
with the drawing process. First, I need to explain layers because we will
start using them. Layers can be found
in this menu here. You'll always have, by default, a background color layer which will be white when
you open the canvas, but you can change
it as you wish. Aside from the background layer, you also get another
empty layer by default. When you open a canvas, if you want to open new layers, you tap on this button here. Layers are used for keeping
different elements separate. The best example is keeping
the line art that we will draw now separate
from the imported sketch. That way you will be able
to hide your sketch layer after you finish tracing
the line art afterwards, all the coloring
will also be done on different layers if you want to erase some of
the color field, but you don't want to
affect the line art, keeping them separate
will make it easier. Now let's try this out. Let's make a new layer above
the imported sketch photo. We want this layer to be above the photo
so we can see it. Just as if you would try to
trace on a tracing paper. In real life, you keep it
above your reference picture. Now let's talk about
adjusting a layer, starting with the opacity. If you want to have a
layer fully visible, the opacity over here should be 100% But we want to trace
the lines on a new layer. So we need the sketch to
be a bit less visible. To do that, we will play around with the
opacity like this. Now we have our sketch
photo at a lower opacity. It's time to choose a
brush for the line art. I will use the brush that I provide in this course as well. You can find it in the
resources section. Now let's try out to see if
the size is good enough. Now let's make sure we selected the empty layer that we
will start drawing on. You wouldn't want to draw
on the sketch layer and realize that you have to start all over on
the correct layer. Let's zoom in. I'd like to
start by drawing the face. It will take a few strokes
for you to feel comfortable with drawing longer lines without interrupting the motion. The less interrupted
lines you have, the better it will look. I will start with the face line and then continue with the hair. Let's see what it
looks like so far. To do that, we can hide the sketch layer by toggling
this sketch layer off. You might feel
like the line art, you feels a bit odd compared
to the one on paper. What I like to do to make
my line art is to add a bit more boldness around the line intersections and
have a few thinner lines. In some places this is called
bearing your line weight. After you finish drawing the line art and varying
your line weight, it should look a little
something like this. The process of getting
used to drawing on the tablet may involve
a few more exercises. But they are easy to follow and you get to
enjoy the results. So it's worth investing
some time into it. Once you are done
with your line art, we will continue
with the coloring. I will see you on
the next lesson.
8. Easy coloring: All right guys. We now have our first line art
made in procreate. We can pat ourselves
on the back and reward ourselves with
a coffee or tea. We could stop drawing
or we could keep drawing and actually have a finished illustration by
the end of this course. If you are with me on this one, grab your beverage and
let's get back to creating. Remember how I explained in
the previous lesson that you would want to keep
your layers separate. This is what we are
going to do now. We will basically create one
layer for each base color. If we decide we want to change, let's say only the
hair color later on, we can only work with
that hair layer. For this course, I will actually try to name my layer so it will be easier for me to return
exactly where I need to. Later on, I will show you the most basic coloring
method that I know. It's actually the one that I was using when I first started
doing digital art. Let's start by
coloring the skin. We will now make a new layer
underneath the line art. The sketch layer is
completely hidden by now, we won't need it anymore. All the layers with colors
will be placed beneath the line art layer because
we want to be able to see the conor and not
cover it with color. You can rename the
layer like this. Just tap on the layer name
and the menu will pop up. On the left, you can see that the rename
is the first option. Tap on that and just type skin. Now let's select the
color for the skin. We will go on the
top right corner and tap on the colored circle. By default, I believe procreate
shows you the color wheel as a disc with swatches
for palettes underneath. But I personally like to use the classic view of a square. And the bars for hue saturation
and brightness below. On the hue bar,
you can basically select the color range
you want to be in. And then play around on the big square and choose
your desired color. If you feel like your
selected color is too muted, you can make it
more vibrant with the saturation bar and move
the toggle more to the right. You will see on the big
square how the cursor is also moving along to the right to choose a more saturated color. And then there is brightness, where you can play around with how light or dark you
want your color to be. Of course, you can choose
every color manually, directly on the color wheel
or on the color square. But you will end up hearing often about hue saturation
and brightness. So I wanted to explain
what they are. For a light skin, I usually
like to go in between the orange and red hues and select a color from
somewhere up here. Now, in order to fill
the drawing with color, we can do it in three ways. One is more manual
and time consuming. That is to select a
hard round brush, adjust the size, and to start coloring as if we had a
regular coloring book. The problem with this
method is that you would have to adjust your
brush size many times if you have a lot
of fine details and waste time on erasing in case you went
outside the condor. I personally like this
method the least. The second method is
the dragon drop method. Let me exemplify on a
different canvas altogether, I will use a hard round brush and draw the counter
of a circle. It's very important to close the shape and make sure
that your counter is solid if you want a perfect circle after
you close the shape, just keep tapping on the screen. And you will see that you
will have this menu up here. Tap on it and select Circle. Procreate will automatically
adjust the shape for you. Now that we have
our shape closed, you can go to the
top right corner. Tap and hold on
the color circle. And drag it all the way
inside the shape dragon drop. It automatically fills
in the shape you drew. It saves a lot of time. Now let's see what happens
if we don't close the shape. Now let's drag and drop. You see the color
spills all around the canvas in order to one deal. Tap the screen once
with two fingers. Okay, let's use this
method on our drawing. I will make a contour
around the face first. And when I'm done I will simply
drag and drop the color. For this, I use
the mono line that we have previously seen
in a different lesson. See way faster than
the first method. The first method is even
faster in my opinion, and it's the one I use the most. We will use the lasso tool, which we can find here. We will select the
free form lasso. Now we will select
the area that we want to work on
slowly but surely, until we close the shape. But before closing the shape, tap on this button here
that will automatically fill your shape with color
once you close the selection. This method saves
a lot of time and has the least chances of errors. Pretty much any program
has a lasso tool, but procreate is doing it
better because you can take your pen off the screen without
the shape closing itself. When you do that, that's
what Photoshop does. In Photoshop, you would have to cover the whole
shape in one motion. And of course, it will
be hard and wobbly. And you will have to refine it a few times until it's perfect. Okay, so I will now use the first method to fill
in the rest of the colors, each one on a different layer. I will speed it up so
you won't get bored. Now that we have all of
our colors laid down, let me show you the benefit of having everything on
different layers. Let's say we don't
want the hair to be discolor and we
want to change it. If everything was on one layer, we would have to
select a hair shape again and redo the coloring. But since we have it
on a separate layer, we can simply choose another color and
drag and drop it over what we already have
took 5 seconds. Another thing we can do
is apply a gradient. For this, we will learn
what an alpha lock is. Tap on this hair layer, and you can find alpha
lock over here activated. What this does is that it locks
the pixels on this layer, so you can only modify
them. Let me show you. We will grab a lighter color and draw over the lower part of the shape and see it only color the shape of the hair
and not outside of it. Although my brush is big. Great. Now we learned a lot of new things that
will help us with the basic coloring process and it will help us
do it fast as well. In the next lesson, we
will start shading.
9. Shading: All right guys. In
the last lesson, we learned three different
ways of coloring or drawing. Now that we have all
the base colors down, it's time to add some
depth with some shading. There are many ways
you can add shading, and depending on the style
you will like to go for, you might simplify what I teach you or even make
it more complex. In this lesson, I will
show you how to do a combination of soft
and hard shading. But let me first explain
what teach one means. Soft shading is the kind of light gradient shading
that you can do with a semi transparent brush or by blending in
the shading color. I don't recommend using an
air brush for this because it looks unprofessional
and you might be labeled quickly as a rookie. We want our illustrations
to look good, even if we are beginners. The hard shading
or cell shading, as you might hear it referenced, is the kind of shading that
has really obvious edges. You can do that with
a round brush and eraser to scalp
your shading shape. Or with the lasso tool, similar to what we did
in the coloring part. Okay, so those are the basic
principles out of the way. Let's actually start drawing. Let's start with
the skin shading. We will select the
skin layer and tap on the plus icon to make
a new layer above it. Let's tap on the layer and
rename it to soft shading. Now let's select the
color of the skin. To do that, you will
use your finger tap and hold on the screen where you want to do the
color picking. After you hold it
for a short while, you will see the small icon here and a circle with
two colors on it. On the upper part of the circle, it shows the color
you are selecting. On the lower, it shows the color that you
currently have selected. You can move your finger
around the canvas while holding it down to choose
whichever color you want. As I said, we will
choose the skin color. The easy way to
do the shading is to make use of layer modes. Next to every layer, you will find the letter N on the right of the layer name. If you tap on it, a new menu will drop below
the layer's name, and you will see all
sorts of new terms. These are layer modes. What these do is that they
apply special effects to your current layer that will modify the colors
you put onto it, depending on the colors
that you have below it. Complicate, Let's make a test. Let's make a small mark on the character's face right here. You won't see anything
right now because we have used the exact same
skin color as the layer below the N that you see on the layer shows that your
layer is a normal mode. Let's step on the N and
choose another layer mode. Let's choose multiply. This is the layer mode most frequently used for
creating shadows. You can see why, because now the mark we made before is
darker than the skin color. Let's see what happens if we
go on another layer mode. Let's go to Color Dodge. The color is now weight lighter
than what we had before. Color, Dodge, Ad and Overlay are the main modes
that we will use for lighting, but we will get there
in the next lesson. Let's go back to multiply
and leave it like that. We can change the color
if you feel like it's too intense and we can make it
lighter or more desaturated. Or we can even change
the hue to give a warmer impression
or a cooler one. If we go towards the blues, I usually tend to make my shading colors
a bit desaturated. Great, now we have
our shading color and we just have to establish where our light source is so that we can shade
on the other side, I will consider the upper
left side, my light source. We will go on the right side of the face with the shading. Let's adjust the size
of the brush and cover the area of the face that
will be in the shade. You see how my shading is
going outside the edges. That's a really
simple fix for this so that we won't have
to waste time erasing. And that is to make
our shading layer a clipping mask
tap on the layer. And on the menu that appears on the left select
Clipping Mask. Now everything that
we drew before is clipped on the layer below respectively
on the base layer. This will allow us not to worry about going
outside the edges. From now on, we will make all of our shading layers
as clipping masks. Great. Now all we have to
do is blend it nicely. To do that, we will use
the smush tool that we can find between the
brush tool and the razor tool appropriate has
the best mush tool that I know from any fromming
software that I tried. Let's select a round
brush for this and start blending our shading until it
feels like a soft gradient. I will do this from the edge of the shading and go
outside the shape. It takes a bit of practice
to get a feeling for it. So feel free to take
your time to exercise. Okay, now we will do the same for all the other
layers as well. I will speed up the
process a bit while you keep exercising and
I will talk to you soon. Now we have the soft
shading finish so we can start working on
the heart shading. Let's make a new layer above the skin's soft shading and we will also make it
as a clipping mask. Let's choose an
even darker color now with the heart shading, we will try to add more depth
with an even darker shadow. Also, we will be using the last, but we will deactivate the
color option so we can fill it in manually and control
the opacity of the shade. Let's start with ovia, dark places like under the
hair and under the neck. We will make the shape of the shadow with
the lasso tool and then use a soft motion of
the hand to cover the shape. I'd like to control
the intensity of this shading manually
in case I want to press harder in darker areas and keep it lighter
in other areas. After a few selections, we should have something
that looks like this. This is the fully
shaded skin area. Now let's do the
same for the rest. I will speed up a bit and
talk to you again soon. Oh, great. Now we have everything shaded. Our drawing looks great so far, but it still needs more. And for that, we
will learn how to do lighting in the next lesson.
I will see you there.
10. Lighting: The last lesson, we
finished doing the shading. Now the next step
would be lighting. However, we will do
a little refinement. First, let's select
our line art layer and set it to alpha lock. We will change the
line art color to the most immediate color in
each area or slightly darker. This gives off a beautiful,
almost finished look. Let's do that first, and then we will start working
on the lighting. Now that we did that, let's group everything
together To do that, we will take each layer
and drag it to the right. This allows us to select
multiple layers at once. Then we tap on group. Now we have everything
in a folder if you want. That's actually what they
are called in Photoshop, but in procreate they
are called groups. This makes it easier to
manipulate more of them. Now we will drag the group
to the left and duplicate, so we can keep a copy of the original layers in case
we need to get back to them. Then we will tap on the new group's name on the menu that pops
up on the left. We will tap on Flatten. If your ipad could not
duplicate the group first because it got an error of number of layers exceeded, then you can flatten
it directly. What flatten does
is that now you have all the layers
merged into one. It's easier to work with it like this when we
do the lighting. Now let's make a copy of the merged layer
by duplicating it. And then create a new layer above it and activate
clipping mask. Let's also select
these two layers by dragging them to the right
and grouping them together. We will start working
more organized. Now let's set a new layer
to color Dodge Mode. We will start by creating
a large light on the left side of our character where the light source
is coming from. Then we will add more
details every here and there respecting the
direction of the light. In order for your color Dodge
layer to show some color, the color you choose on the
wheel should be quite dark. If I choose a dark yellow, the result on the
color Dodge layer will be a really bright one. Let's test it out.
Let's continue using this color on color. Dodge Mode, just like with a shading part, lighting should also
be a combination of soft and hard shading. Now we will make some selections and fill them in with
a lighter color, make a separate layer,
clip it to the base, put the new layer
on color dodge, and let's make selections. I didn't mention this before and I don't know if you noticed, but I'm trying to
make my selections to follow the shape that
it's on for hair. Let's say there will be long, slim shapes while on the clothes there will be bigger
blobs selected. I will show you how it's done and then I will
talk to you again. All right, so now the lighting
part is pretty much done. Let's see our progress by
hiding this group and seeing what we had done. Not bad. Now let's stplicate
the group and flatten it so we have
everything on one layer. Again, we are basically prepping our artwork
for adjustments, which we will do in
the next lesson. See you there.
11. Adjustments: Welcome back. In the
previous lesson, we finished adding light
to our illustration. Now it's time to do
some adjustments. Let's start with the curves, which we can find in
the adjustments menu. You should play around
with this by dragging different points up and down and see how it
affects your artwork. This tab here controls all
the colors of your artwork. But if we go on the
red tab that's below, it will influence mostly all the colors that
have red in them. Similar for the
other ones as well. I think I will go
for this adjustment. Now let's do gradients. Duplicate your layer again,
but this time twice. Now select the uppermost
layer and then go to the Adjustments menu
and tap on gradient maps. You see that when you choose
any of these gradient maps, the whole illustration changes depending on the map you chose. This is why we made
two duplicates, because the one affected by the gradient will have
all the colors change. We will reduce its opacity and try different layer modes to see if we like how it
affects our other duplicate. I went with this
gradient at first, but I didn't like how it looked with any of
the layer modes. So I will delete a whole layer. Now I will duplicate
the one below again, and try with a
different gradient map. Let's try this one and
see if it works better. Okay, so far I like how it
looks with a reduced topacity. Let's march it with
the layer below and rename this layer
according to our adjustment. Next we will add a
few small highlights, especially in the hair and maybe somewhere around
the clothes in the face. Duplicate the last layer, create a new layer above it. Select clipping mass,
just like before, and put it on add
mode this time. Now I will select
my line art brush, choose a light color and
add a few streaks of hair. The trick is to not add
to many of these in order not to overwhelm our
illustration with details. We can also add a few
lines on the face, but we will blend them
afterwards or partially erase them so as to not
be too harsh on the skin. We will do the same on
the clothes and try to vary our colors
and see what happens. Good. Now we finished
with the details. There's no point in
doing too many of them. Now that we have made
quite a few adjustments. Let's try doing curves
again and see if we like the new version
better, basically. In this adjustments part
of the illustration, there's a lot of trial
and error until we get to a point where you
like what you are adjusting. Now finally, we will
duplicate for the last time, create a new layer and clip it. Choose a big round brush
and a really light color, close to white, but
not exactly white. We can leave the
layer mode to normal. Now go over the left side of your illustration without
pressing too hard. And we only want to powder some light on
our illustration. Now I want some of
the colors to be a bit more vibrant,
especially the blues. So let's make a new layer. Clip it and put it
on overlay mode. Then choose a bright blue. And go over the blue
areas of the dress, see how it intensifies
the blue underneath. Now let's go with a warm color over some of the
parts of the hair. Look how nice it looks. The transition between light and the shadows looks really good. This is our final illustration. Thank you so much
for sticking around. I really hope you learned valuable new information and that you will do your first
illustration as well. More details on your
project on the next lesson.
12. Project: You guys made it all
the way to the end. And I'm so happy to see that. I hope the last part with the adjustments wasn't
too overwhelming. But if it was, you can
disregard it for your project. Your project after
this class is to reproduce on your ipad a
sketch that you made by hand. Follow the steps of the class, take a picture of your
sketch, import it, and do all the fun
stuff up until wherever you feel comfortable with your digital illustration. If that means it's
after the base colors, then stop there If you
want to do the shading, to do it you know best
how far you want to go with it and I'm here
to support you in getting started with
your creative journey. I will ask you to post
your final illustration in the project section
because I would love to see what you made if you
posted on social media. Make sure you tag me at Lara, underscore artist
Cape on Instagram and I will give you a boost. Don't forget to get all
your free materials from the resources section
and start creating. Thank you for
watching this course. There are many more
in the making. I hope I will see
you again. By guys.
 Lara Militaru, Digital Illustrator & Coach