Transcripts
1. Intro: Hi, Amanda mom, a visual artists that
productivity gig and procreate brushes maker and collector above this and I have a couple of
questions for you. If you're struggling
to decide which brush to use in your next
procreate project, you end up always
using the same, even if you know there are
other brushes in your library, you'd like to explore or
user for the next project. You do remember a brush XYZ, that one's left you
with the wow factor. But well, your brush library
is a mess or mystery. You are in the right
place at the right time. This class is for you. I'm going to share with you my current productivity
workflow to feel better around your mind. Many procreate brushes to organize them, to
know them better. And yes, also to feel better as they less guilty when you
get a new brush sets. To do so, we are using
a template that I prepare them and one of the basic element
of heart, the line. We're going to explore the line, but many lines as a way to
test brushes in Procreate, get familiar with them, organize them, and guess what? Even to relax. Yes. I actually tend to do this while listening to audio
books, doing a call, or while I need to
take a break from everything and even to
get more inspiration. Because let's be
honest, I cannot resist to the call of a
beautiful brushstroke. The material, I'm going
to use our iPad with an Apple pencil and
the app Procreate and the template available for free in the resource section. While I'm expecting you to be familiar with Procreate somehow, we'll briefly get
back to some of the basic in the video that will show you how to install and navigate their
free resources. If you had already
scaling these, feel free to jump that part. When you use some of the default Procreate brushes as main
example in this class. So you don't have to be a Procreate brush collector
as someone I know, but I bet that if
you are already one or you might
be in the future, this class can really
be a game changer. So what are we waiting for? Let's get your
Freebase ready from the resource section and
see you in the next video.
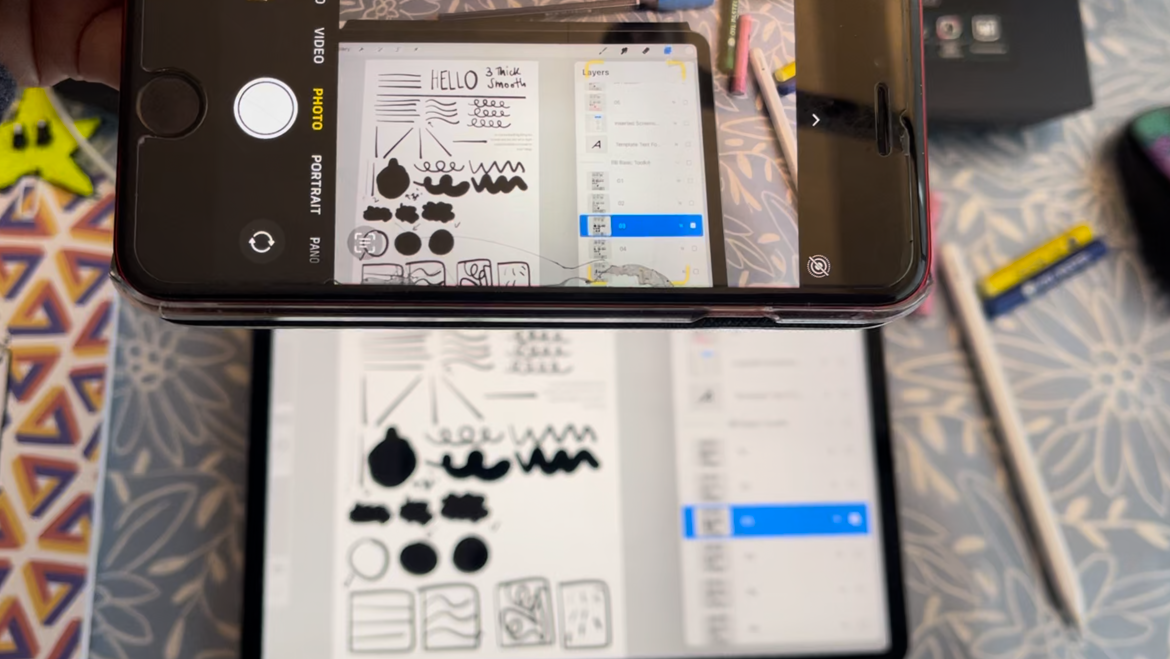
2. Project: As a project, I'll ask you to pause the one of
more screenshot or a photo of your journey in exploring your procreate
brushes library. To do so, e.g. on your iPad, you
could just The Press simultaneously these two button and you'll hear the photo click. Most probably this will
work the same for you. I guess you can just Google it and it's very easy
to find this out. Then in your photo gallery, you will find the photo
of the screenshot and you could share it here
in the gallery session, are also on the social and
you can tag me, feel like it. Of course. Also a photo. If you don't want to
do the screenshot of your hypothesis will
work perfectly. The point is that I'll be
thrilled to know what you discover about your brushes. And I'm sure the other
people here too, where you have a new
favorites with this, even drive you to experiment with new styles in Procreate. If you have a question,
don't forget it to the discussion
part of this class. Because I will be very happy also to share tips
and tricks there with you. But so now it's time to work. In the next video, I show you
what you will find that in the Procreate template
that you'll have access for free
in the resources. But before we begin, I just want to make
a small disclaimer. In this class, we'll be focusing
on traditional brushes. The one that e.g.
mimic panned pastels, crayons, the brushes. While I'll also include a bonus on shader brushes
for you in the file. I won't be covering
the testing of these or for background brushes or
stamp brushes in this class. As I'm still refining my
workflow and template file, I'll be back on this just
when I'm super proud of my system and I know it
will be helpful for you to. However, if you are
interested in those, please don't hesitate
to let me know. Once again, the
discussion section and I will be able to create additional tutorial links and glasses for you. See
you in the next video.
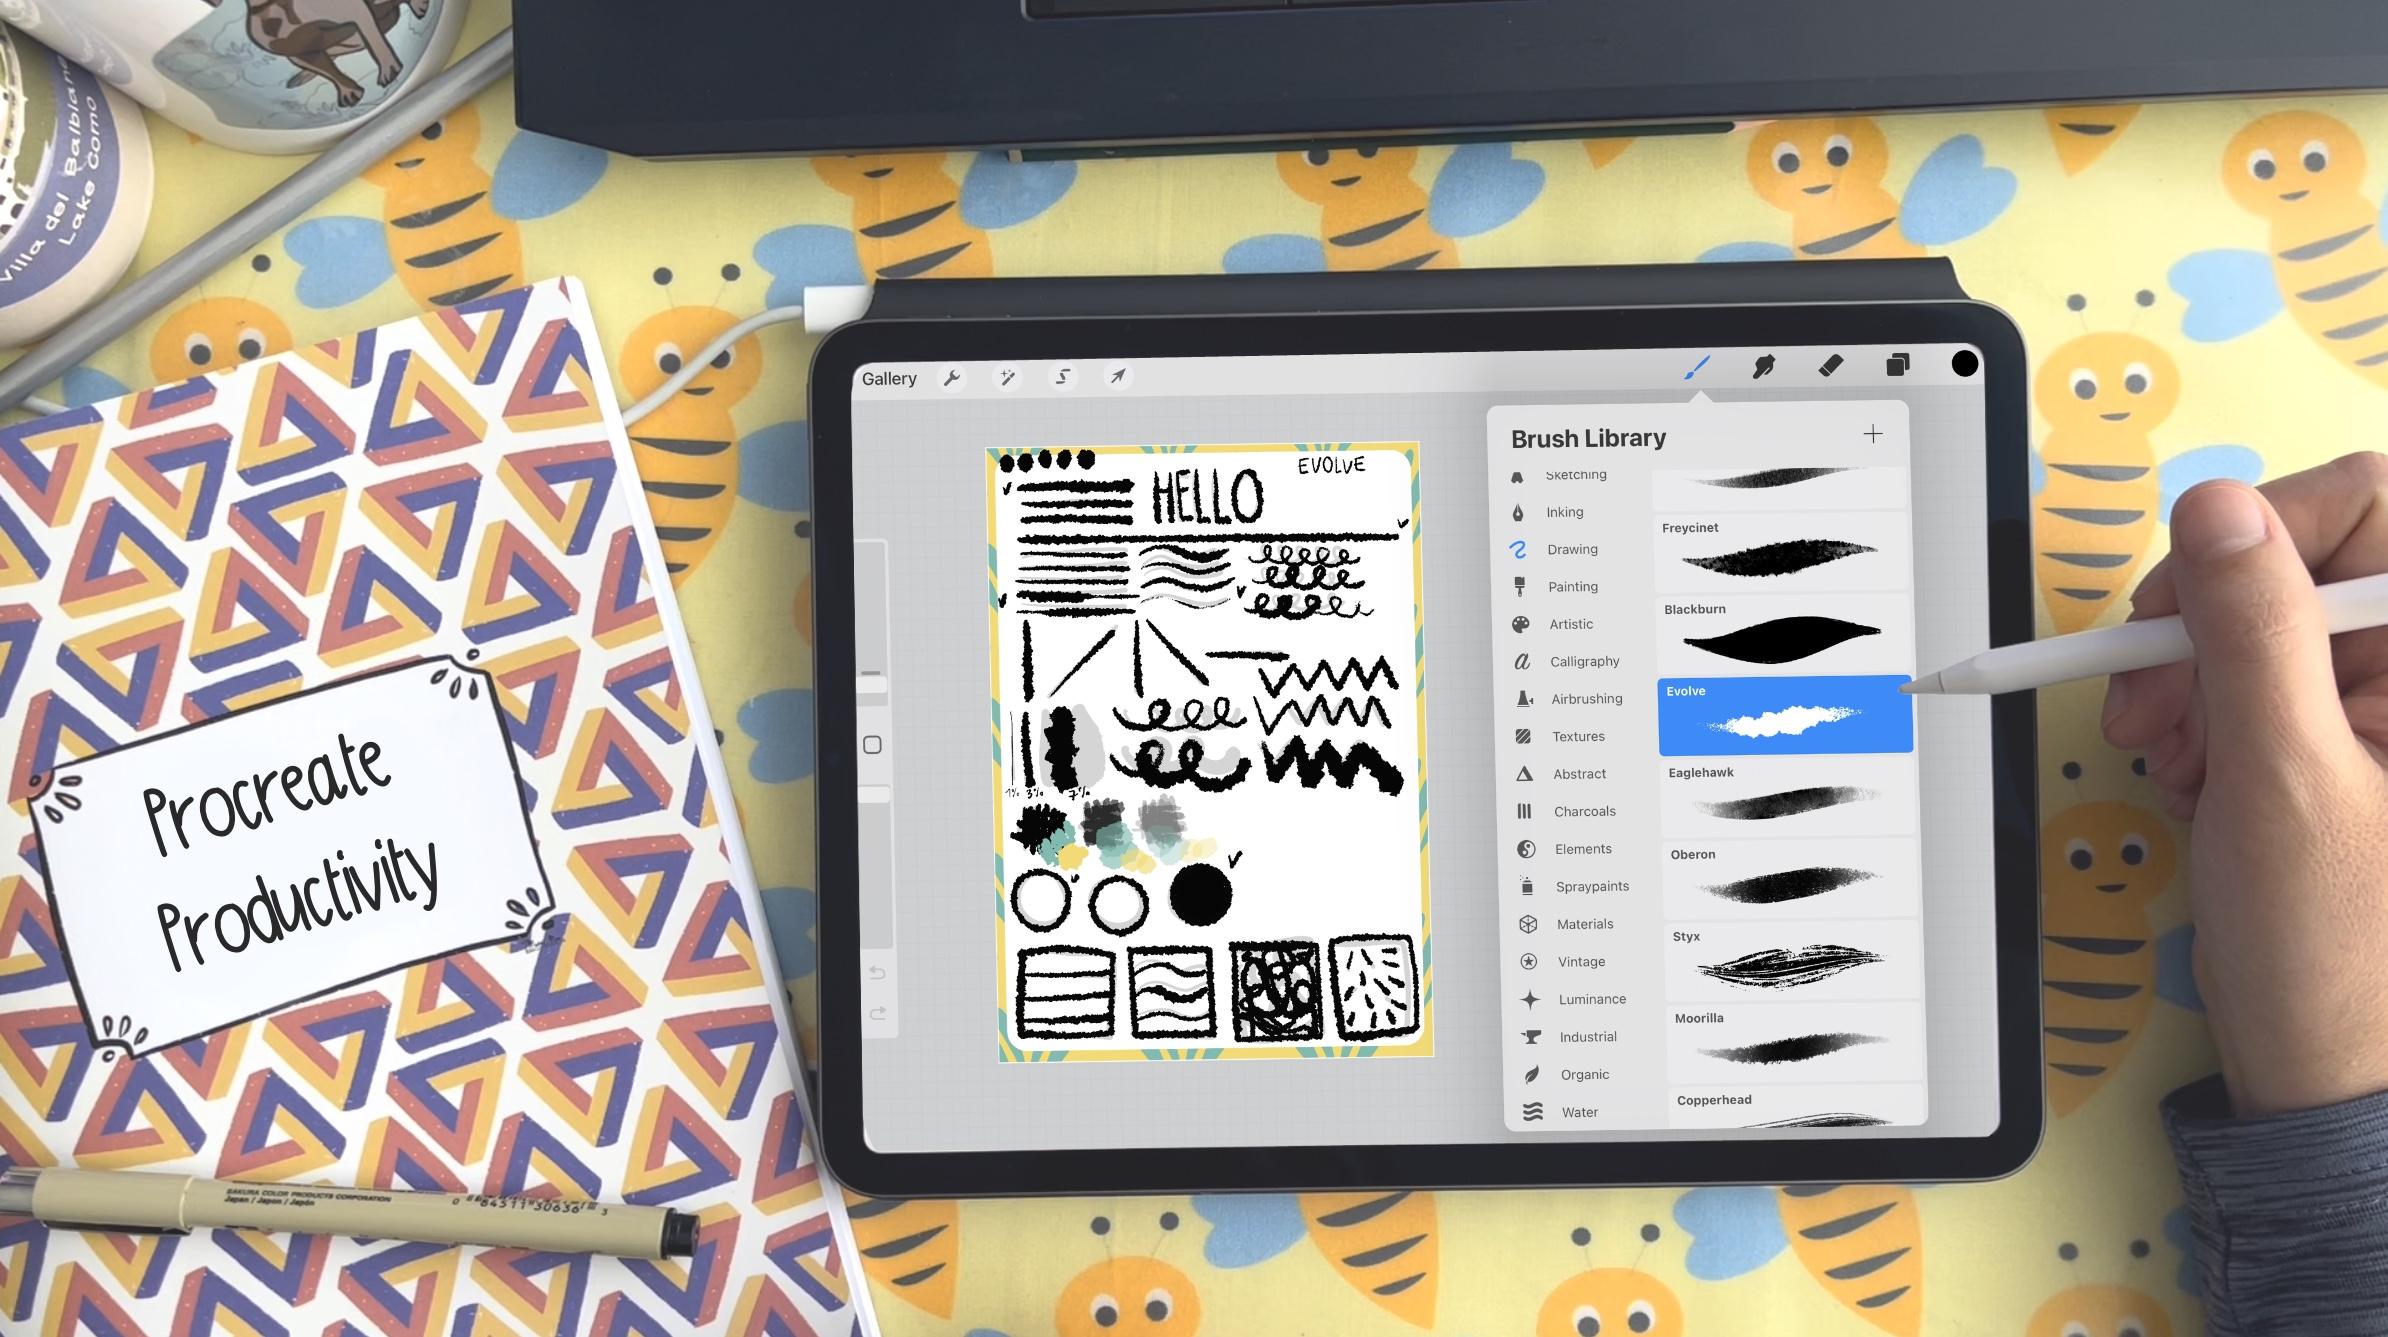
3. Procreate Productivity: At the end of this class, I want you to have
a clear workflow for getting to know in organizing your
current and future procreate brushes
for future uses. To do this, I've created a template file
called brush tester, which you will find in
the class resources. You'll use the
brush tester to do exercise that will help you to get to know
each brush better, but also to develop
confidence and muscle memory with your iPad, a stylus while using Procreate. But also by testing more
brushes over the time, you will be keen to
populate what will become an effective showcase of
your brushes in Procreate, you will have these
effective library as a reference for finding a rediscovering the brush
you really wanted to use for your current projects. As more note about this, getting to know for
real More Brushes doesn't mean that
you have to jump from brush to brush
while drawing. In fact, that those
who already have a defined style that is
usually the opposite. Even in a generic
random project, I tend to personally use 23, at most five or six brushes. Different projects. And new ideas might require a
different group of brushes. As a collector of brushes, I start getting lost
in the library. I was so proud of. I was becoming, it was
becomes so big that even organizing the brushes in the brush menu by
artists or by bundle. I couldn't find the
exact brush that I remember that that left
me that wow factor, maybe doing a tutorial,
but which one? It was too difficult to find them or find the exact lesson. In the end, I end up using the same brushes out of despair. This was starting to
become really frustrating. On top of them, especially as I started to develop my own style. I couldn't remember how and where to use
the brush that I, Marcus favorite wife
following one of my teachers as the same
thing ever happened to you. This was the starting
point from which I develop a productivity workflow
to test brushes and how the brush
tester file was born. With. They hope to help
others with the same problem. I planned it this, this
class to share my workflow, workflow of course that, but also to explain how to use the brush testified itself. Another important aspect, the
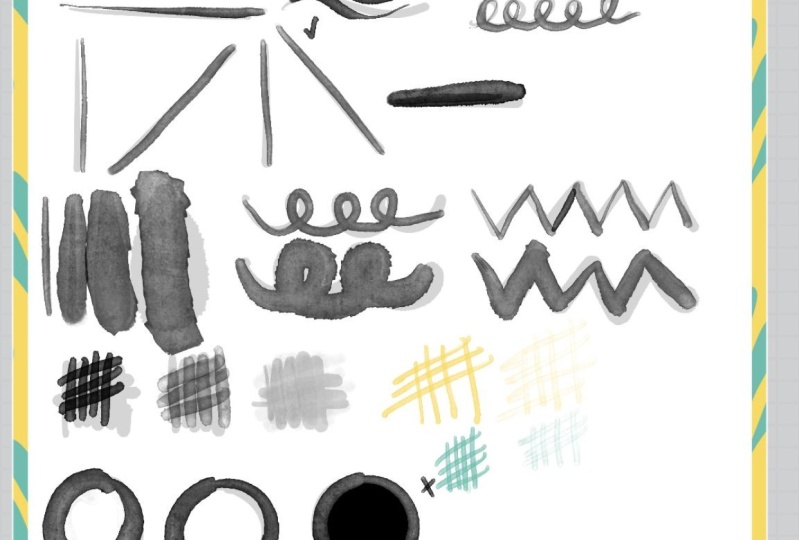
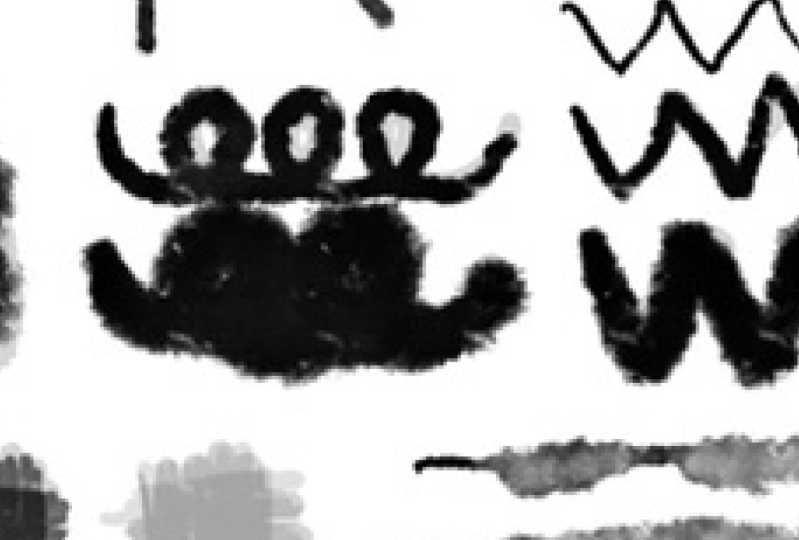
guide I prepare to practice each brush is based in
one basic element of art, the line, what is magic
is that while in one side it is exercise might look childish and they
are in the good way. They might really
help you to uncover unexpected qualities
from the brushes you use more frequently. As a procreate brushes. I assure you these are the
best moment to experience. So surprising, energizing,
stimulating, and satisfying. Try to believe it. My, let's go back
to the file now. This is how you will find it. There is a group
already populated about the sample set of brushes that I'm providing you for free. The model you need to
duplicate for testing your own sets and the guide to exercise and test each brush. In the next video, we'll see how to install the
tester file in Procreate. And also my set of three
stitches, brushes. If you already
know how to import the brushes and
file in Procreate, you can skip the next two
videos and see you soon.
4. Importing files: Now I'll skip to the next video. If you don't need
help her to import a file in Procreate
and the brush set. What we're going to do
together otherwise is to import my template here. So one super easy way to do it is you are in your
procreate library, you will go imported. You will select the
default there where you don't load it
from Skillshare. E.g. in my case is here. And this done, your file, ready to go, He's here. Another way you wanted to do it, and it's super easy to, is that if you are directly in your file system
with the file, you will click it and we'll import it
directly in Procreate. This one works,
That's super cool. Also with the brush set,
that will be this one. So from the file system you
just click it in that on. The brush set will be here. In my case, I have a two times because I already have
it in my library. And you will have
immediately like this. You see in the here you see all the
set that is available. Another way to import a brush setting Procreate is that go to the Brush and then click
the plus button. Important. Again, select your folder. And as you can see now,
easier three times. So my original brush set, the one that I imported before and the one that
I bought it. Now. One last note you want to
check is that wanted to group our brush tester file that you might use for
different types of brushes. So in this case, I
suggest you to do like me to stack them in
a brush that's library. To do so, you just have to
select it and then stack. Once they're done this one, you can just go here
and change it, e.g. this one and call it
with your own name. Like brush library. I hope it out and see
you in the next video.
5. Brush Tester: When you first open my file, you'll see that there are
three groups in the layer tap. The first group is an
example of stats that I ran on my free sector about
the stitches but arches, which you can find
that in the resources. The second group is a basis for quickly and organize ugly
tasting order brushes sets. The third group as the guy that with exercising for
testing each brush. My brush set that, I mean, a group of brushes, group in this way, in Procreate. There are, at least that
doesn't brush sets that are already part of the Procreate
app that we will have. E.g. the one that I use the
most are the Inking set, the drawing and calligraphy. These are the first
set that I recommend you to test it with
our system here. Because at least in my case, they were also the brushes
I tend to underestimate because they were only using certain function for
me before the system. Dustin them, allowing,
following this model will probably allow you to discover new nuance
of applications. Now, back to the example I
tested this set sometime ago. If you're wondering why I just
asked you to test inking, drawing and calligraphy set. And now I'm proposing new
asset of sewing stitches. I reveal the mystery, but allowing me allow
me a brief digression. I know nothing about state
sewing and stitches, but to participate in
Spoonflower Challenge, I needed urgently to know more about it to create my pattern. In the end, as usual, I got carried away and created
this set that was very useful to me and also
saved me a lot of time. So you're asking yourself, what does this have to
do with this class? It matters because it's the representative example of asset that we might
have downloaded, maybe for an entirely
new technique we use just that time. I said that made us happy. I said that is therefore
worth knowing. But above all, I said
that we will probably only reuse on a few occasions
and after a long time. Here's the thing. On those few occasions, if you use our test file, you'll give yourself
a good pat on the back with satisfaction. And you will be so happy to
feel organized and efficient. Don't you believe me? Well, I create this brush
set, my brush set that. I invested time and
energy and doing so. And after a month, I only
vaguely remember the brush XYZ that I use to
do that pattern XYZ with some phases
for the challenger. But since I tested the set
with our procreate file, now, all I have to do is open the group and select
one brush at the time. Isn't it amazing? In general? For any brushes, set of brush I have tested. If I have any doubt, then all I have to do now is to press the level
of the brush itself. And if I want, I can even
add more nodes or testing. And if this can already be useful for sector-specific
brushes like mine for suing. Imagine how useful it can be for brushes that can have various
uses and application. What do you think? Ready to start testing?
6. Tip: Heat is amended recur
for when you encounter an unexpected event
while working with Procreate
during this class, sometime when you are selecting the selecting
or merging layers, you might run into this issue. But don't worry, this
is something that Procreate app will likely make it more manageable
in the future. But in the meanwhile, is not the problem from us. You can resolve it by holding down on a single
layer at a time. This will allow you
to see the test of each brush more easily and even quickly without the guides. Because please note that the guy that only
important during the testing phase or during your exercise noted during
those consultation phase. So if you want them, you can always make them
visible by going on the button, selecting the group,
and make it visible. I hope it helps us you
in the next video, where we'll be testing
the first brush together.
7. Testing the first brush: Let's finally start
to test that. We start with one brush and see how you feel
with the system. Just go to the layer
with the guides now, makes sure is the
only visible group by tapping the stylus
tip on this square. Now, let's add a new layer above by clicking
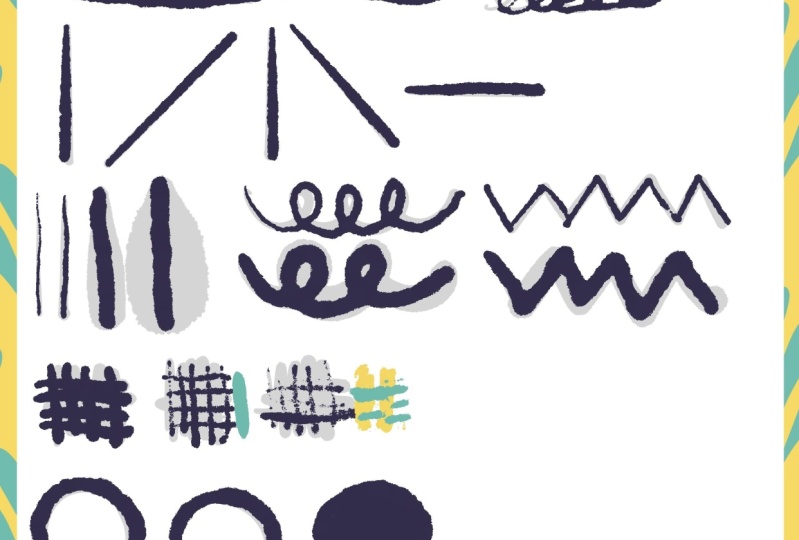
on the plus symbol. Select the brush. You want to test that no better. And let's start one node, my template, use one of the basic elements
of art, the line. As you can see at,
at one glance, you can use a line to draw
it in many different ways. It can go in
different direction. It can have different
thicknesses, sizes. You can also have
different capacities and different textures. They can outline a shape. And even if they
don't have a texture, they can add the
texture and interests like with smaller
lines like here for an animal for they
can even convey different feelings and
these can offer variety. Of course, what I would
like you to do here is to experiment with your
brush with these guides. Because by retracing
these exercises with the chosen brush, we could find an
in-depth knowledge about it and be very surprised. He regards to the application
that we didn't expect. This one is very
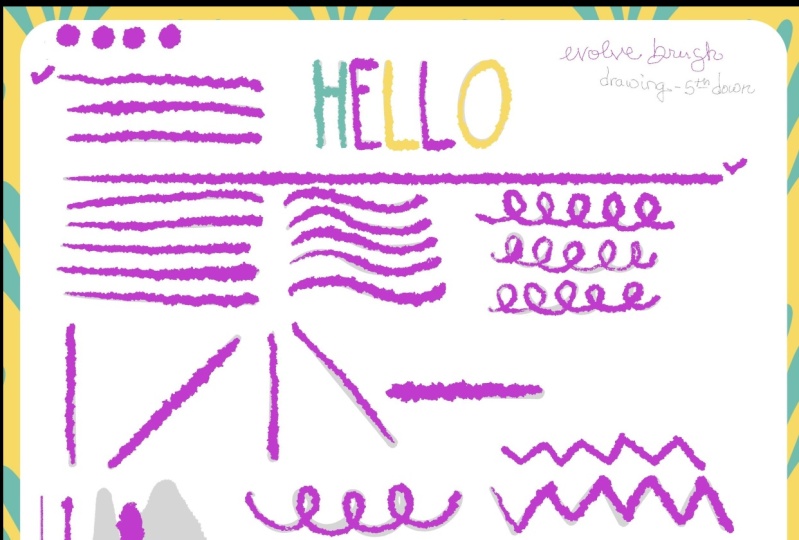
useful for future use. For this video, I will
choose personally evolve over from the default
Procreate the drawing set. You can choose the same
brush and try with me real time or
choose another brush. This process can be iterated fruit or brushes
that you prefer. Also remember that you can add annotation or
customize this guy. I do it very often, but the basic structure
helped me optimize the procedure and leave
room for exception. Let's go ahead and now together with the brush
evolve, if you like. I usually use user black
to test the brushes. You can use any color. The first thing I
do is I like to find the dimension that
fits these guides. E.g. I. Can see that evolve a grows
on a big size very faster. So I will just try to
go down and check. I think three per cent
in this case works well. So when I found the dimension
that matches the exercises, I usually bookmark it because this one will help
me for future projects. About this brush in particular, I really like how
smooth it is to use. He has also a kind of a
streamline that is helping me that when I like
a function, e.g. this one is one of the
first characteristic that I noticed during this
phase of the testing. Are you ready? I do a
ticket then on the top, but I start to add the door to stars or any symbol you like. Just to keep track of how many characteristic of the brush on testing
I really like. Then here I usually try to do a longer line and
I already like it. And then I keep
up my pen here to activate the streamline
function of Procreate. And steel is something
that I really like because it's messy
but has an order. This one is another
point for a vole brush. Then I will continue practicing. And while doing this
part of practicing, I might test also the pressure. And as you can see, there is a very nice pressure
with this brush. Light pressure, osmotic pressure is another point that
I think I'm going to mark and I'm expecting
the same also while doing the
cursor. Yes, it is. Oh my gosh, it's so cool. They didn't see this
effector. So nicer. I should mark another dot, but it's already
collected so many. I try also yesterday's
a factor of my gosh, yes, there is
another point here. I cannot resist. Then I will do the same
with these exercises. It's so nice to see how many variation I could have with this
brush and the same size. Then I will practice with this one happened
is because by mistake, if we have a
second-generation pen, you double-tap here and
you switch on the eraser. You can go back here
by tapping into or by double tapping
again on the pen. Okay, So we try
different orientation. Oh my gosh, it's so
nice to see how do you feel using this
brush in this context. And then this part of the
exercise is related to. Sizes. So what I do is first of all, in the second one, I put the size that I
already bookmarked. In the first one, I tried to put like a size in the middle between this one
and the blue one. So in this case it's already 1%. While I'm putting
the smallest size, Let's say I'm writing here sometime you don't
have to do it often. But in this case, since I see that evolve
really gets bigger faster, what I'm going to
do is that writing here the percentage of this one. Then I will write here what was the percentage of this one? And then basically, I
will try to go like halfway between the bookmark, the size, and the topper. And I already see that it's so big and it's so nice by the way, that I will delete this part. I will go back like
around ten per cent. Ready, so big. So I will go seven per cent. And with the smaller
size, I will write it. This one is seven per cent. Decent nodes basically
will show me that evolve is really an
interesting brush that grows very fast and might
be very useful for project where I need
to cover big surface. But still very interesting also while using with
these societies. Then I will use it, let's say seven
per cent size here to do these exercises with big. Then I will go back on
my bookmark, that one. So that is three per cent
and redo the same here. To give a comparison of the two. I will do it here too. And I like it. Then usually I do
the same zigzag, but I will keep my pen
press here to see also what happened when I use the function for edit polyline in Procreate. And I think it's nice to. Now in this part, we are going to test the day how the brush works with opacity. So what I'm going to do
is here, I'll do this. And then I'll do this. Then I'll do the next one
going down, as you like, e.g. in the middle, around 60%. This one is very interesting
and you might want to reuse this effect of
evolve for a project. And then I will go very
low on the opacity. Again, if you like it, you can mark exactly the
level of opacity for me is not an information
that I use very often. So it doesn't make sense it, But again, it depends on your style and what
you'd like to do. Note about this part
is that sometime I like also to test the
duplicity with colors. To do so, you can choose here the color you
prefer, of course. Or one faster suggestion
is to take advantage of these two color
I use here for the guides that are
like these intense, say, bluish color,
blue-green color. And the yellow for me
are useful because let's say I think they represent
well the behavioral, so on color that are, let's say a middle way
and then a light way. To select the color. You just push here, you get the yellow. Okay. And most probably
I wanted to try who's so here with the middle opacity. I'll go back on the blue. I wanted to see the contrast
that with the watercolors, but also with the color itself. So I'll do this. And then I will
try directly host. So here with the low opacity, most probably I will
not use so much this brush in this way, but I think it's still fine, still like reminds
me of watercolor. And then same with the yellow. And the way here. Here we are. Now I will go back on black. And this part is
supposed to taste the brush of wild when
outlines or shape. So in the first one, I will just say, oh, I have to go back on my opacity. I'm going to present. I will test this circle without
any help from procreate. They like it actually. Let's do like this. This one
by keeping your pen there, presser, put your
finger down to make it a circle and see what happened. Oh, I like it. Then here. I will do the same. But I wanted to test how this brush works with
the filling function. And e.g. I. Was not expecting this, but it works very well. So I might use this, this many, many times. So I will mark a dot here. Rt again are exercising
about outline. This one is drawing
by hand again. Here I will use the procreate
function to streamline. I'm, I do testing on
depression of the brush. Here. I may want to use a streamline
just the by using it each, in each segment and not
the whole figure and doing a messy decoration inside. And this one is the one
I use them to replicate. The fact that e.g.
with the smaller lines like this one is mortal
segment like this one. You can recreate the
photo of an animal, e.g. you can add interest
to your design pattern and you can test the
beginning and the end of the brush also on very
short segments that I forgot. Something very important
that you can do even before, if you like, that is testing
your brush with the letters. So I will testing
e.g. with this world. And it's nice to see if I
can go through this guide. I think it's nice.
It's kind of fluid. And another thing that I
do to test the brush is to write the name of the
brush itself here. So in this case, I will write evolves
in a smaller way. So you see this one is bigger. So I can, in this case, go down with the science. As a final consideration
about this brush. I can say that I
like it in general. I see, I like it
a lot in general. I think I think it's
nice also is so flexible that I can use it also to take
snowed by, by hand. Of course there may
be, will not be the brush I will use
for calligraphy. But it's still a nice option. I really like these
nasty attitude, but the width with character. And that's all. What do you think
about this brush? What I wanted to
show you is that I tested this brush
before for sure. So it might be interesting to compare it with the
previous testing. Let's see, evolve, uh, is is the fifth
brushing drawing. So is this one. Let's check. Oh, yes. E.g. when I
test it at this time, as you can see, are
you really, really, really appreciate the fact
that I could do this one. And they give him e.g. for this reason,
these this is a star, this note that this plaza I didn't appreciate
so much that time. Most probably because e.g. here I was not the testing
so much the pressure. We can test in
different times and different stage of
our artistic journey. And never totally different
opinion about a brush. But what is
interesting for me is that with this test the system, you can have always a global
view of the brush itself. And this one is consistent.
In the next video.
8. Testing a set: Dustin brushes directly as a group is the strength
of the system. And to do this, you just need to duplicate this layer
and rename it. Note that this doesn't
mean that you have to test the old brushes In a
brush set at once. On the contrary, you
can do it whenever you want without losing
track of your work. The only mandatory step is
to choose the set to start. Then after I choose the brush from this set that
they wanted to test it, I select the layer with
the corresponding number. Note that this one
is a convention. Is it clear that
if you rearrange the brushes in the set itself, it might confuse you
and your system. In this case, if
you do it often, you might rename the layer
itself as you prefer, mainly with the
name of the brush. For me, it works
faster to stay with the standard with
this number system. Sometime to be even
more organizer. And they helped me see
the overall sector. I do this. I take a screenshot of the
set and then I place it here. But this is absolutely optional. Another pointer, if you have
already tested the brush, is that you can easily add it in the place you
want like this. Remember revolver? Well,
is the number five. So all I have to do is to put it on the top of five
and then merge it. Just remember when
you merge it that the final layer name
will be the one below. By the way, sometime, maybe because the brush isn't the best for writing
small notes. I like to use the 10th, the texts that function
to add the nodes. The default one might
be out of sides. So here at the bottom you will find also templated
for text nodes. All you have to do
is duplicate it, move it above the
brush and you are annotating bright
and then merge it. You feel like it. Last consideration, then you are really ready to
explode your own library. You can test the brushes
several times over time. And it would be fun to compare the two tests to
keep them organized. It all you have to do is to position the two layers
close to each other. Now you're really ready. Customize this meter
and the base file. Use it for one or
two brushes today, an order to tomorrow's, pick up the testing again
in a week, and so on. Make it your own. It will really be
useful for you. Vote for practice if
you are a beginner and for moving the neck to the
next level of Procreate. If you want it to really
have Procreate break.
9. Customize your library: This is just an auto for when your brush library will
become increasingly populated and you might finish also the delay are available in your procreate
and iPad version. My suggestion is to personalize
it with the method. What's going on after? What do we mean by that? Sometime you wanted to group
all this testing, e.g. by the time you did that, or by the style or by
the function, e.g. I. Might do a file just for Procreate brushes that
I'm using for lettering. Most probably. I'll personally who
also have a file where I will catalog the
brushes of one artist, the MPO. Probably when I finished
testing all the brush sets I have from Lisa glands or Lisa
Bardot or this color brown. This is what will make
sense for me instead of just naming the file according
to the year of testing. By the way, isn't
it curious that so many incredible Procreate
stars are named Liza? Anyway, back to Horeca to do so, to have a file just
for one artist that I will have just duplicate my brush tester file in
Procreate and start to populate them with data sets
of the artist or otherwise. Again, I'm, I just
continue gradually. And when the library
becomes larger, I will add a new brush
tester in the library. I rename it accordingly
to my choice. Of course. Then I will stuck them in a group to keep
everything organized. Anyway, my suggestion is
absolutely a suggestion. Please. Practice
personalized and make your own methods working. I'm sure putting a
little bit of effort in organization now will pay
off for the feuds or later. And I'm really sure about it.
10. Final considerations: Thank you for watching my class. If you made it till here, I really hope my
waterflow can help you feel free to personalize
it, making your own. And please don't also underestimates the
muscle practice that you are acquiring wealth, testing your brushes
with this method. I can weight it to see what
you discover and what you are your actual favorite
brushes after this testing, an organization, I love
to share these findings, thought, tips and
tricks with you all. In the discussion section. You didn't follow me yet. Please remember to do so to
get future notification. And I hope to see you
in the next class, epi, creative and organize
the journey, everyone. Bye.
 Madda Mom, Procreate & Productivity