Transcripts
1. Intro 3dprint course: Hi, my name is Jasim
Carmie and I've been a toy designer and sculptor
for over eight years now. In this tutorial, I will
be showing you the process of preparing my digital
sculptures for three D printing. We'll go over splitting the
figure into cable parts while keeping in mind two
important aspects like clean print
and ease of print. We will start by analyzing
the figure and then we will be splitting it and preparing it for
three D printing. I have broken this course
into 21 easy to watch videos. I don't have any speed ups and all videos are
recorded in real time. I try to be as transparent
as possible with the tools and methods that
I'm showing in this course. I'm using Z Berg, but the techniques
can be applied to any digital sculpting software that you feel comfortable with. I'm teaching you a
workflow and how to get your best parts for
your figures and toys. By the end of this course, you have learned every aspect of the process of repairing
your digital sculpts and exporting them to clean STL files ready for
prototype and production. I really hope you find
this course help.
2. LESSON 01 Figure Structure: This video, I'm going
to show you the process on how I prepare my sculpts
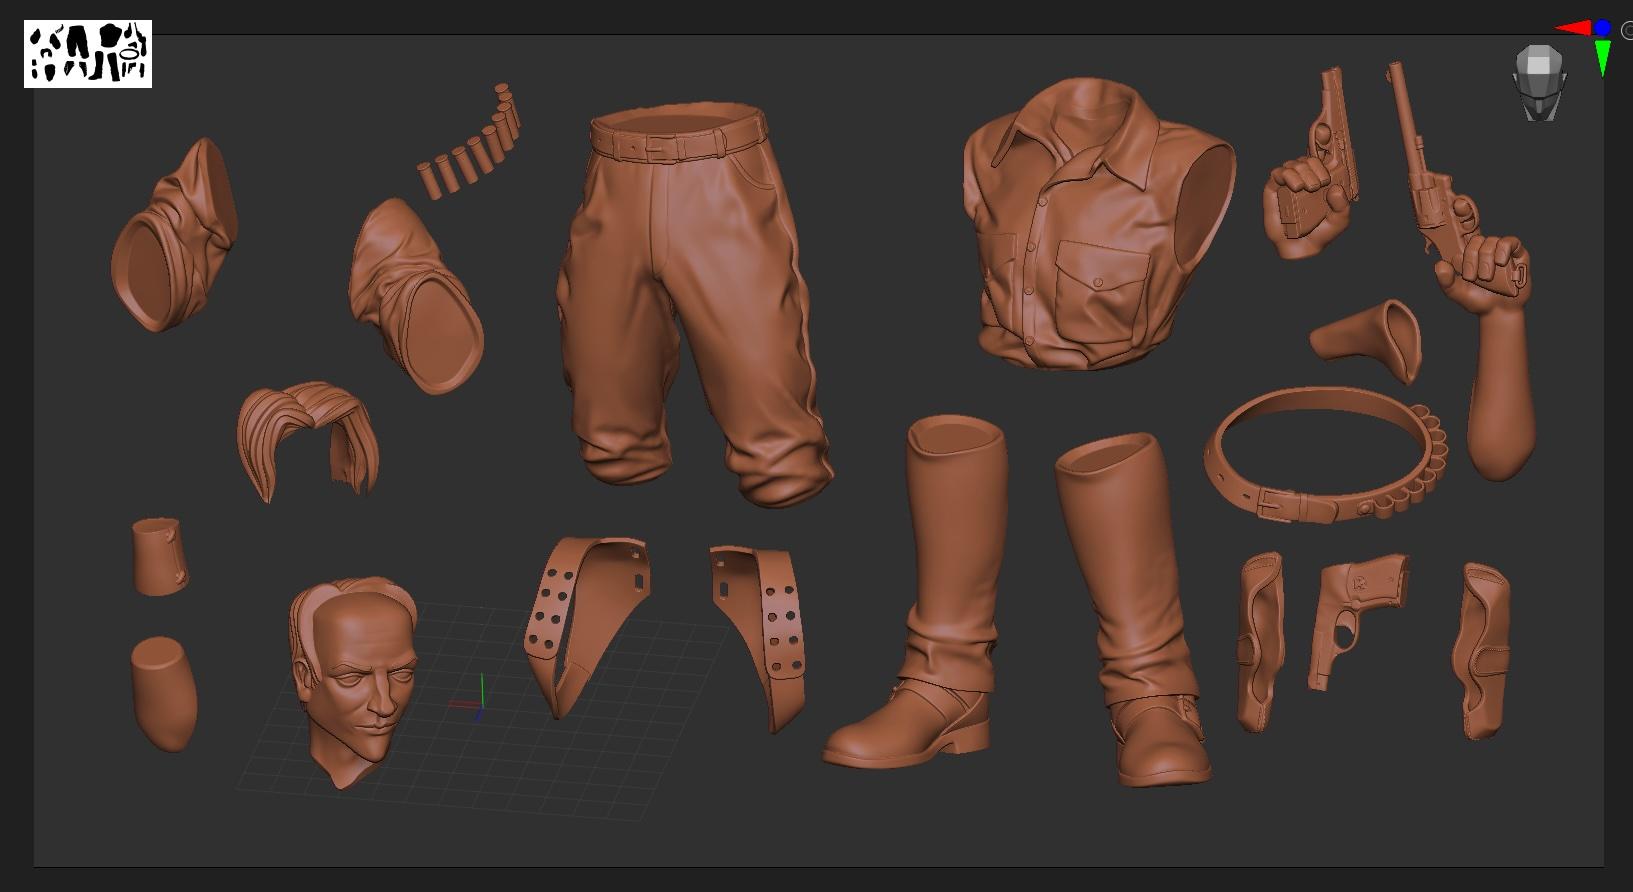
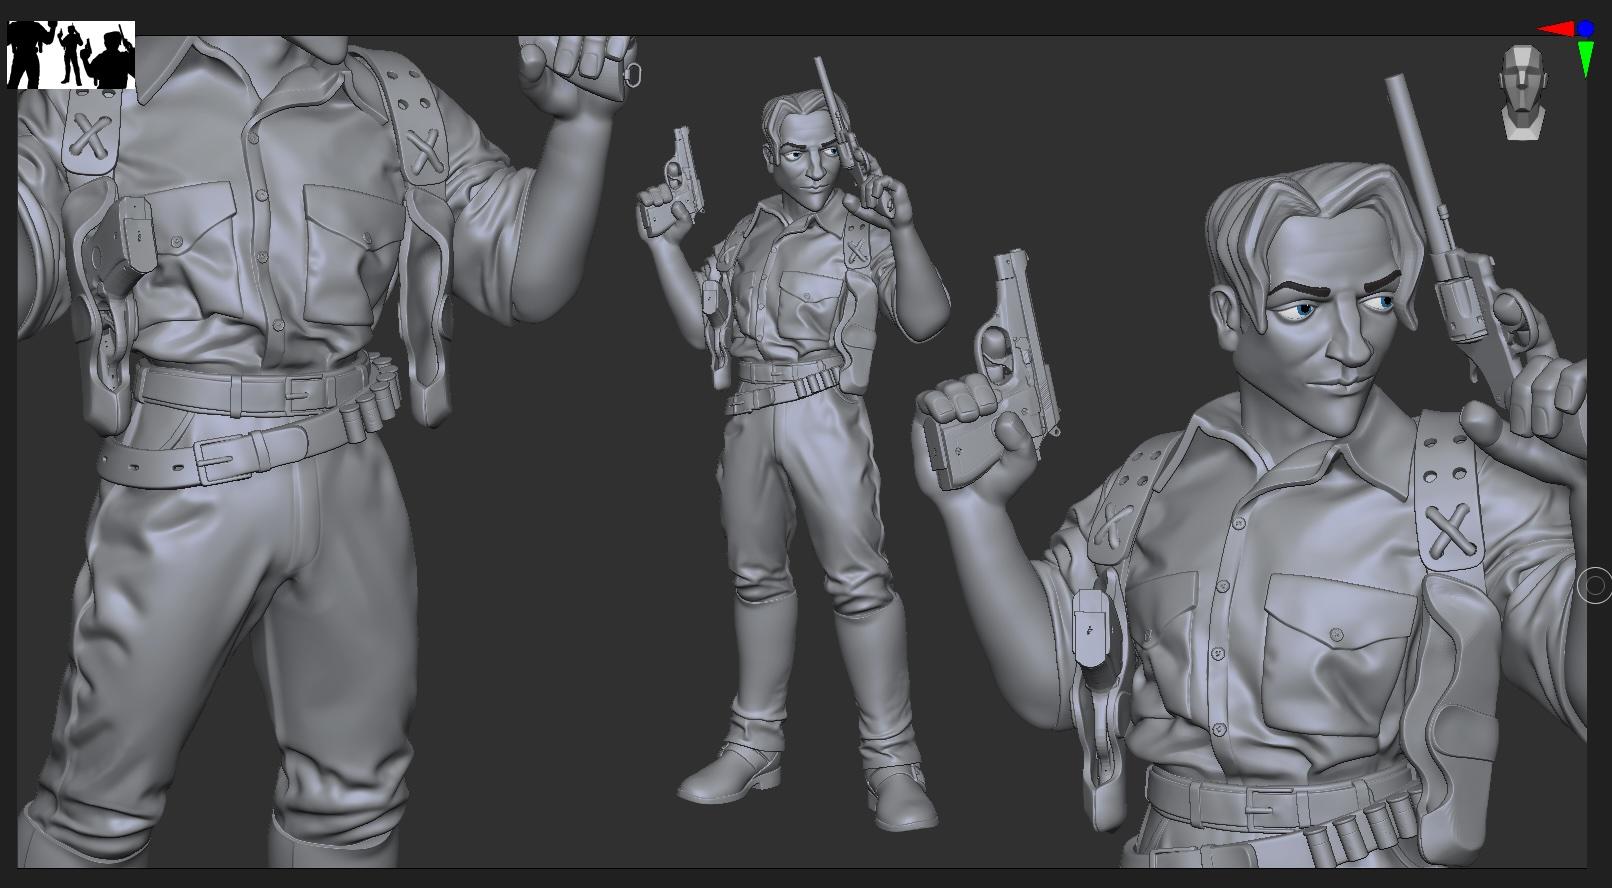
for three D printing. This is the character
that we're going to be preparing
for three D print. This is Rick O'connell
from the Mummy. It's a stylized character
that I designed and sculpted. This is usually the stage
that I start preparing the model for the next stage, which is splitting and keying. You'll notice in my sub tools, these are all the pieces
that make up the character. And I went ahead and named each one when I
finish sculpting. When st, I rarely
name my sub tools, but when I finish sculpting, I name each subtle just to
make it easier to know, maybe leave on their own or which parts I'm
going to be merging. Now, at this stage, I finished detailing and
adding all the small details, so I'm not going to do any
major sculpting anymore. Maybe like some
fixes here and there just in case it
helps the keying. Or sometimes just to hide some imperfections
or stuff like that. All right, when I
key my characters, the first two things
that I keep in mind is how clean each piece
is going to come out. When I key it, when I print it, how easy it's going to
be for me to paint. Now, for example, you
noticed that for these, I kept these as separate
pieces because I want to put these on the figure
once it's ready. This is going to make my life really easy when it
comes to painting, because painting these,
especially on a white T shirt, trust me, it's
going to be a mess. Like if you mess up the paint, lot fixing, and a
lot of tweaking. Now the second thing
you might notice is these holes are really huge. I do have some straps
here, some threads. But what I want to do
is when I print this, I want to use like real leather straps don't fit because I don't
know the size yet. If they don't fit,
I'm just going to do brown threads into it. You might have seen that
in my other videos when I did the telos mini one. All right, sculpting.
While I'm sculpting, I'm keeping in mind which pieces they're
going to be split. For example, if you
look at the torso, you'll notice that this piece
is almost ready for keying. I know that the arms
will be separate. What I'm going to do is
I'm going to go ahead and do each piece on its own. Let me see if it, just
to make sure it fits. We'll solo this and
we'll do shift this way. It's going to do like
a screenshot of it. These are the eyebrows, these are the shirt folds. These are some
straps in the back. Just doing this to
show you the parts. These are the sleeves, this is the shirt, these
are the buttons. These are the hook,
the belt hooks. This is the belt
area of the pants. These are the
pants, the pockets, a buckle, the bottom part
of the shoe, the other one. These are the parts that come with the boots because
he has like long boots. When I sculpted these, I sculpt them separately.
This is the body. For the body, you'll
notice that we're not going to use a lot of it. You're going to se I'm just
going to keep him here. Brater bracelet, this is
the holster for the guns. These are the temporary threads, we're just going
to keep them here. This is the holster
from the back. The holsters that come on. This I found out that makes it easier for you
if you keep parts separate. This is the gun, we're going to go into detail with each one. This is the gun
that he's holding. This is the other revolver. Can't find the belt for the shotgun bullets and this one is going to
be separate as well. The shotgun bullets
belt the other belt. Just save the shotgun
bullets because I forgot And this is the hair. For the hair. I have a couple. I'm just going to show you
this and we'll go through the other ones.
This is his head? Yeah. These are the parts that we are going
to be working with. This is how I visualize
the project in my head. At this stage, I'm
looking to see, okay, which parts do
I leave separate, which parts do I merge, and which part is
going to cut out of the other part to
be ready for key.
3. LESSON 02 Preparing the head: Now that we have all
the parts laid out, it's time to jump in and start
start the keying process. Now, I don't I don't
have a specific, you know, way to start. Like usually you'll see me
jump around pieces to see. So let's start with the tops. I'll do the head and go down. All right, so for the hair, I'm just going to go ahead
and remove all the colors, so just make it easier
for you to visualize it. This is how I initially sculpted the hair, so it's one piece. Now to have this as one part
either have two options because I don't want to
print on one part because I know it's going to
come out really better if I have the hair
separate from the head. Because it's easier
to paint once and it just looks
way, way better. Now for this, we
have two options. Usually when I work, I'll select the pieces and I'll
drop them down. Holding shift in this arrow
just to drop both down. So you can either have
this with live bullion on, so have this part cut
out of that, right? But then you get into the
problem that's not going to fit because the head has
this oval shape, right? So you're not going to be able to fit that in without
breaking the piece. The other solution is to
split this into two parts. Now, I went ahead
and did this before. What you'll see here is the
back part, we see Frankin, we'll have the front part, the back part, and
the head, right? Usually this part is going to key here and that part is
going to be in the back. Now, you do have the option
to have these in three parts, but what I'm going to do is
I'm going to merge these two. I'm going to hide
that looks funny, even if I mess up a
bit of the paint here, it's not going to
be a huge problem because it's not going to
affect his face, right? It's going to be easier
to fix this way. I don't need to worry if I
cut the head out of the hair. We're going to run
in the same problem of having this fit in. The second problem we're
going to run into, you'll notice these
are really thin. Then your option is to either cut them out
or make them thicker. So you're sure you
can notice this here, you'll notice that part. It's definitely going to break the easiest way and
the safest way for me it's to have
these as one part. I'm going to go ahead
and merge these. Now you'll notice that the
head still has subdivisions. It has three subdivisions. Have the lower one
and the high one. Now it doesn't have
to look perfect. Now if you zoom in, you're
still going to see. But think of it,
this is going to be like a 20 centimeters, like an 8 " figure. Those details you're
not going to see. This is usually 1.5 million polygons is more than
enough for this figure. I'm going to go ahead
and delete lower. I'm going to go ahead
and merge these two. I'm going to merge down. Now we have this piece for this one you can
keep polish on polish. Just cleans up. And
I'm not going to go into details for that one
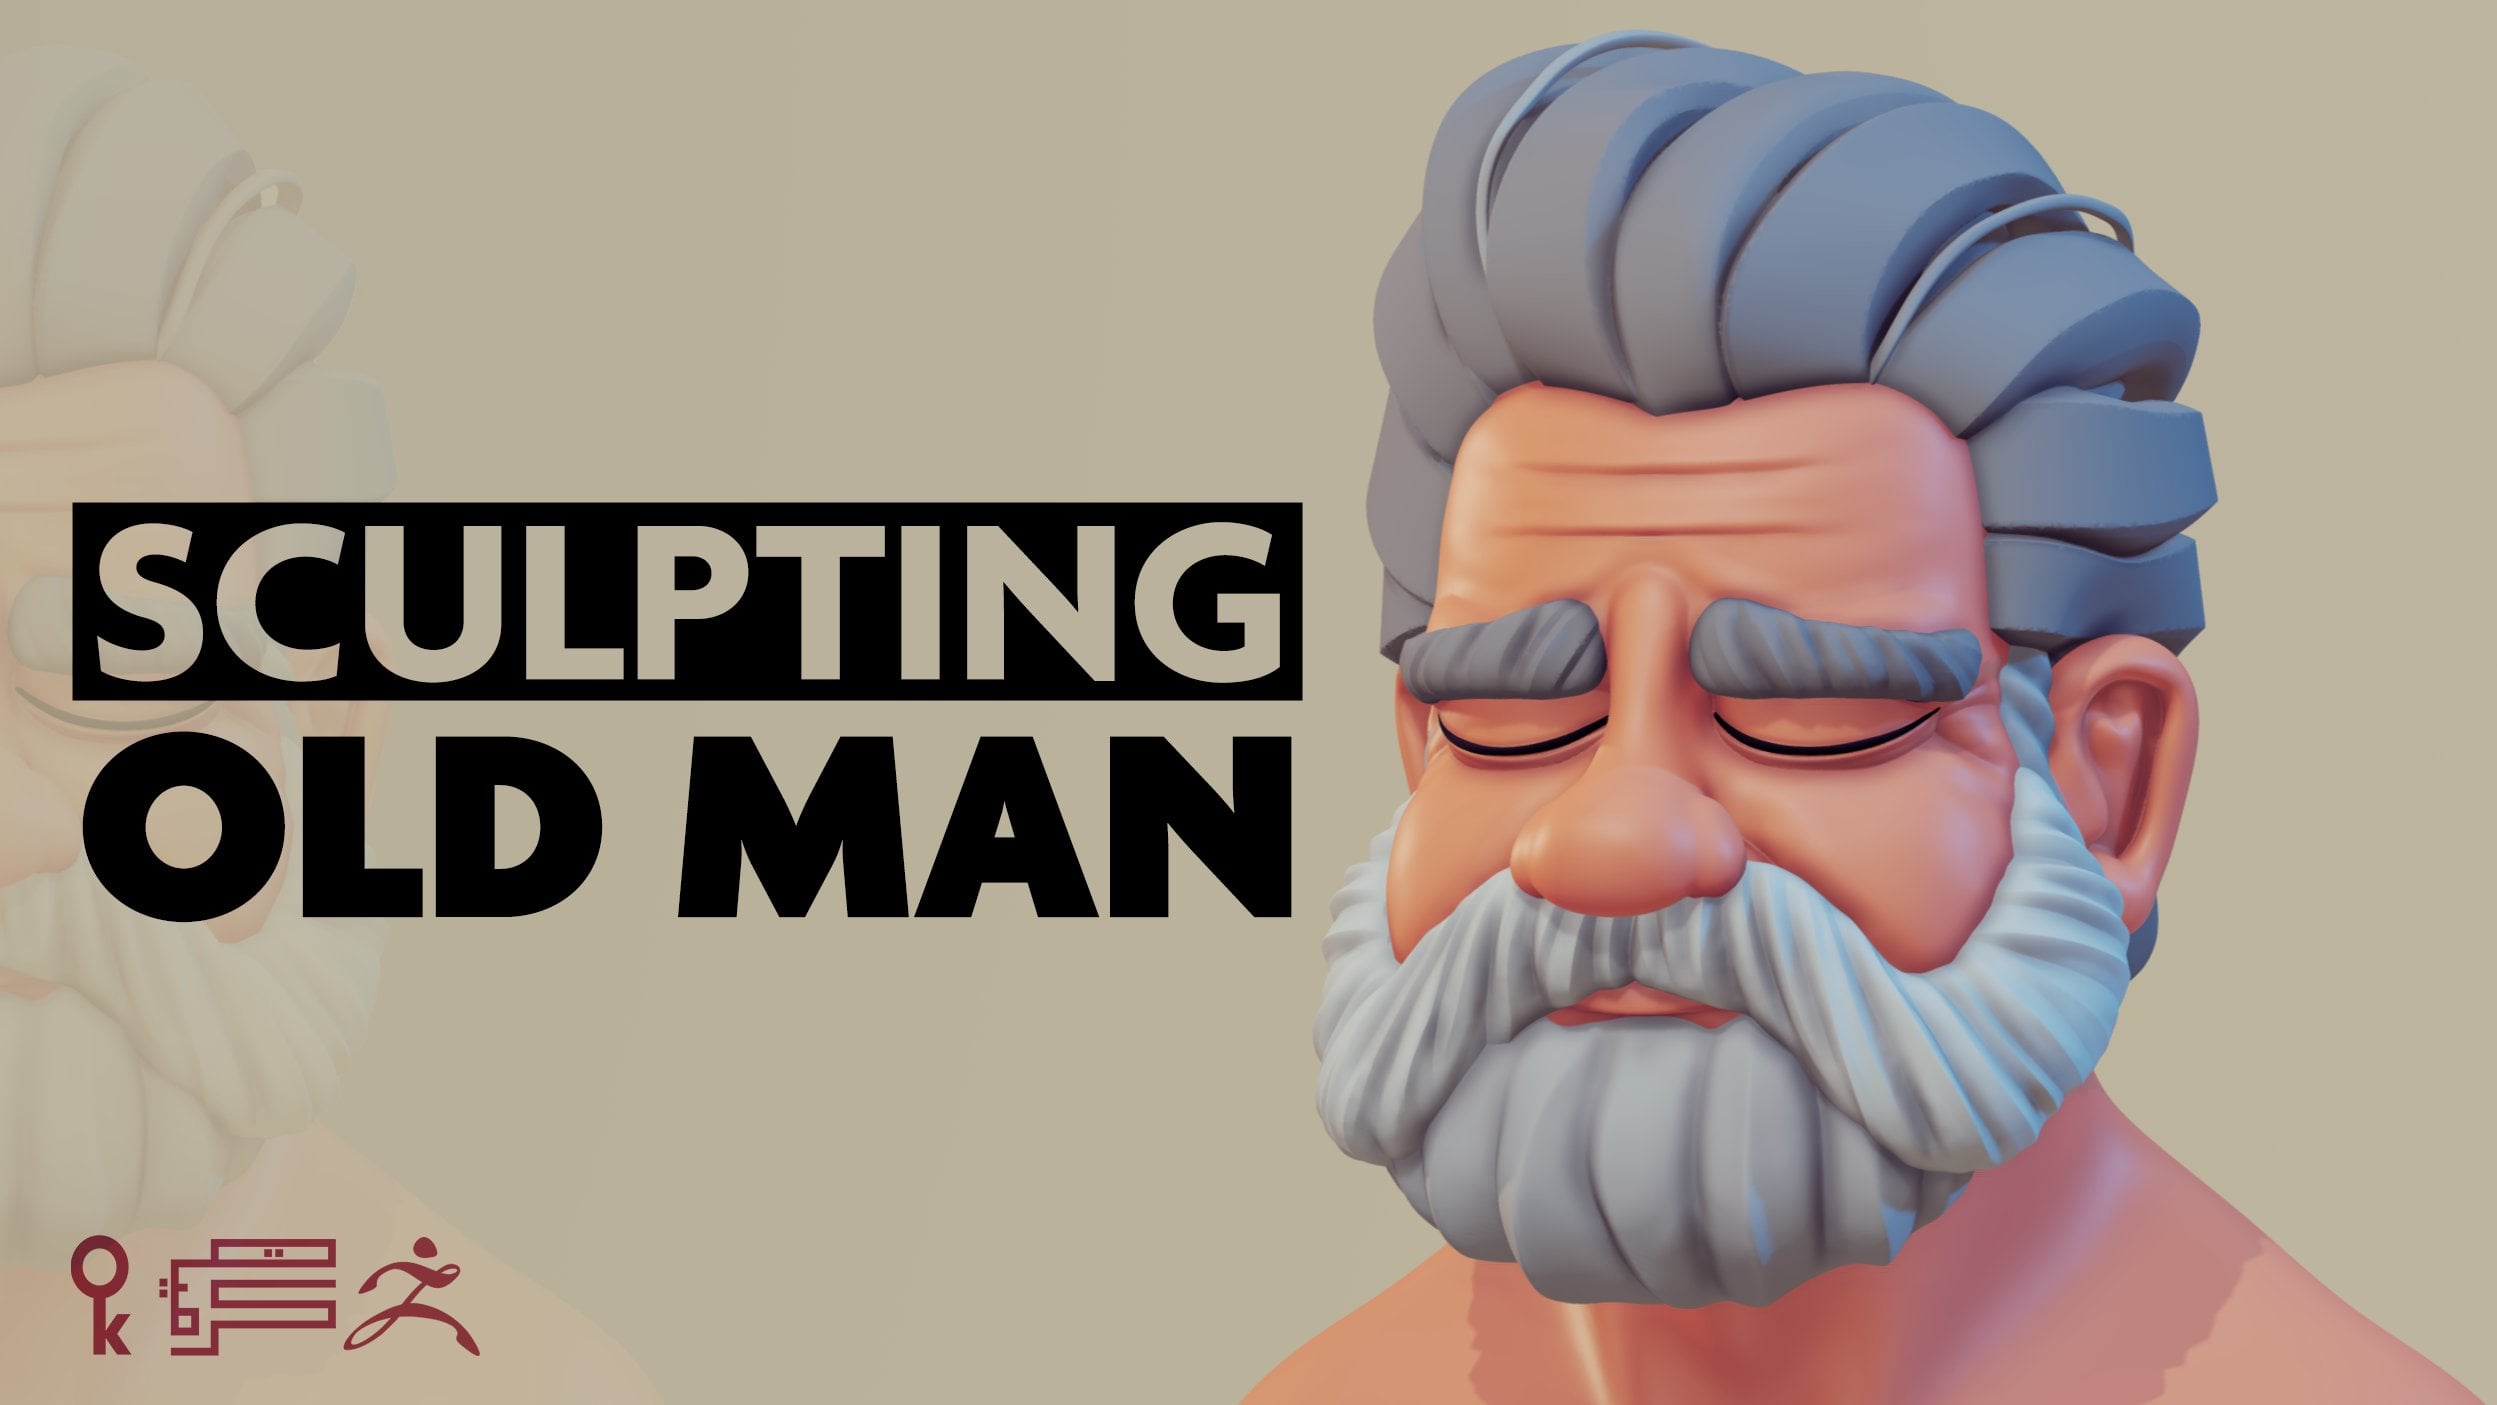
because that's more sculpting. If you want to see my
other sculpting tutorials, I do have how to sculpt
an old man's bust. I'll leave a link
in the comments, or you might see a
card on the screen. Now if I go in for the
resolution I'm going to do, it might be different
for you when you're working on
your own character. Three depends on
the size and so on. So when I merge stuff, I'll just usually go around
the piece to see if we have any gaps or is there
anything wrong when merging? All right, now this
is our first piece. Now for the second piece
we have this guy, right? So this is going to be a
separate to make sure these two, so I'm going to control control
S. I'm going to make sure these two work together when we print them because
if we keep this here, this has to snap there
to make sure that works. You make live bullion on, put the head or the part that's going to cut out of
the other parts. And we select this, you'll notice that everything
that's brighter color, this means it's cutting
out of that. Right? If I go ahead and hide this, you see that's our part and this is what it's
going to cut out of it. Right now, there is one thing I usually do just to make sure I
have enough gaps. Because if I cut the
head out of this part, it's just going to cut
it exactly to the piece. I'll duplicate that head head. Duplicated the new one. I'm going to hide for this one. I'm going to go into Inflate
and I'm going to do five. And I'm going to hit Enter. Just made it a bit larger. It doesn't have to be a huge
difference, just a bit. So what this is going to
do is going to give me a gap that I can work with. And you'll see that in a second once I'm happy
with this and I go over it to make sure it doesn't
create any super thin areas. All right. That should be good. We go into bullion sub,
make bullion mesh. That will create a bullion mesh. Then we need to append
to this. We're going to go ahead and do a pend. Usually adds a U mesh on
top of it and this is like that is a bullion piece. All right, that's the U mesh. If you go into hide the fill, you'll see how that cuts
out of it. All right. Now what I like to do, I z dynamesh, once I have that done, you
don't have to do that. It's just a workflow
that I work on. Because I noticed if I go in and smooth this now it's
just going to leave a hard edge of the mesh union and
dynam bit higher. If I dynam this and
I go in, soften it, now you see I get a
softer edge and this is why I usually dyname my pieces. Now sometimes you'll see
edges like these appear. Now you can leave
them because if I go ahead and show these two, this is why I added that inflate just to give me that tiny gap. You see, because if I would have cut this
exactly from the shape, it's going to be like
a really straight fit. From my experience
for three D printing, you always need to leave a bit of a gap
just to make sure. Because you do have wrapping, you do have the material
changing its shape. You do have heat affects
depending on you're using PLA or you're using
ABS or you're using resin, it really changes. Okay. For that one you see it's a really tiny gap from this distance, you're
not going to notice it. But for D printing, that's really helpful
just to make sure. Now, sometimes I like
to go in and clean those edges just because I'm
used to having my pieces, especially most of the work that I do goes into production. And I want to make sure we don't have any surprises when
we go into production. And no matter how
careful you are, always going to have a piece that needs a bit of tweaking. I like to not leave,
uh, you know, the bullion, I'm going to go
in and clean these parts. I'm not going to bore
you with that, I'm just going to show
you a couple of parts and then we can
move on to the next one. So now we have two
pieces. This piece ready. Two, if I print them now, they're going to snap
together perfectly. Okay. Now that I'm ready with that, I can go ahead and shift click on the eye and we're
going to show everything. Now, we said we're going
to start with the head. I'm going to take the
eyebrows, move those, I'm going to take the
eyes, move those down. And I'm just going to
hide everything and just keep, I don't
need the hair. Usually if a character is big, if I have a huge character, the head is really a big size. I'll even go ahead and split the eyebrows
because just again, for painting reasons, it just
makes it a huge difference. So I can pick these
all black with the airbrush and I don't
have to worry about, but this figure is going
to be a tiny head. I mean, because it's
going to be 8 " figure, the head is going to
be like 1 " or 2 ". I don't see why we
should split that. I'm going to go ahead and
move this to the bottom. Do the same with the head
and then I'm and merge down. So now we have, this is one piece and I'm going to
do the same for the eyes. Now when I work on the pieces, I usually like to have a piece for like a sub tool for each, or a mesh for each of the
parts for the eyeball. The iris, the pupil, and even the shine, right? And you can notice that if you've viewed any of my
sculpting tutorials, you'll see that's
how I like to work. Now you'll notice
that this one is a bit low because we
have these facets. So if I go and do
dynamic subdivision, you'll see now that's
smooth and nice. Now you might say, well why do you leave the pupil and the iris and all that stuff? Because you're going
to paint them well. It helps me know each
part is going to be, I will just use them as guides. Now sometimes you'll see me sculpt with the iris
and details going in. And you'll notice that
the classical sculptors, they always use that. I love that technique because it as like a natural shadows, but for this one, it's
going to work fine. I've done this with the bulldog. If you seen my
bulldog making off, you'll see I use that technique for
painting the eyes as well. Again, for this one,
before I merge them, I'm just going to do a bit like maybe three subdivisions.
I'm going to apply that. Delete, Delete, lower. I'm going to merge
it with the head. Now I have the eyes merged. Now for this one I'm
going to do the same. Maybe raise it a bit
and do a dynamesh. Now you'll notice when you
dynamih stuff with polish, you might lose a lot of detail. This will we had before
and sometimes it's a good idea to keep polish
off and do a dynamesh. It keeps the edges. Now you'll notice that it added these harsh
edges to the sides. Again, from this view you're not going to
be visible again. Keep in mind this
is a free print this close you might see them, but that far you're not
going to see them again. Now we have merged the
eyes and the eyebrows, and we have the head and the
hair ready for printing.
4. LESSON 03 Splitting the Neck: Now we can do the
neck. All right. So you'll notice that the
neck is part of the body, and this is why I said
we're not going to be using a lot of
the body anyhow. So you'll notice the body has
three subdivisions as well. So make sure before
we start splitting, just make sure you have this set too high and delete lower. 1.3 million is more than enough. If you need more,
you can just go ahead and divide it and you can have more than that and you can delete
lower so we can start. Okay, so what I need from this part is I need
it for the neck. What I'll do now is
I'll hold control. Okay, man and neath this, you're going to go mask lasso. Put transparency on. And just cut out the part
that you want for this. Just try to cut out more
because it's not going to just make sure you
don't have enough parts. Just go ahead and make sure you don't have any other
parts selected. And I'm going to go ahead and do control just to
create a new poly group. And holding shift and
control and clicking on it, it's just going to isolate
it and do split hidden. Now we don't have
that part anymore. We have the neck now. For the neck and just do
dynamishwI have this piece? Don't worry about
that because we're going to have the body cut
out of the head and so on. To keep this tidy, move this to the bottom. All right? I need
two things here. I need the torso. I'll take that part
and move it down, and only when I work
I get into the habit, into the parts that I'm keying
or I'm working on split, they're the lowest ones. Just keep stuff tidy. It's just my own process. You don't have to use it,
just the way that I work. You can do the same thing while
keeping the sub tools up. It's not a thing of software, it's just more of my
personal preference. Now that I have these two, I can go ahead and look to
see if the shapes are good. Now what I don't I don't like
to have a lot of waviness. I'll try to have it as clean. I don't I'm I don't mean
have straight lines, but I need to think about
this part is going to come into it and I need
to make sure it's clean. Again, we're going
to do a bullion cut, that's the shape you
are going to get. That part is going to
go plug into the shirt. Okay. I don't like how thin
this is. This looks bad. It's going to be breakable,
but don't worry about that. We're not going to leave
it like that. Okay. So we're going to
do live bullion, Go into and make
bullion measure. That's the part that
it created now. Right? You'll notice that
whenever you do a bullion mesh, if you click on the poly groups, you'll notice that it
always creates the part. When it cut, it creates
like a new poly group. And that's really helpful. Now click W or are holding
control. Click on it. Now I've selected
only that body group. Move the gizmo in the middle and I'm just going to resize it
and move it down. This is why I said
don't worry about the thickness and
then I'm going to size it and scale it down here. I'm just going to
clean it up a bit because think about this is the edges that are going
to go into the shirt. I just want this to be uniform. You don't have to do this. But again, when
working in production, you just get into the habit of making sure
everything is clean. Although, when we're
creating prototypes, after you print your prototype, you might go back and redo some king or some
splitting because it created some new errors
or something like that. Now I can go ahead
and dynamis this now. It leaves these, you can try to click Polish
and do it again. It cleans some of
it. They're fine. But I think you noticed by
now I won't leave them like that because sometimes it's just going to create
an extra edge or something that's
going to poke out. I try to reduce as many problems that might occur because
with three D printing, you'll see this piece
has to go like through three software getting slid
by the printer program. Now that piece is ready, I'm just going to go
ahead and delete that. You see that's what
naming is important because now you say,
oh, that's the body. But it's not because
we split it from the body that's deleted. These are the two pieces. This is what's going to happen when we split that out of it. It's going to sit right in. The purpose of that edge, of this edge is two things. One, it's going to
add thickness as you notice from the fore front part. The second thing is it adds like a nice gap so it doesn't feel like the piece
is floating on the neck. Because you've noticed
that with cheap toys, you'll notice that it's going to add a gap between the two. And I'll show you that example
when we do the sleeves. All right, so now that
we have the neck, we'll bring the head
down, hide the torso. Now we know that these two
parts are going to be merged. Before I do that, I'll select the neck and I'll do a
couple of edits because I know I want that part
to be a bit here. I'm just going to get rid of
because we had a gap here. This is why I said while you're king and while
you're tweaking, you might need to sculpt a bit and move some parts
around just to make sure everything
is flowing nicely. All right. Now that
we're happy with this, I'm just going to go
move that down and I'm going to merge it now. We can go ahead and dynamash
this, that is one piece. You'll see it's still going
to keep the polygroups. I never get rid of the
polygroups until I have to. Because if I notice something when it's printed
or I don't know, maybe this is like way too out or one of the hairs
is sticking out. I still have the option of
clicking and tweaking this, making it bigger or whatever. If you have polygroups, don't go ahead and do you control just to have
that keep them? Keep them, because you never know when you're
going to need them.
5. LESSON 04 Gun Holster Straps: The head is ready, time to
move on to the next piece, which is going to be the shirt. Now before we move to the shirt, what I want to do is I want
to go ahead and have the head cut out of the shirt so we can have that part done already. We'll go ahead and hide
everything by clicking Shift on the Eye and just going to hide all the suptoles
as we did before. We're going to move
the shirt down, Take the head, duplicate it, move that down,
hide the other one. You notice I hit the
one that says head, so I don't have to
rename it again. So I'm just going
to use head one. All right. We're
going to do the same. Going to go ahead
and inflate this. Selecting the part that's going to cut out of the other part. Go ahead to inflate and
just go five again. It doesn't have to be five for me is just I just
eyeball it like I'm used to it by now and I'm used
to my printer and I know what's the tolerance that I can get away with,
so usually five. For me it works
if you want to go ten because also depending
on the scale of the model, because the scale
of the model in your zebra scene will change how much inflate
is going to affect. Because sometimes you're
going to go and add five and I don't know it's going to do something like this, right? And you don't want that, it's way too much or
sometimes it's not. The effect is going
to be subtle. Now, here's another
thing you can check. If you're not sure
about the gap, what you can do is on the shirt, you see you have this arrow. If you click that arrow, it's going to tell
Z brush is like my bullion mesh is
going to start here. Then I can unhide the head
and I can see the gap. Because if you don't
click that arrow, this is going to happen. Even if you show that head, this one is going to bull
everything that's on top. I think these are layers. This is affecting
everything on top of it. But if I select this arrow,
it's just going to stop it. It's just going to tell brush. Okay. The boles starts
from the shirt down. Okay? And this is a great
way to visualize the gap. So you can go into it
and you can check out, see if it is the gap enough
for the neck to go in. Right? So I'm going to hide this and I'm just going to
go in and tweak some stuff. Like you'll notice that this one I don't like
and this is happening because there is like a tiny gap between the
shirt and the head. And to fix that, make sure
you have the shirt selected and you're going to
move these parts. You can actually sculpt as well. If you want to add some
stuff, you can just go in. And it's really
helpful to visualize because this way you can see
one other thing I check for. You see how that is going underneath that created
because of the inflate. Because when this part inflates, the edges just go a bit round. They might go into the model, there's this small, it's
not going to be a problem. But sometimes if you look
at it from the side, they're going to be a C figure and might break when
you put the part in. Do not have that, just
move them down a bit, you're not going to have
any of those problems. Notice that this like
splitting and preparing a model as as it takes to
actually sculpt the piece. If you want your model to come out ready for
production and clean, you can, if you want,
especially nowadays, you can take that figure
and print it in one piece. But it's going to be
a nightmare to paint. And I'm not, I'm not good at those amazing war
hammer painters that they do with one piece. All right. So now,
now I'm happy with that and I'm ready to create
like a bullion out of this. So I'm going to go ahead
and make bullion mesh. I'm going to go into a
pen and U mesh shirt. So you know, this
is how you know that that's the shirt that was
created with live bullion. Zebra always adds U mesh on top. So I went ahead and deleted
those and rename the shirt. I know you're going
to get sick of me telling you to rename
your sub tools, but trust me, it's just going to help you a lot
when you're working. Let's go ahead and do
these with these parts. It's going to be a bit tricky. So we're going to
move these down. I'm going to hide everything. I'm just going to
unhide these two so these parts will just sit on top or glue on top
depending what you're doing. Like if this is going
to be for production, usually the client will make
them out of a soft material. This might be like a
rubber or something else and that's going to be
plastic or PVC or whatever, right for me, because this is going
to be printed in resin. It's not going to be from
a different materials. Still going to be from
that hard material. I need to make sure, because you'll notice that
these are really thick. Now, for scale wise, you'll notice that
they look a bit weird. They would have
looked way better if they were a bit thinner. But the problem
is I need to also keep in mind what
material I'm going to do, if the part is
going to be resin, if the part is going
to be done in vial. So you have to keep in
mind when you're working, especially even if
you're printing it in your office or you're
using a studio, you always have to
keep in mind what's the end goal of that model. Is it going to be done in vinyl, is it going to be in resin? Is it going to be
PVC or whatever? All right, so first thing I'm going to check,
before I start, I'm going to go and take these and bullion them
out of the shirt. What this is going
to tell me, this is going to tell
me like whatever, we have bright spots like these, that means it's
intersecting them. If I'm trying to put these on, they're not going to go on
because they're going to be bumping into these parts. Now you can do a bullion and have these cut out and
go in and cleaning them. The second option is you
can select the shirt. And what I love about it is
you can see where each one is intersecting and just them
down a bit like every area. And sometimes just go
a bit over and you'll, you'll see that I'm going
to do this again when I inflate these just to make
sure that we have that gap. Just go in. Just make sure when you do
this to go subtle at it. Because when you're
doing a shirts, not a problem because
it's just cloth. It's not going to look
weird if the cloth has some bumps on it.
It's still cloth. But if you're doing this
on a face or you're doing this on something
that has to be clean, just make sure when
you're doing the edits to be subtle about
it and double check. Always go back, zoom
out and double check your now some parts, if you don't want to move them
back you can also sculpt. So you can go in and you know, sculpt that detail and then soften it and
then move it back. Right. It's not only the
move brush that you can use, you can use any of the brushes, I'm just going around and
moving some of these stuff just to make sure I don't
have any parts intersecting. When I'm going to be
putting these on top, they're going to
just fit in nicely. I will do another rotation. You see miss this one. Okay. Now, second
test. Duplicate this. I move this down. I'm going
to keep that. Hide it. And another one, sorry. I'm going to move this one up. Hide this, just so I don't
have to rename it again. These, if we look at them now, I'm going to go
into Inflate again and I'm going to go five. Now I notice that I'm
working with my UI, and if you want to download it, I'll leave a link in
the bottom so you can download my UI or for inflate, you can find it here at the
Defamation Everything here, you can take it out and
customize your own. That's inflate. All right. This one we add inflate it. Yeah. Added inflate it. Now, I'm going to go back and check if that tolerance
is affecting and it does select the shirt
again and just go in and move those stuff around. Now when you're printing it for a commission
piece like this, which is going to be a one
off at the end of the day, it's not a problem if you
don't do this step or you have some parts that
they're not coming together because you can
always go back and send them. The problem with this is when you have files that
go into production. Because sending one
piece is one thing, 5,100 250, it's a different
thing altogether. Now I know that this is
going to be perfect. I don't need this anymore. I don't need to do a bull. I know these parts are
going to fit just nicely. You'll notice that for this one we had some straps in the back. If you look these, I'm
not going to use these. These are just for me here
just because I wanted to do some nice screenshots. But these I'm going to use
actual, real material. Because I notice that when you add different
materials to the model, especially when you're
doing a one off piece adds a bit of more
texture to it. Let's move sideways now. Now that we have this,
let's move to the sleeves. So I'm going to move that down. And for this, let's
work with the sleeves first affecting the shirt. Okay, for the sleeves, we're
going to do the same thing. I'm going to do the bullion, I'm going to notice
if we have any white, well, we don't have any because I've already done
this while I was sculpting. Sometimes while I'm sculpting, because I know I'm
going to do this step, I'll just go ahead and do
it just knowing that that's going to happen when I
start going into king.
6. LESSON 05 Splitting the sleeves: So what I'm going to do now, because although these are
not symmetrical anymore, so I'm going to need
to be splitting them because I need to do
some extra work on this. Okay, now we do have a
couple of options here. We either have an
option to have these cut out of the shirt or have
the shirt cut out of them. Usually I'll do the sleeves to cut of the shirt and I'll
show you that in a second. So I'm going to go ahead
and do split hidden, so now we have two of
them going to hide. I'm going to work with this one. So now you can go
ahead and add a key. So we can go ahead now and we're not going to
get to that stage now, but let's say that's our
piece and that's the key, which looks fine, right? The problem is when you print, it's not going to print
that clean the piece, we're going to print
something like this. Okay. Well, no matter how
good the printer is, you're always going
to have that gap. It's because of heat, it's because of
the type of resin, it's because the wrapping, call it whatever you
want to call it. You're always going
to have that gap. And I hate that gap. I literally hate that
because it just makes the figure look so bloody
cheap and you'll notice it. If I go and put it like that, you'll notice just
adds that gap here and here and it makes
it look really crappy. All right? To prevent
that from happening, we'll need to do a
couple of things. Okay, I'm going to go ahead and, we don't have a poly group here. When I merged this, I didn't
keep the poly groups. I think I'm going to go
ahead round and round. This doesn't have to be
exactly to the edge, but try to stay
close to the edge as possible paint in a mask. I know you have to do it
manually and it takes time. I love the fact that
when you digital sculpt, people say you're now
doing stuff manually. I'm going to go ahead
round and round. You can do control and click
just sharpens the masking. Now what I want to do is
I want to do control. You notice in a second
the control shift click. All right, and you're
just going to hide that one that we created. And then I'm going
to do order groups. Now what it did, it
created three groups. Now I'll just hide this. And I have this control. And now it's going
to be one model. When I hide this, I have
two different poly groups. Okay, Now I can click on that and see how now to soften that, just do click on it,
put it in the center. Just move this in a
bit and scale it down. What it gives us, it
gives us that nice lip. So now, even if it
prints out with a gap, you get like a nice, you're not going to get that light going and
it's still going to look like it doesn't look good now because
we need to clean it. But you'll see in a
second what I mean now, if I go in and I'll
dynam this again, you can leave it like
this but I don't like having edges that might
interfere in my keying process. I'll usually just go in and just clean them up
a bit to make sure. I'll usually use a flat brush. And smoothing flat, so I just, I need those parts
to be flat a bit. Now if you want, you can
even get rid of that edge. It's not that visible, but at that scale it's not
going to be visible anyhow. But if you have
like sharp edges, especially when you're doing
something soft like that, while also on the subject of
soft when you're sculpting, You'll notice that, especially when you're working
with the client, going to tell you like, oh, I don't like that part, It's going to be too sharp
and I always have to use exactly the same
that it is like. Yeah. But in Digital, everything looks
a bit too sharp. And we have to keep in mind that if this is going
to be done in vinyl, vinyl being a soft material, you need to over sharpen
stuff just a tad. Even when you're doing
with SLA printing, even SLA softens
the models a bit, you're losing a bit of
that detail, especially. Especially sharpness, you'll get a bit of a call it a gauge blur. Like a bit of a I don't
know, one gauging blur on each part when you're
doing that. Right. All right. So you'll notice
when we do that it's going to start
affecting the shirt. So this is why we always, we're jumping between them
and we might start moving some stuff around,
moving the sleeve. And yes, you have to go back
and make sure it doesn't affect the straps and I'll
go through that before, you know, putting the piece out. All right, so now I want to do is move the other sleeve up. I'll duplicate
this sleeve again. Okay, We'll use
the one with one, move this up, hide it. That one I'm going
to do inflate to it, so I'm going to do like a five. Then we'll do a
bullion mesh. Okay. Now when we're doing
this bullion mesh, you have to keep in mind
a couple of things. Make sure you don't get
super thin edges like that. All right, because these
going to break super easily, especially when you're standing, especially if you're
doing this in resin. Now, there are a couple
of ways to fix that. One of them is make sure
you can have this thinner. I'll go ahead and delete that. I'm going to go back to the shirt sleeve because I
want to effect that one. Because you have to keep in mind that's the
piece that's going to go into the shirt. You might need to go back. This part, this edge
doesn't have to be thick, as I explained. It's just an extra precaution. Uh, and especially,
you'll notice if you're a toy collector and if you have a vinyl toy
or plastic or PVC, just pick up those
toys and you'll notice the toys that have
gaps into them. I don't know, they
look a bit weird. I'm not talking
about the toys that hands or arms or legs
need to move because that's a different subject
because those need the gaps between them because otherwise they're
not going to work. I'm talking about figures that
collect that are still in one pose on the ones that
have magnets to them. They'll always have
this nice lip that goes into the figure
just so it can, and they look so much better. It's just a matter of
jumping between the two. You'll notice I'm bringing these out and I'm
bringing these in. You might say, well,
we have a sharp edge now. We'll fix that. Just give me a
second, because don't keep in mind that this one is going to cut out of the shirt. So I'm going to duplicate this. Move this up again, hide that. Go back to the one that
I'm going to do inflate. I'm going to do inflate five. Now we still have a bit, but it's still better go in. Whenever you find a piece
that's too thin, just go in. I had to move it a bit around and just add
a bit of thickness. Okay, and we'll fix
this in a second. Just give me a second. Now we'll go ahead and do a bullion mesh. I'll append the shirt, which is this guy,
that's our new shirt. Now, now we have this again. We can go in and we can
start smoothing it out. If I go ahead and smooth, you'll see it's
still going to keep that edge because it
created that with the bullion mesh and
it's still going to keep it there
now for this one, I'll keep it now and
I'll do the other one. And then I'll do both of them because I want to
keep the dynamish as low as I can and I'll do those when I
have the other sleeve. For the other sleeve I'm
going to do the same thing. I'm not going to record that one because I'm just going to spare you the trouble of
watching it two times. Now we can move down to the other part again,
which is the straps. We'll move the strap
down, hide it, and keep the sleeve
and the shirt, have them down, and
then have a bully in. Okay. Now we can go in
and see how that affects. Because you remember we
moved some stuff around. Now you don't have to
move only the shirt. Now you can go if you want, you can take the straps, although they're
not visible, right? But make sure you
have it selected. If I move them, it's going to move the straps. Now, the only problem with that is because
you're not seeing, you don't know how much
you're affecting the model. The good thing is when
you do those moves unsolo the model moving some
parts just hit solo. You're going to see
if you mess something up for this piece. I don't have that many details. I don't have stitching.
I will add stitching. But at the end of it, because I knew that I'm going to be
moving these parts around, so I didn't want to mess
up any stitching again, select it, move it a bit, and then I can go back to the sleeve and do like
a mixture of two. I'm going to move these in
because you have to think that those straps will affect
the shirt a bit as well. We look in the back, it's not
affecting the back anyhow. A good here, so we can
move on to the next part. Now the next part is this piece, which is this one is
going to be a bit simper. I'm going to move this down and I'm going to do
the same thing here. I'm going to split
them up, split hidden. I don't need the other one. Okay, now for this one
I'm going to merge them. But before I merge
two sub tools, especially when you
have folds like that, I like to go in and
just do a double check before just in case I have edges that going
to overlap other edges. And it's just, and
this way it's way easier to tweak because these
two parts are separate. Because the moment
you merge them, and let's say you have
something like that, right? And you merge these two, it's going to create like
you're going to lose that edge. You're going to lose
that edge all entirely. So I try to make sure I
don't have any of those. See, I have it here
that's not visible. Because you always have to keep in mind if it's visible or not. All right, so move some stuff around and now we're ready to merge these two. Merge it down. Okay, once it's merged, go ahead, look around, see if something is looking. Now, let's go over the
parts that we have. Ready? We have this part ready. The straps are almost ready. The shirt, half of it is ready. We have the head and
we have the hair.
7. LESSON 06 Splitting the left arm: Now the sleeve is done. Let's move to the hand again. The hands are same part of the body with the body
selected. Control. Take the lasso and I'm just
going to go just select extra because you don't
have to select to the edge. Just add a bit of extra just to make your
life a bit easier. Command or control. Shift click and split hidden. Now with the shift click down and now we
have the sleeves. Okay, Now I want the
hand to cut out this, but if we look at the head
now, it just looks like that. Like a gap, right? So to make it easier
on ourselves, like you can go ahead and
dyna mesh this and so on. But to make it a bit
easier because going to go and use the shirt sleeve that we have and I'm
just going to cut out of that even if it
looks a bit weird Now, just give it a second,
it's going to look fine. So we'll do bullion and
we'll make bullion mesh. If I go ahead and append this, I'm going to do a
pend body mesh now. And that's our hand and
now I don't need that one. And I can go ahead
and delete it. You'll see how we did the split. Now, if we print
this like it is now, it's going to print
out like that, okay? It's going to look just horrendous because it's
going to have that gap. Because we add that key key, sometimes it doesn't fit right. We either have to send the
hell out of it to make sure it fits even. The other thing is when
you start adding glue, so let's say you add glue here. You're going to go
and add glue here. The moment you glue it in, it's just going to drip out. Or you can see it because it's still going to leave a gap. And you can see it
shining from the inside. And it just ruins the
whole thing to fix that. Now, because we did
the bullion thing, we don't have to do
the masking again. Just move this up and
we scale it in again. It doesn't have to
be a huge smoothing. Okay, so you're happy with that? Can dynamish? We'll work on the hand once we get
to the gun part. Okay. So now what I want to do is I want to have this hand
cut out of that sleeve. So select the sleeve. And again, I'm going to go over and this is what's
going to happen. See that's way too thin. Okay, Selecting this sleeve, just track this up a tiny bit. Something like that. Okay. Again, if you want,
you can go back in and you can
make this thinner. But from my experience, this works just work just fine. Left hand duplicate
that I'm going to use. I'm going to keep this one up and I'm going to
use this as the cut. With this selected, I'm
going to go to inflate. I'm just going to go a five. Unsallow it. And then
to double check, just make sure we
have a nice gap. You can see it and look
at it from the side. I mean, how lovely that looks, just looks nice and it
just feels more natural because it feels like you
have a hand inside the body. Now, if you want, when you're sculpting,
when you split that, you can keep like the
arm and just goes in. The problem with that is you have to make sure you
have a lot of tolerance. You have to make sure the
folds don't go through it. Because sometimes you
might have a fold which is like really close to the
skin and when you printed, that part is going to
come out as a whole. Or it's just going
to break for me, this one, because it's not
going to be visible anyhow. You just want to make sure
no light goes through it. When, right now that
we're happy with this, we're going to go ahead and
do a bully and mesh append. Um, now because
we have it named, we have mesh left sleeve
which is this left sleeve. I'm going to go
ahead and save this. We can move to the next part. With the magic of editing, I went ahead and did
the other sleeves. Now to recap, just going to go over and isolate all
the parts that we have. We have the hair,
we have the head, we have the left arm, we have the left sleeve. We have the shirt,
which is not done yet because it's still going to
be connected to the pants. I'm going to put this here. We have the straps,
the shoulder holsters. We have the right
arm, right shoulder.
8. LESSON 07 Right Arm and Bracelette: Time to move on to the
other ones. All right. Now for this hand, you have a couple of options for me knowing that this is
going to be painted. And I would like to do
some leather painting on this and I would like
to do some dry brushing. And I want to do
some nice details. I'm pretty sure I'm
going to mess up the skin paint to make
sure that doesn't happen. What I'm going to do
is I'm going to split the hand into three parts. I'm going to do this
part and this part. And then the hand
with the gun. Okay? So to do that we're
going to just move everything to the bottom. I'm going to move this
to the bottom as well. We're going to use this to cut our hand now because
when I emerged, this is still has polygroups. This is why I said always keep your polygroups because you never know when you need them. Selecting the interior
one, Delete hidden. Now if I dynam this
1 second, see why. Because it had that
sleeve our problem. We can fix this. I'm going to go ahead and mask this part and the
part on the top. What we're doing
here, we're just trying to isolate
so we can create multiple islands to see
what I mean in a second. Now if I go ahead
and do command, you're going to create
these two, right? If I do that and
I do auto groups, what it's going to do is now I have this as
an auto group and I deleted everything
that was inside. Okay. If I do closed holes, I should create these. Now I can go ahead and move
this just closer to the edge. You'll see. Just going to save
us a bit of time cleaning. I'll do the same for this one. Notice I have on that
polygroup selected. Okay. Now going to do
on Dynamite again. Now the dynamesh might
be a little too low. If that's the case. I'm just going to
raise it up a bit, then just smooth that part, you can hide those
valleys like this. Just take the
flattened brush and bring them to holding
the old will flatten up. Like it's going
to add terrain to your model to think of it as
like adding a bit of clay. If you just leave it normally it's going to flatten
but cut out of it. Keep that in mind. If you have pressed, it's going to remove,
it's going to add it. If you just use it normally, that goes to at all of
the brushes inside brush. Okay. So that's
our leather strap. So we're going to be using
this to cut out our hand. Now I'm going to take that, do a bullion mesh and
it's going to do this. Okay? Now if I go ahead, you'll
notice that I don't like this. I'm just going to add a
bit of okay to fix that. I'm going to go in and I'm
going to fix that part. That's why I said
when you're going to do bulls and stuff like that, make sure to go around. And I mean, you can't fix it after you do bullion. Don't get me wrong. It's just the fact
that it's easier to do it when you still have
everything separated. It just makes a
whole difference. Now when you do stuff
like this is why I said sometimes when you dynamish
and you merge stuff, you're going to lose some detail or you forgot some
parts like this one. I need to make it
look like a stitch. You can still sculpt. It doesn't matter if you're doing keying. It's not as if you can't go in and edit stuff
and add some details. It's just like 99% of
your sculpting should be done before you start
doing any of this stuff. Now with leather you can do, what you can do is you can
do a bit of an inflate. So you can do like
a two. See how. And just adds that bit of, you know, gap there. Okay, So are we ready now? Let's see how that looks. Now we still have that
block there to fix that. I'm just going to
move it way better. Okay. So now I do
make bully and mes. You don't have to do this.
If you're a character, it's one piece and you
don't want to go into the trouble of like
splitting stuff and putting parts and you know, because you have
to deal with mi, more parts than to, you know, hollow, add
holes to them and so on. But as I said, when I work with this stuff, I always try to keep in mind
when I'm painting this. Now if this was for a factory, I would have left
that no problem because they do some
masking techniques that they're not going to
run into that problem. They know how to
fix that for me. Because this piece is it's
going to be a one off. And I know I have
to hand painted. I'm just trying to remove some of the headaches
that I might have. Okay. Again, I'm still going to do what I showed you
in the other one. Still going to select that part, resize it at a bit of an edge. You still have to
go at one point, you'll notice that I'm doing exactly the same
thing for each part. The process, I'm
doing multiple parts. I'm doing all the figures, so you can see multiple
parts how to work with them. But I'm doing the
same exact thing. It's not anything new. It's going to be a bit
difficult at the start, but once you get the hang of it, you're going to fly through this because it's not difficult. Just a bit of time consuming if you just take the time
to be a bit organized. Not crazy organized
or something. Just a bit organized. Just saves you a lot of
headache afterwards. Okay? Now, if you get that here, when we do the leather strap, I'll leave it because I need to say first if you get that, it just looks way
better because it looks like the leather is
pushing on the meat. It's not a bad look. I'm going to do the same here. Take that size it to the scale, move it in again. It doesn't have to
be a huge edge, just something so we don't have that glue or light
leaking through it. Okay, let's go clean
this up a bit. We're going to have the
leather strap which we're going to add a key
here and a key here. And we're going to have
the bottom of the arm, which is going to be, we'll have a key here
that goes inside. And for this one I'm going
to go maybe the male and female have this to be
the female for both of them. We'll see once we
get to the keying, sometimes depending on
the thickness of the pee, we'll decide which goes.
9. LESSON 08 Working on the Holsters: Moving on to the next part. Now for the next part, I'm going to go to the holsters. And for this one I went
ahead and did the gun. So you'll notice that
this gun looks bad, but it looks that way because this gun is going to be
sitting inside this holster. I know that this piece
is going to be glued in. I use the same technique
that I've showed you before. You see we have a gap. I've removed any extra parts that I know I can slide
this in and I can glue it. And why did I do that again? Because I wanted this
to be painted leather. Because you remember
when I do this one, it's more of a planning as well. Not only because this
is going to be leather. I want to be able to paint
this with air brush. And then I can go in and I can do dry brushing without
affecting the gun, without having to figure out how do I mask this and so on. And this one I can
paint gun metal or do any details to it. And then I can glue it in ready and it's
not going to be visible like the parts
that are visible. It looks like a full gun because this is
going to be tiny. Like it's maybe 2 centimeters
or 3 centimeters high. So all right, now
for the holsters. Okay. We have two holsters. We have this one. These are
going to be attached to this. Now I'm still figuring
out if I'm going to print this as one piece. I think I'm not. I'm
going to go ahead and this piece is going to
be keyed to that one here. For that one, I'm
going to make sure we have enough thickness here because you want to make
sure when I add a key to this I can go into that part. We're still going
to need the key because when you're having
surfaces like this, it's really hard
to get them right. Although it's tiny, we're still going to go in and
add a tiny key, even if it's small, if it
pokes out of the other side. We can fix that after
we can send it in. Makes your life way easier. And you know, these
are going to stand. What I want to do now
is I want these two and make sure that I don't have
too much of them going in. So to do that, I'm going to take
the move brush and I'm going to do
what we did before, just move them out a bit
while looking at your model. Like for this one, again, it's not a huge thing because
it's a leather piece. But keep in mind when
you're doing this on a piece that for
example this one, because this one has
a gun into it, right? If I start moving
this around it, it's not, it's going to
affect the gun for this. What I might do
is I move it out. I'll put the gizmo here because it's taking a lot through that. I'm going to move
this piece a bit out. Nothing too crazy. Then with the move brush, I'll do those subtle. Okay? Here, I don't
need any bullion. The only thing that I'm
going to do here, again, make sure it didn't affect it didn't affect
the gun. All right. That is sitting in see
it did affect the gun. Now I just the placement
is not important to just make sure the gun when
it cuts through it, we don't have too
many parts that are intersecting because
when we moved it, Yeah, that looks good. We do have these inside. You can go ahead and
tweak this if you want. I didn't because it's not
going to be visible Anyhow, I'm going to stick
a gun into it. Anyhow, for this part, maybe for this one, we'll
go ahead and smooth it. Now you'll notice
when you smooth it, you'll ruin your sculpting
details outside. Click shift and make sure
you have face mask this way. It will only affect these faces and
it's not going to affect the faces in the inside. On the outside like
those are done. Now, again, in relation
with three D printing, you have to keep in
mind anything you move, it will affect the other pieces. You always have
to go in and make sure if I move that a bit, did it affect the shirt? And it did. Now I'll move this down, I'll
take the sleeve. Move that down with this
selected can go in. See, that would have been like a bit of sending
for me just to figure out. Instead of spending
that time sending, I'll just go in and
I'll move this part in and just make sure
I get enough of a gap. When I'm going to
glue this, it's not going to give
me any headache. I don't think it's affects
the shirt, but again, you're not going
to lose a lot of time if you double check it here instead of figuring
out when you print it. You're going to go, oh, why
the hell isn't that fitting? It's hitting something.
10. LESSON 09 Preparing the pants 01: Let's move on to the pants. Now, you noticed when
we laid out the parts, we notice that the pants
have multiple pieces. So we need to go in
and gather everything. I need the belt hoops, I need the belt strap I need, and I also need the
pockets for this one. I will also need the
belt and the buckle. Okay. And I'm going to go ahead and hide everything
that I don't need. Those are my pants. Okay. First thing, I'm going to
select this one again, because we have that
nice polar group. I can go ahead select
that, the lead hidden. If I do close holes, I have a beautiful
model that I can work with and cut and
it's just clean. Now for these I'm going to just dynamash them add some
more subdivisions to them. Again, as I said before, while I'm here I'll
just double check if when I sculpted or when I created them, did I have gaps. Like for example this one. It will cause problem
in printing it. Just take the time, go through all your because I don't know if you've
heard the expression, it's called watertight. So you want to make sure
your piece is watertight. If you have gaps like this, Z is still going to create
the interior of the model. It's still going to
add those polygons. It's because it doesn't know if you want
that to be removed. So I'm just going to go in and make sure
I don't have any gaps that I don't need because I need this tight and I
need this piece to be one piece and go around. See, it's a good idea to work in a different color because you can see
the contrast better. That's why turn poly groups on. Okay, let's see the
leather buck buckle it, leather strap or hoops, if that has any gaps were good. Now for the buckle, I'm going to add a bit
of inflate to this, maybe see if three is good. I can go higher to
because I don't, I don't want gaps on the sides. I don't want to gap
here like I want to give the
impression of a hole. But I don't, I don't
want any big gaps. It's going to cause a lot
of headache when painting. It's going to cause a lot
of headache when All right. Do the same for this one. I'm going to add the dynamic
subdivision to four. For these, again,
four, apply them. Make sure the pockets
doesn't go into the edge. The pockets here don't go over the edge the same
on the other side. Okay. I think we are
ready now for this one. I can't split the belt. I'm going to go battle through it and
paint that belt manually. And then I don't mess
up the paint that much. We're going to start
with the pants. I'm going to move the
pants to the top. Going to apply all
the subdivisions. Make sure we have all the
subdivisions applied. Apply. Okay. And then I'm going to go in and
start merging them. I'm going to go here.
Merge down again. Always. Okay. Merge down. Merge down. Merge down. Now we have the
pants as one piece. I'm going to go
ahead and raise it to 800 and do a dynamesh. Now, there is a
technique for this one. You don't need to whenever you have a piece and you're not sure if it's watertight or what you can do is
you can create a cube, make it a bit larger
than your model, put it underneath it, turn the bullion, and then just go through its because
if you think about it, this is how your printer works. It's exactly like
that. If it's an SLA, it's SLS or if it's anything, it's still painting
each layer this way if you have an area in the
middle which is not filled. Then that's going to
cause a bit of error. Usually, if I'm not sure you see this is
what I'm talking about, it has an island
inside of the pants. Although now I'm not worried
about that. Why you may ask? Because I don't know
if you remember, this guy is wearing boots. Anything underneath the knee
is going to be deleted, so I'm not worrying
about it for now. But if he wasn't, then I would have gone in and made sure I don't
have that gap here. This is if you have
a complex shape and you're not sure if you
have any interior areas. Because then you'll see
when we move this into mesh mixer or any other software that hollows your pieces, you'll notice that if
you have Dors like this, it might just give you some
headaches when you start adding a bit of
what's it called, drainage holes if the
walls are not thick enough or you have
multiple walls because that will happen if
you have multiple chambers. And then when the printer is trying to print
and knows that that chamber is one piece and the drainage hole
for the other piece, then you might run
into trouble of having suction areas
that failed prints. This is why I double check. Okay. Now for the other strap, for this one I'm going
to keep separate. I want this to slide in. I can make this work
for these parts. I'm not sure if that work, this is the first time I'm
trying this because I want to print one of this
and put them in. You'll notice this on this is just an homage to Hell
Boy and Hell Baby, because I have a toy named Hell Baby was a
commission as well. I wanted to use those for my
collectors who know my work. All right, let's get
to the other one. This one. Now this one, I already went ahead and
merged with parts like this. What I might do is
I might do like a two inflate just to get a nice and then raise
this to about five. Go around as I've shown
you with the other one, make sure we do, we don't
have any huge gaps. All right, for the buckle. I think I can go a bit
higher with the buckle. I can do maybe two and
then I go to seven. We should be good. All right. So, let's go ahead, maybe this one I can
bring it out a bit. It's going to be tiny anyhow, but All right, the
provision of five. I'm going to apply the letlow. Let's dynamash this
into one piece. Looks good, go around, make sure everything
is looking good. Now, hide everything. Just let the pants. And I'm going to cut this. I want to go around, make sure if this is hitting anything. Now if you want to double check, you can do also have this
and move it up and down. Usually this is how you test
if parts will fit inside other parts should be
co, come in nicely. Maybe a bit to fit here. I'm going to do. Just going to make the move
brush really large. It affects a just move
these out of the way. Just the dad, we should
be good on this. Now for the bullets. I already made sure
that these are a bit smaller than the hole because these are going to be glued in. I'm not sure if they're
going to sit in. The problem with when you
do resinin, you paint them. If you take these out, they might just chip
and scratch the paint. We'll see. I'm going to see I can have them sit in nicely. If not, I'm just going
to glue each one in. Okay? And for this
one, I don't have to tell you this, but I will. You just need one.
You export one and you duplicate it
inside the printer. You don't have to take
all of these out, you just need one of them out. All right, so let's do
another recap just so we can have the hair have the
head with the hair back, the left arm. Left.
11. LESSON 10 Preparing the pants 02: We have the leather bracelet, the right right hand, right arm. The holsters. Holster straps. Actually the gun that's
sitting in the strap, the other sleeve, the shirt, which we need to cut out of the pants next and the holster. And now we have the pants, I'm just going to
slide them here. Then we have the, the
other leather strap. Okay, So off to the next piece. We have the shirt ready.
Move it, that down. And we have the pants ready. We'll move these down,
hide everything, and only show these
too now because we have a nice clean
shape on the top. We'll go around
and see if we have any parts that are going
through the pants. Going to select
the pants and cut that out of how clean is that? Oh man, I love it when
it comes out like that. I'm just going to go ahead
and Bullying, bullying. And you'll notice that I'm still naming everything like
the magic of editing, but I'm naming stuff, it helps. Let's go and mesh this. I'm going to go pend shirt. I don't need that shirt anymore. So I can go ahead and delete it. Now for this, again, same thing. If you would leave it like that. The amount of times it
happened to me gets annoying. At one point, you make
sure it's perfect, you make sure the print is good. And then when you paint print a piece, it
comes out like that. It's the most horrible thing you can do with your figures. Annoying because what happens with flat areas,
especially like these, when you cure the material
because it goes into resin, it goes into alcohol, it goes into the UV chamber, it gets Dn up, sometimes it just
buckles up and just adds a bit of wave to it. When that happens, this
one when it sits on top, and if this one has a cold, imagine this one
has a bit as well. Then they just sit
on top really weird, and you get that ugly, ugly gap in the middle. Okay, for this one where
I'm going to select, I'm going to select
the two groups. Not only I need this
and I need the purple, because sometimes it
creates that as well. Click on that, move, your Gizmono, the middle. Now what I want from the side, just scale it down. You can rotate this and
make it as straight as possible From the side. You can go in a bit
deeper with this. Like you noticed, I stayed
away from the edges. I went a bit deeper. Why? Because now,
if I go ahead and cut out of the pants,
this is what we get. I don't want the
edge to be thin, I want this to, you have
like a nice slope inside. Still still need to fix this, but you're just trying
to prove a point. Okay. Do this to
about 1,700 dynamin. We take the flat
and we clean it. Now when we have
areas like this, don't leave them like that, they're going to cause headache. What you do, take
your clay brush, you can either go in or add. Just try to have
more uniform shape. Don't too many
valleys and peaks. When it comes to keys
and connected parts, just take my word for this. If you don't want to
take my word for it, just try it printed and you'll see when you have some warping, how annoying these pieces
are when go in together. I have a friend named Evan that taught me so much about three D printing and all that stuff. When I taught him how
to key like this, he used to call me crazy, like, oh man, why do you
do it so clean? And it's like, oh,
this is waste of time. And then he started doing it and now he absolutely
loves this technique. And it just saves him a lot
of headache when it comes to. And gluing and sanding, and also he does
casting as well. So when you're also, you cast your own toys. You have to think
of so much stuff. Okay? So something like that. It's good. Again, the edge
doesn't have to be big. It's just a matter of when I cut into that just gives me a nice, you know, you see, see this is what I'm
talking about, this. I don't want any valleys
like that when I get these. I just want to go
in and, you know, not going to get
rhythm them entirely. But at least I can make
this area as flat, as clean as I can. You'll notice that it's
a lot back and forth. It's a lot of jumping
between each one and just seeing if it looks
good. All right. Now now that edge will
fix it once we bully in. Now I'll duplicate this, keep one of them. It doesn't matter which one
because I didn't name these. But I'm going to go ahead
and inflate for this one. I might go for six, even just make sure
I have enough. Now if you think that some
edges are thick, again, go to select the
pants or the edge, the piece you're
not going to cut. To make sure you have
like a big move brush. It doesn't affect. You'll
noticed when I dynamished this, we got Yeah, Don't
worry about it. We can fix those after. Let's go ahead and do
a dynamish bullion. Sorry, pants are dynamishedh. Now we have these, we can go in and we can start
cleaning them. I'm going to do this dynamish that then now you need
to notice something. When you do smoothing, make sure you double
check after you clean. Because what it does
sometimes smoothing adds to add some volume. This is why one of the
reasons add like that gap, because I know I'm going
to go back and smooth it. But still, even if you do just before you export and before you
decimate your pieces, just double check them and make sure because it's
easier to go like this rather than after you print you have gaps
or overlapping areas. Right now for this, I don't like how sharp
this is because at the end of the day
this is a shirt. When you have areas like this, you can go in and fix them. Yeah, one of the things
that I don't like about when prepping the models and you have to do a lot of zero meshing and dyna meshing and so on, you'll lose some of that detail. This is why you always have to keep in mind to make sure you get you get enough resolution. And go back and double check. Just cleaning those
edges. All right. We can move, you can always go down and you can have each part double check
it on the other part. Have the shirt cut
out of the pants. Have the pants
underneath and have them see if you have any
intersections. It looks good. Even if you get an error
and it prints like that, still doesn't look horrible. You have some edge to work with.
12. LESSON 13 Splitting the boots 02: The other. I'm going
to go ahead and apply and delete lower. I'm going to do a
resolution of maybe 600. See if that holds all
the details I want. Then we get to this part. You see how the
part this is what I was telling about,
testing them out. Right. I'm going to go
ahead and hide everything. I'm going to take the
part that we had before. I'm going to do that one. That's one. I'm going to
take this and move it down. You see how we get those islands like gaps which we don't
want on so many of them see that just double walls and headaches or that part
just floating in midair. We'll go back to this
and to fix this, easiest way to do it, like you can start moving stuff around. Just take spheres and
shove them inside. That just does it and
you move them to hide. You don't want to be visible but just just filling those gaps. That's how I fix most of these because it's
an easy trick. It doesn't affect the model. I can see how you
have this here. Like I should've went in
and this is why I said, don't get rid of
your poly groups. Um, I can select this now. I should have done
this at the start, but he sometimes and just
go to inflate and do three. And just do the
same here, three. Now if I do a dynamish again, again with this one as well, I did the same adder. Should have double
checked because I don't want that edge because it's not going to be visible anyhow. It's just a tiny, but
sometimes you'll miss something having those
poly groups ready for you, it's just a pity
not to use them. You see, I still
have that gap here. I don't like that. I can select that and I
can move it to the. This is why I said it really depends how visible
that part is. Because this is
going to be tiny. Half of it is not
going to be visible. Anyhow, you got to select what parts you need
to spend time, or again, it comes back to material
if the client wants to have those type of accessories that you can remove,
or multiple shoes, or those type of Nikes
and Jordans that you ca, put on the character and it's made like a
different material, then you have a lot more
work to do to make sure. Now, here's one part I was
talking about casting. If you were casting this
or you couldn't do that, I like the caster would
have sent you somewhere. If you would have sent him this, we wouldn't be happy because those would break when you
pull them out of the mold. You can go in with
also the inflate. The problem with
inflate it does this, this is why I'm not using it. Like you can try pinch as well, but again, it's not great. I'm not sure if I'll just add that because I don't know if there
is a goal there. But just to make sure I
don't have any holes. Again, I'll go back to my model, then I'll double check
to see if I have anything that's standing out
and I don't, Which is great. Now, I went ahead and merged the top of the boot
with the bottom. And then we can go ahead
and duplicate these. We can get that nice edge. And don't forget to add
a bit of an inflate. I'm going to go do five, this one then we can go go ahead and
append the new boots. I'm going to go and
delete these two. Okay? Okay, now we have this. Just going to go ahead
and dyna mesh that. I want these edges to be clean. All right, let's do one recap. That's our character. We have the boots here, the pants, the shirt, the holsters, the belts, the shirt sleeve, the gun
that goes into the holster. We have the other holster. The straps put these here. The arm, so that's the
arm with the bracelet, the hand, the bracelet
can put that here. And we have the other sleeve, other arm, the
head, and the hair. These parts are going
to be just one piece. Then we have the final pieces which are going to be
a bit more tricky. Which are the guns then. Yeah, don't forget, I
need to also do this one. I'll do this one first. We have the holster because
it's pretty simple. Now finally, we have those tiny details which
I'm not going to use. These are not going to be used, these are not going to be used, but we must not
forget about these. I'm going to go ahead
and merge these. I'm going to move these down. I'm going to take the shirt, move that down as well. I'm going to make
sure the buttons now, for the buttons, I think we can go and make them a bit larger. So I'm going to do maybe two. Yeah, just makes that thread
stand out a bit more. I'm going to do maybe
dynamite of four, then I'm going to
merge these down. Now I have that,
it was one piece.
13. LESSON 16 Keying Pants and Boots: Now that we have the key for the pants, we'll
move that down. Take the pants, move them down. Now we can bully in that. Here again, we're already here. We'll do the ones for the legs. Just make sure you have this
in, we'll do the other one. Just push that in. Again, always double check
with what it's connected with, have transparency on
because sometimes you'll do a key and maybe
it a bit too thin, I'll show you that and when
we get to the holsters. All right, those
look really good. Now if you don't want to
do auto group multiple times because we hope we don't want the auto
groups here anymore. We'll do auto groups
like that right now. If we see we can go
ahead and select this. Just make sure because
sometimes it might select the one inside. Just make sure that doesn't
happen, split hidden. Now these keys are
for the boots. I'm going to keep those up. I'm going to hide those
two because I don't need them now. Okay. Now we have one that
cuts here and these two, I don't have anything else
that attaches to you can always double check
because this one I don't want it to be
attached to the belt. I'm just going to
add it there now. Again, I will do make bullion
mesh pants are ready. Let's do the shoes. So you
have the keys for them. I went ahead and move
the shoes down and now we have the keys
that cut into the top. The shoes will not be
connected in anything. I might create holes
for magnets at the end, but we'll figure this
out a bit later. Let's go ahead and do
a bullion on this. You'll notice that I'm not
worrying about renaming now. We'll still have to
do a bit of renaming once we finish all of them, because that then becomes
crucial, really important, when we have to export each piece and know
what parts are reprinting.
14. LESSON 17 Keying Holsters and Straps: Let's do this part. Let's move this, and
let's move that together. This is what I was saying about parts that might
go through it, right? We'll select the keys
and we can drag that. This one because it's thin. If I drag it in, it will
reveal the key inside, which is not a problem because the gun is not going
to sit into it. You can do that. It's
not a huge problem. But I'm going to do is
I'm going to resize this. Okay? So it doesn't poke out on that side. But I don't mind if it
pokes out on this side. Because once I glue these on, I can send it, but
I'll try to make it. Because the problem is
if I make this here, it's going to be so
thin it might break, not going to even
worry about that. I'm just have it go through it then I'll cut that
and I'll send it. Once I get to the sending stage, I'll do order groups. I'm going to do split hidden. Now I'll move that
down, hide that one. This is how it's going
to split on that part. I'm going to do make
bully and mesh this way when I glue these parts and we'll see what
I mean in a second. You also have to keep in mind that you'll
notice something with these keys that the outer part is a bit larger and bigger. Now that you look at this, see, it's not that a huge gap. When I glue this, I'm just going to have to send
this a bit down. Should fit in just fine, and it's not visible
from the inside. This is why I was saying
sometimes you have to check to make sure it doesn't
go through the model. But for this one we want it
to go through the model. All right, what else? Let's do the holsters. It we'll move both holsters. Okay. We'll take this
because this one will have the same technique as these. What I'm going to
do is I'm going to merge these two down
just for a second. I don't have to do
it for each piece and put transparency on. And I'm going to make
some keys with this one. You, you don't make the key, so it pops out on this side, the ruin your figure
ruins your stitching. And you have to make sure it's going through the whole piece because this piece is so thin. You see you don't want these. You got to make sure
it goes through it and it's big
enough. Thick enough. Again, you want that part to be hidden as much as possible. Try to have that key not visible from any side
as much as you can. This way makes it easier for
you when you have to clean. Yeah, sometimes just auto saves, especially when it gets
to 30 million polygons. But I try to keep
them as high as I can just so we don't
lose any details. Now with this, I'm
going to do the same. I'm going to go ahead and
resize this as much as I can, while at the same time I
don't want to make it too small because I need to have
a bit of support, okay? Now I'm going to do auto groups, I'm going to split hidden, okay? Now I can go back
to the other one, transparency, and do
the same thing here. Again, make sure, go through, make sure it doesn't go
out that other side solo. It, the keying part
is not difficult. The only difficult let's say about this is it
becomes a bit overwhelming. Because you have like so
many stuff to think about. But once you do
it, I don't know, once or twice, it's
just becomes easy. You'll find your own workflow. With this, we'll do auto
groups and split hidden. Okay. Now these are done. I can hide them and I have these keys
that will cut through it. Both of them will
cut through that. Okay. Now you can merge
these if you want. You can merge the keys because these two are going to
cut from the same thing. One other thing I forgot to see. I have to redo this. This one is way too close. It will cause some problems. When I'm going to,
this might break. I'm worried about that whenever you have problems like that, it's always better to
fix them beforehand. Okay. I think I'm going to redo all of them.
This one as well. I'm going to delete that for this because these
are poly groups. I'm just going to select them. I'm showing you this just so you can see that
it doesn't matter, screwed up the keying, it's not going to affect the
model that you worked on. It's not a huge deal. It's easy fix. That's why I created those keys because I wanted something that doing this
as full time job, I wanted something that
I can key really fast, low poly, without
being too heavy. That's the only thing
I forgot to check is I want this to be
centered from these signs. It doesn't get too close
to any of the edges. We want to make sure it looks
good on the other ones. Let's go ahead and
do that one as well. One thing I had to
make sure is make sure are rotated as well. Okay. We have enough
edge on the side, enough edge on the other side, make sure here we don't have
anything floating here now. One looks good. Okay, now we can do auto
group and isolate this. And I can isolate that. Now I can split hidden, move these under the straps. Do if I do now, much better. Now I have enough space
here and enough space here. The piece is not going to
break. When I attach to those, I'll do bullion for this one, the process is the same
for all the other parts. I'm going to show
you all the process. If you want to skip ahead, you can go ahead and skip ahead. I just wanted to make sure you see how each piece
is being keyed. If I go ahead and do a pen, put that in, I can go ahead
and delete these two.
15. LESSON 18 Keying Arms Hands and Bracelette: And the next one
would be the arms. With this one I'm going to do the same center this, put it in. I'm going to keep this long. But again, double
check like always, always double check to see if it affects the model or not. Do auto, groups,
do split hidden, take the key, drop it down. I'm showing you like you
can work inside your model. You don't have to do my thing
of dropping down stuff. As I said, I always
try to say this, my workflow isn't perfect. You don't have to do
exactly what I'm doing. I'm just showing
you my workflow. Sometimes you know how it is you've been working
for so long on a type of project that you might
be doing some mistakes. Or maybe someone will
look at this and like, oh, there is like a
simpler way to do this. I'm pretty sure there is way simpler stuff
and way easier. That's how I've been
working and that's how I work on the projects
and it works fine for me. Okay. Now I'll take
this, move it down. I'll take the other one and move that down
can hide these. Now I can merge these two. Put these down. Now
here's the thing. You know how these are visible
now they're not merged. But if I go in and
I'll do bullion, it's going to create a bull. Both of these meshes and with
the parts cut out of it. See pen just saves you that extra step of doing doing
stuff twice or three times. You'll notice that
I don't do okay. Always. Okay. Because
sometimes you might delete stuff easy in Z brush and I don't want to do that because you
can't bring it back. You have to make
sure you saved it. This is why. Okay, what's next? So now the hands have it here. Redone. Oh, let's see. Okay, let's see. Okay, let's. No, no, we're not done.
We have this guy. Okay, for this one? Yeah, I'm going to
add the key here. We'll add the key here. I'll move that for this key. I'm going to make
it a bit wider. Yeah, with these keys
you can make them. We like that. Still going to work? No problem. I think this is like version 2.0 because I
changed them a bit, like the first one
was really crap. Each time I change
them, I update them. And you can go ahead
and download them. You'll always have the
latest version for this one. I want to double check because
this is a tiny part and I don't want to go through
that piece too much. So I'll do auto group split hidden that key. I'm
going to move it down. Then I'm going to
take this hand, I'm going to add a tiny
one for this one as well. I'm going to. Yeah, I'm just
going to keep it like that. It's going to be a tiny piece. Anyhow, I'm going to do a group, see how sometimes might
select the one in the middle. And this way, you know,
oh, that's the one inside. One of the reasons
that I've put that is too easy to
differentiate between them. And also the second
thing is when you print, sometimes the edges,
I don't know, the pile up some gunk or
they print up a bit crooked. And this way I know it's
going to fit in nicely. And for me, it
works really nice. Okay, here's the thing. You'll notice that
with the keys, it has a bit of a gap. If that gap is too large, you can tweak it in the
keys that I send you. You can tweak the gaps
to, to your own liking. If you know what's
the distance that usually your printer prints. I'm not that much technical into this
usually if it looks good. All right, here's the
problem that I didn't check. You see how that added
like an extra face? Well, this happened
because I wasn't careful. What I did here is I did that. I didn't check to make sure
this goes right straight in. Now I have to redo that. So I'm going to do
redo the keying here. I'm going to make
sure those goes in. Okay. I'm going to do
order group for this one. I'm just going to
delete this one. To delete hidden, go back
to this and I'm going to do split hidden and
I'm going to take the key and move it down.
Now, we don't have that. That's why I always
say like double check. Double check because it's,
you might miss something. Bully in, make bully mesh. I think that's the
last part we have.
16. LESSON 20 Setting up Calipers: Of the final steps
in Zbrush is to size this to add a
size to it for export. I'm going to go ahead
and append a cube. Okay, I'm going to
move this to the top. I can delete this because I
use that just for naming it. Because in Zebra
names, the file, depending on your
first sub tool, I'm going to size this. It holds the figure
inside the gun, just from the top of the figure till the
end of the boots. It doesn't have to be perfect. Okay, here is what I used to
resize my figures inside. Plug in, I use a plug in called caliper masters. All right. There are multiple
ways of doing this, but this is the way that I use and I've been using
for a while now. What I love about this is
I can use multiple sizing, I can save the sizing and so on. While you have the gizmo, you go ahead and
turn off the gizmo. You go back to the transpose, you make sure you
have constrained into y because we
want the y axis. And I'm going to
click here on top. And then just do
set caliper point. And then I'm going to
click on the bottom and they set caliper point. And this is the caliper here. I'm going to go in
and type in eight, and I'm going to
select custom inches. Now if I tell a display
measurement that's 8 ", now I know my figure is 8 ". The best part about
this is I can save it, and I can save this as
a caliper unit of 8 ". Now one more step and the
figure is going to be ready to take into mesh mixer or whatever other software you
want to be using. I know there are a lot
of you can do to box, there is to box Pro, but I'm using a mesh
mixer for that. The next step is about just
going in and decimate. And I'm not going to
go over all of them because it just takes a lot of time and it's
just the same thing. Decimation is just making
sure the printer and the software can handle the
same because this head is 4 million and you can't
send that for printing, you don't need
that much usually. This is my rule of thumb. Anything that has details, let's say torso
pants, maybe those. I'm going to keep at
250, let's say pants, I'm going to do 250 K. It's going to go ahead
and analyze the mesh. And it's going to go
ahead and decimate this. From 5 million polygons down to 250 K, more
or less, right? And this is why I'm always you, I'm not going to go through each one of them because it just takes a long time for
each one to happen. So I'm going to show you this one and I'm
going to do the head, and then I'll do the other ones. And then we can jump
into a mesh mixer and prepare the models for sending them to your
printer slicer. Okay, so now what I
want to show you, this is the figure with 249. This is the figure
with 5 million. You can't tell the
difference exactly. That's the whole
process of decimating. I'm just going to do the
head again for this one. I'm going to go from 4
million down to 250. You can go lower. I think even 250 is an overkill. But again, it's just a thing of your workflow and how
you got used to working. Because sometimes you'll
work with jewelers, or sometimes we'll do like
a pendant or something like that and they
might print it at five microns or
some crazy like that. And then you need those details so
you make sure you don't lose anything
for this one. We're not going to
do that anyhow. But this is my rule of thumb
when it comes to splitting pieces because then
it's easier for me to decide if it has
a lot of details. 250, if it's smooth areas
and stuff like that. It's, I don't know, 150, 75,000 If it's a tiny piece, 30,000 or 20,000 Again, I'm going to show you,
this is the piece at 245, and this is the
piece at 4 million. No difference, looks
great either way. And this is the final
step inside Z brush. As you noticed, I went
ahead and named each piece. Now naming is important, so you know which part
are you printing, which part has it failed, which part you need to reprint. And then also if you
start working with clients and you start sending them these files
and they tell you, all right, shirt pants or TCM. Ctm. That's the one that
has a bit of problems. You know which files
you need to fix. It's also a thing of a workflow
and also keeping tidy. All right, for the last step, I'm just going to go
ahead and export these. To export these, I'm, you can go export and you
can export each piece, but that takes a bit of time. So you can go into Z Plugins, you go into Subtool
master, not scale Master. Subtool Master, You have
something called export. Then you select
your file format.
17. LESSON 21 Hollowing in Meshmixer: And then it's going
to go through each sub tool and save that. Now for the next step,
you can freely choose whatever software
you find helpful for hollowing your models. Now you can keep
your models full, but I don't recommend that. Now for small parts like the holster and the straps
and the tiny holsters, I'm not going to hollow those because the amount
of materials inside, the amount of materials
inside is not that huge. Right? So what we're
going to do now, I'm going to go ahead and
open up a mesh mixer. And you can download for free or you can use
something called a chat box. And you can also download
Chet Box for free as well. Models inside mesh mixer. We can start hollowing parts. Now for this you can imagine
I'm not going to add any hollow to the holsters. I'm add any hollowing
to the gun. None to the straps as well. The most, I'm going to
add hollow for a lot of parts who have a
lot of volumes For this one I'm going
to go edit hollow. Usually I'll just leave
everything as it is. Just do this again, I'm going to do the
pants and then edit, except then I'm going to
go ahead and do the rest. I went ahead and
hallowed each piece. Now for the last step, just go in, Select each one
from the list and go export. And save that. Go ahead
and do that for each one.
18. LESSON 22 Chitubox and Drainage holes: Now I'm going to show
you the same workflow for the hollow
inside che to walk. We're going to use the same
OBJ files for that one. I'm just going to take
each part on its own. I'm going to do shirt import
that in for this one I'm going to hollow yeah,
wall thickness. I want the wall thickness to be two and I'm going to do start, it goes about that really fast. And then also it gives
you a preview of how, how that's going to work. Now for the final
step which I do in chat box because
believe it or not, adding holes in drainage holes inside mesh mixer is difficult, let's put it that way in
chat box is just amazing. Here's what I do. I'll
hide the holes and I'll put them around
3 millimeters size. I'll hide them in keys. If I have a key, I'll
just create a hole. Make sure it goes through. Uh, here, do another one here. Another one here. Here's a amazing
thing about to box. It also saves your keys. If you would like
to print those out, I never do. I don't need those. Let's say you're putting this on the bed like that
and it prints all. Sometimes it will
tell you, okay, we're getting I'm going to show you that with the
form labs software. Sometimes if you have that, what I'll do is I'll
add extra ones outside. But for that maybe the
hole a bit smaller, maybe like 2 millimeters or 250. I'll add a hole here. Maybe for the depth,
I'll make it a bit tiny because sometimes it's just going to ruin your model. I'll add here. Okay. Just to
make sure it gets enough. Now if you want to
make sure you're not, I'll add extra Danish
holes because usually if it's not going
to affect my model, I don't need to fill them
up or I don't need to because let's say you add a
drainage hole here, right? When you print this. You
need to go in and fix it, but sometimes you can't
without doing that. Sometimes there maybe
you're working on a piece which has details from
all over and it's just, I don't know, you're printing
a sphere, for example, or a helmet and
you're still going to have that part and you don't
have any part to disguise. And this is usually how
I hide all my start. Okay, and then we'll do to box, add that one there, for example. With this you can hide
some stuff because we have the head split in a weird way because we're
going to have hair here. We can add one here if you
add another here if you want. Hopefully doesn't need
more drainage holes. All right, once that's done, I'll go ahead save as selected model and it's
going to save it as an STL. All right, we'll do another one. Let's do the right boot and let's hollow it,
2 millimeters start. Okay. Now let's go ahead
and add holes for this one. Maybe eight. It's not working.
You can do is you can raise this up and you can do the hole
from the inside out. For some reason
it's working there. For some reason it's
not working there. I'll add one here that should
be enough now for these. If you've seen my making off, you'll see how I fill these holes with resin and
the UV before curing them. One tip is when you
print any of the pieces, always make sure
to leave a hole. All the gases inside
the resin escape. The piece doesn't break because
it doesn't fully cure it. Always going to be curing do pants that one
the same Do hollow. I'll add one for the key
doesn't work, make it smaller. I'm going to do two
should be working. This is why sometimes
to box is a bit weird with hollowing. If I do the hollow inside inside mesh mixer, I
don't get that problem. I think it's because maybe I'm, maybe I'm doing
something wrong here. In the previous versions it didn't have precision,
percentage. Maybe I should be changing something to
have more precision. But something like
that, I'm trying to hide as much as I can inside. Now let's say for some
reason you can't hide it and you need to
do whatever you do. Don't hide them in
areas like this, crevices and stuff like that because they're going
to be horrible. You can't send them but actually add them in areas
which are play like that because then you just fill the hole and it's
super easy to send and you get a flow for each piece. Now it's just a matter
of going over each one, the light sleeve, again doing the same thing, hollowing it. Let's do a precision of 90%
if that makes a difference. It takes longer because then the interior one has to
have more resolution. Okay. Do 3 millimeters
that worked. Just make sure how long this is. Doesn't do a hole
on the other side. Because I've done this
a couple of times. Usually I'll forget how
long the cylinder is. As long as these are
hidden, don't worry. You can add as many as you want.
19. LESSON 23 Preform: All right. Now that we
are inside preform, I went ahead and
added three pieces, the pants, the head,
and the shirt. Usually how I work is
I'll tell preform to do an auto orient sometimes
it sometimes it doesn't. I end up orienting it how I
think it's going to work. I've been doing
this for a while. Okay. Once I'm happy with that, I'll just go in until it at generate and it's going to go ahead and generate
supports for that part, and that's what
it comes up with. Usually it adds
more than enough. You can go in and tweak them, but usually does a
really good job. I'll do auto orient. Again, the thing with orienting, I've used to do this
manually with like a B nine software and when
I used to print on a Moi, you have to try to stay away from areas which have details. I don't want any supports on
his face. That's obvious. I will try to have the
supports in areas I can send easily ruining the design. I'll do that. You'll
notice in a second what I meant about now. This works fine, but the problem is you have
a cup, which is this. If you leave this to print, it's going to fail because I know the supports
have been added here in the top of the head. You can print the
piece like that and you won't have any cups. Let's see if I
generate supports now. All right, and that works
nice because it doesn't add. Maybe move this a bit because I don't want any
supports on the nose. I think something
like that works good because let's say you're going
to have supports here, but that's going to be
covered by the hair, everything else is going
to come out really nice. Or you do have the option
to print it like this. Again, just make sure you
look at it from all sides, maybe a bit lower. Then if you auto generate, again you won't have suction
cups because remember we have drainage hole here and
we have a drainage hole here. I think I'm going to leave
it like that because it might just get
rid of that or just make it on the back a bit
and do and generate it again because I want this part to be clean,
it's going to be easier. Half of his neck is going
to be covered by the shirt. Anyhow, for this one, again, a orient, as you can see with the auto
orient is hit and miss. It's not always the best option. I mean, you do have the
options to tell it where the base is and then try again, but usually it's pretty stubborn about where
to put supports, something like that,
maybe on the side. See if that has that works, then I'll do auto generate. What I love about fo labs
and Pre form is you have this assesses your pieces and it tells you if you you're going to have any
problems with the print. And I'm pretty sure a couple
of new software do that now or you can print this the
other way around like that. But then you've got to make
sure you have support. I think this way it
will work nicely. We're ready to print now. Obviously I'm going to bring
in the other parts as well. Pieces like this
are usually really weird to print
because they're going to be filled with supports and I think something like
that should work just fine. I'm going to go auto
generate selected. Yeah, that's good.
That's really, can actually do auto
orient on this. See that brings us
that's pretty good as well those pieces already. Now the next step is to send this to the printer
and we're ready to print.
 Oasim Karmieh, Sculptor & Toy Designer