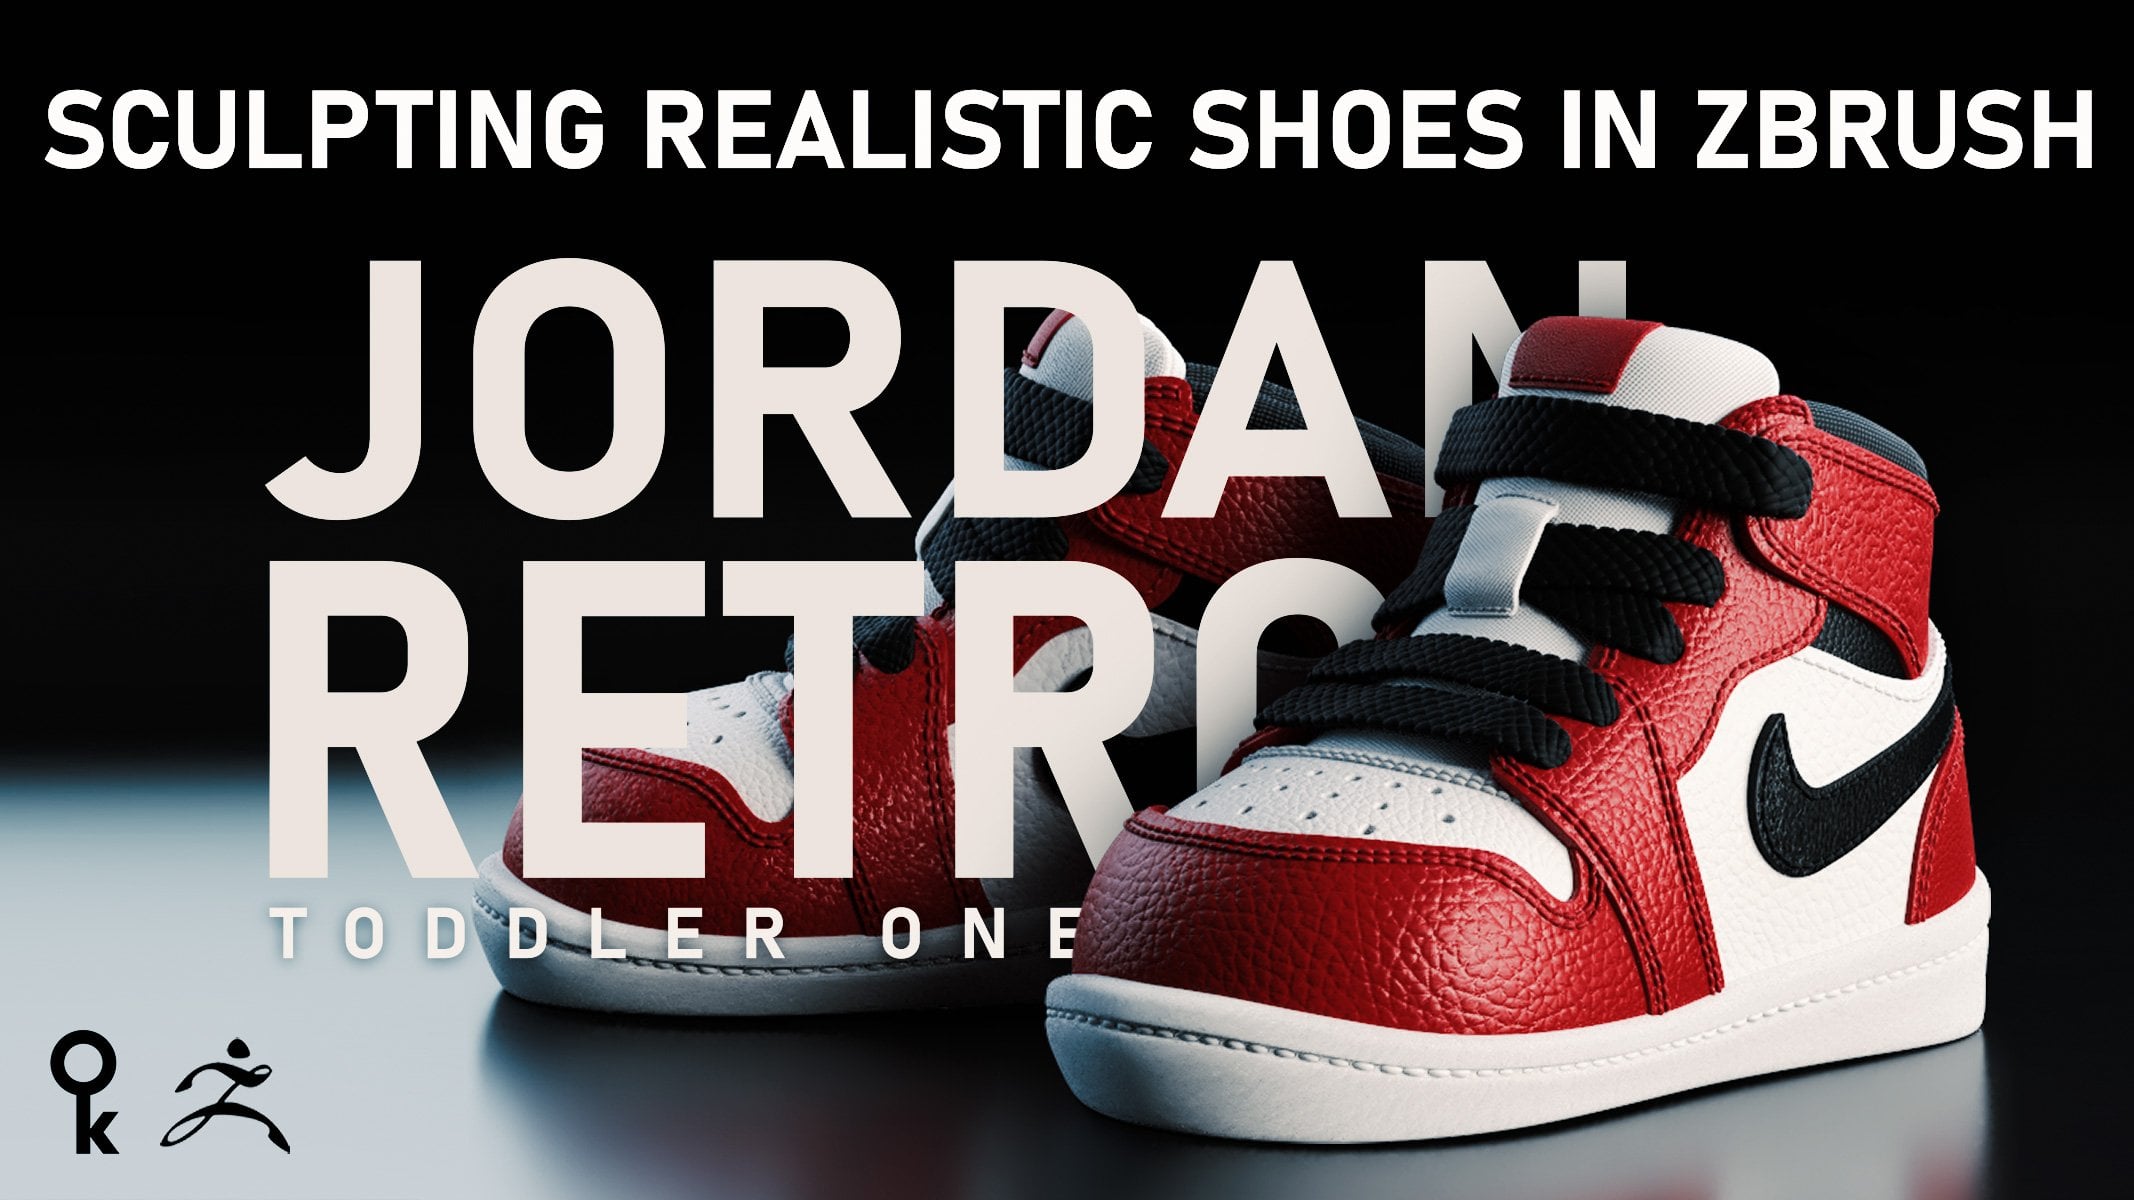
Transcripts
1. Trailer Trenchcoat marvelous designer: And this course I'm gonna be showing you how to create your own clothing from a sketch or suing pattern into the final 3D model that you can use for your animation or your digital illustration project. This course has over six hours of in-depth 3D clothing design using marvelous designer and then detailing the project in ZBrush and then rendering it using dimension and Sketchfab. I'll be showing you multiple techniques and how to add stitching details using ZBrush, his own tools like damn standard and inflate it. And I'm going to show you how you can use downloadable brushes so you can add more detail to your clothing. In this course, I'll be covering every aspect of the clothing design process, from gathering reference to creating the patterns, to assimilating, to adding your final details. I want to show you my personal workflow. This project is actually a client project and the client was really kind enough to let me record this workflow and share it with you. We're going to go over tools like the morph targets so we can add more life into your clothing when we want to present it and your portfolio or for the client. I'm gonna be showing you how I go about cleaning the model and preparing it for rendering or for animation. From read topology using image to UV mapping to adding thickness and cleaning up the model. So you don't have any errors when you export the model to do any rendering. I really hope you enjoy and you find this tutorial helpful.
2. Lesson01: Reference materials: Alright, like most of my projects, I always start by creating simple Reference Board. Just like looking for styles or elements. Or sometimes we're lucky and you'll find like a pattern that you can use. It doesn't have to be perfect. But I found like Pinterest is a great place to look for, for Batten's when doing almost anything, when a task to be done with clothing. So you'll just have to search for suing patterns or, you know, jacket, baton or whatever you're working on. So I went ahead and created designing a trenchcoat and I'll leave that link to you if you want to use the same word as four stylized, I'm going to use this just to dislike a roadmap. I just don't have to follow the exactly because the character that we're gonna do is it's going to be more cartoony. So it's not going to be realistic. Like the Claudian would be realistic, but the proportions will be a bit more exaggerated. Style wise, I'm gonna go with something classical. This actually is a project for a client. So I wanted to show you the actual workflow that I do once I finished a character and how I take that category into from ZBrush to marvelous designer and make, create the cloth and then bring it back to marvellous designer. And at the end of it, I'll even show you how I render it, either using dimensions or substance painter. Just to show you how you can present your product to the client without like sending them only ZBrush screenshots. So going with the Humphrey Bogart kind of style, really clean, really simple. First thing we're gonna do, we're gonna jump into ZBrush. And this is the character that I'm going to work with. And as you can see, is more of a cartoony proportions. Winds like the head is bigger, the body is a bit smaller. And you'll notice that this guy's already dressed in a suit and the entire suit was created also a marvelous designer. So you can see the jacket like this looks a bit weird because when we created this character, he was supposed to have a jacket and also shirt. So if I'm going to hide the jacket, you're gonna see the shirt. So what I'm going to take from this, you'll see that this is has like subdivisions and so on. But I don't care about that. I just want his body so I can simulate the trenchcoat all over that. We don't need the jacket for that one because it's not going to be visible. Because when he's going to be wearing the trenchcoat, The only thing that is going to be visible is this part. But I will need, I will need his shoulders, his arms, so I can have a proper simulation. So first thing that I do is I hide all the parts that I'm not going to need. Now gonna need the hat. And I'm going to need this hair. I'm gonna leave that here just to make him look mice. I'm going to remove the Tai, alright. And should be enough I'll need and only the belt. So I'm just getting rid of I mean, you can go ahead and delete the shoes, delete anything that's not relevant. Ok, so once I have that, I'll go into much visible and that's going to create this. Now, you'll notice that this is a 2.8 million. Now it's way too high. You can import this, but it's gonna take like a long time to render. As I said, I already have these with multiple subdivisions. So I'm just gonna go ahead and lower the subdivisions for the parts that I already have. And I have shoes. And we don't need the jacket. I'm gonna delete that. Pants. I might leave it. Yeah. To delete higher. The shirt as well. I'm leaving it just a bit higher just so I can have more polygons to work with. So I need, I want the simulation to not have that many faces. Okay? So that should be enough to go merge visible. And 69 thousand. That's more like it. Okay, so before I go ahead and export this, I usually go into something called caliper masters. And I give a science to this guy because as you know, marvelous designer is actually physical correct? Simulations, simulators. So if your character is three meters high or your categories like 50 centimeters high, it really makes a difference. So how the cloth simulates on the body and so on. So I wanna make sure this guy has like a, you know, proper height. So everything looks more realistic. So I don't I don't have to give them an exact height or anything, just anything like, I don't know, one hundred one hundred ninety centimeters. Just to give them like a usual male height. Okay, so now that I have that selected, I'm gonna make sure I have gizmo off and just use transpose. Click on top, set counterpoint to make it easier, just select y. So then it's going to draw like a straight line. And then click on the bottom, do set gala per point. So then we have like a, like a ruler. So then here I'm going to go 180 custom centimeters. Alright? So usually I save this just in case I need to do any edits or so. Calipers 1AD, you need to do that if you don't want. But I got into the habit of doing that in case the client comes back and he needs any edits. Now I'm doing this because when we're gonna go ahead and export this guy into and two marvelous import OBJ, businessman and we load as an avatar. Okay. Now for the bounding volume, which is this cage, which makes it easier to, so you can go ahead and you can move the bounding volumes around the character so it's easier to snap to it. To be honest, I found that it's way it's a waste of time to do that. I've seen a lot of people do do that. It really works if you have one character which you're gonna do a lot of outfits to it, then go ahead and create one. But if you're going to create different outfits each time, so you have different types of body. You have to set it up for each body each time. And for that scale, for me, I don't use it that much, so I'm gonna go ahead and delete that. So you just select these and lead them. Okay? Alright, so now the character, as you can see, he's sitting in the middle, so through the floor. So that's not going to simulate just select the character and just move them just above the floor. And you can see it here. If I don't worry about having him exactly sitting on the floor, it's not gonna make, it's not going to make a huge difference. Alright, so now, once we have, as you can see, we have this and the scale of it is really good. So now I can start creating the trenchcoat.
3. Lesson02: Making sewing patterns: So the first thing I'm gonna do is I'm going to create the front part. Then we'll do the site bark which comes under the armpit. And then we'll do the back bar. So you'll see when I usually work in marvelous, I keep my shapes like really, really simple because I'm just trying to block the main shapes and then worry about worry about refining them and making them cleaner. Or worrying about the size of it, right? So we're gonna go almost like underneath the knee and then have a line like this which goes under the armpit to the shoulder and then have the end of the shoulder and goes to that just to create the neck area. Alright. So once we have that, not even going to start making some curves or anything, just, just trying to lay down my, my basic basic forms. So once I have that, I'll go ahead and do a symmetrical pattern. And one thing you'll notice in marvellous, if which is really important to notice the normals. So the gray should be usually should sit on the body and the brighter part should be on the outside. You usually, it's really important when you're doing some pressure with the, with the jacket or you're doing some wind simulations, which, which I'll go into that later on. So once we have that, we can either use this to create the back or we can just create it from scratch. Usually unlike duplicating them. Because then I know my start points for the shoulders and the neck and the arms are usually the same size and then I can I can edit them properly. So I'll take this. I'll just like a simple copy and paste and then rotate that and just move it to the back. Okay, so once I have that and move this here, then here, and then I'll go symmetrical pattern and move that over there. A more, moved it here because this part is going to be sued with this bar, then this part is going to be connected with this point, right? Okay, so now what I'm gonna do is I'm gonna make sure these parts are create suit together. So I'm going to click this. So now you see, you can see the suing lines of threads between these two. I'm not going to simulate until I create the part that's under the arms. So for the part under the arm, I'm just gonna do a simple rectangle. And then we can. And we can edit that a bit later. So now I can go. Usually it's good. It's a good way to get like a good idea to pose the parts before doing symmetrical Batten's because then you don't have to do it twice. So once you have that go symmetrical pattern and it should create it for the other part. Ok, so now what I wanna do is I just want to move these just pit N. And then I'm going to connect the shoulders. Okay. And I think I'm just a bit up. So when they simulate, they don't fall down. Alright, so now we press space and we should have our basic shapes. Let's go ahead and change the fabric colors. So I'm gonna go and add a new fabric. And I'm going to change the color of it. Go with classical color like these, and drank the color over. Alright, so now let's go ahead and store tweaking. Tweaking our shapes. Alright, so the first thing, the first thing you'll notice that this is way too, too big, or it might be just, I think it's the size is actually pretty good. And if you want to usually want to test that because this is you need to know if your jacket is going to be closed or it's gonna be open. Now that we have the basic shapes created. The first thing that I like to do is especially when I'm doing a jacket, is if the jacket is going to be closed, I'm going to try to simulate that. You can either do that by creating a seam between these two and just closing it in. The problem with that is that works if you have a jacket that has a zipper, but if you have buttons, the best way is to use something called tack, right? So what do you do? Which is really simple. What you do is, let's say you know where your buttons are. And if you look at a trenchcoat, should really depends on, on the model. You're going to notice that we have this big color, which usually it's read the open, and we have these which go more deep. So what you can do is you can click and then click that. Then just do a couple. I guess should have some do this. Say the color starts here. So we're gonna go and see the whole is going to be here, and this is the button. The second one is going to be here. And third one is going to be here. Yeah, let's see. You have four. Okay. So now if I go ahead and simulate. It should do that. Now, if you want to have one of these go over the other and just select this part. Let say this is going to be over that one. And we can go here and select layer one. Okay? And that's a good way for us to see how this is going to, you know, look final. Okay, so now let's go ahead and edit the shape so it looks, it looks more natural. Okay, so the first thing that I'm going to do is I'm gonna create the color, which either can be a separate part or you can use the extra material. Now, I love doing it with the second was a separate part because then I can rotate it and I can flip the volume the normals without affecting the jacket. So what I'm gonna do here is I'm gonna go ahead, add a point, and then I can do that. So I can add an extra part. So for this one, I'm going to create the color, which, as you'll notice, I'm not worried about my size. If you want to have to click shift. And was it shift Z? And you can see the only sign that important now and even that you can, because you can tweet unit, you'll need to tweak it later anyhow. So here you have 1908. Usually this is a good idea to have it at the same, the same size. Right? So now if we go ahead and connect these two. And in doing that because we added like different, different layers. Okay? If you want, you can go back and just put that back to 0. Okay? So now it's just about tweaking this. So we have something that looks, looks good. So here we can make the color as big or as small as we want. And this area, the area that sits here. And here it's going to be where the actual color goes back behind the neck. So I'm gonna make this tad smaller. So this way the the part on the shoulder is a bit a bit bigger. And so now we create the color and the color. I'm gonna use just a simple rectangle and show that. So as I told you before, I want the normals to be facing in on the enzyme. So always make sure the darker part is like the inside of your jacket or the inside of your code. So I'm just going to rotate that and move it back. So that usually creates a bit of confusion. So now because now if I move this edge, you think this edge, this edge here, but because we rotate it, it's actually on the other side. So this edge is here. Okay? So if you, if you want the edge which is on this side, you gotta move the other one. I really hope that that's not too confusing. So for to create a suing or to connecting between these two, there is two ways you can do it. You can actually, you can either split the edge into two parts so you can go split and you can split this into uniforms, but you can do split two and then you can merge, connect, or sue these two parts, right? But you can do it better, which is more adaptable. Because then if you resize this, it's just going to adapt with the size of the queue that the neurosciences, which is this tool over here, which is free suing. So what I'm gonna do is I'm going to start with this point and then go there. But this point here starts here. So I'm going to go by holding shift click once, go there, and then collection. Click again. Then start with this part here, which is this guy. And click, click again. Then I don't start from this point because this point connect to that part of the jacket and then just continue. So because these are straight, this mu notes, it's correct. So now I can go ahead and simulate this. And now we have a simple color. Now the second thing that I need is I need to connect this ink, that guy with that. So to this one. I think it was wrong. Say it again. Yeah. That should be better now. So usually with colors if you want to test them out and see if they stand, just go right-click and do. Wherever was it. Strengthened. Ok. And it just makes it like a usually callers have like a strong, you know, a thicker cloth. And you'll notice this is not perfect because I haven't checked the sizing to see if, if it's perfect or not. So now the second thing, now the other thing you can do is you can actually, if you want to, make sure you're working in a symmetry, you can actually split this, like cut this into two parts and then connected as a, as a, you know, Asimov, symmetrical because then if you added one part, is going to edit the other one. And because now as you noticed, I added it here. But the problem with that is when you're doing jackets like this, which are not a 100% symmetrical because you have the folding which goes over. It's easier if you have the color like this. I know from my experience. So I'm going to select this guy and simulate that. Okay, let's see if that looks good. You should be fine. Alright, so now we're gonna go ahead and duplicate this one. So I'll go. Symmetrical pattern was suing. And just help, marvelous a bit.
4. Lesson03: Sleeves and collar: If you're having a problem rotating a color or a sleeve, There is a really nice tool in the marvelous, which is this here, which is a fold arrangement. And you click that one and then you go to the edge that you want to rotate. Click the edge, and then make sure you're selecting the top part. So think it's this one. Yeah. And rotate that. So it's like how you wanted to simulate and then you can simulate. And it just makes it really easy to, to tweak. All right, so now we have our basic, basic shapes. So the, this is going to be the color that's behind the neck, which is like if you look at the shirt, you have the color that's around the neck and then you have the fold of that color. So we need to create another one which is going to connect with this part. So the first thing I'm gonna do is I'm gonna make this bit smaller. Okay? And then I'm going to duplicate this and move that to the top and make sure it's not. And that's not going to acting. And then I'm going to connect these two. Right? O and move the, move the wrong one. So I'm gonna say Joel C, Control V. Yeah. Okay, and then connect these two. Alright, so once I have that connected, will do the same thing, will go ahead and rotate this one. So Folder arrangement, click on the line and then select the red arrow. And then simulate. So it should. Okay. So now that we have that, we can go ahead and connect these with the front part. But I'm going to leave that just for, just a bit, a bit later so we can worry about sizing and making sure it looks good. Okay. So once we have that, the second thing I'm gonna gonna go do, because I'm going to add some sleeves here. And we need to add just a bit of rotation, like a bit of curvature. So, and then we need to make sure this bar has a nice, you know, like a waste to the jacket. So just select this and just and just a bit of a curvature. And then I'm going to take the shoulder. That you can tweak these depending on. Now, what I want is I want this to continue and have like a circle, clean circle. So I'm gonna do the same thing for the back. And notice that this part is 151 and this part is 81. So it has to be like way bigger. So if we look at this and we need to add a bit of curvature to this one. So we have a continuous curve, right? What I wanna do, I wanna move this a bit down. Then the curvature for that. Now if you look at it, it just gives us a cleaner, greener shape. Now if you're having a bit of folds here, what about those? Seem like a bit of extra here. We're gonna tweak these once we, once we add the sleeves because we might need, and actually I'm gonna go ahead and move these. We might need to add a bit of a bit of waste to it. And then just move that bit out. I might need to scale that to scale that in. Just so we can give it a, a clean look. Like if you're thinking this hall is way too big, then then we can go ahead and you can go ahead and treat this. Just my raising this part. Also make sure you have to tweak the other parts as well. But again, we'll, we'll need to eat this even more. Now, depending on the style that you're going for, it's really classical trenchcoat tend to be way bigger. So when the, when you even like in this classical movies that you'd like really big and when you tie that nod around the waist, leave a big folds. If you're going for a more classical look like a clean trenchcoat, this looks way better. So you might need to make these, this a bit bigger. Alright? Alright. As you can see from the shape that we started with, start with simple shapes. We already have a nice shape for our, for our trenchcoat just by doing a tiny bit of edits here and there. Now, I'm happy with how the front looks. It's not perfect yet because once we have the ones we add the sleeves, we still need to edit it. But I want to do the same thing for the back. So I want to go ahead and add. A bit of waste to it. Just so we can, we can get a nice, a nice form. C just adds a nice, a nice shape to the body. Okay. Once we have that, let's go ahead and for the color, I'm gonna go ahead and add a bit of curvature to it. And you'll notice that I want this curvature to start from a straight line. So I want this to be straight and then have the curvature happen more as we go to closer to the shoulders. Now, you'll notice that we need to figure out the size of the back. So this is 106 and this is 385212. And the signs of the color. So we get something like this. It doesn't have to be perfect. And he has, you can see now it fits them just, just like a glove. Alright. Okay, so now that we have this, let's go ahead and merge these with this, right? So to do that we have this one is going to, it's, the height of it is 46. Let's go ahead and make it 50. Okay. And then what I wanna do is I want to, I think it's the other part. So I am going to this with say show me so bottom to top and then and we have that and then bottom to top, bottom. And when I say bottom to top is, this is, if you think of it, this is like the base of your stitching. So this is where this part is stitched to that bar, the interior one. So this will be like the bottom of our stitch to the top. And then I need to figure out where this, so this is the bottom of that part, which is this. So your stitch starts here. So then if I started the stitching, the free searching from bottom to top, and then I need to figure out where that volume starts. And then it's going to you notice that it's going to create it's automatically. So I'm just gonna do it again. So you'll see, I'll see what I mean. So if you select free and click hold Shift, and then See how it's creates that points and snaps to it like you can, you can, you can go over that point but you don't want that. So it snaps to that and then click. And it creates our stitching. And then you can go ahead and simulate. Okay. Just moving some parts on top of the just to see how much I need to, which I need to tweak this. So it looks. And when this happen, showed you select this one, rotated by the same thing for the back one date. And that's Emily. Cars. Marvellous always has the especially if something it's like 3D really fit. The sizing is not still not perfect. So this is how I know that I need to, to make it a bit, a bit larger because I want this to be it's going to sit on top of the shirt, so I needed to be more. Okay. So now that we have that, I think we can go ahead and we can, we can create the sleeves. Alright, so now what the sleep. Let's start with the rectangle. So we can estimate the size. I'm just gonna move these a bit down and just draw a triangle like this. Just, I'm just going to rotate it in to see if it's yeah, it's okay. Again, I don't worry about sizing because we can always come back and edit this. Now for this, what I usually do is I'll create. You can, if you want to do it like exact, you can go, go in, select the Edge, right-click, do split, uniform split, ok, then move this up. And then it can go ahead and you can rotate this sort of create like a curvature to it. And then create a curvature here and the curvature there. And then I'll add a point in the middle. And I can delete these two. Right? Surely you can, you can do that. And then, sorry. And so like these, because what I want, I want is I want a round shape on top and which goes into more. So that's one way to do it. Or you can undo. Or you can add a curvature to this. And then tweak your base year controllers just to get the shape that you are going for. Again, there isn't one perfect way like this. This is one thing you need to, you need to learn, use the yotta need. You gotta stop worrying about if that's the exact way to do it. There isn't an exact way to do it if you're comfortable doing it that way. And even if somebody for somebody else that takes way too longer, then that's your method. So use that, use whatever it's comfortable to you. So this is why I like, oh, you always need to try, try new techniques. See which works better. See which one is more comfortable to you. See which one makes more sense to you. Again. Okay? Now, need to, I'm going to leave this like this and then we edit because I need to show you why. Because usually like sleeves look like that. But if I do that without an explanation and you're not gonna you're not gonna understand what I'm, what I'm talking about. So I'm going to leave it like this and I'm going to rotate this into place. Like the, remember the, the ones that I showed you before, the end here where you had the bounding volume. Well, those bounding volumes, you can use them to snap parts to the body. And that's had I'm not saying that my useful I don't use them because I I don't know how he got used to working in marvelous like this. And it's a, it's an old habit and it's really hard to to break away from. So as you can see, I didn't worry about the science of it because then I can go in and I can tweak to see what signs looks, looks good. Okay, so now what I wanna do is I want to connect that line with these three, right? And we're gonna do this again the same way. Free stitching. Start with the big line always. And then, so if this is the start, then the start of the stitching should, should start here, right? So I'll go here, go like that. Then. And then under the armpit or if you want, you can start from the back of the armpit and then follow through. Simulate that. Sit on the arm. Once you have it set on the arm, you can go ahead and stitch the sleeve. See, now I have a stitched because it's sitting there. I don't need to worry about like moving it into place and just simulate and just done a close. So now let's talk about that v-shape. So if you leave with trenchcoat, you don't need that much. But when you're doing I don't know, a shirt or when you are doing something which is more like hasn't, has to follow the shape of the body with the trench coats. Actually, it looks good to have on an ODE that bit of space. But let's say if you want to make like a, you know, more skinny type of it, you can just drag these in. And then, as you can see, is gonna give like a nice clean shape. And usually if you want to do like a suit that really fits the body, it's a, it's a good, it's a good way to to work. I might add of it. But let me just make sure that my sizing is good and then I can worry about that. So now one thing I need to check is you'll notice when you have edges like that, you'll see that this part has 224 points and this is 215, right? So if I want to know what's the, and I don't want to take out the calculator and start. You know, you can just select, it's easy with due, but he lets say have this split into five parts. It's hard. If you're selected two edges, you'll see under your mouth there's like a under the pointer there is like a 438. That's the size, right? So now what I wanna do, I need to do the same thing here. I want to select this with this and this, and this is 524, right? So because I think the size of the shoulder is good, I'm going to 524. So I'm gonna make sure this is this is 524. Okay. Yeah, almost there. This is what I was saying. If you want to start the stitch from the back, you can definitely do that. I think this looks good. So as you can see, now, like adding a bit of that of a V makes a bit more sense. So I can do that. And still even if it's big on the shoulders, hasn't just goes, you know. Alright, so once I have that, you can, you can go ahead and duplicate this now. Usually if the only problem is sometimes when you do symmetrical Batten was suing and move them. It copies it like really out. And the problem is you need to fit it in. And sometimes it might go a bit crazy with simulation. So a good way to avoid that. Just want to make sure it's saved. Saved project is to select this and select your stitching and just delete it. Okay, assimilate. So it opens up. And then I can take this and go symmetrical pattern and just move that over. Now, you can simulate this. And then I can close the stitching back. And here we have our basic shapes ready.
5. Lesson04: Collar style: We looked on how to create one type of colored for the trench and which is like this is more of a modern look. But remember what I was going for. I was going for something more of a detective like so to get that look of like big, you know, big Flappy color, we need to create one color which sits on the shoulder and then have the front of the jacket B when it falls on its on itself, right? So to do that, we just need to make a couple of tweaks. Alright? First thing I'm gonna do is I'm going to just, you know, arrange my scene a bit so it's a bit it's a bit cleaner. Remove these here. So I'm not going to need these. And I'm going to go in the lead these as well, as well. Alright, so we get this now. So I'm going to work with 1.5 because we already have the symmetry on. So to do that, what we need to do is I need to move this edge, ends up like on the inside. Have it wider, and then move this point up. And then I'll have this one go like that. Now if I simulate, I'm gonna just a bit like a mess for a second. But I told you how we can fix this. Just select the part that you want to overlap and have that puts a layer one. And then just simulate, Give it a second. You can go ahead and help. Marvellous if you want. Now, the, this is happening because these are like way too on the inside. So to edit the tax, just move these to the side. So you gotta think the holes for the button's going to be here. And the button's going to be like more on the inside. There's usually like these trench coats have like a two sets, two rows of buttons. So you'll see we have these, we have these two this you can simulate. Just pause assimilation and just do this visually. It helps. Okay, so this is exactly what I want. I want this part to be like, uh, like this one, right? So it's part of that jacket. And then on top we're going to create a color which is going to sit here. So now if we go back to this and we'll look at this side, this is where the college should sit and it should start here. So to do that, what I wanna do is I need to add a bit of curvature here. But I want that curvature to go into a straight, straight line. And then we need to create a new color which goes similar to something like the shirt. So we need one color which goes around and then one who that flaps over. So we're gonna do the same. Again. I'm gonna go into a rectangle like that. And we are going to rotate this into place. Let's do this. So now if I just testing something is to see where edges are. Okay. So I want to rotate this like that. Rotating here doesn't affect. So you see now just you have my stitching correctly. Okay, so as we talked about this earlier, what I'm gonna do is I'm going to hide all these numbers. So shift z behind all the numbers just so we can, we can have less of a clutter. Okay? So the color now should start from the, from the front, from here, from this point, go like that and then continue to this side and then go to that sign. But so just to keep it simple, I'm going to go ahead and create, like I'm going to go ahead and create half a color. So just going to be something like that. And I'm going to rotate that into place. Just so we can now worry about symmetry. So now we're ready here. Let's go ahead and calculate how big this should be. So 222 to 21. To 21. Okay? And then to know which edge, alright. So if we start from this point, which is going to start here, and then we go to the back. So we go the big part, then hold shift, click, click again, and then continue to the other side. So you're gonna see It's going to create a clean stitching. If I go ahead and simulate, it should just simulate just fine. Okay. And again, navigate, you can make strengthened if you want this to stay really straight. Okay? So now it's a like this symmetrical pattern creates that, move it into place. Strengthen this. And then I need to stitch these two. Now. Sorry. Not the backed. Okay. There's one this way. And that so I think I can make him a bit less tall, something like that. Okay. Once we have that, I'll go ahead and copy paste. Okay? And I'm gonna move this into place. But what I'm gonna do is I'm gonna stitch, did this part with that Bart. Okay. And if it's doing that, then make sure you have this set to layer one. And you should be, should be fine. Okay, so I need this to be really big. So sorry. Track that down to the side. Just make it really big or something like that might be too big. So you get the idea, right? So once I have that, I'm gonna go ahead and take do symmetrical pattern and move that into place. And going to stitch. Think, see this. Now, that's different. That's the back. Okay? So now if I want this to have a more of a curvature like this, so it goes to the front. I need to make it look like it's a bit of a rotation. So I'll grab this one and just drag it in, which is gonna give me give me that. Now, if you want just to usually callers on jackets that look like that, you can drag this a bit up. Alright, and just give you that look if you want to move these to the other side so it's less confusing. Right? So then once you have that shape, you can go ahead and just add a bit of a curvature and make sure, make sure this is straight because if you have this on the back, it's going to look like that. You're going to have this m looking shape. So just make sure this is straight like that. Then you're going to go like a clean shape to it. Alright, again, I think might be a bit too big. It's a nice 3D symbol to edit. So again, just drag this a bit up and should be fine. And if you want, if you don't want this to be strong, you can select these and right-click and, and strengthened. So then the flopped down. Just so it looks a bit with more natural. Now I might need this to, to do a fold. And knowing marvel is that's going to be, it's going to be a bit of a bit of a pain to do so to do to do that, what I'm going to go ahead and add a line and interior line. So from that part, somewhere like this. Ok. So now I can take the folder, click that, rotate my okay. And then simulate. Yeah. Okay. But does that want to make sure this doesn't happen? Just move that part on the front. So it gives a time to, for that to simulate and then it goes back. Okay, perfect. Alright. So now that we have the trenchcoat like that, What I wanna do is I want to add one to have like a have this folder as well. So you can try to do it like force marvelous to do it like that. The problem is, Mao was just goes, it's really insane when, when he tried to do that. So to do that, what I'm gonna do is I'm going to create, take all the tax and the lead them. So this way I can simulate without those. So and by that I mean, you can open up the jacket. So I'm going to open up these two. Also select all of them and make sure the layer is 0. Okay? So now we can go ahead and fold this. And no. Fold that. Okay? And once, once I have it open like this, I can go back in and I can add the tags back. So something like that should get to that point. Later when we're ready to export the final model, it's not a problem, so I'm going to leave it to three now. Okay, so now if you simulate, it's still not perfect. And see if I take this and make it one that did not work out. Let's give it a psych. Okay. So That's happening again. Take the tack off and delete it, and just leave it to simulate just again. Now, if you want to make sure these sit into place where you can do is you can create like an interior line. So you can draw and into your shape. That will do this. And it's going to know. When you do the just kinda give it a clean a clean or look. I'm just going to stay there. Okay. So that's our main shape. Like so I'm gonna go ahead and tweak the body in case you want to make this tighter. If this is the look that you're going for is usually like if you look at this photo, it's like huge. I've got the how many falls he has. So to see if that looks good. Well, we can do I'm not going to go ahead and create like a belt. We can simulate one. So what I'm gonna do is I'm gonna do an interior line. And then I'm going to move it down. Wait to hire or something like that. Okay. And I'm going to copy it and paste it in the bank. Yeah. And you can copy it for the mid part. It's just for testing purposes. So then I select this and you can go. You can go and you can do elastic and have it last tick on and just tweak the strengths. And then we can do a test just to see if if it looks That's the fold that we want. Yeah, I think it looks pretty good. And it adds a large folds. And I other way, good way like to test this is you can select all of that and raise the particles. Might loaning number like 105. Okay. And then just simulate. Just give it a couple of seconds. Minute. This way we can simulate without actually creating a belt. Alright, so next we're gonna go and start adding the belt. The, where the the button's going to be. We need to add like tiny belts on the sleeves like these, and belt holders. And we need to add shoulders, shoulder pads just so. And then we can worry about stitch details.
6. Lesson05: Shoulders and waist adjustments: So once we tested out the the belt and looks really good, I'm gonna go ahead and remove those edges. We just added those to see Falls look good. Okay. So one thing I want to I want to edit the shoulders below the photo that I showed you. Way. It's like a really big but the shoulders like end really nicely. Now it looks like it's It's not was wearing like a really huge coat. So I'll just make the shoulders smaller. We're going to go ahead and tweak this and Shift Z so we can make sure working on the both sides. Go 1-20. See, if that looks better. What else? Let's make this ten smaller. I might add a bit of curvature to this, just to get a bit of shape to it. Let's try making this bit smaller. Fields. We've got some shapes that unlike here. So I can go in and make sure my sizes. Just wanna make sure the edges. So I'll select these three edges lie upon the 32. And so on like this. Yeah, that's good. Okay. Make sure this is 700 and this is okay. That's different. So what I'll do is make sure this is the same. So 105, so 101. So what I'll do is I'll make just this size a bit bigger than one. Think. Make it smaller like this. So my shoulders are now closer to his shoulders. Alright, one other thing you can do is if you want to add to make the waste a bit smaller, and you don't want to like edit the sides too much. You can add, can use this tool to add something called a dart. And what it does. Usually see these on suits. Okay. And then you can go ahead and stitch these. Just to add a bit. They do need a bit of editing, so you can, they don't have to be that big. So you can add a dart in case you want to have. But for this model, I'm not going to use it. Because honestly I like, I like how the big how big the folds were when you can add the belt. And I think it's, it's, it's good. Alright, so now what I wanna do is I wanna add some pockets. Will add some pockets and the belt in case of further pockets. And this thing can something like they're going to be open. So we need, honestly, let's add the pocket first. So see how big that b. So maybe something like this. Maybe a little bit bigger. Okay. No, rotate down in place. Should be under the waste dumps thinking or something like that. Is a move that out. What I want to, this is I want these three edges and I can do clone as internal shape. And I'll add this here. And then you can go in and I can delete this line, these three and do opposite internal line. And this I have to be much just one. And then take the exterior manages to do it. Because I just want this to be to be on the out.. Actually, I can do offset is internal line into five millimeters and delete this. And now I can select this and do copy and paste. So now I can take this shape. I can stitch that while still giving me a nice ice edge to work with me. And in my pocket. I don't need the interior of it is not going to be visible anyhow. So if I have that edge, it should be more than enough. And I think, yeah, I think that's good. Maybe I don't know. Maybe make it bigger. On this side. I can move this up and down and then do symmetrical. Kay?
7. Lesson06: Creating the belt: Next, let's add the shift D to remove the numbers. So I was thinking we can add one here to hold the belt and the front and two in the back. So should be two here and turn the back. So for this, again, we add the shape, let's say, and this is going to be shaved, that's going to hold it. So I'm going to kind of make it way bigger. Okay. Just a bit wider. Then you need to keep in mind that I'm going to import this into, into ZBrush. And when you subdivide, you always lose from volume. So you could always have to keep that in mind. And we're going to do one here, one here as well. So then I can take this, take that, see how that no. Sea lions didn't. Stitching doesn't come in. So just always make sure you have a straight lines. Ok. So maybe have these closer and sorry. And move it up. Having them closer because I need enough space to have the to be honest, I think it should be bigger. Maybe move this a bit down. Right? So let's go ahead and symmetrical pattern this we have done. We need the ones for the back. And we go copy something like that one. Go paste. I think I can even go. Alright, so now let's take this and do just a copy paste and stitch this with that, stitch, this with that. Just make sure it's trait simulate down and it should be good. So none, it's to create this symmetrical pattern. And you get the idea now. Okay? So now that we have that one, what I'm gonna do is I'm gonna do, I'm gonna make the belt. Think. Gonna join two pieces. And even four pieces. Will do the belt. Just a simple rectangle. Move that into place. Okay. I'm gonna make this always going to go between these and see how big we can make it. So I think something like I should be fine. Okay? So now that we don't run into trouble, what I wanna do is I want to just add a stitching which we can remove. You just send it to a line here. Copy that, and then just pasted here. What I wanna do is I want to just stitch these two. So we have a point where it starts. And then, so for the frontal attack it here. Okay. Stop that, move these out, just simulate again. Stop simulation of the straps. Stimulate again of that into place. So this way we know for sure that they're sitting where they're supposed to. And then I can go in and I can extend this as big as I want. And then it can fall off. Alright? So if I take this and do symmetrical pattern, now, no, it didn't because I forgot to add attack. So now I need to. And here we can get at this. Alright. So we can take this one and move it. Or we can just add a new tech. So now removes it. Oh, stop simulation with it out against top simulation. Now you can leave these because I know some jackets do have that. So you don't lose the the belt or we can stitch these together. Alright, so now what I wanna do is I want to take this, tag it to the jacket. Simulate just so stance trait. Okay. So I can make it make these overlap. I think I'm gonna make two of them. So I'm think I'm gonna make like a tide and I make one with the belt, with a buckle. So this way we can do like your regular. Ok, so let's make these a bit longer. Gonna move these and just take this and take him more longer or something like that should work just fine. All right. So to make a NOT occur with the belt. And we're gonna do is we're going to select this, which is called Select Mesh. And I'm going to select just one of these stop simulation. We'll get here and create Ben that will create a bend in mid air. So it's not attack. Ok. So now if I simulate, you can see that just so what I wanna do now is I want to take the tack and just lead that and leave that one as well. So there's one. This way it's staying in midair, right? And then do the same here. Great pin simulate. I want because I can get a straight okay. Stop simulation and then get one of these and create pinned. So we do that. So we can go over. And then we, now we can move. Depends. So what it simulates, it doesn't flip back over. If you want to make sure. These I get that. Now if you want, because it's really hard to see. What we can do is we can take this and we go shift gear so we can hide them. Shift q and the avatar. And then just tie down. Okay? So we can go in and move it like that. Okay? So let's do a particle distance of five.
8. Lesson07: Cuffs and shoulder flaps: If we want to do the belt with tiny buckle in the middle, the easiest way to do is go ahead and instead of resetting these and putting them back together, which is gonna make them smaller. Let's make sure this taste straight. Just hold shift and maybe something like this. Okay. And then just go ahead and stitch these. Might, you might need just so it doesn't go through. Go back to our sort of friend pin. Okay. These guys, move him here. Pen, pen, simulate that. And then just delete opens and you just simulate. Perfect. Okay? So because that's going to be tight, I'm going to make sure that I can read it. It's really small. Too crazy as well. So these two in the back think, might leave them like that and maybe add Luca material on top. Will see. Or for now I'm going to stitch them together so we can stitch these two back-to-back. Okay. I'm going to leave that just just to make sure they don't fall. And again, I think we could go sign into with this. And even tighter. C, t, if this f, this is causing that problem. I'm going to remove those touching and just just make him No. I think that really slow. Now what we can do is make this elastic and I'm not sure it's a good idea. So if we go in, always make sure to save as project and it's a built local. And didn't go and simulate this with higher density. And you see, it went through these. And that's why I wanted to keep that. So I think I'm gonna go ahead and go back and add those two stitches. Go and add an Intel online here and here. And then I'm going to go ahead here. There might be a good idea if I move, let me move this stitching a bit down because it might be a bit too high. I remove this term. Well, I did these anyhow, so just wanted them there because an NC brush we can, we can go ahead and play around with that. So now if you wanna make sure I mean, it's not it's like got it's enough tightness. We can do this and I can show you if it's red, I think it's enough for now and then we can maybe add some folds to that. Let me just, just make it a bit smaller. Again, I'm going to I'm going really slow because I don't want this to go through the material. Okay. So we'll do, we'll do the same for the, for the arms. So we're going to add one in the front, one here, and one at the back. So I think it's going to be there. And one here. Good. Maybe a bit wines are smaller. One here. And let's go and add this teaching. When I copy paste these cause I wanna make sure it's the same. They, they have the same size so it's easier. And the distance K through something like this. So now to this, to that, and this too fat one. Do that again here. Copy paste this. And then just ditch these. Swi, move it into a mold them into place because sometime they just go through the material instead of sitting where there's supposed to be sitting. And finally does do the strap. Here. It gets smaller. Okay, now the, there is another, another way we can do this. So let's see if we can making this like fit there. We need to go here. Those that tone down create depend. Move that down. Ok. And then do the same to this part and move that down while creating a pen. So we make sure they sit where they're supposed to and simulate. And again, and it always helps us if we make this stop it and we do strengthen and move it up and then move that down. So then I can move this here, stop simulation whether these out. Okay. Then simulate. And I can make this smaller. And I guess ditch this would this. Okay. So that's one way to do it. No, live, live. I'm gonna leave that as strengthen and think I'm going to do the same for, for that usually like belts are a bit thicker. Anyhow. So next thing you wanna do is I need to take all these three and do symmetrical. Okay, sorry. So we do symmetrical pattern. I can create the same thing. Just move it. I just want to make sure it moves where it's supposed to so we don't do that again. Come on. Yeah. Make sure it doesn't go through it too much. Then do the same for this symmetrical and again, symmetrical pattern and movies in place. So what I'm gonna do is I'm going to move as close as possible. And the other one here. And then simulate. Let's take this and to strengthen. All right, next we're gonna do these parts. This is, this is called a storm flap and this part which is called the rate rain guard. Okay, so I'll do the, we'll do the rain guards first. So there should be really simple to do. So the first thing I'm gonna do is I'm going to hide these doing shift Q. Alright, so what we're gonna do, we're going to need just some extra parts of material. So to make sure we get the same shape, what you can do is you can like trace this. So it creates. What I'm gonna do is I'm going to do interior line like that. Okay, so let's say that high. And then I can select Trace, and I'm going to select these. And then right-click and do trace as a pattern. And it's going to drop that they're rotated. This way. I don't have to redraw that to fit the shape. The only thing that I need to do, because this is a bit, a bit bigger. You can go in and just, I don't know, just to scale it a bit. Let's say just a bit. Okay. All right, so now let's go and stitch this here. Now one thing that here. And now what I'm gonna do, Let's go. Ok, and I can delete that line. Right? The other thing I need is I want to make this just go down of it. Okay? And then once I have that, I'll do symmetrical pattern with suing and move that into place. Oh, come on. And then I can stitch these two together. And I have my regard. C, if this is too much, I give you the folds, but too much where you can do is you can just take this line and just tone it back a bit. Now for the front, we're gonna do the same thing. So I'm gonna go ahead and save project. The front usually starts from around here. Like that. Alright, so for this storm flap will do the same thing would go here. And here for me to hear. Maybe move it down a bit. Okay, so now select that and those do trace this with this, with this and go trace as a pattern. Okay? Move that here. And then I don't need that anymore. No, I'm gonna do I'm gonna just scale this a bit. Stitch. These. Use that hold Shift. And then two same here. Won't shift. Stitch that here as well. Yeah, I was worried that it's going to do something like that. Okay. So now we have our strong flap and you don't have to do with on two sides. I've seen, I've seen a couple of jackets who have only one scientist. So if you want, you can do symmetrical banter and just make sure you move it. So it's under that K. No, come on. Always use the select these and hide our queue.
9. Lesson08: Import into ZBrush: Before I start adding any stitches or details, what I'd like to do is export what I have done in marbles before I start any, any detailing before, because when you start adding extra stitches, it will become really hard to modify. Now we don't have, if you look at the models themselves are really simple. We don't have like edging on any details on it. So now it's a good time to take what we have here and go into, I don't know, marvelous or I'm sorry, zebrafish or dimensions or something due. So I can see how the model looks on differentiators and see if I need to tweak something. Because as much as I love, marvelous, it's not that great when it comes to like viewing my model in differentiators and lighting and so on. So what I'll do is I'll select all of it. Lowered five. Just give it a couple of seconds. As you can see, while this is processing for simulating, you'll notice that some of the patterns are overlapping. And I never do that when I'm ready to go into ZBrush because the beauty of having this center to ZBrush is I can ask the birth to create UV groups depending on, I mean poly groups depending on the pattern, which makes it really easy to take stuff apart and you can add thickness to them and so on. So when you export anything into ZBrush, I'll go over that once we, once we export the final model. But just so you know, so I don't forget, make sure you don't have any patterns overlapping. Like you'll see these two overlapping on top. Because then in, in ZBrush, neighbors will think these three parts are one piece. So when you try to tell it to create a different policy group, it won't know what to do. So it will add these three into one group. And if they're not close together, it's easy because you can do auto groups, but if they are, it's a bit of a pain. So once I have that, I'll select these again. Go to File Export OBJ selected. And they already had then, but I'll do that again and go test. Yes. This is how I export selected or baton single object, thin, weld them. Anything. The rest is just default. Okay. So you remember when we started the project in ZBrush, I saved something called the calipers to give me the size of the model. So now, when we started the model, I started with body with suit one, right? Which was. My character with the whole suit in the jacket and so on. So watch what happens if I try to import this into ZBrush now. So if you look at it, you'll see it's looks like it's transparent because this is thin. You just have to go here and display properties and make sure you have double on, right? Okay, so what I'll do now is I'll select my character and then append the other one. So if I do this, you're going to see this is the code and this is how tiny my model is. So I know it's not a problem because you can go, you can select this and you can scale it, sorry, scaled it down, move it scalar until, until it's fits. It's, it's not a huge problem. What I don't like about that is I have to do the extra work of fitting him. And why would I do that if I already know for sure and I'll go ahead and hide the jacket that this guy should like the jacket should the trench coat should fit him exactly. So yeah. So I need to do to do all that right. And make sure nothing nothing sticks out and so on. Ok, but instead of doing that, I'll go into low tool, right? And do ZBrush was suits 01, which is the guy we use, right? And I'm going to open up calipers. I'm going to load our calipers. Okay, so now we have it loaded. And then I'm gonna go ahead and import my trenchcoat. Then if we do append, see the only thing. Remember, because we moved the character when we imported it in into, into marble, The only thing I have to do is just move it down a bit like that. And I'm pretty sure it fits perfect. So make sure you have display properties double. Now. So this is why I save cannabis, because I want to make sure when I import this into ZBrush, it will, it will still look as it's supposed to and not. So here, it's a good way to test out this and see if it, if it looks good. Sometimes what I do is I'll go in and I'll add this object. And I'll send, I'll send the client shift as. Multiple views of this before I start adding any any details. Because this way if the client comes back and says, well, I don't like the tall, how all of this as let's make it shorter or let's make the pockets bigger or the strap longer. Any any edits they have, I can make them instantly and without worrying about too much detail have towards stitches that I have to worry about, right? And the beauty of it is you can play around and you can experiment with different with different brushes. Math caps, sorry. Just so you can see, if you have because you might you might notice some stuff that, you know, like this is what I was saying. We don't have to worry about being perfect because you gotta go back here anyhow, and we're going to tweak this. And this is what I was saying about auto groups. If we go to groups and say autographs with UV, see how beautiful that split into multiple groups. So now if I want to work on this part, add thickness to it and so on. What you can do. Other than that, you can either take this all of it, just going to make sure it has one political power when I have multiple polygons to worry about. And we can do is you can merge these two down to an expert. And let's do coat test shaders. And we'll start dimensions. I've been using dimensions for the last year. And honestly it becomes like a really, really, really important tool in my, in my, a toy design bits. Because it's really easy, it's really simple, it's really fast. I know a lot of people may say, well key shot is better, which I, I agree. But at the same time, I don't agree because it's like the difference between them, as I mentioned, is like really super fast to use. And it's cheap. It's really, really cheap because if you have Adobe Creative Cloud, it's going to, it's going to be included in your So I think this is it gave me an error because I don't know why why didn't import Yeah, I don't need I don't either character anyhow. So this is word. Usually I usually do, is I'll take one shader. So I can, I can see how, how that looks.
10. Lesson09: Creating Epaulettes: So now we'll start creating the epaulettes, the straps that are on the shoulder. And for this guy, the client wanted to have the color be lifted just to make them more coal. So for that, I'll need to go in and make the this part of the color just, just a bit smaller. When we'll see how we can, we can make that stand up. Alright, so first thing, let's go ahead and take care of the color. And then we can, we can do the outlets. So I'm going to just drag from this edge. Yeah, something like that should be good. Okay, perfect. We'll tweak this and second. The other thing I wanna do is I want to make sure these are strengthened. And then one way which really works when you want something too. Because if I go ahead now and lets say, we do this like that with the, with the fold. Showed you before. Again, we rotate this up. And then we do the same thing for this signed OK. Now that looks good. Problem is if I go now and simulate, it will fall down. And that's not okay. So what I need to do is go to your property editor and you have something called pressure. And just set this up to something like ten. Pressure, I need to make sure normals are okay. Let's do 20. Anybody try strengthen. These two animals are strengthened. And then raised pressure even to something like that. Okay, so now let's do the same thing for the other part. So let's do something like these. And to strengthen just so they can hold, hold the weight of the caller and might need to make the college just bit bigger. Still can hold the weight of it. Looking good. So I'm happy with that. And now I can turn off the simulation and we can go ahead and, and create the the shoulder straps. Okay, so for that, we'll do the same thing we did for these. So for that one, I'm not going to add the stitching on the on this part. Then the Neith I'm going to add for the extra bathroom that we did. So it sits on top of that. You can check it out here. So I don't know if I'm gonna do the double ones. I'm I think I'm gonna just stitch these here and just, you know, at a, at about them. Okay. So we'll start with a with a simple rectangle. Move that into place. Rotated, maybe a bit longer. Now I'm gonna take this one, just this edge and do split, and split into two. And then I'm just going to track this here. Then I'm gonna go ahead and create an interior line. Well, we can do this or you can just take this line copy and sort of like this c1 copy. So some reason it didn't work. So I'll make sure it's 38. So start here. And just to end the line, just to Triple-click. Okay. So now I'll stitch this to that. And for the button on the bottom line here, you can either do that or you can just tack it. So like attack will work just fine here. So I'm going to check this to that. That looks good. Once we, once we start adding a bit of particle density to this one that will look better. Okay? So take this and do this is, I think this is the only the only thing that I would add a scene because now if I go ahead and do symmetrical pattern, it will move and it will create the symmetry, but it won't add a tag for me. So I need to add that again. So the idea behind symmetries just to make your life easier. So. So we don't spend too much time. So what I can do now is I'll do undo. Undo this one. Okay. Then I'll remove the TAC. And I will go back to our old. Okay, so just a tiny edge. And t line of 21, doesn't matter how big it is. When you use that too, to hold the shoulder stamps. And this might be a bit too much. So I'm going to push this back. There's way too big. This topic as well. That in a bit. Okay, so now when I do symmetrical pattern, it will take care of all the things that we already went ahead and created. And we just need to simulate that. And it should be ready. Okay, next thing I want to add, noticed these jackets usually have an opening in the bag. So to do that, we need to do a couple of things. First thing I need to do is I need to split this in 2092. First of all, I'm going to need lead the okay. This teaching. And then I'm going to stitch these backup. Now. Added that opening in the back. Right. So now the only thing we have left to do is just start adding stitching to hold our shapes. I'm gonna go ahead and save as project and do trench coat details. Now, what you can do if you feel like shape of something and you still need to get out of this and you don't want it to simulation, like to ruin it. Because we're going to do a lot of simulation and move stuff. You can select these and you can do freeze. And now it's not going to, it's not going to affect that. They're going to keep a need to make sure this is to fix this interest. These Similarly that and that gets rid of that edge. Okay? All right. You'll notice like in these jackets the edges are usually round, like we can keep them like really sharp. And then once we add a bit of thickness to them in ZBrush and they're going to be softened up. But I'm going to show you how you can do this here just in case you want to add more, I don't know, more roundness to the edges. In case you're doing, doing something more cartoony or something won't exaggerate it, just select the point. And then here you have what was the name of it? Smooth curve yet? So select this one and just go drag it. And it gives you, it gives you that look. Now, that's too much. I don't want to add is I want to add just a bit of, you know, tiny. It's non-visible Now, again, because we don't have, if you look at the, the mesh, you can see how many, like It's really low in Bali count now, even that might be, might be too much honestly. So maybe ten. And again, remember that value in case you want to do the same for, for the other ones. Because I might do the same here. So I want to do ten years. Well, I don't know, just softening those edges just makes it look a bit more realistic. I'm not going to worry about this because it's going to be under, so it's not going to be visible, just worrying about the stuff that's really out there. So usually this is because it's really close to the face and there's one same. Right. And I think yeah, I think we can we can start to add stitching to be honest. And by stitching What I mean is just adding details so we can make our shapes, Bob Moore. So if we, let's say, for example, this trap, right? If you look at it now, it doesn't have any detail to it. So just to make that look better, we'll go ahead and we focus on this. So we get an you can either go in and do an internal line or we can select these lines and to offset those until nine. And it will give us the exact values. So let's try and see what that gives us. And I think I'm gonna go even more songs to maybe eight. Okay. So here's the, here's the mice part. You can on the property editor you have something called the full strength and a fold angle, right? So what I'm gonna do now is I'm going to go ahead. And I'm going to raise gonna move these here. Okay. And I'm going to hide the rest. They're still there and still simulate just, just so I can focus on this one. And I'm going to raise the particle density for this one. I'm now going to go just double this. Can't go head and do for but I don't want to wait too much for it. Okay. So you can see now it is there. Can barely see it. But I wanted like really obvious because when we, once we take this into, into ZBrush, we start smoothing it will going to lose a bit of, a bit of detail. Okay, so we can do a full strengths and we can do, I don't know, let's go try something like 80. Okay. And then we can do something like that. And you can see tweaking this, it will. I think something like this looks good. Then if you want to make sure it's like the exact look, you're going for some like these and go right really crazy. No, five. Visually, for the final, you can go even under do three is will take way longer, but we'll add so much density to your mesh. And as you're doing cartoony and you don't need that much detail and you can get away with, you can, you can even export it at ten. And then you can, you'll have like a really clean mesh. Okay, so now when I simulate, you'll see just by adding those extra lines, we'll add just a bit of more to it. Now also these, even though you're gonna go into ZBrush inning, you might need to go and make these stronger. But at least it's good to know where, you know to have like a starting point. Can we similarly just a bit of thickness so we can see how that might look. Let's take the fabric and let's try to make it. I mean, it's not leather but it's easier to see when I'm going to go a bit darker. So I want to eat. It's easier to see the shapes and you have a bit of reflection. Okay, so now let's go back to our 20.
11. Lesson10: Adding details: And then I go in and add, maybe add an extra one. Or there is another trick that I usually use. If you want to emphasize these even more, you can go ahead and do it. Sometimes you need also doesn't internal line and reverse direction. I'm going to do just one millimeter. So this went ahead and created a new line next to it. So what I'm going to use this as you remembered when we, we went to 216. So this one, we can reverse that bit to strong. What it did is just added that edge. So now it looks and you, if you want, you can add one on the other side as well. And this way you can simulate a bit of like a depth of a stitching. These tiny details just makes, makes your model really pop. And for these, I'm not going to be nagana GET worried because they like really tiny. And I can add an e to really raise the smoothness on this. So I can add a bit of detail inside z version. It's way easier. What I'm gonna do for this one. Not going to add an edge here because usually suits like ends up like a really round end. So usually the stitching is inside. So this because it's going to have a bit of thickness. It's gonna just. Now what you can do is if you want, you can do the same technique here and an add, add an extra line. Now, when you're doing stitching, you saw that you can select this and you can do, you know, strength of a fault, right? But if you go on an exterior edge, you don't have the exterior of the fold. So because these are used to stitch, stitch was with another, you can select the stitch actually and then you have the same fault strength, right? So I'll do maybe 30 to 200, 240 for this, right? So now if I simulate, and I'll show you the difference here, this teaching goes out. Here, the switching goes in, right? It's subtle, but it makes, makes a whole difference. Again, if you want to force this, because I really want those edges to pop into, into ZBrush. I usually do that offset. And for this one you can exaggerate more into four. And then something like that and go reverse. And it's just adds that extra, extra line. You might say it's a bit sharp here, but just meet once you, once you smooth this out, it will look just great. We'll add a nice, you know, nice fold into it. And I guess he just by adding that, adds a bit of, a bit of more character to this, I guess so let's select these and go shift Q. And I'm just gonna go ahead if you want to, you can you can skip this entire which is going to go ahead and do the same thing for for all the parts. So for the belt, I'm gonna do the same to an extra line. This one I might do a bit more lines. So often there's an internal line. Go 15. Yeah. Sounds good. And I'm going to go to a 160 or something like that. And I might add a new one inside. So set as internal line 15. This is centered. So there's internal line go 18. Yeah, honestly, 17 should be good. And we'll do the same for this 25260. And it's good if you can keep the same intestine density for all of them. And it just helps, you know, helps them look, be more consistent. So we'll do the same thing here. So I will select these three and do also there's internal line and I'm just gonna do two. And for this, I'm just going to keep it low and just go the reverse direction. Similarly. We can see how nice that detail looks. I'm not going to add an edge on the edge because again, there's going to be soft. Because usually they had the stitching on the inside just to make it look softer and cleaner. Okay. Let's do the same thing for the pockets. You remember for the pockets we did something like that. We created an exterior and internal stitching. And this is why as that because then now when I go in and I, you know, go ahead and do an extruded and this one still gonna have that nice feel and this is going to be soft and we're going to sit on the, but we can, what we can do is we can select these and we can make these bit stronger. So they can go and don't go too crazy with this because it will just do that. And it's not going to look at linear and you'll, you'll have to work. More just to clean it up and ZBrush. Now the other thing I want to do is I'm going to select this guy and I wanna do offset doesn't internal line. And I'm gonna do 1515 is too much. Maybe five to five. And I'm going to do the same. Again, keep it, keep it as subtle as possible. That's the problem when you have, when you have the edges, like really close to the edge, it will just fold on itself. Say I tried to keep it, you know, something like that. Okay. I'm gonna do the same for the shoulder straps. And for the shoulder straps, actually you can select either or only the ones that are not stage or even that one, because I've seen styles with both ways it works. Do an offset to five and go to, Let's go, let's do 50 with 216. See, yeah, that looks maybe a bit strong. Now what you can do and can use the same technique. We can actually take these back and do and have the reverse function of them. Okay? Alright, and then select these and do an offset internal line and do reverse and just one millimeter. And this way, I can exaggerate this and it's not going to affect the exterior, exterior edge C. So the other edge, which is negative, it's going to hold that shape. And it's gonna give me a cleaner, way cleaner look. So if want to see how this looks, so make sure you're saving. Sometimes if you erase the density only one part, marvelous tends to crash. It's used to measure with the new version of the fix that. So I'm gonna go to five works mice. So you can see this is our exterior edge. And that the interior edge, maybe for the exterior and one, it's a bit too harsh. Tone this down. And that looks nice. Ok, let's do the same for these. And see I'm a morning about the tiny parts. And then I'll go because usually these hold the most detail, the big parts. The only thing that you usually have to do is when you have pieces of cloth like this, never leave them with an edge because that nothing looks like that in real life. So this is why you have to look at the reference. If you look at this, you see you have a stitching which goes around. You have a stitching on the shoulder. You have a stitching like on this ends. Usually the only parts that we're going to look at this, it doesn't have a stitching on the the sleep because this is inside. See the color has a nice round stitching as well. This is the belt. So thank you. So we'll do the same for this one. And I think because the shoulder had that one, I'm going to add this touching here. I'm not going to add it on the bottom. This way just to make our life a bit easier. So I'm gonna select these two and do an offset as an internal line and do that as a six millimeters. Now, here's the, here's the thing about that. If you notice that it created this, if I go in now and I add strengths to this, and then I simulate, it will look like this. And it doesn't look natural. Because if you look at this, you see it creates like a nice square here. So like details like this, try to always make sure you look at them when you're checking out dereference. So what this means, and you just need to make these as separate parts. Alright? So I'll do this first, and then I'll do this one. Then when they overlap, they going to create that nice edge. Now for this one, it's given me the same headache that I had before. So what I'll do, I'll do the same for the two, Just going to lower the strength and go negative. Okay? And then I'm gonna select this. And to also there's internal line just to two millimeters and do reverse direction. And do the same thing here. Select these two. And then I'm gonna make this strong one. This way. That's not going to break the exterior of that edge. Still gonna keep it nice and clean, right? Will do the same for the back. For the back. I don't want to add. In the middle. Although you can, if you want if you want that stitching to bop more like usually. It's that's why you have to look at a multiple photos and gather as much reference as you as you can. But for this one, I'm just going to add it. I'm just going to add it as we add. I'm going to add one here and I'm going to add one here. So again, officer doesn't tunnel line do 6. First detection. I like that one. Offset as an internal line. Try to match your distance because if you use six here, tried to use the same, then you're not going to have big problems of overlapping and, or edges being way too far from the final model and ZBrush. So then we're gonna go and do this to keep it at ten. Do too much to that. And then we're gonna do offset until on line two millimeters refers direction, the reverse direction. So like these to go 35 to 60. That creates a nice, a nice edge. Feel free to add one in the middle if you want. Okay. So from this one thing we have we have all the parts. Yeah, all the tiny parts and done and so we'll do the big parts now. Okay, so for the big parts, I'm now gonna worry on adding here because we have this on top and it adds a nice fold. Like if you want to add an edge, maybe just select C, It's NC2, which ones we should select. Maybe select this with this and with that. And for this one I'm going to give 25 to 60. Just to make it a bit stronger. Like usually, you can do that. Alright? So now for this part in the front, I want to select this edge goes down and do offset as an internal line and do a six millimeter and parse it, make sure it sends signed and do the same on the bottom. So officer okay. And move these back. Money to do this, sorry. So offset and have it to an inverse. I'm surely know non-diverse, keep playing that. And gay men, 25 to 65 to 16. Okay.
12. Lesson11: Edge details: I went ahead and I added the extra edges details the same way that I showed you. All the parts are added ones here. I'll add them to the caller. What else? To the back of the coat. Here, the only edit I made as I made this edge just a bit deeper. So instead of five, I used 15 or 20. I can go ahead and play around with that. What else? Think that's that's about it. So now the only thing remaining detail wise is to add button holes. So in marvelous designer, they remember when they added this, but you can add button holes to your jackets so you can go and I know it should be one here, so I'll click that. And you might say that looks really good. Which does, if you're, if the model that you are going to do is going to be sent as a marvelous designer to your client. And that's the, you know, the final step of your project. Then go ahead. Sure. Add these because it's going to help at least who's gonna take care of, you know, transferring this to another software or whatever. So then, because it's really easy to, to add these. As we know we added no. We just sort of like this in at it. So we might need to move this one, just bid up, or just delete one of them, which way works for you. So it's like really easy. Just add it. Click. Sorry. I don't want to devote a whole, not the buttons. Click and click. Ok. And you can do the same for the buttons. Right? I'm not going to add a button here because that's going to be whole. That button. I'm going to add a button inside. One here, one here as well, one here. And finally, the last one. And you might need to add the other ones that's visible. Only undo that because we've already added that one. And I think that's it. Because actually the third one should be someone like here, so it's hidden. Okay? So I'd like to factor, you can add the buttons and you can add the button holds. The only problem with that is if you are going to finish your project into ZBrush. So you're going to move this into ZBrush. When you go and you look at the mesh, you're going to see. That the bottom halls is an extra mesh with a texture on it. Which as I said, if you're finishing, the project finishes and marvelous to go ahead and do that, save it and you're done. But because I know I'm going to take this into into ZBrush, it's not a good sign, a good solution for me. So what I usually do, because it helps to know where, to know where you're going to add, add the button so you can either add the stitch, an interior, and an anterior line, or you can add what's called Diamond Hall, the tiny. So I usually I like doing the stitch because then I might just add a brush over button Hall or just a tiny, you know, damn standard or a tiny detail into without detailing too much in. So just doing this will help you just know where. Because it's easier to know the distance of where your buttons are going to sit. If you're doing them here in, in marvelous. Because then he can, you can copy it and then ZBrush. The only thing you have to do is just detail that part and you should be done. So for that one, you can do that. And then if you want, you can make this really strong as fault, so can affect the mesh underneath it. So then when you, when you export this, you'll know that a button holes should be, should be there, or you can just add this detail into zebra. It really depends. Now, if usually the jacket is old, the button has, has, has an effect on the jacket anyhow. So it's not it's not a bad it's not a bad look because then it's going to add a bit of simulation. Do that, do that part. And notice like when you start adding buttons, the scene become like really heavy. So I'm not sure why, or I might have forgotten this part as Yan low density so is not buttons. And we just need to lower the density of this one. Wasn't usually with Microsoft where I don't know, 90% of the time is human error. Okay, so maybe make these a bit smaller. So this is why I was saying about the other tool that you can use. It just in case you wanna do an actual hole. You can use the Dart and can do that. And that's going to actually add a hole inside. So if you're going for dad detail and the problem with the Dart is it adds that bit of edging. So to fix that, you can take these two points and just add a curvature to them. So you still have that whole, but you don't have this sharp edge. It's like now it's sharp because we have really low than low density. So we get one. I mean, if you want to do, if you want an actual hole there and then you want to edit it in ZBrush, maybe add a tube or a curve to it that you can use that. Or you can just add a tiny edge like that, which, which will, you'll, you'll use just to follow and know exactly what you're going to, you're going to place the button hole. Solution doesn't work for me because I'm going to take the model into ZBrush. Alright, so I'm gonna go over the model, see if I missed anything. And then we can play around with the materials and see if we can get different type of folds. So we're almost done with the jacket. And before I move into ZBrush, The only thing I usually do is I go ahead and play around with the type of fabric because usually it gives you a different a different feel for the fault. So I'll show you exactly what I mean in a second. So select your, you can go under your fabric because we have only one fabric to this. You can also play around with this and you can maybe do a velvet fits our look. And here underneath it you're gonna have something called a physical property. And you have a preset, and here you have different types of materials. If you just Google from what what material trench coats are done, you will find this which is called cotton Garber Dean or something like that. Okay, so we go here and you can find gotten good Aberdeen and look at the jacket, see what happens. If you select that you see it. It changes because the stitches affect the material differently. So here's a different with that one. And the, and the default, right? Feel free to play around with these. You have so many. So with leather. See, the material just feels more stiff with them. And so on. So you can play around with these and see which one, because I know that's the material I'm going for. So now select all these dual particle distance of five. Told you you can even do three. And I think we're just gonna do a testing now. But I'm going to pause the video and I'm gonna do a simulation of three and show you the difference and how many, how much detail you're going to see there. And went ahead and I set up all the cloth. That particle distance of four. I tried three, but for some reason, marvels keeps crashing. And either it takes way too long. So four gives us a really good, a really good result. Everything looks good, everything looks clean. I might I kept that Bart the top part as a strengthened part. Although when you leave it that you're not going to have tiny folds that much visible because the material is a bit stronger, but because it's a color, it's not going to have that much, you know, tiny folds into it. So usually when I finished my model, I'll change this simulation settings from normal to complete and then just leave it for a couple of, I don't know, maybe a minute and then I'll stop the simulation. Because I've noticed there's a tiny difference, especially if you look in tiny folds. It just a bit of more, you know, more details in those tiny areas, right? So now we're ready to move from marvelous into ZBrush. When I export the file into ZBrush, I noticed an error with the polar groups from UV, so I'm gonna go over that. So now, as I told you before, usually in the old versions of marvelous, you just had to make sure you don't have any meshes which are overlapping to get cleans poly groups. So now if I select this and I do export LBJ selected and say trench coat 0-1. And usually this is how I export single object and weld thin. I don't add thickness from ZBrush because usually it doesn't give me the results that I mean, I'll add my thickness into, into the ZBrush and then unified uv coordinates. I think if you export without the unified could be uv coordinates. Let's, let's try and like that. Okay. And I open up ZBrush and I'll import the OBJ trenchcoat 0-1. So now if you notice, I needed to Dinesh and have me just make sure I think the avatar just export it with I only need. So export OBJ selected trenchcoat. Yet. No avatar. Okay. Now and port. Okay. So if I go into groups and do a little groups with EV, you should get this. And you'll notice every piece has its own, its own group. Ok, so this is, this is good. But if you, for example, you export OBJ selected trenchcoat number two, and you have unified uv coordinates, okay, a unifying texture. And you go, okay. So now I'll just keep this here. I'll duplicate and I'll import the second one so I can show you the difference. Okay? So now if I go to 40 groups are groups. You'll notice, I'll groups with UV. You will notice that the color has the same policy group. Although these are two separate pieces. And we can notice like they have different normals, Right? So to make sure this doesn't happen under simulation, you have UV editor. So what you will do you need to do is you need to, if you need the UV unified version, if you don't, just make sure you check, uncheck down, let's say you need that one. You want to make sure you have clean movies and you want to take them into Miao. You want to take you into ZBrush and use those and not uv or model again. Then just make sure you have clean, clean and tidy movies. This way you'll you'll have the exact poly groups that I was telling you about. So I'm just going they're moving these parts and you can go ahead and add them to the tiles. So if you use two multiple UV ties, we can use this. Each one is a UV tile. So you can have, these are multiple UV tiles. Now I gotta worry about that now I'm just going to use for UV tiles and then I'm going to resize them. So this way, I have only one UV tile that I'm working with. Okay? And finally, these parts, so make sure you have everything selected and then just resize them. And that's your 0 to one UV tile. Okay? So now if you go ahead and select this, you see it doesn't, it didn't move this. It's only affecting the UV editor. So now if I take this and do File Export RBG selected. And I'm gonna name this trenchcoat three same patterns weld single object UV on. Okay, so now this is what we have with the UV off, which as you can see, each part has its own UV. This is what we have with the UV on, but the pattern is not cleaned. And if I import the third one and do, all the groups are groups with UV. Now you can see that we have separate, separate groups. So I just want to let you know if you're having that problem. This is how you fix it.
13. Lesson12:Thickness Treatment: So now that we've figured out how to fix the problems of the UV editor. I'm going to go, so I imported the third one that I imported and then that we export it from a marvellous story, autographs with UV. And we have different groups. So what I want you to notice that some like it's looking like some parts are missing, but this is just because the normals are flipped. And to view this correctly, just display properties go double. But I want to keep that off because I want to take these two and do control w, which is auto, auto groups. And then I wanna do flip. Alright, so this way I extrude the thickness. Everything extrudes in one direction. So I'm going to show you why I did that. If I go ahead now and let's say I select these two parts and I do split hidden. You can find geometry sub2, split, split hidden. Okay, so now let's say I want to add some thickness to this, right? So if I go to geometry and go to edge loop, and I'm gonna make sure I have a thickness of five Polish bevel. I don't need any bevel known either abolish. And usually I'll add an elevation of minus a 100 if I want to extrude n and plus a 100 developments through it out, right? So let's say I wanna do minus a 100. So if I go ahead and do bana loops, what happens is the top part is gonna extrude in or out. And the yeah, out. And this one is going to extrude that way because usually the extrusion happens in normals because I'm, I'm telling it to do minus a 100. It's going to do where the normals are invisible. So to not have that happen, I want to do to fix that. And we'll just go display properties, flip this way. And now if I go into geometry and do banner loops, you see they both extrude as they're supposed to. You'll notice that here. Now for this one, I usually when I when I do an extrusion, I'll make sure I have ignore groups and I'll show you why in a second. Okay, so now I'm going to go back to the full jacket. Alright, so select the top one and just under splay properties, just have that flipped. Sorry. Okay, so now I need to isolate which parts I want to add thickness to and which barred. Because how I usually think about this is if you Look at the jacket, you're going to see there is a main structure which is sleeves. And right. So front part, sides backwards and the sleeves and the color. And this usually makes like the I don't know the base of your of any outfit that you'll hear you're working with. Okay, so once I have that, I'll go split hidden. And I can isolate this so I can work on this one on its own. I'll make turned on so I can see what I'm doing. So now what I wanna do is I want to go ahead and just add a bit of thickness to this. So under Geometry Edge loop, we're gonna make sure I have only one loop. For the thickness. I'm going to use five. You need to play around with this because it really depends how big your model is. For Polish 0, level 0, and for elevation, I want extrude n, right? So if I go ahead and do panel loops now, and four. And if I go ahead and I add any subdivisions, you'll notice that each part is on its own. So we have gaps, right? So you can actually see the gaps between, between each part. You might want this. I've seen a lot of designers use this method to work. You need to understand one thing there isn't one way to do stuff. You can. Whatever feels correct to you or whatever makes sense for your workflow, then use that. But it's always good to try different other workflows. See maybe you find the workflow which works better for you. And it also really depends on what you're doing in the project. If you're doing for gaming, the workflow is way different. If you're doing film. That's another because then you'll how you can work with more polygons if with gaming, few polygons and so on, right? So usually what I do, I want the interior piece to stay one piece and I want the exterior p's not to break when I sub-divide. So to make sure that doesn't happen, just go ignore groups. So what he's gonna do, panel loops. Now, it creates an interior, which is, this is the extrusion. But now if I go ahead and sub-divide, you're going to see everything stays in one piece. I don't have any gaps. Everything is nice and tidy. Alright, so once I have that, we'll need to go back into this and start cleaning up. But now I'm just warning about thickness. So now I'll worry about the other parts. Now what should I do? Let's do the belt. So shift control, so I can isolate, then shift control drag to flip. The selection is made of two groups. I don't need to polar groups, so I'll just do control w. Make sure you have split hidden. So we have these on separate. So now for this one I want to do the same. So I'll go into geometry and panel loops. One loop thickness five, Polish elevation minus a 100. And then just do band loops. For this one. I didn't, I didn't need ignore groups because I only have one group. So it wasn't a problem. Now when I, when I use these settings of one loop, know Polish and no bevel. So usually you'll have 50 level as default and have 50 polish. And you'll have, I think five loops. So if we do it like that, it's going to add 55 edges. And it's going to round it up. Ads, going to add a bevel to this profile. And it's going to at a polish, which is going to polish your model. So it's going to get rid of all the, the, what's called the lines and any details you have, Right? So make sure when, when, when you're editing something, make sure to try to understand the settings. So polish, I don't need any polish because I want the shape to be exactly how it is. I don't need any Bevel. And for loops I just need one loop because if I need more loops, I can go in and I can add as many as I want. Because when I subdivide this, it's going to look exactly how I wanted to look at one, that roundness. I don't want it to be like a hard edge. Ok, so that's the other one. So let's do, let's do the back flap. Okay, so the back flap is made of two groups. I don't need that. I just want one, do split hidden. And for this one I'm going to do the same geometry and panel loops. And you can see, so now if I subdivide this, it just stays in place, has a nice it looks really clean. Okay, perfect. What's next? Let's do the front ones. Split hidden. Okay? So for this one I'm going to do the same geometry. I don't need to ignore the group speakers. Each group that we have two groups, but each one is not related to the other. So the same thing here. And then maybe to this traps because I want to show you a different workflow. So I'm going to select the straps. Here. I'm doing, I'm isolating each one. And then to split hidden. Solo it. Make sure you have display properties tend to double. Okay, so now, because these are like really simple shapes and I'm not worried about the count. I just want a clean geometry. What I usually do for have simple shapes that don't have any details and I'm willing to lose a bit of detail. What he can do is you can go to Geometry, go to 0 mesh, and then adaptive size two, sorry. Target poly count to lowest as you can, make sure you haven't have symmetry on. Because if you have symmetry on, this is going to happen. It's gonna do symmetrical, but we know this is not symmetrical. So make sure symmetry is off. If you don't have it in your, you can find it here in transform activates imagery. So then go 0 mesh. So it will give us this. So now I have what clean geometry, fewer polygons that I have to worry about. So now edge loop thickness again five, elevation minus a 100. And again, one loop should be more than enough. So I have that now. What else? Let's see. So this was done display properties to double. Ok, let's do the same for these ones. Split, hidden number gets split here, then you can find it here. So we'll do the same geometry loops. Now if you, if you want these to be thicker for me, minus five is working. So you need to, you know, tests which value works for you. What else? This one. And have the pockets split hidden. And I'm gonna go to geometry and do penned the loops again. Alright, so what we have next. So we went ahead and we added thickness of the jacket to the belt. And I use the same technique for each one. So I'm gonna go ahead and do for the straps, the shoulder straps, and split the buttons. So we can do I need to add these just a bit. So now we're gonna go ahead and clean up the jacket where we have a couple of folds and a couple of errors from marvelous. So after we added a bit of thickness, we're going to go in. And you're gonna notice that we have a bit of overlapping polygons because of that, because of the extrusion, we are going to have a couple of, you know, folds that when our way to sharper so they need to be a bit softer and so on. So the first thing I'm gonna do is I'm going to make sure you have polygons, poly groups on. So I'm going to select the, so control-click and make sure you have transformed. So W control-click. And I'm gonna select the interior poly group. And with the move. And notice that even if I make the move really big, that's still really tiny. So if you have that problem, make sure you reveal God of solo. And here, just click on transpose all selected some tools. So then you can, you can resize all of them. So I'm just going to make this a bit smaller or I can even go smaller. Now worried about symmetry. Okay, so now let's go ahead and click this. And with the move, we didn't just move this just a bit n. So we don't have any, any overlapping. Okay, and next thing, we have some overlapping here. You can notice that this is the interior. If we do shift control, it's going to show you that. So click on that one and again with the move or you can smooth it does shift mode that Bart. And with that selected, I can go around and see if we have any other part's going through. Because if you're not happily groups on it a bit, It's a bit hard to see where you can go because this is on the inside is, I don't need that much detail. You can go in and you can smooths a couple of these and see that we still have this overlapping. So if you do control drag, I can move that. Bidden. Always make sure to double-check. So control-click, seeing, just go around, see if you have any parts because of this smoothing that we did protruding out. Okay.
14. Lesson13: Cleanup and Smoothing: Now there are we taking care of all the overlapping areas, can go ahead and start smoothing some stuff. So as you can see, if I go ahead now and do at a couple of subdivisions added like three subdivisions, which gets us that 4 million. You can see that some areas still need a bit of clean up like this area here. Maybe those because you remember we simulated this all over a model. And this is why I was saying, the more you keep this simulation, you'll see some of the parts come through it. But it's like there's 3D simple, easy. I'm going to hold shift and just lower the intensity to something like 15 because I don't need to be strong or just want to clean it up a bit. And maybe like 20. And go in places all in just a bit too harsh. And you can actually see the edges. Here. You'll notice that if you want to make sure, if you want to have only this polygon selected, group selected, you can isolate it. And just make sure you don't remove details like tiny folds. Just worry about the areas that look a bit choppy or just weird. Notice this. And need these two lines, we can keep those. These lines are also good to know where the buttons go. And do the same for the other part. This out. For that. Say, you might think that's an error, but it's actually the tack that we used. So it gives a nice effect of actually having a button there. And we'll notice that a bit of overlapping is happening. So it can just take this and just move it in. Okay, on that. This may be a bit too strong for my button, so we can do that here. And you don't need to do a lot of clean up this just to make sure you have a clean model when you, when you add smoothness to it and you don't have any weird shapes are going to do the same for the back solo this. So for this one, I want, I don't need that overlap because remember we have this here. So again, I think we can get away if we clean this up a bit and just get it back to again, do go ahead and do a bit of a inflate. It was the greys intensity because this is underneath, underneath that. It might cause a bit of problems when we start smoothing it. And if at 1 we want to create some displacement maps or they're not going to be, and I'm not going to be easy to deal with. So areas like this where, you know, it's going to be hidden and it's not going to be visible. Because if you want this to be stronger, it's easier if we go and take something like a just add a bit of folds. Still, it's still cleaner. Then what we had before. These clean this up a bit, can live that his holds that far. Do you think this is too sharp? You can tweak that as well. I'll leave it as just a pit overall. Now, if you want to, you could also do, I can go into defamation and you can do a bit of Polish by feature. But make sure you, if you're doing this and go really slow and really low on the, on the values. Because you might lose some, some detail. And play around with these because you have different, different types of Polish. But usually prefer doing this manually you because I know I can look around and see which parts I need to keep. Which parts need, need to be cleaning, cleaned up, and so on. So just a bit of smoothing here. Again, we're going to do the same here. Just smooth that out because it's screwing over at any house. So it's a good idea to just go in. Again, we can go always back in with them standard or just add a bit of, you know, folds. If we need to. Like here. See we have that fold which goes underneath it. And I'm, I'm from experience, I know these usually a lot of problems. So we reverse inflate this and then smooth and reverse inflate. And I'm gonna make sure I have a clean geometry and then maybe with a tiny brush of move. Okay, now let's go and take these two. And I'm going to do a smooth on all of them, both of them just to make sure we have still have a clean line. Do a bit of inflate, clean that up. And now we have a clean version. Ok, let's do the same for the sleeves. Here. Smooth thing. Just going around and look enough. Like that might be a bit of a problem. And usually it happens underneath the arms. So check these areas a bit and I can go in and just smooth things out of it and also inflate or reverse and plate. It's not going to affect the look of our jacket. Just making sure we have a clean geometry to work with. Okay. And now have, you know, a lot of problems to deal with after. And do the same for this port. Now after you smooth that, you'll see the edges, they don't enum move because we have, there's, so just make sure you smooth it with the other group connected to it. Now here, because we had a color, we have this. So if you want, you can go ahead and just move that just a bit. Because I know this is going to sit on that category that is not going to be a problem. So we'll actually look even more natural because then that part is affecting. I'll make this a bit less obvious. And then we can go around and do the same for the small bards. Now the second thing I want to take care of as this belt. Let's go ahead and make this a bit cleaner. And told you sometimes like knowing if the final product is not going to be of marvelous file. I don't spend that much time cleaning the model model in marvelous. But if you know your model that you're going to send to the client is going to be the marvelous file and your task to be perfect. And yeah, please go ahead and make sure you have everything. Perfect. They're usually I get my my clothing for my characters and my toys. 90% there, and then I'll clean the rest in ZBrush is I have, have more control. And the final product will come out of ZBrush with all the details. Even if I'm doing for animation or if I'm doing for games or for toys. Okay? Something like that. And then what I want, I'm going to select these traps. And just tweaking a bit because I don't like these are way too straight from my taste. So just move these down and you can break up that shape of it a bit more here. Again, do the same for this one. Just break up the shape just a tad. So it doesn't look. That is cloth after all. Okay. The other thing we need to do is I need to add a lot. We can worry about that later. I'm gonna, I need to add buckle there. Okay, let's do the same for these Trump's. Make sure down, down and break up the shape a bit. If you're think if you see something which looks way too perfect, just go ahead and move stuff around. You're going to come back to these anyhow because we need to add a bit of stitching and a bit of tiny folds. Realized how their fault came up. Okay. So now once I have that, one of the other things that if you want to make tweaks to, let's say, we want to add an edge here. And what you can do is you can select that and then go with the dam standard or just on that edge and push it in. Or you can do have lazy mouse on and do just a and reverse string. So it gives us that extra, are gonna be worry about that too much because you remember we have this flap on top. All right, so let's go ahead and add some and add some details. And I'm going to do that maybe on the back flap because it's a A smaller area that we can work with. So first thing, double-check, see if we have any problems. If we're happy with the model. Go ahead and add a bit of subdivisions. Something about like that. It really depends on the type of brush. Now, I usually, there are a couple of ways that I do brush. It really depends how close or how far the model is. If your model is not really, is not close. I don't worry about adding alphas or stuff like that. I'll just select my damn standard. And in the lazy mouse, I'll do lazy steps. And you can do something like that. And I'll do z sub k. So because I know it's going to be a stitch here and I'll do this. And because if your character is not going to be rendered at like that, if you're gonna do rendering like this, then you lead either to add mesh stitching or you need to add the details with the alpha. But if your character is going to be rendered from this distance, it doesn't make any sense to add that extra detail. Or if the character is a bit, a bit cartoony. So you can go ahead and you can do this, and you can see it doesn't take a lot of time too. The fact that looks really clean and it gives a nice, a nice effect. And especially like doing these for small parts that I know the camera is now going to be that close. Okay, so that's the cheat version is like a easy way out, you know, stitching or procedures that is not visible. So it had like a really tiny thread you don't want to add because you'll need to go really high with the points to add details. But as you can see, this looks really decent from that distance. Okay? So let's say we add that then. You notice like on the edges of materials, especially on genes or jackets, you'll see couple of lumps that usually looks something like this. Ok. So to do that, we found away can do inflate and do the same thing. Do lazy steps, right? I'm gonna test it here. Maybe even more. And I'm just going to put the intensity really down, something like that. And you can go on the edges, just breaks it apart, breaks ties, shape, just breaks. So we don't have that perfect. Y can go over it again, just if you think this looks way too clean, just go over it once more. And it just breaks it up. So ready for you. You have that. I just look, which gives it just a bit of, you know, breaks that perfect shape. And you can see how that looks. And do this for this as well. Okay? So again, for, let's say for areas like this, I'm not gonna go in and add like stitching to that. So just raise this maybe a 120 thousand and then do b and take the time standard. Was it here? Actually, I still have it on. And you can go in and you can add a bit of. So is zoom out also. Because if you, if you do it like this, it might look good from a really close. But when you zoom out you can see it's not visible. So it's really important how you are going to render your character. How close is gonna be to the camera and so on. So I think I can go even bigger this. And if you see, if you go to the edge, it will break up that edge abet, as it would do on a realistic material. So I'll just break that up. Sometimes I even do this and then I'll add stitching over, which is a bit of a pain because they need to make sure it fits. But if you look at this just from, even from that distance, it looks through a decent. Ok, now you can do you can do the same for the in-flight. Maybe a bit bigger or maybe intensity, stronger and do the same for all the edges. Magazine just to, you know, regular brushes. You don't need any fancy brushes to do that. And as you notice, we didn't have symmetry on because these are really different. And usually when you add details, tried to stay away from using symmetry because it just makes it look way more, more natural.
15. Lesson14: Adding Stitching and folds: Now for this other part, I'm gonna use actual stitching brushes. And I went ahead and downloaded a couple by a guy name and recognize proline. And he was like so kind enough because you can find it on the 0 central to share the brushes that he did. These brushes are simple and clean and which are really good and I honestly, it's the ones that I always use. So you can go ahead and I'll leave this link into the files that you download. So I'm going to use this one as this stitch brush. So to use a stitch brush, we need to add a lot of subdivisions to this one. So this is one of the things that you need to worry about when you as digits using an alpha brush. So you see now we have 0.5 million. And if I go in and add brushes, and the brushes, you're going to see, it's now looking good. If you want this to look good, you need to make it like really big. So because the y was saying it's like really depends how far your character is going to be. You really have to think about that. This is why the damn standard is really a good solution because you don't need to add a lot of polygons to each part to get that detail. But if your character needs to be really up close to the camera and you need to render it like Ri and show the threads. Then the solution is to have, you need to raise that to about 2 million and then go in and add those brushes. And you can see, even like that, they don't look perfect. You still have that, you know, a bit of a jitter. So you always need to find the exact size that, for that brush to work depending on the model. So you see, just because we had those lines in marvelous, now it's easy for us to know where we need to add those brushes. Those digits, I mean. Okay, so go ahead and add more stretching here. Okay. So go back with the in-flight. And I'll go over the edge. Just break it up a bit. You can play around with the size. We can make it big, and then go, go with, with a smaller one over it just to break it apart. In that apart a bit. Okay? So this is what we have now just with that brush and with a bit of, bit of inflate to the, well, if you're going to add even more, you know, maybe even surface noise, you'll need the polygon count. So you have to keep in mind that once you start adding details using brushes, your polygon count will go really, really high. But these are usually my, the way that I worked with all my, all my characters. As I either do. You know, details using, using dam standard. Especially when I have, you know, tiny parts like this, which and I know from the start that it's not going to be visible like really close on camera. I know I can get away with with just this adding, you know, hints of stitching without crowding in, making my scene way, way too big. And always make sure there's way, way too large. Make sure you, when you're working on one part, you use to about of solo to make sure it doesn't look weird. So you either do using this or you add a US searching. So it's true that on this side, and if I add stitching, you see I need to raise this more to get to get a cleaner geometry. So you either do that. Maybe I'll add. So it's, it's really, it's really up to you which, which style works better? So for this, I know I'm not going to need to add detail threads. So let's see if I can get away with the dam Standard version. And I'm also going to show you how to do mesh, actual mesh brushes. So using both ZBrush and marvelous. But when I'm using alphas or just regular brush like damn standard, this is how I usually work. As you can see, if it's going to be rendered like that. Honestly, it doesn't it doesn't need that much, that much detail. If you're gonna go. And for some, you know, you're going to render this. It's gonna have a detail or the character's gonna put, you know, his hand into his pocket to get a gun or something. And you have that up-close shot then yeah, go ahead and add as much stitching as needed. Because although this technique is nice, is not gonna give you the exact same effect that an actual stitch brush will, would get smaller. And you'll notice like when we are adding stitching, the geometries, coming out 3D clean. Because remember we have UV map, although the UV mapping from marvelous, I usually go back and UV map it in ZBrush because I want some parts to be more relaxed. Some parts feel they don't feel that clean. But again, that's just a matter of preference. But it's really helps to have that UV mapped ready so you don't have to worry about UV mapping when adding details. But as I said, when I'm ready to go and render this into V ray or use substance painter than I usually go back in and recreate the UV maps just to make sure. All right, you'll notice here that I'm speeding up the video because I wanted to show you that I'm using the same technique that I showed you before. Just a simple damn standard with a bit of lazy steps using the lazy mouse. And you've noticed that you can do pretty amazing details just using that step, the lazy mouse step, even with a inflate, I'm going to show you how you can add a bit of edging and detailing to the edges. Just, just breaks up that perfect edge that you get when you extrude any, any mesh in ZBrush. So I'm going in and tweaking the size of it and how the strengths of each stage Also make sure when you're adding stitching to back, zoom, zoom out and see the, the overall shape because you don't want some parts to have really tiny stitches and other parts like 3dB, huge stitching because it's not going to look at what I love about this technique is like it's really clean, really simple. It's, I know it's not as detailed as using an alphabet brush, but it's still, it's still really pretty efficient. And if you think about it, if you look at suits or shirts, usually you'll notice that you barely can see the stitching given up, read really up-close on, on some parts. But the effect that has on the material that's like really obvious even from a distance because you'll notice like bad clothes, which maybe cheap clothes. They have 3D. Stitching is wonky or it maybe it's a bit crooked or something like that. And you'll notice here that I'm doing on the edge and the standards affecting the edge, the extrusion or the the edge of the material. And that adds just a bit. And this is why I love, I love the signal week. I'm going to show you later a technique on how you can use stitching as actual meshes in both of the brush and marvelous. While, while that technique is really nice and a lot of people are like amazed by it because you actually, the stitching is like actual mesh. The only problem that I have with that is you're not going to mesh because it's just sitting on top of the clothing that you're creating. It doesn't affect what's underneath, right? So you're not getting that, you know, the I don't know disturbance that the stitch is doing to adding to that piece of cloth. When, when that thread, thread goes through the cloth that leaves, leaves a mark. Sometimes it adds tiny folds, which I think that will make for this one and even for like four more detail are realistic. And if the camera's not breed the clothes and the magnitude of the threads, I rarely use. Brush details too. If your model is going to show it super zoomed in or you're working for a clothing company and you have some shots that you need to see that. So the threading then, yeah, definitely I would do a mixture of maybe them standard to create a line so defects, and then I would add a mesh image on top. So this way it's a mixture between the two. And it will look at, will look really, really good. So as you can see here, I'm just adding simple, simple, clean line with Dan Sandler just to just to add a bit of searching. Sometimes I will use a mixture between the two hour's, use a simple one and then I would add them centered on top just to give, sort of gives me a cleaner, cleaner, more, more detailed TTL line. So I'm just going to leave you with this so you can watch it.
16. Lesson15: Buttons and stitching: Now that we have added all the details, the stitching details to the jacket. So you see, I used the same technique on all of the parts. I didn't use the staging alpha because I told you for this project, the model is now going to be really up close. So that detail is more than enough for this project. But feel free to add. Touching gets the same technique. But instead of using that simple stitching, which I'm going to put it in the folders that you're going to download. And so I went ahead and added edges. And you might want to do the same thing for this one. And you can do inflate with a lazy mouse. And if you go really beg, you can add, doesn't have to be really strong. Can I just, just so it breaks that edge so it doesn't, doesn't look any perfect. Okay? So just move, move around it. And you'll notice if you play around with the intensity and utility would do a bass with big shapes is going to add like big money. And if you do tiny ones, it's just going to add a bit of more texture than that. Just in case you want to add that to the. But I think I think I'm gonna leave this as it is because usually like belts or 3D, I don't know a bit of material that's harder, so okay, next thing what I wanna do is remember these are the same buttons that we took from from marvelous. And I'm not worried that these are, the only thing I'm worried about is because this is these are unwell. Did so if I go ahead and duplicate them, you see just breaks apart. So you can either duplicate these and go to geometry and go 0 mesh and lower this as much as you can. Get one. Before we do that, go to modify topology and just do weld points. So now you should have all the parts welded. Okay, so now we can do a rematch and we'll get that. The problem with that is it's getting really high. So although these are really nice buttons, I'm going to hide, these. Might just leave them on so I can know where I'm going to add the new ones. I'm going to duplicate the trenchcoat. Cancel. Duplicate. Just lower this down because it's gonna be crazy. Okay? Hide everything. I'm just going to keep these two. So instead of using the buttons that we use, we made Marvelous. I'm gonna go ahead and use a custom. Brush set or RMM that I downloaded from that King.com dot IU. I'll leave the link in the document that I told you about. And here we're gonna have multiple types of buttons and also button holes they're gonna use for our project. So I'm gonna go back into ZBrush. I already loaded my i m, m. So this is, this is why I duplicated the jacket and now I have a lower one so I can go ahead and add the buttons. So for this one I'm going to use this model and I'll just drag it here. And it also has, you can notice it also has the threads into it. I'll rotate these around just so I don't want the threads to be in the same, same position. Now, if you want to make sure, because the problem with these, if you want to make sure that they have the same size, where you can do is you can select, it, can do one, split a mask point, and then just duplicate this. So duplicate it and move it around. You know, rotate it. Just make sure we rotate it so it doesn't have the same stitching with the same threads. Might duplicate. Over down. Now, the buttons that I did in marvelous, that really good. But the problem with them is if I want to do a close-up render and I duplicate, I subdivide these, they won't look good. But if I subdivide these ones, really, really nice. So I can do up-close rendering to them in case I need to. And also saved me the trouble of creating the threads, which I needed to do for, for each one. Anyhow, there might be a way to do the threads and marvelous, to be honest, I haven't tried. This is why I say it's like there isn't only one way to do any type of project or any type of model. This is my technique and usually walk works for me when I do any project. Is was actually client projects. So as the permission if I can use the model to, you know, to create because we were working on a character and we're supposed to do detective for for the character. And the client was kind enough to let me, you know, share the steps and also share the model, the jacket model that I did. Ok, so what I'll do now is I'm gonna go ahead and merge these down. So merge down, down, down. So now I have all of these, ok. And even the count is lower. So the thing the these ones were four thousand, eight hundred and two thousand eight hundred. You might say Yeah, but the jacket is like 256. Yeah, But for the final render, I'm gonna, for the client, I'm going to prepare the models so it's low. And we're going to use the displacement normal to get the DNA out of it. So I can go ahead and delete these because I don't need them anymore. Ok. Now if you notice that any of these need to be rotated, just go ahead and do that. Now. That's about it for the I might need to add and then to add a couple here on top. And just make sure, ok. And offer these one. We're gonna use maybe a different one, 2s this okay. Put that into place. I'll let it they split unmask points and duplicate that one and move it into place. Okay, so now I'll go back to this and I'll do a couple of tweaks and go to the low subdivision. We saw all of these are actually not so obvious. I need to know, see what I'm doing. So what I'll do is I'll hide everything click shift, and only show these two. So now I can go in with the move and just do a couple of sort of the button's field. Okay? Now, if you want, you can go in and maybe raise this. Maybe ADA. Now something maybe use and inflate without a step. Just just tiny details in case you need to add that one. Okay, now, for the next thing that I need to add to this one which we need to select a smaller one. And you remembered we added, we left these so we can add the button holes. So we're gonna go back to button brushes and we have three types. And we're going to use this. You need to tweak them a bit. Put pretty good. Okay. So move him up. What all do? I think these a bit small. Go ahead with a lower intensity and just, you know, flayed them. I could go move these into place. I might be might be a bit too big but seen tinier. Yeah. Okay. So for this split on and I'm going to go good to transparency so I can see what I'm doing underneath it. To that. Again, we're going to inflate it a bit. It's a masked. I think I'm just gonna use the same one. Duplicate. Move it down. Thing. Honestly, I think this has to be rotated around that loop there, hold the threads. It's always a good idea to check some reference. Okay? So now that I have all of these, it's going to go ahead and just hide the buttons so I can start making tweaks. Just wanna make sure these are sitting on the jacket. You'll notice that these are really high, so only for that the counters like 7 thousand polygons. So you're gonna do something which is needs to be but low poly. And the only solution is you can merge these into the model and the high, the heart Bali, and then just take the detail using displacement or normal map, depending what the project needs. Because just losing 1000 polygons for a detail that's not going to be visible. Usually it's not an option for the project. Goes. If the camera is not really up-close and it has to be super perfect. You can do this with alphas as well. But I just wanted to show you like a different, different way in adding detail, not only using brushes. Okay. And that should be, I should be at. So let's go ahead and merge down. So I merge all of these and keep this low body one just in case I need to add a couple of more detailed. I'm just gonna go ahead and make sure this is sitting Well on the hype only one. And if you think needs more and play do you can go ahead and do that. And that's all buttons. To add one more here. Go and duplicate these two. Lone delete higher, sold them. And we're not gonna go into all that work. Move that up. Now, that's just perfect. So I'm gonna go ahead and inflate this split unmask point. Delete this one, I'll meet them now. Ok, make sure it's sitting, just tied the buttons just a bit. Make sure it's sitting on the model. Because again, if you decide to take this into your final can either either as a mesh or merge it into the dynamite and take it out as a displacement. So something like that and just do metre. Okay? Okay. Usually this part takes the longest and it doesn't take much to create the most of the jacket as it takes to prepare the model to final. Now you'll notice that this is floating. So to fix that, just select this and pick, pick apart here. Let's do that in low poly, so nice. Yep, that's ZBrush. Are you pleased to saving?
17. Lesson16: Different types of sutures: Ok, so now just select this and have moved on and just move that part. So it's touching the jacket. Should have done that before for bringing these n that I remembered. And do the same here. These are all going to do all of it. Double-check again. Alright. That's par, that detail. Right? So here's the jacket with all the details. Now, one other thing you can do, as you'll notice when you start smoothing some stuff out. And because this is two parts, you'll notice that this is a bit way too soft now. So you can either do that with regular damp standard and go in and, you know, making sure you have this. And, you know, just go D sub, right? Or the other thing you can do is you can solve this, lower it. And you can click. And an easy solution for that is either move it in a bit like that. And you'll notice it's going to add that edge to it. Or what you can do is you can do a bit of inflate. You can find inflate here. So under deformation, inflating here because I use it, use it a lot. So now when I go back. It's still better than what it was and see some of their own and we had this now. So see it's a bit bit stronger. I like the way it looks. So obvious software, so I'm okay with that. Okay. And usually you just go around and check if if I need to add any more details or, you know, you'll notice like some some parts is still going through through the jacket. Don't rush these because I know like a really looking like you can't wait. And also think about this. Initially, I wanted I wanted to move the, you know, the belt. But think about it. The belt is the heart of the material, so it's way thicker. So that doesn't make any sense. So what I'll do is I'll move the material because that one is holding the jacket. So try not to rush this part because I know it's like you're so close to finishing your project then you can wait to render it. Or if you rush this part, you're going to end up working even more to fix it or you remember something or you'll send it to the client and the client comes back and says, yeah, you forgot this. So just go over it, make sure everything looks good. Make sure nothing nothing going protruding. So as you can see, this one's a little good. Why is that? So you notice that this edge is way too hard. So I'm just going to move it around. And it doesn't look that weird. And I'm going to check the other side. Yeah. Okay. Next, I'm gonna go ahead and show you how to do different type of stitching and using mesh SI unit. So I've showed you how to do simple using dam standard and how you can use alpha brushes, alright, PMA brushes. How about if you want an actual stitching made out of polygons mesh. So you can, well, you have a project that you want the client, you want to be able to put different material on that or have their control to change the stitching and so on. So then you'll need an actual mesh for your. So to do that, here's my technique. I'll append the square cube, just solve this one. And I'm gonna go to IMF parts, which comes through with your ZBrush. And you have this 1, first 1. So just drag down and okay, and then just do split and mask points. And notice this is made out of two groups. I wanna do auto groups. So then I can select only one of them, deleted them. So then I want only this part. Okay, let's tweak this a bit. What I wanna do is maybe. You know, make it a bit longer. Yeah, that's perfect. And I make sure it's treat focused that in and then just go brush and to create, create, insert brush, do new. And then, so now you'll have it here. Insert mesh. But if I do drag it now it's not going to do anything, is just going to put that what I want this, I want this to be as a curve. So go to stroke, click on this, so we can have it open here. Then do curve mode when you put God mode on and see what happens now. Now if you go really close, you see this looks like a stitching. Ok? And now you can control how big this digit is by making the size and just click on it. So you'll have that. So let's say you want a bit of spacing between these two, you have something called curve step. So if you go 1, let's do two and click. You'll see now it adds a bit of spacing between the two. So when I drag Now, I think twos too much. Let's do 1.5. Might work fine. Okay. So I'm going to bigger. That's your stitching. Now you'll notice that the stitching is sitting on top of it. So on top of the usually stitching goes into the material. So to fix that, go to brush, you have something called depth and just move that DOD until it's touching. Again, do it again. So now if you look at it, you see still have that. So now when I click out of it and I do split a mask points and do subdivide these. We're going to look like this. Okay, so now if I take go back to my trenchcoat, it's going to add a bit of subdivisions to this. And let's say I wanna be, I wanna add some stitching here. I just have to drag it like that. Yeah. The problem is you can't do that on subdivisions, so I'll keep this load just so it moves faster. And you can always like, Go Bag. Scale your brush, click on it again. We can do is you can do lock start. So this locks the start point. So you can drag the start point and then you can add to it. So if you do this, it will continue the brush. So you see it makes like a red tail. Because if you go far, it's just going to start a new one now. Okay? So now when you click outside, you have your stitching. You still need to yeah, certainly to tweak them a bit because it follows the and you're going to have it to snap and give you sort of like the unmask this. And if you sort of like B and go bend or snap, so it goes as snaps to the geometry. So it follows the geometry. So if you look at this C, But you still in some places just only to do that manually. Okay? All right. Now let's say you wanna do a double stitching. So if you wanna do a double stitching, just select tube and duplicate that one. Go. Duplicate. Move it to the side, and then just merge them. Ok. So now just go be brush, Create, Create, Insert, merge, append. Actually, brush, create, insert, brand a bend. So it depends to wait, select, make sure I have that one. Brush. Depends on r. You have normal and double. So half curved mode on, make sure you have step 1.5. Then if I go back to this, let's say I want to do a double stitching here. That's gonna give me double teaching. And again, if you see that's going to be outside the just go underbrush depth and just move it a bit down. And this is how you create. While this is a really good technique, not saying the problem with it is this. Let's say I go ahead and I'll create a stitching line that right, okay, so I click here and then do split unassigned and tool. And then if I want this, I can take this into, into Maya or any other software and I can subdivide it, right, which works really fine. But if you want to do it in a software that doesn't have any subdivision like nano dimensions and stuff like that. Then if you make this soft, it is going to be like really, it's really going to be high count. But if you keep your stitching like really simple like this, it doesn't matter how many, how much you add. It's still going to say if we go from top to bottom, let's check the size of it. Let's make it a bit smaller. So it adds even more. And do click, split a mass points. So all of that is only 7 thousand polygons, which is great. Ok? As I was saying, my problem with this is it doesn't have it doesn't do anything to the mesh is just sits on it. And as you noticed, if you look at stitching, it doesn't work like that. It's you'll have something happening underneath. You'll have, you know, because the stitching affects the material. So although it's a really good technique, I don't like using it just because of that. But sometimes if the client asks, what I'll do is I'll make sure I have, you know, a lot of detail. So I'll do, I'll do the double, double techniques. So I'll I'll go in and I'll make sure I have a path where the stitching is gonna sit on or even if it's going to be like really detailed, right? So be damn standard again. And lazy mouse at a step to it and find the one. Find the stepping that works for this. So then I can go, can go in, and I can add more intensity underneath it. But it's not as simple. So usually works like something like that, just works better. And just make sure you have and you have a line that that's sitting on it so it doesn't feel like it's just, you know, polygons on top because stitching it doesn't look like that. Stitching effects the material. It always affects the material. You always have a bit of a line, even if it's, if it's subtle. Because if you're gonna go into crazy detail of creating stitching, which is realistic, make sure you are creating also the path that, that's touching the ceiling on, like when you are doing here, that's going to work fine. You can go in and you can select this guy. And I'm going to go use that trench coat because it's low one and have these sit on that. And when you do split a masked and you move these so they can see, you can show them. It works because you have that path already and it works redefined, right? But if you don't have anything affecting that, it's going to look weird. Okay, next one, I'll show you the technique using marvelous to create stitching.
18. Lesson17: Different types of stitching: We looked on how we can add stitches to the jacket using the simple method and we looked on how we can add using alpha brushes. And now I'm going to show you how and how you can use curved meshes. So you can create an actual mesh for the, for the stitches. So now I'm going to show you another method that you can use straight out of marvelous designer. So for this method, what I'm, what I'm gonna do is I'm going to just select one part so we can, we can focus, focus on that. So I'm gonna move this side and I'm going to shift q and hide everything. And I'm going to hide the avatar as well. Ok, so now just working with one part. You'll notice here we have edit, stopped it. Top stitch, segment, top stitch. So it's exactly like segments teaching and free top stitch, okay, and this is show or hide. So what I wanted to do here is I want to add a stitch on this interior line. So to do that, I'm going to select Freestyle edge. And I'm just going to drag it over and just end that. Notice that that's going to add a stitch here. The other thing you'll see when you press Space to simulate, you'll notice that the stitching disappears. But it's actually, it's still there. The ballroom is for some reason when it's doing the synchronize, the simulation is not the surgeon is not visible. Right? So I'm just going to stop that. So now if I want to edit the stitch, you'll notice that it's sitting way closer to the edge. And I would love to have that sit on top of the stitch that we already created, right? So to do that, I will select this and click on this edge. And he'll, you'll notice that we have something called default top stitch. Here. It's going to show us like a start and end. And that's about it. But if you want to edit the properties, you just have to click on this. And here we are going to have length, space and thread thickness and so on. So let's start with length, right? So by length it means the lengths of each, each thread of the stitch. So go ahead and do. The first thing when I'm going to do is I think this is set to five or four. Yeah, so that's going to be slow. So what I'll do just, just so we can move a bit faster. Just gonna go with the particle to 20. Okay? Just sort of doesn't take a lot of time. So zooming. All right, so now let's see the settings. So here, if I want to make the stitching longer, right, let's go and do a five. You'll see the threads are way longer now. So let's do something like two. And the space, it means the space between each, each thread. So for that, maybe let's go, if we go 0 in, I'm going to have any spacing. If you go, let's go maybe one, think it's enough. And it's always a good idea to go back, to step back and see if the sizing looks good. Because if the sizes look good, what you can do is you can add the thickness to it. So maybe let's go 0.5. So that's way visible. And the other thing we can do is maybe to the length three. So I think that looks way better, right? So now let's move the stitching. To do that. Here we have something called offset. And I think it's a good idea to remember the distance that we used. And I think we use six or five for our usual ones in there. We used eight for the doublet when we did double stage and so on. So that's good to keep in mind, but you can just play around with this. So because we're using this one like the actual line, the interior line, I want that to sit on top of it so I don't need any offset, right? So I'm gonna just put 0. And that just gonna put it on top. If you want, you can just move it a bit and be able to like 0.2.4. Yeah, because for some reason when it sits on that, it it's doing a bit of error. Maybe because we have a bit of maybe it's because of the folds strength. So if you're having that problem, just select the stage and just put it offset it does the dad. Okay. So this is how you know, if you simulate again, you'll see it's not going to be not visible here, but the staging once you, because you can see them here floating because we have everything else hidden, right? Let's go ahead and do another part. Sort of shift q to reveal everything. And maybe let's go ahead and add for the big part of the trenchcoat. And I'm gonna go ahead and hide everything by the avatar as well. Okay, so let's add the stitch to the big part, right? So to do that, you know, we, this is where the color starts. So I just want to stitch where we added these two. And so what I'm gonna do, instead of selecting that one, well, I'm gonna do this time. I'm going to select the outer. Okay, just so I can show you a different way to do it. And then we can go ahead and add stitch. Let's use the second one, not the three. So 123, right. So now if we select these, this, this, and this way, we can have three of them. Which, which means I can add like different, you know, different properties for each one. But make sure you have all of them selected. So once we have all of them selected, you're gonna see that it's sitting on that edge. Okay? So we'll do, we'll do the same thing, will go in. And let's say I want these to slide on the inside, also like default stitch. And I'll go because I know there was, I think six or 88 and it's exactly what I wanted. The size is good because we already said that one. But if you want, you can play around with that k. For some reason. It's going around once they're happening like this actually. And just delete. And instead of that, I'll just do a freeze touching. That gets easier. So this way we have one piece to deal with. All right, so that bees and go back and do eight. So now we know that's sitting exactly where we want it and we're happy with it, right? But now, if we look at the pocket, will notice that that doesn't have a stitch anymore. And why? Because we already created that one, right? You'll notice one thing when you select the stitch. Notice that this says the default top stitch. So you have to think of it as a fabric or a setting where we have fabrics. We can have multiple fabrics here. You can create different type of stitches, right? So let's say for the buttons we wanted that to sit on top of the interior line for this one, I wanted to slide a bit. So to fix that, I'll just have to copy, keep the default stitch as 0.4. And we can rename this and maybe named this blanket stitch. So it's easier to write and we can make this leave this as eight and what, you know, big parts stitch. Okay. So now you'll notice that that one slide that over because we are using only one. So to fix that, I'll just go ahead and select this. And while having the big parts, just go ahead and do. So, that means it's going to just apply that to it. So this way, we have two types of stitching. We have one for the bucket which is sitting 0.4 from the line, and this one, which is. Eight millimeters offset. Okay, so now if we wanna do one for the bottom, for this one, I'm gonna use just an edge stitch. And I click on that and I'm going to add one. Right. Now, forget, and we using the eight millimeters offset, so we're using like usually uses the last one that you've used. So because I want this to be 15, I think I'm gonna go select this and copy, right? So now if I turn this and had put 15, nothing's going to happen because I need to I need to apply it. So select it and just click on the arrow. And you'll see that's going to, I'd like you'll see this is the error that I was telling you about for somebody, the stretching when it's sitting on a on an edge and t line. So you can see that's sitting on and theta line. So what I'll do to fix that, just move this a bit. Go 15, I think this one is 183 almost no, maybe 17, almost 16. Let's go 1717 sits on it. And then this gives certain 18.5. So we can see the floating lines. They look really good. So now we have, we have a clean stitching. Okay, so now let's go ahead and reveal all of these sort of shift q and assimilate. And keep in mind that those are going to be visible. Alright, so what I wanna do now, I don't want to add any more details because I'm just using this as an example. I'll select these and go ahead and export. So we'll do OBJ selected and as do stitching test 0-1, OK, and do save patterns and single object weld and so on. Okay. Maybe, maybe will be a good idea to see multiple objects. We'll see. So as you go, ok. So now if I go ahead and open up ZBrush, so impulse to test. Again, go to display, mature, have double on. So now if I, if I turn this so it's easier to see. We can see the, the stitching as an actual mesh. Okay? So what I wanna do now, as we did before, auto groups with UV. And you'll notice this will give us a bit of a headache. So now it will give us all of these different. But if we look at the stitching, each stitch has its own group. And that's not going to be easy to work with. So instead of doing auto groups, sorry, without, with UV, I'm going to just do auto groups. So it's still going to give me stitching. And like each one is going to be separate. But at least the jacket has one piece. So what I can do is I can select these and the buttons to drank. Symmetry on just want to make sure and then select anything by mistake. So all of these and as do selection on these, It's hard to visualize where these are. Okay. One remaining. Ok. So what I'll do now, I'll do split hadn't. So what that's gonna do is gonna put this touching on its own and the jacket. Okay, so now I can work with these. If I solo them. Now there'll be, they have like multiple answers to control w. So this way, when I merge them back, they still have, they will have only one. So now you'll see that we created stitching that follows the lines that we had before. And it's it's a mesh stitch. You can control how that stitch sits on top of the of the mesh and it's going to be exact and you don't have to do the curve. We have to go and do this manually. Now, you'll have the same problem that you had with the mesh that I showed you before. It's now going to affect the material underneath it as, as it would do if you do it with a, with an alpha that has a bit of folds here to the side and so on. But the other thing you need to worry about is the polygon count on these. Now when you're doing curves, you can control how detailed they are and these have way too much. So I think you can control that by going to 0 mesh c if we do 1380 thousand now. Okay, so I'm going to see please borders, see 0.1. just trying to lower the size of this. Now. So 80 thousand is actually a good number. So that's one of the things you have to keep in mind. And I'll show you later when we had to use the jacket. But the client had a limit of how many polygons we can, we can use. So then when you export, this is the low mesh. Keep in mind this is not the detailed mesh that we got out of it. If you look at this, this is like really low. This has 13 thousand polygons on its own. So the only the jacket has 77 thousand, which is, which is really good if you're doing gaming. So if we do split hidden, but you'll notice that you can't use this, this topologies way wrong and so on. So, and I'll show you how you can keep the details that we had and then use a cleaner version for your, your topology.
19. Lesson18: Creating and adding the belt buckle: So we finished adding the details of the buttons. We finished adding the stitching. But you'll notice that we forgot and a buckle to the belt. Alright, so to do that, I'm going to select the belt, move it by clicking shift and this arrow. So it can move it to the top of the line. And so then shift and on the eye and hide everything. Want to duplicate this key, hit down on this to be Leith higher. And under your brushes you have IM closing. And we are going to use this guy to create buckle. All right, so drag a size, you think it fits. Might go the other way around. So something like that. Move that down a bit so it's centered. So now I want to do split unmask points. I can hide this. So I just needed that is I can drag that brush on it. And it's going to go low with this one as well. Okay, so what I'll do now is also like this and I'm going to mask the top. Actually, I want to match the top and the bottom. So I'm going to activate symmetry, and I'm gonna make the symmetry in y. So now I think I have symmetry, local symmetry. So it's own that tool. And now just drag this. So it goes over the belt just a bit. Okay? Once you have that, you just move. Make sure symmetry is off and move it on top of the belt. Center this. Okay, so you want this broad to be hidden underneath the belt. So I'm gonna go something like that. Okay. Let's go and unhide the coat just so we can see what we are doing. Ok. And rotate that around. Something like that. All right. Just move it up a bit because I want that to be sitting on it on the belt now. Okay. So now on the other codes because we don't need it and go back to the to the belt. Wanna do Control and drag this, but just so we can mask it, just make sure we don't have anything else selected. Like move, focus down one and unmask that words, flip the mask and then just solve it. Solve it to get what is. Now let's move, solve this and move this bart and then un-solo. And then just move this, drag this a bit up, just a bit. And then what we wanna do is I want to just mask. Center. Flip the mask. Just anything that's more than enough. Okay, so for the rest of them, just gonna do it with d, with the move. Alright, so now I want this to be, to feel like it's really not. It is cloth after Rawls to feel like it's really tight. And I'll move that up. And you can move this feels like the metal sitting underneath it. Okay. You can go around and I can now unmask everything and just move these back. Okay. So now when I go up, subdivision still stays clean and neat. Tweak these just a bit. You can you can do that tweaks. So it looks like the metal is going through it. As lower it to three maybe. So you have more, you know, something like that. It doesn't look that obvious. Okay? So the other thing is you want all of these Mike, these edges and a to B because these go underneath them, metal make him look like it's metals like sitting on that cloth to make that work and just make transparency on so you can control the part underneath the metal. Something like that. Works just fine. Okay. Alright. Now, if we go ahead and show everything, we have our belt. But usually belts have an end. And you might say, well, we forgot to do that in a marvelous, I didn't forget to do that in marvelous. I wanted to show you away one way to do that without going back tomorrow. So you could go back to marvellous, create that part, bring it in to the same extrusion again and try to fit the same stitching. But sometimes you can't do that. Sometimes you're on a such a tight deadline and the client wants this to be TN panel and a couple of hours or an hour and you don't have all the time to go back and redo all of that. So you need to learn, to adapt and to use whatever you have and not do the work. Do the extra work when you can. You can already use the parts that you already done. So what I'm gonna do is I'm going to duplicate this, move it up. You'll notice that the width is subtle that I'm working. I always try to move them on top of the so this way I don't get confused on which one because then you don't need to go in and name everything. But the problem with ZBrush is because you are deleting so many extracting and so on, you'll end up having a mess anyhow. So usually you name everything. Once the project is done and you're ready to export, are we ready to clean up or wherever, right? So for this one, what I'm gonna do is I'm gonna go to Geometry low and already have a really nice low cage for this, right? So what I wanna do is I wanna go and do something called free subdivision levels, right? And want to unhide my parts. And now what I wanna do is I want to figure out how long do I want that strap to be, right? So let's say you're gonna do something, something like that. So now what I wanna do is I want to split us. I wanted just to I don't need the parts from the back. I'll hide this. Okay. Alright. And I'll do flip, flip them, ask. Okay, let me control w. And I'm gonna do delete hidden. Now from this. What I need, only need that part, that face. I don't need the other one. So delete hidden. Okay? And we go under Geometry and we go banner loops. Thickness I think will work to me was 0.5. And let us do panel loop. And that's perfect. So before I do panel loop, forgot one thing. It's easier to do it like this because we have only one edge to deal with. I'll just move the edges just about a bit. Just so we can have around. Also make sure when you're doing your end. Subdivision levels, make sure you make huge changes, especially when you already have details like alpha and stitching or maybe textures or somebody that you can do subtle changes. But so once you have that and you're happy with the result, you can go in and do banner loops. Okay? And then I'm going to click free subdivision level. So what it's gonna do is gonna rebuild all the subdivision levels that we froze earlier. Now, you'll notice that there's this is not super clean, so it's gonna give some, but it's really easy to clean. So just go under age. Some live, so go to two, then to move up to three. Alright, you can soften it up if you want. Just lower the intensity. Doesn't want to be really strong. We're just trying to clean up the edges here. Okay? If you want to make sure you have a flat, you can take h Polish and you can flatten that area even more, especially here on the edges. Just so you can have a cleaner, cleaner edge. Okay. And then go to four. You have to go to each one just to make sure you haven't missed. And I'm going to do h Polish again to, to have a straight clean line. It can do it here from the top because that part is going to be this one is going to be under the belt, so I don't I'm not even going to bother with that one. And for the last sort of divisions, i'm gonna go clean that up a bit and do the same here. So we can keep, Go back to abolish launch. You can go in and you can, you can make it like really nice. Okay. Once you have that done. Now, if we go to the top, take our Rotate, gizmo. Just rotated a bit. Okay. Now go to the lower subjective, move it back and you can maybe mascot this area and soften it and then take them move. Let me have one of the faults moved just a bit so it doesn't look like really symmetrical. Ok? The other thing you need to do is you need to take the edge and just move that under the buckle. Is that's going to, you know, just come out of there. Just make sure if you want, you can work in subject to so you have more polygon so you can not affecting the entire shape. Does make sure you leave a bit of thickness. So it looks a bit, you know, it looks realistic. Ok. So once you have that, you can go back into the highest of division and you can see we have the same stitching. We have same detail, the same side of the same edges that we added. And we didn't have to go back and forth and undo all of that. Okay, so now for the final thing, I'm going to duplicate the belt again, move it to the top, hide everything. Well, actually not everything. Just leave this one. And for that one I'm gonna go and lead lower. And under your RMM, there is the same one we used. I am am clothing, I think. Yeah. And that's used this I let Type two and yeah, sorry. Delete high. So we'll use that. Okay. This sign and just drag that in. Okay, you can rotate it a bit, move it out a bit. If you think it's not big enough, you can just make it a bit bigger. Okay. And now, if we look at the jacket, let's say we need maybe a couple more. So we'll do do on no, sorry, let's do, let's do one more here. Move it in K. And there's two. He had tried to keep the distance as much as close as possible to the look. And if you wanted, you can maybe add one here as well. That just squeeze that in. And I can, I want to do now is just take these and delete hidden. And I only need that one. And I forgot to check where the okay, so let's move that out. And I think I'm going to just take that. Now. I'm going to move it back to the other side. Okay? So now if I want to take these to render them, gives it like so low, Paulie, again, add a bit of subdivision to them and they become really nice and round. Let's shift. Click on the I, reveal everything. Now if you want, you can do the same thing to do these traps. If you want to add like a, I know this. Maybe SOP tool, Doppler gate, remove, delete higher, swallow it, and then use the same one. And maybe due to like a tiny buckle for that here. And just do the same thing, freeze it. Do that. Bart can even do a tiny, tiny buckle on the side. About the buckle. Forgot one thing. If you select the buckle now and you focus on it and you subdivide it. Looks mushy and it's small. So one thing you can do is you can inflate this. Again, don't forget, you can have inflate under here deformations. So I'm gonna inflate this. And the next thing I wanna do is I wanna make this. This has a nice chisel here, so it holds that edge. So if I subdivided seats, looks, looks metallic. So if you want the same look, just go. Now B and select Z modular and on the edges, hold space, go, crease and edge loop complete. Just click and click. And maybe I had one here as well. Ib here. Oh yeah, that looks pretty nice. So now it looks more like a metallic. See when you always need to check your just check your models when you start subdividing them. Because sometimes they because they lose a bit of volume, they become way too small. So you might need to do the same thing for, for the other ones. Are you going to do it with inflate? Just a bit.
20. Lesson19: Dealing with Polygroups: So now we've finished the jacket. We have a clean jacket, we have all the details, we have straps, we have metal Bucher buckles and so on. So if we look at the jacket main part and we'll look at the active points. It's about 16 million, which has allowed, especially if you want something that has touching details and so on and textures. But usually you'll take the low poly of this, alright, which is around 256, which is a lot. And you render that in, I don't know, V array or what have you, right? So let's say the client comes back and says 256 thousand is not going to work. Sorry, the character is the clothing on Edmund. The character is going to be heavy. So we can't work with this one. We can animate it. Like if you're working with it for animation, then you'll need to do or the topology on this one. And by the topology I, I talk up them talking about like manually topology. Do we get doing it in TOPO gun or Maya or whatever other software is out there, right? But I'm going to show you an easy way because usually some animators, especially depending on the budget and depending on the project, you can work with the topology that z remeasure gives you. Because if you look at this now, although it looks clean, it's messy. It's, you don't know where the loop is, you don't know where that line starts is just all over the place, right? Because Marvel's designer works as a triangle to triangulate everything. And once you finish your model, you go and you do when export thing you do quadrangular later model and then you bring that into what he can't even bring the triangulated into ZBrush, right? But if you look at this, you can't work with this. So I'm going to show you a way and how to lower the count to something more reasonable. And we're talking about maybe, I don't know, seventy thousand, eighty thousand, fifty thousand polygons. It really depends how much you, what's your polygon budget? So to do that, we are going to go ahead and do clone. So we're working on a separate sub tool. And what I'm gonna do is I'm gonna take this subtour and I'm gonna duplicate it. And the geometry I'm gonna delete higher. So I'm going to work with the low. I'm going to keep the high hidden because we're gonna come back to that one in just a minute. So what I need to do now is I need to reads apologize this using 0 measure while not losing my poly groups, while not losing any detail. First thing you need to know, when you're doing 0 measure, make sure you don't have symmetry on. You want symmetry on with 0 measure just in case your model is symmetrical. As you can see your model, I'll model it is not symmetrical. A look at the color and everything else is not symmetrical, right? So make sure you have symmetry off, then go to geometry. And under the geometry we have something called 0 measure, right? So I'm not gonna go into detail about 0 measure that a lot of tutorials out there, just google 0 measure on YouTube or just search on YouTube and you'll find every freeze borders. I'm just gonna go over them like really fast freeze borders. It's gonna freeze the borders all the edges of your model. Frees groups is going to keep the group's exactly as they are and freeze the groups and their edges and the limits. Keep groups and this is what we're going to use. I'm going to make sure that it keeps the groups target polygon count. This is about, if I do the Zerocash now it's gonna give me around, I don't know, 10 thousand or 8 thousand, something like that. So that's way too low, but I'm gonna go ahead and show you. So if we do 0 measure, it's gonna go in and it's going to progress and it's going to look into, into the model. But we made sure to tell it, keep the groups. Because I want to keep the groups. The groups are really important because when I finish this, I want to be able to go into UV map and lower and do UVA's new movies. Like because I can't use the ones because we did the 0 mesh now, so we don't have any movies that we used to have, right? So I want to redo the movies and I want them to still follow that. Ok. So as you can see, it's eleven thousand. Eleven thousand is way too low. I have more budget for that. But I'm going to show you, I'm going to show you how clean This is. So at least now, if I go and select and drag a mask, at least I know that this has starts here and all the edges are clean. And it does make, make a bit of, a bit of a sense, right? Okay, so that's way too low. So what I'm gonna do is I'm going to go into here, I'm going to put like 50 thousand. So 50 is going to be a good number for me. And I'm gonna do Xiu mesh again, making sure we have keep groups on. So now if you look at the model, this is perfect. 60 thousand. I can work with that. It's clean. Everything just looks really nice. I still have my groups to read, which is really good. Now you'll see sometimes it messes up and it does like stuff like this. So you have holes and stuff like that. So if that happens, make sure your model doesn't have any parts which are like going through, we already, we already went through that, but sometimes you'll miss a spot. So if that happens when you are doing is you re mash going to go ahead and do that again. And I, So that got rid of that error. Ok, still have 60 thousand, which is really good. Okay, next, what I want now, the problem is, now if I go in and I start adding subdivisions, I don't have any of that detail. So all that detail is gone. Remember we had all that detail in. We had a model that was 16 million and it has all those nice tiny folds and all that's touching and all that stuff that we worked on, right? So we kind of lost all that. So if how do I how do I go in and, you know, get that detailed back? So to do, to do that, we're going to go into the sub tool, select the lower, makes sure that the high version is underneath. And then what I'm gonna do, making sure that one is at the highest point. Select that one that we have, the low poly. Do. Control w, Control D, sorry. So it adds more subdivisions. So now we have an extra subdivision. And then under project we have project all. And we give it a bit. So now what it's gonna do is going to take the mesh details of the one that's underneath it. And it's going to project it again on that new surface, right? But I'm not gonna do it at one girl. I'm now going to add a lot of subdivisions and then do that because sometimes you brush crashes and especially when you're dealing with models which are really, really high, that will definitely happen. So you'll see we already have so much detail just from one and we're really just at 1 million. So we'll weave, have a long way to go. So what I'll do is I'm going to add another subdivision and another subdivision and another subdivision until I get so add another subdivision and then go ahead sub tools and do project all Again, I'm not going to do project all now because for 17 million to project on a million takes a bit. And here is the model with all the details in, inside. So I went ahead and projected all that detail back to a 16 million Polly. But you'll say now, but we, so the idea was to lower it know the idea was not to lower than the maximum subdivision count idea was to lower the cage, which is this one. The one that I'm going to send it into my I'm not going to send the 16 million into Maya. I'm going to send only this into Maya, which or, or substance painter. If I wanted to add more detail to the texture of you or you wanted to send it to dimension. I'll actually do dimension. You can actually send the 16 million by decimating it and sending it, as I mentioned, but foresaw and key Schottky, Schottky key Sheldon dimension can handle more polygons, specially key shotgun and electric 3D polygons, especially when you want to do really fast rendering without going into all the 0 mesh, create new textures, normal maps and all that despite them out and so on when so. But because the client wants to render this into V or a, I am going to make sure it has a low cage. So now the location is 63 thousand, which is just perfect. So now I can, I still have my, I still have my, my loops, I still have my polygons and so on. So the other thing you'll notice is now the interior has to poly groups because you remember the old one had only one poly groups. What I did is I selected the one that we had, and I just made a couple of selections on the neck and on the color and on the arms, and on the bottom of the anon, the back. Why? Because once I'm ready to UV map this into my, I'm going to go ahead and I'm going to delete that part. And this way, I don't have sixty three thousand, one hundred forty four thousand to work with because the character is going to sit inside. So the only part that you want to be visible as a double part is the color. Here. You're not going to see it because you are going to have the shoulder. And this part in case the character is like waving or the characteristics Morgan a cigarette or taking a gun out and so on. And also at the bottom of the the jacket, but the rest I can get rid of, but I'll only get going to get rid of it once I UV map it. So then I won't have any problems with my, because if I do three subdivisions on the 17 million model, it's it might break. So I don't want to, I want to, I don't want to take that risk. So instead of doing that, I just went ahead and created an extra pile group, which going to make my life way, way easier, right?
21. Lesson20: Creating UV maps: One of the first steps that I do once I finish detailing the jacket, you know, we remember in the previous lesson we added the details from a high polygon count that was out of marvelous. And we transferred it to the Zui mesh version, which is this one. So now we need to prepare because you remember with the one that we got out of, marvelous, we had UV maps with it, but when you start receiving meshing this, we, you'll lose the UV maps that you had from that. So what I need to do now is I need to create UV maps for the jacket and all the other parts and prep this so you can export a normal map or the displacement map or a cavity map or whatever the client needs for the final, the final model. So before I start UV mapping, the first thing that I do is I think about how I'm going to split this and how many textures. And usually you have to coordinate this with the, with the project manager or you are a director or whatever, right. So for this one, after talking to the client, we decided that we're going to go have the body or the main bark as its own map and have that as a for game app. And then for the other parts, which is going to be the the belt, the pockets, the other belts on the arms, the epaulettes and so on. And have these on a 4K texture on its own. And then we have the other parts, which is the metallic parts, which is, which I'm not going to worry about. Uv mapping. You can UV map these if you want, but I'm not going to worry about it. And you have the buttons. And then finally, these details which remember we added them as button stitching, which I'm now going to export anyhow because the client thinks it's a, just a bit of waste of polygons. So how we go about doing this, when you work in creating, giving map, make sure you always work on a clone, the work on the main Because a UV Master has a tendency to to crash. And this way it's way easier to work on that part. And it's also cleaner. So I'll show you in a minute. So go ahead and do clone. And I'll go ahead and you don't need to duplicate or anything, just make sure you delete tire. So we already have the groups because we save these from marvellous. When we did the 0 mesh, we told them to save, save the groups. But one thing you need to, you need to do before you start UV mapping is you need to recreate those groups. So we don't have any tiny islands of groups. And by tiny islands of groups, if I go ahead and do UV map now, and I'm going to show you that go z plug-in, UV Master and I don't need symmetry, I just want him to create separate UV islands using poly groups. Alright. So now unwrap, wait for it. Just as going through that. And then on the Z plug-in, I'm just gonna click this so we have it here on the side. I'm going to do flatten. Now, this was talking about islands, so it kept all Polich groups, right? But if you zoom in, you'll see a bunch of tiny poly groups like this, face, these edges, and so on. And that doesn't look good. So, and it's going to cause so many troubles when you have displacement or normal maps or even if you want to paint any textures on this. So how do we resolve that? It's pretty simple actually. You remember when we did a thickness to the jacket, remember how it's created that edge. Which is really helpful because then we have, we can control. If let's say we wanted to just tweak this or we wanna tweak that with that part, right? It's really helpful, but at the same time, it can cause a bit of a headache when we go into UV map. So what I usually do is the outer shell, make sure you have the edge and have this as one party group. So then it goes from the outer shell to the inner shell, right? You remember we created the interior shell for that and I'm going to show you why we did that and how I'm going to UV map that one. And then do the same thing again for the entire thing. So now I'm gonna take this exterior and I'm gonna take these tiny edges, selected edges if you want, you can turn on line. It's easier to select that way, right? And I'm gonna make sure these are one piece. And then you see the other one like this. And I'm gonna select that one and have this as one group. And do the same for this one, which you'll notice it has a tiny edge. She's hot. Sometimes it's hard to see it. Because the colors a bit, a bit similar to this, same thing for one side, for this one, for some reason that did split it into multiple groups. So select that one isolated and then isolate the other ones. And you can see if you rotate here, you're gonna see a couple of missing. So when you do that, make sure you look at that edge and see if it's complete or mop. And this step is only important if you're, if you need to send this into animation, if, if you, if your final product is just digital, still render. Most of the time, you don't need all all that. So what I'm gonna do now makes sure there is another part which is missing. And I need to find that. You can see it here floating. Say, okay. Now if you want, you can do this step before, before I need the details. There's just this is the way how I how I usually work. Okay. So now what I'm gonna do is I'm going to just send these back. So now if you look at the edge, you're gonna see that goes all the way around. Alright, and that's exactly what I want. So now we're going to do control w. So well, know when I isolate this as an island, it's going to be with those edges and that's not going to cause a problem anymore. Also, the other thing you're going to notice is when you will make sure when you look in between polygon Islands, you'll see arrows like this. You can go ahead and well these, I'm not going to worry about those because it's a tiny error. So to fix that just added to one of the one of the islands. Okay. And do the same for the side. If that ever was in a really obvious place, would have when welded it and made sure it's clean. Sometimes it really depends how much time you have and how much time you're willing to, to put into something and if that part that isn't even visible in the rendering, so it's really important to keep that in mind. Okay, so just go around and do that. Make sure you have all your edges selected. Make sure the polygons is clean. Okay? Do that. And always to test this if you, if you're not sure if you have any. I think there was another one here. Yeah. So this one. This one. And do that. Okay. So now if we go ahead and do on rap and see what that gives us Now. Let's see. So flatten. Okay, I don't think we have any tiny ones anymore, which is good. Now the other thing is really annoying is this one which is really long. And I'll show you in a minute which one I'm talking about is this guy. So if you isolate this, you're gonna see that's one long Balad group. So here's, I'm going to fix this. First of all, I'm going gonna do the sleeves different polygon. And because this is not going to be visible anyhow, so this is just for the underneath of it. So what you can do is you can split this in multiple groups if, if you want. So what I'm gonna do is I'm going to split this starting here and go all the way around in the back. And then I'm going to make that on its own. I'm going to do that. No, sorry. That's going to be its own polygons auto group. Ok, so now if I go and do unwrap issue, we should get we have only 19, we had like 33 before. So if we go flatten, that's our poly groups. Okay? You'll see this one is really big. And remember this is that one. And I don't want that to be that big. So it cuz it's gonna end up, end up taking way too much out of. Out of our sort if you go flatten. So that's almost a quarter of our 4K resolution texture and it's not okay. So what I'm gonna do is I'm gonna do w, click on that. And I'm just gonna make it really tiny. So something like that. It's don't forget this is not visible. So this is only on the inside. So if you have a close-up shot and that's gonna be really visible, make sure it's not that small. But for this project, I know this is not going to be that visible. Now, next thing is just arranging these and just click, rotate, drag. And knowing which parts should go where. Because let's say you want to add a pattern to this, a bump map of an actual shader and actual cloth shader, right? A cloth month that's going to add a detail to your shader. Then it really helps if you can, if you can do this before, you can leave it like that, it's going to come out fine. But if you send this to a client and the client wants to add, I don't know, some specific detail to the texture or some text or anything. They're going to go crazy just about, just figuring out where each, each island and each part goes, right? So it's just about keeping keeping the work that we're clean. Okay. So I'm just gonna go ahead and do that for the other ones as well. Just so. And once you have that arranged nicely, you can go, go ahead and and create your normal maps and create your, your displacement maps if you want to, if you want to use that instead. It really depends on the project again. No, it's tedious, but this process is you'll you'll really be happy that you did this process when you need to make some edits to the texture. And you don't have to worry about. And also about when you do patterns. You know, each baton has its own repetition. And let's say you repeat something on, you know, 203040 times, right? And let's say these two are rotated in a bizarre way and it was our shape. Then you have to indicate that you have to rotate that pattern to fit that look. I would usually spend more time and cleaning this up so I can, you know, save up on the real estate so I can have a bigger, a bigger texture. But for this, I think you got the idea. So just again, nice and tidy. This bit. Signed. The easier. Okay, so that's how I usually UV map and then I'll go on flatten. So now you remember we deleted the retire so I can't use this, I'm just going to use this to copy the uv. So go copy of 0s and then go back to your high subdivision. You can braise the subdivision to make sure that the one and then do base to bees do not close the file until you see this one here. Updating subdivision geometry go away because I've done that before. And when I opened up the file, it wasn't it wasn't there. So give it a couple of seconds until you see that disappear and then you can go ahead and save it. So that's for that bar. And now for the next part, I'm going to do the same, so it's exactly the same. So do clone. Move to the new SAP tool. Go lower, delete higher, right? And as I've shown you on the jacket, I'm gonna do the same thing. You see, we have those edges. So for that one, I'm going to select the edge. Do control w for this one. Make sure you select the Edge. Again. You don't have to do this, you don't want, so it's just a matter of preference. And this is how I usually work because I like to because I know I'm going to render this into V Ray and I know I need to take out normal maps and and displacement and really need to make sure that UV maps are clean when I do that. And it's also a good habit to get into if you want to work for you no studio or and usually you need to keep your textures really. Oh, especially if you're working for game studios, then you need to to really step up your game and make sure you give your maps or read really clean and alright, so once you have that cleaned and polished grouped, we do UV map, we copy him them apps and we move them to the. And then you have a model which we can extract normal maps and displacement. So once we finish grading the polar groups and the UV maps for the main body. And you can see it has, I'm going to hide lion and you're going to see we don't have those groups underneath as we did. The same thing I did for this one. So get the thickness with the part in the front. So now let's go ahead and export or create our maps. So for that, I use on the Z plugin you'll find something called multimap exporter, right? And usually I'll extra displacement, cavity and normal map for normal map. For each one, you can select how big you want the map. So let's say maybe some Bart's won't be that visible or don't need that much detail. You can go with a 1K or 2K texture. For this one, I'm going to choose 4K and four k4, the body So for the main part of the jacket. So if you want to see the exports, I'm not gonna go into all the details. I'll just show you the usual options that I go through. For the displacement map sub div. What's the subduct level that you want to export, which is going to be one, the lowest one. I usually export any XR because I wanted the highest. The highest resolution, the highest details. I don't change the scale so the scale stays at one. Then for the normal map, tangent, smooth movies S normals and also make sure you have flipped G because from ZBrush to my have flip G using 3D Max. I don't know, you need to google it. I don't remember which one was it, but I know it's it's it's kinda different. Alright, cavity map. I usually leave it the same, but you can play around with these if you want. And I usually make a mesh export when I mash export into Maya. And if you're using Maya, make sure you don't have groups on. Maya doesn't like that. So if you export your group, your mesh from ZBrush tomorrow, make sure you have groups on or when you export important to my, You'll get weird groups and meshes which are really separate and 3D pain in d. So I'll show you just one piece how I usually do it. Lowered and then go make sure you have 4K export. And then just create all maps. And it's going to ask you, what do you want to put these? And let's go maps. Ok. Leave it because it's going to use the name. Yet what one thing I forgot forgot to tell you is once I finished working, I name H Bart accordingly because then it's way, way easier to arrange or assets when you're working in mind because if you have a displacement normal map, a cavity map, diffuse map, and then you have, maybe have a roughness map or you have reflection map. It's going to get really, really hard to keep track of all your assets. So you really need to get into the habit of naming stuff and even arranging them in different folders. Because it's way easier to, if you're working with different artists because usually, or if you're doing the modelling and you're doing the sculpting and the texturing and you send it to an animator. It's easy if those have all the assets or maybe you're using and sending it to a lighting artist who will like these. It's easy for them to see the assets really nice and tidy instead of going insane to find that specific texture. So I'm going to leave a ZBrush to do all the maps and I'm gonna get back once, once it's finished. So let's go out and check. So here's the cavity map though it created. Here's the normal map. You barely can see it. The details are mostly stitching. And the other map is an ESR. And you need to open Photoshop to see that. Okay? And here's, here's on that. And it's really hard to see. So I'll put some levels on so you can see. And this is used. So we can get really crisp and really cleaned folds. So this is how you create normal maps, cavity maps, and displacement from ZBrush. So you can render into 3D Max Maya or whatever other software you, you're using.
22. Lesson21: Wind and final pose: Now that we've finished detailing the jacket and adding all those stitches and making sure it looks great. So we can send it to the client and we finish our project. How about we go and give some personality does jacket? Because honestly, anything that is set into an oppose or a T-Pose I'm sorry, but it's not presentable in our and add that to my portfolio. So if you want to present your clothing, makes sure you oppose them. In a way, they would look more interesting because the point of any prop is to tell a story, right? So if you having a detective and let's say we we give him a pose as if his walking or smoking a cigarette or is doing something or raising a gun, it's better than having, just sorry to say at the stupid appose, right? And oppose is a technical pose that we have to do this. So it's easier for the rigors to go in and add the bone structure so they can animate the 4G, just pose the character, right? But when presenting it, we can go crazy with that. So what I've done, I went into ZBrush and I pose the guy just a simple poses. I raised one arm as if his smoking. I don't care about the hand and give any attention to posing that one because I'm not going to use the character. I'm just going to use the actual jacket. Lower the other arm. And I have them more natural posts, right, so that I can work with. So what I did, I took that exported as an OBJ. So what I'm going to show you next is how I usually take my final cloth and presented and especially like presented for this course and also presented to the client, right? And just make it more appealing. So, well, what do you want to do is go into File, Import, OBJ, and we'll go into Avatar. And just you'll have, you just need to import the Posed version of your character. So business Bose one is what I named it. And instead of loading as an Avatar, if you look here you have something called load as a morph target. And if you worked in 3D before, what kinda ZBrush or you're an animator irregular, you know, an amorphous target is, if you'd haven't, morph targets is, let's say you have two shapes and you edited one of them and then keeping the same subdivision in the same polygon count and everything. You can do like a simple animation between the two. And that's what it's called the morph targets. So I'll load that. And for the morphing count, for me, 60 frames worked really good. But you need to play around with this. It really depends how, how, you know, how detailed character is and so on. But for me, for the test that I've done, 60 is just perfect. So I'll go ahead and just click OK. And you'll notice what's going to happen here. He's gonna do like a simple animation. And he's going to just going to stop that because this flow away. Just gonna free you this and started animating. So it can take the pose that we sent it from ZBrush. You can, you can pose a character in anything Maya 3DS Max, doesn't matter. You can just import it into, into marvellous after. Okay, so now let's just go ahead and tweak this a bit. Because because of the arm and morph targets are not perfect. And you've noticed that how the arm just grew small when smaller and then grew back and it went through through our jackets rights and we just need to do to do a couple of fixes. So now we can go ahead and start dragging and pushing. But I don't want to, because if you start dragging this this part, you're going to interfere with the jacket. And we might just lose that detail that fold. So if you don't want to have that happen, just take away the parts that you want to fix, select everything else, go right-click and just do. What was it? Freeze, right. So they still stay there. But I want them I don't want anything to be. I can't move them with the mouse pointer. So what I'll go, I'll do shift q to hide them. So now I can work in peace. So I can drag this sort of covers. You can go ahead and reset the the bathroom by going right-click and reset to the 3D arrangement for the selected. I don't wanna do that because it's an easy fix and just had to drag this out and it should be just fine. Okay. We can go ahead and drag these if you see anything else. All right, now for the second one, for this one actually what I wanna do is I want to activate this tends simulation off. And for this one, I want to do the right-click and reset 3D arrangement. 3d. Not 2D arrangement because I want the reset to its initial shape as it was here. Okay, so now what I wanna do is I just, I don't wanna go ahead and just pose this back. So we can we can add this back into its place. Okay, if you want, you can hide the avatar but going shift a, ok. And as we did before, take the mesh select, drag these edges was shift so you can drag the both of them. Now, dragon back, you'll see we still have the stitching. Move. Sorry. Take that. Oh. If this happens and it's not taking all the shape, just go to the pattern. And because you can select, you can select the mesh here as well. So I'll, I'll do that here. Because it gives me a cleaner, cleaner selection. It just won't, that won't move that in a bit and do the same for the other side. Okay, and now we can simulate, sorry, move it up out of the way here. Just going through the jacket and it's causing some headaches. For some reason it's Merc working. Okay, so now let's drag this back to our regular selection. Drag this up a bit, and just trees it. So now drag these as we did before so we can force it into place. Revealed one, maybe the other one is hidden. Move that out of it. And now simulate. So they sit on top of. Okay. So now we have our two shift a to bring out avatar rack, select everything shifts Q, bring everything back. Now, select all the parts that were frozen and just do unfreeze. Alright, so now we have a more interesting pose. So if we hide the avatar, now we can look at that. That looks way better than just our plane apples, right? Okay, we can push this even further. How about we make it a windy day, right? So under settings or preferences in a second no display. We have something called environment and we can do show when controller give us that controller that you can select. Sometimes it's a bit difficult to select. Move that into place. Let's say the wind blows from this side. Ok. And here I will go ahead and do 5 thousand. I'm putting 51000 because I've tested it and this is what works for me. Play around with this. And now I'll go on and let's go ahead and simulate this. So what it's gonna do is gonna just simulate a bit of wind, going to help it by dragging that part. And once I'm happy, I can stop the simulation. So already you can see how good that looks and what we had before, and how mice and Ohno just, just feels like it's telling a story. And now they can, you can look at this and say like, Yeah, this, this good work. Good work as a, I don't know, an invisible detective or you can present it that way because the idea of presenting a product is just trying to tell a story even if you're doing a simple jacket, right? When you posting on your on your portfolio, try to put a spin on it. Not only just make it look good, That's important. I, I'm, I'm, I'm telling you, it is important, but also telling a story or making quite interesting is as important as making it look good. So once you're happy with the pose, if you want this to be more extreme or you want maybe that color, you can go ahead and turn the wind back and you can do that, right? If, let's say for some reason you want you like how this fold works, but you don't want the wind to affected more. You can select it and do freeze, right? And then you can continue the, and that's going to stay in its place. And let's say let's make this bart. So the wind hits it more. Okay? And that, that's our final pose. Alright, so we can take this and import it into ZBrush, and then we can, I'll show you how that looks there. One thing before I forget, when you export this into ZBrush, make sure you raise the particle distance so you can't, you can't set it like this, but it's just don't forget that this is going to be low, low poly, right? So as usual, just go five. Give it a second so it can raise the density simulated just a bit. So once the particle distance goes to five, just hit space, just want a couple of seconds. So all stitches and almonds, he is take the final and the final place and then go ahead and export, export that into ZBrush.
23. Lesson22: Render settings: So as you can see, this is the post version and with a bit of wind added to it, just to give it that more, I don't know. Ohms. So as you can see, this looks way better. And if you want to present this into your, into your portfolio or just want to send it to a client, you go shift as if you want to show him like multiple multiple views. And this is how the same trenchcoat looks just as an appose right? Now, as I've said before, it really depends on what type of projects we're working on. Because if your project is animation and the client asks you for an IPO so they can draw, like they can create some clothing for a character that I already have. This is what you're supposed to send them. So useful, send like a clean geometry that they can reg and animate and so on, right? But if, let's say your project is still 3D illustration, and I don't know you want to make an invisible man working like walking on the street, right? So you have a street, you have a new import, this guy. And then you need to do clean up depending on how, what type of project is doing. Because if you need to add thickness, you need to go in and you need to clean this up. You need to add a bit of straps and a bit of buckles and a bit of edges. But again, because if you're doing a still, this works really fine. But if you're working on a project that needs, you know, these, the, the character to be enables. This is, this is your project, but usually when I finish my project and even if it's a simple API pose for a client, I'll go ahead and just strike a simple pose that just makes your product which look way, way, way better. We already looked at how we can add a post to this character using the morph targets and also how we use when Just to add a bit of cloth flapping and moving around, just a bit of movement and a bit of a more connected to your clothing that you're creating, right? And for a trenchcoat look, the best look is to have, I don't know, some wind beating into it just so and we have some bit of movement. So we took that and we exported it into ZBrush. And I showed you how we can, how that looks and ZBrush is by adding a bit of subdivision, this is not cleaned, this is straight out of, out of ZBrush right? Now. The only problem with this is what I wanna do now is I want to try to render this in two dimension. But if I go ahead and render the, this in two-dimension and I'm going to show you, I'm going to clear this with control. And remember when we brought something for marvelous and this is because it's thin, it doesn't have any thickness to it. We always turned double on. So if we don't have the along, we can see through that and that because of the reverse normal. So if I take this and important in two dimension, we're going to have a darker color inside, right? So before we jump into that mention, what I want you to do is I want to do to go into marvellous. Select your selling baton, do an export OBJ selected. I'm going to name this trend goes three. And here you remember when we export it the first time when we had the a pose and we started cleaning this up. We made sure it was thin. We made sure it was single object and it had was welded. Alright. This time what I wanna do is I want to have a thick version of it, right? And you see we don't have that. You, you do have the option for multiple objects. But for now I'm going to keep this as a single object because it's works for what I wanna do next. So do that and just hit okay, all right, so once that's exported out of marvelous, you can go ahead and jump into Adobe's dimension. Been using Adobe dimension for a while now. And it's like really, really good when it comes to doing fast tests. And just, you know, have a render really just so you can check it out and see if, if, if the shapes look good and so on. So here is what we had before. So this is the one that I was telling you about that we used from we used in ZBrush, right? So I'm gonna go ahead and I'm gonna go into detail on how to use dimensions. There are a lot of tutorials out there. What I'm going to go like a fast. I mentioned you have three areas for areas actually you need to worry about. So you have the first one which is models, and now I'm going to go into that. The second one is shaders. And I'm going to show you we just be just drag and drop them. That's that's about it. Okay. The third one is lighting. And you have a different lighting types. You can see when you change that to the reflection changes. And the last one is backgrounds. So you can set a background and will match the image for you and so on, right? But what I want to show you now before we do any of that, I'm going to select the material that we just added. And I'm going to go into, I think that's the one yet. And I'm going to change this into something more like a trench goatee color. Yeah, let's say something like that, right? So if I do a faster under now, what I'm going to get is black interior and an exterior of that color. And this is because dimension doesn't know how to do two-sided materials, right? So, and I haven't found a solution. If you do, please let me know. Alright, so instead of doing that, what I want to do, and it's also the other thing is we don't have any thickness to any Most of it it's okay. But when you look at the straps, they look like they're made of paper. And I just want a bit of thickness to them. So what I wanna do next is I'll go new. Don't save. And as I mentioned, I wanna go File Import 3D model. And I'm going to import trenchcoat to say no, I worked with them before. Leave it a bit to load. It defends on how big your, your model is. And I think that one is like really big. So if you don't see the model, it's, it's there, just go F, So we can focus on it. What I wanna do first, I just wanna make that smaller. So let's go point to and to focus. And if you see its way high, so just want to drop it down because it in case you want to get some ground charter shadows, you can do that. Okay. So that's, that's how you import them into you. Okay? Now, the second step is to assign some shaders to this. So to assign shaders, you'll notice when it comes out of, if you click on this molarity, if when it comes out of marvelous, it comes with some, some shaders. And these are the shaders that marvelous sets to all of the, all the parts. So here these are stitching. I think that's for the buttons and that for the tiny buttons and so on. So you can go ahead if you want, you can go ahead and name these or you can just assign one material to all of them. I'm going to leave it like that because I just want this to be a quick quick rendered. I don't wanna go into, you know, a lot of detail into it. So first thing what I wanna do is for the stitching. I'm gonna give it a dark color. I'm going to click on the material. It will open up the properties. If it's not open, you should have it underneath. And other properties you have surface which is base color. Base color. I don't want it has a file now I don't want that. I want to just a simple color and I'm gonna give it something like a drag, dark beige. Just so it fits with the look that I'm going for. Somebody like that. And do you want to take the hex decimal of this one and just use it for the rest. So announcer Like the second one, delete the image and just give it the same color. Do the same for the second one. I know these are all staging, so I'm not going to even look in the scene. Just base color, delete that. You can't load. If you want to load the texture, the candle, there's extra for this, for the stitching and just want to call it for the buttons. I want I want a photo, something like this, Dr. Brown. And I'm going to use the same for the other ones. You usually, this one has the texture that marvelous gives us. And finally, we get to the material. So again, I don't want the image to that. So I want to delete it and I want to set a color for that color. I'm gonna go something like that. Okay? And so here you have roughness. So no roughness means you have a really shiny material. Law roughness, it's mapped. You don't have any, any type of shyness. So I know from experience that everything has shyness even if you're doing a bit of a fluctuating glossing is even if you're doing cloth, if it's made of nylon or a bit of, it's not God, and even cotton has a bit, you will have a bit of specular. But I'm going to exaggerate that because I want to. Make the shapes a bit obvious when we render this out. Okay, I don't want metallic because that's an IBM Intel. If you want to mentor like you can just play around with this. I don't care about translucency. I don't want to add normals. If you want to add a bump, you can, you can just load the normal maps here. And you can play around with how much that lump repeats here. Okay. So that's about it for the texturing. I think I'm going to make the buttons just a bit Parker. For all the shoulder ones as well. Okay. Make sure these on these to be really glossy. Plastic after all, focused down. So next thing I wanna do is I wanna add a lighting effect to this. So we go to the sun and I'm going to select, I think this one worked fine on the other one. I C. So to tweak the environment, you'd go to environment and here you can rotate your reflections. So if you're looking for something specific, like to get a silhouette or maybe a rim light around this, how you do it. I play around with intensity just to get the look that you're going for. I think that's good. If you want to add a bit of sunlight and you can use that as a key light and have your enlightenment light to be your fill light. So if you want to do that, you can do sunlight, which is going to exaggerate database. So you can, you can see it and you can colorize it. Let's say we wanna make it red. And here you play around with how intensive that light is. And that's how soft the shadow is, cloudiness. And this is the height of your because you can't control the lights here. So the only way you can do height and you can do rotation, right? So you can think of it. It's like a controlling, controlling a light on an axis, which I think the center is underneath is the center of the scene. So maybe something like that. But I'm not going to have a really intense or you can make it look really low and have it. As I told you as a you know, maybe has a rim light have maybe like a darker type of detective scene. Okay. So for the background, for the, for the background, I want to use a color. And I'm gonna go with something. It was a dark. And now do a desk render and you can click that I can to do a really quick test tender. And already you can see just by doing a test there and then this is noisy. This is just so you can see how fast you can check out your shaders and so on, and made the buttons a bit darker. And now, while you're in desks render, you can go ahead and you can actually play around with the rotation. And if you give it a bit, it will update. And simply so you can, you can see what changes for this one. Actually, I'm not going to use a sunlight. I'm just gonna leave it like that. I'm just going to use the environment light just to render that one. And what I wanna do is I want to, you can render this as a, as a file and then render the back. But you can do one other thing. You can actually duplicate this. So you can do Control D. And I'm gonna go ahead and move this here and maybe rotate it a bit. And once you're ready to render this, go under render. And I've already rendered this before. So I'm just go select a name, export bath and do I know trench coat? You are one. Okay. And I usually rendered low for my first pass just to make sure it looks good. And then this is low and it looks pretty decent honestly. And then once you're happy with the results, you can go ahead and render medium. I rarely use high, it's really slow and the difference between high and medium, I can't see I mean, you can't see it, but if you only zoom in, so trust me, if you're using media you're using. And I mentioned you using it to do fast surrenders. Just so you can show the client or something really fast without going into v way or setting shaders and so on. So that's the whole point of it. I don't want to spend two hours waiting for render when the difference is not that huge. So medium is the final for me. So low, render that. And what it's gonna do, it's gonna spit out a PSD, which you open up directly in Photoshop. Now, the beauty about this is you have, you'll have something called the additional layers, which is hadn't. You'll have a background color. This group I added, and we'll go into that just a bit. And background color which you can actually tweak. So it sets that up for you from the start. So if you want to change that color in one and leave it, go, go ahead and do that. And the other thing is this is transparent. So you have selection masks. So if you wanna do maybe some edits on this one, maybe you want to do one darker and when you do have that control, right? And also it gives you a depth information you can use in case you want to do some lens effect to this. Alright, so what do I usually do when I get this into, into Photoshop? The first thing I do is I add lots to it and buy lots. I mean, column lookups, which are really great for me when I want to present something really fast and see if I can play around with different looks. Lots are my go-to. So I'm going to use film stock because I know that worked for the look that I was going for. You can tweak these. You can also play around with so screening, dodge overlay. So you, you choose, you can get really a lot of, lot of looks. And the second one I'm going to add, player, just go ahead and play around with these because some of them, if you want to go with a vintage luck, if you want to go with something more warm, something, maybe something more bleak, you'll get like so many different, different looks. And I'm gonna go with something called soft warming. And I'm just going to tweak the capacity on that one. So I'm happy with that and that looks reasonable. So I can I can actually send this to a client and ask him if they have any notes. This is the violet light or we can use, usually use this as a final render if we presenting something really fast. So what I wanna do is I want to go ahead and split these two. So I want to select this and do control x and Control V. One thing you'll notice is you see that we have like a soft cloud. What it does, it does do a bit of lighting to the ground and a bit of shadow. When you have a dark, when you have just a simple background, it's not visible, but it's always it's always there. If you don't want that, what would you need to do is under environment, you gotta make sure you don't have ground plane on it. You can notice it here. If you don't have ground plane on is not going to put any shadows on the ground. I usually I leave an arm because sometimes it gives us gives you a nice shadow underneath it. So just adds more to the okay, so now that I have these two, what I wanna do is I went ahead and created a text. I wrote just a trenchcoat. But I want to add these between the two. And I went ahead and grow marvelous signer. And I went ahead and looked for the marvelous desired logo. So there you go. This is how you create, you render a product really fast, looking really good without going into now, yeah, if you want to add a bit of buckles, you notice that we don't have a buckling the front or the sleeves. If you wanna go, you can just take this use the same procedure that we used when we clean the oppose one and just or even use that one and just rotate into place ADA buckle and then export the buckles on their own and then import them into. So you don't have to redo all of this or import the buckles into this and just rotate them into place so you can get a more metallic logo or anything like that. For this, I wanted to show you that just straight up out of marvelous into, into dimension and then spit it out into Photoshop. You can get a decent render. Yeah, it's not V ray or, you know, other really good rendering engines out there. But for the purpose of presenting something other than sending your client, you know, ZBrush, which it doesn't look bad, but usually it's not exactly what it's gonna look like because you have the math gap or really sharp and so on. So you don't get the exact book of shadows and everything when you're doing, when you're doing that. So for me, I always use dimension and I've been using it lately to do, to do some, you know, some blenders that I'm really, I'm really like each time I'm really impressed on how simple the software is, at the same time, how powerful it is.
24. Lesson23: Import into Sketchfab: Now the second option for rendering and also presenting with clients is that I've been using lately is Sketchfab, which is fantastic. I've been using it for my my toy design business. And I've been I've been presenting the clients like this and they love it because one thing is to send a 2D sketch or 2D screenshot from ZBrush to your client and tell them like if they have any notes. But if you send them actually the model they can rotate, look around. If they can actually move the light, they can zoom into places and they can give you absolute, perfect notes to know exactly what you have to edit without a lot of guesswork and without having too much back and forth when you go into production and you realize that part doesn't, doesn't look good. So this is the quick sport that I sculpted for quicksort. Its ravaged her. This is the march piece that I did. And you'll notice that this is, this is entirely textured and shaded inside and I Sketchfab. It's not super realistic, but it's really good. And it's really amazing what you can do just by spending maybe 15 minutes setting these up. And you'll see how beautiful these shaders look and how fast it works, and how, how nice you can present your model as a 3D model and also makes it makes your job way, way easier as a 3D artist. Here's the bear champ that I detour CG Riviera was an absolute pleasure working with them and beautiful project to work with. And you can you can notice that you can send in, yeah, keep in mind that most of these are decimated. So because they were like really high. I decimated these inside ZBrush and then sent them, send them here so I can do a quick render to them. This is the chef that I did for another one of my clients. And this is based on character, based on Stephen Curie. Really, really had fun working on this guy. And it was really, really nice because I could show my client like details. He can he can go around and he can tweet, can notice, and he can see if there's anything he wants to change before, before we start production and prototyping this guy. And here's my bubble fat, the one that, you know, I sold on my website. So, so this guy is like was read really high and lot of polygons, but I decimated this and I think it's under 900 thousand, around a million polygons. You're okay when something to Sketchfab, I think I've noticed that if you go over a million, then you'll have problems. But look at this. I mean, if you send this to a client, it's way better than sending them screenshots because they can go in and they can, you know, notice any, you know, especially when you work in, in production and you want to, this will be sent into a factory and you know, your clients are going to produce these. You don't want them to notice an error once. Once, you know a factory starts production, it's way better to notice these before. Okay, so what I did is I went ahead and zipped the LBJ and the material that it's sent out of marvelous, and I just dropped them into Sketchfab. You can use Sketchfab for free, but you have to keep your files really low. But if you get a subscription, I don't think you have a limited I think you have a limit of how many downloads you can upload you can do each month, but it's more than enough. So when you upload it, it's going to look like this. And honestly it looks like crap. So you need to do 3D settings. And it's going to take it to your interface where you're gonna tweak, tweak stuff. First thing you gotta do is you've gotta go into background and you gotta make sure you have image selected so we can start with that, okay, once you have image, you can also upload your own images. So if you want to upload your own branding, so when you're sending it to a client, you have your own logo and you own style in the back, right? Usually I keep my backgrounds really simple because I want to focus on, I want to focus on the model. I don't want to focus on my logo on it, but it's a good habit to get into and to put your, you know, branding when you ever sending something to a client because they shared it to somebody, it's good for business, right? So the other thing I wanna do is I wanna go into lighting. And here under lights you have your the SDR that come with this. And most of them I think are Forum as IPL. And if you want, you can also import your own HDR. So if you have a good HER library, you can import your own, your own stuff. Usually the stuff that is here is more than, more than enough for my project. So maybe I'll select, see which one works. Maybe we go with this holding Alt and rotating around. And now you'll notice that the light is really, really harsh. So you can go ahead and just lower the light intensity on this, and you can also lower the brightness. So usually I'll leave the brightness to one and I'll play around with the light intensity. So if you see something like this, you want your lighting to help make the model easier for the client to checkout. That's I think that's the whole point of when you when you light something. So something like this. Shadow. Yeah, let's leave it. And then we wanna do is I wanna go into materials. And for the base color, I'm gonna use a color, nagana, it's the texture. And this is for the buttons. Okay, we're gonna make sure these are reading glossy. And it's gonna do glossy. Yeah. And if I double-click on the jacket and it will select the blanket shader. And we'll play around with that until we find the color that we'd like. And then here I'm going to just add a bit of a shine to it. Roughness, maybe sounds like this. Just move the light around so you can see if this looks even on the dark areas. I might go a bit more saturation. Okay, so that's most of the muscle, most of the work. Now you can go in and you can, you can add even more so you can go and the post-processing you can do and grain, and the grain on top, you can do a bit of occlusion. So if you want to have a bit of occlusion, sometimes it helps, sometimes I don't know, I think it breaks the model. It really depends on the model to be honest. So I don't know, maybe if you do it, like really keep it low. So you'll have a bit of ambit occlusion, but nothing too crazy. The other thing you can do is sharpness, which I always use, just, just adds a bit of. So it doesn't look too mushy. Can play around with chromatic aberration if you want, you can add a bit of vignette, which is, it's a good idea for this. We can do a bit of Blum. I think it's working for Dark Materials. And the only thing I forgot is if you want, you can go and you can change the I'm going to leave them for now. And I don't need any Blum. What else? You do have a bit of tone mapping. So if you want to, and with this and you can have a Reinhard or maybe filmmaker. So he can play out with the exposure bit of brightness. So I love it that you have the, almost the controls you have in Photoshop to edit a photo, but you're too, if you wanna go black and white. I mean, how good is this? More contrast, less contrast. Give us something nor looking. Ok. So maybe, maybe, maybe, but maybe a bit desaturated. Okay. Plus exposure, maybe less brightness, more contrast. And this already looks way waver, right? So once, once you have that done, you do have more options here. You can load a normal map, you can have some capacity. Honestly, I'm just gonna leave it at that. Usually that's more than enough for, for what I need. I'm gonna do a save view because it's going to save how and this is how it's gonna look where and when the client opens it, opens it up for the first time. And once you're happy with that, you just go and do Save Settings and publish. And when you give this to a client, you're gonna go put that in. They can, they can view the model on their desktop or on their mobile. And it works really well. Like even on the phone, it works really, really well. So if they have any notes, it's going to be way, way clearer to tell you where you need to edit or what do you need to tweak? And the beauty of it is you can, you know, share this on your behalf portfolio on your website as an iframe so people can actually see the 3D model next to your beauty renders. I really hope you have found this helpful.
 Oasim Karmieh, Sculptor & Toy Designer