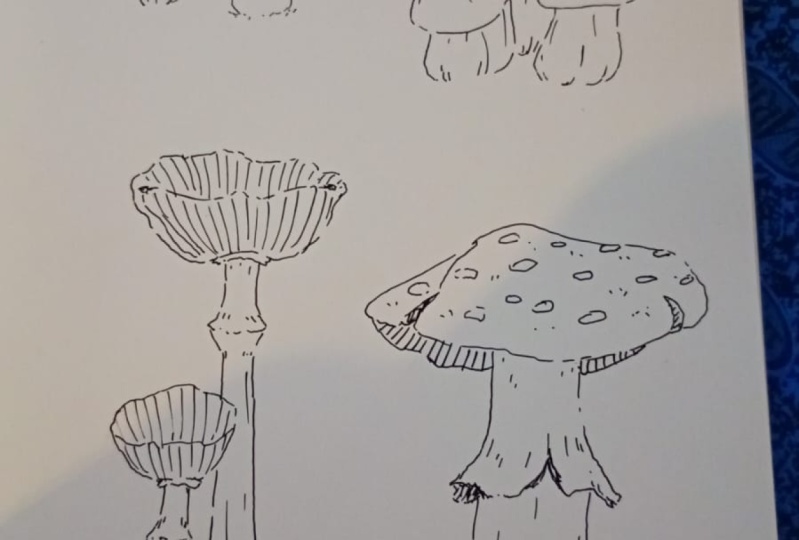
Transcripts
1. Introduction: Hello everyone. In this course I will teach you to sketching of mushrooms with pencil in three simple and
easy steps and phases. Just need a pencil
and eraser, a paper. In the first step we have to primary sketch of the mushrooms. In the second one, we create the mushrooms details. And in the third step, we will teach you how
to shade the mushrooms. I hope you will
enjoy this course.
2. Primary Sketch: Hello to all of my
dearest friends. I'm back again with another
tutorial session for you. In this session we are going to create kind of a mushroom together and we wanted
to see how it's done. All right, First of all, I'll start with the general
shape for my mushroom. So basically I'm creating a direction line for the
mushroom that I want to create. For starters. And this would be the biggest mushroom that
we're going to create. Then I will also
create several more, smaller mushrooms
comparing to this one and comparing to
the direction line that I've created at first. I would also create
another mushroom. On this side on this area, a small one, which is actually
the smallest one. Okay. I'm going to create my shapes on these direction lines
for my mushroom. First of all, create a general shape
for my mushrooms cap. This would be an oval
for the whole actually. The cap like this. I will create its
cap on top of it, on top of this oval. Therefore, it would be
complete, looks like this. Right now we're just
creating general shapes. And later, I'm going to add the details to the work index. Two steps. We have
our mushrooms cap. We are going to work on this
inner part of our oval. And we will create the
stem of our mushroom. Actually, the rest of the
body of the mushroom. Just create a general
shape going down. Something that you should pay attention to in
creating this part is the A's that it's
thinner at the top. And when it comes
down to the bottom, it will be thicker and wider, Just as you can see here. And then I'll create
the other mushroom. For the other mushroom. Again, we're going
to do the same. You will create
an oval at first. Some of it will actually be
placed behind first mushroom. If you pay attention. I'll complete my
mushrooms cap like this. Then I will create the rest
of my mushroom in this way. And I'll bring it
down just like that. For our third mushroom, which is the smallest one. I'm going to make it a little bit more distant
from the other ones. I'll create a little bit
further from the other two. So it would be just
different than I completed scab as well as
I did for the rest of them. Then I'll create the
rest of my mushroom at the top it would be thinner
and as I come down, I will make it
thicker and wider. Alright, now that I've created general shapes
for my mushrooms, I will create a line
just for the background, actually for the ground in the background of my mushrooms. And I would also add
some grass around my mushrooms just to make it more attractive
and more accurate. I would also create several
grass over here in front of our mushrooms just to show
that they are more random. And this would be the
ground of our work. Just to complete the
background, more and more. I'm going to determine the
lines a little bit more. And then I can step into
next parts and next phase. Okay? For the tip of our bodies, for the two Pi of our mushrooms will create the
shape that we want. And as we come down, I'm going to create
a shape like this. These shapes are all asymmetrical and I'm just
creating some lines kind of randomly for this upper
part of the mushrooms. Because the upper part and the lower part have
different shapes. Because bit of our mushroom
has gone behind this. I will create it as
much as we can see. Now in next step, I will add the details.
3. Details: Hello, My dearest friends. Alright. Now we are going to add the
details to our mushrooms. In this step. For
adding the details, I will edit the general shape
of my mushroom and little. I mean, I have to
make the tip of our cap more around give
it a special shape. I mean to 12 hour cap should
have a special shape. Then we are going to shape
this lower area like that. We'll complete it like this. All right? Now that this area is
more complete and shaped, we are going to consider this line for this inner
part of our mushroom, and we're actually
going to separate it from our main part
of the mushroom. Basically we are giving
some dimension to our cap. On the top of the cap. I'm going to create
some designs and patterns looking like this. As you can see, I'm just
creating some spots and some patterns on my mushroom. Just like that. And very randomly, we are going to use these circles and
shapes and patterns. You should be careful
that whenever you want to create the edges of the work, you should create your patterns. We'd considering
that your shape is going toward other
side of the cap, so it would be half, it wouldn't be complete. You should do that
on all the edges. Comparing to the fact that these parts are
turned interested, you can actually
create your work as much as they can be seen. Now for this inner
part of my mushroom, I'm going to create
several lines like this. You should consider that
these are the inner lines, all of our mushroom. We are creating some curved
lines from the center of our work inside of the mushroom. I would also create
some more lines from the round of the edge of this inner
part of the mushroom. And I bring it
toward the center. And we are just doing, I'm creating these lines
randomly and we're doing use any specific pattern for it. Then I'll continue
bringing these lines down. Try to do the same for the
other parts of my mushroom. I'll complete this lower area. Then I'll complete its body. It's a stem this way
and I move down until, I move down until I
get to the ground. I'm going to work on
the other mushroom, which is, which
has a medium-size. Again, I start from the tip
of the cap of my mushroom. I complete the shapes and
forms a little like this. As you can clearly see it. Then for this inner part, I would complete my shapes here. I mean, from this spot which is in the back of our mushroom. I'll start, I'll
continue the risks of it over here and
in here I'll make a turn and I'll separate this inner part
from the outer part of the CCAP as much as we can see it and it's not behind
the other mushroom. Pay attention to that as well. I'm going to create the
shapes and patterns which I want for my mushroom on. It's like that. Just be careful that. When you are working
on these patterns, you should create very
differently and very randomly. Because this way your work
would look much more better. Try to not use a very similar
pattern for all of them. Now I'm actually
going to complete these lines from this area, actually for this area
inside of the mushroom. And then I create some
random lines going down. Then I'm going to
work on the rest of my mushroom and
completed in this way. Now I want to work on
the third mushroom, and I'll do exactly
the same as I did for my previous mushrooms. The procedure is exactly the same as I did for the other two. I'll start from
the tip of my cap. I'll complete it in the
shape that I wanted to be. Then for this lower part of my mushroom, I will complete its shape. And for this part, for this inner area, I'm going to turn and I
will go toward inside. Then I will create
a patterns on, on my mushrooms cap. This way. Then it will create this
inner part of the mushroom. And I would create several lines over here inside of
this mushroom as well. Again, I say these
lines should be created very randomly
without any special order. Then for this area, for the body of my mushroom, for the rest of my mushroom, I'll just continue this. And then I'll complete the
grass growing around them. Just as easy as this
your mushrooms are made. All right. This is our detailing phase. Now I'm going to erase all the extra lines and
all the guidelines. So in next step, I can add some
shadings in my work. First of all, I'm going to erase this extra lines and
obviously the guidelines. Therefore, I can move
on to next level, to the next sip that I can add some shadings
and some colors. I mean, not colors. It would be in black and white, but I'm going to add some
shadings to these mushrooms. I will erase all
these extra lines. All the lines which were
in our primary sketch. You would also have to
erase all the lies which you feel during the shading will make some problems for you. You should erase
all of those lines. As you can see, I'm just
erasing all these guidelines. And just like that, I will erase all
this extra lines, especially the line which is which we've created at first, which is our direction line. For our mushrooms. Do not forget to erase that. We have to also erase this lines into back which
can be seen definitely. Alright. I've erased all the extra
lines and the next step, I'm going to shade
these details.
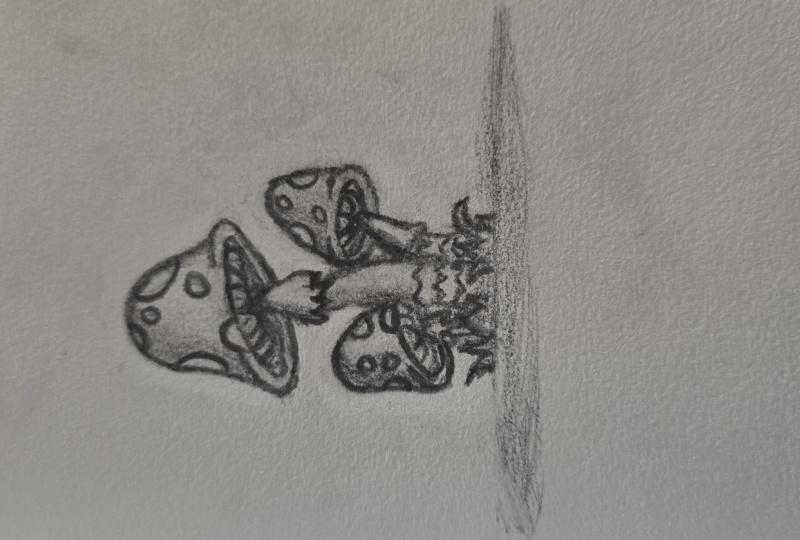
4. Shading: Hello My dearest friends and
welcome back to all of you. Now in the third
step of my work, in the third phase, I'm going to add some shadings to my mushrooms to make
them more interesting. As usual, I start from
the tip of mushrooms cap. And then from the tip, I will shade downward. I will add my shadings downward. Considering the direction and the angle of my
mushrooms is standing. I'm just going to shade this
outer part of my mushrooms and not the ones which are
inside of the mushrooms. I'm shading the caps
of my mushroom here. As you can see. I'm doing it from top to bottom. You're adding these shadings
from top to bottom. Just like that. I will shade all around
my mushrooms cap, except this inner part
of my mushrooms gap. We've done it. I will bold some lines which I've created inside of my mushrooms. I go over them to make
them darker in Boulder. Then in the center, I will create some more
shadings just in order to show the depth of this
area only in the center. I will add some
more shadings and darkness only in center,
not anywhere else. I will add some
more darkness and this upper part of
my mushrooms body. And then for this area, again, I'll go over the lines to separate this upper part of the mushroom from
its lower part. And then below these lines, I will add some more shading. I will have some shadings over here on the
tip of our stem, on the tip of our
mushrooms buddy over here. It shouldn't be too
much or too less. And you have to continue the same way for
this area as well. With this way, I just apply
some shadings to this area. Therefore, this lower
part of our stem, for the lower part of
our mushrooms body, which is also taller and longer. I'm going to create a
shape over here like this. We're going to do this in the shading phase because
the rest of the phase, the rest of the phases, these lines would TE and they will not get mixed
up with our work. In our shading phase. I'm going to add these lines. But if you're going to
create these slides lighter, you can add this in your previous phase and your
previous steps as well. But if you think that erasing these lines will make
your work to look messy, do this work and
add these lines in your shading phase because
it says a small volume. Now I'm going to start
the next mushroom. I'm going to start from
my mushrooms cap again. I will shade it like this. I start from the top
to the bottom and I will add the shadings
in the direction and the angle of my mushroom. Because it's important as well. Then I will shade all around my mushrooms cap except
the inner part of it, as I said before. Now for inside of Vine washroom, exactly like the
previous mushroom. I will build these
lines inside of it. I'll go over them to
make them darker. And in the central
of these lines, I will add a little shading, a little darkness to say. Then will shape this area which connects the
stem to the cap. I'll make it darker. And then from one side, I come down and I shade. Again, I emphasize that you
should create the shadings considering to the direction
of your mushrooms. And you should also consider an imaginary light
source for your work. So you would know
where it should be lighter and varied,
should be darker. I'm just going to add
these parts as much as I can see from behind. And I'll add it to my work. Now, I'm going to work
on my last mushroom. And from the top, I come to the bottom
again as usual, I'll add my words shading. I would also be careful that I wouldn't go inside
of the patterns that I've created on my mushrooms
cap because I should not go into them or shape them
in any way. Not advance. Covered are mushrooms cap. We are going to work
inside of the mushroom. And we're going to do
exactly the same as we did for the other two mushrooms. For the previous ones, we will add some shadings
in the center of the lines over here inside
of our mushrooms cap. I'll shade this lower area. I'll add some shadings. Then I'll consider
some shapes for this bottom part
of our mushroom. Like that in these areas, I would also add
some shadings here. And then I want to also shade the grass
a little over here. As you can see. And I will just bold these patterns on my
mushrooms calves because I want them to be seen in this shavings and
these contrasts. I'm going to go around
these patterns. These circles are semi-circles because I want them
to be separated from this plain background
and they can be seen at, actually, I'll go all over and all around all of these patterns just to
make them more clear. They would be separated
from the shadings. Now I will darken around my work and then I will finish my whole work. Because I want you to see the difference
between the parts that we have shaded and the parts
which we didn't have. I'm just doing this
for you so you would see and feel
the difference. You shave these shapes, you're actually giving
more life to them. And obviously more dimension
if you shape them, right? As I told you, I will do the same
for the smallest one. Again, I say the procedure
is completely the same. This, these are our three cute, beautiful mushrooms that
we've completed them. This was our last phase. Now, I can also work on this background line
and shaded a little bit more because I'm
going too wide it the shape of our mushrooms can show themselves even
better than they are. And I'm going to
shade these areas a little bit holding the pencil
like this in our hands, we can add to these
shadings are little. They won't be too
much or they won't be two little, too less. So we can make these shadings
more visible, more clear. And at the same time, the shadings would be
more faded into our work. It would blend into
our whole work. So I worked with look more interesting and
more attractive. So you can use this method for blending in your
shadings into your work. As you can see, my work would look much
more, better right now. Or you can do it by hatching. Depends on you, but I
think this way can be easier and better
for your whole work. Wherever we can see less
shadings, has less darkness. We can just go over
them a little bit more. To add some darkness. This kind of shading. At the end of your work. I say at the end of your
work because you've already worked on your hatches
and your work is shaped.
 Amelie Braun, Artist & Cartoonist