Transcripts
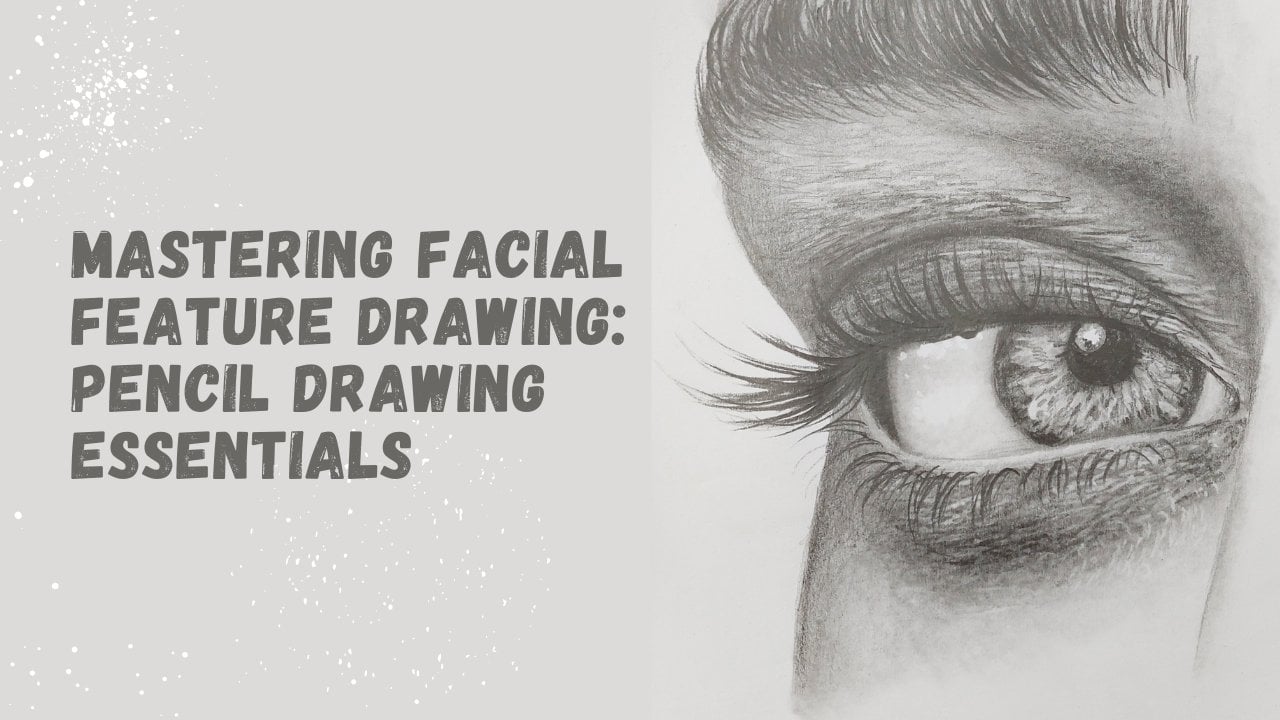
1. Introduction: Are you looking for learning the fascinating Art of
Hairstyle drawing with pencil? Do you want to sketch
all kinds of hair by mastering
professional techniques? So the best opportunity
has come for you. In the Hairstyle Sketching
class with pencil, we teach you everything
from the basics. In this class, you'll learn the professional techniques of Sketching hair with a pencil. You'll get to know
the key points of braided hairstyle sketch. You sketch a European
chignon easily. You discovered a secrets of composition and setting
of a long curly hair. Not miss this opportunity
and register for this class. Alright, now, you
need a normal pencil, HB pencil, B6 pencil,
and B2 pencil. And you also need
an editor eraser that we've always needed it in all our chapters
and tutorials. We need a normal eraser. And something that
has been added to this chapter is
actually a fader. It can be in any
size that you have. But if you have it in the
small size like this, it would be better
because you can add more details to
your work with it
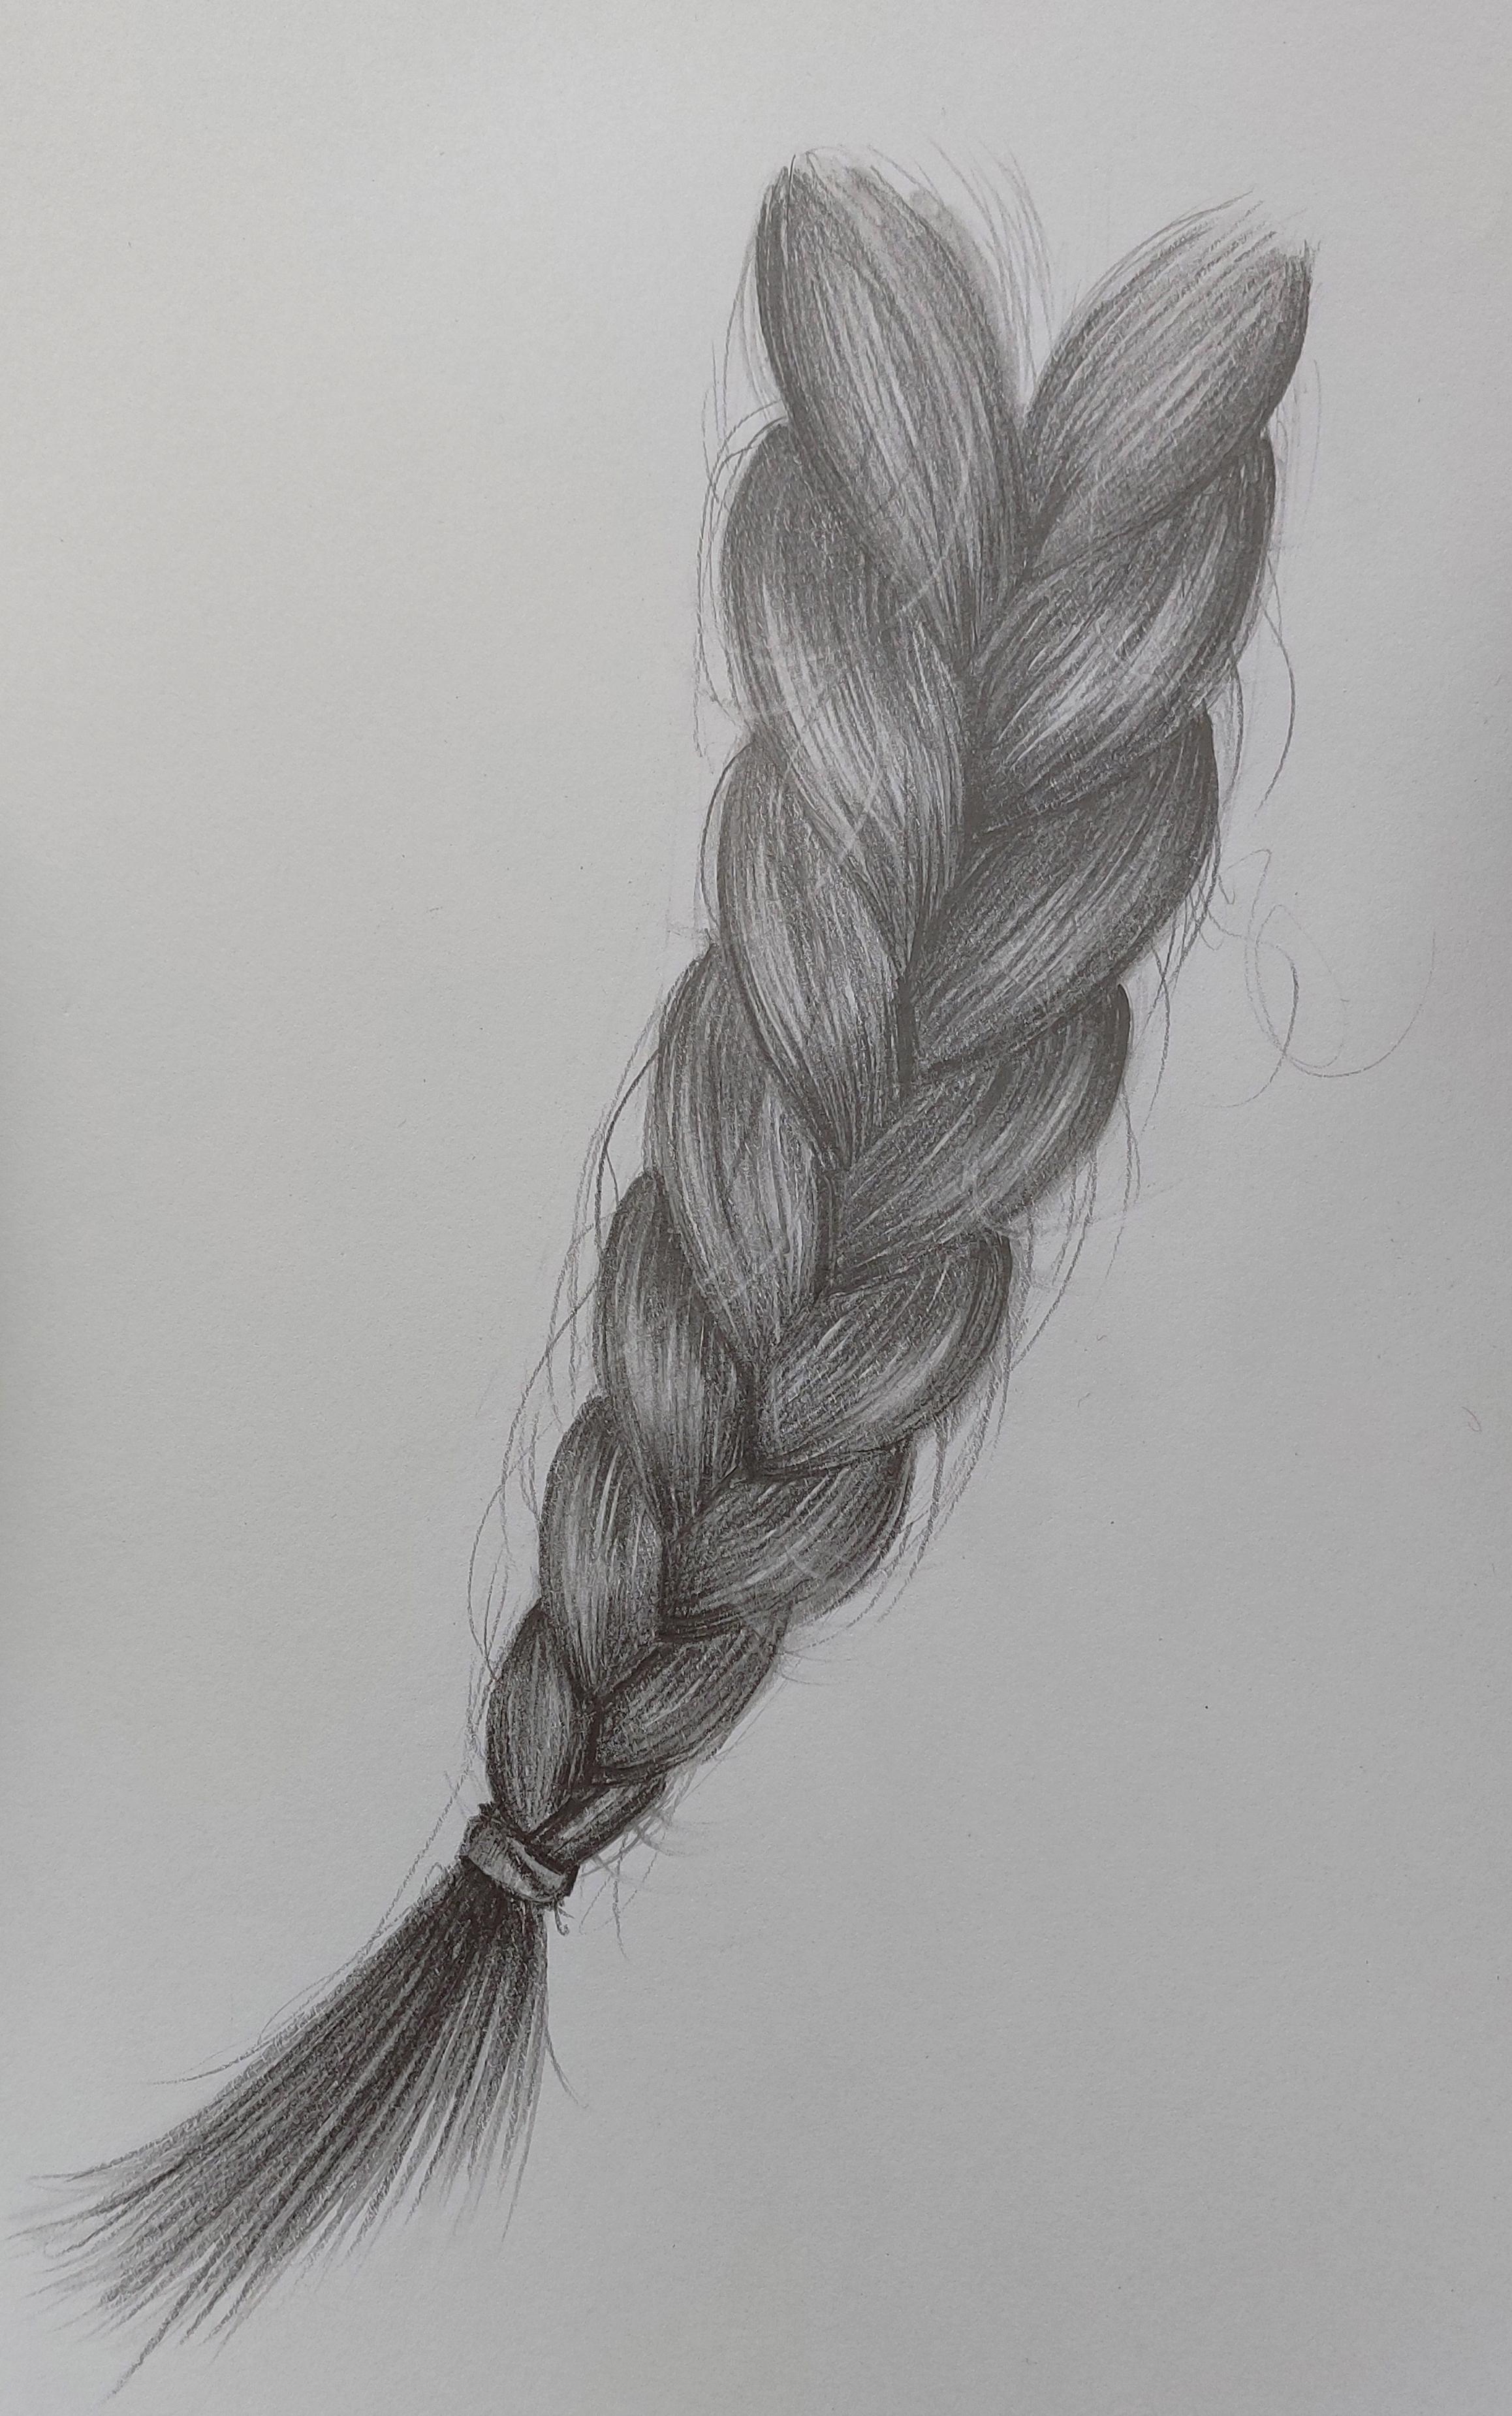
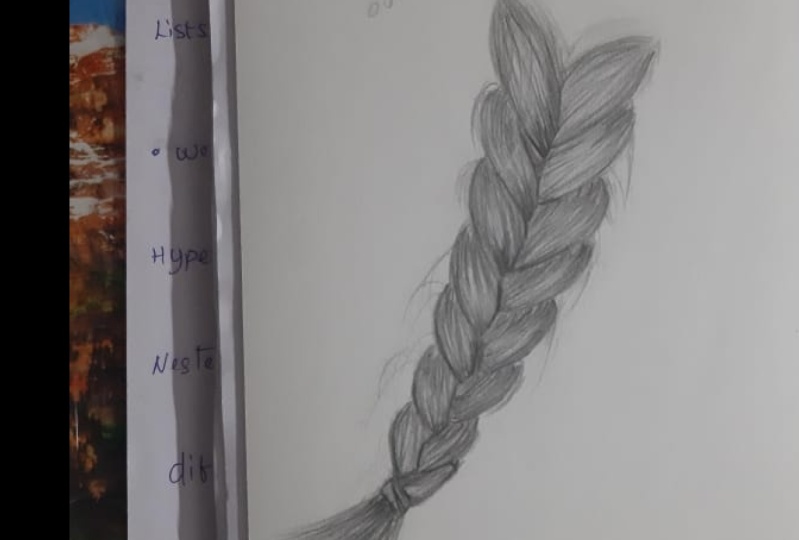
2. Basic sketch of braided hairstyle: Hello and welcome to a new chapter of sketching
and drawing with me. In this chapter, we're
going to learn how we can draw and shade different
kinds of hair. For starters, I want to
start with a braided hair. So first, I place the primary
sketch of a braided hair. First, I just draw a line and determine the
direction of the hair. I'm using my HB pencil, my normal pencil to
do my primary sketch. And then I determined the
width of the hair in this way. And over here, the hair ends. And this would be
the end of the hair. Okay. Now, did think that I do is that from the side part of this area, I come toward inside
with curved lines. So I draw this curve blinds toward the central
line in the middle. And then from the other side, from the opposite side, I draw my curved lines, but it, it comes actually in-between the two lines of the other side. You see each line of this side goes in-between the
lines of the other side. Now over here, it will
be closed like this. See, just like that. Again from here. The same way. You see it has an X
or zigzag pattern. Then again, from each side, I go out very neatly. From the central line. I go toward the outside
from each line. And now, as you can see, my hair has been
sketched pretty well. This is the braided
hairs primary sketch
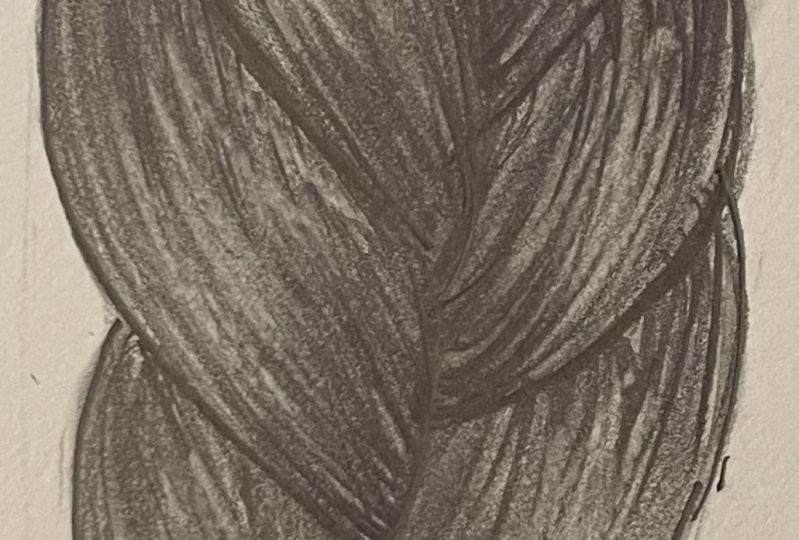
3. Basic shading of braided hairstyle: This is a general shape
of the braided hair. Now, I want to do
the shading zone it and give some volume to it. So I started with my
HB pencil and I start my shadings in the
direction of each part. The z-direction is
very important. I mean, the direction
of your shading is very important when you're
working on hair. So be really careful about it. I just shaded. And then from the sides, I'll do the more. Mostly because on the
size and on the edges, we have some curved areas, some parts that
have gone into one another so they would be darker. Therefore, I increase my
hand pressure when I'm shading on the edges and
on the sides of the lines. Then again, I'll do
the same thing for the lower part. My dear friends. One of the most important
hints that I should tell you is that the
lines that you're drawing for shading your hair should be actually continuous
and constantly moved. Your lines should
not be liked that it means that your lunch
should be shapeless. They would be various
trade and you should just move your
hand back and forth. And you should do
them continuously, as I said before, don't interrupt. During the shading. You see, I'm just shading
with my hand moving back and forth constantly
and continuously. So as I said, during this phase of shading, they should be shapeless. Your lines. Again, as
I told you before, right now, I'm just doing
the background shading, so don't worry about it. In the nexus of, I'll work on the
details and I'll give this beautiful
hair more volume. So right now I've just
done a background, shan't. Then I'm going to start from
the other side as well. See again from the central area, I come toward outside
and of course, as I said before, near the central line, near the center of the hair, I would have more hand pressure because on the
edges of the hair, on these border lines and sides, we have more darkness. So we should increase our hand pressure and
shape them darker. Remember to do it
very patiently and spend as much time
as you can on it. You don't have to do it as
fast as I'm doing right now. I'm just saving time for
you to teach you more. But when you want to do it, just take your time with
it slowly and carefully. Shade each part. This way, your result will
come out beautifully. And then again, from this
lower part of this area, I create my shading lines, K. Like that. This would be the
end of the hair. And in this area, I should also bring
some shadings. And as I've done the background shading for
the upper part of the hair, I'll do the same for
this part of the hair, the ending part of the hair. Okay, now, for the next step, I'm going to use my fader. And with my fader, I'm actually creating
a smoothness and softness for my hair. Be carefully, our hand pressure
should be very, very low. My hand pressure is just
as much as my lines will just look more
smooth and softer. And obviously I'll do the
same thing for this side to my worksheet be symmetrical. Okay? Now we will just erase the extra lines around our work or extra
lines in the work. I just want my work
to be cleaned so I erase everything
and its surroundings. Wanted to clean work
4. Continuing the shading of braided hair and final details: And now with my B6 pencil, I want to start working. But remember, when you want
to use your B6 Pencil, it should be totally sharp so you can create very fine lines, very fine and delicate lines. Let me go over this area, making this pattern
more visible. And right from here, from this deep area, which is actually the
depth of the hair. The hair has gone under
another part of the hair. So from this deep area, I start shading dark and as
I come up or as I move out, I start fading it. And I decrease my hand pressure
to make lighter lines. And then I'll do the same thing for the edges insights to. Just like that. Then again, because this area
is beneath the upper one, I would shape them
darker because obviously it has rent underneath the upper
parts of the hair, so that will be darker. In this part of the hair, only the middle is lighter. It totally shows the
prominent part two. This is the way that I'm going to give my hair some
beautiful volume. Okay. Again, I come over here and right here on the edges, I start shading. Just be careful that all the
lines that I'm creating, all the lines that you
should be creating are actually Sharp at both ends. So you should create or draw
lines sharp at both ends. This is very important while
creating any kind of hair. Again, I follow
the same procedure for the rest of the
parts of the hair. Now, as you can see, this middle part is
obviously more prominent. Therefore, you should keep
this area actually a bit lighter comparing to
the sides of H part C. And each part, I'm saving a light area in the middle of
that part because I wanted to show that that area is more prominent and the sides are actually dragged underneath
the other parts. So that's how to hair
has been braided. So again, I just emphasize on the main pattern and
shape this area to do the same thing for this area. Okay, Now I'm done
with one side and I should do the exact same
thing on this other side. The procedure, the process
is totally the same. I start darker on the deeper areas which
are on the sides, especially the side which is
towards center of the work. And then the middle will kept
obviously a bit lighter. So dark on the edges, on the sides and
lighter in the middle Okay. Now, from this lower area, I bring more darkness
into my work. Again from here. I'll do the same thing. I shade the sides and
the edges darker. And as I move toward
the middle of the part, or better say middle
of each part. I tried to keep them lighter. I just continue the same thing
till the end of the hair. Again, I just emphasize on
the shape of your lines. They should be
sharp at both ends. There wherever you
want to work on any kind of hair texture, you should create lines which
are sharp at both ends. Okay. Also from here. And I still continue shading all the way through
till the end of the hair. Okay. Now we're almost near
the end of our work. Just like that. Okay. Now for the ending
part of the hair, exactly the right here
that it's tied up. I bring my darker shades
and I let go of my hair. Toward the end of the
hair, see some parts. I'll do it more. And in some other
parts I do it less. But anyways, as you can see, I started very concentrated and very dark from the part
which the hair was tied up. And as I moved outside, I just let the lines go. But I just tried to
keep them sharp, even at the end. Then I get my fader and I just move over
some of the shades, making them blending
together and making my whole illustration
softer and smoother. So That's what I'm doing
right here, right now. Lending my shadings. Again, I take my B6 pencil
and I just want to create some hair coming out of this beautiful braid because
that will be more natural. Because when you
braid zones here, it's just some of the
hair are keep coming out. So that's what I'm
doing right now. In order to make it
look more natural. I'm creating this hair
coming out of the sites. Okay. Now, if to darkness of your work got too
much in some parts, you can use your editor
eraser that you have already caught sideways
and it has a sharp end. You can use your
entity eraser to create some kind of light
in the middle of your work. If in some parts your work
got darker than you wanted. See just as easily as
that with a sharp tip, which was called sideways. I'm using Maya to the
eraser in order to lighten these areas or make some more lights in the middle to create a better contrast
and a better volume. You can also create some
kind of lights like this. Again, like the hair that
were coming out of the sides. These are the hair. I want to show insight
with my eraser. I can totally show them. And I also shade this area. And here we go. It's done. So this was the Sketching and
shading of a braided hair. I hope you've enjoyed
it as much as I did. So follow us for
the next tutorials.
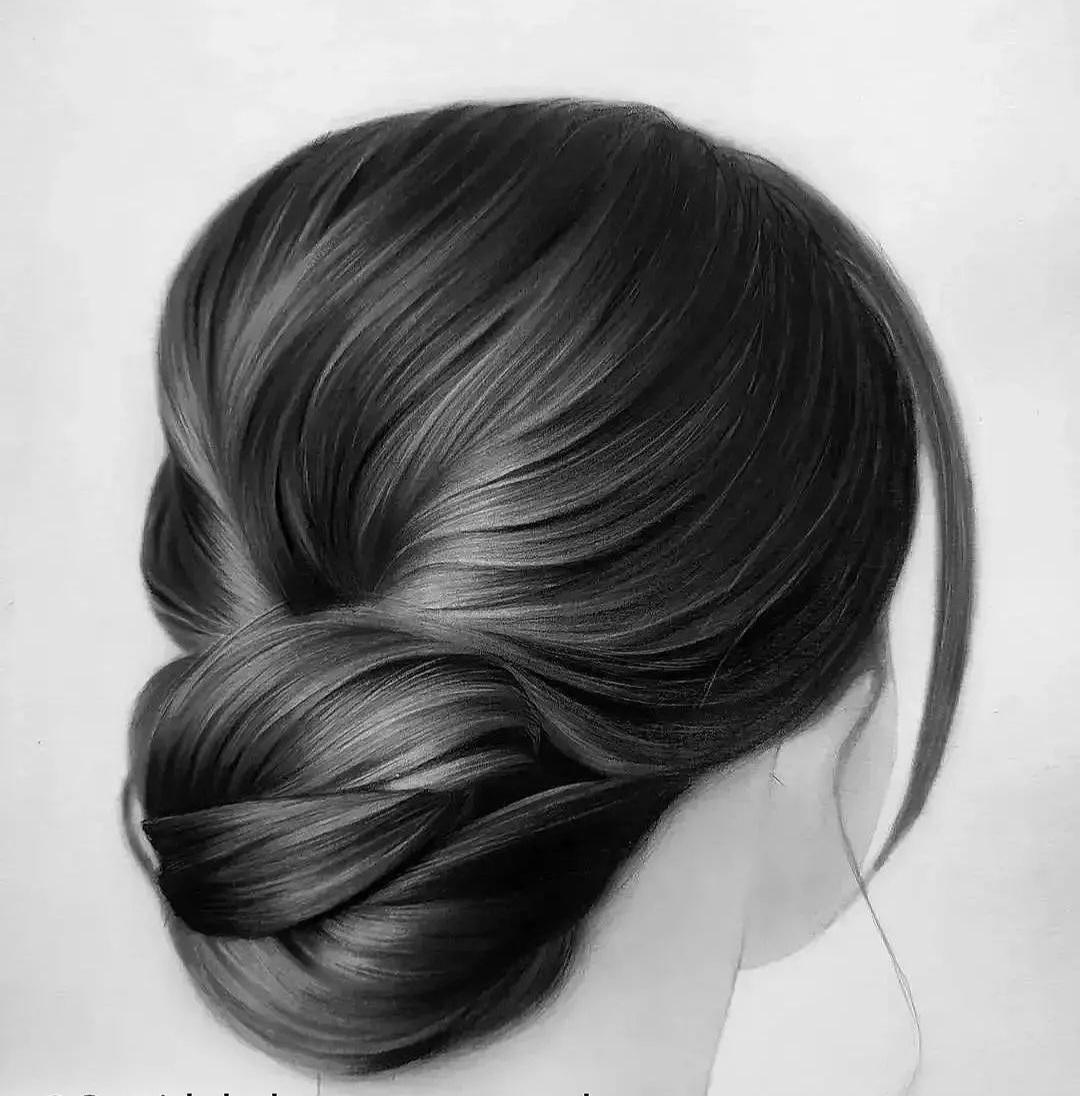
5. Basic sketch and shading of European chignon hairstyle: Hello and welcome to a new
episode of a Sketching hair. Of course with me. In this episode we're going to work on another
attractive hairstyle. This Hairstyle which is tied up. And so many of my students have some problems and
creating this style of hair. But I'm going to teach
you some hints and points that it would
be super easy for you. It might seem hard by
just looking at it, but when you start
working on it, it would be just so easy. So first, I will make the back of my Models
picture black. I've turned my paper and I am
darkening behind my models. So I darken all the parts. I'm make sure that I've
covered everywhere. And then when I got Sure, I turned my motto over and I firmly keep
my work over here. And from the top, I start copying my
primary sketch. I'm using copying method. So I'm also actually dividing
the parts of the hair. For example, there we have strong darkness or
where we have a part. You can actually see that. So you can also not copy the model and you can
just use your hand to do it. But anyways, this
is a faster way, so I'm going to do this. We also have one hair
coming out here and a part of hair coming out
from this area. Of course, I will work
on the face to the neck. Let me just check. Yeah. You got sure that your
primary sketch is transferred to or
cardboard or paper. You just take your model off the cardboard or your paper and then you can start working. I've just made my paper clean and now I'm going to
start with my B6 pencil. Is C because the Hairstyle
over here is very dark. I can start with
the method, dad, first of all, I apply
the darkest areas. So basically I'm going to
start with the darkest area. And even doing, even
while I'm doing that, I'm using lines which
are sharp at both ends. And add the same time. I am paying attention to the direction of the
hair where it's going. For example, here
is coming down. So I'll do the same thing. I'll keep the right
direction of the hair. And as I said before, I try to keep my lines
sharp at both ends. And I'm starting from the
darkest areas of my work. This way I start shading, I start doing actually
background shading. I also consider these parts of the hair which are
going into one another. So very slowly and
very patiently. I am going to do this. Also from this top
part of the head, I bring the darkness
into my work more. And also from this
side of the hair. I'll do the same thing. Okay. See, now over here we have a light area and we have
darkness right next to it. So I'm going to apply my darkness exactly
as I sit in my model and exactly the same
direction that I see. Okay? I will also keep this
light area as light as I can Now I want to work on this
middle part of the work. From over here, I have
a very strong darkness. It's very visible in the work. And I should take this darkness upwards in this way
that you can see. And I come all the way up. See, I am going in the exact same direction
as I see in my model. I should keep the
direction and the style. So I'm just creating
these lines one after another with
the same direction. Just try to control your hand pressure so
it won't be too much or too little. Okay? Then again, I apply each a strong darkness
that I see a my model. Just add them to my work. Again. I say that
right now we're only working on the
background shading. So we Dear Editor eraser, you can later create some of
the lights that you want. And then again, you
can add more darkness. So we have to do so much more detailing before we
finish our work. Right now is just the
background shading. And later we have to
add some details, some more contrast,
which creating delights. And then we can have the volume. I also bring some darkness
coming all the way down here. Okay. Now I want to work
on the next part. See this area, it comes
all the way through here. I follow this same shape
in the same direction. It's a very curved line coming
all the way from the tub. This tied up area. Alright. It's really easy. You just have to
pay attention to your model and just
follow the directions. And keep the hair
texture in your work by creating the lines which
are sharp at both ends. These two points are very important while
creating hairstyles. And I bring all the hair, which I'm bringing to
this end tied up area. I bring all the hair
with the same curve, with the same direction
and with the same angle. So I just repeat the process. And I increase my hand
pressure on some parts, which I can see
has more darkness. This way. Alright, should do this very patiently. Now in this lower
parts of the hair, my area is more dark, comparing to other
parts is very darker. So I just do it the
same way I see it. I mean, with the same
amount of darkness, I'll create this area, especially here and a tub. It's very dark. Okay. I am addressing my hand pressure and I'm adding the
darkness into my work Here we go. Okay. I'll continue this. And I start the second
part of the hair. It is like a bun, but it's a bit lower
than it should be. Here we go. And I'm almost
done with this area. Very strong darkness
as you can see. Okay. I would also add some more darkness to this
area because it should be darker even if we are doing primary shading or a
background shading, you should pay attention
to these points. It's very important. Okay? Creating this kind of the hair
which has a special style. The most important point, as I said before, is that you create your hair in the same and exact direction
as you see in the model. In this way, your outcome
will look much more natural. So don't ever lose the direction of the hair
while you're working. I wanted to work on
this little button. The second part of the hair. So again, even in this part, I'm going to start with
a stronger darkness. Parts which have a stronger
darkness, of course. Okay. Now, while you're working, don't forget that
as much as you're, the tip of your
pencil is sharper, your hair, we'd look
softer and smooth. Er, so try to keep the tip of your pencil
as sharp as you can. All during your work. Again, in this area is
start creating sharp lines. And I work on the hair. I applied a stronger darkness and any other part
which is darker. Okay. See, I am just following
the patterns, the lines, the directions, even the amount of darkness that
I have in each part. Okay. I just have to do the same
thing for the lower area, the bottom of the hair. Here, I have a very
strong darkness because I have a dip over here. The hair going
underneath another part. That is what creates this
a strong darkness here. And then from these parts, I apply the darkness
the same way. Okay. So follow me for the
rest of this tutorial.
6. Continuing the shading of European chignon hairstyle and final details: Hello and welcome to the rest
of this tutorial with me. Okay, we are going to
complete it together now. Exactly like the previous parts. I start applying
my darkness from here as and as I move
toward the lighter areas, I faint them or I decrease my hand pressure
and they get lighter. Okay. And then again, I'll do the same
thing for this area. Okay. As you can see, I'm keeping the ends of my
lines completely sharp. It's like I'm lying my hand go off the cardboard
or off the paper. When I get to the end of
the line, just let it go. Okay? Now, I'm going to do the last part of the shadings
and the end of the hair. Okay? You can clearly see that, hey, use a very light
shading for here. And then I'm going to use
my HB pencil in order to create very fine
and thin lines as very fine and delicate hair. Right here in the middle. So you can see the fine hair and the delicate hair coming out. It wouldn't be just too dark. Okay. So just continue on these areas. And I tried to keep the lighter
areas as light as I can. Because I want to
keep a contrast. I want to show that some parts are more
prominent and some parts are more curved in and
underneath the other parts. So again, as you can see, I'm still keeping
the right direction of the hair because that's
the most important thing. And of course, for
showing the texture, I'm keeping my lines sharp. And then again, in these parts, I apply more darkness. Okay. You see, I worked even on the parts that
were totally wide. I don't want white
spots in my work. So now it's done. Then I get my fader and I
just drag it on my work. I really try to control
my hand pressure. That's what you should do to officially on the
lighter areas of our work. Okay. Now, I blend in all the dark colors that
I've applied up to now. I'll delights and
mostly the dark areas and darkness should blend
into money each other. And I'm just making my
shadings more cohesive Of course, in these parts, which I have the most, the strongest actually darkness, I drag my fader harder. I'm going to use
my integer eraser, which I caught sideways.
And it's sharp. And I'm going to use it on the lighter areas in order
to create the lights, of course, and even
create some light hair, some lines as some light hair. And this actually
gives my work a be useful contrast that shows the more prominent parts and the parts which
are going on there. So it gives it a volume. It wouldn't just look flat. And then after that, I work like this. Okay. All right. Now again, I caught
the tip of my eraser. And you should be really
careful because the tip of the eraser can
also become dirty. So whenever that happens, you can easily cut it. Tip off and start again. You can see I'm using my antigen eraser
in a very organized way. Alright. In this area, I'll do the same
thing, creating delights. See over here when I use my eraser at the same time that it's
creating some lights for me. It's also fading
some shades into one another and it's great benefit. I'm creating delight. At the same time. I'm doing some fading. Okay? And now for the last time, I'm going to use my B6 pencil to apply the strong darkness. Again. Just be very careful because this is the last round
that when you're doing it, you should do it very
softly and very smoothly. So apply your darkness or wherever you think
you need more. But don't overdo it
and be careful not to go inside of the light parts. Suddenly just fade your shading as they move toward the light. K. Here we go. And hair in this. So I'm still working on some
strong darkness over here. And on these parts. I'll do the same thing. I'm working on the
stronger darkness. I also have strong darkness over here on the top of the head. So I also bring this darkness downward as I can see
it in my Models head. Also a bit from here. And make sure that you go
all around your work too. Because, for example,
in this module, specifically, the edges of your hair should
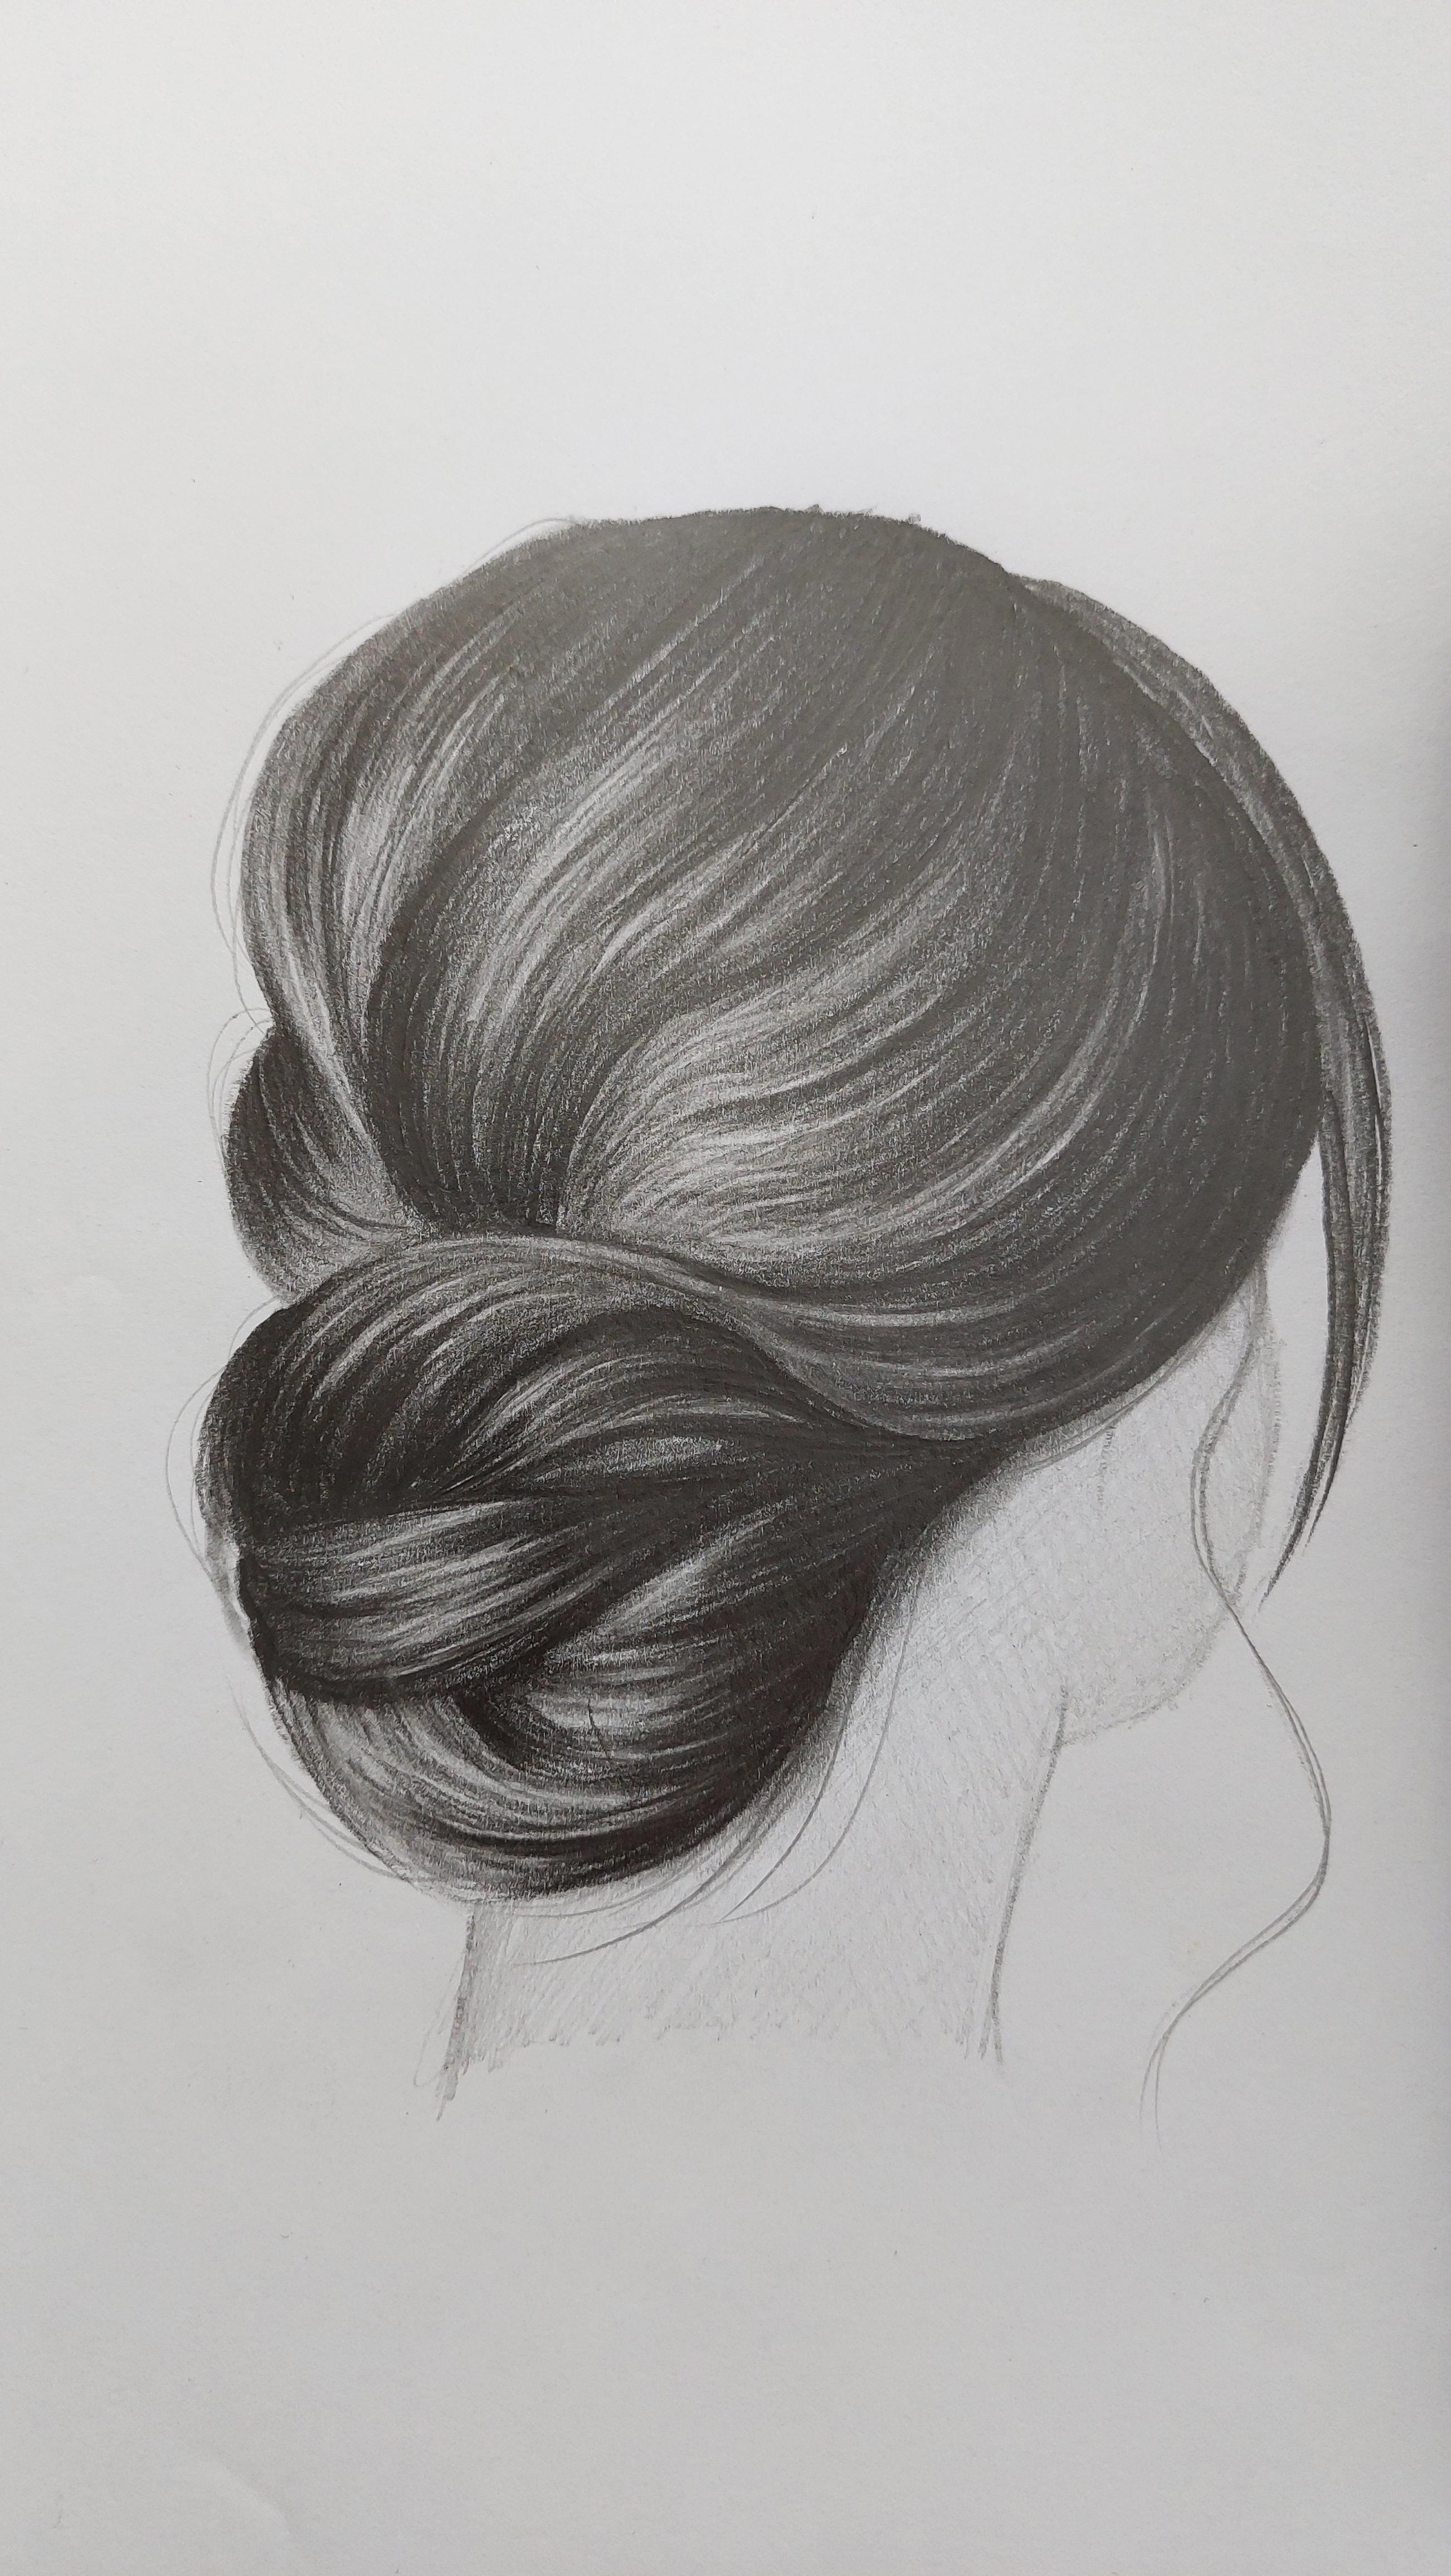
also be very dark. Okay? Here it is. Alright. Now this is a general
shape of the hair. And then I want to
create this part of the hair which comes from the front to the
side of the face. So after I've created it, I use my fader on it to fade it. Then I'm going to
use my HB pencil. And I won't go into face. Then I start shading
the face just a little. And just as much as I don't leave it untouched
around colored, you should have a
trace of color on it, and that would be enough. Okay. And for making your work
more natural, of course, as I said before, you can just create some
hair coming out of the bond. Or did General Harris side. If you bring this hair out, your work and your outcome
will look more natural. Of course. Here it is. And I've also done
the Touch Ups. And it's done, I
hope you've enjoyed this tutorial as much
as I did as always. And I'll see you
in next tutorial.
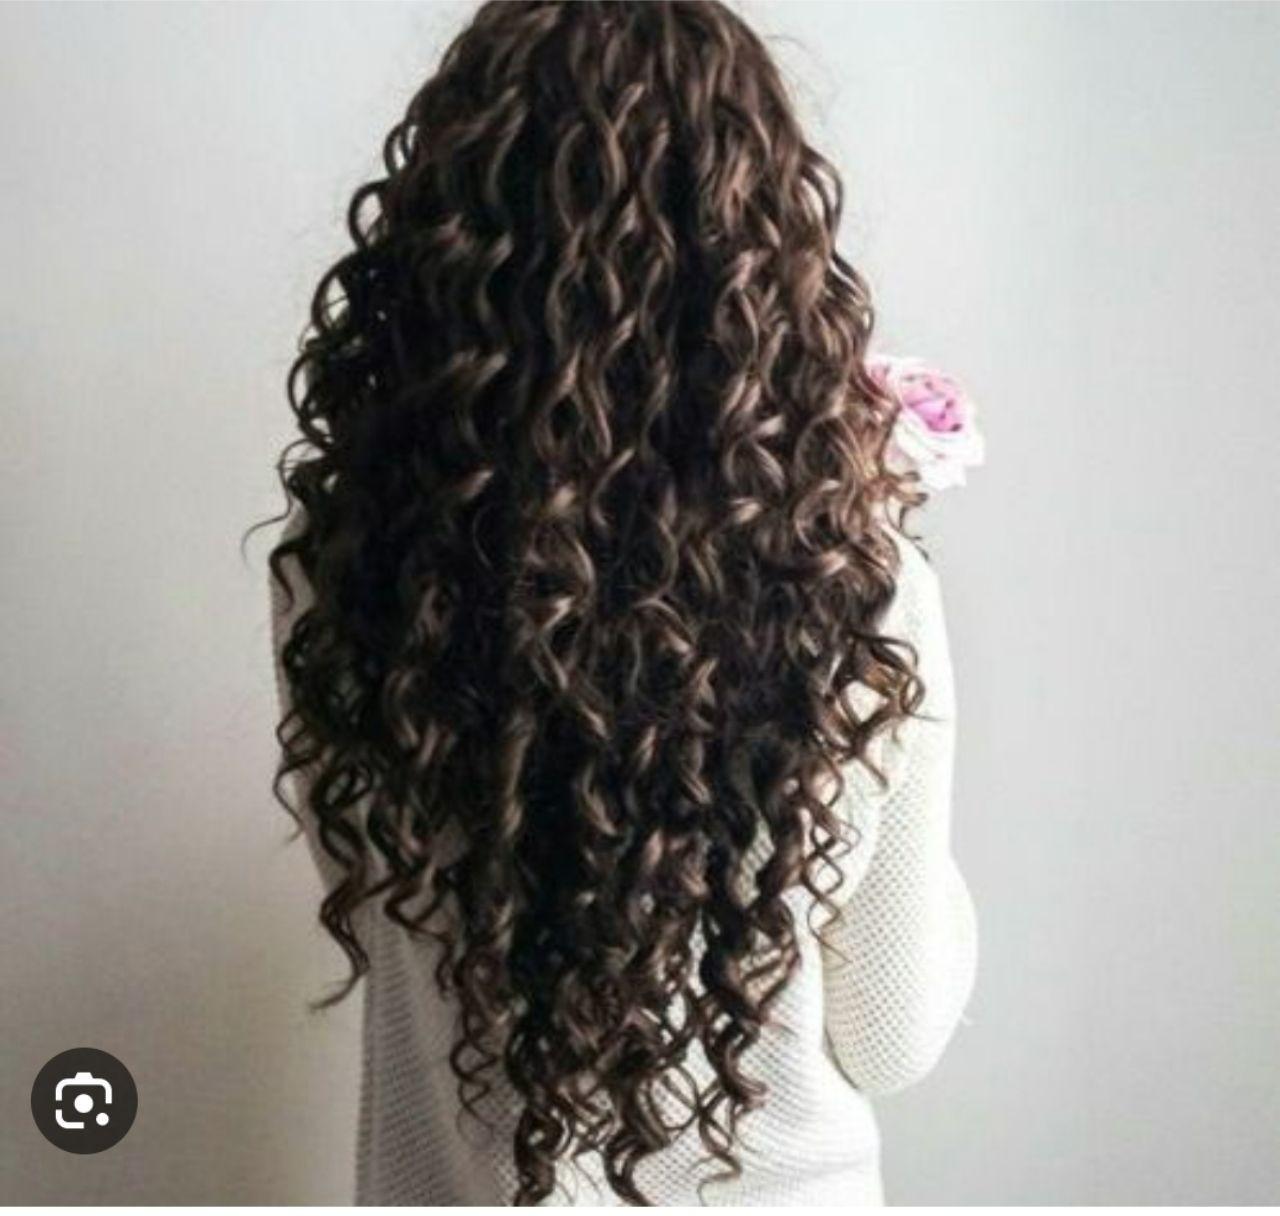
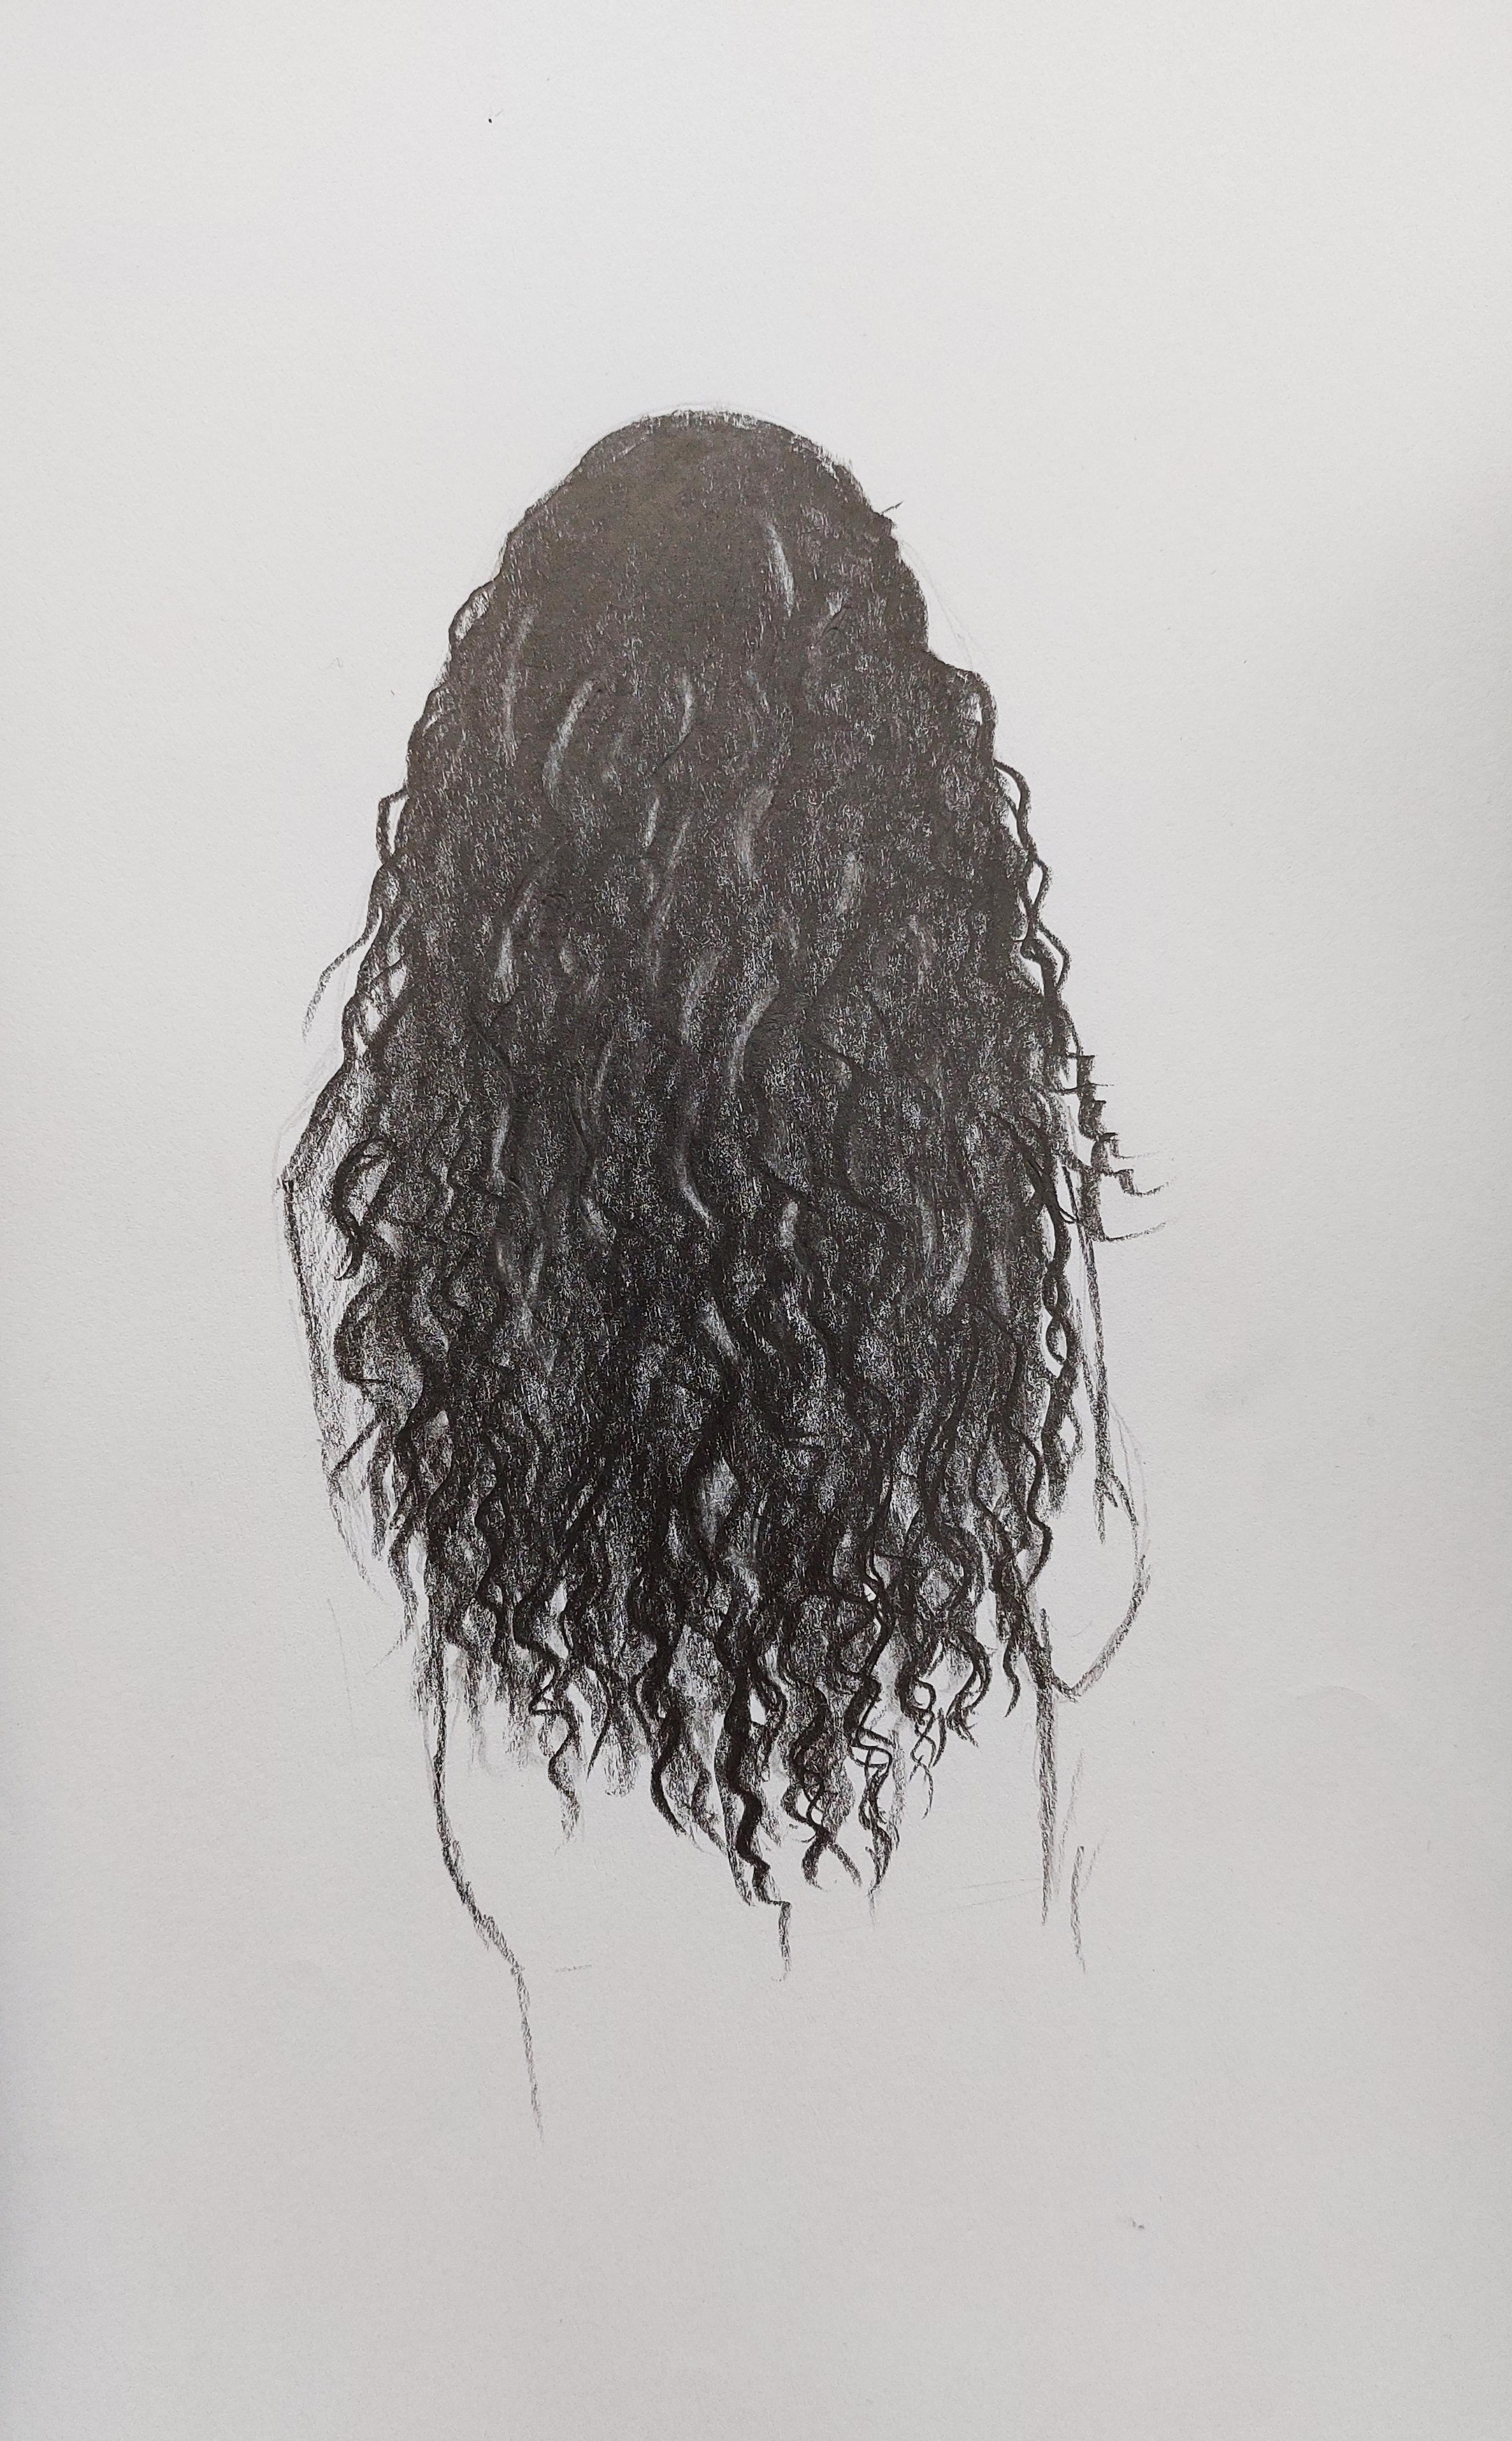
7. Drawing and shading of long curly hairstyle: Hello and welcome
to a new episode of Sketching hair tutorial with me. Okay, In this episode, we're going to create curly hair together and love
curly hairstyle. First daughter's,
I'm going to create the general shape of
the head and the Hair. See. Just like that. I create the shape of it. General shape. And it almost comes up to
there, are better say, down to there in this way. So this is a general
shape of the hair. In order to create
the curly hair, we can do this actually
in several methods. The first method, which
is very, very simple, is that you can use this
side of your pencil and create these waves
and this curly shapes. Write down for the
background of your work, for the primary
sketch of your work. Just use the site
of your pencils tip and create these waves and bring them all the way down. Continue that as much as you can get enough volume and enough
darkness from your work. In this way. I'll continue this
as much as I can and as much as I get the results that I want
from my primary sketch. Okay? So I can also apply the
darkness of my work. And sometimes I increase my hand pressure because
I want more darkness. So I continue this as much as it gets as dark as the model. So as I said, you can also
increase your hand pressure. Also from the top of the head. I don't forget about that area. I apply more darkness on it. See, creating curly
hair is very easy. I tried to feel all the
white parts in the work. My dear friends for
creating curly hair. This is one of the
methods you can have. There are so many other methods in order to create an sketch. Curly hair. Okay. Well, also darken the lighter parts of my work. This way. I also consider some small waves, especially for the
end of the hair. I tried to create the waves more specifically
in more beautifully Alright, now I do a general shading and general darkness
over all of my work. And then of course, I use my fader on it. And I try to make
all the darkness and all the shadings more cohesive and blend
them into one another. This is a very easy method
for creating curly hair. And as I said before, even at the end of the hair, you should continue your waves. And even when you're
moving your fader, you should continue that way. You should actually
work on that way. With waves. You shouldn't just bring it down because they are more separate and they
can be seen more. Again with my B6 pencil, I start creating some
more darker waves. But this time I'm
going to do them. I'm going to create them
more organized and neater. So my basics pencil, I'm creating some organized
and neat waves and of course, darker waves on top of
my primary shading. And as I said before, because at the end
of the hair you can see the waves more separately. You should try to
do them separately. Beautiful thing. I'm just continuing
this downward. Alright? And also
in these parts, try to consider these
a specific waves, even the ones that came out. So in these parts, I'll do it. Okay. Now, I want to add some
details to my work. Of course, as usual, I call it the tip of
my Etude eraser and I start applying delight
areas of the hair. So wherever I see the light, I apply it in my work to. Then you should use your electronic eraser in order to do it
faster and easier. So if you don't have
an electronic eraser, of course you should
continue and you can continue your work with
your simple as his eraser. But if you have
electronic eraser, it will actually make your
work go on easier and faster. But so pay attention that
this kind of light is not necessary for all
parts of the hair. Only in some parts you
can see the light. And only there, you
should apply in them. Hair it is. And as you can see, little by little, I'm adding these lights in
their own placement. Just as easy as that. I've created a background
shading width, actually the pattern of the
curly hair with the waves. Then I went over it
with a general shade, and then I started
adding details with a darker color for creating the darker hair which
are showing more. And then atlas, as you can see, I'm using my erasers just to remember while you're
working with your eraser, in order to create delights, you should not create a straight
lines with your eraser. Even the lights that
you create should be curved and wavy. Then again, you should take your B6 pencil and add
some more darkness, right, Nick satellites
that you've just created. Why we do it? Because we want
the lighter areas to pop out more and show
themselves more and better. That's why we add It's a
darkness right next to them. So the contrast will show. Also these parts of the
hair should be dark in. Here it is. And just as beautiful is that I've created The curly hair
with the simplest method. And the rest is done. Okay? You're almost done here, just working somewhere on it. I hope you've enjoyed
this tutorial as usual and as much as you wanted. This was the last model and the last style
of this chapter. And I hope to see you in next classes and
in next chapters
 Amelie Braun, Artist & Cartoonist