Transcripts
1. INTRODUCTION: Hello, and welcome. We're going to create a
charming pen and wash illustration of a child
holding a balloon, using a relaxed
three step process that keeps your work
fresh and full of life. The pencil sketch focuses on gesture and storytelling
rather than detail. The black ink gives the piece
character and energy and will bring it all to life with soft, transparent,
luminous watercolor. It's suitable for all levels, including beginners because I'm going to be guiding you
every step of the way. And I'll be sharing all
the techniques, tips, and tricks that I use in
my own professional work. Class is part of
my expressive pen and ink with watercolor series. And each lesson
contains a new subject, some different techniques, and a few unusual cheap
tools you can use. You don't need a lot to start
with, a few watercolors, two or three black
waterproof pens with different sized nibs and
some watercolor paper. You can use a fountain
pen if you've got one, but it's not essential. There's a copy of the drawing in the project resources section, which you can choose to
draw free hand or to trace. I am a professional artist, author, and tutor,
and over the years, I've sold a lot of work
across the world and helped hundreds of people to
learn more about watercolor. You can see examples of
my work on my website. My style leans towards
impressionistic and contemporary rather
than photorealistic. I like to explore loose approaches that bring
out the colour, light, and essence
of my subjects. I've tried to
replicate this across all the many other videos
that I have on Skillshare. I'd love to see your
own finished painting, which you can upload through the project and resources tab. And I'll be sure to give you some personal
feedback on it. At the end of the
class, you'll have your own beautiful artwork
to be very proud of. So let's swizzle our brushes and get on with the painting.
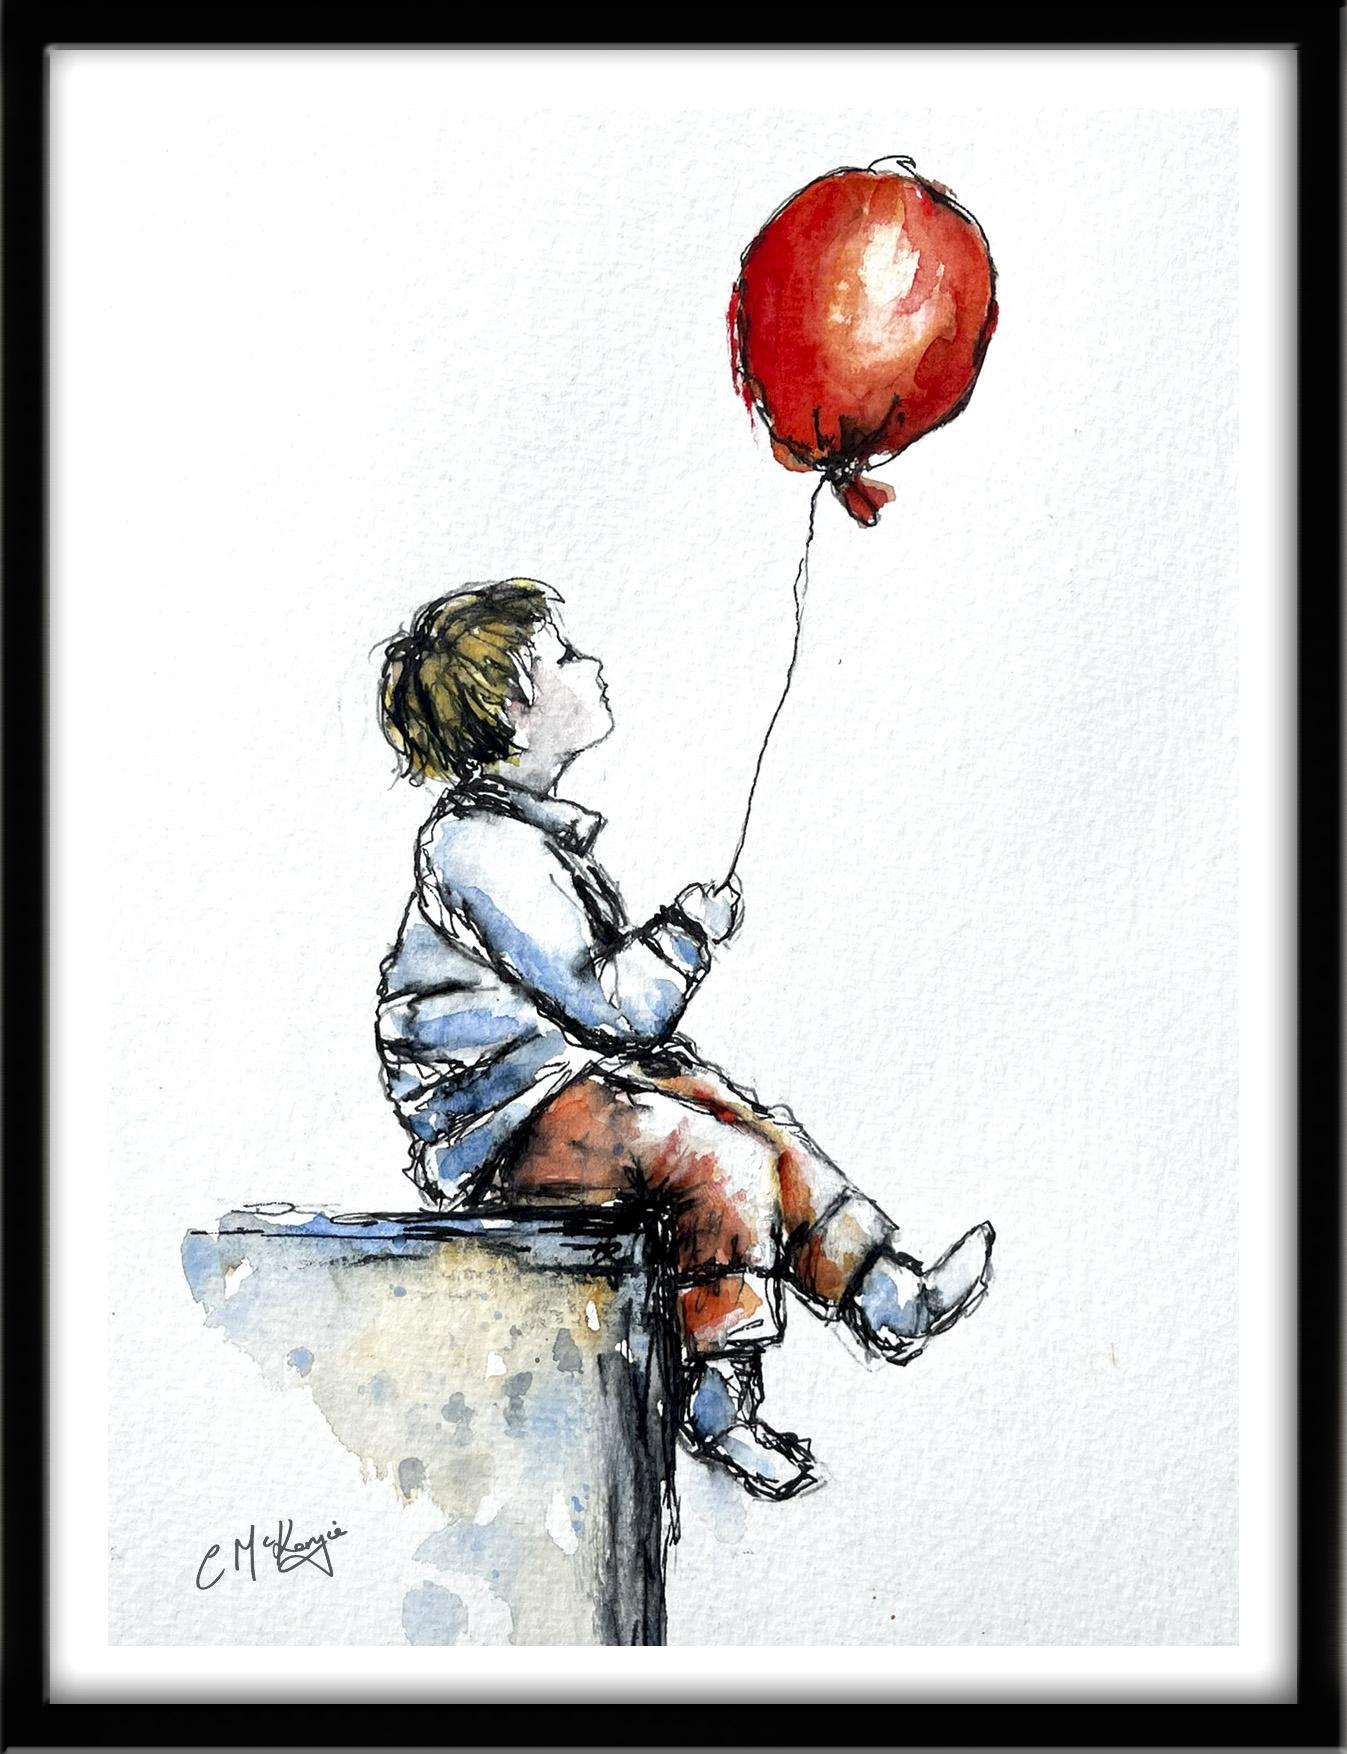
2. Use light, sketchy lines to capture the dangling legs, upward gaze, and floating balloon: For this painting of The
Little Boy and the balloon, we're going to use
the continuous line style of pen and wash. The continuous line style is drawing without lifting
the pen from the paper. So it's exactly as it sounds, drawing a line without stopping. In fact, it's sometimes referred to as taking your
pen for a walk. It can seem a bit
difficult at first, but it is a fun and interesting
way of drawing an image. And when you get into the flow of seeing the contours
and shape develop, it really does become quite a spontaneous and lively effect. These are all the materials that I'll be using for this
particular painting, but as before, do feel free to switch up with
whatever you have. You can still use the waterproof black pens that you used for the
previous painting. But I wanted to show you
a little tool that I use, which is a preppy fountain pen with black carbon
ink cartridges. Instead of using different pens with different nib thicknesses, I can use this one
pen to do it all. You can increase the weight of the line simply by
putting more pressure on the nib and it kind of
spreads the ends of it a little bit more so that
we get that thicker line. I can also use less pressure and on its side to get a
very thin line as well. It didn't come with the
waterproof cartridges. I did buy those separately, but they're very easy to insert. Regarding the
watercolor materials, I've provided lots
more information about brushes, paint, and paper, et cetera, in a
document that you can download from the
resources section. There's a drawing in the
project resources section, which you can choose to
draw free hand or trace. Notice the curve of
the child's back, the tilt of the head
looking upwards, and the long vertical line
of the balloon string. These directional lines
give the drawing its story. The key here is movement, the dangling legs, the upward
gaze, the floating balloon. Those relationships matter
more than precision. Keep your lines
light and sketchy, and once the structure
feels balanced, you can refine a few contours, but just enough to
guide the ink later.
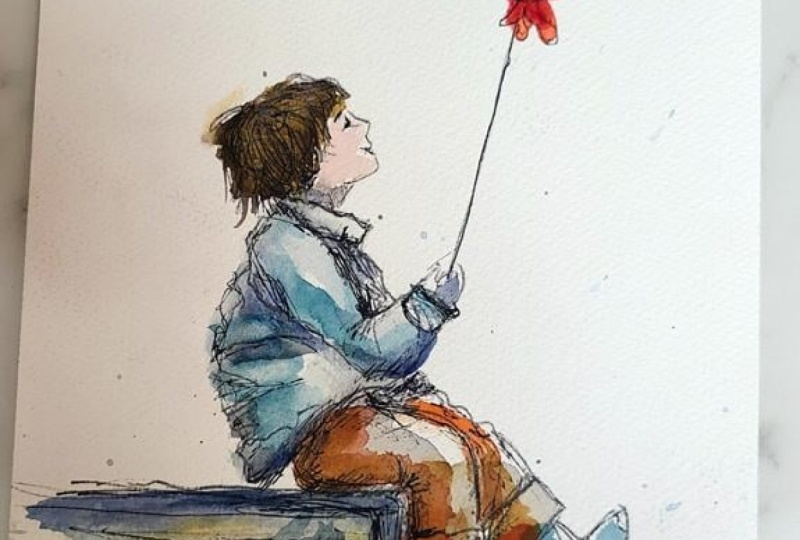
3. Continuous Line Style with Black Ink. Draw in a continuous, flowing manner without lifting the pen.: Here's my drawing,
and I've started with my prepipin
from the top where the balloon is and taking it down in this
continuous line style. As I said earlier, the idea is that you complete the
whole of the drawing with the pen in one continuous line without lifting the
pen from the paper. Now, this can mean that you
have to go back and forth sometimes in order to get to the place that you
want to do next, depending on what the
images that you're drawing. I do tend to add the
dorker areas as I'm going around rather than wait till the end and go back to them
as we did with the flower. And I have to confess
that I rarely do finish a complete image
in one single line. I do take one or two
quick checks just to keep the drawing anchored and make sure that everything is
going as it should be. But in the main, I do keep to the spirit of
the technique and complete as much as possible without moving
my pen off the paper. There is a sense of
freedom that comes from concentrating on looking
rather than on the results. And I do think you get
a much bigger sense of movement and energy
with this technique. As you can see, I'm
retracing my steps with the line to go back and have some darker shading
in some places. And the shading that
I'm applying is not your typical cross
hatching kind of shading. It's more scribble, really, because if I were to
do cross hatching, which is a series of lines, I would have to lift my pen from the paper each time I was
drawing a different line. So the only way you can
really do it is to scribble. I suppose it's a kind of
messy doodling, really. And I think what I like
about it most is that every part of the image
is connected to the rest. You can see also that
I'm not sticking slavishly to my
original pencil lines. And I'm adding quite
a bit of detail where there isn't actually
any pencil line at all. An example of that
would be where the creases in his trousers
are where his leg is bent, the shadow that would
be over the cuffs of his trousers and the left
side of his boots or shoes, where they're in shadow
and not in the light. I've done quite well with my continuous line going backwards and forwards
and hither and thither, but I am going to have
to take a bit of a break because I think that
the head and neck area, that's going to need a
little bit more detail. So I have done the unthinkable
and jumped across. Nobody would know if
I wasn't videoing it and just adding
some darker shading, especially to the
back of his head.
4. Add Expressive Watercolour - loose and minimal for spontaneity and vigour.: And now for the color, again, I'm keeping this very
loose and minimal. I'm beginning with the balloon first because it's
the focal point. Although I'm painting
it a bright red, I'm starting with
an orange underwash because I do find that
when the red colour dries, it does look a little bit flat, so it needs a little bit of injection of
color underneath it. Notice also that I have left some area of white for the
highlight on the balloon. Dropped bright red,
my cadmium red into the orange wash and
let the two colors mingle. And I've added a little
bit extra red pigment around the edges
of the balloon and allow that pigment
to move naturally so that I get a darker
tone and a three D effect. I'm using the same
two colors for the little boys
trousers because I want some harmony of color
in the composition. I've added a little bit of a
gray color to the trousers, where it bends at the
knee so that I get, again, that shadow where the
leg is not in the light. And I'm adding a
diluted neutral tone in the hair just enough to
suggest light and shadow. I'm using a very watery
cerulean blue for the shirt, applying it lightly and unevenly so that some of the paper
texture shows through. And again, leaving areas
of white unpainted paper. So I'm not filling
everything perfectly. I'll let the paint
break at the edges and occasionally drift
beyond the inclines. And I'll use that same blue
color for his little boots. I'm adding a soft
pinky gray color, very watery, just to the side of his face where it
will be in shadow. And also a little bit of shadow
to the back of his hand. It's probably a
little bit too gray, so I'm just going to
add a little touch of pink on his cheek to
warm his face up a bit. Not too much because
he's sitting here looking all nice and
relaxed and peaceful. So I don't want a
red puffy face. I'm adding a soft gray blue wash to the ledge
underneath the figure. I'm using a little bit of macabot blue and some
orange going in there. By keeping the colors harmonious to the ones that
we've used in the painting, it creates a sense
of overall unity. And by adding a little
color to this ledge, it creates a sense of grounding. To add a bit of extra
tone to my cerulean blue, I've added a touch of
cobalt blue to it, and I'm just going over
some of the areas that I've painted and adding
this darker tone, especially at the back of the figure and also a
little on the ledge. It's really easy to
get carried away with the watercolor and put a
little bit too much on. So I'm just going to talk about two techniques
that you can use to lift a little bit of color off if that
happens to you. One method is to use what's
called a thirsty brush. So you just use a
clean brush and clear water to paint the shape you want to
lift out or lighten. Just let it settle for
a minute or two and then dab away the water
with paper towel. Now, you might need to
repeat that a few times, depending whether you just
want to lighten the tune, a shade or two or to remove
the color completely. It is actually quite
difficult to remove the color altogether with
the brush technique. For that, you'd be better trying the magic
sponge technique. Now, the magic sponge
is actually used to clean ovens and
skirting boards, but it works miraculously to
remove unwanted watercolor. Just tear a little bit off, dip it in some clean water, and then squeeze it
out so it's just damp, and then you can rub away the unwanted paint and
block with paper towel. The diagram on screen now shows just how effective
magic sponge can be in getting almost right
back to white paper. Another thing that
sometimes happens is that your black ink lines
don't always look as dark after you've had a
paint over the top of them. So there's no reason why you
can't use your pen again, go over some of those lines to strengthen the
really dark areas. Of course, you do need
to make sure that the paper is completely
dry before you do that. As you can see, that's
what I'm doing now, strengthening a
few little areas, particularly the ledge that
the little boy is sitting on, and then I can finally call
this painting finished. Now, don't forget to upload your own painting through the
project and resources tab. After all your hard work,
I'd really love to see it, and I'll be sure to give
you some personal feedback. This class is part of my expressive pen and ink
with watercolor series. Each lesson focuses on
a different subject, introduces some new techniques, and even a few unusual
tools you can use. You can follow me on Skillshare to get to hear
about new classes. And if you could leave
me a short review, that would be really great. If you've enjoyed this class, it might encourage you to look at some of my other videos. I've got lots of lovely
subjects loaded with more tips and techniques to help you with your own
exciting art journey. In the meantime, thank
you for joining me, and I look forward to seeing you next time Happy painting.
5. FINAL THOUGHTS: Well done on completing the boy and the
balloon painting with pen and wash. We began with
a light pencil outline, keeping it soft and minimal. We use the continuous
line technique to add the black ink without lifting
the pen from the paper. We let the pen travel around the image without
lifting it too often, and we didn't worry
about small wobbles or trying to correct lines
that went a bit askew. Finally, we added some
loose, minimal watercolor, remembering to leave some white unpainted
paper in between. Your version will have
its own personality, and I can't wait to see it. The class is part of my expressive pen and ink
with watercolor series. And each lesson
contains a new subject, some different techniques, and a few unusual cheap
tools you can use. Now, don't forget to upload your own painting through the
project and resources tab. After all your hard work,
I'd really love to see it, and I'll be sure to give
you some personal feedback. And if you've
enjoyed this video, do have a look at my other
classes on Skillshare, which are packed
with more tips and techniques to help you
on your own art journey. If you click the follow button, you'll be able to follow me, and then you'll be the first
to know when you upload a new video or any
exciting updates. And if you could
just take a moment to leave me a short review, that also would be really great. In the meantime, thank
you for joining me, and I look forward to seeing you next time Happy painting.
 Carrie McKenzie, creating painted visions