Transcripts
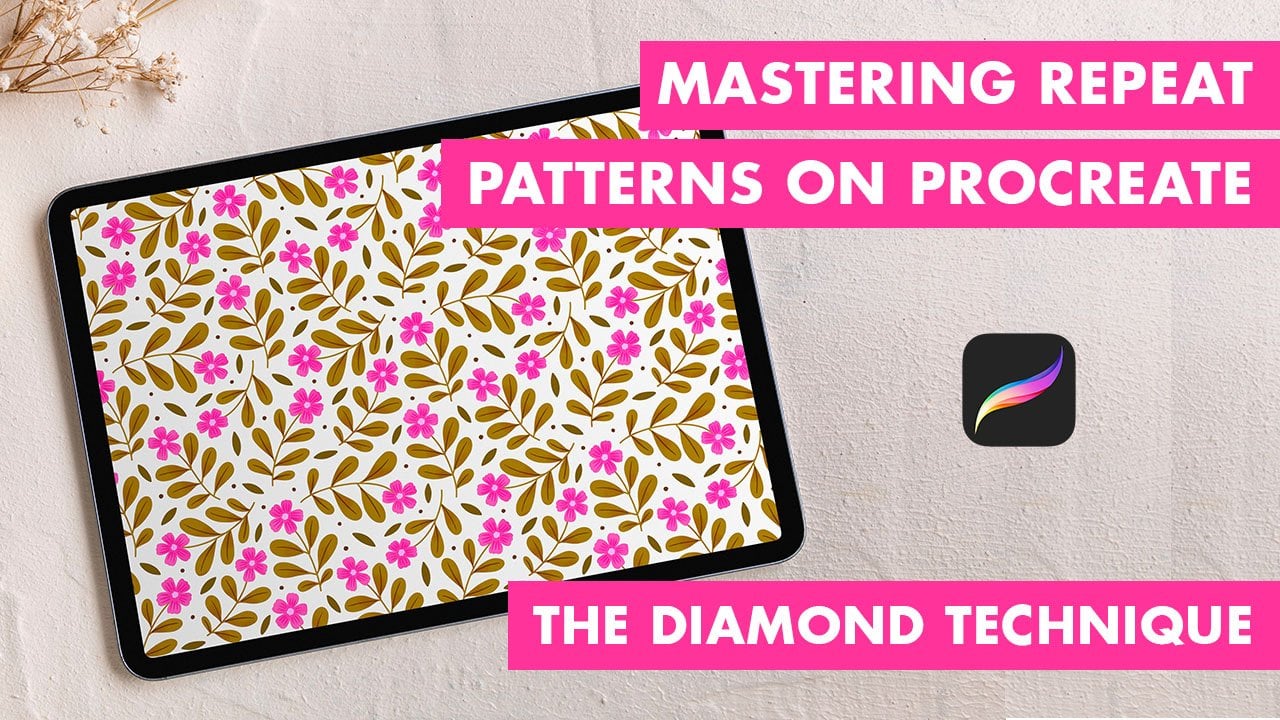
1. Class Introduction: Come to creating symmetrical repeat patterns on Procreate. This class is designed
to guide you through the exciting world of
digital pattern creation, where you will learn to craft stunning symmetrical
designs using Procreate. One of the most powerful and
intuitive digital art tools available on the iPad. Consider this class
as your getaway to the vibrant and dynamic world of surface pattern design where creativity meets functionality. Hi, I'm a Comsen. I'm an illustrator and surface pattern designer based in India. I love illustrating
with Procreate for most of my surface
pattern design projects, and I have used those designs
on multiple products, such as chbooks, notebooks, rugs, calendars,
throws, and so on. Touhut this class,
you will explore the fundamentals of symmetry
and pattern design. Gaining a comprehensive
understanding of all the tools required to create a seamless
repeating pattern. We'll start with a
walkthrough of procreate, getting familiar with
its interface tools and features that are essential
for pattern creation. Step by Step, we'll create a
simple symmetrical pattern, focusing on the use
of symmetry guides, layers, and custom
action templates. Finally, you will learn how
to perfect your pattern. Ensure it repeats seamlessly and export it for various uses, be it for print, digital media, or other creative projects. Whether you are an aspiring
surface pattern designer, a digital artist looking
to expand your skills, or simply someone who loves
to create beautiful art. This class is tailored for you. So grab your iPad, fire a procreate, and
let's get started.
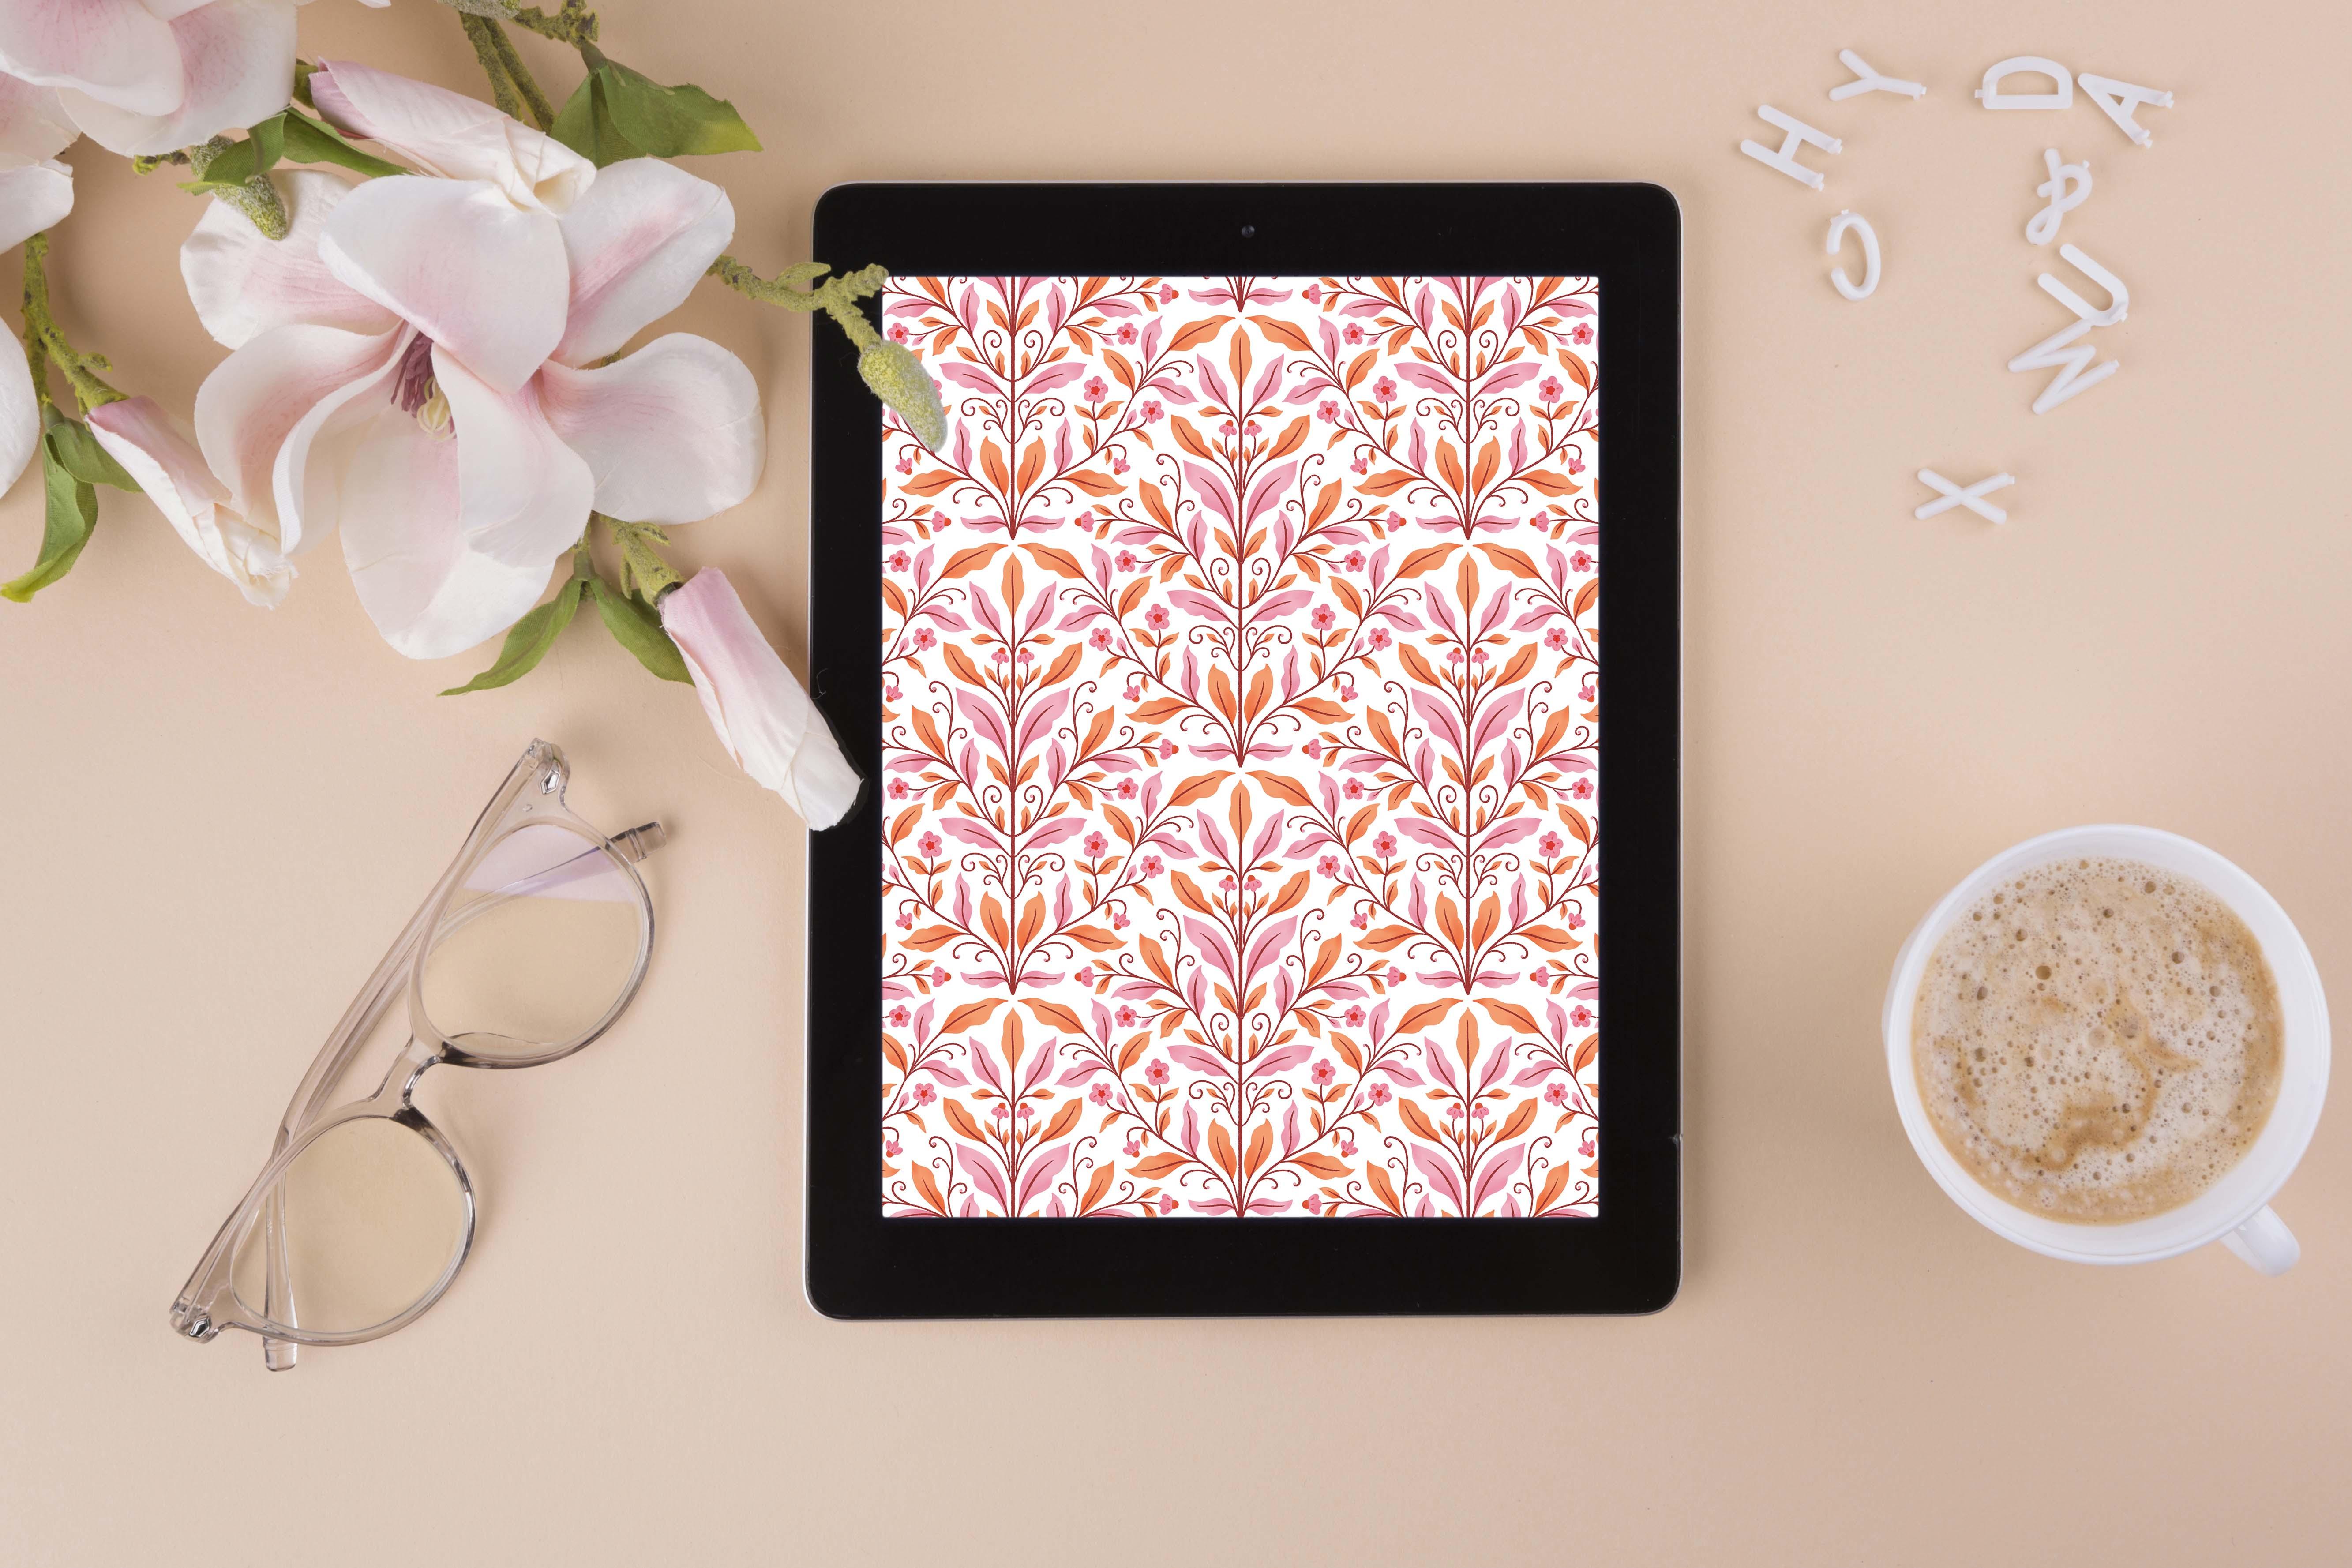
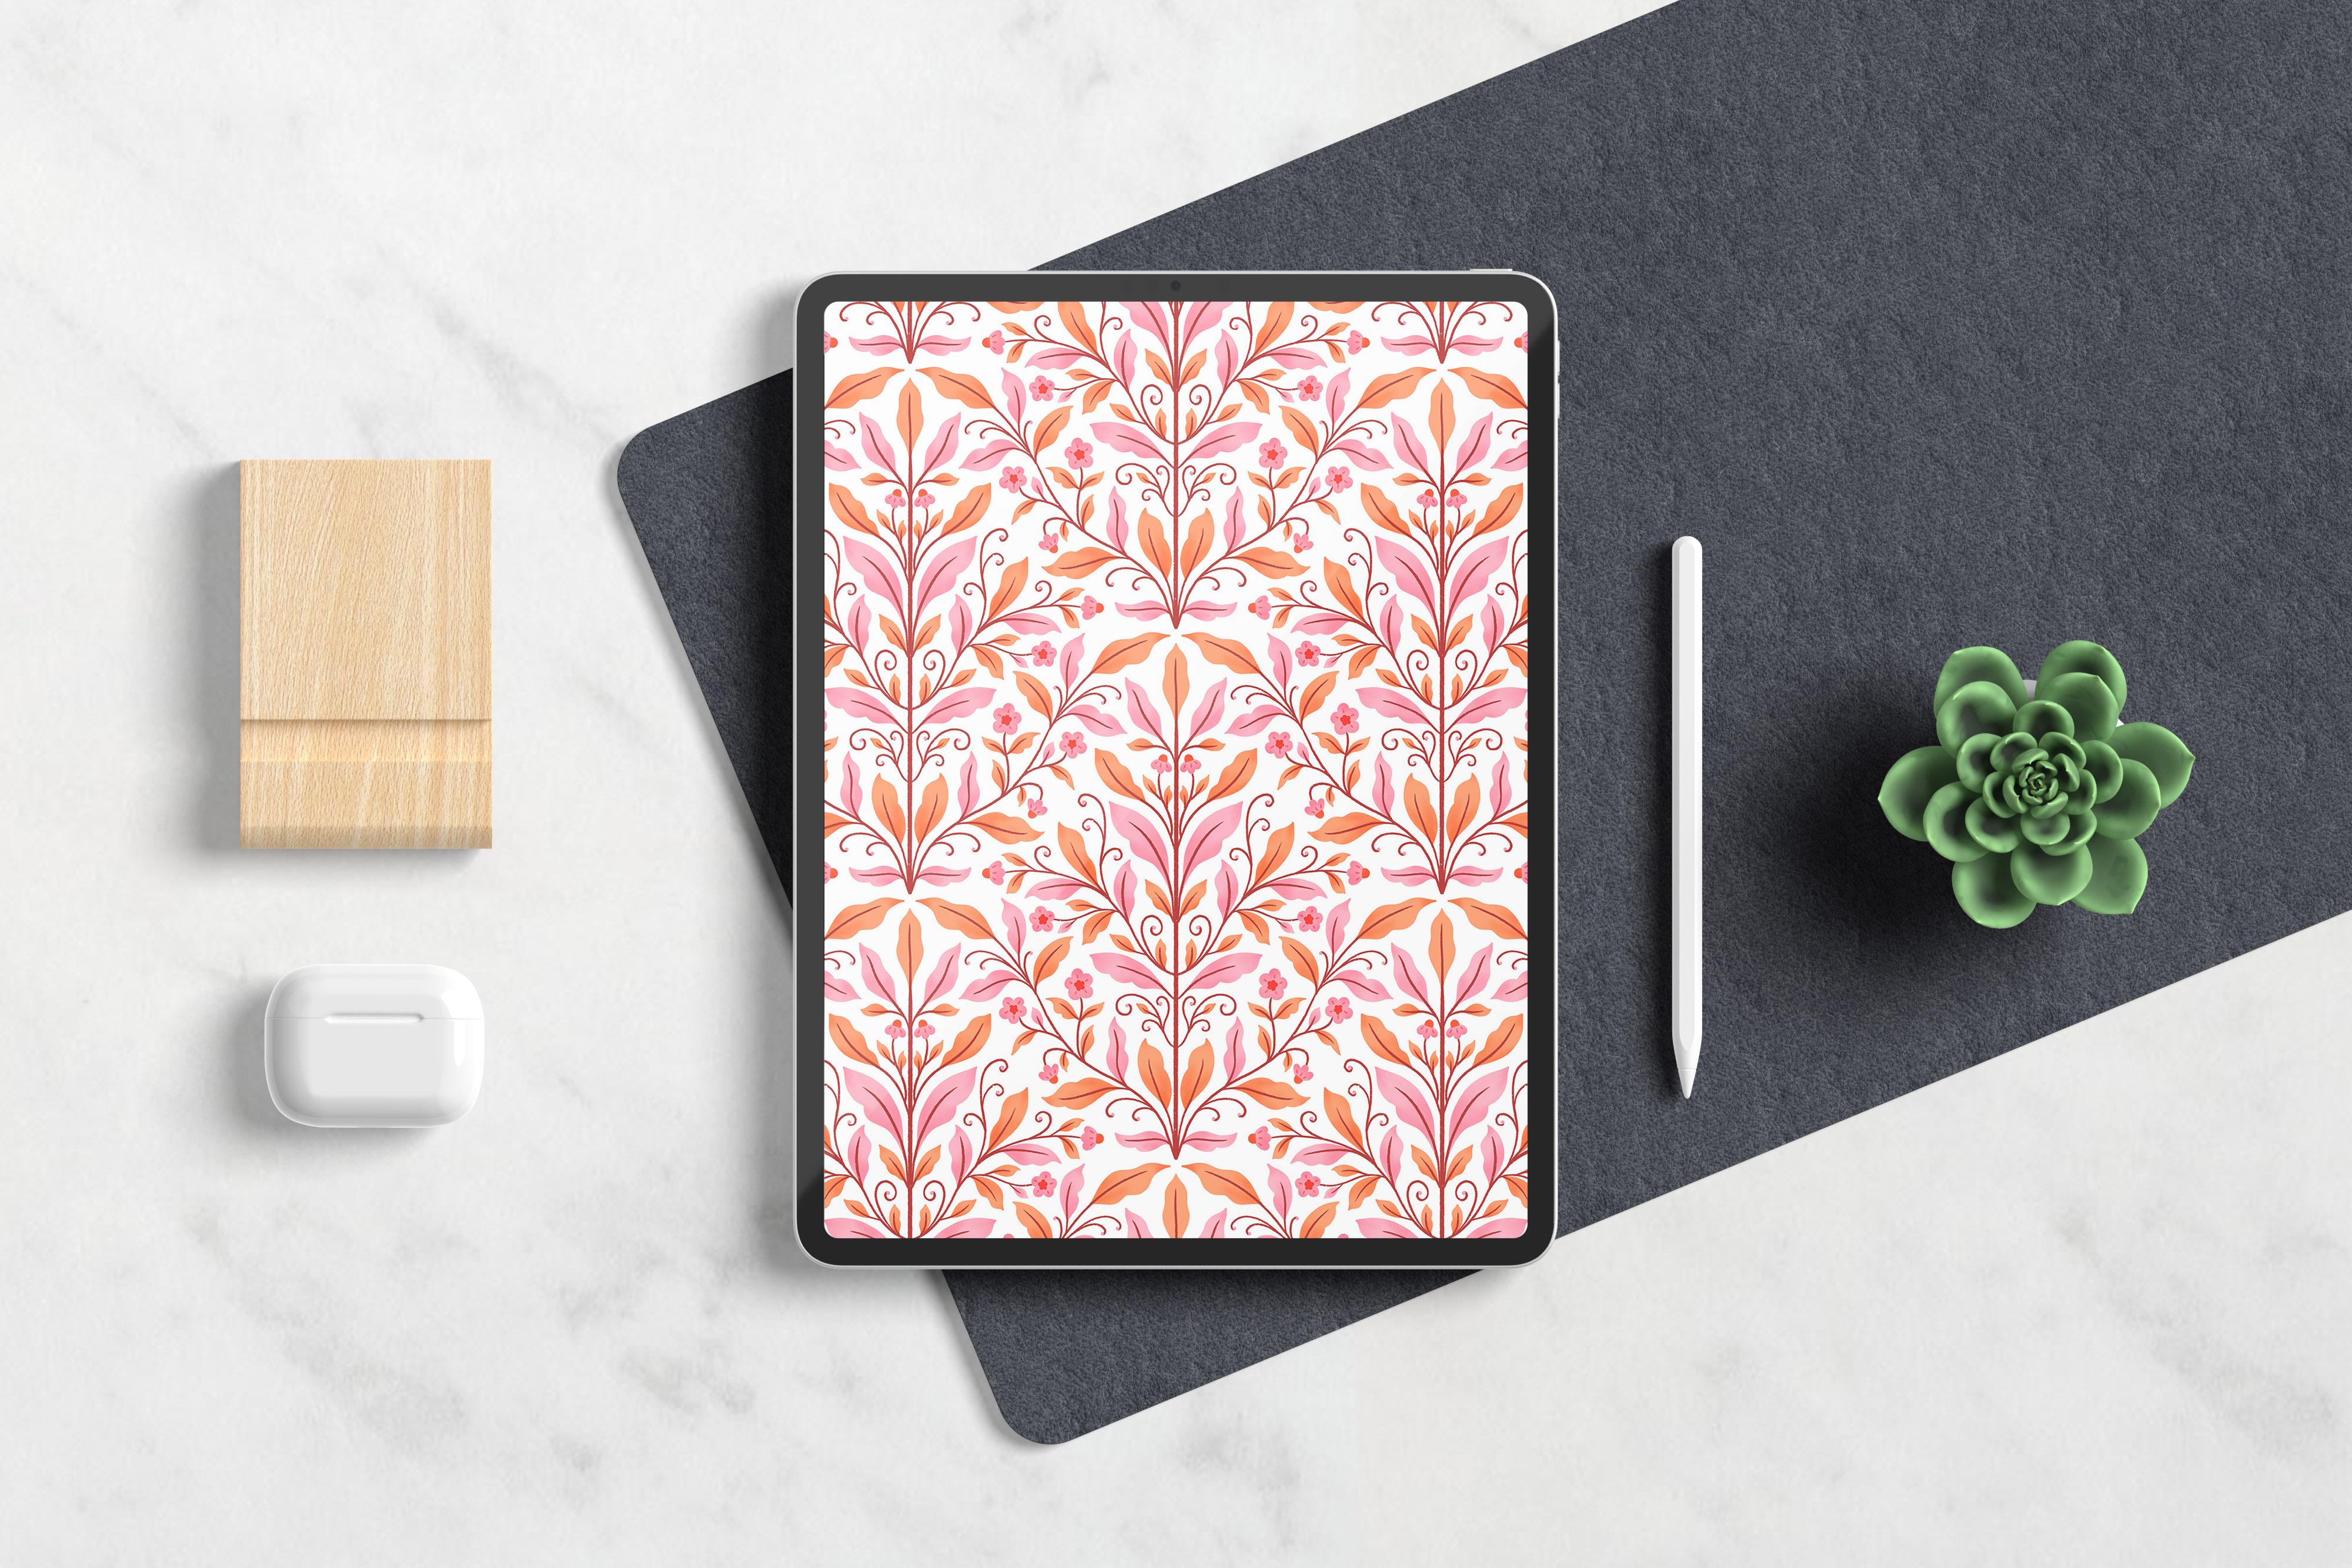
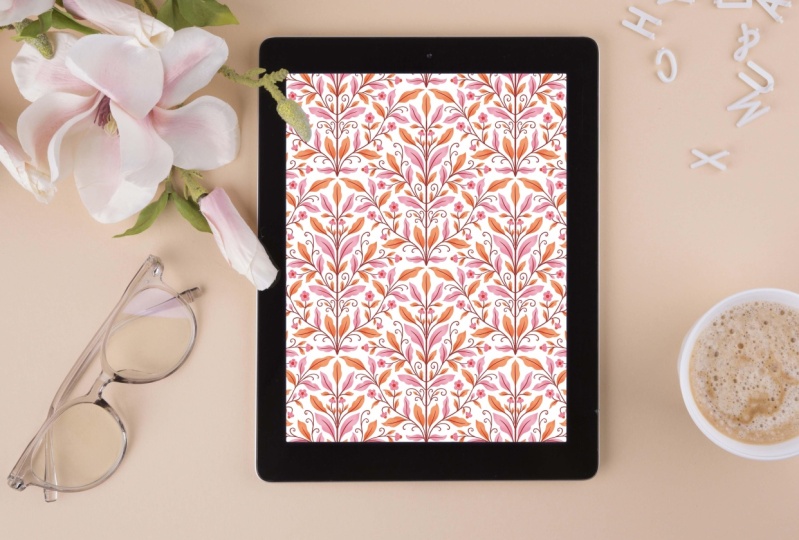
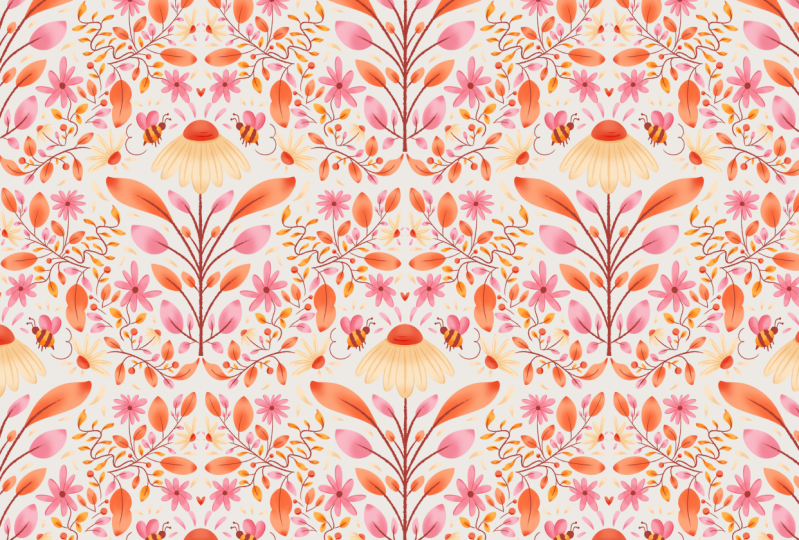
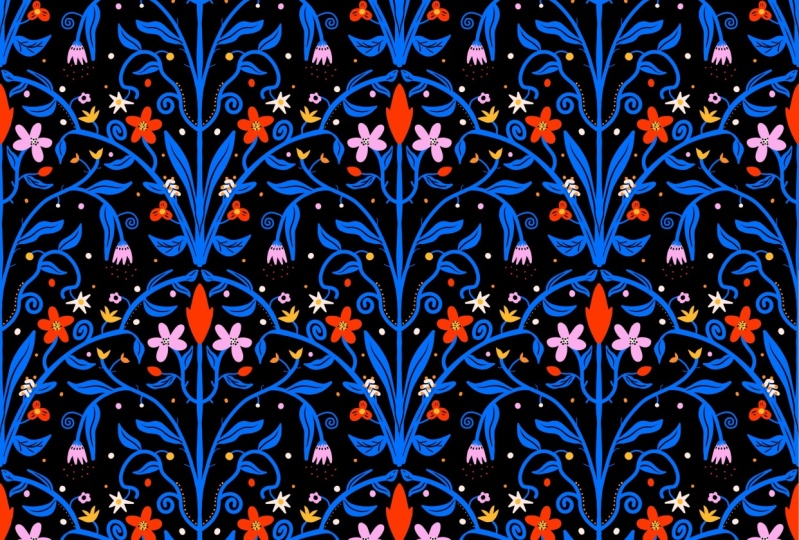
2. Class Project: Subclass project, we will
be creating a beautiful, full drop seamless repeating
pattern using Procreate. All the resources that you
need for this class can be found under the projects
and resources section. I have also shared a Pinterest
board where you can find tons of inspiration to get started with your pattern
designing journey. Make sure to download all the resources before you
get started with the class. I'll see you in the next class.
3. Materials: The supply list is very
simple for this class. All you need is an iPad
that is compatible with a Procreate app and Apple pencil or any
styles of your choice. I'll be using iPad
Pro 2017 version and first generation
Apple Pencil. That's it. I'll see
you in the next class.
4. Canvas Setup: Once we are inside
the Procreate app, our next step is to
create a Canvas. On your Procreate app, click the plus symbol that you see on the top right corner. Next, click on the
new Canvas icon. This is where you will
enter your dimensions. We are going to keep our
Canvas square shape, so I will be entering the dimensions 3,000
pixel by 3,000 pixel. Click on it and just
enter 3,000 pixel. And 3,000 pixel. Again. Now, make sure that
the DPI is set on 300. If you're planning to create a pattern for the purpose
of printing it later on, then the DPI should
definitely be 300 or even more than 300. But if you're only
planning to create a pattern for the sake
of digital media, say for Internet or maybe putting it on any other
social media platform, then 150 DPI is
more than enough. To change the DPI, you can again click on it. And enter it to the
number you want. So I'm going to retain 300 DPI, and the maximum layers for me is 55 and I set the width and
height to 3,000 pixels. Now, this maximum layers is something that
procreate sets for you. You cannot change this, and this completely depends upon the va size that you have chosen and also the iPad model
that you are using. Since I am using a 2017 model, it allows me to have only
55 layers when I choose my Canvas size to be 3,000
pixel by 3,000 pixel. If you're using a
higher end procreate, maybe a 2021 or a
higher end version, then it might allow you to
have more number of layers. So once we have entered
our Canvas information, next is to click on
the color profile. So once you click on
the color profile, you can see that it shows
you either RGB or CMYK. For the purpose of this class, I am going to be choosing
display P three. Though it is an RGB profile, it works perfectly fine
for print as well. You can also choose
from the CMYK profile. But I personally feel that the CM YK profile on
Procreate is quite dull. I mean, the colors
look quite dull. So for that very reason, I'm going to go back
into the RGB profile and make sure that it
is on display P three. You can also go into
your time labs settings and change the
resolution accordingly, and if you want to later on show your Taps video or share your
Taps video on social media. You can do that and to
change the settings, you can just click on the T lab settings and
change it accordingly. Finally, you have
Canvas properties. I'm not going to do anything or I'm not going to change
anything over here. I'm going to keep it as it is. Once you have entered your
dimensions, your DPI, and then selected
your color profile, just click on Create. And now you can see that the
canvas has been created. I'll see you in the next class.
5. Custom Action Template - Full Drop: 00 Why do we need a
custom action template? A custom action template
is a great tool for eliminating any manual error that might occur
due to snapping. It is also a great solution
for the layer limit problem. Once you have created your
custom action template, you don't have to
duplicate your layers multiple times and drag
them to the corners. This saves a lot of time
and speeds up the process. I have already added a custom action template file to the projects and
resources section, but I also want to
show you how you can create your own
custom action template. So let's get started. The first step is to click
on this wrench tool. And then click on the Canvas and make sure that the
drawing guide is turned on. Once you turn on
the drawing guide, click on the edit drawing guide, and go to your grid
size over here and just make sure
that it's at Max. Then just click on Done. The next step is to click on the layers panel and make sure that the Layer
one is highlighted. Next, go inside your color wheel and choose any color
of your choice. And just drag it and drop it. Now go back into your
layers panel and make sure that it has filled
on the layer one and then click on
this cursor tool or the transformation tool and make sure that the
snapping is turned on, and so is the magnetics and make sure that the distance and
velocity is at the max. Now, make sure to drag and snap your color square exactly at the center
of the canvas. So when I just drag it back, you can see that the yellow
lines are highlighted. This means that it is getting snapped exactly at
the first quadrant. So just leave it over there. Now, also make sure
that once you have turned on the transformation
tool or the move tool, it is at uniform. Okay. Now go back into
your layers panel. And make sure to click on the thumbnail of
this particular layer. And just click on Select. Now, once you do
this, you see that the select tool is highlighted, and you have a
couple of options. Make sure that it
is on free hand and not on rectangle
ellipse or automatic. Once you have turned
on the free hand, the next step is to
click on Save and load. Click on the Save and load icon and just hit the plus icon. Now it says selection one. Now, go back to your M tool. And move your square to
the second quadrant. Make sure it snaps perfectly, and then go back
into your layers and click on the thumb nail of that particular layer
and click Select again. Now go back to the
safe and load icon and click the plus icon. Now you can see it
says selection two. Come back to your
move tool and drag it to the lower quadrant and
go back into your layers. Click on select. Seven lower and plus. Now you can see it
says selection three. Now, again drag it to
the fourth quadrant. Go back to your layers, click on sell it. Click on Seven load and
then hit the plus icon. Now you have selection four. We are basically creating a template in the
clockwise direction. That's it. Now you have
your custom template ready. You can del this particular
layer or clear it, and then go back
into your gallery. And just save this as
custom action template. Once you have your custom
action template ready, the next step is to
plan your motive. From now onwards, anything
that you are drawing, make sure that you
are drawing on the custom action
template Canvas file. That's it. I'll see
you in the next.
6. Motif Layout: Now that we have our custom
action template ready, the next step is to
plan our motive. Now, on your app, make sure to click on the custom action template file that we created previously. If you haven't created, you
can also download the one that I have uploaded to the project and
resources section. Just click on that file. And now click on the Branch two. And again, make sure that your drawing guide is turned on and then click on
Edit Drawing Guide. And this time,
click on Symmetry. And under Options, click
on it and make sure it's at vertical and Assisted
Drawing is turned on. Then hit done. Now onto your layers
panel, just click on it, and you can see that
the layer one is highlighted and it has the term assisted
highlighted as well. Now, this means that the
symmetrical guideline that we had applied is now active
on this particular layer. Let's just test it. Click on the press library tool and choose any pencil
that you like. I'm going to go ahead
with a sketching pencil and select black. I'm just going to scribble. Now, you see that
anything that I create on any of the sides is just going to get mirrored on the other side. This means you don't
have to work too much. You can just work on one side, and it's going to
automatically get repeated on the other side or
mirrored on the other side. So I'm just going to go
ahead and clear this. Now, one more thing to
remember is usually the very first layer has the drawing assist
turned on by default. But in case, if you
create a new layer, say you hit the plus
button over here, you see that the assisted
is not highlighted anymore. So anytime you
create a new layer, you have to make sure
that you manually go into the layer settings and
turn on the drawing assist. So you can do this by
clicking on the thumbnail. And just click on
the drawing assist. Now you can see that the
term assisted has appeared. Anytime you create a new layer, you have to manually go into the layer settings and turn
on the drawing assist. Now that we have the
drawing assisted turned on. The next step is to
create a base template. Now, this base template decides the overall shape of your pattern that is
your pattern motif, just to give you an idea. I'm going to go into
the layers panel and drag and drop the
black color into it. I'm also going to go into
the blending mode and make sure that the opacity
is turned down by 25 or 24 percentage. I'm going to go ahead with the move tool and
drag it all the way down until it snaps at
the middle of the Canvas. So you can see that the yellow guidelines
are highlighted. Now go back into
your layers panel and just click on
that plus simple. And now make sure that the
drawing assist is turned on. Now, go into your brush and select any brush of your choice. Again, I'm using
the six P pencil. Going to increase the
size a little bit. And this time, I'm going to start by just creating
a straight line. Anything I draw on this particular
quadrant is going to get mirrored on the
other quadrant. I'm just going to start my line. Little above to the point
where the canvas ends. At the same time, I'm
also going to stop it at the center point. I'm not going to drag it
outside of the canvas, I'm just going to keep
it within the canvas. Just draw a straight line doesn't have to be
straight when you draw, but to make it straight, you can just hold it and
even tap on the screen, and you can see that you have
a perfect straight line. You want to extend, I
can extend a little bit, and I'm going to leave
it at that point. So my idea is to create a
diamond shaped template. So I'm just going to go into my layers panel again and now you can hide the black
color layer if you want to. I'm just going to
keep it turned on. And in between these two layers, I'm going to create a new layer. So to do that, I'm going
to click on Layer one, and then click on the plus icon. So what happens is, it
creates a new layer just above the layer that
we have clicked previously. And now I'm just
going to go ahead and fill this layer with
any light color. So you can choose any
pastel shade of any color, and again, dragon drop it
into that particular layer. So you already have
your black layer. You can turn it
off at this point. And now you have created a
new layer and you have just added a pastel shade of any color to that
particular layer. Now the next step is to
choose the layer and rename it as place card. Now, the reason that
we are doing this, that is we are having
this particular layer is, I'm just going to
turn this off now, and I'm going to come back to the layer where we have drawn. And if I just click, you see that only the area where I have drawn the
lines is highlighted. Now, if I just try to drag it and create a diamond
shaped template, it's going to create
a lot of error, which means manually,
I'm going to get a lot of errors while snapping. Okay, so it's not going
to let me snap properly. So to avoid that, we are
creating a place cut. Now, when I select, I'll turn on the place cart, select
multiple layers, click on any one layer that you want to select and just swipe towards your right
and you see it just selects the
other layer as well. Now that we have both
the layers selected, just click on group. Okay. Now the next thing is, I'm just going to duplicate this group that we
have created twice, such a track towards your
left and click on duplicate. Again drag towards your left
and click on duplicate. Now we have two duplicated
versions of the same group. Now, select both these groups, click your arrow
tool and drag it to the top and stop at the point where it
snaps to the center. Selected. Go back into
your layers panel. Click any one of these groups and move one of
these groups towards your left and the other
one towards your right. This doesn't have to
properly meet or connect. This is just an outline for
your initial motive sketch. It doesn't have to be perfect, but if you want it, you
can extend this line. Once you extend this line, it'll get connected
here as well. And yes, you'll
not see that gap. Now you can see that we have
our diamond template ready. Once you have that,
you can go back into your layers panel and you
can merge it altogether. Just pinch both of
these together. And you can also pinch the original and make it
all as a single layer. But I'm just going to keep
the original as it is. In case if there is any error or anything and I have
to change anything, then I have to go back into the original layer
and make the changes. So now that we have
our diamond template, I'm just going to
create a duplicate of the original
just duplicate it. And now you can
pinch it together. So now you can see that you have it all on one single layer. Right? So I also want to see how this template looks when it is put into
a repeat pattern. Okay. So just duplicate
this layer three times. Now, we are not using the
custom action template yet. We are doing it with
the traditional method. So we're just going to click on all of these and
select all the layers. No click on the arrow tool. And just click on this blue
dot that you see here and enter enter half of
your Canvas dimension. And you can close that. I'm also going to go into my layers panel and turn off this original.
We don't need that. So we have our duplicated
layers over here, and we have reduced the size to the half of our Canvas size, and now click on the arrow
tool and click on any one of these layers and just
drag it to the corners. Sorry, not to the corners,
to the quadrants. Sometimes it's usually hard to drag it the diagonal fashion. If you find it really hard, click on the layer,
click on the move tool, and move it, move it towards your right and then move it in the
downward direction. And now you can see that
you have a repeat tile. Now, if you are going
to sketch your motive, then it's going to get repeated in this
particular shape. Okay. So this is how you can create your base template
for the motive. Okay? You can also
change the shape. Now, what we have
created here is a very simple diamond shape. But for a final project, I'm going to slightly change the shape of this
particular template, right? That's it. I'll see
you in the next class.
7. Sketching: Once you have
figured out the kind of pattern based
template that you want. The next step is to
start sketching it. So go to your branch tool and make sure that the
drawing guide is turned on, and it is set to symmetry. Now go to your layers and also make sure that the
asistate is turned on. A very first step is to drag the color black into our layer. And since it's already
at 25% opacity, it's not black
rather, it's gray. Now go back to your move
tool and just move it. Tone and stop at the center. Now, create a new
layer above it. Choose a pencil of your choice. Now we can start sketching. Now also make sure that the drawing assist is
manually turned on. Now this time instead of
keeping it very simple, I'm just going to add slight
flaw to our base template. You can choose any
shape you like. Okay. I'm happy with that. The next step is to turn
off your black color layer. Just click on it and create
a new layer above it and create your
place card layer. Group it and now create two
copies of that new group, such as select both these groups and move it to the top quadrant. Make sure it snaps
at the center. You can also turn this
original layer off for now and select any
one of these groups and move it left and the
other one towards your right. Can make sure that
it snaps perfectly. And now you can turn
on the new group. My template is going to look
something of this sort. This is going to be the
base shape for my motive. Don't worry if you have these unfilled gaps,
that's totally okay, because we are
anyways going to fill those gaps with
different elements. It's now that I'm happy with it. I can merge all these layers, but before I merge them, I just want to turn off the place card layer from
all of these groups, and now you can just
merge them together. Now go to your
blending mode settings and reduce the opacity. If you want to lock this also, you can lock this layer
so that you don't accidentally sketch
on top of that layer. Now I'm also going
to go ahead and turn on this particular layer. Now I'm going to
create a new layer above the sketch layer, manually turn on
the drawing assist. Choose black, and
choose your pencil. Okay. So the idea is to
draw different elements. I'm going to keep the
elements very simple. It's going to be just a couple of leaves and floral elements. That's it. Okay? You can change these elements
according to your style, or you can follow along with me. Okay. Now, before
we start sketching, anything that I draw on
the lower quadrant, right? I'm going to keep it contained
within this black box. So my sketch that is my
element is not going to go, or my elements are
not going to go above that box or above
that, horizontal line. Okay. If you want to reduce the opacity of
the black color layer, you can do that as well,
and you can lock it in case you don't want to
accidentally on top of that. So once we're done with that, let's start with the sketch. Again, make sure that the assisted drawing is
manually turned on, and you can start sketching on either one of
these quadrants. So, like I said,
I'm going to keep my elements within
that black box. I'm also not going to go
very close to the edge. Oh Oh Oh. Now, before we start sketching the center
portion of our motive. We have to make sure that we
are not creating anything in the center that would
end up overlapping with the elements that could fall on either side of
that particular mot. So to be sure or
make sure that we are not making any
sort of such mistakes. I'm going to quickly go ahead
and create a p layer below this sketch that we have created and fill that with
a light color. You can turn off the
other two layers. Now we're going to
repeat the same. Select both the layers, click on group, create
or duplicate it twice. Now select both of these groups and take it to the top and make sure that it
snaps right at the center. Now you can choose any
one of these groups and drag it to the left
or right accordingly. Now we have an idea as to how much space we have in
the middle so that we can draw or we can sketch the center part
accordingly so that it doesn't overlap with these
two elements on either side. You can merge these layers
together if you want to, but before doing that, again, I'm going to turn off or you can remove the
place card layer. And I'm going to
retain the original, so I'm not going
to merge that one. So only the top two groups, I'm going to merge. Just pinch, and you can
merge both of these. So now they are on
a single layer. Okay. Now you can come back
to your original sketch. You can tell it for now, the place card layer, and you can start working with the
center part of the motive. When the drawing
assist is turned on, it's really hard to
create a center line. So I'm just going to go ahead, turn off the drawing assist
and draw that center line. Hold and then tap on the screen, and then just leave it. Now you can go back to your layers and turn
on the drawing assist. And again, you're going
to just draw on one side, and it's going to repeat or
mirror on the other side. Okay. So I'm done
with my final sketch. That's the motive sketch, and I do feel like there
are certain tweaks that I can still work on and, you know, add to this motive. But I stop here for now. And once you're hay
with your sketch, the next step is to
start coloring it. I'll see you in the next class.
8. Colouring: Now that we have a sketch ready, the next step is to
start coloring it. Go to your layers panel. And now you can uncheck
this particular layer. We don't need it anymore. So we're just going to
color this part alone. So you can flatten it
or you can keep it as it is if you want to make any further changes to the sketch. So I'm just going to go ahead
and create a new layer, and I'm also going to reduce
the opacity of the etch. I'm just going to
remove this salt, and you can rename this azo t. You can also remove
these two layers as well. So we have sketch,
and now we have the new layer on which we
are going to start coloring. Before I start coloring, it's high time that you
import the color palette from the project and
resources section and bring it into
your Procreate app. So to do that, just go into your color wheel and
click on palettes, and then click on the
plus symbol and new file. Then go into your rests. And now you can just click
on that swatch file, and you can see that it is
imported into your procreate. You can feel free to use the color palette that
you have downloaded, or you can also choose
your own colors. Next, I'll be using the
mono line brush from the calligraphy section
for my color filling. So I'm just going to
choose the orange here and I'm just going to show
you how the brush works. So it's a nice line work brush, and You can drag and drop
colors into it easily, and it fills really well. So this is the brush that
I'll be using for coloring. So go into your layers
again and this time, make sure to turn on
the drawing assist. So we have I think four
different kind of elements here. So we have the leaves, and then we have the flowers, and even in the flowers, you have two
different varieties. One is like a daisy, and the other one is
a very simple flub. And you also see these
swashes. In certain areas. So these are the
elements that we have and We're going to use a different color for
each of these elements. But for the leaves,
though there are just one type of leaf
element going on here, we're going to use
two different colors because there is a lot of
leaves in our composition, and having them all in the same color can
look very monotonous. So for that reason, we're going to use different colors,
not different colors, two different colors,
and we're going to color them in an
alternative fashion. Okay. So the very
first color that I'm choosing from
the color palette is this nice light orange or
this flesh tint skin color. And yeah, so make sure that the assister is
turned on and choose your monoline brush or any brush that can fill
in nice solid color. And we can start color. I'm going to start with the
leaf. That's on the top. When I come close to this line, I feel like it's
not working well. So let's reduce the
brish size a little. I'm going to turn off
the drawing assist. And now, turn it back on. Drag and drop the color. So first, I'm just
going to go and color all the orange color leaves. I'm reducing the
opacity furthermore. I'm done with this
particular color. Next, go into a layers panel. Again, create a new layer, turn on the drawing assist, and this time I'm going to
select this light pink shade. Uh So I'm done with the pink color, but I feel like there's a
lot of pink in this area. So I'm going to make these
two leaves the orange colors. I'm going to go ahead
into the color palette, select the orange. That's the light orange
color that we previously, go back into that
particular layer, and just color it in. I also missed coloring these
leaves in pink colors. I'm going to go ahead
into my pink color layer. Choose the pink
color, or you can also click and
select that color. Yeah. So now, again, go into your layers
panel, click a new layer. And this time, I'm going to go ahead with this nice dark pink. And I'm going to color
in these flowers. Ma sure to turn on
the drawing assist. So we're done with
that flower next, create a new layer. Turn on the drawing assist, and I want to chose the same light orange and
color in these petals. Now I'm going to
create a new layer and choose the yellow color. Turn on the drawing assist. So the one last element that is left out are these swashes. So we are going to use this
maroon color over here and create a new layer and
turn on the drawing assist. But this time, instead of
using the mono line brush, I'm going to go into the inking and use
the dry ink brush. So first, I'm going to turn
on the drawing assist, and I'm going to draw
the vertical line. Crease the brush size. Hold and leave it. Use your arrow
tool and make sure that it is snapping
at the center. Now, go back to your layer and turn on the drawing assist. And you can start drawing the veins of
the leaves as well. So we are done with that color. Next, I'm going to go
into my layers panel, and I'm going to drag
that layer that we created those swashes on, and I'm going to
drag it all the way, click and drag it
above the leaf layer, but below the flower
layer so that now lines do not appear
on top of the flowers. Right. I'm also going to go ahead and turn on
the draw sorry, turn off the drawing assist
on that particular layer. And just extend this
line a little bit. And turn it back on. So now I can turn off
the sketch layer. I would not need it anymore. So this is how it looks. Now, I do feel like there is
more that you can do with this particular motive in terms of coloring or adding
details and stuff, or even adding texture. So I'm going to go ahead
into my layers panel and create a new
layer at the top. And Drag this over here, like below the sorry, above the pink flower that
we had created earlier. And I'm going to go
ahead into the blending more and choose multiply. And I'm going to just click
and hold on the same color, or you can choose it
also from the palette. And using the same
dry ink brush. I am going to go ahead and also turn on
the drawing assist. And then I'm going to go ahead. We will start from the side, and I'm just going to draw the center portion
of those flowers. And you can see this
is a different pink. But when we chose the color, it was the one from
the palette, right? But when we use
the multiply mode, we sort of get slightly darker pink from the one that we
have on selected here. And this is a nice way to add more color
into your palette, but you don't have to painstakingly choose that particular color
from the color. You can just add the
multiply mode and choose the same color that is the base color and create
a different color. I'm going to reduce
the brush size. I'm still on my dry ink brush. Now I'm going to go into my
layers panel and click on this daisy flower
that we had created earlier and create
a layer above it. Turn on the drawing ***. Again, go into the multiply. And choose the base color
that is that light orange, dry ink brush selected, and you can add the detail
on these flowers as well. So we're almost done
with the coloring part. But I do feel like
something is still missing. So what I'm going to do is, I'm going to go ahead and add texture so that the composition that is the motive
looks a little bit dish and also has depth to it. So to do that, I'm going
to go into my layer panel. And say I want to add texture to the orange leaf leaf layer. So I'm going to click
on that and create a layer above it and
go into the layer setting and click on clipping mask and also make sure to change the
blending mode to multiply. Once you have done that,
close your layers panel, go to your brush and
under materials, I'm going to choose
the noise brush. So go back to your layer
and make sure that it's still on the one that we had created with
a clipping mask on. Again, turn on the drawing
assist as well for that layer. Once you've done
that, just zoom in and you can start coloring
at the lower partner. You can see it creates
a gradient effect into your leaf and once you are
done with all the leaves, you'll see how much of a
difference it creates. You can do this the bottom or even slightly at the
top, the tip of the leaf. But don't do it.
I wouldn't prefer doing it on the entire
part of the leaf, just the lower and
maybe the tip. Combine with all
the orange leaves. Next, repeat the same for
the pink ones as well. Click on that layer, create
a new layer above it. Turn on the clipping mask, turn on the drawing assist, get into the blending ward, and turn it to multiply. And now you can choose the base color that is
the light pink shade. Make sure that you are
on the noise brush and you can start
shading the leaf. Oh. We're also going to do the same for the flowers. Click on the flower,
that is the pink one, and we're going to create a layer below the
base color layer. Turn on the clipping mask, turn on the drawing assist, change it to multiply
mode, and can start. Click on the base color and just going to color the edges. Repeat the same for
the under flower. That's it. We have our
final colored motive. So you can see how much of
a depth it adds once you add that nice texture
to the elements. Now, this is
completely optional. If you want to, you
can, or else you can just your elements with the base That's it. We're
done with the coloring. The next step is to convert this motive into a
repeating pattern. I'll see you in the next class.
9. Repeat Pattern: Now that we are completed with the coloring part of the motive. The next step is to put this into a seamless
repeating pattern. For this, we're going to use the custom action template
that we created earlier. Since everything that
we have sketched or colored is already on
that template canvas. We're just going to
directly get into the step of creating a full drop
seamless repeating pattern. So now, go into your
layers panel and make sure that you have all
the layers selected. Accept the sketch layer
and put it into a group. Now you can rename this
ase. Final motive. Now, the next step is
to create a place cut. So I'm just going to create another layer below the sketch. Sorry, above the sketch layer. And you can use any light color. So I'm just using a very
subtle yellow color. You can also use
white. Doesn't matter. And now I'm going to drag
this into the group here. Now it's part of the group. Now I'm going to
create a duplicate of this particular
group just once. And I'm going to turn
off the original. Now with the duplicated layer
turned that is highlighted. Go into the select tube. Make sure it's on free hand. Now click on save and load
and click on Selection one. And you can see that the first quadrant is
now sort of selected, and the other areas are sort of highlighted with
diagonal liights. Now, go back to your move tool and click Flip horizontal
and flip vertical. Now you're going to
repeat the same for all the other three quadrants. So we're not creating
multiple copies. We're just creating one
duplicated version of that group, and we're only
working with that. So now go back to
your selection tool. Click on Save and load. Click on Selection two. Now you see this quadrant, this part of the
motive is highlighted. So now, again, click
on the arrow tool. Click on flip horizontal
and flip vertical. We're going to repeat the same for the other two quadrants. Selection save and load, selection three, move tool, flip horizontal flip vertical. Selection tool, save and load, selection four move tool, Flip horizontal, flip vertical. Now, click on the move too. And you see the entire
Canvas is selected. So we're just going to
click on flip vertical. Once you're done with it, you're going to go back
into our layers panel. And this time, I'm just going
to go into my first group, and I'm going to turn off the place card
layer and close it, and I'm going to turn
on my final mode. So now you have a seamlessly
repeating pattern tile. And you have just created
this without creating any multiple copies or
duplicating the layer. All you had to create was just a single duplicated
version of the final mode. And using the custom
action template, we were able to create
this whole repeating tile. Once you're done with it, you can turn off
any other layers that you have in case
if they're turned on, and now just take your
three fingers and swipe down on your Canvas and
click copy all again, swipe down and click paste. So now you can see that
this action that we did earlier has created a image
of whatever is on the Canvas. So now you can turn off
all the other layers, and with just the
image layer turned on, we are going to duplicate
it three times. So click on duplicate
one, again duplicate it. And then now you have four copies of that
particular image. Select all the four. And click on the move tool
or the transformation tool. Now, again, click on
the blue colored dot, and we are going to enter
half of the Canvas size. That is 500 pixel. Now, go back to your layers, choose any one of these images and click
on the arrow tool. Again, make sure that the
snapping is turned on, and it's on uniform and just drag it to each
of the quadrants. So that's it, now you have your seamlessly
repeating pattern, which is also a full drop and created using your
custom action template. Now you can go ahead and
merge all these images. Now, if you want to
see your pattern in a smaller scale, again, duplicate it three times and select it all and repeat the same process
half of your canvas sides. And now drag it. That's it. You very own full drop seamless symmetrical repeat
pattern is all ready. I'll see you in the next class.
10. Final Thoughts: Congratulations on
completing this class and creating your
own repeat pattern. If you enjoy this class, kindly leave a review, and don't forget to
share your project. Feel free to drop your queries under the
discussion section, or just drop a DM on my Instagram
handle the wishing Inc. I'll see you again
in another class.
 Vidya Kumaresan, Illustrator