Transcripts
1. Introduction: Hello and welcome to creating Ogee Repeat Patterns on Procreate. I am glad that you're here.
I'm Vidya Kumaresan. I'm an illustrator and surface pattern designer based in India. I absolutely love creating patterns on Procreate,
and over the years, I have had the joy of seeing my designs come to
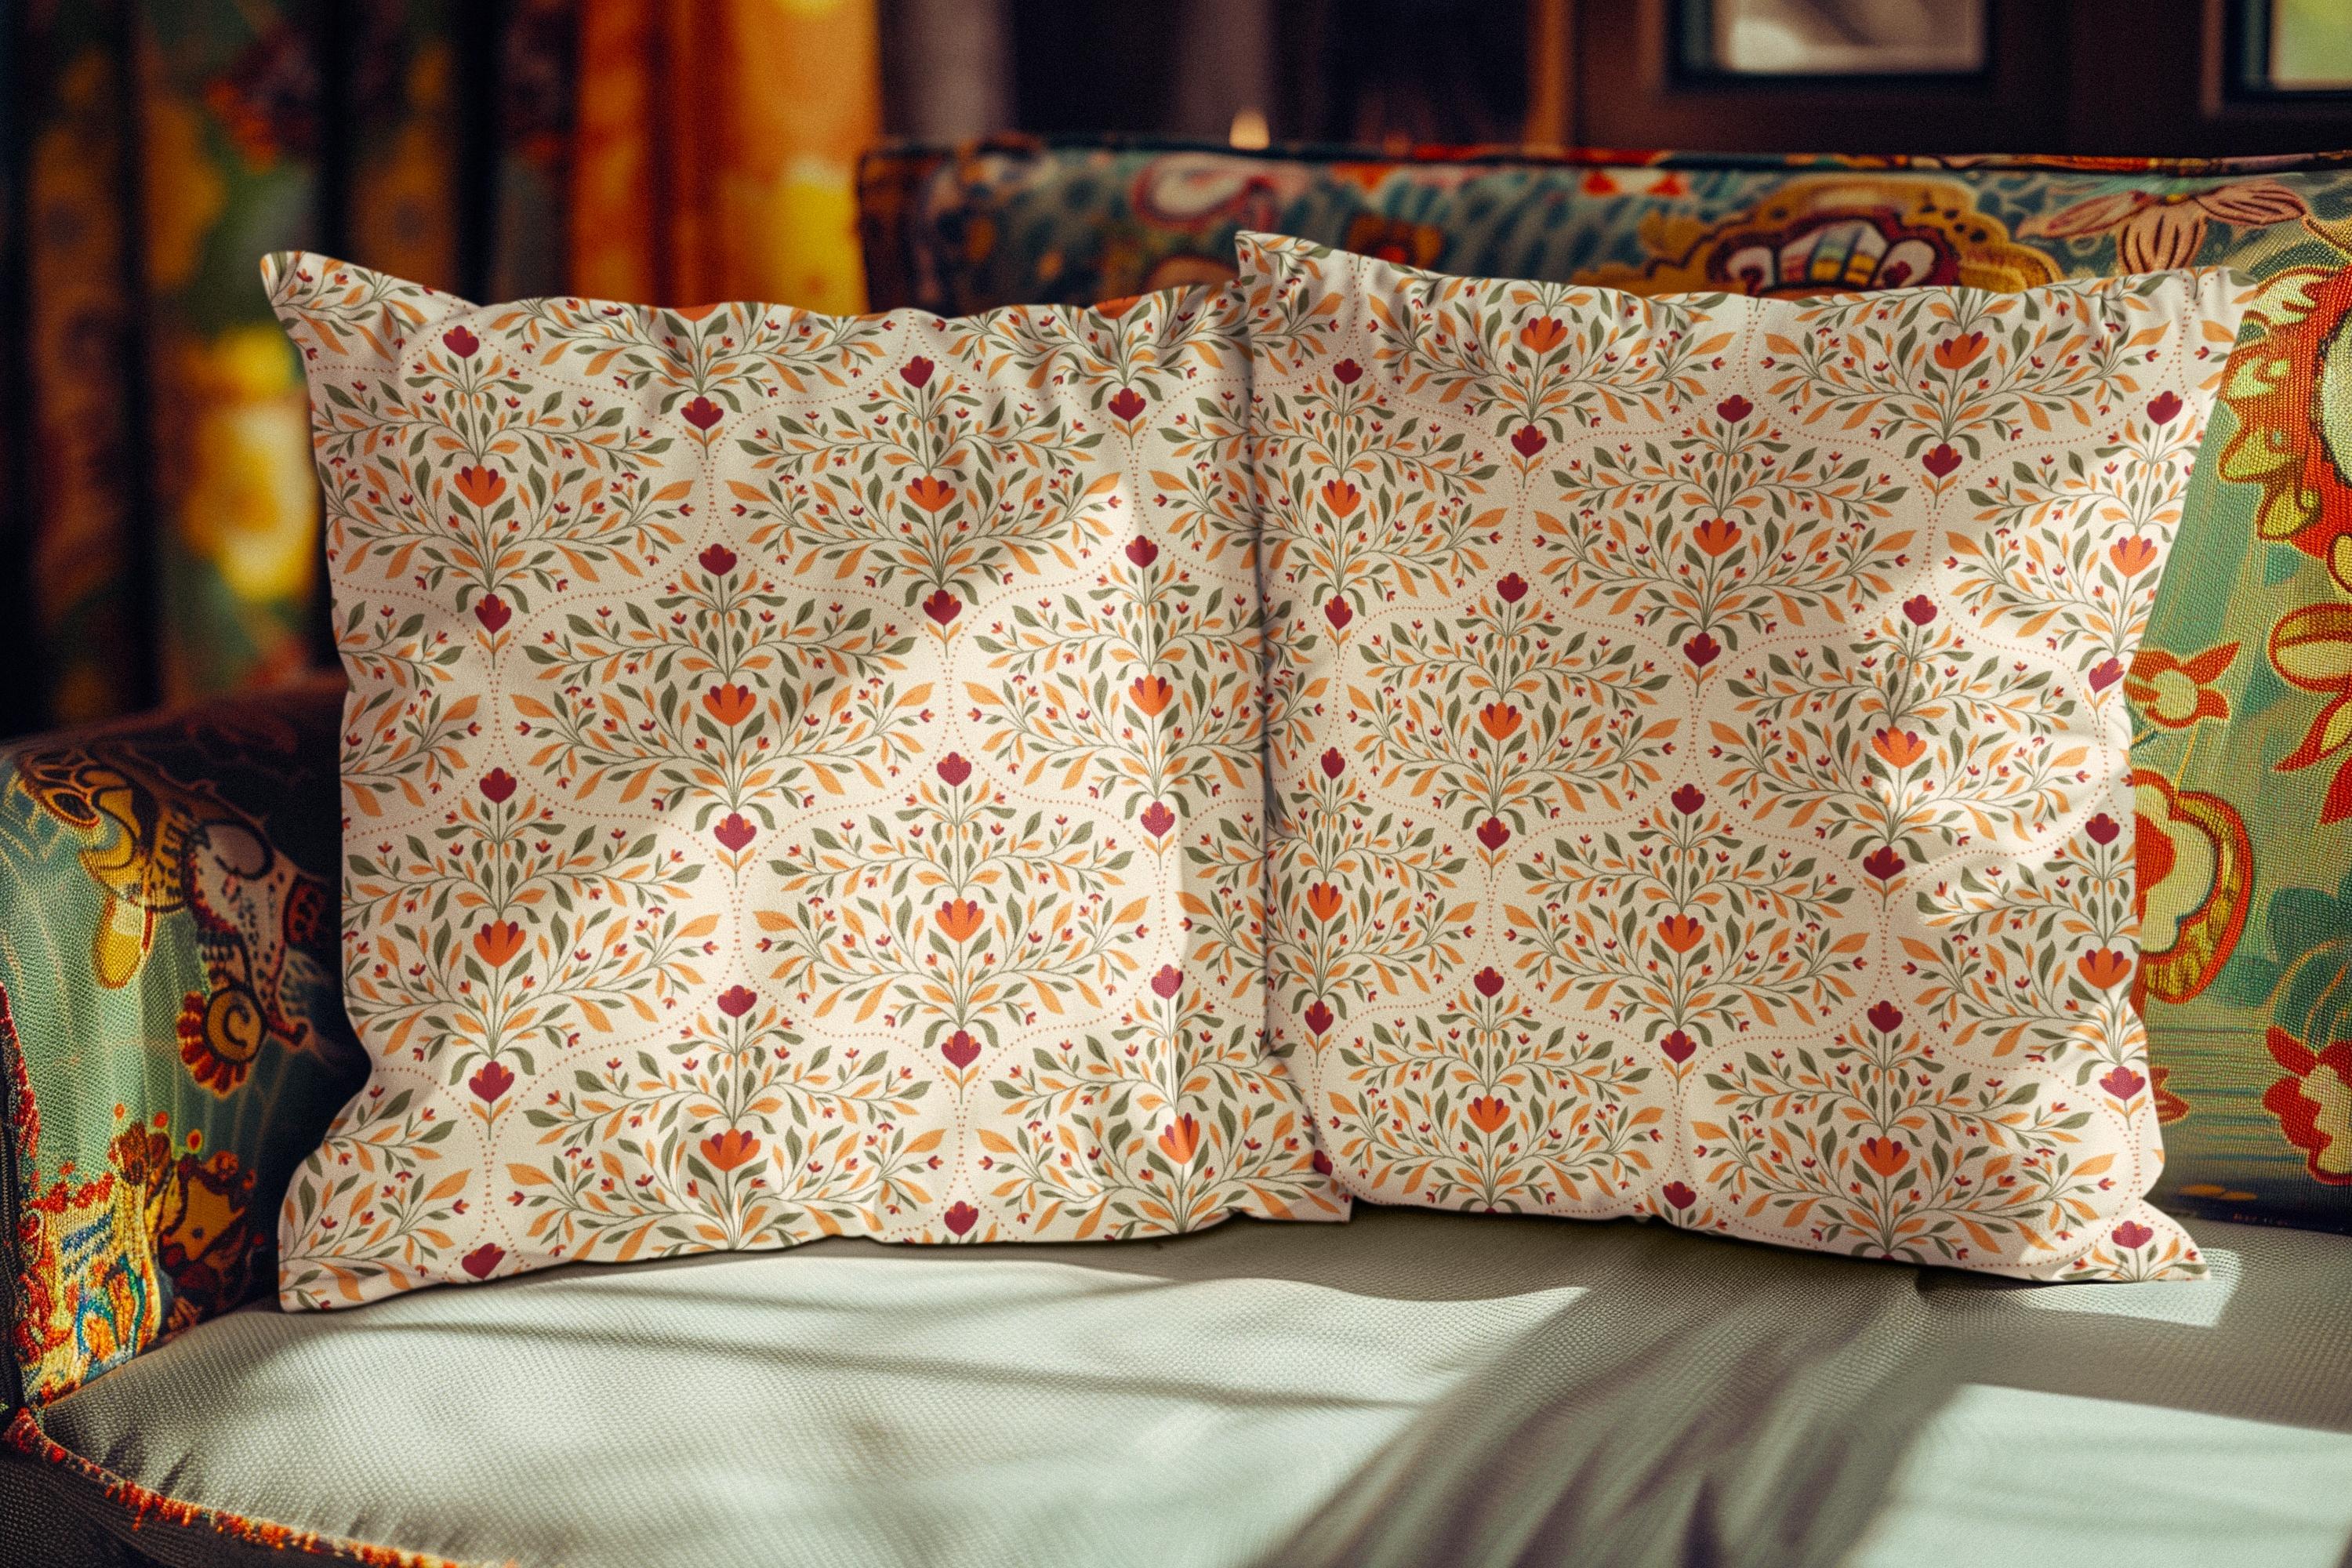
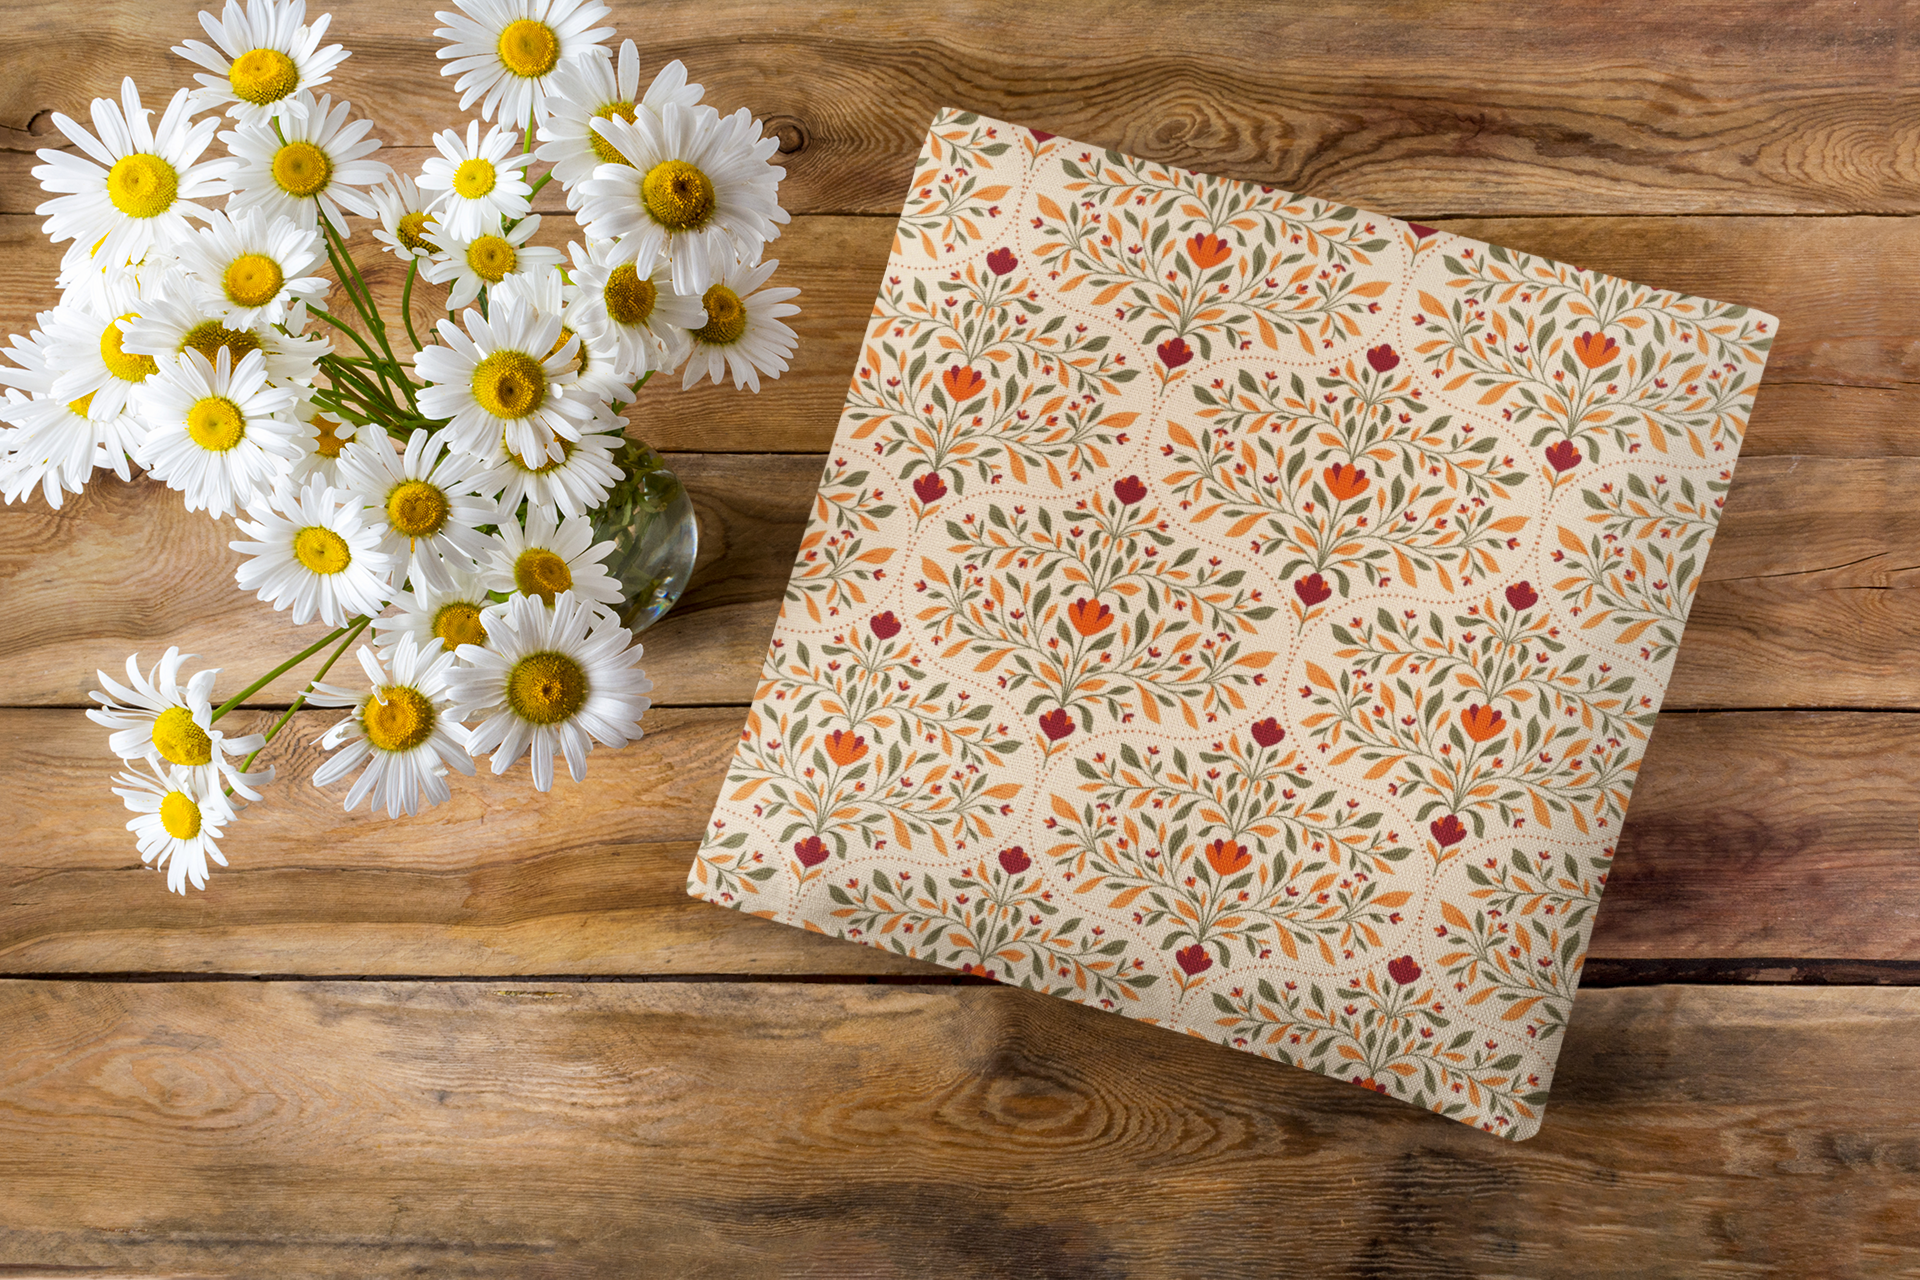
life on notebooks, pouches, home decor items, and so much more
through licensing. Procreate has become my
go to tool for all things digital because of how
simple and intuitive it is. In this class, we
are diving into one of my favorite
pattern style, that is the Ogee pattern. If you're not familiar
with it, don't worry. We will cover everything
from scratch. The Ogee is a beautiful
flowing S-curve motif that has been used in
design for centuries, and it creates such
elegant, timeless patterns. Here's what we'll be
creating together. First, we'll set up a
custom Ogee template that you can use
over and over again. Then I'll guide you
step by step through the entire process from
creating your canvas and sketching your
design elements to adding color and finally assembling everything into
a seamless repeat pattern that's completely print-ready. This class is beginner friendly. Whether you are new to Procreate or new to creating
pattern design, this class is just for you. So grab your iPad, open up Procreate, and let's get those creative
juices flowing.
2. Class Project: Now, let's talk about
the class project. For this class, you
will be creating your very own Ogee repeat
pattern, from start to finish. This is where you get to
bring your creativity to life and put everything that you have
learned to practice. You'll start by setting up your ogee template in Procreate. Then move on to sketching
your design elements. These could be florals, geometric shapes, or
anything that inspires you. Once you're happy
with your sketches, you'll add color and
refine your artwork. Finally, you will arrange all your elements
into a beautiful, seamless repeat pattern that's ready to be printed on the product. Best part, by the
end of this class, you will have your own
print-ready pattern that you can use for
your own projects, add to your portfolio, or even license
it out to brands. To make your learning
process even more smoother, I have added some resources
that you can download. An Ogee template to get
you started quickly, a custom action template to
streamline your workflow, and a curated color palette. Make sure to download them onto your iPad before you
start this class. I can't wait to see
what you create. Do add your finished project
to the project gallery. I'll be there to give you
feedback and cheer you.
3. Materials: Before we begin,
let's make sure that you have everything that
you need for this class. An iPad with
Procreate installed, an Apple pencil or a
compatible stylus. That's it. I'll see you
in the next lesson.
4. About OGEE: Before we dive into creating, let me share a little bit about the fascinating history
of the Ogee pattern. The Ogee is characterized by
its flowing S-shaped curve. It curves outward at the top
and inward at the bottom, creating an elegant
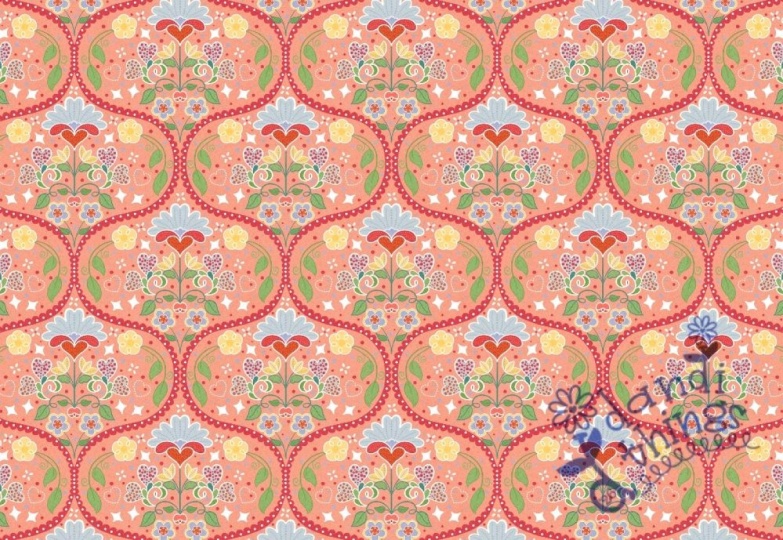
wave-like effect. When repeated, these curves form a lattice of trellis
pattern with pointed arches or
teardrop shapes that flow seamlessly
into one another. This timeless motif has traveled through centuries
and across cultures. It appeared in ancient Persian
and Islamic architecture, graced Gothic cathedrals
in medieval Europe and became a favorite in renaissance textiles
and damask fabrics. During the 18th and
19th centuries, you would find Ogee
patterns everywhere, from elegant wallpapers
to luxurious upholstery. Today it remains a beloved choice in
surface pattern designing, working beautifully across styles from traditional
to contemporary. You'll see it on fabrics, tiles, wallpapers, home decor items,
and fashion accessories. And now you're going to create your own version of
this timeless pattern. I'll see you in the next lesson.
5. Custom Actions: One of the tools that
I'm providing to make your work flow faster is
the custom action template. This action will
help you quickly duplicate and arrange
your pattern elements, ensure perfect alignment
for seamless repeats. Great solution for
layer limit problem. Installing and using the custom action
template is really easy, and I'm going to
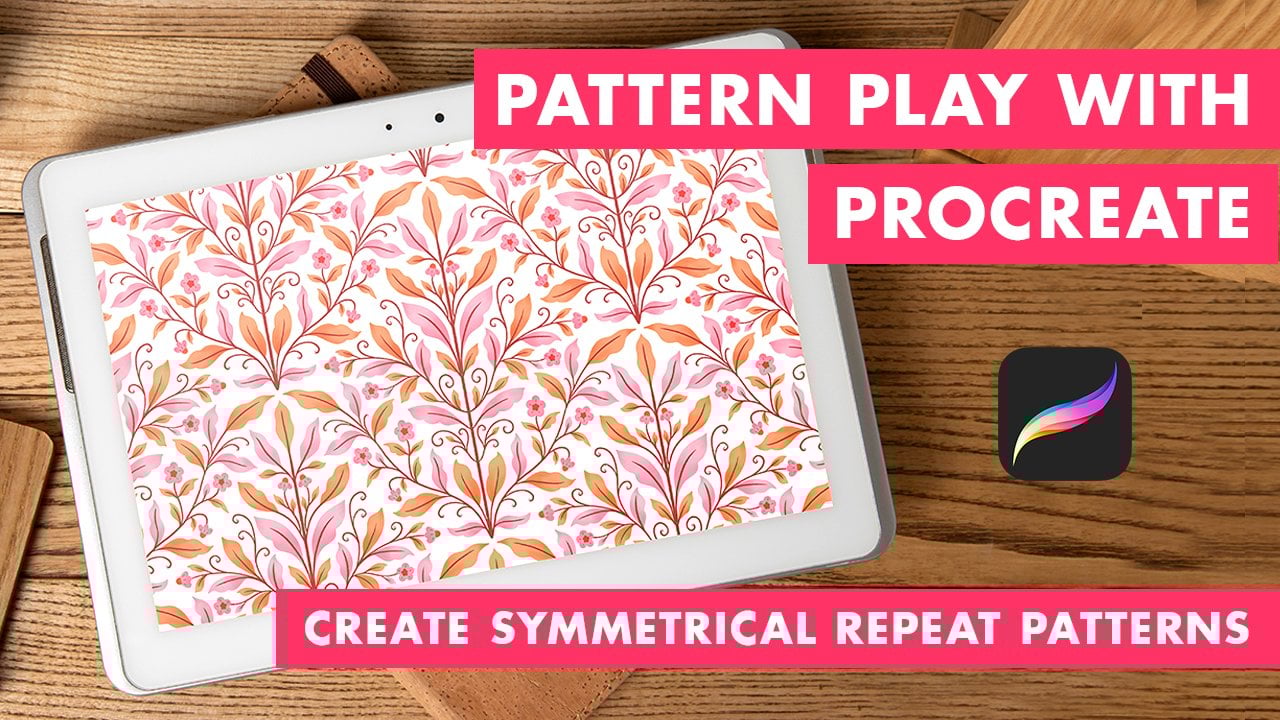
walk you through the entire process, step by step. But if you'd like to learn more about the custom
action template, then you can check
out my other class on creating symmetrical repeat
patterns using Procreate, where I'll be showing
this process in detail.
6. OGEE Template: So we are going to choose
the custom action template that I have provided in
the resources section. So once you open it,
you're going to go into the wrench tool and click on
Canvas Canvas information. And click on dimensions. So this is just to show you the dimensions that
I have provided. So it's currently
at 12 by 12 inch, and the DPI is set to 300. So we will always make sure that the DPI is set to 300 or higher whenever we are creating any illustration that needs
to be printed, right? And the color profile is
set to display P3. Okay. And once you hit the selection tool and
hit the save and load, you would see there is
something called selection one, selection two, selection
three and selection four. So this is your custom
action template. So I've already set it in
for you so you don't have to worry and I'll also show you how we'll be using this
later in the class. Okay. Now that we
have our Canvas set, I'm going to show you how to create your very
own Ogee template. Now, you do have the template in the resources section so you can download it and bring it in. But at the same
time, if you want to create your very
own Ogee template, this is how you're
going to do it. The first thing
we're going to do is we're going to go
into the wrench tool. We're going to turn
on the drawing guide, and we're also going to
click on the Edit Drawing Guide. And currently it is at 2D grid, and I'm just going to
change the grid size to max and hit Okay. So it's going to have just this horizontal and vertical lines. The next thing is you're
going to choose your brush. I'm going to go to the
Calligraphy section and choose the monoline brush. And on the new layer, I'm just going to draw a circle. So I'm just choosing the
color black for now. And we're going to turn
on the snapping and the magnetics and bring this circle to the
center of the canvas. Once you have done that,
we're also going to bring this circle to this particular
quadrant over here. And I'm just going to—sorry, make sure it's at uniform and I'm just going
to scale it down so that the circle that we have created fits this particular
quadrant over here. So once you have done that, you're again going to
move this circle to the very center of
the canvas like this. Right. So the next step is to again click on the
selection tool over here and I'm going to choose rectangle and I'm
going to draw a Fine. Rectangle as such. I'm making a
rectangular selection and I'm going to use
my three fingers. swipe down and I'm going
to click on cut and paste. What this does is, it actually creates
a separate layer with the element that we had
currently cut and pasted. Now again, I'm going to go into the selection tool
and I'm going to create another rectangular
selection as such. Again, three fingers swipe
down, cut, and paste. Now you have three layers. I'm going to click on the
move tool and I'm going to drag this
particular selection all the way down, like this. Go to your layers menu. select the next layer. that is the lower
half and you're going to move that to
the top like this. So if you zoom in, you might be seeing
certain irregularities. Don't worry, we can correct it. Right. So the next step is to, like I said, correct this. So what we are going
to do is going to zoom in and I'm going to choose that layer which
is already selected. Go to your move tool. and at this point, I would
like to turn off the snapping. And I'm just going to
slowly move this line down. So now it's better. I'm going to do the same
thing with this part as well. So go to your layers panel, click on that particular layer. and you're just going
to slightly move it It doesn't have to be
perfect, it should be enough. Once you're done with that, you're going to go back
into your layers menu. You're going to merge
all these three layers together by pinching it, and we're just going to swipe towards your left
and hit Duplicate. I'm going to select one of these layers and I'm just
going to again turn on the magnetics and
snapping and move it to your left and we
are going to choose the other one and
we are going to flip horizontal and we're going to move it
to the other side, that is towards your right. That's it. You have
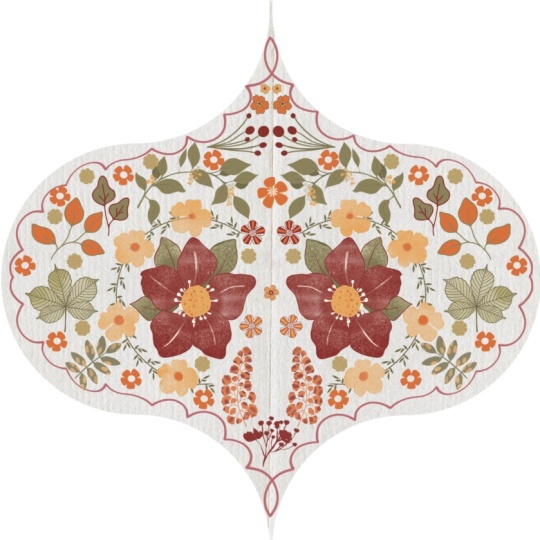
your Ogee template ready. So anything that you're going to create—that is the motif
that you're going to draw, you're going to draw
within this area, and this particular
shape that we have created is what is
called an Ogee shape. Right? And if you want to, you can also go ahead
and add a color to it. Before doing that, you have
to merge these two layers, and then you can add your color. Oops. So it seems
there's a gap here. so you can just
quickly fill that up. And then you can just fill it in and you can
reduce the opacity. And that's it. You have created your very
own Ogee template. I'll see you in the next lesson.
7. Sketching: Now that we have set our
Ogee template in place, the next step is to go into our layers panel and to
make sure that you rename it and you lock it
so that we don't accidentally end up drawing
on the template layer. Right? Next, you're going
to create a new layer. And before that, we're
going to go back into our wrench to edit
drawing guide, and we're going to change
the 2D grid to symmetry. And under symmetry, you're
going to make sure it's at vertical and not at
horizontal, right? And also make sure that the
assisted drawing is turned on and then you're going
to hit done. All right. So once we have turned
on the assisted drawing, you would see that on the layers menu on the
particular layer, there's something
called assisted. What this means is that if you
draw anything on one side, it's going to get replicated
on the other side. So we're going to
be sketching only on one side of this template, and whatever we're
going to be sketching is just going to get
mirrored on the other side. So there's no need for us to
be sketching on either side. Just one side would do and it's going to just get mirrored
on the other side. Right? So I'm going to go
into my layers panel and I'm going to rename this
as sketch layer. And I'm going to choose the 6B pencil under sketching. So you can use any brush that you feel that you're
comfortable to work with. I usually prefer
6B for, like, sketching because it gives
that pencil-like feel. So it feels like I'm actually sketching with a pencil. All right. So we'll get started. So the very first thing
I would like to do is start from the top. But I also want to let you know that I'm going to add
I'll be adding a border. To this particular
template at the end. So for that very reason, whenever I'm drawing
any element, I'm going to make sure that it's not too close to the outline. That's the template outline. So for example, I'm
not going to draw anything that is touching
it, something like this. I'll be drawing something that's like this so that there's enough gap between the element
and the outline, right. So with that said,
let's get started. So I'm going to be filling this particular shape
with floral elements, but feel free to use any other element or abstract elements,
anything that you like. So the idea is to just fill in this particular
shape with elements. Okay, so it could be
a stand alone motif or it could be
abstract elements. So I'm going to be drawing
a standalone motif, which is of a botanical nature. Right? And I'm going
to temporarily switch off the
drawing assist for now because I want to draw
a line in the middle. And if the drawing
assist is turned on, then it's not going to allow me to draw a proper straight line. So for that very reason, I've just turned it off for now. So once I've done
drawing that line, I'm going to go back into my layers menu and I'm
going to turn on the drawing assist and I'm going to just
continue drawing. Sketching is definitely
going to take a lot of your time because
obviously it's the phase where you'll be deciding
and then you'll be erasing and going back and
forth with all your elements. So this part is definitely
going to take a lot of time compared to any other
section of our class. So take your own sweet time to decide the placement
of your elements. Again, I'm making sure
that I'm not going too close to the outline and, you know, there's a certain gap. So I'm almost done
with my sketching, but I do feel like
there are a few gaps. like negative gaps
here and there. So I'm just going to go
back and, you know, correct them so that
there's no negative space. So I think I'm done
with the sketching, so I'm going to stop here. And the next step is
to start the coloring. But before you do that, just make sure that your
elements are not too close to the outline because
if you're adding a border, then it's definitely going
to interfere with it. Other than that, if
you are just able to fill the entire shape with
whatever elements you like, that's more than enough. And you might see a little
gaps here and there, but that's totally okay. It is not necessary
that you have to make your motif very, you know, full. Like, it doesn't have to fill every area or every little
space that is there. Having a little negative
spaces here and there is okay, it's something that makes
it look like, you know, you have enough the pattern has enough breathing
space going on, so that's totally okay. There's no necessity
that you have to fill every little
gap that you see. Right? I'll see you
in the next lesson.
8. Colouring: Now that we are done
with the sketching part, the next step is to
start coloring it. For the color palette, I'm going to go ahead with the Ogee color palette that you can find under the
resources section. You can also use any other
color that you like. There's no compulsion that
you have to only follow the particular color palette that has been provided
with this class. So we're going to go
into our layers panel, and we're going to create a
new layer above the template, but below the sketch
layer, right? And we're going to make sure
that the drawing assist is turned on manually for each
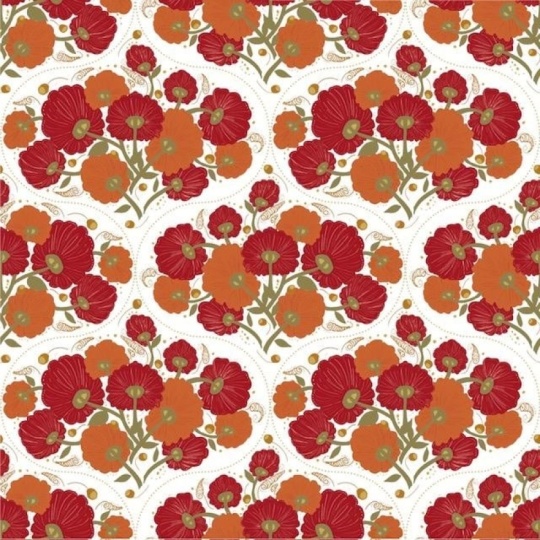
layer that we create, right? So I'm going to start with coloring the floral part first. So for the brush, I'm going to go ahead
with the monoline brush. You can find this under
the calligraphy section. And I'm going to choose this nice maroon color
from the palette. Again, I'm adding colors
in such a way that each—that is, alternative
flowers have different colors. So if I'm adding red over here, then I'm making sure that the alternative flower that's over here is not
of the same color. So when you're trying to fill colors with a color filling, just make sure that
you zoom in and add the colors because these area that we are trying to color, that area is very small, so you might accidentally end up coloring outside as well. So that's what happened
previously when you saw that there was this entire maroon
color all over the screen. Again, I'm going to go
into my layers panel and I'm going to
create a new layer, turn on the drawing assist. Before that, I'm just
going to rename this as red flowers and
this one as orange. I'm going to choose
this bright orange and repeat the same. Next, I'm going to create a new layer again and turn on
the drawing assist. And this time, I'm just going
to add the middle part. So wherever we have these orange color filled and the middle is going
to be in maroon color. And wherever we have
this nice maroon color, we're going to fill it
with orange, right? So go to choose the
maroon monoline brush. And right now, this layer
is about the orange layer, so I'm going to go to the
layers panel and drag it below. Sorry. The orange. Next, I'm going to
create a new layer and I'm going to track it below
the red flowers layer, turn on the drawing assist and I'm going to choose
orange and start coloring. So we're going to do the
same over here as well. Right now, I am on
the orange layer, so we're just going to fill
this up and color it. Sorry. I'm going to go back to this layer that is
about the red flowers. I'm going to rename
these layers again. Red flowers. 01, we can name this as 02. I think again this as 01 and this as 02. Now I'm going to create a
new layer for the leaves, troingass and rename
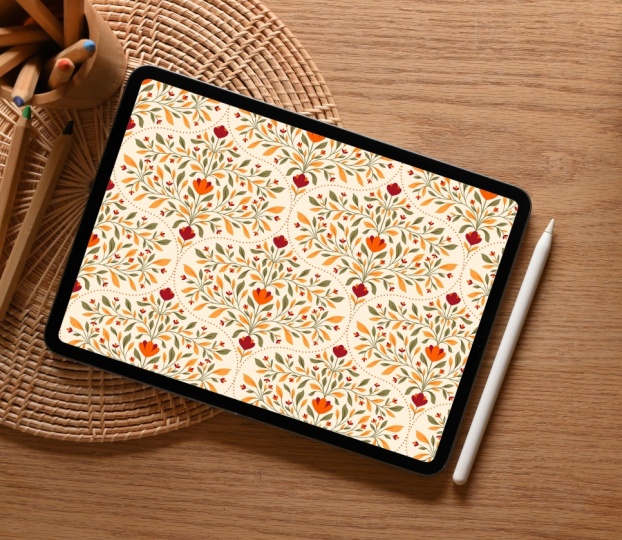
this as green leaves. I'm going to choose green from the color palette and
I'm going to start coloring. I'm going to use
the same technique. If this leaf is green in color, then the next one is going
to be of a different color. We're going to color the
alternative leaves first. Again, you're going to go
into your layers panel and create another layer. Turn on the drawing
assist, change the color. So I want to choose
this one over here. And with the monoline
brush selected, go to draw the other leaf. Now that we are done
with the leaves, the next is the stem part, we're going to create a new
layer again and turn on the drawing assist
and we're just going to draw those stem areas. I'm going to choose the
same green and I'm going to choose dry ink brush
under inking section, and I'm just going to
go ahead and draw it. Again, make sure to turn
on the drawing assist. I'm going to turn off
the drawings for now. I'm just going to
draw the center line. I find this really hard
to get it straight. So for this very reason, I'm just going to go into the wrench tool and
I'm going to turn on the edit drawing
guide and choose 2D and set it
to max over here. And now I'm just going
to draw the line. You see, it allows me to
draw a nice straight line. Now I'm going to go back
into the drawing guide and edit drawing guide and
switch it back to symmetry. So while I zoom in, I do see that the line that I have
drawn is not so straight, so we're going to repeat
the process again. I like it now. I'm going
to turn it back to symmetry and go back to
your layers, rename it. I'm going to click on the stem layer and
I'm going to drag it all the way down to the last. Right. Next, we're just going
to add some details to these leaves, and that's it. I'm going to create a new
layer about the orange leaves, and I'm going to turn
on the drawing assist and I'm also going to turn
on the clipping mask. I'm going to click
on the end over here and turn it to multiply. I'm going to change the
blending mode to multiply. And with the same brush, that is the dry ink
brush selected, I'm going to choose
the same base color, the orange one because we are creating it about
the orange leaves. I'm just going to
add the details. Now I'm going to repeat
the same process, but with the green leaves, I'm going to click on
the green leaves layer, create a new layer above it, and then you're
going to add drawing assist and clipping mask to it, change the blending
mode to multiply and with the same base color that
is the green color chosen, you're going to just
draw the details. And I'm going to go back
into the layers panel, and I'm going to sort of select all these
leaves that we have. And I'm going to bring them
below the floral layers. Yeah. And I'm going to bring the stem about the lead layers. Sorry. Yeah. I'm also going to turn off this sketch just to
see how it looks. I'm quite liking it, but
I just have to erase few areas where we have those
green stems overlapping. Other than that, I think
the pattern looks good. I'm sorry, the motif looks good. Next, we're just going
to go ahead and add this part and maybe erase
these overlapping areas. So next we're going to add
a little border over here. So I'm going to go into
my brush settings over here and I'm going to choose Caligraphy
under calligraphy, I'm going to choose
this monoline. But to create a new
brush, I'm sorry, I'm just going to quickly
duplicate this monoline brush. I've already done that
you can see here, it shows monoline three
for me. That's okay. I'm going to click on this
new duplicated version of the monoline brush
and just tap on it. I'm just going to increase
the spacing and if I do that, can you see that we
have this nice um, dot-shaped brush going on. So you can keep it to Mx. And click. Okay, so now you have this
nice monoline dotted brush. I do feel like I'll go with something of 90 because
100 is very loose. That should be sufficient. So we have our new dotted brush ready so you can rename it. And now with that
dotted brush selected, I'm going to go again,
create a new layer. Turn on the drawing assist and can choose the
color that you like. I'm going to go ahead
with the orange. It's enough if you just draw on one side. It's more than enough. I'm just going to go ahead and increase the
brush size a little. So we'll see how it
looks. Yes, perfect. So, just keep a dot here and just follow the outline
that's more than enough. So if you're not
sure where to stop, just go to your wrench tool, edit drawing guide, and just change it to 2D grid and make sure
that you have it at MAX. So now you see you have this
horizontal line over here, so that's where
you're going to stop. So I made a little
mistake over here. So if you see when we have
the 2D grid turned on, it actually doesn't
let us do it. So what I'm going to do
is I'm going to go into the wrench tool,
edit drawing guide. And instead of choosing
the 2D grid, we're going to go into
the symmetry options and we're going to
select the quadrant. Okay. And now you can go
ahead and start drawing it. But you would see
that it actually repeats over here as
well. That's okay. We can erase it later. Yes. So we're going to stop right below this horizontal
line that we see here. Okay. Now I'm going to
go back into my layers, turn off the drawing assist, select your eraser tool, you can just erase off
these extra border lines. All right. So we're going
to rename this as poder. And you can also turn off your template just to see
how it looks at this point. So I think it looks good. We're done with
the coloring part. So the next step is to turn this into a
repeating pattern. So I'll see you in
the next lesson.
9. Testing the Repeat: Now that we have
our motif ready, the next step is to create a
repeating pattern out of it. I'm going to go into
my layers menu over here and I'm going to
click quickly just select all of these layers and I'm going to add
them to a group. Now we have them in a group and you can rename this as Ogee. And now I'm going
to just duplicate this and I'm going to click on the thumbnail
and I'm going to flatten it. Next, I'm just going
to add a new layer, bring it below this
particular layer that we just flattened. For now, it states that
its green leaves, so we can just rename
it as motif for now. Okay. And on this particular
layer that we just created, I'm just going to choose
white and drag and drop it. We're going to rename this
as a place card for now. So there's nothing
special about it. We just need this place card so that we can use our custom
action template. That's it. So now I'm going to select the place card and
the motif together, and I'm going to group
them together. Okay? So we have the OG group, and now we have just
a new group which has the motif and
the place card. Right? Now I'm going to go into the selection
tool over here. And if you see that, we have something called save and load. So I'm going to click on it, and you have selection
four, three, two, one. So we're going to
select selection one, and we're going to
use the move tool. So you see this part of the
Canvas is getting selected, and we're going to use flip
horizontal and flip vertical. Right? Again, we're going to
go into the selection tool. Click on save and Load. This time, you're going
to select selection two. Click on the move tool, and again, flip
horizontal flip vertical. So repeat the same. Save and Load Selection three. Click on the move tool. Flip horizontal, flip vertical. And again, save and
load, selection four. Click on the move tool, lip horizontal and
flip vertical. Now what we are going to do is we're going to just
click on the move tool, select this entire
layer and click on flip horizontal—sorry, flip vertical. So I'm just going
to quickly undo that and just click on the move tool and
click Flip Vertical. That's it. Now go to
your layers menu, go into that
particular new group, and you can just turn
off the place card. And now you would see that
your pattern is ready. Your repeat is also in place. This is why your
custom action template makes things really easy and quick for you and
you don't have to duplicate too much or
create multiple layers. Now that we have
our pattern ready, the next step is to
see how it repeats. For this, I'm just going to swipe down with my
three fingers and click Copy All and again
swipe down and hit paste. Now go to your layers
menu and you would see something called
as inserted menu, sorry, inserted image, and we're just going to
duplicate this three times. Like this. I'm going to select
all of these layers together and turn
off any other layer. Got you move to click on this blue button at the corner and you see
a calculator appears. Inside this, I'm going
to enter half of 3,600, which is 1,800 and
click outside. Now we'll click on any one of these images and move it to each of these quadrants to see
if it repeats perfectly. H. Now I'm going to go into the
wrench tool and turn off the drawing guide,
and that's it. You have your very
own OG pattern ready. So I'm just going to go
and see in this part, you might see that the border that we actually drew might
overlap. That's okay. You can go back and
correct it a little bit. But other than that, it's
not going to just show too much on your final output,
so that's totally okay. So that's it. Your
pattern is ready. I'll see you in the next lesson.
10. Final Thoughts: Congratulations. You
have just created your very own Ogee repeat
pattern from scratch. You now have a
print-ready pattern and the skills to create more. The Ogee template and the custom actions are
yours to experiment with. Try new motifs or different color palettes and add your own unique twist to it. I would love to see
what you create. Please add your finished
projects to the project section. if you enjoyed this class, leaving a review would
mean the world to me, and it would help others
discover this class. Thank you for joining me in
this pattern making journey. Keep creating, keep
experimenting, and most importantly,
keep having fun. I'll see you in the next class.
 Vidya Kumaresan, Illustrator