Transcripts
1. Introduction: Welcome to Mastering
repeat patterns on Procreate using the
Diamond technique, where you will
learn how to create seamless repeating
patterns which almost give the illusion
of a half drop repeat. Hi, everyone. I'm with
your commoron and I'm excited to be your
instructor for this class. I am an illustrator,
surface pattern designer, art educator from India. I create most of my
designs using Procreate, which has become my go to tool for almost all of my
creative projects. Designs have found their way on variety of products
like sketchbooks, notebooks, rugs, calendars,
throws, and so on. I have always been passionate about translating
my patterns into functional beautiful pieces that people can use in
their everyday lives. In this class, we will be focusing on using the
diamond technique, which is one of the most
versatile techniques for adding a dynamic flowing
feel to your patterns. By the end of this class, you will be able to create your own seamless
repeat pattern using Procreate tools to
your advantage. Ensure your designs seamlessly
repeat across any surface. Export your patterns for
use in various projects, whether for print or
digital applications. Whether you are a seasoned
artist or just a beginner, this class is completely
tailored for you. So grab your iPad and let's get started on creating
beautiful patterns.
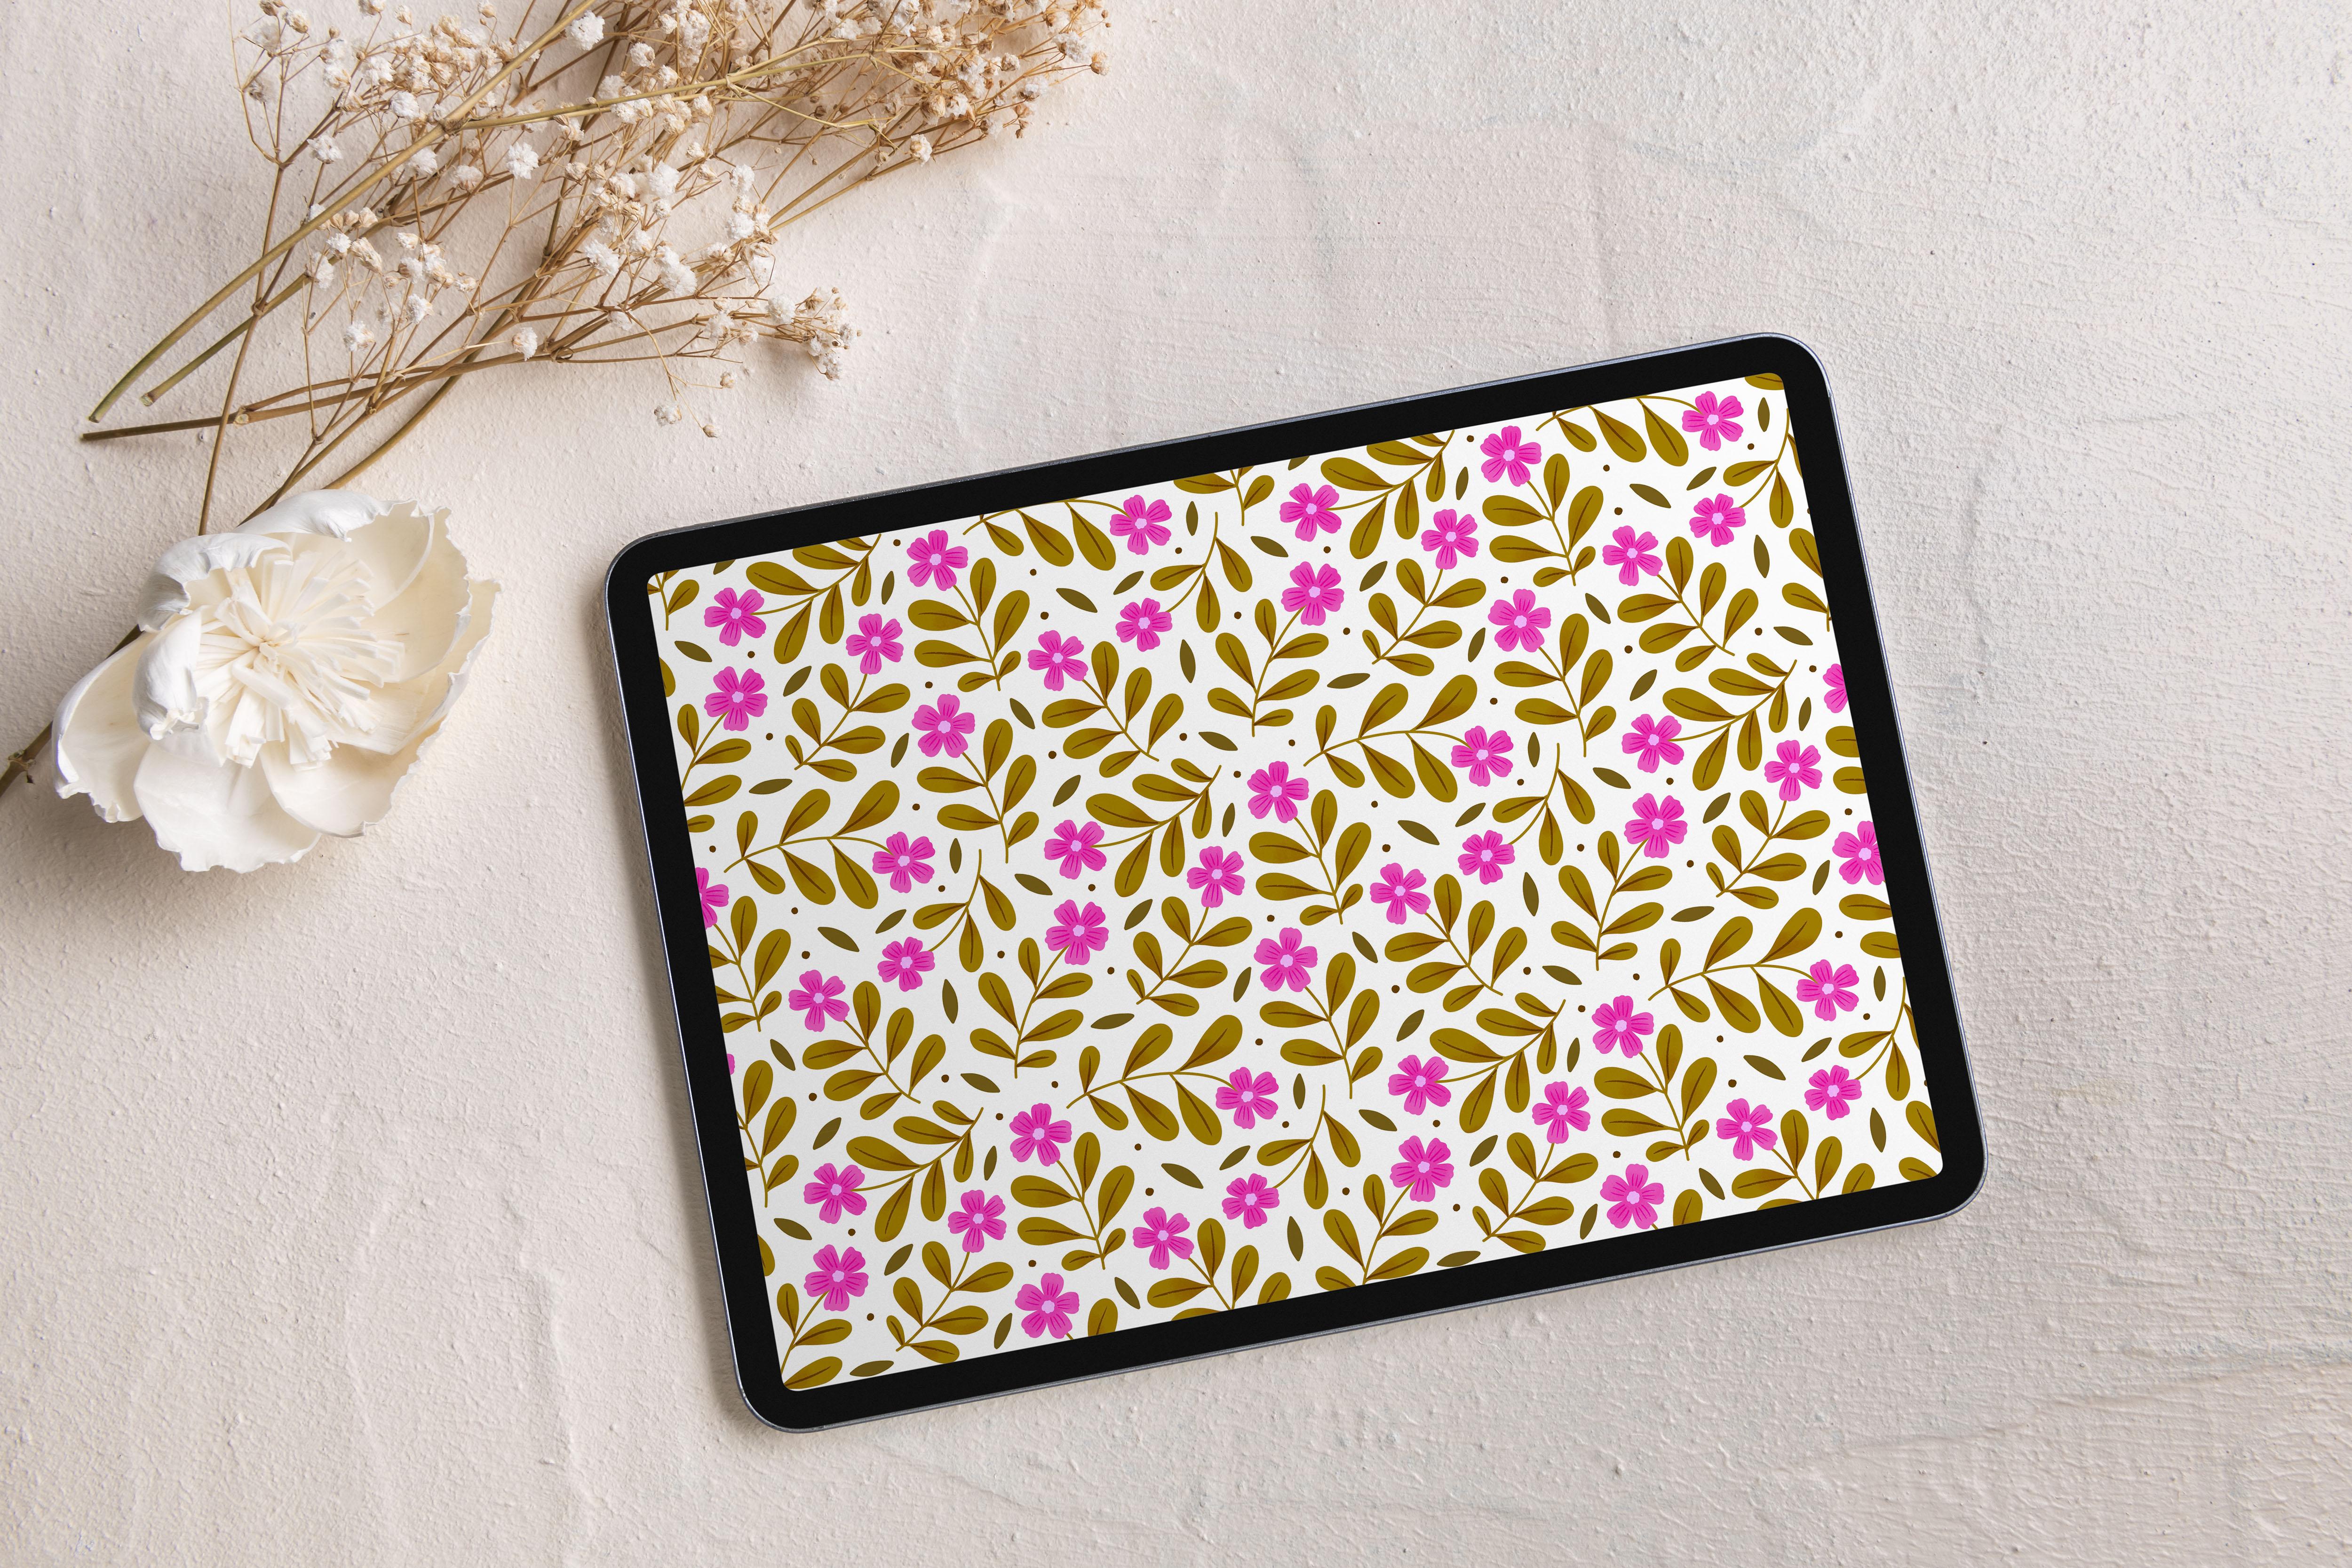
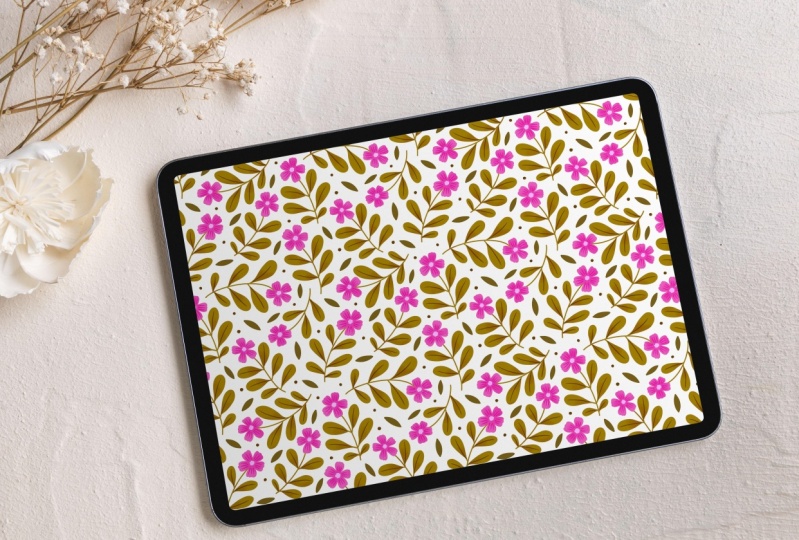
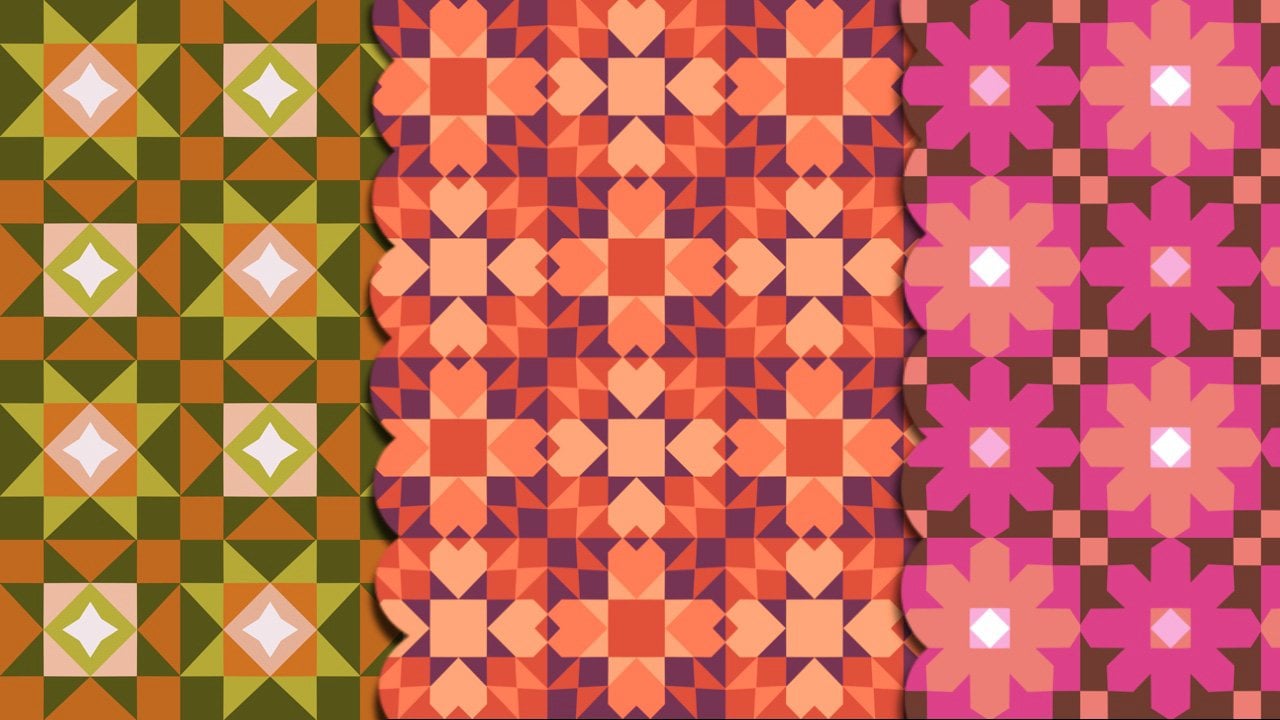
2. Class Project: For the class project, we will be creating a colorful, seamless repeating pattern
using the diamond technique. All the resources that you
will need for this class can be found under the projects
and resources section. Make sure to download
all the resources to your iPad before you get
started with the session. I'll see you in the next lesson.
3. Materials: Before we begin with the class, make sure that you
have the Procreate app installed onto your iPad. You will also need a stylus, ideally the Apple
pencil for precision. Don't worry if you're new
to drawing on Procreate. I'll be taking you step by step, starting with setting
up your canvas to adding finishing
touches to your artwork. I'll see you in the next lesson.
4. Canvas setup: Once you're inside
the Procreate app, the next step is
to set the canvas. To do so, click on this plus icon that you see
at the upper right corner. And then click on
the new Canvas icon. This is where you
will be entering your dimension for the
sake of this class, and since it's going to be
a square shaped pattern, we will be entering
the dimension, 3,000 pixels by 3,000 pixels, which roughly translates
to ten by ten inch. If you're planning to
enter a higher dimension, you can do so as well. The max would be 12 by 12 inch. So based on the iPad
version that you have, you can enter these values. Now, once I did enter
my width and height, you would have noticed
that the maximum layers, the limit that it has set
for me is actually 55. Now, if I change the width
and height over here, say I'm going to go and
choose something like 3,500 pixels by 3,500 pixels. Now you see the maximum
layer limit is actually 39, whereas earlier it was 55. Now, this might differ
from iPad to iPad. So mine is a 2017 model. So it allows only
max like 55 layers when I set my dimensions
to 3,000 by 3,000 pixel. But this might
differ in your case, if you are having
a higher end iPad. Now, I'll just set
it back to 3,000. And I'm going to
retain the DPI as 300, since most of our
patterns are mainly created with the idea that it's going to be
printed later on, it's better or say
it's safe to have the DPI set at 300 or higher, but never less than 300. Next, I'm just going to
tab on this color profile, and under RGB, I'm going to
be choosing Display P three. Now, for print purposes, we usually go with CM K. But since I'm using Procreate on iPad and display P three is
only available for Procreate, it also gives me this advantage where it reflects
the true colors. So whatever colors that I
am using on my artwork, it is going to be reflect the
same on my printed artwork. So can't say it's
going to be 100% true, but more or less the same, so it's easy to
match the colors. So whatever I see
on the screen is what it is going to
get printed, right? So on some of your iPads, this might be named
as unnamed profile, or it might be as
Display P three. So if you don't see
this, probably you need to update your Procreate app, but mostly you'll be able to see it in the newer version. Right? So for that very reason, I'll be using GV, that is the display
P three profile, color profile, but
it's not a compulsion. You can also go ahead with
your CMYK profile as well. The only difference is I
feel like on the screen, display P three colors look
very saturated and bright, whereas CMYK looks a
little dark, right? So once we have set
our color profile, I'm not going to go
ahead and, you know, make any changes to the rest
of the settings over here. All you have to
do is hit create. And once you do
that, you see that a new canvas appears on
the screen. So that's it. You're done with the
canvas settings. I'll see you in the next class.
5. Diamond Template: Now that we have
set up our canvas, the next step is to
add the template. Templates are a great
way to make sure that your pattern elements
are lined up perfectly. It also speeds up the process and gives you a
clear framework to work with. They also help you maintain consistency throughout
the design, ensuring that the spacing, rhythm and flow remain balanced. This means that your
final pattern will look more polished and refined. I have already added a diamond template to
the class resources. You can download it and bring
it into your Procreate app. But for the sake of this class, I'm also going to show you how to create your own template. So the next step is to click on this wrench tool over here and then hit on Canvas and make sure that the drawing
guide is turned on. And once you do this,
you'll see that the guide appears
on your Canvas. The next step is to click
on Edit Drawing Guide. And inside this, you're
going to hit on symmetry and then hit on options and make
sure that it is on quadrant. And also make sure that the assisted drawing is turned on. Once you're done with
all of these settings, just click on done
and hit again done. Next step is to choose
a color of your choice. I'm going to go
ahead with black. So all you have to do
is double click on that color wheel
and it will make sure that you're choosing
the perfect black color. And then next, click on
the brush tool over here, and you can choose any
brush that you like. So I'm going to go ahead with this six B pencil that you
see under the sketching. So with that selected and inside my layers
panel over here, just making sure that the
assisted is turned on, I'm just going to
go ahead and draw a diagonal line on any
one of these quadrants. So you are just going to draw
a diagonal line in one of the quadrats and it's just going to mirror on
the rest. Okay. I'm going to start from here. So make sure. I'm just going
to zoom in a little bit. And I'm going to start from this very edge where the
line actually meets. And I'm going to also make sure that it also meets
at this point. Okay. So with that, sort it. So we're going to draw
a line now from here. And it doesn't have
to be perfect. Even if it's a little bit jat, that's okay. But keep drawing. And once you reach this point, just keep holding the pencil
and you would see that it sort of makes your line
appear super straight. At this point, if
you want to make any changes, you can also do it, but I'm going to just
keep dragging it, and now I'm going to leave it. So now you have
something like this. And just to make sure that we
have done it perfectly zoom in and make sure that it is actually crossing not crossing, but it's touching over these
areas and also over here. At this template, it
doesn't have to be perfect, but it has to make but you have to make sure
that you know it is crossing the line that you
have drawn is crossing outside the canvas so that it's
touching at this point. That is the lines are meeting
each other at this point. Okay. And you're going to
hit on this move tool, that is the selection
tool as well. And once I do so you can see that the selection is happening
throughout the canvas. So that is what I need as well. So anytime I select this
template, it has to select. That is the selection has to appear throughout the canvas. Okay. So now, since that
has been sorted, that's it. So we are done with setting
up our own diamond template. I'll see you in the next list. If you have downloaded
the template, then I'm going to show you how to put it into your procrete. So again, click on
this wrench to, and now click on Add over here
and click on InsetaPhoto. Now, what this does is it
takes you to your gallery, and from there, you can
select the template. Once you do, it gets
imported into your canvas. In case if you feel like
there is any sort of difficulty where it is not getting selected
throughout the canvas, then just hit on with
the move tool selected, just hit on fit to Canvas, and it will make sure that the
diamond template is fit to the canvas and the selection is happening
throughout the canvas. That's it. We are good to go.
6. Sketching: Now that we have set up
our diamond template, the next step is to start
sketching our pattern elements. Click on this layers
panel menu over here. And you would see that
the layer where we have the diamond template
is named as inserted image. Now, if you had bought in the diamond template
from the resources file, then it's going
to be showing but it's going to show
as inserted image, whereas if you had created
your own template, then it's going to be
showing as layer one. Whatever it is, the
next step is to reduce the opacity of
that particular layer. So we're going to click this
end over here and here, you see that there's
something called opacity. So we're just going
to reduce that so you don't have to reduce
it completely because if you do so then
it'll just disappear. So we're going to set it
somewhere like 35 now, this completely depends
upon your choice. So it's about the visibility. So if you're happy and
you can see the lines, but it shouldn't be extremely dark because we are going
to draw on top of it. So this line that we see here might actually create a
sort of visual clutter, so we don't want that,
and that's why we are reducing the opacity of
that particular lay. So I might want to
reduce it even more, maybe let's try 15.
Yes, that should work. And once you have
reduced the opacity, the next step is to
swipe towards your left, and you see these
options appear. Now, I'm just going
to click on Lock, which means I have locked
this particular layer. And now if I try to draw
on this particular layer, it'll not let me draw on it
because we have locked it. The reason why I'm doing
this is because anyways, I'll be creating a new layer
and drawing on top of it. But while doing so
when I am doing so, there might be instances
where I might end up clicking this particular
diamond template layer and end up drawing on it. I don't want that to happen, and that's why to be
on the safer side, I'm just going to make sure that this template layer is locked. If you feel like this is
a little bit confusing, you can rename the layer. So I'm just going to go
again and unlock it. So you can again swipe
towards your left and unlock this layer and that
lock icon is gone now. Now, click on the
thumbnail that you see here and hit on Rename. Once you do so, you
see it gives you the option to actually
rename your layer. So I'm just going to
go ahead and rename it as time and template or you
can just name it as STEM. So now that I have renamed it. Now I can go ahead and lock it. So swipe towards your
left, hit on lock. And now you see
that the lock icon appears over here, right? So this means that this
layer has been locked. Next, I'm going to go ahead
and create a new layer. So to do that, just hit on
the Splis icon over here, and you see that a
new layer appears on top of this diamond
template layer. Now, this is going to
be my sketch layer. So I'm just going to go ahead and click on the
thumbnail again and hit on Rename and
rename it as sketch. Now, before we start sketching, I just wanted to show you
how the template works. So I'm just going to pick my six B pencil over
here and show you that. So anything that you
draw on these lines, so say I'm going to draw
a flower over here, it means that I don't have
to draw anything again on this area because when we are putting this template
in a repeat, this particular flower
that you see over here is going to get
repeated over here. Okay. So anything that you draw on this diagonal line will
get repeated over here. Save anything that you draw
on this side of this line, it's going to get
repeated over here. So say, for instance, if I'm
drawing a leaf over here, I don't have to draw
the leaf again. Rather, when we are putting
this in a repeat tile, this leaf will get
replicated over here. So right now, I'm just drawing
and showing it to you, but you don't have to draw. So when we are drawing our final pattern or
sketching a final pattern, once you draw any
element over here, you have to be aware
that whatever you draw over here or over here, it's going to get
repeated over here. So I like in this example, since I have drawn
a flower over here, I'll not be drawing
any other element over here because if I do so, then this flower will overlap on that particular
element that I had drawn. Right? So this is how your diamond template
is going to work. Just be aware that anything
that you draw on one of these lines over here is going to get
replicated over here, and anything you draw over here is going to get
replicated over here. Right? So now I'm going to go back into my layers
panel over here, and I just want to remove all these elements
that I have drawn here. So instead of
deleting everything, I'm just going to undo. So to do that, just take your two fingers and
tap on your screen. And you see it just
undos everything and you can use three fingers
and tap on your screen, and it redos everything. Right? So two fingers tap Undo. Three fingers stab. Read. I'm going to undo
everything that I have right now on this layer. So just two fingers. So now my sketch layer is clear, and now we can start
with the sketching. So again, for the sketching, I'm going into my brush
library over here, and I'm choosing this
six B pencil because I feel like it sort of gives me this nice pencil like texture. So I'm using it, but you
can go ahead and use any brush which you
feel comfortable using. Since this is just a sketching and we will be
coloring on top of it, it necessarily
doesn't have to be texture like a pencil texture
is fine, but nothing fancy. You to be on the safer side, you can either choose
a sketching brush like six B or HB pencil, or you can also go into this calligraphy and you can
choose monoline as well. So this sort of gives
you a very solid line, and it doesn't have
any texture as well. So this is something that
I'll be using while coloring, but you can also use
the same for sketching. Now going back into
my brush library and clicking on sketching and
choosing the six B pencil. Now, again, I'm going ahead with the black color over here. So if you want to
choose the black color, just double click on the black and you'll have
your black color, right? So on the sketch you selected, I'm going to start drawing
my pattern elements. So I'm not drawing the idea behind this pattern element is basically I want to draw just
a few flowers and leaves. Nothing very fancy
or complicated. We're going to keep
it very simple. Okay. So I'm not
going to go ahead and draw the petals right away. Rather just to
understand the spacing, I'm going to go ahead
with a simple circle for the floral part
at this point. Once I'm happy
with the placement is when I will start
drawing the petals. Until then, it's just
going to be a circle. And again, this circle
doesn't have to be perfect because flowers
like in nature, when you see a flower,
it is not perfectly, like, you know,
built into a circle. The petals aren't
perfectly aligned, but there are also flowers
where you see this perfection, and then there are also flowers where you see this imperfection. In my art style, I
usually prefer to have that imperfection
incorporated. So I'm not worried or concerned about the circle being perfect. So now I'm just going
to go ahead and draw the circle and add
a stem portion to it, and then couple of leaves. Now, if you remember earlier, I told you that anything you
draw on this diagonal line, it's going to repeat itself in the pattern
over here, right? So when I'm sketching, I am not going to draw
anything over here again. I'm going to leave
this space empty. Okay? The same applies
on the side as well. So now I'm just going to draw another flower on this side. Now, also remember that
there is no limit as to you should only draw within
this diagonal line. You can also draw outside. You sketch can go outside
that diagonal line. And when it comes to the center, you don't have to
worry too much. You can place your
elements as you like. It's just when it comes to the side that is the side
of the diamond template, is that you should be aware that whatever you
draw on this side, it's going to get repeated here, and whatever you draw here is going to get
repeated over here. So I also feel like I might want to move this a little
towards the top. So I'm just going to
go ahead and choose this selection tool and making sure that it is
right now on free hand, and I'm just going
to draw around it, and then hit this move tool and just slightly
move it to the top. And I'm going to
repeat the same for this element that is here
that I'm drawing around. Hit the transform tool
and just move it. The idea is that you have to
make sure that there is also a little negative spaces
between your elements so that there is a breathing space there and they don't look too much of, like, you know,
visually cluttered. I might also want to add
a few elements over here, but I also have to be aware
that when this repeats here, how much space is left here. So this is the time where
you take a break and take a break with the
sketching and go into your layers panel
over here, right? And sort of create duplicate versions of
the particular layer that we have right now and see, let's say, test if
this pattern is going to work out, right? So before we do that, I also want to make
sure that I mark the corners so that I am not ending up with
any snapping error. So on your sketch layer, just make a little mark at
the very corner over here. Over here over here and
one more over here. And now when I select
this particular layer, you see the selection happens
throughout the canvas. Now go into your layers menu, and you're going to create duplicates of this
particular layer. So I'm going to
duplicate it four times, so hit on duplicate. Then again, duplicate. Right, so we have four
duplicated version and the original sketch. Now, I'm going to go ahead and rename this last
layer as original sketch. So just go ahead and click on thumbnail and hit on Rename and just rename it as OG sketch. So we have the original, and then we have two
duplicated versions of the same sketch, right? So now the next step is to move each of these layers
to the quadrant. So let's start with the
first one over here. I'm going to turn off
the other layers, including the OJ sketch layer. Right now, we only
have the first layer, that is the first
sketch layer turned on, and the diamond
template turned off. Now, click on the
first sketch layer and then hit on the move tool or the transform tool over here, and then click on this snapping
option and make sure that the magnetics and
snapping is turned on and the distance and
velocity is at max. Okay. And now hit on the
transform tool again. Now again, click on the
transform tool, and this time, we are going to move this particular layer to
the top half of our canvas. So we're just going
to move it to the top half and make sure
that it snaps at the center, both vertically and
horizontally. Well. Now we're going to
move it to the left. So we're going to
repeat the same with the rest of the layers. I'll turn on the second
layer, click on it, hit the transform
or the move tool, move it to the upper
half of the canvas, and now move it to the right. I'm going to select
the third layer, hit on the transform tool. Now, this time, we are going to move it to the lower half of the canvas and move
it to the left. Select the transform tool. Move it to the lower
half of the canvas. And now towards the right. Don't worry about this
little X symbol over here. You can erase it later on. But now you can see
that the element, which is repeating on this
side is quite evident. Now go back into your layers panel and make
sure to turn on the OG sketch. So now you get an idea. So you see that
whatever you draw on this particular line is
getting repeated over here. And the same whatever
we have drawn on this particular tiinal line is getting repeated
on this side. Now, it also gives you an idea as to how much of a space you have left for the other elements that you are planning to add on. Right? So now the next step is to merge all these four
layers together. So we're going to keep
the OG sketch as it is, and we're just going to
use the pinching method. That is, we are going to pinch all these four sketch layers together and make them
as a single layer. Now, all of these are a
part of a single layer. So if I turn it off, you can see that
all the other parts of that layer is turned off. I turn on. They appear. So what you sketching? Like, what we are planning to
sketch the other elements, we'll be sketching it only
on the OG sketch layer. So this sketch layer on the top is just
for rn. We get it. The same time if you find this
little X to be disturbing, just click on the sketch layer, go to the erase tool over
here and just erase the top. Okay. So now make sure that you are on the OG sketch layer. Okay. And if you
feel like you might accidentally end up drawing
on the sketch layer, you can swipe towards
your left and hit Lock. So that way, you'll not be
drawing on the sketch layer, and you'll be one D drawing
on the OG sketch layer. So now I'm going to
choose my brush. And again, with 60
pencils selected, I'm just going to fill
the rest of the areas. So while you're sketching, it's better to turn off the
magnetics and snapping. And one day, when you
are actually moving your elements to the quadrants,
you can turn it off. So for the time being, I'm
just going to turn it off. So I'm going to go ahead
and test this again. So go into your layers panel. And this time, I'm just going
to delet the sketch layer. I don't want it because
I'm going to again, create a new version of that. So just swipe towards your left, unlock it, and then you
can just hit on Det. So whatever we have drawn is right now already on
the OG sketch layer. So again, we are
going to duplicate this particular OG
sketch layer four times. So swipe towards your left
and hit on duplicate. Four times. So again, we have
five layers in total, and we have four
duplicated version and then the original
sketch version. Right? So again, this
is confusing for you, you can go ahead and rename it. For now, I'm just going
to keep it as it is. So I'm just going to keep
the first layer turned on, and I'm going to turn
off the other layers. So at this point, again, the first layer layer that is on the top is turned on and the diamond
template is turned on. Now hit on the move tool. Make sure that the
snapping is turned on. And then we're going to move
this to the upper half of the canvas and then to the left. Next turn on the second
layer, click on it, hit on the transform
tool or move tool and drag it to the upper
half of the quadrant, the canvas and move
it to the right. So repeat the same. But this time, we're moving this particular layer
to the lower half of the canvas and move it to the for the last layer, drag it to the lower half
and move it to the right. Now you can turn on
your last layer. And now this again,
gives you an idea with the placing of
the elements, right? So again, I'm going
to go ahead and merge all these top four layers, pinch and merge, and now you can rename this as
just sketch layer. So you have your sketch, and then you have
your original sketch. So go to your sketch layer. Take the eraser to, and you can just erase off this cross mark. And from time to time,
also make sure to turn off the diamond template
and check if you're happy with the
presing of the elements and, like, you know, you want
to add or remove anything. Now I'm going to go ahead
and turn it on again. And I sort of feel like, um, there can be made
certain changes or certain elements can be added
over here as well so that, you know, these big negative
spaces can be eliminated. So I'm just going to
go ahead and do that. But whatever sorry,
whatever you're drawing, make sure you're drawing
on the OG sketch layer. So just go ahead, swipe and lock this one and
click on the OG sketch, and you can start drawing again. I think I'm quite happy
with the placement. So there's still room
for improvement. But I like where this
is going right now. Again, I'm going to
recheck if everything is okay because I placed
these dots again. I just want to check if they
are repeating properly. Again, go into your
layers panel over here and unlock this
layer and delete it. So you want to again
create duplicate copies of this original layer
four duplicate copies. So you have four layers
and the original sketch, so we want to repeat
the same process. Now, just turn on the
original sketch layer and merge the rest. Erase that cross. I'm going to turn off the template layer just
to see how it is going. I think it looks okay, except for the fact
that these two dots over here look a little awkward. So I probably need to do
something about that. But other than that, I
think it looks great. And yes, there's always
going to be a point where you want to keep on working
on this particular pattern, and, you know, you keep working until you feel
you're satisfied with it. And for me, this
happens very late because it's really hard for you to satisfy
yourself when it comes to, you know, um, art, right? So keep working on it, and this is the process
that you keep repeating. So if you add an element
or you're deleting an element just to see if the placement is working or not, you're going to create
duplicate copies of that layer, and then you're
going to place it in different quadrants
and check it out. So this is a process that we're going to keep repeating
again and again. And once you're quite happy with it is when we are going
to put an end to it. So right now, I feel that these two dots are
looking a little awkward, so I have to do
something about it. So I'm just going
to quickly change. Second a lock can rename
this layer. It's confusing. The lock it and
work on OG sketch. So I'm gonna just quickly
check if that is working. I want to dele it unlock, Del it and I'm going to repeat
the entire process again. So, yes, I'm kind of happy
with how it looks now. And yes, like I said, if you still feel
like you want to work with it, go ahead
and work with it. But I'm going to stop here and I'm done with
the sketching part. So the next part is
to start coloring. I'll see you in the next lesson.
7. Colouring: Once you're done
with the sketching, the next part is to start
coloring your pattern. Now, we're going to click
on the color palette. And once you do so, you would see that this is
how it's going to look, and probably you'll not
have anything over here. It might be a little empty. So don't worry too much
about this area for now. So we're going to go and
click on the palettes, and then we're going
to click on Plus over here and new from five. And then hit on Reasons. And if you have downloaded the color palette that was attached to the
resources section, then you would be able to see that particular swatch file over here in your file section. So just on it. And once you do
so, you would see that particular color palette is imported inside
your Propriate. So make sure that particular
color palette is selected, and if you have selected it, you would see this tiny blue
color tick mark over here, which indicates that that
palette is currently active. So now go back to your
disk and you would see that particular
palette appears over here. Now, inside your layers panel, we are going to sort of
remove this sketch layer. We don't need it anymore. So you can either turn it
off or you can delete it. That's up to you. So
I'm just going to delete it because I
don't need it anymore. Okay, so we just have
the OG sketch layer and our diamond template ly. Okay. So now I'm
going to go ahead and reduce the opacity of
this OG sketch layer. So I'll click on that end and reduce the
opacity a little bit. So I think 35 or somewhere
36 should be enough. I'm also going to lock
this particular layer. So swipe towards your
left and hit on lock. Now, both the layers are locked, and I'm going to create
a new layer over here. And this is where
I'm going to start coloring the elements. Now for the brush, I'm going
to go ahead and choose the Caligraphy
underbrush library and choose Monoline brush. So inside your layers panel, make sure that anyway that you have now both
the layers locked, it'll be obviously on
the new layer that you have if you want to rename
it, you can rename it. So what I'm going to do
here is for each element, I'm going to create a new layer. So say, for example,
if I'm going to draw the flower portion of this
particular element over here, then all the flowers, that is the petals
and all those things are going to be in
a single layer. And then I'm going to
create a new layer, and then I'm going
to draw the leaves. So for each new element, I'm going to be
creating a new layer. So I'm going to go into
the color palette now. And I'm going to choose
this nice pink color that you have a darker version
and a lighter version, so I'm going to go ahead with
this bright pink over here. And I'm going to start. So my idea is basically to
keep the element very simple, so I'm not going
with anything fancy. I still feel that the sketch
layer is a little bit dark, so I'm going to go
into the layers panel and unlock it and reduce the opacity a little
bit more and lock it up. So your flower that you have drawn doesn't necessarily
have to be very perfect. So don't worry too much
about making it perfect. Once I'm done with
the whole outline, I'm just going to drag
this and drop into it. I'm going to repeat the same for every other circle that I
have created over here. Next, I'm going to create a new layer and I'm going to draw these
tiny flowers over her. I'm using the same color. But I'm just changing
the shape of the flower. Again, create a new layer, and now I'm going to choose
this green color over here, which is a lighter shade, and I'm going to draw the leaf. Now, since this layer that I am currently drawing
on is at the top, it's interfering with
this floral portion. So I'm just going to clay
below the floral layer. So all the way to the last. So at this point, you
can either drag and drop the como or you can hit on continue filling
and you can just next, I'm creating a new layer. And using the same color, I'm adding the leaves for
this particular flow. You can also draw it in the same layer like
the previous one, but I usually prefer
to have it in a separate layer so
that maybe in future, if I just want to make any
changes or add anything extra, I can do that without having
to worry about, you know, it interfering with the leaves that are on the previous layer. Again, I'm going to
create a new layer and I'm going to choose
this dark green color, reduce the brush size a little. And again, create a new layer. I'm going to use the same color, and this time I'm going
to change the brush. I'm going to go into the inking and go with this dry ink brush. So now I'm gonna go ahead into the layers panel and turn off the sketch and also the
diamond template layer and see if it's working out. They looks fine. So
next turn them back on. And I'm going to add the
center part of the flower. We'll go into the layer spanner, and I think this is the layer. Probably this is the layer. So I'm going to create
a new layer about this particular layer that is the flower layer that we
have here. Layer three. I'm going to create
just click on layer three and hit
on this plus sign. So it's going to create
a new layer above it. Now, to this layer, just click on the thumb layer. And you can add clipping
mask if you want, because adding clipping
mask sort of helps you to contain whatever you draw
within that floral element. So, for example, if there's anything that I want
to add as a detail, I'm going to go
ahead and probably choose this darker pink. And if I try to add some
sort of petals into it, maybe I think I should
choose some other colors. Sorry. Be a dark color. This is just to show
you an example, so don't worry too
much about it. So once I've added clipping
mask to the new layer, you see, even if I start
drawing from the outside, it doesn't show that part. It only shows
whatever I'm drawing inside or on that
particular flower. Click on the thumbnail and
hit on this clipping mask. You see that so I go back and
turn on the clipping mask, it sort of clips it to
the shape of the flower. So I get the freedom
to work within the flover so that none of
my lines are going out, even though I have drawn
them from the outside. Right? So for now, I'm not going to do anything
with these kind of lines. I'm just going to
quickly hit on Telit, again create a new layer and
just add the center part. Now, for this, I'm going to use the blending more
to my advantage. So I'm going to click on the same color that
is the base color, so you can choose it from here, or you can just click and hold and you can
choose the color. Now go to your layers panel, and on layer nine, that is the newly created layer. Click on this, and you see
right now it's at normal. So now I'm going to
change that to multiply. So as you drag it down, you'll be able to see this
multiply option at the top. So just hit on that and with the same dry ink brush
selected, can just draw. And you see it sort of
gives a different color. This is a fun way to actually
add a new color into your color palette without actually selecting
a new color, right? And whatever color it
sort of creates is also incohesive with this entire color palette that
we already have. So I'm just going
to color inside this because sometimes when I drag and drop, it'll not work. So since this brush also
has a nice texture to it, it's better to start coloring inside instead of flag drop. I'm gonna repeat the same
for every other flower. So going to go back
and click on this. So now you see since we have
chosen the multiply mode, it shows M instead of
N. So click on that M, and you can experiment with
different blending modes. Each these blending modes
have something to offer. Some might not work,
some might work. So just lay around with it and see which particular
effect do you like. So I'm just going to
go back with multiply. I think color burn
also looks great. I think I'll stick
with color burn. So once I do that, you see here, it changes to CB. No, I'm sorry. Okay, so now we are done
with that particular flower. The next step is
to go ahead into your layers panel and create a new layer
about the layer four, that is about this particular floral
layer and repeat the same. So click on N, hit
on Color Burn. And the same color selected. Going back into the layer nine because I feel like
this is slightly moved. We're gonna select it?
I'm gonna turn off the snapping for now
and just align it. So at this point, you can
turn off the sketch layer. You don't need it anymore. So now I'm going to go to the leaves layer that is
layer five over here. So if this is confusing, you can always
rename your layers. I'm going to go ahead
with a layer five, that is where my these
huge leaves are. And I'm going to create
a new layer above it. And this time, I'm going to also use the same multiply mode and use the same base color and with the dry ink
brush selective. Just go to draw these veins. Just dry ink brush works based on the
pressure that you apply. So if you apply less pressure, then the line that
you get is thin. And if you apply more pressure, then the line that you
get is slightly thicker. So if you want to
add similar kind of lines to these leaves over here as well,
you can do it. I'm just going to
leave it as it is. So the next step is
I also want to add some nice texture to these leaves and those floral
elements that we have here. So I'm going to use the
clipping mask to my advantage. So we're going to go into
our layers panel over here and click on
this layer four. So this is probably
the tiny flour that we have that kind of layer. And just click on new layers or new layer
gets created above it, and then hit on clipping mask. Now, this clipping
mask works onely for the layer that is
immediately below it. So it will only get applied
to this layer four over here. It will not get applied to layer nine or whatever
that is below it. I only get applied
to Layer four. So if you want to make
or apply clipping mask to this layer nine,
then you have to again, create a new layer and
apply clipping right now, I just want it to be
applied to layer four. So I'm creating a new layer
above it and hitting on the thumbnail and making sure that the clipping
mask is turned on. Now, inside the brush settings, I'm going to go
into the materials, and I'm going to choose
this noise brush. So you only have one noise
brush. I kind of have two. They're the same, but just slight settings
have been changed. So I'm just going
to give it a try. So I'm going to select
the same color, same technique, click on, change it to multiply more. Increase the brush
size a little. And you see, once I do, it sort of adds a
nice texture to it. So now you can see the
difference between this particular flower
and this over here. So earlier, our flowers
look very flat. The elements look very flat, but now that we have added a
little bit of texture to it, it sort of gives
us a nice depth. Now, this is not necessarily that you should use
only noise brush. You can also experiment with different kinds of
texture brush and tries. By create a new layer about this layer three. Hit on clipping mask and turn the blending mode to
multiply and repeat this. So I'm choosing the
same day's color. I'm going very lively
with the pressure. I'm going to go back
into the layers panel, and I feel like right
now at this point, this color burn that we
had added previously looks a little bit too bright. So I think I probably
just want to go back with multiply
and see how it looks. No, I think I'll stick
with color burn, but I also find it to
be very, very dark. So I'm just going to reduce
the opacity a little bit. I'm also going to reduce the opacity of the
texture that we added. So it is this particular layer. And we're going to reduce
the opacity a little bit, not too much because
then you will not be able to see
the texture at all. So somewhere like
85 should be okay. And same for this flour
also, the texture portion. So I'm also going
to go ahead and add the texture for
the leaves as well. So just click on that layer, create a new layer about it, hit on the thumbnail,
clipping mask, and change the blending
mode to multiply. Choose the base.
Choose the base color. You can add the texture. I'm going to repeat the same
for these leaves as well. So go to your layers
panel, choose that layer, create a new layer above it, it on clipping mask,
and multiply move. Choose the base color. So I'm gonna go
ahead and turn off the diamond template just to
see how it looks overall. I think that's good. Maybe I just have to
reduce the opacity of the texture for the
leaves. So just reduce it. Just like how we did
for the flowers. So I like the way
how it looks now, and we're almost done
with the coloring pat. The next step is to put
this into a key pad. I'll see you in the next lesson.
8. Repeat Pattern: Now that we are done with the
coloring of our elements, the next step is to test
them into a repeat pattern. So now go into
your layers panel. Once you're inside
your layers panel, you're going to choose
all these layers. So to do that, you're just going to click on layer ten over here, and you're going to swipe
towards the right on all the other layers to
make multiple selection. So we're just going to select all the layers on
which we have colored. We are going to
leave the sketch and the diamond template as it is. And once you have
selected all the layers, you're going to click on group. So once you have
clicked on Group, I show you that now all these layers are
a part of new group, you can close it and expand. Now, inside this new group, just click on the topmost layer. So for me, it is layer ten, and I'm going to
create a new layer and just use any bresh and we're
going to mark the corners. Next go into your layers panel, and now just close
that new group, and we're going to duplicate it. So just swipe towards your
left, hit on duplicate. Now, we cannot make
multiple copies of the same group because there are a lot of layers included in it. So we're going to
retain the new group that is the original
group as it is. So to avoid confusion, I'm going to rename this
group into OG group. And this new group, I'm going to click on
the thumbnail over here and hit on flat. So now we have merged all those layers that
were part of the group. So we have the original group, and then the duplicate of the
group has been flattened. Now we are going to
duplicate this three times. So we have four layers and
the original group layer. And we are going to
repeat the same. We are going to drag
each of these layers to the top half and the
bottom half respectively. So I'm going to turn
off all the layers except for the one
that is on the top. And I'm just going to turn on the diamond template
just for our reference. Click on the top layer, hit the Woolf tool, make sure that the
snapping is turned on and just drag it
to the top half. Snap and move to the left. Now select the second layer. Move it to the top half
and towards the right. Next layer to the lower
half and towards the left. And the last one again to the lower half of the
canvas and to the right. And then you can turn on
the original group layer. That's now you have your
repeating pattern type. Now you can again merge
all these four layers on the top and use the eraser
tool and erase of this mark. And you can also turn
off the diamond dim. So now we have our
repeating tile, but the next step
is to test it to see if it's repeating
seamless fum less. So I'm going to go ahead into the layers panel and
into this Pj group, I'm going to turn off
this tip, layer 70, which is actually the
layer where we sort of put down and you get
this marked the corners. Click on I'm just
going to turn that off and then hit on pick. We're going to use our
three fingers, swipe down. Copy all, and then again, three fingers swipe down paste. Now, what this
does is it sort of creates an image version of whatever was
there on the canvas. So now we are going to duplicate this inserted image three times. In total, you're going to
have four of those images. Now I'm going to turn off the layer five and
also the OG group. And we're going to select all of these inserted images,
select all the four. Hit on the transform tool and then hit on
this tiny blue dot. Here, I'm going to
enter half of 3,000. That is 1,500. Sorry. Thousand 500 pixels. Now when I do so,
you see that the image sort of moved to the
very first quadrant. So half? So I accidentally turned off the drawing diet. I'm
just going to turn it on. Yeah, so now you can see
that it has perfectly so all the port snapped to
the very first quadrant. Go back to your layers menu. You can select any
one of these images, hit on the move tool, and now just drag it to
each of these quadrants. And now go into the wrench tool and turn off the drawing guide. So now you have your own
seamlessly repeating pattern using the dim in technique. Now here, as you zoom in, you should not be able to
see any lines, white lines. If you see that, it means that there has been
a snapping error. So when you actually tried to move these images
to the quadrant, probably they didn't intersect
in those yellow lines, and there was a slight
snapping error here and there. So that might have happened, and hence you see
that white line. You might have to rework on
the snapping part again. So this might also
happen when you are also creating your pattern that is sketching your pattern. So that's why it's
very important to make sure that
you are snapping perfectly and exactly
at the point where you vertically and
horizontally b yellow lights. So that's it. I'll see
you in the next lesson.
9. Final Thoughts: Congrats on completing
this class and creating your own seamless
repeating pattern. If you enjoy this class, don't forget to leave a review and share
your class project. Feel free to drop your queries under the discussion section, or you can connect with me on Instagram at the wishing Ink. Thank you for taking this class. I'll see you in the next class.
 Vidya Kumaresan, Illustrator