Transcripts
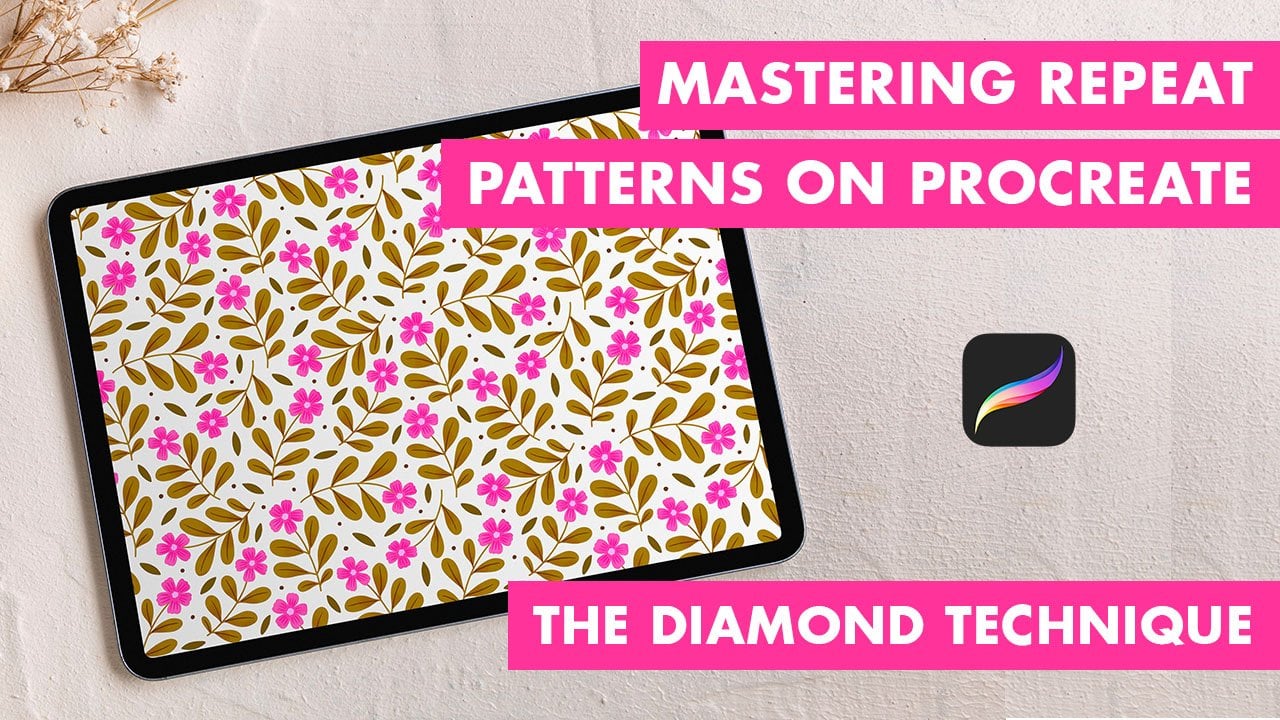
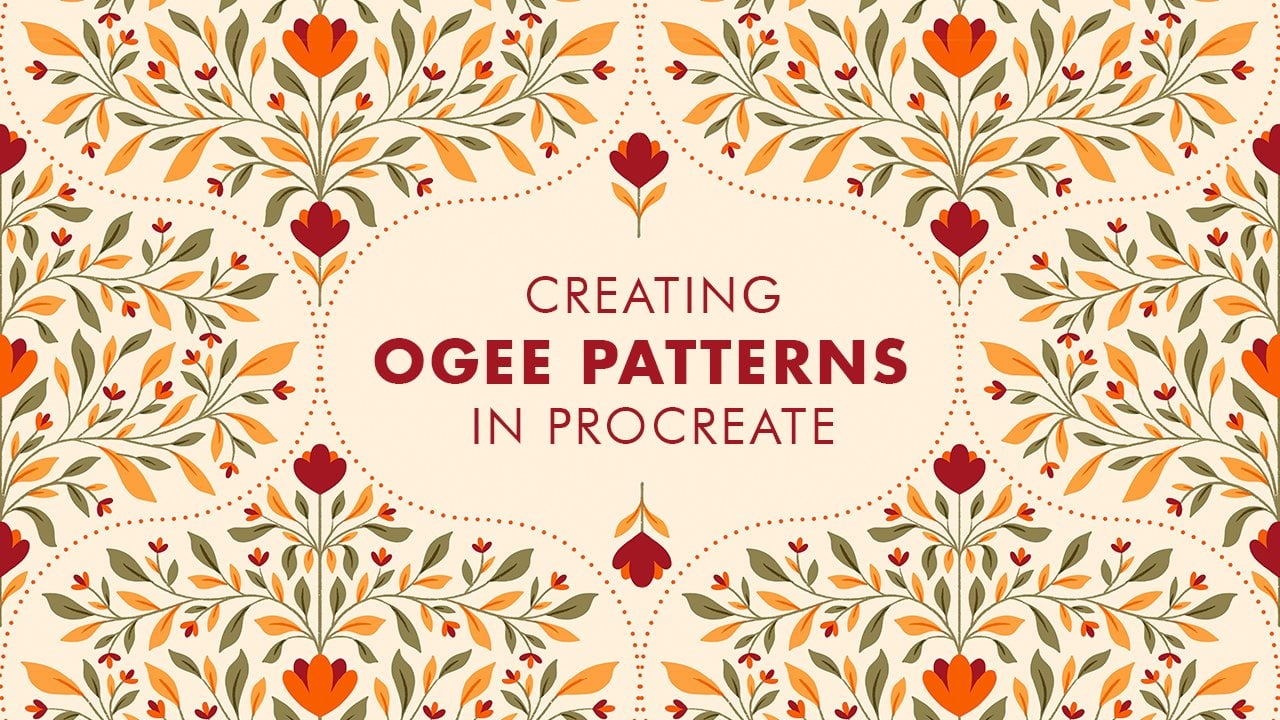
1. Introduction: Hi, there. Welcome
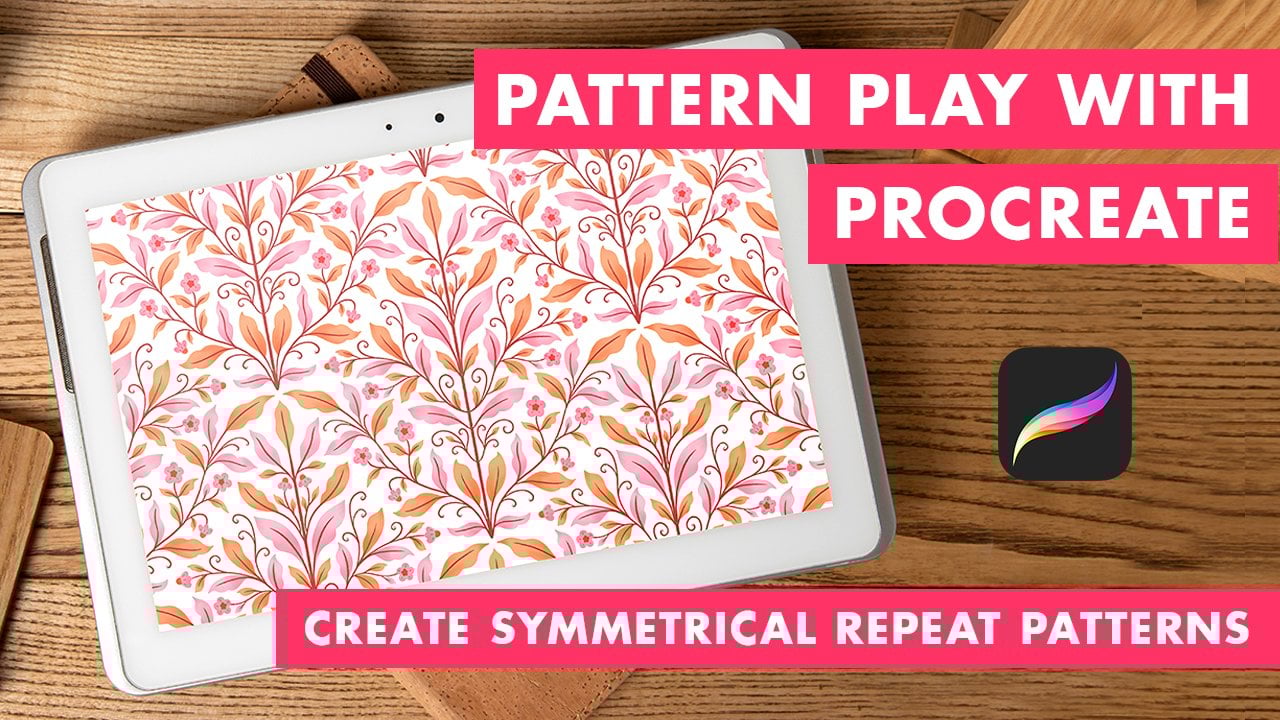
to this class on creating beautiful half drop repeat patterns on Procreate. I'm with your commaron. I'm an illustrator and surface pattern designer based in India. I absolutely love working with both traditional and
digital mediums. Whether I'm painting with quash, sketching with
colored pencils or creating digitally on
my iPad with Procreate, each medium brings its
own magic to my work. What really excites me is seeing my standalone illustrations
and surface pattern design. Come to life on everyday objects from notebooks and throws
to rugs and pouches. There's something
wonderful about transforming a simple sketch into a pattern that can beautify the objects
we use every day. In this class, we are diving into creating half
drop repeats which create beautiful organic flow to your patterns in
comparison with a full drop you have taken my previous
class on full drop repeat, you will love how this class takes your skills
to the next level. However, if you're
completely new to creating patterns
on Procreate, I would recommend you to take
my full drop repeat class first as it covers the fundamental basics
of pattern creation. That foundation will make this class easier
to follow along. Together, we'll cover setting up your canvas with the right
dimensions and settings, understanding print
ready specifications, learning exactly how half drop repeat works
and why they are coloring and refining your
artwork and most importantly, ensuring your patterns repeat seamlessly without
any visible breaks. This is an intermediate
friendly class that works perfect for someone who has already worked
with Procreate. By the end of this class, you would have gained
the confidence to create your very own half
drop repeating pattern and use this technique
to your advantage. So grab your iPad, open up Procreate, and let's create some beautiful
patterns together.
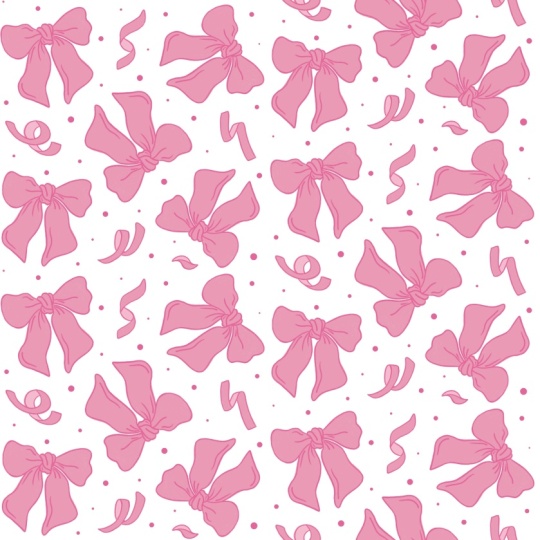
2. Class Project: Now, let's talk about what you'll be creating
in this class. Your project will be
designing and completing your very own half
drop repeat pattern from start to finish. I'll be demonstrating
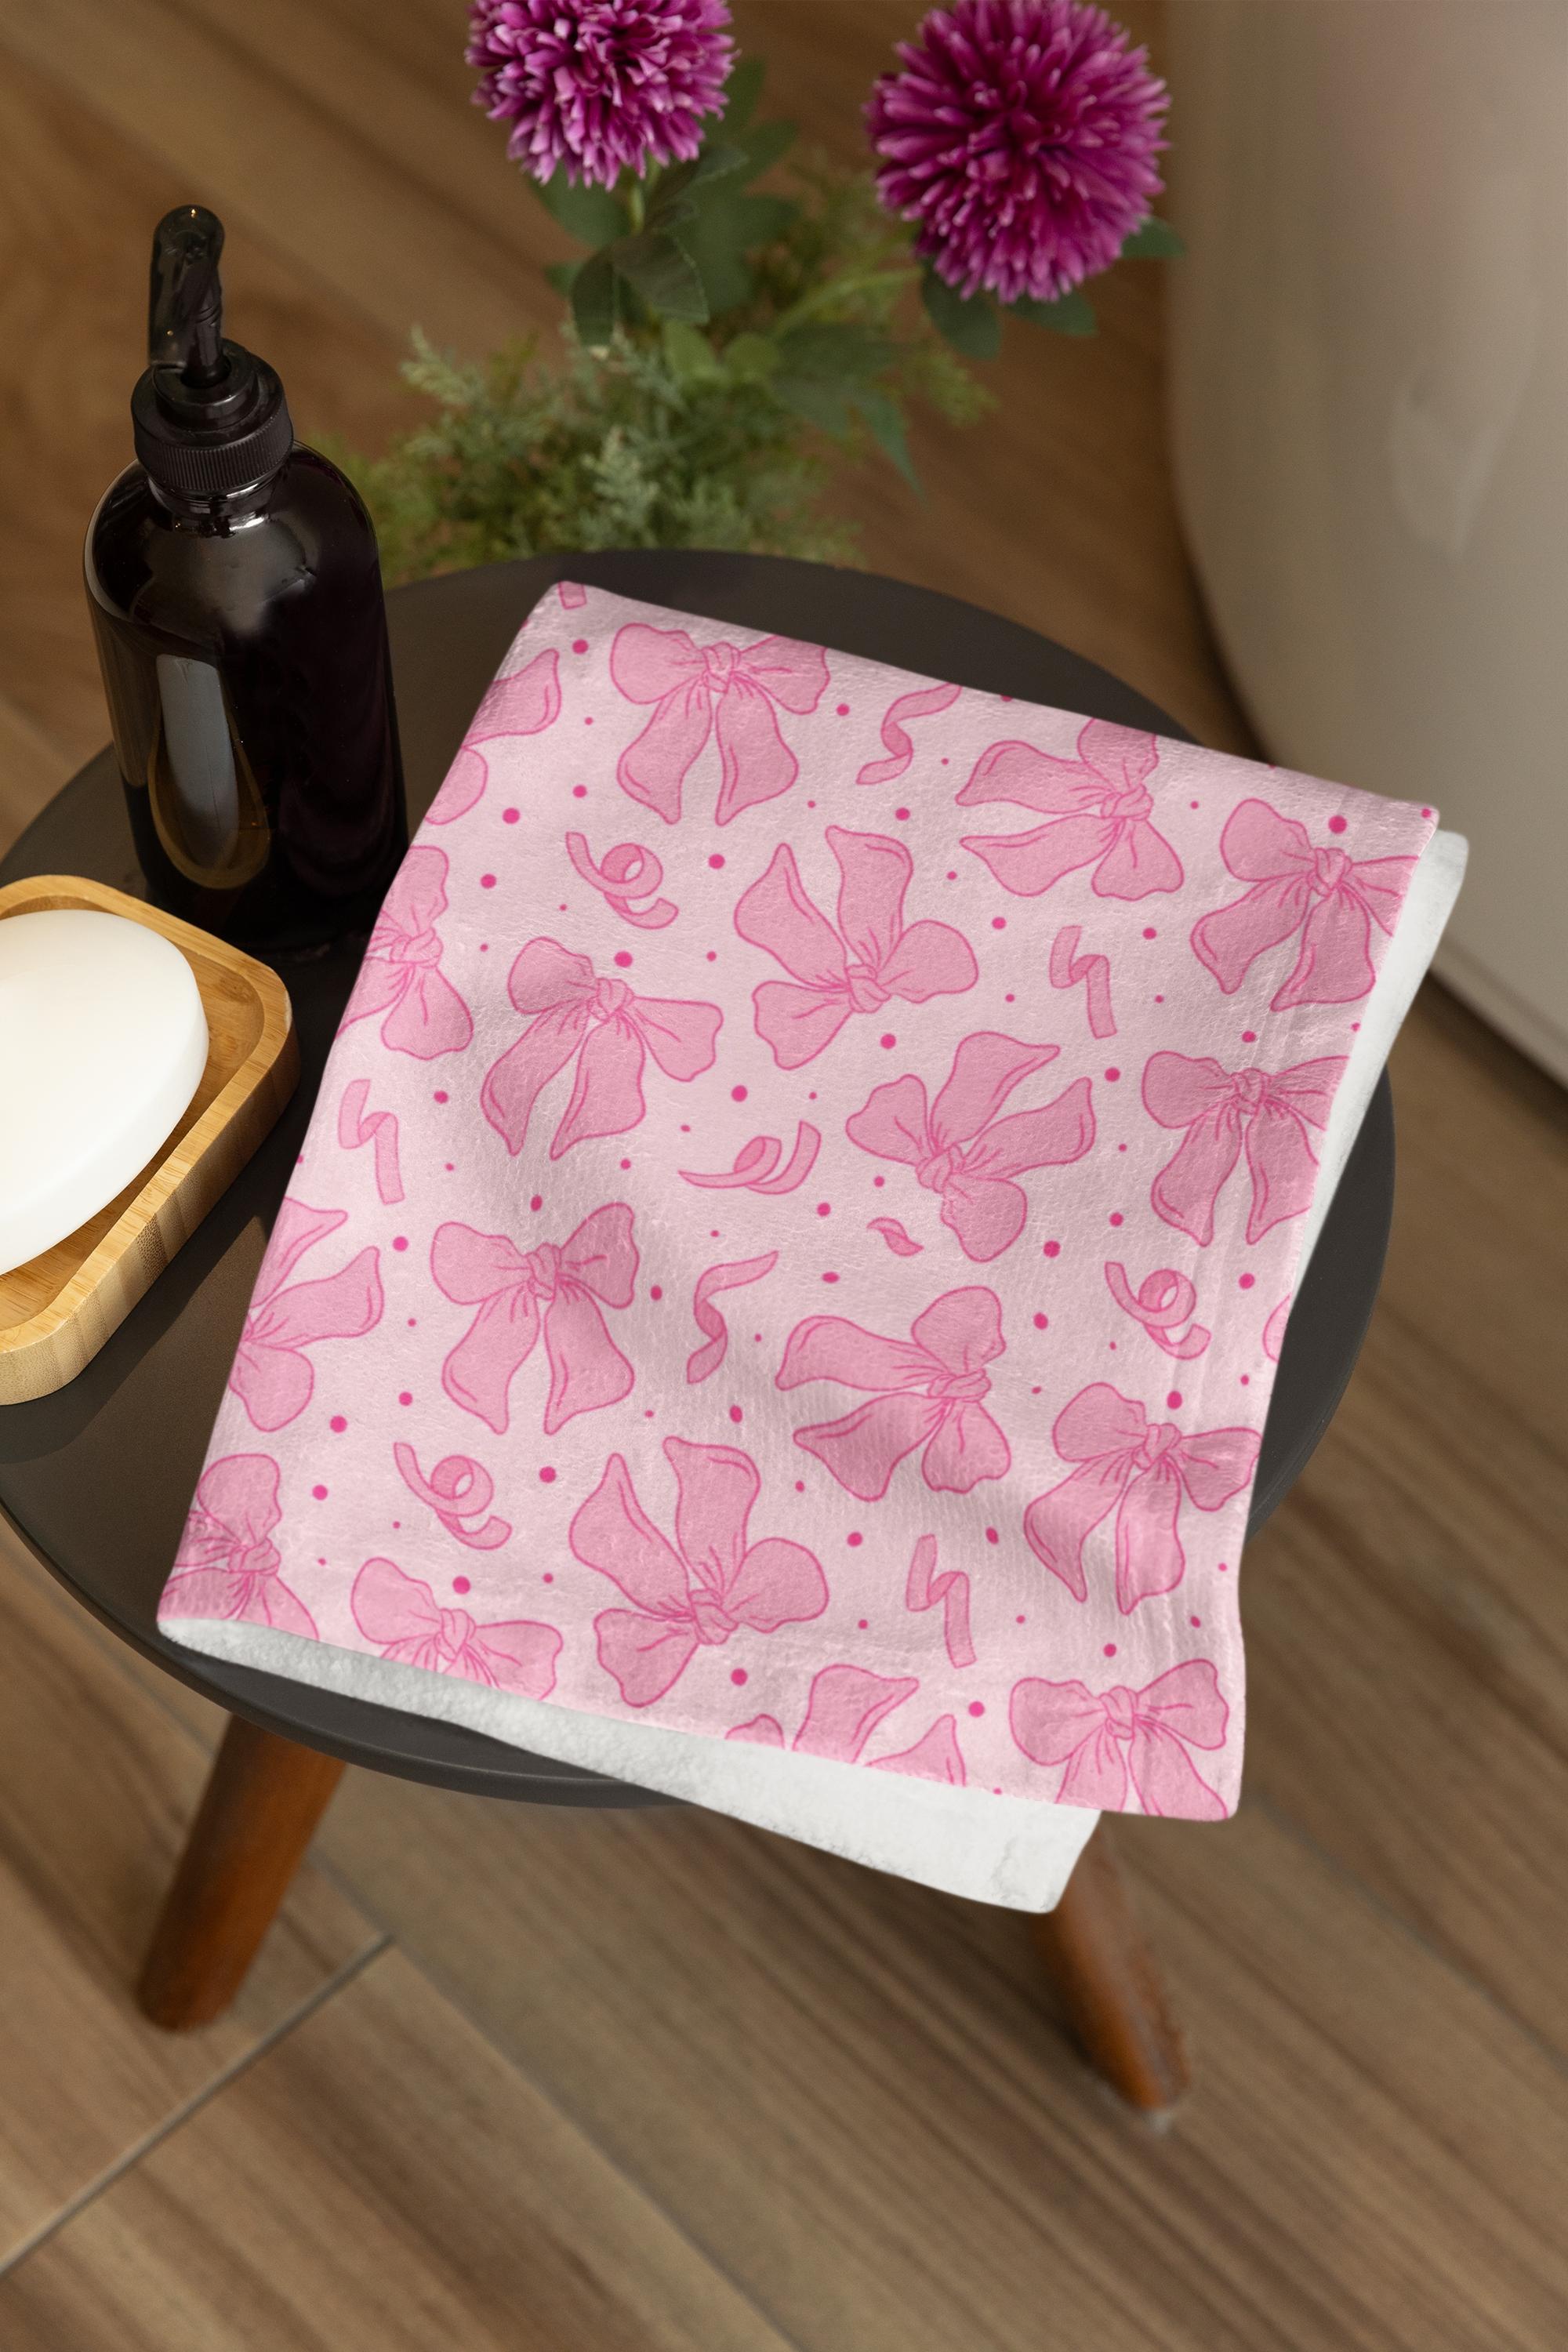
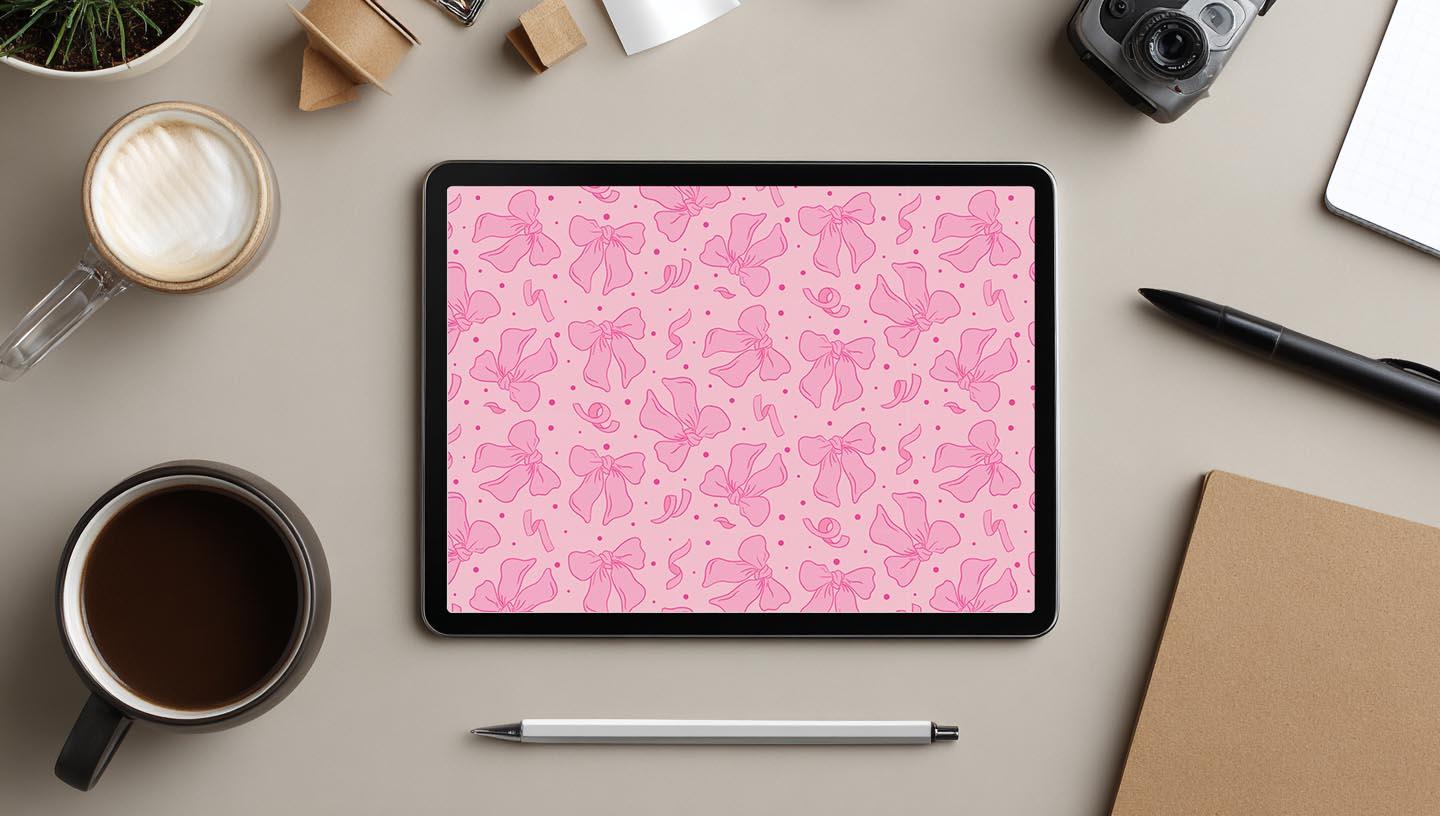
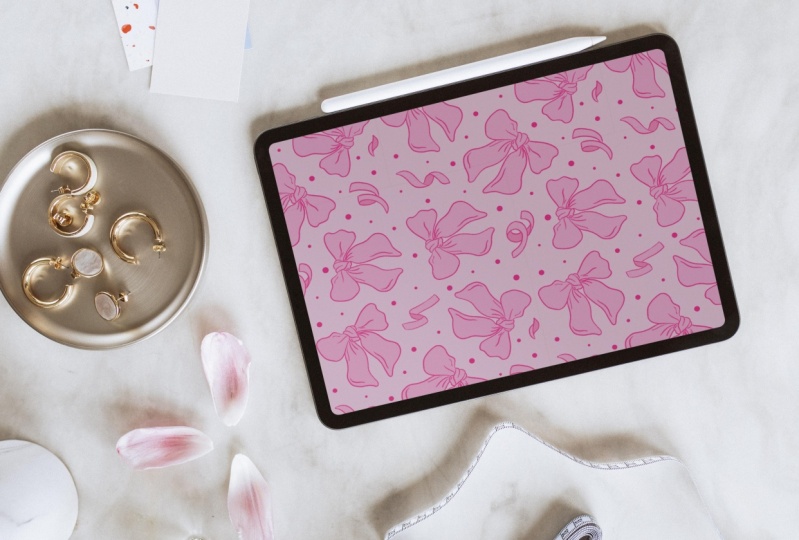
the entire process using this charming bow
pattern you see here, but you're completely free to use any element
that you like. To make your learning experience
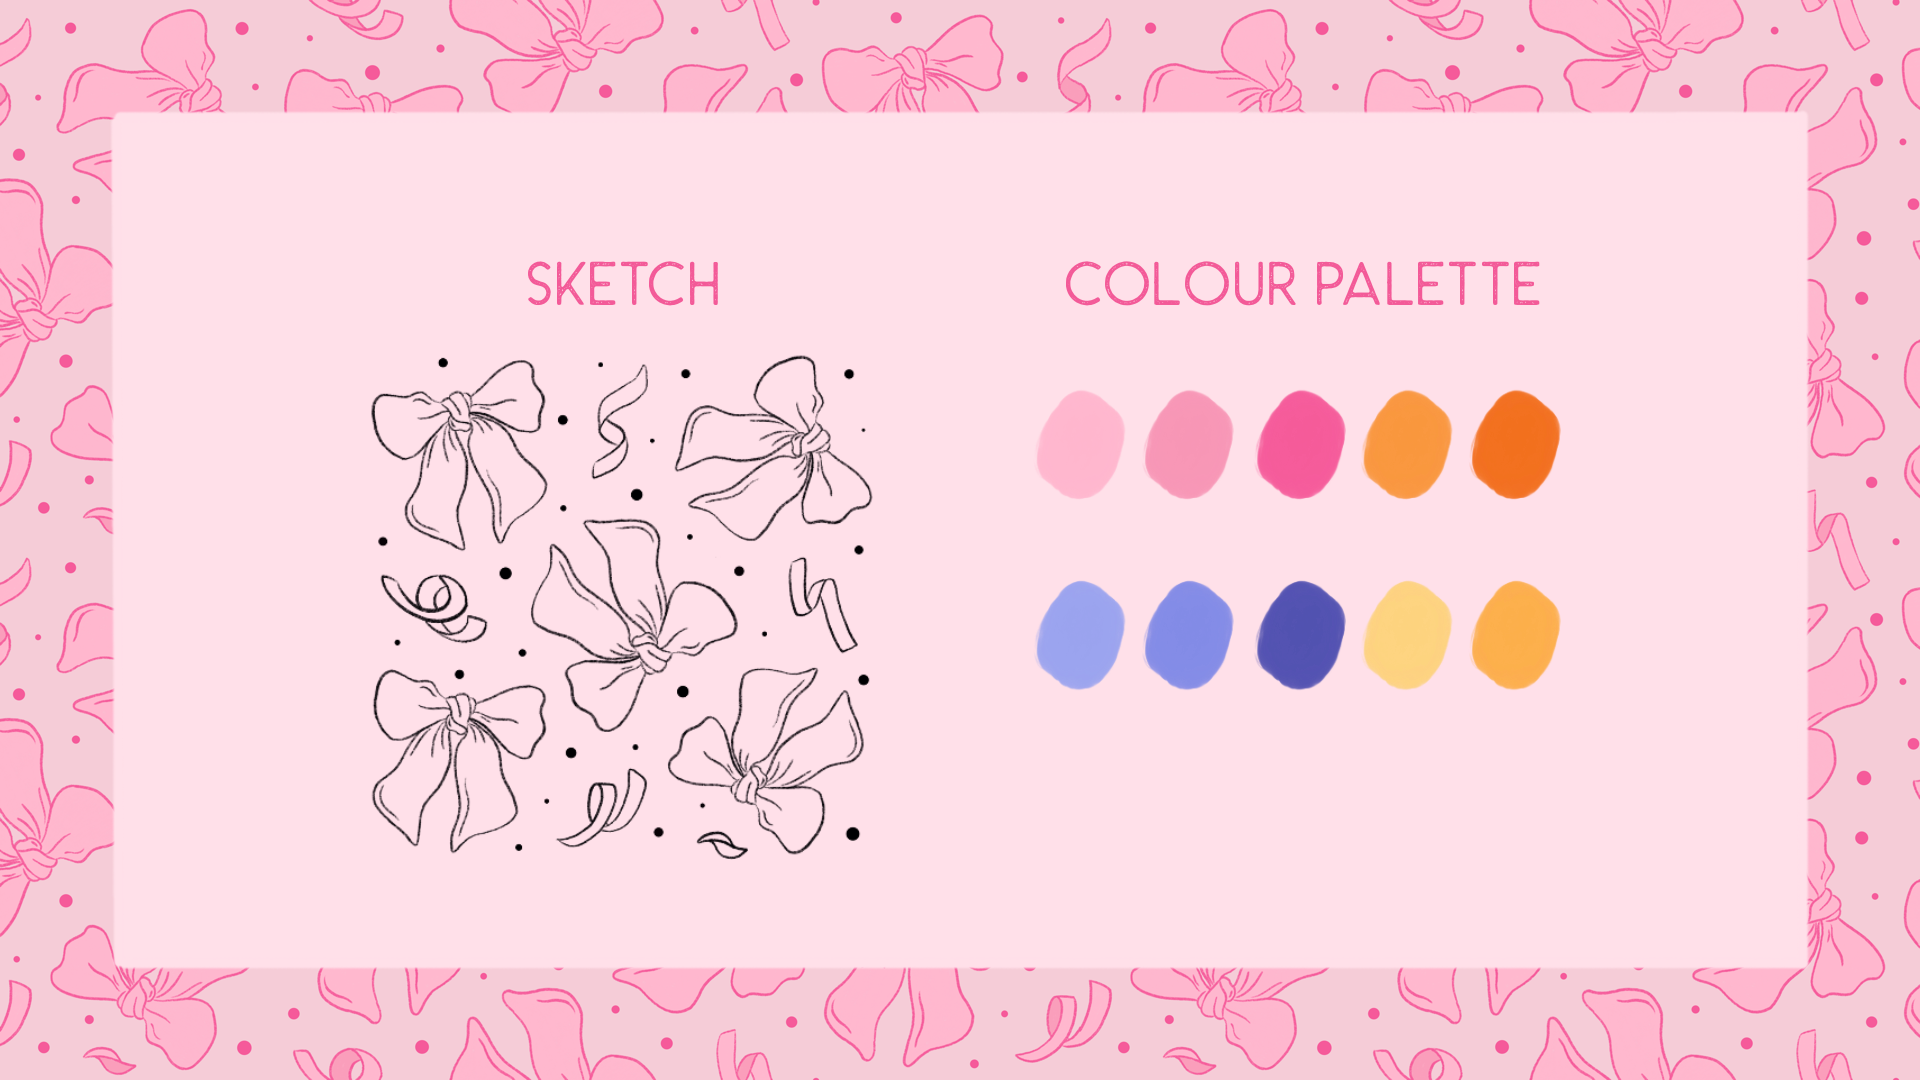
as smooth as possible, I have created some resources pre sketched
elements so that you don't have to worry
about sketching and can purely focus on learning the technique and a color
palette ready for you to use. All of these resources will be available under the project
and resources section. So you can download
it from there and you can create
alongside with me. I encourage you to share your final project in
the project gallery. I'm so excited to see
what you'll be creating.
3. Materials: To follow along with this class, you will need an iPad
with Procrit installed, an Apple pencil or a
compatible stylus. That's it. Everything else is provided under the class
resources section, so you can start right away.
4. Half Drop Repeat: So what exactly is a half drop repeat?
Think of it this way. In a traditional
full drop repeat, your pattern elements
are arranged in a perfect grid
like a checkerboard. But in a half drop repeat, every second row is
shifted or dropped down by exactly half the
height of your repeat unit. This technique is
used everywhere, starting from high
end wallpapers to fabrics to home decker. So now you know what a
half drop repeat is. Let's dive into the next lesson.
5. Canvas Setup: Our next step is to
set the canvas up. To do that, you're going to
go into your Procreate app, and you're going to click on this plus icon at the
top right corner. And underneath this, you
would see a lot of options, but we are going to go ahead
and click on New Canvas. So here you're going to
enter your width and height. We are going to
keep the width and height approximately 12 by 12 ". This works perfect for
creating any pattern. So I'm going to go
ahead and choose inches over here and click on the width area and Enter 12 and also enter
the height as 12. Next, I'm also going to make sure that the DPI is set to 300. You have to make sure
that the DPI is set to 300 if you're creating a pattern that is
going to be printed. If your DPI is lower than 300, let's say if it's at 1:50, then when the pattern is
getting printed on any product, you might see that the pattern might be lightly pixelated. That is, the quality
of the output is not going to look That's the reason why we are
going to go ahead with a DPI of 300 or higher, but never lower than 300. Once you have entered the DPI, we are going to go into
the color profile over here and we are going to
choose the color profile, Display P three under RGB. That's it. Once you have
entered all these settings, we are going to hit on Create and you would see that now a Canvas
has been created. I'll see you in the next lesson.
6. Importing: The next step is to import
our resources into Canvas. I'm going to click on the
color palette over here, and then I'm going to
click on the Plus icon, and I'm going to
select New F five. Now, if you have saved the resources onto
your file folder, then you will be
choosing this option. Once you are into
the file folder, you can either go
into the resins and look for this particular
swatch named Bs. You can click on
it, and you will notice that it automatically gets imported into your iPad, and now it also appears
onto your color pale. The next thing we are
going to do is we are going to input the template. So to do that, I'm going to click on this wrench
tool over here, and then I'm going
to click on Add, and I'm going to click
on Insert a photo. And then I'm going to
go into my gallery and select that particular file. And bring it onto my iPad. Just make sure to click on
Fit to Canvas to make sure that it is completely selected and occupying
the entire Canvas. That's it. I'll see you
in the next lesson.
7. Coloring: In this lesson, we are
going to learn how to create our half
drop repeat pattern. You can see that we already
have our template ready, but I also want to
explain how to place your elements if you're planning to create a
motif or an element, which is not a bow, but something like a
flower or an abstract. So the basic idea that
you see here is that you have to fill your
canvas with elements. This element could be anything starting from
abstract elements, geometrical or even
florals, right? But here today for this class, we are going to be
choosing our elements as bows and ribbons, right? So anytime you're creating
your half drop repeat pattern, the first step over here, I'm going to just
turn this off for now and you see you
have your empty canvas. Let's say you want to create a element that is
something different. So for example, I'm just going
to go to my Besh library, and I'm going to select my six f pencil and choose
a color, let's say, black. I would begin creating
somewhere over here. In these areas, and over here. But I would make sure that my motive or the
element that I am creating is not touching
the sides of the canvas. So for example, let's say
I have drawn a flower. Now, this flower is
perfectly at the center. I wouldn't say center, but
somewhere in the canvas. But let's say I have
drawn this Let's say if your motif is placed very close to the canvas
sites, then it's okay. But if you're drawing it or placing it somewhat like this, then you should be
aware that the pattern that you're going to create will have a lot of alignment issues, and also the motif
is going to get cut. Avoid doing something like this. Always make sure that your elements are
within the canvas, or it can be close to
the sides of the canvas but never outside
the canvas, right? With that getting clear, now let's bring
back our template. So I'm going to
delete this and I'm going to turn on
the template layer. So to avoid confusion, it's always better to
rename your layers. So I'm going to go ahead and
click on the thumbnail of layer one over here and I'm
going to select Rename. I'm going to go and
select my keyboard. And I'm going to rename
this layer as template. Or you can also
rename it as sketch. Once that is done, our next step is to start
coloring art motif. So I'm going to go ahead
into my color palette, and I'm going to go
to the palettes. And I'm going to make
sure that we have selected the color palette
that we have downloaded. So here you can see that
there is already a blue tick, which indicates that this
is the selected palette. But in case if you
don't see this, just go and click
these three dots over here and click on
set as Default. Once you do that,
you will notice that the blue tick mark appears right at the front of that name. So I'm going to go ahead
and choose the color pink, which is second in
the very first row. I'm also going to go
into my brush library, and I'm going to go ahead
with the six B pencil, which you can find under
the sketching option. Okay. Now I'm going to
create a new layer. I'm going to click on
this plus icon over here and you see that a
new layer is created. I'm also going to go back into the template layer
and I'm going to hit on this N over here and I'm
going to reduce the opacity. So I'm keeping it
at 34 percentage. And I'm going to go
back to my layer two, and I'm going to make sure
that my brush is selected, and I'm just going
to start coloring. For this particular pattern, we don't have to color
all the ribbons, rather we are just going
to start coloring one of the ribbons and we are
just going to duplicate. So I'm going to start with
the ribbon over here. And once again, go to your layers panel
and make sure that you're not on the template layer rather you are on the new layer. And if you feel that
you might accidentally end up coloring on
the template layer, you can just click on
the template layer, swipe towards your left, and click on Lock. So what happens here is
this particular layer is now locked and you
cannot draw on. Now go back to your layer too, and let's start coloring
the particular element. Please. So my brush size is already at MAX, so I'm just going
to start coloring in with the same six B brush. But if you notice,
though it's at MAX, the brush size is too small, and if I want to color it in, it's going to take
a lot of time. So for this very reason, I'm going to go ahead and make certain changes
to my brush. I'm going to click on
the brush library again, and I'm going to duplicate, so swipe towards your left
and hit on duplicate. And click on the
duplicate version. And inside this, I'm just
going to go into properties, and I'm going to increase the maximum size
under brush behavior to almost somewhere 30
percentage and head done. Now you notice my brush size is much bigger and it's
easy to color as well. You can also use
a different brush and go ahead with
dropping the color in. But I'm using this six B brush mainly for the
purpose of texture. I really love the texture that this particular brush
has, and if you zoom in, you can actually see
these white grain, and it adds a lot of depth
to your illustration. So I'm going to go back
into my color palette, and I'm going to choose
this dark pink over here, which is the third
color in the top row. And for the brush, I'm going to choose the
default six B brush, not the one that we
actually changed. So we'll go back to the one that was already
there, which is default. And I'm going to go ahead
and create a new layer. And I'm just going to
draw on top of this. Now, if you notice you cannot
see the sketch anymore. So what we're going
to do is we are going to click on this template, and we're going to click and
drag it to the top for now. I'm also going to swipe
towards my left and unlock it. And I'm going to
click on this over here and I'm going to go and
choose multiply for now. Once you've done that, make sure to lock your layer again. Now that you can clearly
see the outline, click on the layer three, and you can just start
drawing the outline. So now that we are
done with the outline, I'm going to go into my
layers panel and I'm just going to turn off the template layer just
to see how it looks. So it looks fine to me. I'm going to go
ahead with this one. So the next step would be
actually to duplicate this. I'm going to go ahead and choose both these
layers over here. So that is layer one and sorry, layer two and layer three. And I'm going to hit group. Okay. And I'm going
to rename this as B And now I'm going
to duplicate this. I'm going to swipe
towards my left, and I'm going to hit duplicate. And on the thumbnail of
the duplicated layer, I'm going to hit
and choose flatten. So what this does is it basically merges both
the layers as one. We still have our original. So if you want to make
any color changes, you can still go ahead
and make those changes so that you don't have to worry that you have
already merged a layer. No, you still have
your original. So now I'm going to click on the layer that we had merged, and I'm going to swipe
towards my left again. I'm going to hit duplicate. I'm also going to turn
back the template layer. So you see we have
two layers here. I'm going to click
on any one of these, and I'm going to
choose the move tool and I'm going to move it and place it or say position it
according to the template. It doesn't have to
be very perfect. But like I said, make
sure that your element is not too close to the canvas
sites or is getting cropped. Again, I'm going to
duplicate that layer. So we're going to keep repeating this process for
all the other bows that you see on the template. Again, I'm gonna hit
Duplicate and position this. Duplicate it one last time. That's it. So now we are going to create these ribbons as well. So I'm going to go into
my layers panel over here and I'm going to create a new layer and I'm going to repeat the same process that we used for the booze. So I'm going to choose
the lighter pink color. Make sure you are
on the 60 pencil. So I'm drawing all these
elements on a single layer. But if you want to, you can also draw them on
separate layers. A So now we're going to create another layer. I'm also going to turn off
the template layer just to see if I have
colored it properly. And I do see that there are
a lot of gaps over here. So I'm going to go
back to the layer ten and fill in those gaps. All right. So now I'm
going to go back to my layers panel and
create a new layer. And on that particular layer, I'm going to choose the same
dark pink color over here. And with the six B
pencil selected, just go to draw the outline. Now, I feel the outline is
a little bit dark for me, so I'm just going to
reduce the opacity. So I'm going to go back into
my layers panel and turn off the template just to see
if everything looks okay. Yeah. And now I'm going
to go into my layer ten over here and go
to your color palette. And I'm going to choose
this very first color. And I'm just going to
color it over here. Just at the bends so that it looks like the ribbons
have shadow over there. That's it. So now I'm going to just quickly rename these
to avoid confusion. It's always best to rename your layers because
we'll be creating a lot of layers and having
them as layer one or layer ten is going
to be very confusing. So I'm going to go
ahead and rename them. So I'm going to click
on layer ten over here and rename it as ribbons. And I'm also going to go ahead and merge
these two layers. Okay. And we also
have these layer two, multiple copies of layer two. I'm going to quickly go ahead and rename them as B
one, B two or B three. Now, I'm going to
create a new layer and I'm going to turn on the
template layer over here. And with the same six
B pencil selected, I'm going to go ahead and choose the pink that is the
dark pink again. And I'm going to go
ahead and add in these dots or circles. You can also use
some other elements like florals instead
of these dots as well, or you can even add sparkles. So you can replace these dots
with any other elements. So go back to your layer
menu and make sure to rename this as tots. So that's it. So
we are done with the coloring of our
elements of motives. The next step is to create an actual half drop repeat
using these elements. I'll see you in the next lesson.
8. Creating A Repeat: Now that we are done
coloring our elements, the next step is to create
a half drop repeat. We are going to go into
our layers menu over here. I'm going to turn off
the template for now. And just make sure that
everything looks okay. And once you're happy with it, go back to your layers
menu over here, and I'm going to choose all these layers over here
and group them together. So I'm going to click
on the tots layer, and then I'm going
to swipe towards my right on all
the other layers. And I'm going to hit group. I'm also going to rename
this as Ogi Elements. So we are not going
to merge this group, rather we are going to
create another group. That is we're going to duplicate this particular
OG element layer, and then we are going to
merge the layers together. So to do that, I'm
going to swipe towards my left and hit Duplicate. And then I'm going to
click on the thumbnail of the duplicated layer over here and I'm going
to click flatten. Next, we are going to
turn off the OG elements. And now here you can see it's
somehow renamed to Bo fi, and that's totally okay for now. So now I'm going to just zoom out and I'm going to create duplicate copies
of this particular layer. So I'm going to create three duplicate versions
of the same layer. So we're going to swipe towards the left, head on duplicate. Again, swipe towards your
left and hit duplicate. So altogether, we
have three layers of the same element
composition, right? And I'm going to turn off the
first two layers over here. I'm also going to turn off
the bow layer over here. Okay. So now I'm going to just select the one
that is turned on, and I'm going to go to
the move tool over here. I'm going to make sure that
the snapping is turned on. And now I'm going to turn off. Now, go back to
your layers menu. And in this particular layer, we're going to also
go to our brsh layer, choose any pencil
that's totally okay, and I'm going to just
mark the corners. Now, make sure to select
a different color, so I'm going to go
ahead with black again. I'm just going to mark
the corners over here. We are doing this to avoid
any alignment issue. So once you have marked
all the four corners, now you're going to
click on the move tool, and you're going
to actually move this entire layer
towards your left. I'm just going to drag it
slowly towards my left, and I'm going to leave it when it snaps right at the center. Here you can see those
yellow lines that guide you. So when it snaps perfectly both vertically
and horizontally, you can just let
go of that layer. And then I'm going
to go back into my layers panel
over here and I'm going to choose the second layer above the previous layer. I'm going to turn it on. And if you want to turn off
the previous layer, you can. And again, we're going
to repeat the same step. We're just going to
mark the corners. And we are going to use
the move tool this time, we are going to move this
layer to the second quadrant. That is just going
to drag it like this and snap it over here. Then again, we are going to go ahead and select
the third layer, turn it on, and you can
turn off the layer below, mark the four corners, and this time,
you're going to drag this layer to the
lower quadrant. Okay. Like this. Now we're going to turn
on all the layers. So your pattern is going to look something
like this for now. The next step is to merge
all these three layers. I'm going to quickly
go ahead and use the pinch technique and merge all these three
layers together, and now they are part
of a single layer. The next step is to go
to your eraser tool, choose any eraser and just make sure to erase off
these black marks. So once you have done that, the next step is to notice for any negative spaces
or empty caps. So here at the center over here, I do notice that there is this huge empty space or
a negative space, right? So we might go ahead and fill it up with the dot or any other element
that you have chosen. So while we are
making our repeat, we can make sure that there
are no empty spaces or negative spaces that are
quite evidently visible. So I'm going to go back
to my layers panel. And on this particular layer, which is named
currently as B five, I'm going to go ahead
and draw the dot. Choose your brush, which was six B pencil and the
dark pink color, and I'm just going to
draw a tiny dot over here just to make sure that the negative space is
not visible anymore. You can do this to
all the other areas where you feel that there
is a negative space. Again, over here, I can see that there is a little
negative space. I'm just going to go ahead
and fill it up. Right? So you can do this to
all the spaces where you feel that there is a
negative space, right? So I'm just going to see for
any other negative spaces. I think I'm fine with it. The pattern looks good.
So I'll stop there. Now go back to your layers menu, and the next step is to duplicate this particular
layer two more times. So we are going to
swipe towards our left, hit duplicate, swipe towards your left
again and hit duplicate. Now I'm going to turn
off the top two layers. And with this one
layer selected, go back to your move to, and this time, we
are going to move this layer towards our right. Again, make sure that it snaps perfectly at the center
vertically and horizontally. Now, go back to your layers
menu turn on the next layer. You can turn off
the previous layer. Now, again, you have to make
sure to mark the corners. So we'll go ahead and do that. In this time, you're
going to move this to the top quadrant. So remember, you're
not scaling it down, you're just moving it. Again, you see these
yellow guidelines. Once that appears,
you can leave it off. Now you can turn
on the last layer and turn off the previous layer. Again, make sure to
mark the corners. And if you notice,
I'm not marking these sides because we do
have our elements over there, so we don't have to mark
it, but on these sides, you can see that
there's an empty space, and that's why I'm just
giving those marks over here. So once that is done, go back to your move
tool, and this time, you're going to move it to the
lower quadrant, like this. In case if you find this to be very difficult without
having a grid, my suggestion would be to go
back to your wrench tool, canvas, and you can turn on
the drawing guide over here. T makes this process
even more easier. Now, go back to your layers
panel and you can turn on the other two layers and we
have something like this. M so now what I'm going
to do is I'm going to again merge all these
three layers by pinching them together, right? And finally, I'm just going to go ahead and use
my three fingers, swipe down, use copy all, swipe down again,
and click Paste. Now, go back to
your layers menu, and you'd be seeing something called as an inserted image. That's it. We have almost
completed our half drop repeat. The next step is to test it. I'll see you in the next lesson.
9. Testing: Okay. Now that we have completed our half
drop repeat pattern, the next step is to test it. So to do that, we
are going to go back into our layers
menu over here. And remember we had created this inserted image in
our previous lesson. We are just going to use that. I'm going to click
on that and then I'm going to make sure to
turn off any other layer. So inside your layers menu, only this inserted image
layer will be turned on. Now go to your
arrow tool or move tool and we're going to scale this down and stop where
it snaps at the center, both vertically
and horizontally. And then we are going to go back into our layers panel over here, and you're going
to swipe towards your left and hit duplicate. And now we're going to bring this particular image to the
lower quadrant over here. Again, you're going to
go back into your menu. And duplicate this layer again. And this time, we are going to take this particular layer, and we're going to bring it to the center over here and then drag it towards your
right like this. If you had created your pattern, that is your half drop
repeat pattern properly, then when you are
actually moving this particular third
layer over here, you will not have any issues and the pattern will
merge seamlessly. But in case if you
hadn't created your half drop repeat pattern properly or if there
is an alignment issue, the elements over here will
also have alignment issue. You might probably, if
you just zoom in closer into your image over
here on your canvas, you would be able to see certain alignment issues or even a very thin
white line happening. So if that is the case, then you have to repeat your half drop repeat pattern
process all over again. Now I'm going to duplicate
this layer again. Move to, and you're going
to drag it to the top. And now I'm not
going to duplicate this layer because you see it's already cropped over here. I'm going to click on the
lower layer over here and duplicate it and bring
it to the bottom. Now you can see that
your pattern repeats seamlessly without having
any alignment issue. That's it. You have created your very own half drop
repeating pattern. I'll see you in the next lesson.
10. Final Thoughts: Congratulations. You have
successfully mastered one of the most versatile pattern making technique
in surface design. Don't forget to share your final project to
the project gallery. I would love to see your take on this particular technique. If you found this class helpful, I would love if you
could leave a review as it helps other students
to take up this class. Thank you for joining
me and Happy Creating.
 Vidya Kumaresan, Illustrator