Transcripts
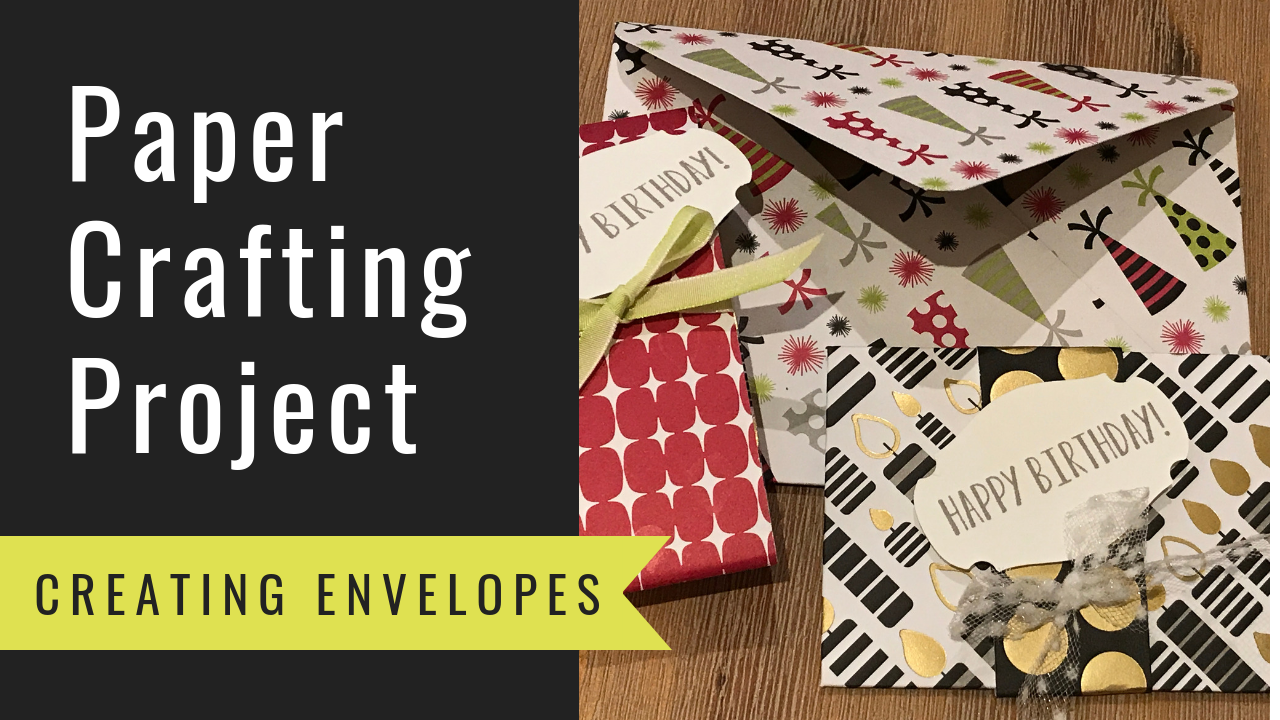
1. 01 Creating Envelopes: hello and welcome to this class on creating envelopes using the envelope Punch board. I would like to introduce myself and introduced the class to you in this video. My name is Kimberly Smith. I'm also known as the Paper Chief. I have a block called the paper check dot com where I share paper crafting inspiration through projects that I've created. And I always share measurements and videos. I have a YOUTUBE channel, The paper Chef. I have several classes on skill share and other platforms as well. I hope when you're finished this class, you'll check out my other classes. And I also hope that you'll be sharing your projects because I'd like to build a community of crafty learners here on skill share, especially for the paper crafting area, because I see a lot more art, art and drawing classes offered here than paper crafts. Okay, Another thing I do is I'm a stamping up demonstrator. So you're gonna notice that ah, lot of products I use are by stamping up for instance, this punch board that I'm using for this class. But don't worry. If you have a punch board by another, brand the techniques I'm going to teach you will work the same way. But I do believe in my products, and that's why I also demonstrate them and use them in my classes. All right, so we're gonna be creating two envelopes. One is gonna hold a gift card. The techniques you learnt will create are going to enable you create envelopes of any size is we created little belly bands in this class that will that will closure envelope. Or you can just close them with the sticker. Here's an envelope that holds irregular birthday card in a two sides birthday card, and you can put this through the regular postal system as well with the label. And it's nice if you have double sided paper as well. So I will see you in the next video where I work over the materials that you're going to need for this class. Thank you for being here today.
2. 02 Creating Envelopes: Hello. In this video, I would like to go over the materials that you will need for your envelope projects. First, you will need a couple pieces of pattern paper Now they could be double sided, like minor minor from stamping up. And it's called the Broadway bound designer Serious Proper. Okay, so that's what's really nice. Is that one side you know will be the inside and look really nice. You need an envelope punch board minus from stepping up there, Also made by American craft. We are memory keepers. There's there are different kinds of punch boards, but they all kind of work the same way. You need a scoring tool. My my punch board has going toe inside of it. You're gonna tow a pen, a paper trimmer. Because when I teach you how to use this, you need a paper tumor because you need to know what size your original papers going to start out with. Okay. And then I'm just using the cricket paper tumor, and it has It opens up, the arm opens up. I'll just leave it open because we're going to use that in the next video. It opens up, So you can cut 12 by 12 inch paper. Okay, so that's all for making envelopes and then some adhesive. I'd like to use this adhesive called advanced tape glider. Okay, but that's for the envelopes themselves. But if you want to embellish your envelopes Meaning like we want to put Happy Birthday on her envelope. I grabbed the stamp set in a punch that would work, and I grabbed the stamp set because I like how simple this happy birthday is. It's called lemon zest. By stamping up, I'm gonna use this happy birthday sentiment. And this punch I have. Okay, story, label punch. That way, I'm gonna put a little band around the envelope, and I'm going to put Happy Birthday on the envelope in it. So that's just one option, okay? And then you can use ribbons. I just took some ribbons to coordinate with this paper. Okay, Lemon lime twist ribbon. And it's six. It's sort of a really nice It's got an ombre ribbon because look, it has double tone. And then I just took some tool. I'm not really sure for me to use this one, but sometimes you just get extra supplies. So then because we're going to embellish. We would then need some some foam dimensional or some foam adhesive and some ink for our step. And I just got some grease gray granite, Inc. Because it was very basic, and it matched the project and then scissors in case we need to fix anything. Okay. And if you don't have, really and he said you can use glue if you don't have phone, but he said you can use, you know, glue. It doesn't matter. Just get whatever you have. Whatever stamps you have, whatever paper you have, it could be single sided paper and whatever kind of punch board you have. And you can follow along because in the next video, we're gonna cut our papers for our two for two projects. We're gonna go ahead and cut both the papers that we need. Thank you.
3. 03 Creating Envelopes: hello again in this video. I'm going to show you how to figure out what size paper you need for the kind of card you're trying to have an envelope for. We're gonna make two envelopes in this quest. The first temple. It's gonna be for an A to card. The next envelope will be for a gift card. So the first thing you need to dio is just measure. What size card? You're trying to make the envelope for now. Already said it's an eight to card. But just in case you don't know, I'm just going to show you You would just go. You would just referenced this. You would say it's 5.5. Okay. By 4.25 In other words, if you taken 8.5 right Evan piece of card stock and cut it in half and then score what's left, you will have an A to card. You can get two cards out of 1 8.5 by 11 piece. Okay, so that will be so like I said. So it'll be 5.5 by 4.25 So then you take your envelope. Punch Born and you look up the measurement and we make sure this isn't focus, okay? And we're going to say 4.25 Okay, four and 1/4 right there by 5.5. And it's telling us we need to start with an eight by eight. Piece of card stuck. I'll get to the scoreline part later. So we taken eight, right? So what envelope do we want to put this black card in? Let's put it inside this colorful and beloved here. Well, put it inside with this party hats. So we need an eight by eight piece of paper a square. We're starting out with square. Can you? Just so you can see me cutting focus there. That there too. The lines. I'm just I'm lining up my card stuck with the eight inches. Okay. And now you have this nice piece to left over for bookmarks and for party your card. So 88 Okay, let's cut this. And just to give you a better look at that, see on the okay. So you always use this little this little ridge there to hold your paper in place. You're cutting. So now we have an eight by eight piece, and that will be for a large envelope. Now let's go ahead and cut the piece. We need forget card envelope. But first we have to see about what size or gift card is, and it's gonna be a little bit bigger cause you're gonna leave room for a note. And because it doesn't have in its excise envelope for a gift card, we're gonna make it a little bigger. But let's just see what size at minimum we need. So our gift card it is going to be three. Um, almost 3.25 123 It's like three and 3/8 but let's just say 3.5 or so at least 3.5. And this one's 2.25 say, or No two and an eighth. Unless I say 2.5, let's say 3.5 by 2.5 at a minimum. Okay. And we're gonna take this, we're gonna we're gonna use our So our card sizes 3.5 by 2.5. And that means we need a piece of paper right here for that. Okay, It's 5.5 by 5.5. So let's take this paper, okay? With the candles on it. And we'll use that one for a gift card holder. And we're gonna say, Let's open up the arm again. Make sure I mean focus here. 5.5 by 5.5. We're starting out with the squares. You can see. Let me make that a little bit closer, Get a little bit closer there. So there's our five inches and then put that in focus. So here's our five. And here's our six, and we're just going to 5.5. Okay, So it doesn't the point of this classes to learn how to do this for your own projects. So you might not be making and blips for the for the things I'm making books for, But now you know how to resize the paper. To get the size and blip, you need toehold the gift card and to hold the card. Okay, so now we're gonna come back in the next video. We're gonna we're going to start. We're going to start using the punch board to create the envelopes
4. 04 Creating Envelopes: Hello. Welcome back. We have an eight by eight piece of paper. We're going to create an envelope for that, A two card. And I'm gonna show you how to use the envelope. Punch board. Don't worry. If you're not really confident after this video, because I'm gonna show you one more time in the next video. When we create a smaller envelope, the process will be the same. Are you? Pull your score tool out of the side and remember their other kinds of punch boards that great envelopes and they all work the same when I say other kinds, I mean other brands, but they all pretty much a shape like this. The idea is just to know your first measurement. That's it. Once you know that first measurement, you don't need any more measuring on this side. Okay, so the first measurement, we have to go back to the kind of envelope we're making. And we said that we're gonna make one that is five and 1/2 by foreigner quarters. Let me just go right there and make that focused for you. And so here I am right there. This is the envelope we're making me cut out the eight by eight paper. We only need to know this one measurement which is called the Scored the Scoreline. Right. This is the scoreline. But how far does the paper need to be over when you when you use the score nine, it needs to be at 3.5. Let me put this back down and go ahead and do that. So we're going to go to 3.5, and that is all you need to know. That's the only measurement. So there's 3.5. I'm gonna hit punch. I mean, I'm not gonna hit punch. I'm gonna punch and then I'm gonna take my score tone. I'm gonna go inside this groove. You can't really see the scoreline because it's it kind of ends. It ends down here. So you just have to kind of know where it's at by going in the group, okay? And so now that's the only measurement we needed to know. From now on, that score time we just made us what we're gonna be used using to line up to this notch every time. So I turned the paper and I lined up the scoreline with this. Not and then I just punch again. Okay. No more measurements. I don't need this anymore. Okay? Wouldn't you don't have to use that that side again. I mean, not for this project. Ok, we made another. We made another score time, so we punch. I was punched first in the scoreline. That doesn't matter. What order you do it again. I'm just lining up the Nats punch. And by the way, these air kind of hard if you have arthritis or something, these air hard punches, but not when you're standing up. I think I find it a lot easier when you're standing up and put the weight against it getting this. So So far, I have 123 And now I need my fourth notch and my last scoreline. Okay, So punch okay and score. Okay, great. So now we're just gonna fold, we're gonna folder, and but we're not going to hear just yet. We wanted because we have to do something. We have to round a couple of the sites and let's fold and figure out which ones the top so that you know, because we're gonna have a horizontal and a vertical, and then we need to know which way to go. So I like I like how these party hats are at an angle on the back of the envelope. When you turn to the front of the envelope. Do you want the party hats to be upside down? I mean, it really doesn't matter. Or do you want to be right side up? And if you want to be right side up, then that's the flap that you put on the top because thes flats are exactly the same. This flap is the same as the sweat. So let's just put the flap where they're facing. Oh, no, let's not. Because you know what? I think it's better to have them right set up on the side, because what I mean, when you have double sided paper, that's what's gonna happen. They're gonna be right set up on one side and upside down on the other. So let's just keep it upside down on this side. I've made an executive decision for every crafter out there who's watching this. Okay, so now we know, and we're gonna now put notches we're gonna put around it, not here. We're gonna put a rounded nuts. They're very easy. Todo turn around your punch board. Like I said, they all have punched all punch boards, had this and we're gonna put the put the end of the envelope in, and we're gonna hold it. And we're gonna touch case. We've rounded the top we've rounded, we're going around this care, and then we can Then we can use our adhesive. Okay, Very easy. We're gonna put the adhesive. I'm using rolling adhesive on putting a strip of adhesive here in here. Okay, I like this tape Greider, but use you can use liquid glue you can use whatever it he sieve you want. Okay? And it's just I'm going to show you that shiny adhesive on where I put it in just a second when I get this close to camera. So there's where I put the adhesive, See the shiny strips of it. He said, and let me just do that. It can. Okay, so there's a little bit of he said, and then I just press and closed the envelope, and that is it. So we're going to embellish later, but let's just find the card. Makes you double check to make sure your card fits. And it does. Theirs are Cardiff. It's pretty snugly. So you could have went one smidgen higher if you wanted. Okay? No, it's up to you. So there's our beautiful envelope and there's the front. Okay, There's still more we can do to it, but it looks great the way days now, if you're gonna if you're gonna put this in the post, you need to put a label here. Don't try to write on this busy part, put a white label and then put the address on it. All right, so that's see in the next video, where will make Smaller and Blip, I'll go a little bit slower and I'll show you the measurements a little closer to reinforce what you just learned.
5. 05 Creating Envelopes: Hello. Welcome in this video. We're gonna make a smaller envelope using the technique you just learned, and we're going to be creating it for a gift card. Recall that our paper. Are that the original gift card and paper? Let's say we had We went with this. We went with this measurement. Here, let me focus that. I have to hold the paper. There we went with 2.5 by 3.5, which was a little bigger than we needed, But it was next closest one. So we want with 2.5 by 3.5 as our card, we took a 5.5 by 5.5 Piece of paper. That's the square. And here's where our scoreline is going to be two and 3/8. So what I'm doing is now to start out, you have your punch board and you're going to put your paper at two and three, ace. So there's two and 1/8 two into its two and three eights. I'm gonna hold that closer focusing. So you don't miss anything, okay? And make sure that you don't see a glare. Okay? So That's what I'm doing. Two and three days and there's where I'm gonna punch. And that is the only measurement I need at all. When you make the envelope shave. Just put the paper there and you punch. Okay. It's kind of bright. Focus, more time. There we go. I'm gonna punch. And it's always good to punch when you're standing up, okay? You take your Squirtle, you go inside this notch and you feel for that group because it's kind of hard to find. And you want to line up with this group right here. That's what we're lining up. Okay, It looks good. There's the scoreline. You take that score nine, and you light it up to this where it's a score guide. The little nuts. Okay, so that's what we're doing. We're lining it up to the score guide. I'll do that again. I'll focus it. So we lined it up, get above it and punch hopes. And why were punching? We score. So always punching score. Okay, then turn the paper. So here's what I did. I turned the paper focusing. There's the scoreline. I got this little score guide. I lined up my scoreline to the score guide. Okay, and every time. But I no longer needed to send to them punch board, okay? And I punch and I score. And we turned the paper, and we do it again. And if you mess up, you always have these guides to go back to. If you forgot to punch one of the times if you forgot to score that the beauty of a punch board is you have these guys and you can go back and use them. All right, so now we have this. I couldn't show you the full level of last time because of the angle. But the camera Proceed. Now we have this full envelope. Look at the Ford Notches. How beautiful that is. You can also create a card box with a very similar technique. Maybe I'll do another class on that. Okay, so now we're gonna break. So let's let's fold the score lines. This we do first. And then we will make the little rounded top and bottom. Okay, So let's say let's see how this looks. That looks good with that side, and it looks Give it that side. I actually like the way the flip I like the way it slips ever. Okay, so let's put, let's put a little rounded. We turn this side ever and we round. Can you see that? Says reverse. It's called a reverse punch. And you around and around. We turned us around. Okay, then we're gonna add the adhesive. Let's see what I said. Candles upside down there like the candles. Right Set upon. I like it when it's this side in the candles. All right, set up. Because if you do give it to someone, that's the side with their name on it. And this side really doesn't matter as much of their upside down, it's decide that matters, I think. Okay, so let's it hear. But it's up to you. Your crafters. You can be creative and do what you want. They were gonna put the adhesive here and here. I'm going to just show you that with a little bit of light case you missed it. See, just the line of adhesive. You can use glue. You can use rolling adhesive, and that's it. And then we take whatever you were gonna put in the envelope in this case, a gift card, and we're going to slide it in to make sure, and also if you're using glue, I forgot to mention this. If you are using gluten like liquid glue instead of instead of the rolling, he said, then you need to while it's before it's all dry. You need to put this. Put your paper in a couple of times to make sure that the glue is not making the envelope stick shut. Okay, but the gift card looks good in there, and there's room for a little note and a card. Okay? And so I like this envelope as well. So now in the next video, we'll start to it will embellish, are envelopes will start to embellish her and flips. See what we come up with. See you then.
6. 06 Creating Envelopes: Hello. We have created two beautiful envelopes using our envelope punch board. And now we're gonna create belly bands to go around the envelopes. I think that it would look good. I think this color here would look good as a belly band around this one. And the reason is, this inside pattern of that lovely lipstick color is not very busy. Okay, so let's go ahead and make a belly band about 1.5 inch for the big one. Okay, so I'm just using my paper trimmer again. Going wanted to have inch by 12 inch because the paper still long. I haven't. This is just the scraps left over from when I made that. So I'm just gonna wrap it. I don't need to use you could score it if you wanted to, but I think just wrapping it's fine. So put the paper underneath the envelope kind of center. It okay? Make you really been like this? Your centering it and you're just folding it. Okay? I don't need here it yet. You want to make sure this is equal First leave a little bit of room. In fact, make this kind of loose. See I'm kind of loose. They're not too tight. The reason is your cards trust to go in there. In fact, you might want even put the card. And when you make your belly band, okay, and I'm just making a little bit loose, okay? And then I'm gonna adhere it. But if you want to use the scrap for something, go ahead. You can lop off a big piece of here using your paper tumor because you only need, like about, you know, maybe an institute overlook. So let's lop off this cute little piece, because maybe we can use it for something else. So we get, you know, we can save maybe almost two inches there just by loops. That didn't really work because it was very hard to hold the trimmer up in the air. When you're cutting, you don't put the hammer down flat. Okay, so now we have our Billy been, and now we can adhere it. We don't need to hear it rots on the envelope. You just need to make a blood and see how it's kind of loose. And I didn't use score lines. It's kind of loose, loosey goosey. That's because I want to be A to slip the card in there later. And if the card has embellishments on it and I'm never sure what the card is gonna look like it, it's a birthday card for sure. Okay, so there's the belly band and not a hold your envelope closed. I see. So we were slip. It will slip it on there, but we're not. Now we can just worry about decorating the band if it's on their snug, but you can make it a little bit looser if you need to. So now we can. We can take the band, often decorate it, and we don't have to worry about getting it to stick onto the envelope. And it's really nice because the person gets it and they just It's like a gift packaging, gift packaging and you just slip it right off. And then there's the embellishments or right on there. Okay, so let's create a belly band. And that would be the bottom of the part with the seam is the bottom. Okay, we have a Billy been for that one, and that's created Billy. Been for this one. Okay, we have candles. Let's see. Can we use the other side of the confused the other side of this paper. Yes, we can. This would make a nice belly band. I'm not sure if it's long enough, so let's see. Yes, it's long enough. You flip the foot, the envelope over. Make sure. So I would. Instead of just measuring the coming inches, I would just take two rows of these gold dots. That way, I'm not cutting in the middle of a rogel that's there just so beautiful as they are. So what I would do is not worrying about the measurement. I would worry about having the two vertical ducts. So when you when you use your cutter, this lying is down the middle and I might cut him off a little bit. But we'll see. Well, see, it's hard to get in that execs, but But, you know, just keeping the paper straight as much as possible. Let's see if I can do it. I think I did it. Yes, I did. So here's the rivers of gold. So again, so layer, make your belly dancer. Lay that down, lady. Envelope flat folded over, but not too tight. Okay, leave a little bit of space because you got a gift card. And look again. You could put the gift card in there before you do it and just make that side. And then again, it's it's it's wide enough. Maybe even a little bit looser. And then, if you want to say, if that little piece not little, that's actually a big piece, you can save them. But you know what? I'm not gonna go ahead. I'm not just gonna go ahead any here. I'm not even gonna save that piece. I'm just gonna put some adhesive on there. But you could punch out the pieces, save safe paper and use it for something else. Okay. And again here, let me take that off. Push down, push down on it, show you that it's a little bigger. It's I don't like helps slicks ever. Always did hear the end because you don't want You don't want to loose end. I don't know what's going on with my Joseph today, but there we go. Nobody doesn't decide. Don't fluff with him, okay? I'm happy with that, and it looks a little tight. Could have made it a little bit looser, but if it works, I am very happy. And it does seem to work groups. I made that a little tight, didn't I? No, I did. It works fine. It's loose once you get it on there. Okay. So as long as this by slides, it slides it. We're good. Okay, So we've created to belly bands, and then in the next video, we're gonna stamp the embellishment on there, and we'll put that. Then we'll put that in the belly band so that it looks on enough. See that?
7. 07 Creating Envelopes: Hello and welcome back. A stamping black wasn't originally in my supply video, so I just want to mention you do need a stamping black for whatever stamp you're going to be putting on your card on your enveloping me. Okay. I'm taking the happy birthday stamp out of this lemon zest stamp set. Use whatever you have. I'm sure you have a happy birthday, Stamper. Something that marks the occasion that you're trying Teoh, celebrate with this festive envelope. All right, so this is Happy birthday, and that's the happy. And that's the birthday. So this is I don't use my stickers on my stamps, By the way. You could. Then I would know what's right side up. OK, so let's, um, flipped us over. This is great grand. I know. Great grand. It works. It's one of the coordinating colors with that Broadway bound paper. I'm using a story label punch. I'm gonna open that up using the little left. I'm gonna stamp this a few times when I stand by tek te pttep. And then I stamp it kind of far from the edge. Not too close, because I need to still put that happy birthday. I mean, I still need to get that punch to fit in there, some living space between and always do it a few times because I could smear it or I might like one better. And also because I might want one for the card inside. I might want to put inside the envelope as well or just to have an extra. So I was kind of stepping extra. So we have to stand now. We're gonna punch those out. I always start with the middle one. Kind of wave it around to dry. You shouldn't really punch until it's totally dry. But see how that works. Really? Well, if you have a cricket or brothers gaining cut, you can cut out its X shapes that you need for your sentiments as well. Or you could just use a paper trimmer and cut out a rectangle shape, maybe have a circle punch. It could punch out a circle shape, just again use whatever craft you have. I'd like to have a lot of punches on hand because of these occasions. Okay, so there there are. We have our stamps sentiments. Now we're gonna put you could also, like, get some one thing be nice to do here is like pink around the edges. Maybe do some antique ing. Whatever. Okay, so I think I'll put it like that. You mean the cars onto on that belly band? Let's see if I'm gonna do it that way is on this one as well. And this one, I might do it that way. Okay, so I told you need some dimensional. So So you need the foam adhesives. And I think this belly bands gonna be fine the way it is. I think this little belly band for the small envelope is gonna be fine the way it is. So let's just go ahead and put that on. In fact, here doesn't need to go all the way to the top. Here. Let's leave it. That kind of put it, Let's put it out a little bit of an angle. Let's see how that looks, OK? We're gonna slip it on. Yeah, it looks fine. Okay. We'll also do something with the ribbon, okay. And for this one, I'm gonna put it I'm gonna put it off to the side a little bit, okay? Lets wait because we have to put up with not wait, but let me say that's the envelope. You know, I'm gonna put it. I'm gonna put it ours. I'm gonna put it like that. I will put it up because the way the heads are going, if the pattern was a different way, I would I would put it. I would have put it like this. But the pattern is the hats have to stay up. So I'm gonna put it in an angle again. Kind of like the hats are Happy birthday. And then what I want to do for that one is I want to put a bow on it. So I'm using this this lemon lime twist ribbon because it matches and I know get you get about this much. I'm no, no, say this much. Just get a couple extra inches for D Way. I told you to have your scissors. So snip always snippet in angle. I was using these to cut it. He sits another Not as sharp, if they should be. These used to be really sharp. Says there's What is up with that? I'm gonna put on my reading glasses. Try again. There we go. Uh, I'm not really happy With the end of that, I'll get a different pair of scissors to cut the end of that boat. All right, so we have a tie, a little bow. And, you know, the idea is just to get the coordinating color of whatever paper you're using. That's why it's nice when you have sweets of products and they all have, they also don't match. Okay, so I will trim that a little bit. I'm gonna chimp. I'm gonna make the bow a little smaller and chimney edges off using a better a pair of scissors because my don't ever use your your sharp scissors to cut adhesives with, because then they get all cranked up. Okay, I'm pretty happy with that. So not put that on the envelope. Okay? You can even bend the envelope a little when you put the belly, Vandana, because it'll stay on better. Okay, Awesome. I'm happy with that. And then we'll slip this one on. Let's see if we can. Let's see how the other ribbon will look. I did bring this of the ribbon, and it may or may not work. I mean, sometimes you just have to try it to see what works. So it was cut off a piece, and I'm gonna slip this billy bands kind of tight. So what I'm gonna do is I'm gonna slip the belly bent on with with the ribbon in there. That way I can tie the ribbon after it's on, and I'm not trying to move it. Okay, so there let's just see if it works. If it doesn't, I'll be the first trip minute. I think it's going out. It'll look pretty good. I have to push it up alot. And now, of course, if you're mailing this envelope, you can't do all this stuff with the belly band. But if you're giving it to someone, it's a great little touch for your envelope. And it's like a gift. You know that where your envelope is a gift in itself. Uh, not bad. I just think it can go up. You can get pushed up a little higher like this. Thats bo can be split up. Didn't stick at super. But I actually do like it and it matches. I mean, it's white and it's kind of shiny like your like envelope. Okay, so they're the champions. I'm just gonna trim those up in conclusion. In this course, you learned how to used the envelope punch board to create any size envelopes that you wanted. Based on the card size that you're gonna put in them. We cut the paper size the way we needed it. And we learned about what the score nine means and where to start off your whole envelope process. We learned how to create notches. We learned how to create rounded corners of the ends of the envelopes, and then we learned how to embellish them as well. So I hope you enjoyed this course. And please check out my other crafty courses that are available to you on skill share as well. And I would love for you to go and create some envelopes on your own, using whatever punch board you have. And please post them as projects that you can share with the rest of the class. I would love to see them. Thank you. This is the paper chief
 Papered Chef, Kimberly Smith