Transcripts
1. Instructor Introduction & Class Overview: Welcome to the Skillshare
class on card making basics, or you will learn to
create thank you cards. My name is Kimberly Smith and I'm your instructor
for this class. I'm a full-time crafter, stamping up demonstrator
and crafting educator. I'm also known as
the paper chef. And I have a YouTube
channel and I'm also on many other areas
of social media, including Facebook,
Instagram, and Pinterest. This is one of several
classes I have on Skillshare. Most pertain to paper crafting
of some form or another. I also have brothers scanning cuts skills-based
project courses. And I have a course on
how to create envelopes. Now here's some of
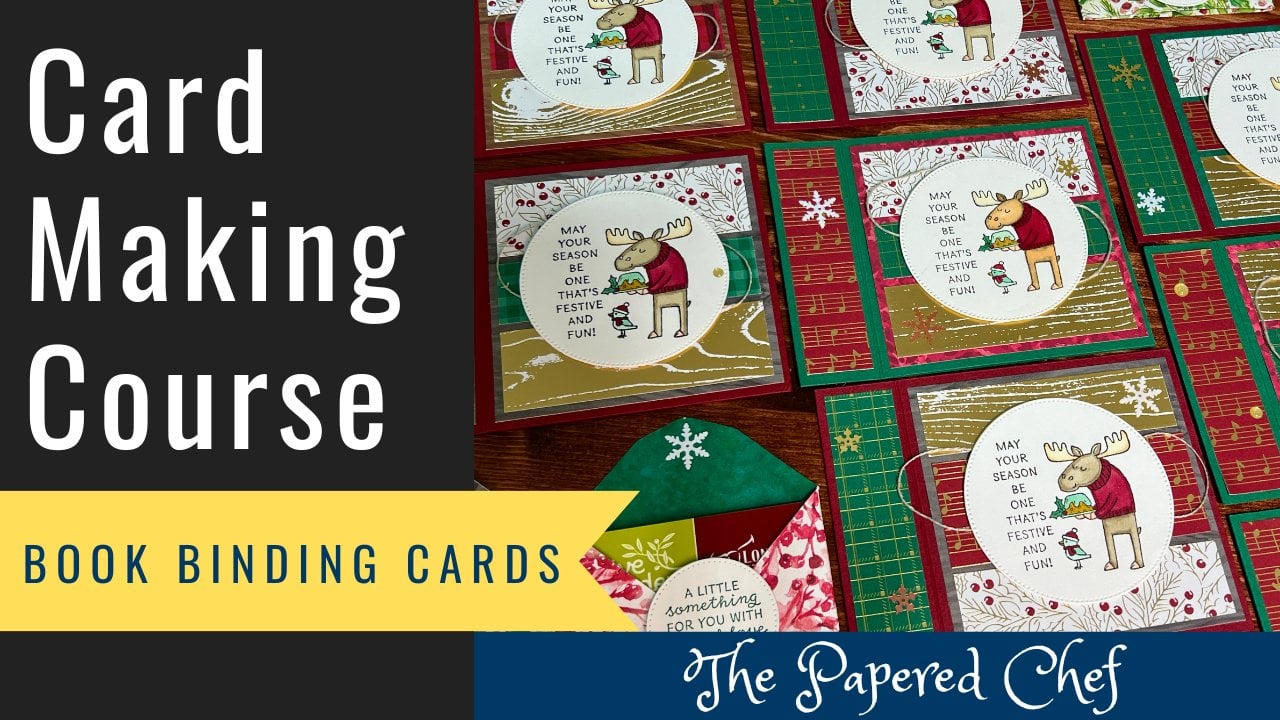
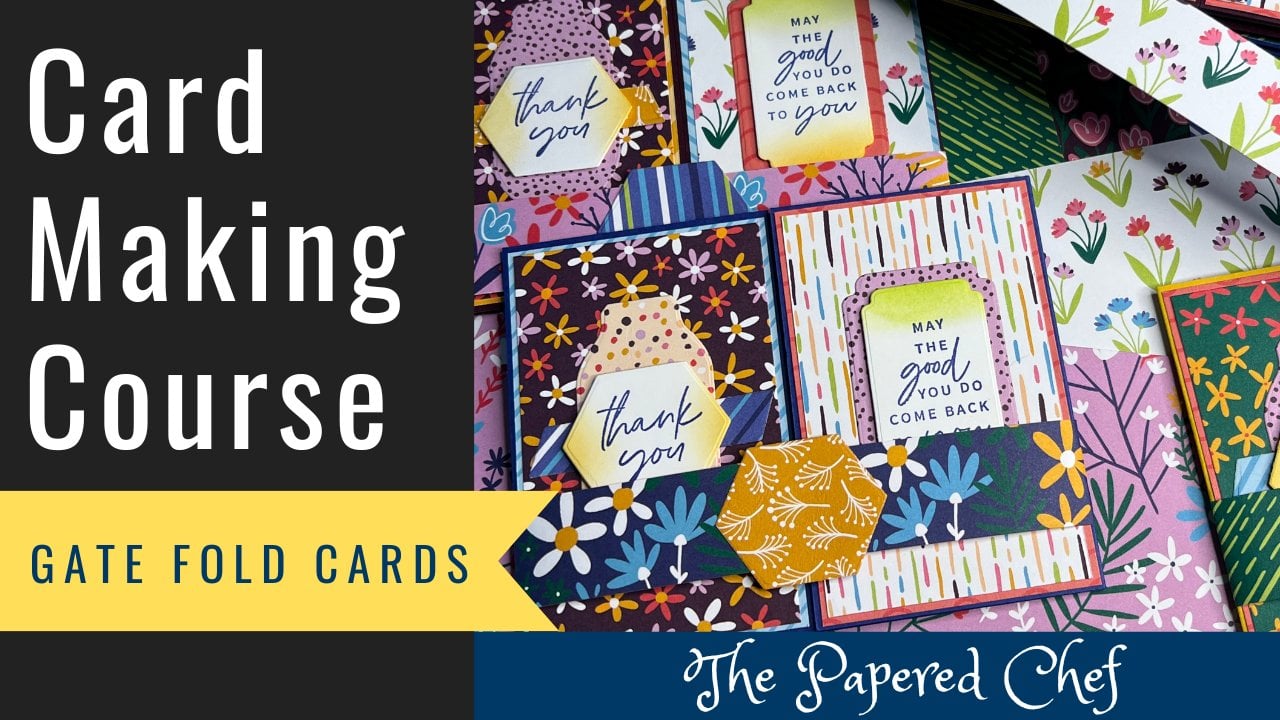
the projects you're gonna be creating in this class. Each card is just a
little bit different. That's because you could take the same pattern and the
skills that you learn. Just embellish it and use different papers and your cards. We'll look, we'll
look different. The skills that you learned
in this class can be applied to any card
making project. Although we'll use stamping up products for this
particular class, such as the hello beautiful stamp set, beautiful
shapes dies. The mini stamping cut
and Emboss machine. Certain embellishments
and stickers. It doesn't matter
what materials I use. You can follow along with
whichever materials you have. Now, That's because the, the skills that you're going to learn how to create the card
base is using card stock. You're going to learn to
cut in scorecard basis. You're going to use
any card stock you have how to create
all these layers using designer series of paper and the basic
white that goes inside. We're gonna die cut shapes. But if you don't have
a die cutting machine, let me show you what dicots are. I might not be familiar
with this process. If you don't have metal
dyes, for example, you can use other
things like punches and things that you could
use for the shapes, other ways to create the shapes
or just a paper trimmer. The idea is I'm teaching
you how to layer up cards and how to embellish them. And that can be accomplished
in many different ways. I'm going to stop
between each section. This course is broken up into nine videos and
I'm going to stop and continue parts so you don't have to wait for me to do all the different sections, but I will leave nothing out. You're gonna learn how to
do the stamping and how to ink around the edges for dimension at how to use
different types of adhesives. Many other things. If
I make a mistake out, keep on rolling and
you're gonna get to see how I work in real-time, how I create multiple cards. Because that satellite, that's how I do my actual workflow. I create multiple
cards at once by doing everything in stages like I'm gonna be teaching you. I'm very happy
that you signed up for my Skillshare class. I hope that you'll follow me
and you'll be notified of other exciting courses
as they are developed. And I hope that you're
going to try out what you learn in this class because that is how
you can inspire others and it's gonna
be great will get, you'll get feedback from
other classmates and myself. And you can post in the discussion as well if
you have any questions. And if you're using different
materials than I share, please share which
materials you're using because we can all
benefit and be inspired by how you take these skills and apply
them to your own projects. Well, that's all for now. Let's get started by
creating the card basis. We'll see you in
the first tutorial of this class. Thank you.
2. Card Making Supplies: In this video, I'll go over several card making
supplies you will need. Keep in mind, you
can follow along with whichever
supplies you have. But this is what I'm
using for this tutorial. We are making a layered
card and we're gonna be using all kinds of coordinating products,
thereby stamping up. It's a hello,
beautiful stamp set. Let me give you using the
thank you for the thank you card from there, but we can just as well use the other in both mitts and I'm using the dice that coordinate, they don't
come in this case. I put them in this case
on a magnetic sheet. You can get magnetic sheets
from home supply stores. You can also get some things. You can get it
from craft stores, but you can also get something called vent covers, the ENT. And that way you
can put your dies on there for organization. So we'll be using
what we die cutting those and we're gonna be
using a dye cutting machine, which I'll get to
in that section. I didn't want to bring
everything out right now. And on the table, you're gonna be coordinating
colors of card stock. We're gonna be using
basic white for the inside of the cards
and for the sentiment. We're gonna be using
black for the hexagons, but we can also create
a card-based in black. We're gonna be using balmy blue and native Navy for
the card layers. And we'll alternate between the two depending on which
paper we're using. Because I want to
make a couple of, a couple of cards
to show you how easy it is to make multiples. We're using what's
called the abstract beauty designers series paper. And right now I'm
just going to go through the paper with you. It's a four by six style of
paper and it's double-sided. There are 12 sheets and we'll just be using
a few of them. But I wanted to make
sure I showed you the whole stack so
you can see how carefully I'm coordinating
these supplies so that everything matches now on the
other side of each piece, if a one-sided hasn't
metallic look foiled, look on the other
side, it doesn't. What's nice about pieces
like this is you can also cover them with your ink, but we're just going to using two colors of ink right now. At the end of this, I'll
show you some ways to go further in your card making skills and other
things you can do. But we're just going to using
lacking for our sentiment. So you need ink. We're gonna be using to put a little edge
around our sentiment. Crash Carey. You can gather from what I've
said so far that there are coordinating colors
and that's what you're seeing in there like so I'm using the
crush carry from, you can see it in the
inside of this flower. You can see how the balmy
blue is on these pieces. So I'm coordinating things
and then I have this. Then you're gonna need
some stamping blacks to put your stamp sentiments on. We might do more
than one sentiment, but right now we're just going to probably stick
with thank you. This is a little rubber or
silicone mat to stamp onto. This is a bone folder. It's to help make a
crease on your cards. You're going to need
some adhesives. I'm, I have liquid
adhesive, glue, dots, seal. These are just different kinds
of adhesives and it will be will use them as needed. And I have these little
dimensionals to pop up, popup your embellishments. Then we have, I have a pack
of embellishments and I have some adhesive backs hexagon so we can use
sticker embellishments. This pack now my
pecs already opened. I'll just be using ones
that I already have opened, but I wanted to show
you that there's a whole package of what's
called an ephemeral package. Ephemera is just a bunch
of nice, fun things. Abstract beauty,
they go with it. Just because they
go with our colors. You can see just Jade there. The night of navy, you can see the different colors,
magenta, madness. That's why I wanted
to show you that, but my pack is already open, so I'll be using a
package like this, are a couple of packages
combined together. We have a die cutting machine, neck and show you yet
you're going to need a tremor or scissors. But I mean, I would say a
trimer is always better for carbon making because you
can make straighter lines. I'll be raising the camera
view can say better. I'm gonna be putting a
cutting blade onto this. I was just about to change it, so I guess I can do that
with you on this tremor, there's a scoring tool.
You can pull that out. It's a stamping up tremor. That's the brand I'm using. Okay. So this one,
I put a little S on it just to remind
me that it's a squirt. It doesn't cut. And then I have blades to cut. I'm going to use a new
blade for this course. I'm just going to go
ahead and take that out. And there's a little
arrow that goes up. I'm gonna go ahead and
put that on there. There's a little hole
that's bigger than the other areas and you
can get to put that on. So now I have a cutting blade
which I used to put a c on, but now I know it's
cutting blade. They're different
colors. I always put my cutting blade on top of my scoring blade on the bottom. If I use a scoring Blake, sometimes I just use
two cutting blades. And when I do, I labeled one of them with the
little dimensional, which is a little foam
adhesive just to let me know. Okay, well that's the
one that's dough. And I, the reason I might
use a dull one is when I'm not cutting things that
need to be precise, I might use my doublet
and this trimer has a little edge that go
out and we'll use that. And you can also
use what's called an scoreboard to
score your cards. And we'll use both just to get you used to that kind of tool. Would ask if you want, you can use something to help you pick up your
embellishments with. If you have finding
bones and it's like little Ryan standards
or something. This is called a take
your pick tool and it does helps you lift
your embellishments. I have a little placement
down there to stamp onto. If you don't have what's called, this is called a blending brush. To blend some colors,
you can always use a little sponge Arbor. This is a little finger
sponges, rubber. They are just a
basic card making tools that you're going to need. You always need a stamp set or something for your sentiment. And you don't
always need dicots, but some kind of way to get shapes through your
embellishment packets, through your punches,
a metal punch which we've used in other tutorials
and things like that. Okay, so I will get started
in the next tutorial. We're gonna start making the card bases themselves are
gonna be making A2 cards. In this course, we will
see you real soon, gather your supplies
and follow along with whichever materials you have,
will see you again soon.
3. Cutting & Scoring A2 Card Bases: In this video, I'd like to show you how to create A2 cards. We're going to create them in both balmy blue and native Navy. And then we're also
going to be creating some extra layers for
your cards because it's always good to make your cards with professional
by having extra layers. I'm gonna be using two
pieces of night and Navy card stack and two
pieces of balmy blue. Our cards are all going
to be vertical cards. That means they're
gonna be, they're gonna be able to
stand up on a table. But you could do you
could do it either way. But let me just go
ahead and show you the way I prefer to do it. So what we're gonna
do is we're gonna, we're gonna open up this tremor all the way out like that. Just so you can see something. What I'm trying to show
you is this that you can, that you can just
look at the way that this paper is facing and it is 11 inches across by 8.5. So this is a typical this
is where you're cutting. This is the line
where you're cutting on 11 inches by 8.5. Know what that
means is I can make two cards out of one
piece of card stock. I just wanted to open
that up for you. You don't need to keep it open. I just wanted to show you
that we're gonna be laying the paper along this side. So it's 11 inches across. And we're going to go over
to the 5.5 inch mark which is right there because there's a little ledge
here at six inches. There's a little ledge
which I like when I'm cutting papers. We're
going to go to 5.5. We're going to use get rid of the Get rid of cutting
blade for amendment. And I want you to use
the scoring bleed. There's S on it. I told you that but
it's just the gray one. Use the scoring blade and
I'm going to go back and forth a couple of times at 5.5. So what I've done is I've scored the paper and let me just make sure you can see
that in the light. There is a line that scored. Good. There you go.
You can see it. We have skirted at
the 5.5 inch mark. I'm gonna go ahead and
do that again with the with this night
of Navy paper. Native maybe card
stuck over to the 5.5. That line is n squared. Now, you can see
how I squared it. So what I want to do
before I do any cutting, I'm going to be cutting
some pieces and amendment. We're going to take
one more piece. Let's take a piece
of balmy blue. Actually now we're
gonna do native Navy. I already have enough balmy
blue cards card basis. And this one goes with
a lot more things. So we're gonna take
what's called a simply squared because maybe
you have a tool like this. And you're gonna lay
your paper across, 11 inches across, and you're
going to score it 5.5. This is just another
way to score. See how there's little
ridges along here. I'm going to square
it the 5.5 inch mark. And I just want to put that
up there so you can see that this is just
another way to do it. So let's go ahead and do that. You can see the line, well
now what you're gonna do, put that over here. Remember we're going
to turn our tremor back to where we are
gonna be using this one, but that's the cutting blade. And we're going to
turn our papers, should say not a tremor. Turn our paper this way,
turn it vertically. So you're in the portrait orientation and
you're going to lift up your tremor and you're gonna go to the four and a
quarter inch mark. Because remember that I said
the paper was 8.5 by 11. We're gonna go to the foreigner quarter inch
mark and we're gonna cut, should only have to go
down once and it's cut. Now we have two
cards made it once. Okay, so that's how
you make two cards. Now we'll do that,
We'll do this one. School goods, go ahead
and cut them all over here and not
making this many cards, but we already have m squared. So we should go ahead and
cut while we're here for and a quarter. Four
and a quarter. I'm going to go ahead and let you see that a little better. There's your four inch
mark and then these are the big lines are
the quarter-inch marks. This trimer also does metric, but I'm just going with
the four and a quarter. And we're going to click here. Click here. I should say cut here. Alright, there we go. We have our cards. Now you're gonna take, you
can take your lead here. There's a nice ledge
which I like to work on. And I'm gonna take my cards. I scored downwards and now
I'm going to fold upwards. That's called the, I call
that a valley where you score down and then a mountain
when you fold up. Now I'd like to use the edge, the edge or the edge of
your of your tremor. And I'm going to
go ahead and get what's called a bone folder. And it helps me
because it helps me. You can use either side of it. It just helps me burnish
the edges like that. That's how you make
your card basis. So now I'm going to just do one more and then I'm
going to do the rest, take a break and come back with some paper where
we do the layers. Okay, So that's what
you're gonna do, burnish all the edges. What I want to show
you this A2 card is now the card we have. And I'll say this again
in the next tutorial, in the next section
here, 5.5, right? Because we had just remember we had an 11 inch
piece of paper. It's 5.5 by four and a quarter. Okay, why is that important? Because the next layer is
going to build upon this. So I'm gonna go ahead and fold on my cards up,
burnish all the edges. I'm going to get white card
stack and I'm going to use the extra card stack that
we have four layers. And that's what we're gonna
do in the next video. We're going to create the
layers to put onto this card. Will started hearing
things together. All right, thank you. See you soon to make
some card layers.
4. Creating Card Layers: I've created all the card basis. I've folded all the card basis. I'm gonna show you
how they stand up. I really liked making
vertical cards like this. So they stand up like
this and then you can see the front when
you give it to someone, they can put it on their
mental, et cetera. I've made the car basis and now we're gonna make the layers, card layer for both the
inside and outside. We have balmy blue and 90 navy. So we're going to
take pieces of, we can go ahead and cut two pieces of card
stock of months. But we're going
to take pieces of balmy blue and night of Navy, and we're gonna be using the
cutting part of the blade. Now, recall the card itself. I'm just going to go and make
sure these are at the edge. Was four and a quarter wide. So we're gonna go ahead
and make this this, these bases are these layers, I should say, four inches wide. That'll give us a little bit
of a margin around the card. So I'm just gonna go ahead
and make these four inches by five and a quarter. Why? Because the card is 5.5 wide. So that's why we're making
these four and a quarter. I'm just going to go ahead
and turn this around and make I mean, sorry,
five and a quarter. So five and a quarter by four. You'll see what I mean
when I put it together. I'm just going to hold
this up before I get the white part and then I'm
going to get back to it. We'll glue it in
a moment but see how we just made a layer. The card itself as an
A2 card, it was 5.5. It by four and a quarter. Therefore, this
layer here was for because it's a
quarter-inch smaller and now it's four by
five and a quarter. I made four of these because I remember I
made some extra cards, so we're just going to
put those together. Yeah. But while I'm here, I always like to just finish cutting the rest
of the card stock. Let's go ahead and do that. Four by five and a quarter. I'd like to repeat myself
as you will find out, just reinforces the concepts. Save these little
scratch you never know. You can stamp onto them. You can use them for trimming
your cards and things. I mean, I don't
save parts that are all die cut and weird shapes, but when you have nice
strips like that, then they're easy to save because I just cut on that side. I just tend to turn around and I tried to do it the side that was
never cut on over there, just a habit of mind, it
doesn't really matter. But if you see me flipping
the base cards around, That's why I always
try to go with it. The side that we're doing is cutting some
basic way, the thin side. To finish my last
thought, you're gonna, you're gonna see me now do
this a little bit slow motion. I have a piece of basic white. I'm only going to cut
one at a time right now, just to show you something. Okay, so we have it for this is for the
inside of the card. It's still four by
five and a quarter. But what I'm gonna do
is that piece is done. It's four inches wide. Instead
of cutting this side off. I know that this side
is flat because it was machine cut by the manufacturer. So I turn the paper over, I just tend to turn
the paper over. I already have a nice
perfect flat side. I'm going to cut along the side. That's just a habit I have. I don't think it really matters. It's like a miniscule
thing because my tremor is also a machine cutting
a piece of card stock. It's just not using
the same kind of machine that was used
at the manufacturer. Now I can just go
ahead and cut two together. You'll see
what I do it again. So again, this edges
from the manufacturer. And then I cut that. I tend to take Mike
edge that I've already cut and flip it
around and cut this edge. But again, it doesn't
really matter. If you decided to just
leave it where it was. We put bottom line is we have pieces now that are the
same size as these pieces. All of these pieces
are the same, so it will start to adhere them. To show you how I don't need
to cut anymore right now. We do need an extra little
piece of scrap, save, save a piece for some dye
cutting. Put that peck away. So what we're gonna
do is adheres them. You have a few choices of your types of adhesive and
what you'd like to use. I think by far the easiest
thing to do is just to open up a card and take this white
piece of card stock. And if you cut it and
there's a little bit, you can tell which
is the inside. If the blade left a little
bit of an in-depth this case, in this case it's pretty perfect because I just put
a new blade on it. I'm using what's called the CO plus adhesive and it has
little ridges on it. It's just so neat because
there's not any liquid glue. Just very neat and tidy. I put a little bit
around four sections just showing you
that in the light. So that is called CO plus. And move that away from the pile so you can see
yourself centering it. If you keep a pile
underneath it, it might be hard to center it. I'm just going to
use both hands. Center that on the inside. And of course you can stamp
on the inside as well, some flowers and things, but this is a very basic cards. We're not going to keep the cards plane inside.
It's a thank you card. I'm leaving the inside for the message we're going to take, because this is 19 navy, we're gonna take a piece of
balmy blue and put it on top. That same as, and now I'm going to just use,
I should've had this. It was kind of tilted down. Hopefully, the glue
comes out easy. So now I'm going to use
rolling liquid adhesive. I used rolling adhesive. The CO plus is called
rolling adhesive. And now I'm using
liquid adhesive. Just putting some on there. Not too much. Not too much because I don't
want it to ooze out the sides, right. That's your other option. Then you have many other
kinds of adhesives. Like we could probably do a
whole course on adhesives. And examples of that. There are things called tear and tape that you can portable. There are glue dots. I have some of these here
for for the dimension, dimensionals to pop up things. But the adhesives,
we don't want to pop this part up because
it's a card layer. If you pop it up too much, it's gonna be hard to
put it in the post when you're trying
to mail something. For that for those reasons, I'm just going to be using
for the cards and the layers, I'm just using these
two types of adhesive. But for the embellishments
we can use these two types. What I'm gonna do now
is adhere these pieces. We have when we have a
balmy blue card base, I'll put putting the night
and navy color on top of it. And I'm gonna be
putting one of these inside and I'm going
to get to hear them. And then when we come back, we will continue this by
doing some dye cutting. Okay, so you're
gonna get yourself a piece of scrap paper,
that's what you need. Next, piece of scrap white. And then we'll be
doing some scrap black card stock in it
so it can be scrapped. I'm just going to pull
it out of the container and we're gonna be
doing some dye cutting the shapes that we're
going to be needing to use for this card. Thank you.
5. Die Cutting Shapes: In this tutorial, you
will learn how to die cut to create embellishments
for your cards. We're gonna be using
a mini stamping cutting in boss machine. Metal dies from
beautiful shapes, dyes some little plates to
cut the cutting plates. We're going to be
making hexagons. These hexagons will be making forced four different
sizes hexagons and then some little half hexagons, maybe a couple of triangles
and diamonds just to give us extra pieces to have more
choices for our card. Now before we do that, well, you don't have
to do this step, but I'm going to be taking, I'm gonna be using
these 12 pieces. These are the 12
different designs of the abstract beauty
design research papers. So what I'm gonna do
is pick out the ones I went on the front
of my card first. I think this one would
be really good for hexagons because
it's small patterns. After I pick out the ones I went on the front of my cards. Then I can, then I can go and make the
other ones into hexagons. So I'm thinking, the more
foiling the better let's do. I'm going to take one of these yet this one
I'm gonna save for hexokinase because I really like the black and white
pattern on the back. I really liked the
front of that pattern. Let's see what's on
the back of these, this one we'll use on
the front of a card. And this one. And I'm thinking, this might be really nice. This one here with the goat. What we'll do is we'll take, we'll take those three. Because you can cut
three at a time. We'll make those into hexagons. And then we can save these and I can cut some other
pieces up later. Later we'll be talking about the front of the cards
and how to decorate them. So let's just get into
the hexagons itself. Now let's take out. You could cut them all, you
can cut some. It's up to you. But I'm thinking, okay, So for the, for the background, hexagon will do some
black card stock and some designers
should use paper, will do different designs, then would then we'll have,
I didn't use the size. I use these two sizes. Then this one cuts
to hexagons at once. So we use this one,
little bit of diamonds and some triangles and
things and half hexagons, and then we need some white. These are gonna be basic
white for this shape here. That's all the dyes
will be using. And now we're going to set
up the little cutting plate. I'll show you how to do
this a couple of times. And then what we'll
do is, and then I'll go and I'll create more shapes and
start on some cards and then come back and
show you how to use these embellishments to use this mini bus cut
in both machine, what I did is I opened up just so you can see,
it was collapsed. It's a little
stamping up machine. It's called the mini
cutting emboss. And I'm going to
open up the plates. And now I'm going to
create the sandwich. And usually it gives
you instructions, different machines
give instructions. So plate number one, and then we're going to
use a plate number two. I use the scratch plate number two because that's
the bottom side. And then I put my paper
there and my dies and then I put the plate
number three on top. I'm sorry, not
plate number three. Another plate number two. Okay. Now we're going to take we
need to put the paper down. Let's say we could take scissors and sort of
trim how much we need. Just so we could do
some big hexagons and we'll make it so this other piece will
still fit in there later. We'll put this down. Let's just do two pieces of paper only because
it's the mini machine. And then we also
have more options for different size triangles. On a bigger machine usually
put three pieces of paper. Now we're going to see, maybe
this one would be good. This double hexagon. We'll put a couple of the
little diamonds there. That's what will fit, maybe
this little triangle as well. If you want to make
sure things don't slip, you can put a little piece
of washi tape on there, something that won't
rip your paper. I'm not going to get
at step right now, but that's sometimes what I do to keep things from slipping around or just make sure there's a little
space between them. I say slip around sometimes
when you're rolling this through, things tend to shift, but I'm going to
squeeze this little and I'm gonna go ahead
and roll it through now, you want to alternate
the plates a little bit. It catches. They're not all
going in at the same thing. If I alternate a
little bit like that, then I can catch sea. They caught onto the little
roller inside if I know an alternate them and I piled them up and put them
all in together. Sometimes this doesn't
run through is easy. I'm going to do that. Now our card is
starting to take shape. As you can see, we have shapes, we have shaped for decorating. Some nice hexagons. These little ones
just pop right out. I'm just separating them so I don't because they're
kind of tight. So you want to do a separate
them so you remember not to put them on
the card like this. There's two layers.
Sometimes they stick close together because
it doesn't metal. I'm gonna lay these atom I met. I'll separate those later. So we have a couple
triangles later. Here we go, where we
have lots of shapes. So we're going to do
that again and again. I'm gonna do it with
card stock now. And designers use paper at once. You can either, I'm thinking
in these scraps are done. Normally I would save scrapped, but I'm not gonna save. Now we need a piece of black. I'm gonna do some card stock. And what I do for the card stock is you can't fit the whole
card stock through there, but what you can do is cut
a piece of size you need. We'll make it a
little bit bigger so we can do some
extra things on it, but not bigger than the plate itself will have a black one. We don't want to cut it
longer than the plates. So maybe something like that. Card stock and you
could probably put a piece of design research
paper under the card stock, but I'm just doing
this to show you. I'm going take this size. This is the double hexagons. They're nice, but
there's done there. Let's do that. You just kind of a range. It, It's like a little puzzle, putting everything
where it'll fit. Now technically because
we're covering up the biggest hexagon with
our card in our design. We could technically cut a small hexagon out of
the middle of that, or a small shape out of the middle
because we're gonna be covering it up anyway. But I'm not really worried. I'm not trying to save on card stock right
now and I think it makes things a
little stable when you don't cut out
the centers of them, it makes it easier to adhere. I'm looking for the top plate, putting the top plate on there. So now we're cutting
the black card stuck. Even though I'm right-handed, I'm just using my left hand for today because the demonstration, it's easier to teach you and I could see better what's
going on with this machine. There we go. Now, if, if you're if you're die cutting plates do get
a little bit warped. That's okay. Actually
that one didn't get work because
it's a top plate. Little shapes. The bottom plate
sometimes gets warped, but if you don't, what you could do
to keep it from warping as you can flip it over, sometimes, flip it
each direction. And then also one
thing I do is I try not to cut too much, too fast. I cut some, then you set it up, set up the next one
cuts somewhere. If you cut too fast, you get a lot of friction. I'm going to get a
lot of friction. The heat causes the little
plastic plates to work. I'm just seeing if I
can't use that scrap here because it might be to fit, say something like
that on there. So I'm saving that little
piece of black card stack. And now I want to do
with the white parts. Just going to grab a piece of white card stack and show you. We need some of these. They're going to be
embossed a little bit. I'm gonna go ahead and just cut. That's the only part I
need, the white part four, so I'm just going to do that. And then I could cut
another one in a moment. That little strip. While I'm there, I'll
just cut a little bit of a little bit of
those little diamonds. Now when you're making cards, you're going to do all the
different sections at once. So later when I show
you how to stamp, we do all the stamping
at once and we do all the inking and we do
all the like earlier, we made these, we
did these parts out. What you're gonna do
things in stages. That's how you get a
lot more cards done. I use some of the white
for the inside of that. I'm using that same
white card stack. These sentiments. Some metal dyes have a
little ridge around them. And as you can see,
this little ridge makes it look in box,
which is really nice. And then we're going
to even bring out that embossing a little bit more. When we use the blending brush
to ink around the edges. I prefer to stamp first two dicot first,
and then stamp later. You could also put your stamp
images onto your paper. You could have put
Thank you on there. This is again, this is a sample. You could put Thank you on there with the
black ink and then you could have put this on
there to center it and die, cut it and roll it through. I tend to, I like my processes
to get a lot of shapes. First. I'd like to have
a lot of shapes. Have them already, my diamonds, my hexagons, and
among other things, ready to stamp and then
I prefer to stamp later. I'm just going to
have extra pieces that I die cut and stamp layer. So that's
what I'm gonna do. I'm going to keep
on making shapes. Have a lot of extra pieces. I'll even assemble a couple of the cards to give you an idea. And then what we'll do is we'll assemble a coupled together. You're gonna get to see
how to to start laying out the design in the next tutorial. So we're gonna cut
and that extra term, we're gonna decorate
the card French were going to cut out the pieces of designer shares paper the
size we need them. We're going to attach some of the hexagons and
then I'll show you in another tutorial how
to do the stamping and coloring around the sides. All right, that's all for now. Go ahead and do
your die cutting. All the embellishment you need, and we'll see you in
the next tutorial. Thank you.
6. Decorating Cards with Shapes: Now that you've
learned how to die, cut your shapes to the
front of your cards. It's time to decorate them. In this tutorial, you're
going to learn how to decorate the forensic cards, and I've already
done two of them. And here's the
sample will go by. And here are two
that I've started. We'll be doing the
sentiments later. Here's one where I just put
the little triangle on. Here are the card fronts. The first thing I want
you to do is learn how to cut the size for
your card front. And then we'll start putting the hexagons and
shapes in there. So get out your tremor. Remember, just recall
from the card basis we created that are the card
itself is an A2 cards, so it's four and a
quarter wide by 5.5 long. We have. Then the next layer was four inches by five
and a quarter. Now we need to make this layer one-quarter
inch smaller than that. So we're gonna now
going to go to three and three-quarter
inches or 3.75 inches, 33 quarters by five. And now we have a quarter. These are quarter-inch smaller, saved these little scraps
because you can cut out some extra
hexagons and things. Now before I attach this, I wanted to give
you a little trick. Something I discovered
when I was doing this triangle is it's
a lot easier to use the ledge of your
tremor when you're arranging these
hexagons and things, especially on the
ones on the edges. It's a lot easier to glue them when you're using the edge. So let's take this
little triangle. When you're, when
you're adhering something to the
edge of your card, use liquid adhesive, but you can use any kind of adhesive
for the ones in the middle. Let's put a little
triangle right there. And you can just use the edge
to help you line that up. Doughnut here, this layer to
your card yet until later. Now let's take this one. Well, let's first look.
Do we want to use this kind of hexagon? Or maybe this would not be enough contrast that one might look really good
with the stripes. So let's use that one instead. Because it's the
middle of the card. We can use the rolling adhesive. But liquid adhesive works a little better for
the edge of the card. Make sure you tuck the sides. And for that one, we're going
to put that in the center. Then let's just do a
little layout here, maybe hexagon there. This one doesn't contrast. That one's okay. The other side. Reason I cut out so many
extras. There we go. That one's a good one.
A cutout so many extras because it gives you so many more options
when decorating. We'll do a little bit. I'm just going to be using
the liquid right now just because it's a
little bit faster. Now we'll take maybe
over here we could take, let's turn this
one around and do. I'm just going to look at
the other sides of these. We could do a diamond. We'll do a diamond up there. And we could take
another stripe. I think that would
look good down there. So we'll put these
half hexagons. That one's nice
with the gold side. I'm going to save that one. Let's see what
else we could use. I'm gonna take this
one away for a moment. When you have such a really
beautiful background, you don't need to cover
with busy patterns. You want something more solid. Now I'm going to go ahead
and move this to the bottom. You can see that the
bottom of my tremor, that little ledge
line up things. Now we're gonna
take this diamond I'm gonna put over here because that way the black offsets, the one that's up there, that hexagon, we need
something over here. We don't need another hexagon, but maybe a 1.5 or
one of these pieces. Now that's not
contrasted enough. This May 1 work because it goes with the
one at the bottom. I'm gonna go and turn
the card and use this. All right, great, so we have enough extra elements on there. So what we're going
to do next is layer up the inside hexagons. I'm gonna decorate
the card as well. So let's, let's just look
where we can lay this down. Possibly. That one. This May 1 look pretty good because it goes with the
other parts of the card. I think we'll go with that. This one I'm gonna
say For over here and I'm just showing you how
to decorate this one. I'm going to use
the black hexagon for this card and this
one in the middle. And I'll be, I'm just
gonna show you how I would lay this out. I like this, I'm gonna
save it for another card. What I'm trying to do is get three hexagons on each card and then I would
hear them and come back and we'll do our stamping. We need something
that's going to contrast at each time we go up into a bigger size. So this one too similar
to the one underneath it. But I may know what I think
I'm gonna use that one. That's the same size of seven. Here we go. This one I'm going
to put over here. I'm liking it. Now we need
something to put on that card. I have a bunch of other, I have a bunch of
other hexagons in my little container
from this set of paper. There you go. So
that would match. I'm gonna be adhering these
and I offset them like that. Because when we put
our stamped image, I'm going to have that going in the middle there. We're good. I'm going to be adhering these. We'll just go ahead
and glue those down. But this one, I'm
gonna be puffing up with foam dimensionals. We have this card is laid
out. Just need to adhere. Thinks this card is
going to look like that with a little
bit of offset. I like how the stripes kind of contrast. A little
bit like that. Now we're going to lay
out a couple more pieces. Here we get, we have
this piece which will be, that'll look nice. You can do a couple
of black diamonds. Down there, went down there. Let's see if we
can't find something to offset that hexagon,
possibly that one. If I find a half, I really hate to
use the other side of that because it's
such a beautiful gold, but it's gonna be
a good contrast. Then little triangle
possibly up there. So we could go do
this like that. I don't need this diamond. Could do that. And I'm going to put little
triangle over there. Alright, so that's the layout. And I'm going to go
ahead and hear those. This card. Then I'm going to adhere
these the front of the card and I think
that one but the gold because it putting
it on a balmy blue, I don't think it
contrasts enough somebody to take this
whole thing and move it over and put it on the
night and navy like that. This one, however, would look good because it's
a softer cards. We'll put that one
on the balmy blue. Then for these, I get to
use some more fun hexagon. So maybe not that much. Use this one over here. This one over here. We're good. We're good. I think. This one I think that's good. I'm gonna go ahead and finish hearing all of these pieces. And in the next tutorial, you're going to see how we stamp the sentiment and
ink around the edges. So we'll see you
again real soon. Thank you for watching.
7. Stamping Sentiments & Blending: Now that we've created
our card fronts, it's time to do
some stamping and inking around the edges
of the sentiments. Going for something like this. And I'll show you different
ways to accomplish that and different ways to put little
borders around your stamp. Your stamp. Let's start with, well, let's start with the Crush carry for a moment
because I might, it might be easier than
the black won't smear. So I'm going to open
up the crash, scary. I'm going to put a little bit of ink on the stamping block. That helps me when I'm
using my blending brushes. I know how much I'm putting
on my blending brushes. Then I tap the first little
blob off onto the mat. And then what I
do is I go around these little sentiments instead
of anchor on the edges. Or you could, I'll show you
a couple of ways to do it. I'm gonna incur on edges. After a couple of edges, I'm going to dip
into the ink again, tap off a little blob
so it's not too dark. If you end up getting
blobs of ink, it's okay because you can cover them with
embellishments and things. All right, so that's one way, so that gets around the outside. Let's do that again. I'm just using my little
silicon met here. It just helps me. Especially when I'm doing sentiments that really helps me. I'm just showing you again because I want to show
you in real time. That doesn't take very long. So there's one way and I'm going to just put
these on the back of one of my pieces of night
and navy so you can see the difference between
doing that and not doing that. Okay, So it just,
it just gives you a nice extra depth and you already have a
little border from the die, so why not ink it up? All right, so that's
one thing you could do. Now let's show you some
of the things that's due. By the way, when we do
you're stamping later. If you mess up your stamping, you can always stamp
on the other side. It's always a little trick. Tips and tricks in my classes. All right, now let's enter
their thing we can do. It's just a tip off the blob and then
I could just sort of do have or just de-register
should say not have. Like that should be enough
to do the other side here. That's another effect
and I think that was the kind found my example. I think that would be close to what I did
it for the example. Now you're putting the
weight in the middle. The crushed carry
on the outside. That looks good. Let's try. Now. We could just do
the half and half. So we could do tap it around. And we can just have that one came out kind
of dark because again, this is why I have
a lot of these. If I cut out. So there we go. That's more like the color. You can do a little
ombre effect. That's another way of doing it. We'll probably use
all these cards. It's all good. You can also do this after
you stamp tool if you're not sure what colors I'm
I going to be using, I'm gonna do it now
at the bottom half. Say, what am I doing? What am I, what colors and
what color inks should I use? Well, if you have a
bunch of these done, we know that crushed carries one of the coordinating colors. But then you're not
sure what colors you're going to use for the ink, for the sentiment, then you
can just do that part later. I'm just going to go back
to doing the sides again. And if you want, you can
take your blending brush and hold your finger over
the top of it to remember, I said there's other
tools you could use. You could use if you don't
have this blending brush, you can use little sponge Arbor, wash them out
between, let it dry. And then you can use the
SpongeBob or dip it into the ink or a dip it onto
your stamping block. Alright, let's see you get the other side that
up a little bit. All right, so now we
have the edges done, done with the crash Carey. We're going to take the black, I'm going to do the stamping and take the black lid off
the Momento black. Let's get a stamping
black and we're gonna take the hello
beautiful stamp set. We're gonna take
the thank you out. Don't worry that your
stamps gets stained. That means that I was using
a lot of reddish colors. Maybe I was using magenta
madness on there. It tends to stay in your
ink so you can take stamping black and put
it flat side up and then tap it into your ink
before you stamp onto your actual pieces of
basic white card stock. I like to, I like
to ink this up, stamp it a couple of
times onto the mat and I call that
conditioning my stamp. Then I stamp onto the thing
I'm actually stamping. That means that I know that
my sentiments right-side-up, that I get good ink coverage, that the ink has a lot of ThinkPad has a
lot of ink on it, will show you what these
look like in a moment. There's a few reasons I do that. Especially if your ink pad is
new and it's really juicy. You want to try this tapping
onto your mat first. Getting more than
enough sentiments done and I put them into
what I call my bucket of crafty goodness so that I have extra
sentiments already stamped for quick little
projects and things. It just helps me. When I'm into
mass-producing cards. There we go. Now we have that
stamped and we can close. I like this kind of ink. It's a hybrid ink, so
meaning I can use my alcohol blends markers when I'm coloring in stamped images, I can use my my regular markers. I can use regular ink. So that's why I like that. Let's put these all here
so you can see them. Then I'm going to show you
how I'm going to attach them to the cards and
then I'm going to go ahead and do that off camera so that just save you a little bit
of time. So here we go. There we go. We have
eight of these. Eight of these all suitable
for using for our cards. And I'm gonna take, I'm
gonna take dimensionals. I want to point out
a couple things. So this one had
an extra hexagon. So we have three
layers of hex guys. This has 33 and this one has two, and
then this one has three. So it doesn't really matter. Then this one has
the widest hexagon. See, this one has
a lot of colors. This one has a lot of color. Let me just share. For that one, I would probably use since it has a lot of color. Like this one that's pretty
light seat because it contrasts with that C. But then for this one
with a lot of white, I might use one that
has some darker parts, like maybe this one would look good there or this one
here with this effect. I think something like that. Just kind of put
the ones there so you can have good contrast with the hexagon and this one,
it really wouldn't matter. Let's go ahead and
put this on there. Then two it to attach
that I'm going to put two-dimensional xs
on their popup this. Then we still have our
final embellishments. We need to put on embellishments from our ephemeral pack
and some stickers. So we'll come back and do that. I'm gonna go ahead and attach
the rest of Sentiments. Hope you enjoyed
this tutorial for part as part of your class. And that you're
following along with your materials and creating
some cards along with me. Thank you for now. We'll see you soon.
8. Embellishing Cards: I've attached all the stamp
sentiments to the cards, and now it's time to
embellish our cards. Using both the ephemera pack. I may even open a new FMR pack. I'm just not sure yet. We'll see if we
need any of these using some of this
ephemera and then some of these adhesive hexagon stickers like to do those little hexagons in odd numbers of three or five. So let's just take
this first one. It's very busy already. Doesn't need a whole lot. But we can always
add little flower. Let's say we have a couple
of different choices. We have these
pumpkin pie flowers and there's already a
lot of pink in there. So I think I'll
go with this one. See where to put it. Just kind of move it
around and there's little little places to put it and where it doesn't
block the other sentiment. Let's see. Just experiment with
it. There you go. That's where I'm going to
put it. Now we're gonna take this little dimensional,
put it behind there. And if you want, you
can use your take your pick tool to get
that off of there. I'm even going to yeah, I'm
even going to touch it up there a little bit that can
make it go up higher. Okay. So there you go. I'm thinking there's
just so much going on on that card that I don't really need a
lot of other ephemera. I mean, if I want a
little bit of bleeding or an extra extra one of these little gold
things I can't on a car, but the thing is there's so
much gold foiling already, so I don't really need that. So I'm saying I'm
just going to go for I'm gonna stop there. I mean, that's
actually sometimes it's not usually my style. I never usually say
enough is enough, but that one really is enough. We're going to take some
adhesive back hexagons. And I'm gonna go with a
big one right up here in this area because that's
a big blank white area. We'll put one there. And then we see how there's
three sizes of these. So I'm going to now
put a blushing bride, one that was just Jade will
go with the blushing bride. Somewhere in here. I don't want to go straight
down from that one, maybe at an angle over here. And then we'll put
whenever there we'll put the black one will go
for a small black one. Because we've already
done the other two sizes and there you go. I mean, that's all
it really needs. Three of those flower. I'm happy with this guard. It is embellished enough. Let's get one that doesn't
have as much gold on it. See, this one? This one doesn't
have a lot of gold. So this one, I would
take these little leaves then use them for that. I have glue dots,
mini glue dots. Going to see how far
down it goes this. Where do these start? Around in Rome, they
go where it stops. Nobody knows. Here we go. This one is used up, so let's go for this. I'd like to take my
glue dots and put them on on the role. I take the embarrassment
and put it onto the role. That just helps me get them
offset and put one there and one there. And I'm
gonna go for it. I'm gonna put it
down kind of curves. So I'll put one over here. Now. We'll get, we'll get that
little pink flower that we had a minute ago. Now this one needs a little bit extra in, but there's
a pink flowers. So I'm gonna put that, that
maybe up here will look good. When you have, you
can either use mini dimensionals or you can cut your bigger
dimensional, smaller for that. Now, I'm thinking
another one of these. Maybe we'll go for the star. Now sometimes when you pop
things out of these packages, packages, there's a little bit of let me see if there's any. Sometimes there's like
little nibs sticking out and you can use a little
nap, how to get them off? Sometimes I just trimmed decides that one I
can't really tell. Not so bad, but it could be my eyesight is going in my age. Okay, let's put the
star over there. So now we have some
three things going on. We get the little gold pieces and now we'll put some femora. Need to take your pick tool this time I'm going to
start with the black poses, a very black dominated card. There's not a lot of
black on this side, so we'll put one over here. And then we've already,
we've used the small one. Now let's go for we'll do
the medium one in this time. And just Jade. I'm going to put one right
inside this hexagon. Sometimes I like to put them
inside of the hexagons. And now we can go
for the large one. Put that up there. I used that odd number again. I did 123, those
123 the hexagons. All right, Let's keep going. This one needs
some color because this one has the blink
now. It needs the color. That might not
contrast very well, but we can use that. Note that flag is a little bit, that flag is a little bit too. Black and white already.
We have a lot going on. This is what I meant by this
little this little nibs. Sometimes when you
punch it out, you see the little nibs sticking out. Alright, so we're gonna
go for a pink flower up there because this
one needs some color. Get the dimensionals. And we will do big dimensional. I'm going to put two leaves
down. I'm going to do it. I'll do a gold one
and just Jade one. I think I might do it Go
on. I mean, I'm not sure. It just depends on
if it's a contract, if I can put it
wherever contrast. Yeah. Yeah. That'll work as long
as I put it down here and not on top of
the other gold part. You can see when you use
coordinating products, you already know everything is going to line
up and look good. Not really line up with,
you know what I'm saying? Coordinate. It's
going to coordinate, so it's going to look good. You don't have to worry about, will this look good? Will this be good on my project? Let me go do
something like that. Even though it's kind of abstract rate, we're
gonna put it like that. It has to go like that because that's the way the pattern goes. And then we'll put
the flower here. We've already, we've
already put one on there. All right. So we have that. We've
got some color going on. Don't want to do another flower. I think it is time to open
my other pack because I did say ahead of time, I think this one needs a heart. This is what the
package looks likes. Flow package. Let's take a heart out of here. Have a heart. I'm going to go for this. I'm going to go maybe down there or could put it on
top of hexagon. Let's say. That might look cute. Okay, We'll put it on
top of this hexagon with a mini dimensional. I'm just seeing if this other heart would be okay Somewhere. Take the backup for that
because it's already loose. There's one there. I'm going to put the
other one up there and that hexagon. Here we go. Now it's time for some of
these other kinds of hexagons. We have a lot of just Jade
going on already there, so It's okay, but
we'll put it up here. The big one, we're
going to go for a medium one family to put that right inside
this little diamond shape. Then a black one. Yeah, you can see that's how I decorate. I just go for it. I just go for it and I
think I could even use five of those or I
could use a couple of other pieces here. I'm just gonna go
for five of these. So I've used a jade that
was that size already, so I'm gonna go for
one that's that size. Let's move it over. Well actually, I'll
just leave that one in. We'll go for a big one. There you go. So it's an odd number. You can't really get them
off again, so I'm liking it. So that's my third card. I have a couple of more
cards to decorate. Well, I have one more
card to decorate. This one is already
decorated from before. I will go ahead and decorate
this real quick and then we'll come back for
the conclusion where I show you other projects
I created with this abstract beauty collection, which is a really
good collection. And I have a lot of other
projects aside from the cards. So we're just gonna go
for three hexagons, maybe a flower or a star, I think, and it doesn't
even need a flower. I mean, maybe do a little star. Not all cards need a flower. There's somebody so much
going on with that paint, painted foiled background. I like a lot of embellishments. I mean, that's that's
my personal style, but you just do it you're
most comfortable with. I don't want to keep
holding that big one. All right. Where to put this
guy? Where to put? It could go right there
but it doesn't kind of an awkward spot thinking,
let me put it over here. We have the hexagons
and I'm going to go for maybe this little tiny
star ethically dot. There you go. That's done. I'm going to clean up the table. I'll see you soon. We'll wrap up this
whole, entire class. You're going to get to
see some more projects. I have one more card I actually, I've been working on
throughout this course two, which has a little
bit of extra paper. And then I'm gonna go ahead and finish that before I come back. All right. We'll see you real soon. Thank you for your attention.
9. Finished Thank You Cards & Abstract Beauty Projects: This is the last section
of the class and I'd like to share the finished
projects with you that you learned how to
create other projects from the abstract beauty
collection and where to get some more supplies and
knowledge on this collection. All right, so
here's, here we go. These are, we learned how
to create carb basis. This is the balmy blue
with the night of Navy, learned how to die, cut out the shapes to
put on the card basis, and we learned how to layer up both card stock and
designer series paper. Then we learned how
to stamp ink around the stamp so that it adds dimension and you don't have
to embellish your card. Those are basic
card making skills you can learn and apply to any thing that you
do in card making. And you got to see my little
quirkiness along the way. And as I made mistakes, as I made design
design decisions, that's a tongue twister. You got to see why I did
the things I did and how I tried to combine the
colors, shapes, and patterns. The only thing I planned
out ahead of time was the actual design and
layout of the card. And we'd create,
we recreated that. I had one created and then
we made for more five total, just like that
with that pattern. Those dimensions
you learned can be applied to all of these cards. And then I just want
to show you what I did with some scraps. Here are the cards
we learned how to create these thank you cards. Then these scraps, I took the little scripts at the
edge and I put it on. You can put a little
belly band across the middle of your card
just for one extra layer. Other than that,
it's the same card. And this was one I was
creating us along the way because I lived really like this little pretty floral pattern. Along the way. I just added pieces as I went along and had extra pieces and that's what I created. All right, Now I'm
going to share some other cards with you. I do have a YouTube
channel called Paper CEF, PAP RED not pampered, papered PAPR because
I craft with paper. You can look me up
or you can look up Kimberly Smith on YouTube. And I have what's called
a workshop series. And in my workshop series I do multiple videos
and about ten projects. These are some of the
ones we do, shaker card. We do how to layer cards. This is a watercolor project and some embossing that series, this is a designer
series paper panel card. Here are ones I've
already shown on YouTube. This was an introduction to the abstract beauty
collection and using designer shoes paper
to layer Picard. Very similar to what you
learned in this course, but the dimensions
you'll be different. When I do, when I do
workshops series on YouTube, I have kits that my
customers in the US can purchase and things like that to follow along
with different supplies. Here, here's what I created
was something called the abstract beauty
cards and envelopes. These, these packages of cards and envelopes came
in a kit and then I just added the extra
embellishments like you saw me do in this
course, in this class. The word class course tutorial. I'm using those terms
interchangeable because I do teach on a lot of
different platforms. Here's another one
within boss background. Here's a bookmark and tag treat that I'm using a punch for. It's called a fancy tag toupper punch and balmy blue card stock. And that's how I usually
end my series by creating some tags and different
kinds of treat holders. And then here's something else
I'm doing in that series. There's a watercolor box. This is a mini paper pumpkin
box or the watercolor front, and then a card, a note card that
goes inside the box. And then finally
here is a box for, that holds a mask and I
really liked the sentiment, I miss your face. And this was a box I created to hold a face mask
because I miss your face, which is relevant
in the Times today, but who knows when you're
watching this course? Here's the abstract
beauty, sweet, by stamping up in all the different pieces
and parts that I used. I used every bit of it
except for this part. I used all the bits
with you and then this part was the
one I just showed you those cards
and envelope peck, closer, look at the sentiments. No matter when you're
watching this course, it could be years from now. You may find that you can find similar materials
at papered chef that stamping up that net. That's my stamping APP store. Or if you are watching
this in the year 2022, this catalog is good
until June 30th, 2022. That's the catalog where
you can get these at tech products and I'm not sure if there'll be
available after that. I'd never know what
will carry over. But usually usually things don't carry over
to New catalogs. They're limited and exclusive. You can find me on
Instagram at paper chip. That's my just put the at sign and paper check and you
can find me on Facebook, YouTube, and other
social media platforms. I have a Pinterest page and etc. I hope you'll stay in touch and follow me and I follow you back so you can get notified of future crafting
courses I'm having. And I do specialize in the scanning cut and
have scanner cut courses on this
platform skillshare. And I have them on another
platform called Udemy. That's all for now. I appreciate your attention in this class and I
hope you learned a lot. If you liked it. Please give me some
feedback and review. Have any suggestions
for improvement. Also, please feel free to fill out that feedback questionnaire. Thank you. This is the paper
check. That's all for now.
 Papered Chef, Kimberly Smith