Transcripts
1. Instructor & Course Introduction: Hello and welcome to this
card making workshop. My name is Kimberly Smith and I'm your instructor
for this course. I'm a professional crafter. I love making cards and
3D paper crafting items. And I'm best known
for my YouTube channel, the paper chip, where I've taught
thousands of students how to create cards and other paper crafting projects more efficiently
and effectively. I wanted to tell you a little
bit about what you're going to learn in this card
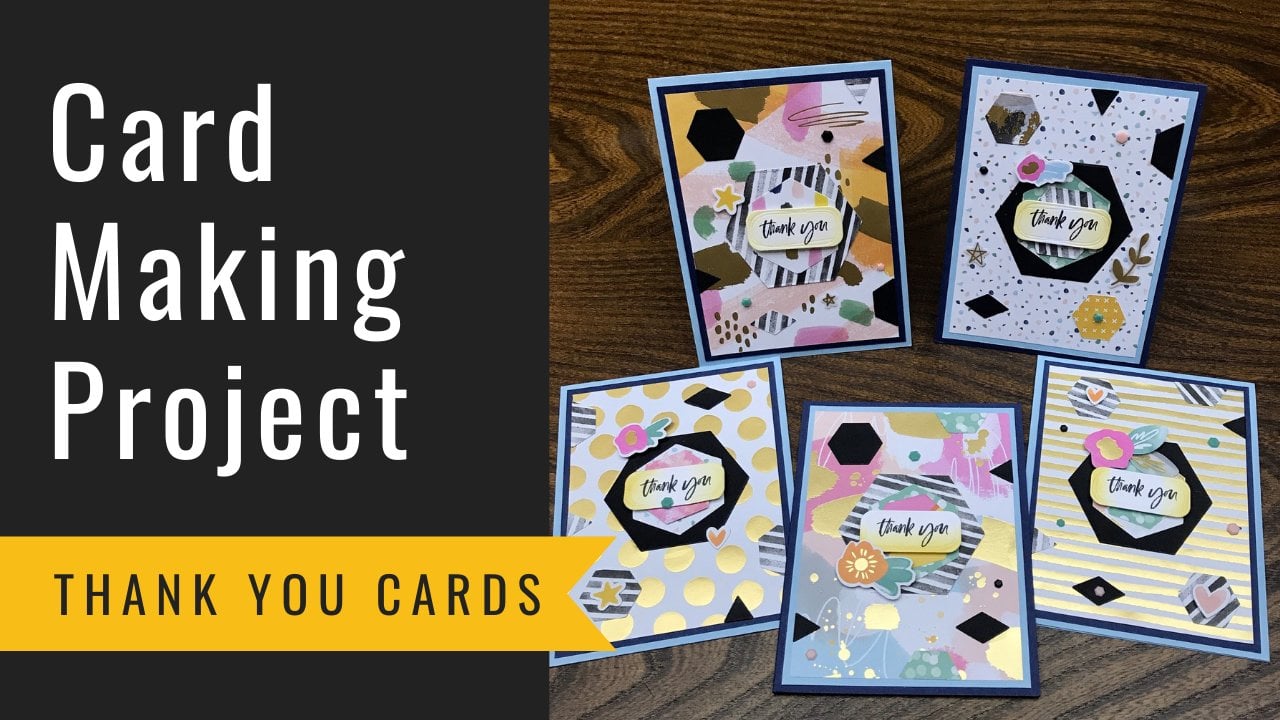
making workshop. Here's a little sample of what you're going
to be creating. This is called an
easel fold card. This workshop is for any
card maker at any level. Because you're going to
learn everything from how to score and cut the
card basis and how to make this easel
filled cards stand up to have to do some stamping
techniques, die cutting. And I even show
you how to step up your card if you wanted to try
some embossing techniques. I also, one of the benefits
of taking this course is to do what I call mass
production of cards. So that's something that
I will also teach you. You are going to be learning
how to cut and score all the different pieces so that you can put
them all in a pile. And then when it comes time
to assembling your cards, you could do it more
effectively and efficiently. I have a workbook that goes
along with this course. You won't need to
take any notes, just print out the workbook. And it has all the measurements
that you will need to cut all of your designer
series paper layers of your card stock layers, and all of the different pieces that you're going to be
needing for your stamping. You can follow along with this easel fold card workshop with any supplies that
you already have. I'm focused on the
natures prints, stamp set, and the sun
prints suite of products. But you can go ahead and use
any supplies that you want. Let's just get started
and start making cards. I'll see you in the
first tutorial. Thank you.
2. Card Making Supplies - Easel Fold Ingredients: In this video, I will share
the supplies you will need for your easel
fold card project. The first thing you always
need is a stamp set. This is going to be
for your sentiments. We'll be using the Hello there. And you're on my mind from nature's prints stamp
set by stamping up. It is a clink stamp set. So whenever you see
these rubber stamps and it's called a cling stamps, that it means it's going to
claim to a stamping block. This is a sticker. When you put that down, You need a stamping block
to grab onto it. So we need stamping blocks. I'll be showing you how to use
those later in the course. This one is a stamping black D, and you'll also need a stamping Black Sea by stamping up or whatever stamping block will fit whatever sentiments
you'll be using. So there's the Hello there came out that onto
a smaller one. So that's the first thing is a stamp and a stamping black. Of course, you need ink
when you're using stamps. The colors of ink will be
using in this for this project are Pacific point and gray
granite by stamping up. Now because I'd like
to add a little bit of texture around my sentiments. I'm going to show you how to use either you can either use a blending brush or what's
called a sponge daughter. And they sponge divers
put on your fingers. And this is how to
add a little bit of ink and texture around the
outside of your sentiment. Now we need shapes
for our sentiments. Now I die cut these shapes and I'll be showing
you how to die cut. In this course. I die cut the shapes using what's called the
layering circles dies. It's a set of dyes where
I cut out the white and for the sentiments and then another layer
for the background. So this is what they look like. The layering circles
dies by stamping up. You could use punches
or anything you want for your sentiments. That's what these
two dyes look like. So you need different
colors of card stock or designer series paper
for the backgrounds, for your sentiments, and then another color for the inside. Nice layering effect. Now, then you need another
set of dyes that goes with whichever stamps that you're choosing to use
for this project. So I'm using Nature's prints. There's a stent set to go. I mean, there's a die set. When I say die, I
mean metal dies. There's a die set
that goes with this. So these little leaf or the, I guess, little sprig
embellishments, we need those. They're going to help hold
their art easel card up. These little embellishments,
we're going to need this one for the sentiment and this is what it looks like. It actually cuts. And in bosses at the same time, you can see that
little ridge on this. And then when you get into
this beautiful wreath, I really loved this wreath. So these are all part of a set called the natural prints dyes. Some more dies in that set. Now usually, I usually store
my dies on magnetic sheets. So maybe, maybe later in this course I will show
you the magnetic sheets. If I get to the point
of storing this, and if not, we'll
just take them out and put him back
in the container. This really looks stunning. This wreath when you cut it out with silver foil or
any color of a foil. So I want you to use
foil or some kind of textured paper for
what I'm about to say. So I'm using a piece of silver foil by stamping up and I have a few
others coming in. Maybe there'll be here by
the time I do this course. So we're going to cut this out. And then we're gonna
die cut this wreath. And we're gonna put these
extra little pieces in the inside when we die cut. What's really fun is using
this adhesive sheets. So these adhesive sheets turn whatever paper your die
cutting into stickers. Now if you don't have silver, you can use whatever colors
like this one is rose gold. This is a rose gold combination. So you could use any kind of, any kind of texture paper or, or silver foil to
cut out your wreath. Then you're going to need
some card stock and designers serious paper and
the card stock. Let me move this
out of the way to show you this next
little section. Card stock will be using
it coordinates with what's called the sun prints
designer Sherry's paper. And this whole suite we're
using for this project. I'm using gray granite
for the card stock. And I'll be showing
you how to make the easel card basis
in the next video. And I'm using night of Navy. And I've also pre-cut some
other ones in Pacific point. And I believe Let's look at the coordinating
colors. Starry sky. So those are the four colors. Also, you need some
basic white card stock for the inside of your cards
and for those sentiments. Now let me show you the sun
prints designer series paper. It comes 12 by 12
as most paper does. As much like card stock or paper comes when you're doing
scrapbooking and things. So this is by stamping up, it's called son prince
designer series paper. And those four
colors, once again, the coordinating colors are gray granite. You
can see it here. Native Navy, that's
that background color. Here's great. Grant it again. Okay, and there's native Navy. Then we have starry sky, which you can sort of see
blended into this piece. This piece is gorgeous. It's so pretty, I don't
know when to cut it. And specific point which is
that brighter blue color. I think you could see that
in this, in this piece here. So pacific point is one of
the coordinating colors. So more gray granite. When we use this
striped pattern, I'm going to show you
how the best way to cut this paper to get the most
effective use of the design. Let's make sure that I showed
you all the backs of these, okay, there's some
specific point that's that bright
blue color in there. Okay, So these, these pieces and these patterns will serve different purposes for our
project. Here's another piece. So those are the four
colors, Pacific point, starry sky, native
Navy, and gray granite. Use any colors of card, stock or ink to
coordinate with those. Now, when I'm doing
easily fooled cards, I particularly like to use what's called the simply score. Scored. It's this scoreboard
for folding my cards. But we're going to also, I'm also going to show
you how to do that with the stamp and tremor
because it's the tremor. This is a stamping tumor. By stamping up, it does cut with one blade and
it scores with another. So I can show you
how to do that with this tremor as well. Then finally, there's a
couple of more things and I I'm gonna see if I can just reach over and
grab this machine. When you die cut, you need
a die cutting machine. I'm using a stamping
cutting in Boston machine. I'll show you how to use that in the proper video and the video. Not proper video, but in the appropriate video
for that topic. Okay. And you also need some adhesive for your
adhering to your card layers. I'm just using some SEO adhesive in some or you can use some
tear and tape adhesive, some kind of rolling
adhesive or glue for your layers so you
could use some liquid glue, might need a pair of
scissors, often in crafting. And when I fold my cards, I like to use little
spatulas or bone folders. So here's a couple of
the ones I like to use when I'm folding my
cards along the score line. Finally, when you're
creating cards at the, at the end of this, I'm
going to show you how to step them up
to another level. You can use embossing
folders, which I'll get to. You can use some Blaine. I have some bleeding here. Okay. Some other things you
could use on your cards. This is just ways to hold your cards open to
keep them from. When you have an easel card,
you want to keep it open. I have some foam
adhesive sheets we might use for some
of this project. And here's some more bleeding. Again, these programs are great for holding up
an easel filled card. There's a disadvantage,
but when you do use bling on your cards
because then you have to protect those
when you're there in the mouth because this can
poke through your layers. Displaying. I also have a
couple of other tricks. I'll be teaching you how to, how to attach some tape to your dies when you're cutting
them so they don't slip. If we might use that tape
when you're stamping. I like to use a silicone mat. I also want to teach
you about how to clean your stamps and
things like that. So I might get to the embossing folder
part that's going to be like a bonus on how to, how to add extra, extra, Wow, pizzazz to your car. Just an extra nice layer. Okay, So these are all the
supplies that you need. And of course, if you don't
have them all, don't despair. You just use what you have and follow along
the best you can. I'm sure you have a way to cut your paper and score your paper. You have some card
stock and you have some pretty papers
to layer it up with. That's really all you need to learn how to create
an easel fold card. The rest is all
icing on the cake. So I will see you in
the next tutorial where we will start to create our card basis for our
easel folded card project. Thank you.
3. Cutting & Scoring Easel Fold Card Bases: In this tutorial, you
will learn how to create the card basis for
easel fold cards. We will be using gray granite and night of navy by stamping up this card stack coordinates
with our son prince paper. After this, I'm gonna
go cut some more using starry sky and Pacific point, other
coordinating colors. And then later after we
cut some more layers, will be coming back in assembling all the
different colors. What I want to do is take
out two of each piece. And that's because
I want to show you how to do this in a
couple of different ways. Just to give you some ideas and based on which
tools you may have. So first let's just talk about
this simply scored tool. We're going to put the piece of paper on the simply scored. We're going to turn
it. It's a piece of 8.5 by 11 card stock. So we're going to turn it
in the landscape formation so that it's 11 " across. And then down here,
I just took out the little tool and
it's a scoring tool. There are two sides
to scoring tool. There's a small side. In a larger side, I tend to use the small side when I'm
creating score lines for cards. And then I use the larger side. If I'm creating flowers
and things where I need to press into a silicon mat. We're gonna go ahead
and create the score lines and then cut this. So let's go ahead and do that. We're gonna go over to this. This would be, let me just
make this little cluster. So this is just two inch mark. Even though the two is there, it's referring to
the larger mark. So that's actually two
that's two-and-a-half. And that would be two and
three-quarters or 2.75. So that's where I
want to score 2.75. And we're gonna good and score the whole paper card stack,
copays, a card stack. So you can see there's a line. Now we're gonna go ahead and
score at the halfway mark. So this is 11 " across and the halfway mark is
five-and-a-half square root 5.5. Now that's all we need
for this easel fold card. That's the only score,
lemonade, I should say. There's going to be
more to it than that. I'm gonna go ahead
and take my tremor. And I'm going to open it up. Just so you can see that. Let me just make sure
you can see this nice. Now going to turn the paper, so that's in the
portrait orientation. Now I'm going to put the
paper or the card stock, I should say, right ear
at four and a quarter. And we're going to
cut this in half using the trimmer blade. Now we have two cards at once. Postcards made it once. Now I like to take a spatula, our bone folder or something
to float the cartilage. And we're going to I
just want to show you a look at a finished
card so you can see the fold we're going for. Okay, so what we're doing
is we're going for an hour, explain outer layer this up
and how to make this stand. But what we're going for is
this type of fold like that. That's just one type
of visa card and diesel card is basically
a standing card. There's still piece
of this missing off. Describe it. A little extra spray. So what you wanna do is
you want to flip the card. So we, we scored downward and now we're
going to flip it over. Put it against the
edge of your simply scored or your edge
of your trauma, which can follow it
along the score line, or I should say, furnish. Now we're going to turn this, are open this back up
and we're going to fold this one in the middle seat. That's all there is to it. We're going to end up, this is what we're going
to end up with. And I use this same
template a lot from making calendar or
something, I went to stand up. So your cargo end up like this. The research you got a couple of pieces of card stock
is I want to show you how to do that
with the tremor. And then I'm going to show
you how to do it a little bit faster because we've been
making a lot of these cards. And when I'm asked produced,
I just want to show you the speed I work at. We're going to
we're working slow first just to show you the
steps I get folded in half. Open this up. Scoring on there, so
we have the cards. Now these are gonna
be of course, folded down until you're ready. We're going to be assembling
them. See what I'm saying. You can then square
them somewhat flat. Two are ready to assemble. Now. We're going to
now take a piece. I'll just take a piece
of the gray granite to show you this concept again. So for when you're used to tremor that this is
a step it up to you. I'm going to open up the arm because it only goes out to 6 ". So now when you open up
this extra extended arm, because after 17 ". So I'm going to now put the
paper again horizontally. I'm going to lay the
paper horizontally. Now instead of cutting. First, I'm going to use,
this is the cutting blade. That's, that's the gray blade. I'm going to use what's
called the scoring blade. That really screenplay
because it's not a blade. I should say the scoring tool. And it has a little round thing. So whatever tool you're using, you may have a tremor, which I have built in, built into it with a
blade and a scoring tool. So let's look at the blade
closer so you can see that two, there's the blade. So I'm gonna put
that back in now. They take in score, we're going to take
this piece of gray granite and we're
going to go out to 2.75 or two and
three-quarters, right? I'm just working in inches. So two and three-quarters
each of these bigger marks on the on the grid if this
trimer or coordinate inches. And now we can take
the scoring tool. We can just go up and
down a couple of times. So what we've done is we've
created a score line. Could see that. See if you can see that in
the light of the camera. So there you go.
That's the score line. It's much faint, faint or line. Then the simplest score
mix simply squared. Now we're to go out to
five, five-and-a-half. We're going to go
ahead and squirt. And then what's nice is
you're gonna go to turn this makes we've already
done the two score lines. Now we're just going to turn this paper and we're going to go for an acquirer. That's
a foreigner quarter. And we're not going to cut. So you can see how easy that was to cut and score
at the same time. But what I prefer to do, I'm going to be scoring the
other ones on this board. But what I prefer to do
is I prefer to score on this because I liked
deeper score lights. They helped me better for
not getting any younger. And my I say Just
dwindles over time. So it helps me to have a bigger, deeper score, nine to see. Sometimes I'm watching
TV and making cards and maybe a little dark
where I'm working. It's just better to have
deeper score lines. I also prefer to use this. This one has a lap
desk is simply scored, so I work, it's good work surface spilling,
turning that over. Sometimes when
incarnate, can we use the terms valleys and mountains when talking
about score lines? So when you, when you square something down, it's a valley. And then when you fold
it up, it's a mountain. So I'll be kinda pointing that out in the
next set of cards. There we go that we've
made a couple of. So now what I wanna do is take a piece of each
and work in real-time. Just show you how I can
make cards quicker. And I, how I, how I use this process in my everyday card making and I will be making
a lot of these cards. So what we're gonna
do is to start out turning the piece of this is night of
Navy card stock. Two and three-quarter
inch scoring 5.5. I get the next piece. Two and three-quarters,
five-and-a-half. I can even mark these points. I can use them again.
These would be called valleys because they are down. Then when we fold them
up the mountains, we can take the tumor. I wouldn't recommend any more than two pieces of
card stock at once. And this type of
tremor, you can cut, you could go push
it out to the edge. This is 6 " to make
sure that they're even. And then bring it back
to four and a quarter. And go ahead up and
then down because I did up and down because I did
two pieces of card stock. I have four cards created. Get the spatula. This was a valley scoring
down, hold it up. It's a mountain. You could see how if
I, if I scroll down, then when I'm folding
up by folded, that way. If you want to do all
your scoring later. Because they do take up
a little bit more room. They're not quite so flat. Then you can let your scoring. You're, you're,
you're burnishing the edges you that later. But I definitely recommend
working in stages. Normally doing this
one card at a time because this part I didn't do one part of card stock is pretty thick and
just flatten it out. And you can see I'm
using the edge of the simply score
to align things. So now you know how
to use this trimer. Reverse scoring and cutting. You can see my
preferred method of using this simply scored for the score lines and for using it for
folding, for work surface. Now, just to give you a little sneak peek of
what we're doing next, we're gonna, we're
gonna be cutting. I'm gonna go ahead and
do some more fees. The next time I returned,
I wanted to explain what we'll be doing in the
next couple of videos. I wanted to show you how to make some more card stack
layers that we're going to need for diesel fuel cards. And I want to show
you how to make some designer
series paper layers that we're going to
need for these cards. So don't cut hold of your
card stock into cards. I should say, I should have
mentioned that earlier. Save a couple of pieces to be able to cut some of the layers you're
going to be needed. We're also going to be
showing you how to cut. I will be showing you how to cut the basic white layers
for the, for the inside. Well, I would say
inside we could put a message in set
here if you wanted, but it's more like in this
case for the back of the card, it would be just if
you want to make a message, make
that extra piece. And then I'll be getting
into the assembly. That's what's coming up. So hopefully you can get, gather your supplies
and catch up to the point where at
the best way to learn how to make this
card is by doing it with whichever supplies
you have available to you. Thank you.
4. Creating Designer Series Paper Layers: Now that we have cut and scored or easel
folded card basis, I wanted to show you how to create the layers for this card. So in this video, I'm gonna show you
how to cut the designer series paper layers. And I'm going to right now go give you an overview
of what that will look like and then show you the best way
to cut this paper. So here's an easel
folded card base. It's going to go like that. And then we have
pieces of card stock which will cut in
the next tutorial. Let's get one
that's contrasting. So this one here, let's
put, let's take this one. And if we're going
to attach it here, That's a panel of card stock. This is card stock and then
there's designers newspapers. So right now we're
going to be cutting the designer series paper layers. We need layer for here,
a layer for here. And then we need another
panel for the front. Let's get a contrast
in color like that. So this would be, you need, you're going to need one
for here and one here. So we need four pieces
of design research paper altogether. And we can get that. We can get everything we need from one piece of card stock. And we get, we can make
more than one garden fact, which I got to make multiples. And I also like to cut a couple of pieces of card
stock at the same time. I also like to assemble these
panels at the same time. I do everything in
stages and that's how I get a lot
of cards created. So let's go ahead
and take two pieces of design research paper. And we're going
to cut the first. Just make sure my
paper's going right way. It could always be aware of your patterns to and
how you want to cut things. But this is gonna be
the five inch mark. We're gonna go out to the
five-inch mark because these are going to be
five by 3.3 quarters. This group of panels here, let me show you
where the bleed is. And I just go up
and down the blade. Move that to the side. I'm just going to do that again. To make it simple, we'll have to trim
them and a little bit. But let's just get these done. Now we're left with
this piece here. So let's take these and just
going to turn the paper. We're gonna, we're gonna
go with we have 5 ". So now we're gonna go with
the next measurement, which is three and three-quarter
inches. Do that once. Twist. And then this one is already done for you because
the last one is already cut. So these are 4 " I'm sorry. No, this one has
three terms. Sorry. Sorry about that. These two are done. I'm so used to making
for Instacart basis, we need to trim 35
by 3.3 quarters. And this is all in your you can actually much about
how it actually works. Sometimes get a
little little myself, but that's why you put them in a pile and
you mentioned them. Oh, they weren't the same size. And that's actually a
troubleshooting tip for you, is to pull your car
pieces together when you're done this big pile to make sure they're
the right size. Alright, so just so you're not confused, that was in no way. These are just extra
little scratch. This was five by 3.3 quarters. So we only just did
that one little. That first piece we cut, it was 5 " but we didn't. Then we already
have three panels that we need for each
from each piece. That's good. And turn this and
get another panel. 3.3 quarters. Okay. And then we can go through
and three-quarters again because we're going to need that for the next,
for the next group. So we have all of the big ones. We're gonna be able
to get four from each foot for the large panels. And now let's get the bottom. This is now we're gonna
do the bottom panel, 3.3 quarters again to
go out to 3.3 quarters. And I'm gonna go to
3.3 quarters again. Save that scrap
now for this time. Now, instead of making too
big panels, which you can. In fact, it, it depends
because you might want to take this whole
sheet and this is such a good one for panels
that you might want to make this six panels
out of this paper. And that's fine too, because
they really do look good. So that's what this back panel. But in my case, I'm going to just show you I'm
going to turn this. So we had the 3.3 quarters, but now I'm going to turn
it and I'm going to make the bottom panels because
it's the same width, but then they are there
different height, two and a quarter inch. So that's what these
aren't two and a quarter inch over there are
set up in there. Two and a quarter inch. Okay. So now we have a
couple of those. I'm just putting these already here because
I want to show you what I made from one designer, one piece of design
research paper in a minute. Give you the big picture,
two and a quarter. And I like to
repeat myself a lot when I'm teaching a
two and a quarter. So there are panels, four big ones for the top four for small instances
out of each sheet. Now we need these other pieces. We need these, these tiny strips and these tiny strips and
these strips, the size. Okay, so here's
what we need. Now. We can have, we have some of these little pieces already
that we can work with, but I want to take
the bigger panel, the bigger strip for you and
we'll cut that one down. So what we need is this, this is a 12 inch strip already, it's 12 " this way. So what we need for this for
these cars are going to be 4 " by three-quarters
of an inch. Okay. So let's just do the
three-quarters of an inch and we still have
two pieces together. When you start to get
when you start to have small pieces and you
don't want them to slip. Sometimes I use a
little bit of posted or post-it note tape to keep
keep this small paper from. When I say small, I
mean, if I'm only going up to three-quarters
of an inch, maybe don't want this
piece of paper to twist, especially when you
get into small pieces, a little piece of tape
and it does help. Three-quarters of an inch. I'm going to go ahead
and lift that up. So that's what we have is
three-quarters of an inch. Now. That is that is the
size for a big panel. I mean, that's that's the
width for the not big panel for the bigger piece of the
small pieces and bigger, meaning it's the
piece once again, that's going across,
across here, across this piece of card stock. And I'll just show you
what that looks like. So there's that panel
three-quarters of an inch by four. So now we can go
ahead and this is a 12 inch strips so we can
go ahead and go out to the four-inch mark that
we're cutting to it. Once we cut this piece, sometimes the paper was a
little bit bigger than 12 " and that's and that means that the final end might
be a little bigger, but I'll show you when
you're assembling. If anything, it
doesn't match up. Like say you're
assembling these and there's a little piece
of card stock that was our little piece of design
research paper that's bigger than the card stack
when you're assembling. First to fix it there, see how that one little piece was a little bit
bigger than 4 "? And I would fix it at that
point when I'm hearing it. But you can also just chest the last one that's
not so we have 4 " 4 " and then it seems like sometimes the
paper was a little bit more, slightly more than 12 ". So when you get to that
last little piece, you might have to sliver
off a little end. But I like I said, I do, I do it at the assembly stage. Now let's go ahead and, oops, I don't want
to mix these with. I want to show that we're using. I want to put that
in the fall, not mix them with the
polar head earlier. Just so we can see what we got
out of one piece of paper. Now let's go ahead
and take over here. By the way, these are my scraps. So let's check these
scraps we have familiar and this
looks like okay, it was already
three-quarters of an inch. That little scrap from earlier. We're going to flip that
around and we're gonna go 4 " to the four-inch mark. There's a method to my madness. This one is now we have
the same amount of each of those pieces of
disasters paper we need. And then over here on my scraps, we have for the strip,
for the bottom. This little piece
grabbing these pile, this little piece
to the bottom needs to be half inch across. We'll see what we have here
with our little scraps. Think these are
already half an inch. And they are well, yeah, They pretty much aren't. That's each of these lines on the tremor or a quarter-inch. These were already half an inch. And just to double-check. Yes, they were half an
inch. I think that's the reason when I first came
up with these measurements. This one's not big enough. I came up with them
because this was already the right with. So we're going to take two of these little scraps and just go to 4 ". So we have 4 " by half an inch and putting
that on that side, and then this should already be half an inch or
close enough, right? Because this is carbon making. Not to be totally perfect. This is just measurements. And of course you can go with your own little
variations of these, but I don't know if
these are going to be 4 " in width to that. I was not long enough.
So that's okay. It was it was the right
width but not or the right? Yeah. The right width
but not the right leg. So go ahead. We're going to have to
take we're gonna have to go into our last step here. So we have more than we need. This extra strip here is getting we need to
half an inch from it. When you get a little
piece of tape again, that's the little trick for you. Let me go ahead and take this down to get
that extra half. Okay, there you go. And turn it to the side. Okay. Now these pieces. These are, these are what you can make with
your little scraps. So we have more than
enough we have more than enough for the extra
strips we need for now, I just wanted to
show you something. Now that I've cut
enough of this, let's go ahead and take another piece of disasters paper for contrast to go
over what we just did. And then I'll cut the
first part of this again in real time
so you have an idea. So here let me just take a
piece that's pretty plain. Here we go. We're
gonna put this on this piece of design research
paper in the camera's view. Now here's where we just
cut out of the paper. I'm gonna go ahead and
use this color e.g. so let's go ahead and take,
or I'll just use both. I'll just use so we have 12. So out of each piece of paper. Well, actually it's better
if you look at the side. There you go. So we had from each piece
of design issues paper, we have four of the
bigger card basis. These are just the extra because we cut two pieces of paper. So we had we had four
of the bigger layers. And then we had four of this
this size layer, right? And when we did that, we had those extra little strips that we were able to start
using for our cards. Then these are the extra 12. So this is what
you're going to be able to get out of
one piece of paper. I'm just giving you the big
picture of how I cut it. You might have been figured
out a better way to do it, but this is how I
came up with it. Okay. And then we were able
to get a bunch of these were elite where
we have more than four but I did four but
there was still, remember we have
extra steps up there. We could have done
more than four. But I'm just showing you. Put that over there. That's all you need
and then you can save your other
sculpture, other things. And you're going to
need 1234, okay, you're going to need 1234
of this larger layer, 1234 of the bottom panel. And then you need 1234 if the size and then
1234 of this size. So these were the half-inch, three-quarter inch, two
and a quarter inch. And what did we say
3.3 quarters it. How does that correspond? It corresponds to this piece
here is one of these panels. This piece here. One of these. Then for the bottom part, you have this piece corresponds to that and this
piece corresponds to that. So I hope that makes sense. Now what you just see another to put those together because I'm a very
visual person. I have to do that when I'm card making just to
make sure I've cut out the paper right sequence to get the most out of my
designer series paper. You may have heard
of a term sometimes used in car making called
a one sheet wonder when, when carmakers talk about how many pieces they can get
out of one sheet of paper. So we just did our
little one sheet winter. These were our
scraps from before. So this are plenty that you
need for this smaller pieces. So I just want to show
you the bigger piece part one more time. So you take your pieces
of disasters paper and maybe you become aware
of your patterns. So for this one, I would want to use
this side of pattern, this one, this is a
piece of scrap paper, scrap of paper. And
put the pattern there. And I'm going to go out to 5 " two pieces at once
and I slice it, then I turn it. And I'm just going
to go 3.3 quarters, 3.3 quarters, 3.3 quarters. Now we have an extra piece here. So we have the extra piece
that we needed earlier with the It's already 0.75 " so we can go out to
4 " and we're done. So now it's just scraps. So I mean, look at, look at
how easy that is, right? And then we're going
to go up to flip. We're going to get to
that 5 " again, 5 ". And I'm not going to show
you this part again, this little small
little slippers, but do use your workbook in your recipe book
and everything that you're going to need is in there for all your measurements. So we have 3.3 quarters again. So there's our four panels
and then these pieces are gonna be for our smaller parts. So we're going to go
to 3.3 quarters again. We're going to do that. I'm going to do that twice. But we need to turn
these and make these smaller panels
for the bottom part's going to turn
it two and a quarter. Push this through
two and a quarter. Save all these little
scraps because these are, I think this is going
to be our little half-inch piece we need yet. These were already
made from fresh look. Look at that. Already done. That's gonna be for the
bottom part of your panel. She isn't up for it. Just know that's not
4 " You know what? We need them to be. Let me look at the bottom panel again. Yes. The way I had it
was 4 " because I wanted it to go across
the card stock. However, what I just noticed, and this is kind of
a good discovery is that these pieces
will be fine tune. These can be used for you can make your own
that are bigger, or you can just keep it like this and that would
look really good too. It doesn't have to go over the edge out to the
edge of the card stock. That was just my design choice. There's no right or
wrong way to do it. We're going to turn
this though and make it two and a quarter for
the bottom panel. This will make sense
worrying when we assemble. I'm gonna be like that little
piece in which part to cut. I go over things in
many different ways. You're going to get
more practice with this as we assembled. Okay, there you go. And
then you're going to cut those extra strips
as we discussed. And there you have it. That's how to cut your
designers to use paper. I advise you to cut your entire packet to
sanitary is paper. Don't look back. You
may want to save. I do advise you maybe tonight, cut all of the
really plain pieces. Because if you've run
out of card stock, which I think I'm about to do. And in my project that
I'm trying to get, I was trying to go for the
70 cards and I only have a few pieces of
card stock and I'm only up to about 32 here. So I know. I'm going to start having to use some extra pieces
of design shoes paper for some of my layers that I would've
used card stock for. So e.g. this circle in the back, I may run out of card stock for the circle in
the back of them. They have to use the
sanctuaries paper. Or one of these pieces
I use card stock for here could be designed
to serious paper. This part. I don't want this to
be disastrous people. I want this to be
card stock and this here to be card stock because it needs to
be for the weight. But there's a couple of
places in my design where this piece in the background of this can be
decentered series paper. So maybe don't cut
up your whole pack, saved some of these plain colors that you can use it as
sort of faux card stack. Later on when we
do some assembly. Alright, coming up next, I'm going to be cutting
similar design shows paper. And then when I come back,
I'm going to show you how to cut card stock
layers that we need. And at the same time
in the same tutorial, the basic way that
we're going to need in case you want to put
notes on your cards. That's all for now. We'll
see you in the next video.
5. Creating Cardstock Layers: In this tutorial, you
will learn how to cut the card stack layers for
your easel filled card. We're going to be creating these layers which will
go on the card like so. And the front, there's some
calling the front panel. We're going to be creating
the bottom panel. You say when put together, which is going to go in the
front of the card like this. And we're going to be
creating this piece here. We get one for better contrast. This, for this
decorative element to go across the front
of your card. Those are the three pieces of colored card stock
that will be cutting. Then while we're here,
I'm also going to show you how to cut
some basic white and some silver that
we'd be using for your panels if you want
to write messages and for your decorative elements. When I show you how
to step up this card. So let's get started by taking night of navy will get the
night and Navy card stock. And we'll just go ahead and cut and every member
you can cut through two pieces of card stock
if you want at a time. I'm just going to go
ahead and use one piece for this demonstration. The paper is the card stacks
eight-and-a-half by 11. I'm going to go up to
the four inch mark. And I'm gonna go
ahead and cut it. And I'm gonna go
ahead and do that again to the other side. So we're going to have an extra sensitive and half by them
and we're going to have that extra half inch strip that you can save for
other elements later. Okay, we're going
to take now we can cut through both of
these pieces at once. I'm going to use
this little ledge to help line up the card stock. And it's gonna be
five and a quarter. Go out to the five
and a quarter mark. So the measurements are
five and a quarter by 4 ". Oops, that was already 4 ". So we're gonna go
five and a quarter. So let's, let's compare
those two are other pieces. So I always like
to put my pieces. I like to take my
pieces of card stock, put them in a pile as I work before I get too far and every
time I cut a few pieces, I just put them on the pile to make sure that they're
all the right size. And then I also didn't go
back and check because you could go really far down the rabbit hole cutting
the wrong size papers. So I sometimes check
and I go, okay, this is right, that's in
front of my card base. And we're good to go. So here's our hero pieces. Now let's get another
piece of card stock and show you how to cut
the front panel. We'll take a piece
of native navy. This looks like it's
already a card-based for an easel folded card. So that's already a
card-based friend. He's a folded card. I'm going to go ahead and use
a different piece. We will go ahead and we'll
just go ahead and take one of these pieces of gray granite. So for the bottom panel, we already have it's 4 " across. And then what
you're gonna do for the bottom panel is it's gonna
be two-and-a-half inches wide or 4 " wide and two-and-a-half
inches high, I should say. So this is the
bottom front panel. We have. This is gonna go like
so just like that. And then this front
panel that we cut is gonna go on the top
of your card like this. And you can grab any
mix and match any of these four cards dark
colors because they all coordinate with this suite with the sun prints designer
shares paper, please. So just to show you
what we've done so far, let's say we have a piece of design research
paper for the top, and we have a little
piece for the bottom. We're going to be assembling
these in another tutorial, but let's just get a little
piece for the bottom. And you could see how these
layers are going together. Now let's do the
decorative strip using my piece of gray granite. It's a scrap my head. It's 12 " long. We're gonna go out
to the 1 " mark. And we're gonna go ahead
and cut the 1 " strip. And let's double-check that. That's the decorative
piece for the front. Good to go. And that's gonna be
1 " by 4 " across. And because I was
working with 12 inch card stock for that, we can get three pieces. Those are going to
have this piece, this decorative piece
in the inside of those that we cut in
the last tutorial. And those were these pieces of card of descendants
trace paper, like so. So you can see how
this is all coming together in the
different layers. So those are the
steps for the front. Now while we're here, let's get a piece of basic Wipe. And we'll cut look, just cut a little panel to
show you how this will work. So because our little
panel was 4 " across, if I want to make
little white part to go in the inside of that. So one approach could be that I go out to 3.3
quarters and I'll have this. It's all in the workbook. By two and a quarter. Let's
see how that will look. Now I could take one of
these pieces of cards, stuff that we just cut the
front for these panels. And I can layer a piece of basic white on
top of it like so. And I will have a place for
my message, for my card. So I didn't have an
example of that tissue. You here's, here's an example. Here's, here's a temple card
partially put together. We have an easel for card, and when you turn it around
on this bottom part, you have a rectangle
and you have a piece of basic Wipe where
you can write a message. Maybe you don't want to
do the message there, and maybe you don't want to put a little rectangle around it. The other option is just
take your piece of basic white and you can go up to 4 ". This measurement should
be familiar to you. 4 " times by five and a
quarter and a quarter by four. And you could put
the panel along the back and it would
be pretty tough stamps. Some of the flowers from nature's prints are
some of the foliage, I should say some of the natures prints
elements on the back. And you could do, you
could have your card, it stands up, easel folk card. And you could write your
message on the back of the giant panel or inside. You can put several
different panels inside, but the only thing about the
inside is there going to be you're going
to be able to see them when the sustaining safe, The standing on the mantle. Keeping this
measurement in mind, the one that we just used for the card front that we used
for the basic white message. We're going to use
that same measurement again to cut our silver card
stock while we're here. When I did the ingredients
for this series, I only had this
silver card stock. Now you have some better ones. Some more actually, a
better pack, more variety. So we're gonna go
and cut a piece of silver the same as
we've been cutting. It's gonna be four. And it's going to be
by five and a quarter. And that's one option. And I'm going to show
you that we can embrace that like that, like so. And then I'm going to cut
some different options. I'm going to show you later. We're going to cut
one that's just a quarter-inch smaller than that, 3.75 by five. So that's gonna be some,
something like that here. Let's put that on another,
another piece like so we can emboss that layer and I'm going to
show you how that will look. I want to show you how
a full one would look and why we may not emboss it on a full sheet because what it'll do is it'll show
through on this piece. But I do want to show
you that anyway, and I'm going to show
you 3.75 by four. Okay, now let's
go ahead and take out this other silver card
stock I wanted to show you. It's called the silver
foil specialty, which just came in in my
shipment. Very exciting. And there's three different
types of silver foil. What I really like about this
is it's already textured. It's three different
shades. It's this. What is the silver that
I was showing you? But it also has a
little bit texture. This one's sort of a
matte finish and then this one is even shinier. Let's see if we can't do
three of these at once. Maybe we could do three at once. So nicking that one, probably
more like two at once. But let's go ahead and
I don't want to cut that little nick is we're going to go up to four
actually with this one. These ones we're gonna do 3.75. So I'm gonna be showing
you something else later. So we've got 3.75. Yep, I was able to cut off rate once I just move my
blade up and down. Don't use up all of your silver because you're going
to need some for these rays that we're gonna
be using for the fronts, the current if you 0.75 by
five, I'm lining them all up. She had just use decide. Some of these have a little
nick at the end of the paper. So I just want to get I just want to go a
little bit beyond five and a quarter because it's a little bit of a nick
on sometimes when he's card stuck at
ships like this, this metallic card stock, it gets nicked on the corners. So we have 3.3 quarters by five. So you can use, I'm gonna be showing
you different ways. You can use silver in
place of this card stock. For this background
layer of card stock, which you would then layer up with one of these and you
can put that on your card. So I'll be showing you that
when we step up the card. We can also take a big piece and emboss it and I'll
say why you would, why you went to emboss
the larger piece. But I've been showing you that. Then you could take this piece here, these smaller pieces. We can emboss these later
and I'm going to show you what that would look like
and put these on the card. And how the, how the wreath
you would have to use one of these other styles because you want whatever you want it to contrast
with the background. So these are just
gonna be use later and I'll be sharing how
in the next tutorial. Get your adhesive ready
because we're going to be attaching these layers together
that we've been cutting. And your hard work
will start coming, be coming to fruition
as you layer design histories paper on top of card stock here, here, and here. Thank you. We'll see you in
the next tutorial.
6. Assembling Easel Fold Card Layers: Now it is time to assemble all of those layers that
we've been cutting. In this video, I'll
share how to match up different pieces
of card stock and designer series paper
for better contrast. And then how to assemble
these different layers to get ready for the next phase
of our card making process. I've cut out lots of pieces
of designers, serious paper. For the backgrounds. I've cut out these little strips that we can put onto card stock. We've already cut card stock. So let's just get down to it
so you can use liquid glue. I prefer to use
rolling adhesive, but for this tiny
strips along here, I do like liquid glue
because it's more forgiving. Let's get a little Mac or some kind of surface to play on. Don't want to just
mess up your table. And I'm going to just
show you that these ones, I did start running out
of the night of navy and gray granite and
I started I started using some white for some of
my layers and that's fine. That's one of the
coordinating colors. So that's why I have some
white mixed in here. And I'm still using
starry sky and the light. So go ahead and get a piece. We're going to look at
the card backgrounds. So here are the card, stock card stock
backgrounds, I should say. So if you recall, they go on, these are folded card, like so. So we're talking about
this piece here. And we're gonna go ahead and get some designer series papers. So I want to show you
how I would mix and match first before we even
started touching them. Especially if you're
just making a few cards, you want to get the maximum productivity out of
your session here. So let's say here the
designer series, paper, pieces of paper we
have to choose from, I prefer these, this
side over those sides. So then I'm just going to
start matching them up. And I'm just going to
see how they contrast. Okay? So for this particular one, this has specific point in it. So this looks good with that. Because you can see
that that Colored Girls in from the side. This one is a starry sky. It's sort of like a starry skies are like a purplish colors. I think that would
look good on that one. It would look better than
this one who has that? It has more of a
blue tinge to it. This one with it's
more of a blue tinge. Better on the gray granite. Yeah. And I think I'm
gonna go with this one On the night and navy. So you can see how
I've matched those up. I'm not going to show you
how to adhere all of them, but let's just go
ahead and end here. One for good measure. So you can see how I do it. I'm just using rolling adhesive. And then you're going to be
right over the top of it. When you do this. I'm staying, I happen to be standing
up and it's actually a good idea to do. You could do some of these
when you're standing up, especially if you
want to get the even even margins
around the side. But the little
ones, because I am using glue and because
they're smaller, I can sit and do those
while I'm watching TV, etc. Alright, so then you just met. Now these are ready to go for later so you
can stack them up. And if you're not sure, if you're going to
need smaller pieces, always cut them bigger first
because you can always cut these pieces down for the different sections
of your card. Alright, let's move
on to the strip. So then we would take well, let's go ahead and
make a stripping them. We'll put one across the middle. So now let's take the
pieces of card stock we cut and look at how
they'll contrast on there. So sometimes it's nice to use the same color as
the background. That looks nice.
Sometimes it's okay to use a different color. Well, it just
depends on the color of design research paper
you're going to put over. It, will decide that before
we put that on there. So let's go ahead
and match these up. So we would take
little pieces of designer series paper and I'd like to that as a little piece of specific point in it so
it could use that one there. I wouldn't use this one on there because
there's no contrast. That one might look good
on the Navy like that. And this one would look
good on a whiteboard, would also look good
on a gray granite. For this, I just want
something that's a little bit of a purplish tangent. Or maybe this piece would look at this and
enough contrast. This one, this one might
look good on that one. Now let's take this
piece of Navy. Think I can go with
this piece here. I think that will look nice. Let's go ahead and put some
adhesive on the background. And go ahead. And I
just said you should be using the silicon
mat. Okay, good. And then we can layer up that
section, flipping it over. And then here's what I was
talking about earlier. Sometimes you get
little pieces that are just hanging over the
edge just a little bit. I thought it was. And if you do get that hanging over the
edge just a little bit, I think this one's okay. This one's not doing
it. But I did save one. I think that was
doing it earlier. Because I want to show
you how to trim that off. Let's look at these. Yeah, here's a piece, Here's one that's hanging over
the edge a little bit. But let me first attempts to see what happens
when your card making. You can get easily distracted. I put that there and I look
this kind of piece here. So I was saying earlier when
I was cutting these are some of them might be a little
bit over and it's okay. What I do is I
hear there's drips onto the card and then I just trim off this little extra
sections with my paper snips. Alright, so that's good. That's looking good. Now. We will get to keep on doing those. I'm going
to do this later. I'm not going to have you wait, I just wanted to
do the next layer. So let's look at
these, this part here. So we'll get out some
of those pieces we cut and some pieces of card stock and I'll show
you how I match this up. Okay, good, but not loving it. Let's see. I'm looking for something
that's a little bit here. I like contrast, but I also like ones that really
go well with it. This one would look good on a
specific point or this one. Yeah, that would look good
because of the contrast. And sometimes it's nice
to have striped patterns. Now this is a real light color, so I'd like to bring out the white from that one so
we have dark and light. Okay. This will look good on anything. This gray granite will
look good down the bottom. I tend to use more great
granted on the bottom parts, but instead of the
background for the top part, because I think the silver Reese look better on
these Navy pieces. Oh yeah, that looks much nicer. And I'm going to go
with those for now. So you get the idea. This one is still
going to be good. We're gonna go ahead
and attach this one. So you always make extra pieces. You always cut out extra pieces if you're doing a lot
of cards because it gives you way more
designed choices. Getting that little
quarter-inch margins centered. Now we're going to
take this strip. Let's see. That'll look good across there. And now I'm going to use
the liquid glue because that works better for
these little strips. And go ahead and put, when you reuse liquid glue,
put something under there, DO get it on your table. Actually, I shouldn't put it
at the top of that either. I think it's time to
buy another bottle of glue for that one
right? There we go. It gives some coming out. Now when you have little strips, glue is liquid, glue
is more forgiving. Because if you move, if you
place it in the wrong spot, you can sort of wiggle
it around a little bit. Now for this, sometimes
it's good to have a little ledge to push
up against on your tray. I'm just making sure that that's the edge
of your chair and let's see if it's
sticking out the back before we put this onto the card and it is sticking
out the back a little. So if there was no glue on the edge, you
can go ahead and cut. Now. If there was glue there, then you wait till it dries and then do your little
trimming off. That is how to
assemble the layers. And later on we're gonna be assembling
the entire car, nick, the actual the rest of the card like as far as the dye cutting into
pieces for embellishing. But I can go ahead and show you what I would do it
these two pieces right now we can go
ahead and use these. There's a lot of night
and navy in here, I think is rather than use this piece because it doesn't
bring any of those colors. Rather than use that because
that's too much great grand. And although I'm
running out of 90 Navy, I'm gonna be using a lot of
tone onto this will be okay, but it doesn't bring
any specific point. I think I'm gonna
put that on here. Okay, so that's how I'm
going to assemble this cart. So I'm gonna go ahead
and put the adhesive on for you to show you
this part so we'll see how far we've come. And then turn the
card, turn it this way and put another bit of
adhesive on this section here. You're going to take this piece and center it because
this parts the bottom. It helps away your car down. Okay, So when you're
standing up your card, this is heavier so it helps, it helps make your
cards stand up and it helps way that section down,
which is what you want. Then for this section, go ahead and turn that over to see which way is up and down. I guess. This is just kinda looks like it's
sticking up this way. So we'll make that the bottom
over the bottom panel. Now before we make this
actually stand up, we need some of our
embellishments. And I'll put it like
this right on here. So this is how to
assemble the layers. But you're going to
be on there like so. And now we're going to keep on doing that until you get all of your layers done. And you can see I've been
working on my layers. Okay, so that's what you wanna do for the
whole next stage. You don't want to worry
about your die cutting. Because think about it. If you have this much done, you don't even need to
die cut the wreath. You could put a
sentiment on here. And it's centering on the
bottom and be done a card very quickly if you ran out of time. So this, these are almost done. Now. Of course I'm
gonna be doing decrease the risk for these, so we will get to that. So what I'm gonna do
is I'm going to keep on assembly my layers. And when I get back,
when we meet again, you will see how far I've come along with this
part and this project. And we will start to
work on embellishing our cards by learning some
dye cutting techniques. Thank you for watching and
keep on creating. Thank you.
7. Using Adhesive Sheets for Die Cutting: Now it's time to
learn how to use adhesive sheets for die cutting. This is a wonderful process
because instead of using liquid glue which
could ooze out of the wreath and all
these intricate pieces. We're just going to turn
this into a sticker. And then in the next
tutorial I'll share I had to die cut somewhere. So let's take this piece here and I want to
give you a little tip. If you have a piece of 12
by 12 card stock foil, e.g. you want to cut it
in four inch strips, even though your adhesive sheets come in six by six
or six by 12 sheets. In this case, I'm using the package of stepping
up adhesive sheets. They come in six pi twelfths, but the card stock
needs to be cut in foreign strips so
that you can get nine out of one
piece of card stock. I learned that the
hard way because some of those I cut six-by-six. And what happened was when I cut my original foils six-by-six, I was only able to get
six whole reset of it. And then I had to use
all these middle strips, these middle pieces for lots of extra little shape,
which is great. But now I'm kinda short on foil. I didn't plan, I
didn't plan that. So I'm just letting you
know that little tip. So you're gonna get a
piece of silver foil and you're going to
turn it upside down and just go ahead and cut this adhesive sheets the
size you need it. I'm gonna go this direction. Just to show you, of course, you could cover up your
whole piece of card stock. Now, these come
in little panels. Here's gonna peel that. It's double-sided, sticky
side on each sticker here, or should I say wax paper. And it's a sticker
in the middle. So you peel it off. There's the sticker piece, you can see the shininess. And you're gonna go
ahead and put that, put that on the back of your card stock that
you're cutting. The designers trace paper or whatever you're going to
turn it just sticking. Another strip. This
this beets glue anytime for intricate dies. That is for sure. I
had put that there. Now. I would, I would continue going down and putting it
all on the bottom. That's what I would do. Now what I want
you to do is take your somehow a little bit of
Google on the front here. Take your, your knee
just prints dyes, urethra meatus prints dyes. And you're going
to cut around it. So in order to get
three out of this, you just want to use just the part you need when
you're die cutting. We're gonna go ahead and set
up the dye cutting platform on the stamp and cut
and Emboss machine. This is what it looks like. It does close. Okay. Opened it up. The platform is this
base plate number one? It's pretty it's
pretty thick. And then you have what's called
a thin di adapter. Whenever you have
metal dyes like this, you need this number to
then dive depth adapter. You need to plate number
three, the bottom plate. Then you need to put down
what you're cutting. We're making a sticker there. And then you need to put this
top plate on number three. Now what I want to show
you though is don't just run this through
without extra things. So you could put extra
things in the middle of one of these extras, nature's prints, dyes like
that little piece there. Or in this case, we could put a couple of these little pieces. These are the little pieces
that help hold up the card. I didn't put them on this yet, but you can see these
little extra pieces. I will find a finished
car to show you. A finished, not finished, but one with some extra pieces. And you can see how I can
add that element on the top. And a couple of elements here. So you can add those before you run this
through the machine. You can even add one
of these as well, but you don't want
to get them to touch each other at all. Because if they do, you
can bend your metal. And what you can do
is use some post-it notes or tape to keep things from slipping too much before you run it
through the machine. Because once they overlap each
other, they can get bent. So let me grab a sticky note just to show you what I mean. I'm just I don't want to
cover it up too much. I just want to cover it
up like right there to keep it from
knocking into there. I think that should be good. Alright. So you can see actually,
if you use posted tape, we can actually see through the tape and it's
a little better. Just like to give you
lots of tips and tricks. So I'm going to use this
wall safe posted tape. And I'm going to just go
ahead and use that so you can actually see before when you
put the next plate on top, okay, these are not touching each other and not
falling into each other. That one looks like
it is. Now usually doesn't take this
long to die cut. I'm just doing it for teaching purposes and then I'm
gonna be doing a lot more as my mass production
of this project. So now we're going to put
plate number three on top and I'm going
to roll it through. Sometimes you hear
little cracking noise when you roll
things through. Now if you're not going
to use all of these right away, that's fine. You're going to take
up the metal part and just leave this
part together. I'm going to reuse this
tape because I can just tape it to my
machine over here. You reuse it later. Now, let's say we're going to just
peel these up later. Because maybe while
you're watching TV, you want to assemble
your cards, right? So I put these in a bag, the ones that I'm cutting
and save them till later. So, but let's for this purpose, I'm gonna go ahead
and take a minute, go ahead and get a card
and show you how to, how fun it is to make a sticker. Now remember, we did have it in there's two sections
on the back. So you can peel them
off in sections. Just get when you get
one section going, it's pretty easy to
get the whole thing. So it depends on if you want to go to
the front or the back, but as long as you get you're trying to get these sections are and you want to get rid of all these extra little pieces that are in the
middle of your diet. And sometimes you need to
poke them out with a tool. Like sometimes you
can't get them all off. They don't just
peeled right off. Just go ahead and peel that. And like I said, these intricate
details to me are meant for when I'm watching TV or in my case, Netflix. Because I can get a lot done. I'm going to use that
piece to of course, once you get the
sticker off the back, you do have to use it because you can't store it this way. You have to put it on your card. All right, so look at
that beautiful sticker. All the extra pieces
are mostly gone. And we're just going
to double-check. If you have what's called a, this is the Take your pick
tool or any kind of tweezers. Just comp kind of pokey
tools you can peel. He can push through
that off and you can get all these little
pieces of there we go. And that is all
never going to go ahead and put that on the card. You want it to be even
so that both sides have a little you don't want
to get it in this part, the card stock part, it'll fit on the designer
shows paper part. So let's just kind
of push the sides a little bit like that. And then before I push
it all the way down, let me give you another tip. You're going to take what I call my bucket of
crafty goodness, these are just extra
pieces I've been cutting. There's
no contrast there. Let's get one that
would use maybe use this gray granite piece
as the background. So put that under
there like that. Because that's
where it's going to you're gonna be able
to put that under there before you finished laying down the
rest of the leaves. Because the leaves can
overlap this a little bit and it's not going
to every time because it depends on the direction
you put the wreath. But something like that,
that's sort of in the middle. I want to move to C. I didn't push it down too much. I want to move it
up a little bit. That way I have room for my sentiment that's
going to get in. Now once they get it
all the way I want it. Notice how loosely until
I got this under there. And then I'm going to take an
extra piece of wax paper so I don't get my fingerprints
or Glue Oliver something. Go ahead and push against. Push on this foil and
really seal it done. And that is how to do it. That is how to get the
sticker onto your card. So now I recommend just
creating the Reece, do that part of the
car making process, get as many as you
can done until you run out of soil like I'm
gonna be doing soon. And then when I come back, I'll give you some more tips and tricks for die cutting
will die cut out the pieces we need
for the backgrounds. I cut out the pieces we need for the sentiments that we're
gonna be stamping on to. And I'll show you the machine at a little
bit different angle. That's all for now. Thank you very much for your attention.
8. Die Cutting Tips & Tricks: In this tutorial, you will learn some more dye cutting
tips and tricks. This time we're going
to be cutting out the basic white card stock that we're going to be using
for the sentiments, the background card
stock layer and this other piece of basic white card stock
for this part here. The reason I created this video
and die cutting separate, separately is because in the last video I showed you
how to use adhesive sheets. And so when you have
detailed dyes like this, the metal dyes, you will
need adhesive sheets. It's better than
using liquid glue. For these, it would be a
waste of adhesive sheets to use these because
these sentiments, e.g. are gonna be popped up
with phone dimensionals. This background piece just needs a little tiny bit of glue
behind it are rolling. And he said, we don't need to use adhesive sheets
for this part now. But if you want to
get a review of that, go ahead and watch
that last section. I also wanted to change
angles so you could see this entire machine. It's called the stamping
cut and Emboss machine. And by embossing, you
can emboss backgrounds, which I'll show you later, but you can also
emboss metal dyes, as in this outline
on this die here. When you open it up, you
can open up both sides. And that way if
you're right-handed, you can crank it with
the right right hand or if you're left-handed,
you could turn it around. So you open it up
like that because it stores in a portable
way, sort of portable. And then you're going to use these distant getting sandwich. You can always have a
**** cutting sandwich. That means the order
of the plates. So for the first plate
we're going to put down the base plate. It's usually called a platform. Then we're going to put down. So this is the next one, it's two and it's going to be for when you have thin dies. It says use within dies. It even gives you a little
cheat sheet right on it. Then we're going to use
one plate number three. And then I reserve
a top plate number three that doesn't get
scratched as much, whereas this one is little
more scratches on it. I'm going to use
it for the bottom. So we need to plate
number three, so the sandwich, one to the
bottom and one for the top. Now for the bottom,
I often turn it around like this to keep it
from getting too warped. It's not good. It
hasn't been worked yet. I also turn it sometimes
this way and this way, say for four different
options there, it'll just keep it
from getting worse. Now, if you recall
back to the time when I showed you how to cut
in layer card stock. You know that we had
some scraps leftover. So that's what I'm
using right now, the scraps to make
these circles. Now it's going to
each little scrap from when we cut the date. The card stock is going to
make us two of these circles. These two circles here are from the layering circles
dies by stamping up. So I'm going to put one on that piece because it doesn't really matter
if it's slips around. Well, it does
matter, but we want it has a little bit
of wiggle room. I can just put it there
without putting tape on it. Now for these two,
we're going to use our scraps of basic white. And we're gonna go ahead
and put those in there. So this is one of the smaller dyes from the layer circles. Now this one is from
the natures prints, and that's the same dissect
that this wreath came from. And all of these little sprigs that I was telling you about, that you should definitely
use adhesive sheets for. Now. If you have extra card stock. After making these
little pieces, you can also cut some of these little sprigs out
in card stock as well. So that's all there
is for the plate, we're going to go ahead
and we're going to put down the extra plate number three for the top and we're gonna go ahead and
crank it through. And then as always, I
recommend mass production so that you do all of this step
first, as many as you need. And in my case, I
didn't even count them. I just know I have a lot of extras to get me
ahead of the game. And I'm going to show you my little bucket I've
been working on. So there you guys you can
put that down to move because it does in the plate. You don't want the scratches to stay in the same
place each time. So you're going to move this
little piece of card stuck around and you move it, put that there, put this
little piece there again, and you can just arrange it in the most efficient way
possible where you can still, maybe if we put this over here, you'll still be able to, and you'd put it in a
little bit of an angle. We still might have enough later for another circle right there. But just if not, you have enough room for
another kind of die. Now we're going to take
the extra piece here, put that up there, and
we're going to take the other layering circle
and cut that Navarro. We're cutting it. You always cut a few at once. Make the most of it. You have to cover it. You
don't have to cover the plate. They can be staggered
a little bit. They don't have to be exactly
on top of each other. If you're using a mini machinery to be staggered a
place even more, but in this case, just
staggering a little bit, this one as always, I'm
covering the dyes fully. I can I can put these plates and so that they're staggered a little does help
the machine catch them. Notice it wasn't as hard to cut out these shapes as it
was to cut out with the adhesive sheep because
the adhesive sheet makes the paper thicker. And there you have
that fun embossing. Let me put this on top of another piece of card
stock for contrast. And that little embossing
edge is really nice. Then that comes right from
the layer inside the die. So you could see that the
middle part cut out the paper. And then a little ledge
which was raised up, made that little
in Boston pattern. So we take these out, you might be able to get
one more circle out of it and keep cranking
that through. So we're going to
make these pieces here for the back of our cards. In Pacific point, native Navy, starry sky, gray granite. You could even make some
invoice if you're gonna be doing some sentiments
in gray granite, something that will contrast depends on what Becker
and you're putting on. And we're making, we're
making these in basic white. Now I'm going to show
you my little bucket of crafty goodness I call it. Here's what I've
been working on. I have lots of extra sprigs. Most of these have their little adhesive
sheet behind them. I have all these pieces
that I'm ready to stamp. And I'm gonna, I'm gonna
go ahead and cut out some more pieces for stamping because I do my stamping
mostly at the same time. And in the next tutorial, that's what I'm going
to be showing you, how to stamp the sentiments onto these pieces and then how to anchor on the edges with our little sponge job or to
get some extra dimension, as you can see in this example. And this example as well.
So that's all for now. Go ahead and die cut
your pieces out. And we'll see you in
the next tutorial.
9. Stamping Sentiments & Blending: Now it is time to stamp
and ink up our sentiments. You have done all the work. You have all the
pieces you need. We take out the
shapes for sentiment. You're on my mind. That's gonna go on
this sentiment. We have hello there, we have all these shapes for
the hello there, we have the background layers. And what I did is I
used a few pieces of, I understood his
paper for some of these background layers
which came out really nice. So you can use your
designer series paper or your card stock
for those layers. You're going to need
for this section, you're going to need a
little sponge diver or one of the blending brushes because we're going to ink
around the edges. I think I'm going
to start with that because that's how it
would actually work. Because sometimes if you
put the sentiments on first and then you
increment the edges, you might smear the sentiments. Then I'm going to show
you how to put the stamp onto a stamping black and stamp it and we can
stamp it in one of the colors that coordinate. You could use starry
sky of course, but I'm going to use native
Navy or Pacific point. Just mix it up a bit depending
on which card I put it on. Let's start with
the gray granite. You're going to
open up stamp pad for the sentiments I
do like to put silicon under my work surface, but for when I'm just doing the thinking around the edges, It's okay if you just use the
mat to protect your table. What I like to do
is I like to put the ink to put the ink on the standard black and
then I kinda touch it to the mat to make sure I
get that first blob off. So let me show you
that one more time. So I'm going to stamp I'm going to put the
gray granite ink onto the stamping
bucket when you touch a bit to my brush, but I'm going to tap it on the mat to get that
first blob off. And then I'm just
going to sort of go circular motion and get in
there and ink up the edges. Sometimes it comes up
darker than other trends. So let's turn it around. It looks good. Sometimes you have to
lift it up to see if it's even looks good, I'm
going to turn it around. See if I have enough on
my brush to continue. I know I need a little bit more. Tap, tap, tap, circle
on in around the edges. Let's go ahead and put that onto the back of one of my cards just
so you can see it. For contrast. I
like to test that. Alright, it looks
pretty good to me. And we can go, you
could also think around these other edges as well, but
I'm not going to do those. Let's just do one more so you can get a good
look at what I'm doing. So we'll just use, we'll
move it over a bit. Make sure you're using
the bus side up. Tap onto your stamping block, tap onto your mat to
get that first blob off and circle on in there
around the edges. Could flip it around. I do this pretty much all the time for I should've
typed that one off. You see when you don't
tap off the blob, you get a darker spot. Real life. So what you
do is you just go back. If one side is dark, you go back and
make the other side tuck just to even it out. You can see the
camera's shaking a bit. I guess I should
have made the tripod not touch my table
as I'm working. But the show must go on.
Okay, let's go ahead and on there. It looks good. We have even thinking
around the background. So we have those done
and we could do, we could do a big pile of them. Then you're going to stamp
the sentiments on later. Or again, you could step
sentiments on income up later, but do let your sentiments drive, you're gonna
do it in that order. I highly recommend doing
all of these at once. I've done a few just for
my sample cards, but now, now I'm working on the
book of my cards with you. In this section. Let's go ahead and put a little bit of ink
on the stepping back, tap it off, and then I'm
doing the same thing for these other white. Now because they are white. Sometimes working
on this Silicon Mac just helps you see
it a little better. I think I'm just going to
keep on going with the white tap it off. Another method is
aside from sponging. Now that we've got
a lot of ink on that one little spot.
But that's okay. That's what embellishments
or for another method is. You can take, You
can actually take your central enrollee,
roll it in your ink. I didn't want that darker edge, but that's one way that
I've added to mention too. I just roll the
sentiments across my ink and they get
darker around the edges. Sometimes for these, I think, I think what I'm gonna
do is hold this one up. It's just a little bit better. And doesn't give me as much ink. And you're going to notice
the difference in how I did them when I show you a couple
of samples in a moment, you can't really even tell
if you're getting around all the edges until you put it against a different
color background. Let's go ahead and
even then, let's see, you can see this one
isn't during the edges, but you barely even notice it. And that's what I'm going
for certain when that look. Whereas sometimes this one
is a lot more noticeable. It doesn't really matter
which way you do it. It just adds a little dimension, but you just want
to be consistent. Get around those edges.
And here's one with a lot more thinking
around the edges, which is really cool. Alright, let's go ahead
and put that down. I want to get in there
a little bit more. This is something you can do
while you're watching TV. As long as you have a
little work surface. And then you would test
it out and you go, okay, that's pretty good. I like that or you
could do it like that. So if you only have
a blending brush, that is fine too. But it is going to be a larger
surface and it's going to, it's going to get
into the middle. So if you were to use
this, you could say, you could still put ink on your brush and touch
it down there, but this one would be better. There was a little bit of green still on there from before, but let's just show you
to give you the idea. So we have put some
ink on your brush, tap off the big blob, and then see this is fine too. But just remember you have a bigger surface area
than the sponge. I think this one's working
a little bit faster. I'll probably use the
blending brush for these outer pieces and then maybe the the sponge
driver for the inner pieces. So we have enough done
to now go ahead and do one more of these
and then work on the stamps stamped images. Now that the only
disadvantage of doing this, thinking around the edges, first one was dark because
I didn't touch it up. Is that when you do it first? And then if your stamp
doesn't mess up, then you're going to not better. If you do flip it around. This image, which is
fine to do this shape, then you're going
to have to ground the other side as well. Or sometimes by doing it first
you to accept either side. I think that one had a
little bit much ink on it. Too much ink. Let's
go ahead and do. I'm not actually
going to rerecord this because I think
it's good that you see that sometimes we just make mistakes and just
to keep on rolling with it. Because I can still
use all of those. There's so many
ways to use these. There's always little
leaves on the wreath that cover up little
sections with too much ink. And I already showed you how the dice can overlap these
sentiments a little bit. Alright, that one came out
exactly what I wanted. Third times a term.
So that's good. Now we have the pieces we need. Now we're going to
use this part four, we're going to close this
gray granite for now. We're going to place these pieces that we're
going to stamp onto, onto our silicone mat. Any kind of silicone mat
or bakers map is good. That you're not just stamping on a surface that might be uneven. Go ahead and take your
stamp out of the package. This is called a coupling stamp. We also have photopolymer
stamp styles. That's a different style. You're on my mind. It's this one here. So you want to go ahead and
take the clean stamp off. We'll be using this hello there as well. So
we'll take that out. Go ahead and we'll
mount the Hello there on this stamping Black Sea. And we will go ahead and mount this year on my
mind stepping block H. Now it's pretty much
the way you see it, but I still like to test
it out ahead of time. So we're going to tap,
tap, tap into the night of Navy ink and go ahead
and stamp onto the mat, see how it's not
really strong yet. The sentiment, maybe the, maybe this ink pad
need three inker, but I think it's
just more because the first few stamps
are not always as dark. I think that's pretty
good. Let's move that up there and do
it one more time. Good. So once I have a
good crisp image, I can start stamping on to the circles that I've inked up. Now these don't really matter
because they're circles. If you, if it was
a little cookie, you just turn the circle
that came out really well. Put that over there. Go ahead, let's get some more. When it is. And you just do all
your stamping it once, then you can wash off your
stamps or use a stamp and scrubbed clean them or a
stamping chair me to clean it. Baby wipes. I mean,
there's many ways to clean your stamps to
do all that at once. That's all done. Let's go ahead and
do your on my mind, this one's a little bit
harder to get lined up, but it can be done. Once you figured out the first first-time which
way to line it up. I just watched that you're
on if that straight, then the rest should be street. Trying also not to
cut off the way at the bottom. Oh, perfect. And told many times
I've used this step, but the first couple
of times you use it, you might come out a little
cricket and that's fine. Because then you flip it
over and use the other side, but you won't get the
embossing, of course. Looks good. And we'll do one more. I'm going to clean
it and got my hands. Shut this for a moment. Just to show you part
of the assembly. I'm grabbing a baby wipe is what I'm going to be using
for disagreeing. Keeping my hands quickly so
that I can show you this. So for these little pieces here, we're going to take what's called the stamping
dimensionals. They're just different
foam adhesives. I'm going to open up a new pack. I mentioned that we used
inked for adding dimension. We also use what's called dimensional for
adding dimension. And that's when you
pop up your sentiment so that it rises off the back. I think one of these
should be okay, there's a pretty
strong one of these behind the circle.
Let's try that. We're going to flip it over. Press on it. So now we have this piece and now we can take
regular adhesive. That's what I said. Don't
waste your adhesive sheets because now we just
need a little piece. This is COPSE. He's
a little piece of adhesive on the back to
get that to go into the card. So let's grab a card and we get a card
with a wreath on it. See if I have one. It's partially done. Ready for you to
show you this part. Okay. Well, actually, I already
put the recent them. Love them. It's okay. We're just going to go with it. We're gonna put this
one right on there. And we'll put the wreath
around the outside. But what I typically
do is put this on. Okay, so we have this piece
here and it go ahead and put, I'll just put this
down on there. I forgot in my mass production that I've
already done a lot of the reasons I wanted
to show you this one. This one's fine. There's
nothing on the edges. But for this one, I can take, if there's a little blob
of ink there, I can tuck. I can use to someone at
a race that has this little leaves
tucked in like e.g. I. Could have like up there. I could have put
that where the leaf covers up any little
blobs of ink. But this one is fine. We're going to put it there. That's how it's done. We're gonna be doing some full assembly with these
cards because I'm gonna be showing
you other tips and tricks for making
these stand-up. So let's go ahead and just do the bottom part though,
why we're here. But this bottom part, I would
use two-dimensional one on each end to keep it from dropping in place that
along the bottom. And you can see how
I've already been doing the mass production
technique with just how I've done this part and this
part and the wreath. And now it's waiting to put the stamp sentiments on there. And this card is complete now because we've been
doing it in stages. It's a nice feeling to
have a completed card like that and you just keep on going. So now I want you to go to that, to your set of cut out,
so your set of dye cuts, I want you to get your sentiments
on those and go around the edges with your
sponge Java or your blending brush stamp with
one of the dark colors. Show you real quick how this
looks in Pacific point. And then that's it. And just keep on going. I'm
gonna get the ink off or you can rub it off with
you on your baby wipe. Let's get the Inca doesn't
get onto my specific point. If you're going to
use different colors, you would usually use
the lighter color first and then followed
by the darker color. In this case, I'm gonna be
using mostly the darker color. But I just want to show you
that this specific point looks really nice as well. It's just a nice,
happy, happy color. Will stamp it on
one that doesn't have the gray granite
around the edges yet. So you can see that. That's all for now. I hope you enjoyed this stepping session. We will see you in the
next section where I'm going to show
you ways to assemble and make your cards
stand up. Thank you.
10. Making the Easel Fold Card Stand: In this tutorial, I will share more tips and tricks
for assembling your easel fold card and several ways to make
your cards stand up. Let's go ahead and
finish the card we started creating in
the stamping section. There's a sentiment here, and I started peeling off
the sticker for this wreath. And I wanted to just show you how we'll put that on there. Then I'm going to continue with some ways to make
the card stand up. Now, I like using
sticker sheets, but sometimes because they
were cut along certain areas, a little bit hard to peel off. And also sometimes they don't
always cover every section. In which case you
would just need a little bit of extra glue on the leaves that
didn't get covered, but this one looks
like it's pretty good. Just need to peel
off that section. I'll give it a little tap and
it's all sticky everywhere. One or two leaves,
It's okay if it's not, but mostly it's sticking now going to put
that right there. It's a good spot. Hope pinching in the
edges a little bit. So it's a little bit more vertical than horizontal
only because I want the same amount of space on each side once
I get it that way. Remember I told you about the wax paper pushing
down with something. We're going to get
him push down with my pack with dimensionals. It just keeps all of
your fingerprints from getting all over your car. We'll give that a rub. If
there are pieces sticking out, maybe there wasn't
a history sheet. You can go ahead and
put glue on those, but I don't think
it's a problem. It'll still be just fine the
way it is. So there you go. Now we're going to take
it and open it up. And I've already put some of these leaves on
the bottom of that. So let's see if
we have one here. You put them on that. So I've been working in stages. Let's check this one here. This one needs them. So
we're gonna go ahead and put these leaves. These are just ways to make it stand now you need,
now first of all, the first way to make
an ease a folded card stand is by having this card stock piece
at the bottom already. So that helps. If you
wanted to make it thicker, you could put double
card stack layers. That would make
your make it stand. Now this is an extra
way to make it stand. I'm going to put, I'm going to make this card
stand up first. Push this up against the edge. And that little foil embellishment will
help make it stand. And I just tend to
put the ones that are facing that way on the right side and then the lens facing the
other way on this side. But it doesn't matter because
they're all really pretty. So that's great. Now, this is already a really busy,
beautiful paper. For this piece of paper. I don't need an extra one of these sprigs because it would last in the
business of the paper, but for some maybe well, that one and that one,
I wouldn't need it because the wreath
is down really far. Maybe for that kind of card, I could use these extra
little sprigs that I've been cutting along the way. Okay, so those are
just tips and tricks. Now let's get into
the foam piece. This is really fun. There is a way to make this stand which is really efficient and it's using what's called
foam adhesive sheets. It's like using
these dimensionals that I've been using for the sentiments except you're
going to die cut them. So we're going to
just take a piece of card stock or designer
series paper. We're going to, in this case, I just have a piece of
design research paper. And we're going to open
up these foam sheets. You're gonna get
one of these dies. Either one, I'm just
going to look at my little magnetic bowl. I'm going to put
this right on there. And I'm gonna go ahead and it's going to cut up this
section I need. So it's not too big
because you don't want to waste this stuff. Because we have a
little section of foam adhesive and
it could have cut out the paper at the same time, that would
have been more efficient. So what you're gonna do
is you're going to take this as a sticker,
double-sided sticker again. So just go ahead
and peel one setup and put your design
research paper on there, and then put your die on
their first time I used this, I was like How in the world
is just going to cut. How is this little diagonal cut through this giant
piece of foam? But sure enough it does work. So let's get that machine
that we've been using, the stamp and cutting
and bus machine and the sandwiches the
same as always. Except you may even be able to take out the thin died
after, but let's try it out. Remember for ticket out, we'll try to do the same sandwich. It's 12.2 plate number threes and I'm going
to crank it through. If it's too tight,
I will take out the thin died dr. but I think this is how
I did it before. Nope, it went through just
fine because the foam compresses. So we'll
pull that out. See it went all the way through. Pretty neat. So now
we have a sticker. So we're just going
to peel it off because the front is already
sticking onto the paper. So now we have a sticker
that we're going to be able to use to help
make your cards stand up. Now, I'm not going to
do is tell my cards. This is just teaching you for this course because this
I would do for some, but for this particular case, I'm already I don't
need to worry about the people who
are giving these two. Or what we would call
an avid cracker. So I don't need to
worry about them figuring out how to
stand up the card. But if I was giving this
to my aunt or something, I would give her I would definitely put
that in there for her because she didn't she
just stands it up and it's like a no brainer, right? It just stands up really
easy on the mantle. But in this case, let's
go ahead and just open this up and take one of these little foam pieces and just put one in the
milk, push it up against. I think that one looks
really nice the way it is. Let's get one here and let's
put, let's put on this one. This one needs a
little something, something, put it up on this one so you're going
to touch it against. You're going to make
the card stand up first and then touch it up
against that edge. And then you have this
great little sticker that's going to help
hold your card up. Of course, we still need are as we're talking
about assembly, we still need the
urine my mind piece. And that's why we did them
all at once. Stamp those. So this card is
ready to go as well. You might want to cover
up that little sprig or let the spring
hang over there. But I'm just going to
cover it up a bit. I just like my sentiment
to be up above or upon this top of this piece
of designers trace paper. That's another little tip
for you if you want to, if you want this to be
centered in a certain way, now it's getting a little
lumpy under there. So what I can do is I can just
cut off a little piece of this so that it doesn't puff
up my sentiment too much. There we go. So that's,
that's the way I like it. So there you have it.
One way to stand it up. Well, actually
three ways. So far. We have our card stock. We have these foil pieces that would help
to stand up the car. We have the foam
adhesive sheets. That technique, I'm
going to show you another technique in any of these can be combined
with each other. Oh, and you can have asked
you could have also. Let's just stay in these up. Now. You could also along the way, have doubled up these pieces. So if you are like
it's kinda slipping, you can double these up, put some extra foil layers because
they're all the same size. You can also use pieces
like you didn't. If this wasn't a square section and this was the bottom
of the diesel fuel card. You could use that
as your use of full car diesel can
go down that far. But not when you already have the piece of card stock there, but just when you wanted
to put a sentiment there, this makes a great little
stand for your card. So that's number four. Let me show you another trick. So what I'd like to do
is take embellishment. For the crinkling
sound I should have taken out of the
bag ahead of time. Any embellishments will do that are starting
neutral colors. Let's use now these, these are Metallica and then
I'll go with the silver. But these opal rounds, I'm going to use
some opal round. Let's see what these
are. These are, these are clear ones. You can use Ryan Stones, just not certain colors you want ones that
are more generic, deferrals, iridescent, iridescent
Ryan Stones and pearls. Okay, but we're
gonna go and stick with these for now, opal rounds. So what you can do, I
like to work in threes, but you can put
one right up here. If you put one up there
right in the middle and it's gonna help your card
stand up just like so. There is a disadvantage
of using this. You can use one there. And then I'm going to put, since I do like to work in threes, I'm gonna go ahead
and put one there. The little ink good
on that one done, they're just sort of
randomly placed on the card. Now, the only problem with that is that you now
when you shut this, it's gonna be much thicker, harder to fit in
the postal service. Maybe they charge a little
extra, like in the US, maybe $0.20 extra for that extra ounce or
the extra thickness. Also, what happens is when you
put the pearls and things, they then indent this section. So when you put it
in this pushes down, they tend to indent through, but it's okay because you
won't be able to see them. There's all these layers
of card stock there, but it's a great way, easy way of standing up your
card using embellishments. So in review for assembly,
Assembly the current, we can use adhesive
stickers for these Reece. And for these pieces. There are several ways to
stand up your card. The waste sustain up your
card or a card stock base. Embellishments. The sentiment itself can
be used for your easel. Foam, adhesives, puffing
up your embellishments, or having some bling, like in this case,
override some blink. So there's many ways to stand
up and assemble your cards. I hope you enjoyed
these tips and tricks. And next I'm going to
show you how to step up your cards and take
them to a whole new level. If you think these
are fancy way, do you see the next
tip I'm going to show you? That's all for now.
11. Adding an Embossed Layer & Bling: In this section, we will discuss more ways to step up
your easel fold cards. Let's do some embossing with the fern 3D and bossing folder. It's going to take your
car to a whole new level, which you may not have imagined. This is what's called a
3D and busing folder. And whenever you die cut something called the
dye cutting sandwich. And you've learned from cutting metal dyes that the dye
cutting sandwich was plate one and then we had the thin dy dr. And
then to cutting plates. But when you have a
3D embossing folder, you don't need those things. You could take away the 2s
and the two and the two 3's. And all you need is
the number four. And if you're ever unsure,
there's a little cheat sheet. It says when you're using
a 3D embossing powder, that you need, the base
plate and the number four. Let's go ahead and take
the photo that we cut earlier and put it into
the embossing folder. I want to do this a few times. You can see the result with
the different types of foil. Start with just
plain silver foil. I cut these different
sizes for a reason. To show you how you
can use them in different ways.
Put that in there. Put your, put your plate, your plate number four, and it's pretty smooth. Bride, you one thing you what you need to remember,
excuse to shaking. But one thing you
need to remember when you put any busing folder into any machine
is to always put the seam first because you wouldn't want to put it in this way because it
could come over. And so always put
the scene first. That is just gorgeous and it's part of that sun
prints collection. So it's really coordinating
well with our nature theme. Has put that down
and let's try one of these others that are part of the silver foils
and Africa, e.g. this one is already
textured foil. So let's put that in there. It's a little bit darker and
you can move it around on the embossing photo depending on which part of the pattern
you went to show through. I tend to just use the middle. Let's roll that one through. And you may be able to
tell that I'm using a different tripod and I did
for the rest of the course, which is a little
bit shaky here. Okay? And this is what you can get with the texture on
top of the embossing. Simply gorgeous. Okay, let's try just one more
for good measure. And you can see there's a
couple of different sizes here. And I did that on
purpose to show you, to give you a couple of
ideas on how to use it. We'll use this one which has
that matte finish. That in. Now when you die cutting a lot, I tend to move things
in different parts. Whether it's cutting plates
or anything I'm cutting just to make sure that the machine doesn't get the same
impression in the same spot. Matte finish. Okay, here we go.
Let's compare these. So now I want you to
take out your card stock and put that onto a piece of card
stock before I show you the ways to
step up your card. So let's just take it take some card stock that's coordinating with our projects. We have native navy, great granite, and starry sky. Let's take that and put it
onto a piece of card stock. You can see how it just makes the card come to life, death, three, three-dimensions. Three-dimensional. If you're going to have
a silver piece of foil, it might not look as well
on a piece of gray granite. Now this piece was a full piece. This piece I wanted to explain what you could do with
the fuller piece, but these pieces that we
made a quarter-inch smaller, this piece would look good on gray granite because
of the contrast. But you would tend to put that
piece maybe on this color, just, you just want a
little bit more contrast. I, I would probably not
use the great grand. And if I was using foil, I would probably
use the night of navy or something
else just for that. Just so that
different countries. So you can put you can
put them on there. And then after you do, you can then attach them
to your easel card. Now, if you want, this can be if they're
not too warped, notice that the matte finished
and it get to work itself. This could be, you could
use it as the easel itself, but it tends to be
that the more foil, the more metallic in it,
the more work tickets. In which case you would,
it's better to put it on the card stock and then mount that whole
piece onto your ISA. Let's talk about ways
to step up your card now and a couple other
ways to step up your card. Now, we've talked about
the 3D and busting folder. And there's also playing, and there's also something
called some specialty paper. This is paper that
came in three colors. Thought I hit the third
color to show you. It's called, oh, here it
is. Is that the color? It's called brushstroke paper, breaststroke specialty paper. So this is really nice. And what I did is I cut a
wreath out of it because I was, I tended to cut all the wreath, those beautiful reset or silver. But then when I had
a silver background, you could have put the wreath of silver onto it because it
wasn't going to contrast. So I use this brush stroke
paper, specialty paper. It comes in native Navy, soft, succulent and blushing bride. These two colors I didn't use. I just cut out the wreath and
the night of navy because it's one of the
coordinating colors with the son, Prince Street. And then the third the third
and the fourth way I did it. I did step this up
with some blank. So here's the result
of what you can do. You're going to first
take your piece of paper. Now, this one is, this
one is a full one, so you take one that is
a quarter-inch shorter. So just to recall that this was these pieces of paper that we
put on our easel. Here's the front of our ISA. They were four by
five and a quarter. So then these would be
33.3 quarters by five. So it's that quarter
inch margin. And I put those together
that way you don't see the back of that when
you stand up your card. Now, if you were going
to use this piece here, the full four by
five and a quarter. You could put it right
on your card like that. But then you would see the
back of it, which is fine. I think that looks kinda cool. And I just tend to
think it's stronger. If you've mounted
onto a piece of card stock first and
then put it on the card. Okay, So one way to step up your card is the
embossing folder. Another way is to use blink. I used three grind stones here. Another way is the
brushstroke paper. You could see this texture. So not only did I die cut it, but it's shimmering
and glimmering. So it's texture on top of the
actual wreath die cut too. So you have texture on
top of this embossing. Then you have a few
little Ryan strands. And then I did one more thing. When you open up this part. I added a pearl and I
discussed this in ways of making your cards stand up. Just remember though, when
you do things like that, you put little pearls in there. Then you go and you put
this in an envelope. Okay, because I'm gonna
be handing them out. But we tend to put this little Perl would
indent this section here. So you could put, and I wouldn't use the regular
basic white card stock. I would use some
scrap paper that's not stamp it up or that's a
little bit cheaper paper, maybe even copy paper. Put it in there to protect
your card like that. And then maybe even
something over the top to protect the car because you
have Ryan Stones on it. It would make it heavier. It would be paying a little
bit extra for postage, but it'd be worth it
because it wouldn't punch through the envelope or
poke through the envelope. I hope you enjoyed
this section on how to step up your cards using embossing folders
and more. Thank you.
12. Finished Easel Fold Card Projects: Now we're going to
take a look at these finished easily
fold card projects. You will see that each one
is a little bit different. Because we used the sun
prints designer series paper, and many coordinating
products to go with that. And I just wanted to
show you each one because although I'm not
finished completely, this will give you a
really good idea of all the different combinations that you can create just
using the products I shared. Of course, if you use other coordinating products
that you have, imagine what you can do. Just taking the same design
using your workbook, using the measurements,
taking your same design, the design we worked through. Imagine what you can do with
whichever supplies you have. So I really love
all the variations. And as I've mentioned, I've, I've embraced the blue, lots of different shades
of blue going on in here. I love the texture of this. These metallic foils. You can see sometimes
they inked around the edges in different ways with even some different colors. As I started using gray granite, then I decided to use
some starry sky and some specific point down there. So I did, I did
different things. Sometimes they used three
little embellishments to help the stand up
and sometimes only to. My next job is to just
finish some more risks. These risks here. That's the last part because
I have the base is done. I have the panel's done,
Everything's assembled. I just need a few more recent. I have a couple of
friends locally who are attending this
conference with me. The stamping up onstage event, which was what I created these four I'm
gonna be swapping, these are for other cards. So you can say, Wow, you just made all
those to give away. Yes, that's why I craft
to give things away. I may end up keeping one
or give one to my mom, meaning then it'll
stay in my house. But I do like to give
away what I make because that is the joy of
crafting in my opinion. So make sure that you're
doing that section. Don't hoard your supplies, don't poured the
things that you may give them away or sell
them or something, share the love with others so that they can
enjoy the designs. And I guess you can say
the fun is in the journey, the journey of making these. And that the sun is of
course in giving them away, but not as much as it's not fun to keep
them in hold onto them. Although I love to
share the designs, but see here's her site covered a little bit of
the hello with the leaves. I like turning the wreath.
I hadn't been doing that. So I think, I think for my last few, I'm going
to turn the wreath. So a couple of leaves hanging
over the edge like that. I really liked that style. Now, for these last few, I'm
going to show you over here. These are ones that
had little variations. I'll just point out. This one has the extra
Bozeman on the front. And the extra bleeding on those days were
called OPO rounds. This one has that foam which I really liked because it
helps hold the card up. But I didn't do that just
because they make some thicker. I didn't do that for
most of these cards. I forgot what was
different about that one, but put it in that pile. This one also has foam. Okay. And of course this one has the embossed background
that we discussed. In this really steps it up with that breaststroke paper and Emboss background and the blame. So there's so many ways and
the extra little proton it has so many ways you
can step up your cards. I may make a few more
like this one because I have a lot of these embossed
panels already created. So I hope you enjoyed
going through some of these cards and I hope you will keep on creating and
sharing what you've made. Last are up next, I should say, before we do the conclusion of the course is I'm going
to show you how I package these in
order to give them away how I labeled would have used the products abused
and things like that. See you in the next tutorial. Thank you.
13. Packaging Cards & Easel Fold Samples: Now I would like
to show you how I package and share my cards. This is going to be a
little different if you're selling your cards
versus giving them away. So I'm giving them away,
so I don't need to put any information
on the card itself. I'm just going to check, does
it have any bearing on it? No, if it does, I'll put the paper in the inside which I'll
show you in a minute. And I'm going to take one of these clear medium envelopes. I'm going to put the card
inside with the front showing. So it's really pretty, it'll be a nice surprise
for them when they open this up and find
out its Nissl card, there's no way to tell because I didn't
write it even here. It's just a nice
pleasant surprise. I'm going to take the
information I've printed out. I printed for on a page. It has all the different
product numbers and supplies that I used. And then I might make
a few more because I did change ink later
on in the project. So I may make a few of
these with different names, but pretty much this is what
I use for all of the cards. I'm going to put that inside. Has my contact information if they want more
information and I'm going to peel that off and shut it real tight so the
cart doesn't bounce around in the bag or the envelope so
that it doesn't get damaged. So now you can give
these out as you wish. Swapping. You can put this in
another envelope, put it in the mouth for someone, give it out as a
business card if you want to just get
this whole thing out. Now, want to show you if you were selling these cards
at a craft fair, e.g. you need to do one more step, and that is attaching the copyright
stamping stamp onto this or onto a sticker that
you then put onto this. So of course you
wouldn't want to put anything on the front of a card that's just would
mess it up, right? You're going to put your going to put it on the
back of the card. You could use tone on tone, so it's not real prominent. Like gray granite
ink on the back of gray granite card
stock would work. Or maybe black ink
on the night of navy or native Navy on
the starry sky. So there's a little
stamp for that. I just don't have it. So that's why I couldn't
show that in the course. But I'm also not selling them,
so you'd stamp the back. You could also stamp
it and emboss it. So that's one extra step you would do if
you're selling these. Let's find one that
has some bling and just show you what I've put a little extra piece
of paper in it. Not sure if those are real handy now because
I've mixed them all up. Alright, well we're crafters. You get the idea. So we're
going to say this one. Let's just pretend
this one has blank. And the inside like this pearls
I was telling you about. You put an extra piece
of paper in there like this and it's just
to protect the card. If it has blink on the outside,
you can put the current. We could put this
on the outside, but then you're going to
block the nice design. So instead what I would
probably do is if this said bling on the
inside and outside, you put the piece
of paper in there, put this in the bag. And just so you wouldn't
block is pretty design. I'd put the whole
thing in the envelope if I was going to mail this and then I would take
another piece of paper and put it on the outside. So when they do take it
out of the envelope, they pull those pieces
of paper way and then like, Oh, how pretty. And then they open it up again. It's a gift that keeps
on giving. How nice. And then they go and they're about to open
it another way and then they have to figure out,
it's an easel folk card. So that's really fun.
So those are some tips. Now that's how I
package my cards. Now I want to tell you about
a swap. I did a while back. And this is from my applying. She's like my team and my team. I'm on her team actually, but she's also part of my team. We're all on the same team. And her name is
Hattie Hattie Nelson. And you're going to see how
do you walk her nose and actually long three-part names. She put a little sticky. That's another way to
do something could put a little sticky on the
back with your information. Now she made this for a
previous swap awhile back. So this is a stamp from the natures prints that
we haven't used yet. Best wishes and happy thoughts,
which is really nice. So you could see how you could
take coordinating colors. This is peddle
pink, native Navy, the embossing folder which we used a little piece
of linen thread, some bleeding, and some
different colors of ink and you can make
magic with your card. So that's, that's
another example of what to do with the sweet and
how that coordinates. It's very pretty. So this was one of the
scripts we did earlier. Now for this one I wanted to, or for this video, I wanted to share some
swaps that were done. The ease of old-style
to give you some inspiration and show you
how they also inspired me. So this one here
stands up like this. So it's a partial this
part is a partial easel. So you have this little
panel on the side. It's still an A2 card. And that doesn't own the place you'd write a message
is right there. So it doesn't open
up from the side. That's how that's how it works. I'm not going to confuse
you by explaining all the different
stamping of products that were used for
all these cards. I'm just trying to
show you the different types of easel folds. Okay, and that one is done and I'll just make
that a bit as you can see it stand up.
Seen on the side. That one is done by Sandra COVID because she's one
of my team members. Okay. Let me let me look on the bag to make sure I get all
the names right. This one's done by
Donella browser. Another team member she is. So this was a team swap and
they shared this with me. I really liked this one
because it stands up. Well, if I had a flat table, maybe it's stand up
a little better. Okay. It doesn't quite stand
up the way we'd like it, but it is still an easel. Okay. Pretty cool. Right? I like this. Oh, it does stand up. I'm sorry. I stand corrected. Okay. So it does stand up. It has this extra little
easel in the back. How clever, right? Really have clever. I just actually first-time
standing that up. She put a little sticky note
on the back with her name. And that's the next
harvest carts. So that's like an extra easel in the back and an extra
panel in the front. Next card is by Deborah
Shaw, another team member. And I really liked this style, simple and this is
what we just made, but it has the horizontal style. Okay, So Deb Shaw did
a really nice job with this way of
making it stands. So if you go back to the video on how to
make it stand up, you can add just
adding an entire panel and channel strip of paper to make it stand up,
which is really nice. This one was done
by Keisha Davis, another team member,
and look at that. She put the whole
giant sentiment up there to make it stand up, which is really nice. And it's similar to
what we've done, except it's a horizontal. Now look at look at these
are both horizontal, but then you can make the
panels different sizes. So these are the same
card as far as the base. And then you can make the
back panel bigger or smaller, same color or not. And look how each
each demonstrator, because this was
actually a group of demonstrators who created these. Each one has coordinated
the products, which I've been talking
about throughout this whole course,
is coordination. Using the colors of ink to
coordinate with the paper and all the supplies, which
makes it really nice. This is done by Vicky Reese. I liked the embossing on there. So talk about stepping it up and how much embossing
are the steps it up and look at that
wink of stellar, that's the glitter pen. Really fun and the sentiment
holds up the card. There's another one
sort of in that style, so I'll show you that one next. That is this one been done by, again by Heidi
Walker Nelson fee. The same person who in a
previous swap meet this card. She made this cartoon super
neat because you can have a giant section here for your message, which
I really like. Then it stands,
stands up like that. Okay, here's a nice one with and you can tell that
the holidays are coming. So if you're taking this course
at another time of year, you could still be inspired
by all the designs. Can see that many of
these are holiday cards because that's what's
coming up next. So I liked the very vanilla. It's very, even though on top of very vanilla, That's the color. There's that same way
of holding it up. That phone I mentioned before. This one is done
by Amy Whitaker. This card here. Okay. You need a cook did this one. And this is an
interesting design because not only I liked the way she made her own design
ensures paper in the back. But she did what's
called a twisted easel. And I want to show you
how the twisted easels inspired me as well. We'll get to that in a moment. But that sunflower
is, what's this? This is holding up
the sentiment and the sunflowers are you
need to put on that panel. So I was kinda calling
it a triangular before, but I like the name
twisted easel better. So that was a cook.
And then Cindy, uh, dare made this amazing mind
when my brother saw it. They were like,
wow, that's a book. And I didn't really notice it
first, but isn't that neat? It's a book. That's really nice 3D book. And then it's being
held up by the piece of rest acarbose paper and it's just really neat
to hold it up that way. So you put it, you can put
the book on the top and your layer and you see there's some scoring going on there. Then the next one is
one that inspired me. This card here inspired me
because it's made by Mary now, my team member and I really
liked the square style. So I got this swap in the mail and I was at the same time, I was doing a series
that I do on the jingle, jingle, jingle series, which is another type of, it's
a type of step set. I was wondering how to
conclude this series and how it could do something different, a different kind of card. So I looked at this card and
I immediately got inspired. Then I created this
square twisted easel with different types of papers. So that's what
swapping is all about. You share your cards and then they give you cards and then
you get ideas on what to do. So speaking of, we have a swap coordinator
and her name is Lisa. We're and she I hope I mentioned
that was marrying those code in any no point. Okay. Lisa, we're sent me this
and inside she wrote that. She said she gives
credit to the paper CEF, which I actually give credit to Hattie who taught me this pouch. But what happened
is she was inspired after she saw my pouch. It's a double t filled pouch, which I had been inspired by a different swap, someone else. So then I made it and then
she she gave me credit for. And then what I did
is I took I had made this one. It's a double. And then she made it with ribbon and I thought,
well, that's really nice. So next time I tried
it with ribbon. So that's how it inspired me. And then she made a rounded top. And I took a corner rounder
punch and made a rounded top. I stop and put the
sentiment on it. But you can see how I was
inspired by someone else. I then made this. She, she got inspired
by me and made this. I'm then re-inspired
by her upgrade or different I should say
upgrade or changes, I should say because
nothing's really upgrades more of a
date she changed it. I was inspired by her and then I changed the next
variation of it. So that's what
swapping is all about. I hope that that's what card
making is all about for you, is to be inspired
by other designs, to modify them to do things your own way with
your own unique style. And then to share,
because that's what paper cooking is for
to share with others. Thank you and we will see you in the conclusion
of this course, which is less and I hope you've enjoyed what you've
learned so far. Thank you.
14. Course Conclusion: Well, that was a lot of fun. Thank you for joining me on
this card making journey. You now know how to create easel folk cards from
start to finish. I can't wait to see
your creations. Remember, use any materials and supplies that you have
readily available. And the techniques and tips that you learned in this course. And you will have
beautiful cards. You learned a lot of
different techniques for mass production. So please keep using that. Whether you just want to make a few cards or a giant
stack like we made here. Use the processes you learned to be a more
efficient car maker. In this course, you learned
how to cut and score the card basis using
the various colors of card stock that went along with our natures prints
designers shows paper. You learned how to cut that DSP and card stock
and layer it up. You learned how to
embellish the cards, including tips and tricks
for using adhesive sheets. You learned ways to stand up your cards so that they
will become an easel. And in fact, several
ways we took, we discussed five different
ways of doing that. You don't have to stamp
and ink around the edges. You also learn ways to step up, discard and take it
to another level using some embossing
folder techniques. And finally, I showed you how I package and share the cards. Whether they be for selling or for giving out to friends
and family members. All of these skills are
going to be useful to you as you create
cards of your end. I appreciate you
enrolling in this course, and I hope to see you again in a future course in this
card making series. That's all for now. My name is Kimberly Smith
and I'm the paper CEF
 Papered Chef, Kimberly Smith