Transcripts
1. Instructor Introduction & Course Overview: Hello and welcome
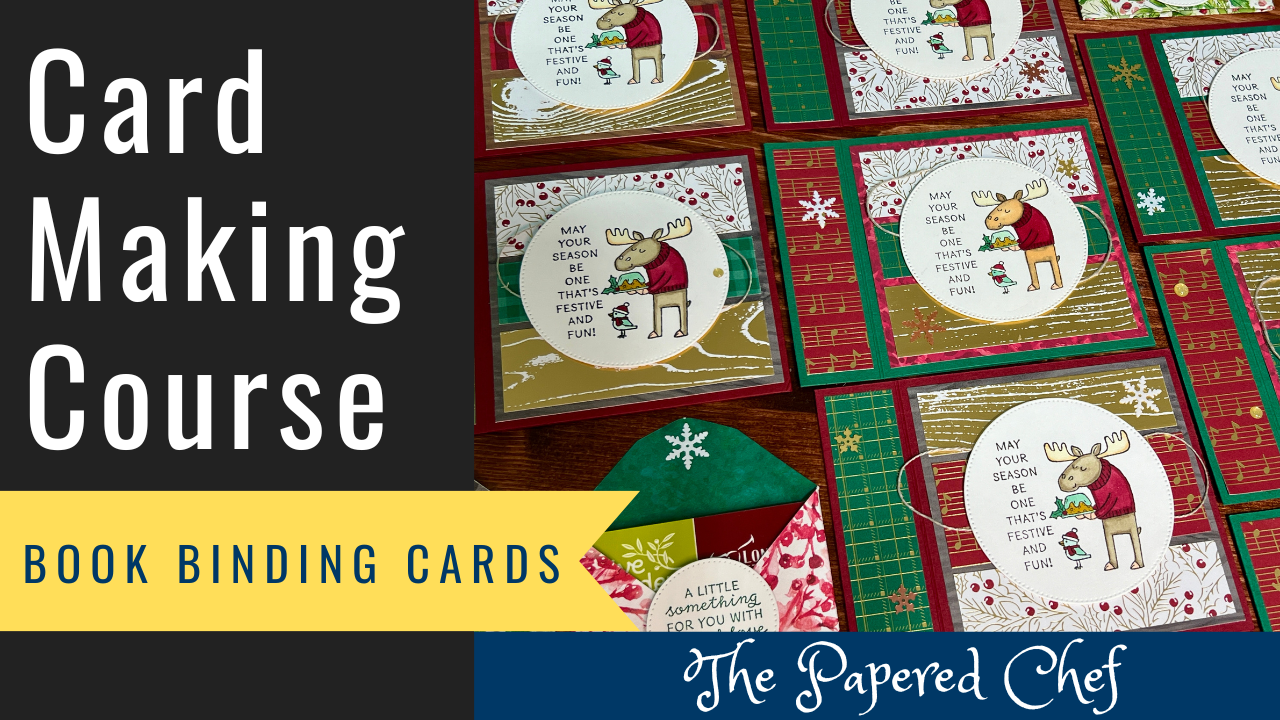
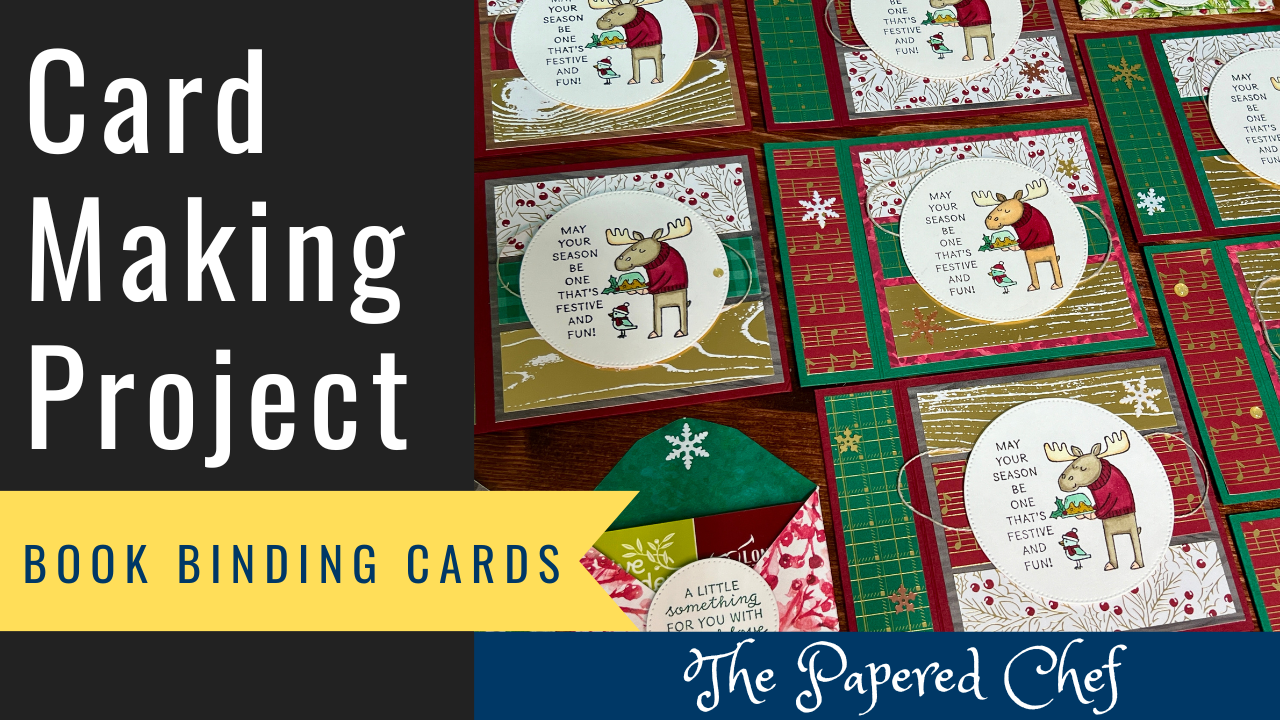
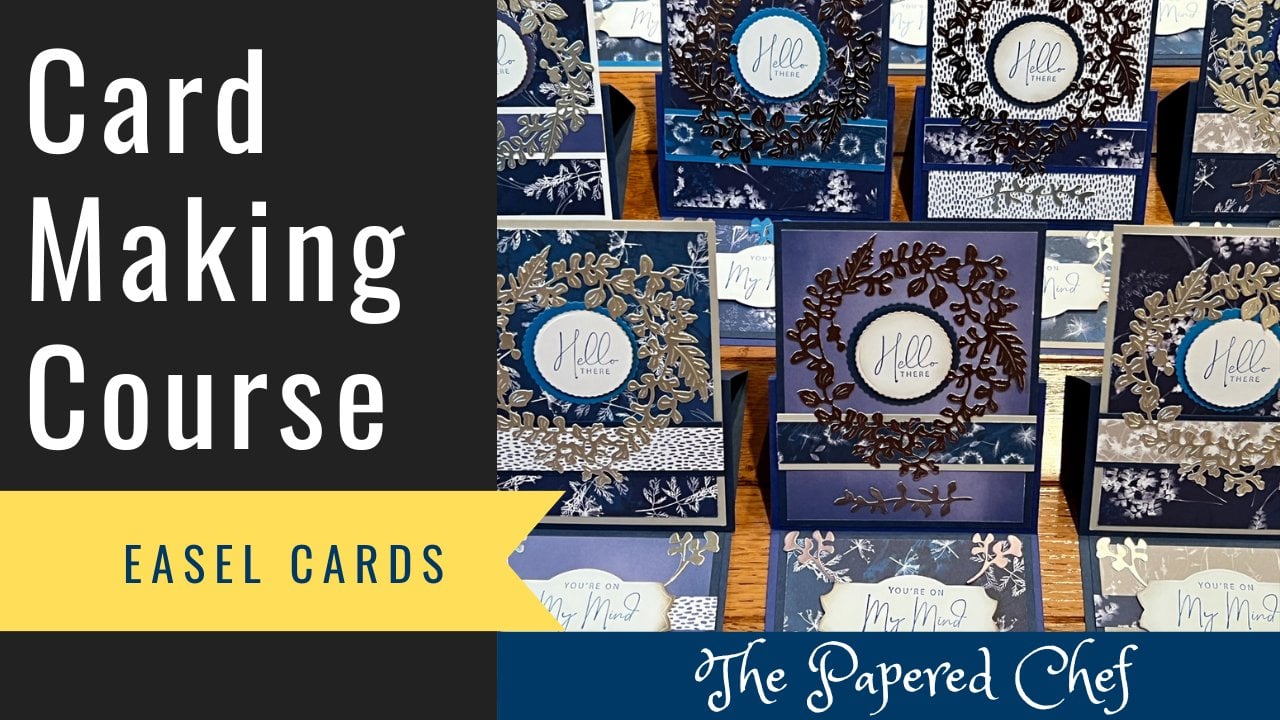
to this course. In this workshop, you're
going to learn how to create these bookbinding cards and
mini gift card envelopes. But before I tell
you what you're going to learn in this course, I just want to introduce myself. Tell you a little
bit about myself, and then I'm going to
tell you what you're in store for in this
card making workshop. My name is Kimberly Smith, I'm known as the paper chef. I'm your instructor for
this cardmaking workshop. I'm a stamping up demonstrator, a craft instructor, a
Youtube content creator, and host of the Hello
Crafty Friends podcast. I have many other
cardmaking workshops. Please check those out as well. Now, whether you're
a beginner in your crafting journey or you're
an expert paper crafter, there are always new
tips and tricks to learn in this course. You're going to learn every step of the way how to
create this project. This project consists of
coordinated card stock, designer series paper,
alcohol markers, embellishments, stamps, and many more little fun
things that you can add to it, such as we're even going
to decorate the envelope. We're going to start
out talking about the materials that you'll
need for this workshop. Then I'm going to
talk about how to create the different elements
of the card overall. You'll spend time
creating layers. You'll spend time stamping. If I make a mistake, I
just keep on rolling. This is real, actual, real crafting and
you're going to see me do this in real time. You're going to see
how to decorate the inside of the card. You'll be inspired by
these mini envelopes, how easy these are to create. You can put these inside. I'll show you how to embellish
the envelope as well. I'll show you other
things you can put in the envelopes if you don't
want to use them for gift cards because you can put fun treats in there as well. Just things like
adding snow flakes and linen thread are all just
ways to step up your card. I'll even show you a
couple other designs using the same stamp set that we're using in this workshop. And the stamp set is
called festive and fun. I know there may be a
glare from my light, but you're going to get a close up look at this stamp set. I want you to understand that you're learning
the techniques. It doesn't matter what stamp set designer series
paper and card stock you use for this project. As long as you use colors and styles of items
which coordinate together. I stressed that a
lot in this course, especially when it comes to
picking out the colors that precisely go together
with the card stock. We're going to be using a couple different
colors of card stock. With the designer series paper, with the specialty paper, and with the alcohol markers. That's the main takeaway that I really want
you to get is that your items will look so much more professional
when you spend the time to coordinate
your projects. Those are just some of the things you're
going to learn about. Now, the reason I'm making these cards at this
particular time is because I swap cards with fellow demonstrators
and other crafters. When I give them cards, they give me back cards and I'm going to share
those cards with you. So you can see the
cards others are making and also be inspired by all kinds
of other designs. I also created other kinds of
cards using this stamp set, so I'll show you those as well, which have completely different
measurements and styles. I appreciate you
being here today and taking the time to develop
your skills as a crafter, which we all should
keep on doing, because creativity
really never ends. Every time you watch
someone else craft, it can trigger off
ideas for you and springboard ideas for
you in your own designs. Thank you for being
here with me. We're going to jump
right in and start gathering the materials
we'll need and get crafting.
2. Card Making Supplies - Book Binding Card Ingredients: Let's go over the ingredients you're going to need
for this project. These materials are most
of the things you'll need. And then in each section, we may expand on some
of the materials. First of all, we're going
to create this fund card. We're going to need
the festive and fund stamp set of course, substitute with
another stamp set that you may have in your stash. That will be fine
now because we're using line type of drawing, which we're going to be
coloring or stamping I should say It's a line
drawing that will be, we're going to need
memento black ink. That's because we're going to be using some alcohol blends
markers to color it in. Now of course, use whichever
markers you want to use and whichever ink that
you are comfortable with. I'm going to show you how to
color this in a couple of different color schemes
for the moose that is, but the sweater will
be in cherry cobbler. All I'm just looking
at this one. We have the piece, then we have the
stamped image in black, and then we have the sentiment
and coloring all, no, you're going to need
these dyes and there's a die cutting machine as well that can't really fit
on my table right now. But you'll get to that
section and you're going to learn how to cut out
these stylus shaped. Yes, they're from the set here. And I'll show you how
to cut these out with the stamp and cut
and boss machine. So you need some basic
white card stock to die, cut those. All right, now
looking at this card, I can also see different kinds
of designer series paper, whether you use the paper that I'm sharing or other
paper that coordinates, just be sure that
your card stock coordinates with your paper. We're going to go over that and as you can see this is
the shaded spruce and then we have cherry cobbler as another option for
your card base. So you'll need your card stock. The coordinate, of course, your basic why I already
mentioned this is Joy of Christmas
designer series paper. You'll get a better
look at this. It's double sided,
it's really fun. And you're going to be using
that for a lot of the card. But then we also have a specialty paper as
well with the foiled, all the ones with the foils, a specialty paper that
goes along with that. That's this one and
this one, not this one. You're going to need
the basic paper, the joy of Christmas, for the little envelope that goes inside this
book binding card. And whether you attach
it or not is up to you. But that's the little
envelope that goes inside and that's the
designer series paper. You're going to make the
envelope, the paper itself. And then I'm going to use
this particular punch. And you're going to
be able to get in there and make the
edge of your notch. You can also use a
corner rounder to make the notch for
your envelope. Or you don't have to
have a notch at all, except if you don't
have a notch, it's going to stick out of
the card just a slight bit. You need your gift card if
you're going to be giving a gift card to someone. This ink here is for the
sentiment for your envelope. When you embelish your envelope, I'm using shaded spruce ink. Of course, you use a
coordinating color of ink. Now for the back of this piece, I'm using some linen thread, so it's good to have some
twine to embellish the card. You just want to get some
coordinating embellishments. I'm using these adhesive
back snowflake assortment, but we'll play around with
some other bling that I have, some other gold gems
and some snowflakes, just to see how those look. Now when you make your cards, which you're going to be
learning how to do next, you need either simply scored. This is a scoreboard, also known as a scoreboard, Has little notches
in it and you need a stylus for making your lines. A lot of that can be
done with the trimmer. This is a paper trimmer. And this paper trimmer, it's upside down, has
an arm that extends. It has a cutting blade, but you can also get a
scoring blade for it. I'm going to see if that
is handy, which it is. This is a scoring blade
and you could use the trimmer for both
cutting and scoring, but I'm going to be using this
to cut the card stock and the designer series paper
and I'm going to be using this simply scored
to score the paper. Those are some tools if you want to use other
tools like to take your pick tool to help you with the embellishments and
setting them, you can. We'll be talking a lot about mass production and I'll be
sharing some techniques. You may need some materials
when you're doing that, Like your spatula or
your bone folder. This is a after you increase
with the score line, this is a way to
flatten out your cards. Now all of these items, your cards are going
to need to be adhered. You can rolling adhesive, that this is rolling
adhesive or you can use liquid glue I'll
explain along the way, which is better to
use for purpose. Actually. Finally,
so many more things. But sometimes you're going to be popping up some of your
items with dimensionals. These are little foam adhesives
that pop up your card. All right, Let me
take one more look at the card and see if
we forgot anything. We have our designer
series paper and our specialty paper. We have our black
ink and we have our colored ink
for our envelope. We have our basic
white card stock in the way we're
going to die, cut it. We have our different
bling and our decorations. We have our card stock. Okay,
we're good. That is it. Those are all the
materials that you're going to need for this project. Let's get crafting. We'll see you in the next
tutorial. Thanks.
3. Die Cutting Tips & Tricks: In this tutorial, you will
learn die cutting techniques. We're going to be cutting
out the circles used to create the sentiments for the moose and for
this sentiment, for our little envelope.
Let's get started. We're using the stamp and
cutting embossed machine. By stamping up both sides, collapse, it opens
up the platform. When you die cut, we use a die cutting sandwich.
This is your base plate. And it'll also tell you that you need to put
this at the bottom. And there's instructions on
what you need to do on here, but it's easier if I
explain it to you. This is plate number one,
which is the base plate. The next thing is if
you have thin dies, which we do, these
are called thin dies. Even though they look
thick, they're still metal. Yes, we use this adapter. This is also known as
a thin die adapter. I'm going to put that on there. The next thing you need
is a plate number three. You need a pair of
plate number 31 for the bottom and then
another one for the top. The top one isn't a scratch. The bottom one has more
scratches because we're putting the paper on here. This is going to be our piece
of basic white card stock. And then we're putting
the shapes face down. Let's look at the
shapes we need. We need this shape, the
big circle for the moose. But while I'm cutting, I might add some extra shapes because we want to take advantage of a good
crank through the machine. And then for this
little sentiment, we'd always just test it. We need this one here, because the plate is 6 " across
and there's lots of room, and I'm going to be
cranking it through anyway, unless I'm really
trying to save paper. I may add a couple extra shapes from my stylish shaped style
or whatever set I'm doing. Working on that way, I have extra shapes
to use in what I call my buckets of
crafty goodness. I have so many of
these. These are just little containers that I have all the time
I'm filling up. And anytime I can
cut extra shapes, I do, then I have them ready
for my card club and such. You best to only cut one or two pieces
of paper at a time. I'm putting that extra plate on top and I'm going to
crank it through. The reason is you can
cut two at a time, and we'll do that next. And it does make a little
noise when I crank it through, but the stitching is better and more deep when
you only cut one at a time. Now, there's different
philosophies on whether you should
stamp and then cut. But I like to cut them
all, have them all made, and then I like to ink
around the edges and do the stamping later and
the coloring later. Because it all
depends on which kind of paper I'm going to be using. When I know I have a
project coming up, I just cut a lot
of shapes at once. So now let's try this with
two pieces of basic weight. Again, there's a
thick basic weight and there's a regular
basic weight. Which is, this is a regular one comes in 40 sheets in a pack. And then there's what's
called a thick basic weight. Just to make sure I'm
using the right one, I usually don't use so
many different dies. The thick basic weight is
better for making card bases, but the regular basic weight
is better for die cutting. Let's go ahead and put
that circle on there. You have to make
sure that you cover up the area which
has the plate on it. I'm looking for it's clear
and I couldn't see it. So we want the top plate. Let me go ahead
and at this point, tilt the camera a little
bit so you can see me work this whole machine. Here's the machine, I've covered it up now. You
got to be careful. See what I just did there? You have to be careful
when you're die cutting that they don't slip
into each other. So here's a little tip
and trick for you. This is just painter's tape
to make sure they don't slip, especially if you need to cut a stamped image and you don't
want the sentiment to slip, then you can use low tech
tape or painter's tape, that way they don't
slip into each other. If they do slip into each other and you crank
them through, sometimes you bend the metal. Now this is a little
bit tighter and harder to crank
through because I have two sheets of basic
white which is fine. I'm just letting
you know, peel that off and these are, this
is the top layer. Look at the nice stitching. I'm going to bend it
because these are stuck together. And look
at the next one. The stitching isn't as
good on the second layer, but it's still pretty good.
I do cut two at once. I do that often,
but I prefer to cut one layer at a time.
That is how to die. Cut next you're going to learn
how to stamp these moose. And then you're going to
learn how to color those. Later on in this workshop, you're going to be
learning how to decorate these envelopes
and how to make those. For now, what I want you
to do is get your Yes, and it may not be
these particular Yes. Maybe you don't have
the stylish shaped yes, but get some circles or some shape that will
fit your sentiment. Then you can use punches, that's another
thing you can use. Get your basic white paper, and I'll see you in the next tutorial
where we'll be doing some stamping and coloring
after that. Thank you.
4. Stamping the Images & Sentiment: Now it's time to stamp the
sentiment in the moose. We're going to put
the sentiment on the left side of the circle,
the moose on the right. And then we'll even put a
little bird in the middle. As you know by now, I'd like
to do things in stages. We'll just do a couple at a
time on this silicone mat. It's good to stamp onto. Let's go ahead and
mount our stamps. We're going to take them out of the case, they're
cling stamps, I'll put the moose on
this stamping block D. I'm just putting at an angle so that it
has more stability. Let's put the little bird on this little stamping block B. See, sometimes it wobbles. I like to put it in the middle. If it's a small block and then
it doesn't wobble as much, then I'm going to take this
big block for the sentiment, because I definitely don't
want that one to wobble. We're going to put that, may your season be one
that's festive and fun. That on a big block you
could use a smaller block, but I'm using the. You could also, I think. All right, let's do this before
you stamp with any stamp, I'm going to use it to
block for all of these. I'm going to open up
the stamp case and I'm going to tap, tap, and make sure I stamp onto
this little sticky note first. Or a piece of scrap paper. Get it inked up real good because you don't want
to use the stamp for the first time on the
nice white paper that you spent all that
time die cutting. I'm going to go, you're
going to take one of these and use it as a guide to make sure you know
where to put it. I'm going to put this
off to the left now. Hold it for a few seconds
and then lift it. You're going to keep doing
that to all the sentiments. Tap. Tap. All right. I'm just going to keep going. I'll do four for now. But I would go ahead and
do all of the one item in whatever color you're going
to do it in all at once. Make yourself a
little assembly line. If you have a bunch of silicon
mats, line them all up. Okay, I'm holding it there for a few seconds to
observe it. All right. Now keep the lid off
of the basic black. I think I want to
do the bird last. Let's go ahead and do the moose. Now if the stamp is so big, you might have to turn your stamp upside down
and tap it that way. Sometimes it just works out
better to do it that way. Sometimes the middle
needs a couple, get up a couple times to get the middle to
come out right. Yeah, and I think it's
good. We're good. Now we're going to take
the momento black stamp it and put the moose
off to the right. Now because of the
cling, there's a little bit of
cling in the way. Oops, that one didn't
come out for these. I'm not going to use
the other side of it, stitch better on one side. I'm going to need to
make sure. Now, I'm going to teach you a little
technique called rocking. You want to rock
it back and forth? Since we know that side is
not coming out real well. You just either want to tap
on the side rocket a little, but not trying not
to move your stamp. Okay, better. Not quite as good. Just better because it's
touching the letters. This is definitely a job for a stapparatus or a
stamp positioning tool. That one came out perfect,
but that's why you die, cut a lot of shapes, right? So that's precisely why. Okay, tap, tap, tap. A stamp positioning tool is something where you can line up each element onto the plates.
Okay, that one came out. So now we're going to
do the little bird. We're going to put
that in the middle. Oops, now that didn't come out. Come on, let's get one good one. Let's get one good one, because I already have a
bunch done already, so we should just need one
good one for this video. Yeah. All right, so you're all laughing
at me but that's okay. I can take it because
we all make mistakes. Now, you can keep going
because you can always cover up that one with a cut out shape if you
want or you can. Like I said, normally I
would flip them over. The stitching looks better
on one side. This one. Good. This one, it
would be too hard to fix because this is not a
cling stamp because even, wow, I can't believe I got that. To actually go on
this right spot, what you could do
is you could just add a little element
over the top of it. This one is salvageable
because you can add another little
bird or something over it. But this one is what we want. Normally. Normally I just
usually mess up one out of ten. But for this video,
I messed up more. But that's okay, because
we're keeping it real here. I just wanted to show
you how to do that. Now, there's a few ways
to clean your stamps. That is how to stamp
your sentiment. I did mention stamp
positioning tool. This item is retired, but I just want to
show it to you. When I say stamp
positioning tool, it's a way of using a hinge tool to help
line up your stamps. Okay, now let's talk about
cleaning the stamps. I put a little bit of water on my chamois before this video, but it doesn't have as
much water as I'd like. But a chamois is an easy
way to clean the stamps, you just go like that, then you can wash
out the chamois. Okay. It is like a chamois that you
would use for your car. Like I think you may have heard
of the brand called Sham. Wow. There would be commercials
about that holds water. This one, this is
called a stamp scrub. This is the wet side. There's
a couple little drops there and that's the dry side. So you can also
clean your stamps by going on the wet side. I put some, there's a liquid you put on there and
that's what makes it wet. That's wet side and
then the dry side. So that's another way
of cleaning them. Okay. A third way would be
just grabbing a baby wipe. Best to probably have
the non scented kind. But I mean, it's okay
and you might get a little bit of T on your stamp. But it is a quick and easy
way of keeping your stamps clean when you're just trying
to keep your surface clean. So any techniques to clean
your stamps or you can just go rinse them in the sink with water because this
is water based. Now if you're using another
in called stays on in that you'd have to use a special cleaner
called stays on cleaner. Now you know how to stamp, we stamped in memento black. And the reason we did
that is because of the coloring that we're going to be doing with
the alcohol markers, which you're going to learn
about through several videos. That's what we're doing next. We're going to color in stages, just like we stamp in stages. Get these already
and you may want to use other sentiments as well. You can use anything
for this design, but this one just fits really well with the square design. All right, we'll see you in
the next tutora where we will start to color your
stamped images. Thank you.
5. Coloring Stamped Images - Part 1: Coloring the stamped images
really brings those to life. I chose cherry cobbler for
the sweater because I'll be putting this moose on a
cherry cobbler card later. I want to show you in
this video how I just color one section of
the stamped images, because that's what I do
when I make a lot of cards, is I'm going to take two alcohol
markers, light and dark. And I'm going to show
you all the sections I would color with that color. And then in the next tutorial, we'll color some other
sections of the Moose. I'd start with this
color because tricky, you have to be really careful
with it on these blends, there's a small side and
the capture on tight. Then there's a brush side for this dark color, which
I always start with. First, I'm just going to color
the yoke of the sweater. I'm always going to use the
small side when next to the section or near an edge
like so when that dries, you're still going
to be able to see the lines of the
sweater underneath. I'm going to do a little bit
around the edge in dark. Jerry Cobbler being careful
not to go over the edge. And if you do it's okay because there's something called
the color lifter. But it takes a while to get this color off because
it's a very dark color. I'm going to do the arm
of a sweater like so. And then the bottom
of the sweater. Now that I've outlined this, I can blend it with the
lighter color, put the cap on. Actually, I would
actually typically leave the cap off and do
a bunch of these at once. But I'm just going to
show you how to do one. What you can do if
your edges are getting a little frayed is you can use snips to trim them down a little bit or get new
nibs for your markers. But I'm just going to go
and show you like this is the this is the light
cherry cobbler. Now that's a big brush side but you can see what I'm doing. I'm just using a circular
motion next to the edges there. I'm going to go ahead
and use the thin side, only because the
brush chip is big. Then you're just going
to get in there. And to blend the dark
and light together, just use circular motions. Another way you
could do it is you can just take the edges
and pull them in. Pull the light color
from the dark color. And it'll blend together nicely. As you can see when they
dry, here's one that's dry. It really does have
a nice blend to it. Next thing I want to show
you is that while I have this cap off and I'm using
the light cherry cobbler, this would work with
light cherry cobbler or dark cherry cobbler. I'm going to go ahead and
color the holly berry and the scarf using the small
tip of the stamp and blend. Okay. Even though I'm
wearing my glasses, I have to really check
that I'm inside the lines. And typically this
is something that I might do while
I'm watching TV. I don't actually stand up
in color like I am now. This is something that
I'm doing for this video. Let's say I'm just
going to keep on going just a few more to go. Once again, I'm just tapping
with this small end. I want to show you
how this differs from the tip of a marker. When you have small
areas like this, you may want to use a marker that was Mary Merlo. Here's the cherry
cobbler. As you can see, this is, these are water based as opposed
to alcohol based. They only come in one color. But you could take the
tiny tip if you prefer, and color the
berries in that way. There's not a whole lot
of ink in this marker, but you get the
idea that you have a lot more control
over the tiny nib. Now there is a
different style now. I just haven't replaced
all my markers, but you could see they make the nibs a little
bit different now. That's not the one, sorry. Okay. This is the one. This is a
a newer style of marker. And you can see the nibs are a little bit thicker and
they're easier to color with. I just haven't replaced these because I already
have all the colors. But that just gives you an idea of how to color with one color. Now I want to show you next
how to color the moose, because we're going to use
three colors for the moose. And then we'll color the rest
of the parts of the image. In the next video, you will see that all of the cherry cobbler
parts are colored. And we're going to
move on to the next section of our stamped image, which is how I do this when I'm mess producing
cards. Thank you.
6. Coloring Stamped Images - Part 2: I've finished coloring all the sweaters using Terry Cobbler. In this tutorial, I'll
show you how I colored the moose and the
antlers of the moose. Let's get started.
We're going to use for this tutorial light
and dark crumb cake. Again, the stamp and blends. The alcohol markers come in
pairs and we're going to be using the ivory color,
that's for the antlers. Let's start with the antlers very easy and we're just going to get the crumb cake. I'm using light crumb
cake because it's, I should say it's
darker than the ivory. Because I'm blending this with ivory which is a lighter color. I'm always starting
with the darker color. I'm just going
around the bottom. The antlers disregard
that squeaking sound. These are on my list to get some more these markers because
they are getting dried out. I'm going to take the
small side of the ivory, the small tip, and I'm just
going to blend that together. Now the antlers are much
lighter than the rest of the body and it
makes them stand out. Later we'll be adding glitter to these and you'll see how we can really this pop. Now we're going to put this back on and we're going
to start with, now I'm going to
do the moose body. Here's where we're
at and see how that blends as it dries,
how nice that looks. It just comes to life. The colors look better
after they dry, Typically, when you're
coloring stamped images. Now I'm going to take
the dark crumb cake. These lids are on tight today. I'm going to color the
ears and just go around the head trying not to
get into the sweater. There we go, Good. You might be wondering
at this point why am I not coloring all
of the dark parts on all of the images first and then go back and
do all the light parts. Well, that's because
I do one at a time, maybe two, because
alcohol markers dry very quickly. Do you see? I'm leaving the lid off for that because I'm going
to use it again. You can take the big side
because this is a big area and you do the circular motions
color in that area. But I find that it's
a lot easier and more controllable when I
use the small side. Again, circular
motions, blending the light in, the
dark colors together. That is why see how it, when it dries too quickly. You can't blend the
colors together. I actually have another one. Let's use this one. I put tape on this crumb cake
because that side is dry. But then this bottom side
is not. I have lots. The colors I use the most are
crumb cake and pool party, which we'll use in a little
bit. I'm always coloring. The different animals get more use in my She shed
than they would typically. This is not your
typical eye color. Hundreds of stamped images
when I make things, that's why my markers seem very dried out and
was also going to that was the light blending in with the
dark and I'm going to use dark for the tail. Now, you also want to make sure that you put the right lid. It's not good to leave the lids off because they do dry out, but it's good to put the right lid back on the right marker. Then I put them
back in my trays. Put them in my trays, like so with my colors. The other colors we'll be
using or here for this design. Plus a marker of crushing. This could be a form of yellow, but I'm going to
use either a yellow or a crush carry marker,
which should be around. That's going to be to
color part of the cake. What I'm going to do
next is I'm going to go color all of the moose. I'm going to get
all that done as I would in a typical
coloring session. When we come back, I'll show
you how to color the birds. I see I missed the cherry
colder on that one. I'm going to come back
and show you how to color the cake that Mr.
Mouse is carrying. The hooves, the bird beak, and the little
parts of the bird. And then we'll add some
glitter to the whole thing. That's why I broke
this down into parts. So you can do the same, get all of your coloring done
for one section, move on to the next color. This is the one I
was looking for. We'll have that
already. We'll see you in the next tutorial. Whatever you're using to
follow along in this tutorial, get out all of your
supplies so that you can color all those sections
at once. Thank you.
7. Coloring Stamped Images - Part 3: I finished coloring the Moose. Now I'm going to show you how to color the rest of the scene, and we will add wink of Stella. But first, I want to tell you what happened when
I ran out of the crumb cake. I did use the dark crumb cake and light crumb cake for these. Then this pile, I used
the dark crumb cake, and I still used the
light crumb cake and the ivory for the antlers, but I used dark crumb
cake and then I found a skin tone blend that was dark enough to blend
with the crumb cake. It is SU 800 and this will be in the list of colors of markers that I used. I like how those
turned out as well. I'm left with one here to share how I'm going
to color this. We're going to take
the pool party. This is the light
and dark pool party. We'll start with the color, the bottom of the tray
in dark, pool party, then the face of the bird, the head of the bird, and
the wing of the bird. Now we're going to take
the light pool party and color the top of the cake. Again, I would do all
of these at once, but I've already done everything
except for the last bit. We're going to also
color the belly of the bird in light pole party. Next we're going to take the crush carry marker
because it needs to be small. This area, the area
is really small. So I'm going to color the beak with the fine tip side of
the crush carry marker. Again, this is water based, This is not alcohol based. That's because
stamping up doesn't make a crush carry
alcohol blend marker. I would be using it because I actually prefer alcohol markers. But either way,
because we're using a hybrid ink of Momento black, you can use water
based inks or based, or alcohol based inks with that. Okay, I forgot the tail. So I'm just going to grab the crumb cake. I
remember the tail. I double check everything at the end to see if
I forgot anything. Now we're going to take
shaded spruce shaded spruce. Light or dark would work. But I think that
light shaded sprue worked a little better
for these leaves. I'm using the fine tipped side
of the shaded sprue again. I would do the
whole pile at once. And now we are left
with petal pink. I'm going to use the dark
petal pink for the hooves. We'll do that over here as well. Now, when you use
Wink of Stella, we're going to put
the glitter on it. It's important to stay
away from that red area. You either want to do
the red first or last. I'm just going to
go ahead and do the phase and the antlers, because these other
colors tend not to run. It really does give it
a nice three D look. I love using wink of Stella. Go ahead and do the
rest of the bird. And then I'm going
to do the red last. Okay, we have it now. Let's do, when you
use winks Stella on the red because it does
tend to run sometimes. I'm just going to
go ahead and see. Okay, it's not running,
so that's good. You can tell when you just
clean your brush off, I guess I have a good flow. Maybe it's when my flow is
not as good with the glitter. Okay, it's not
running, that's good. But I usually do
the red separately. Now, there we go, with the
cute little wink Stella. And if you want another
added touch you can do, you can just draw around
all the stitching on your die with
the wink Stella. That will come out really nice. I'm going to go ahead and
finish doing all that. I'm going to see if I
missed any more tails or finish any more
coloring I need to do. I'm going to do all
the wink of Stella. Then the next tutorial, we will go over how to start assembling the card basis that we made earlier
in this course, we'll show you how to make the, how to get the paper ready for your card basis to start
decorating them. Thank you.
8. Cutting, Scoring & Assembling Card Bases: In this tutorial, you will learn how to create
the card basis. We're going to have this
little book binding effect on the side. Then this opens up. I'm not attaching the envelope, but this is your little
gift card envelope that you could put here or here. Then you have the white
part for the inside. We'll cut the other
layers separately. Now you can make this by scoring the entire piece of 8.5 by 11 card stock
at the same time. Then when you cut it,
you have two cards or you may have a stack
of cards already made. I'll show you how
to fix those and make them into bookbinding
cards if that's the case. Because I already
have a bunch of the cherry cobbler
card basis made. All right, let's get started. We'll do a couple of these now. I like to use what's
called a simply scored, I guess it's time for
cleaning this guy. This is a scoring tool. It's often called a scoreboard. Let me type my camera a little bit so you can see
all the numbers. I prefer to score that
way now because we are making a card that's
going to be 11 " long. I'm going to go ahead and score the eight to 11 piece by
turning it into landscape mode. It's 11 " across, and then scoring
it halfway down. There's a little scoring
tool called a Stylus. And I'm going to go to the 5.5 inch mark and I'm
going to score down. I'm going to do the
same thing with my shaded spruce card. So you can see this is the
shaded spruce card stock. I'm just using more coordinating colors for a
different card basis. So here you can see 5.5 and
I'm going to score down now. Let's show you now on the
trimmer how to cut this. So we're going to go
ahead and cut this card. This other side, we're going
to turn the portrait style. This is 8.5 So we're going to turn the paper and
we're going to cut this at four and a quarter. Let me do that so you
don't have a glare. Four and a quarter. So I'm
using my trimmer to do that. You see? All right. Now, let's go back
to this paper. So that is just how to
make a regular card, but because we're doing
the book binding card, we're going to go ahead
and we're going to do the extra score now so we
don't have to do it later. So we're going to
go ahead and make, this was 5.5 and that
little section over here is 1.4 inch wide. So what we need to do
is go backwards, right? So this is 5.5 so that's 42
is one in 4.4 That gives us that section for
our book finding card. You see, technically, if you were explaining to
someone how to make this card, you would say to
them, you would say, take a piece of paper
and it's 11 " long by four and a quarter,
four a oar wide. 11 " long by four A ar wide. And then you would say
score it 4.4 Score it 5.5 And that's how you tell someone to make this card
if you're explaining, if you're doing
this as a tutorial. However, I just wanted
to show you that that was a quick way to
just make a card by itself, which would have
turned into a card. That's how I store my cards. And you might store your
cards like this as well. And I use my little spatula or phone folder to put
a crease in there. But then I might have
a bunch of these and I want to turn these into
bookbinding cards. So what I'm going to do
is open that up, back up. Actually, when you're going
to make your score lines, I like to score down. And then I'll fold up,
you'll see this is going to be 4.4 We've already scored 5.2 All right, And now I have my
book binding card. What I do to score it is
going to go backwards like that and just score it. And we're going to be
hearing the inside part now. Let's go ahead and do that
to the rest of these. I told you I was going
to show you have some of these cards they're
already made up. So we open them up. These
are my cherry cobbler cards. I'm going to flip them this way so that they come
up a little bit. Four and a quarter, I would do all of these at
once because I do need these for this project because I'm making a lot
of the same card. As you can tell,
that's how I roll. I like to make a lot
of the same card. Lift it up. I'm going
to fold it back. Let, let me put down the stylus. Okay, we're done that now. Let me just show you again. So we have this piece of paper, it's 11 " wide. We're going to turn it and
we're going to cut it at 44. That's done now, we'll do
all the folding later. I also want to show you
that sometimes you have a trimmer that has a
scoring tool on it. I can put an S for scoring. It doesn't have a
blade for cutting, but it has a scoring tool that's very convenient on some
trims, paper trimmers. And then this is a cutting tool because there's a blade on it, so I'm going to touch
that, my finger, in which case, if you do have
that situation going on, you can open up the
arm of the trimer. Move the blade out of the way, and I'm going to go ahead and score at four and a quarter. I just bring this over to 4.4 I score up and
down, up and down. And then 5.2 up and
down, up and down. It doesn't give you as deep as an impression as you could see
as the Scoring Board does, but it works fine. And then I don't need
this arm open anymore. Close that. Now, I'm going
to go ahead and do the four. Turn it do four and a quarter. And I'm going to use the blade
and I'm going to cut it. Then I have two cars at once,
they're exactly the same. The only difference is how deep the impression
is when you score it. So I just wanted to give you
all those tips and tricks because you can make
cards any time. I'm just getting another tool
to show you how to fold it. You can make cards any time, but the tips and tricks
and making a lot of cards efficiently is
what I like to show. So here's our card. I'm
going to flip it over. First I'm going to just
turn it into a card, that's my method for making
this book binding card. And then I'm going to flip it around and there's
the other score line, and I'm going to flip this back because that's
how it opens. You want to train the paper
to fold how it opens? And I'm going to go ahead and it's called
burnishing the edges. Okay. And when you're
all done all of that, we're just finish up
by just showing you. And all you need to do is put the adhesive and you can
use glue if you want, It's okay. I'm using
rollinghesiveealn. Put the adhesive in there
and push down just on that part and give it a
good rub, give it a seal. And that's where
I'm going to meet you for the next section. I'm going to have all of these done and sealed and ready
and I'm going to show you how to cut the designer
series paper layers for this card. Thank you.
9. Creating Designer Series Paper Layers: I've completed all
of the card basis by adhering the bookbinding areas. I have cherry cobbler
and shaded spruce. Now it's time to work on
creating layers for this card. Again, let's look at our sample. What I'm using is called the Joyful Specialty Designer series paper for
these three layers, this layer on the side. You can also, if you want, decorate the inside, which we'll talk about
when we step up the cards. You can even put
something over here on this side for the
background though, because it no reason to use specialty paper for
a background layer, I'm going to be
using this paper. This paper actually
comes in a 12, 12 pack package and it is called the Joy of Christmas
Designer series paper. It's double sided. This piece
here would be too busy. So we're going to
take the patterns that will be good in the
background and use them. You can see that
they're double sided. Let's just get a couple of s because you can
cut three at once. This one would be fine as well, but I would say you want to get the wood textures and
the musical notes. It's okay to use this,
especially this smaller one. This one you might not
see the actual pattern. It's going to be hidden behind, the DSP is going to
be in front of it. That's a good one to put though. However, on the
inside that pattern, let's just say these
would be really good. Like that's a solid color. And I thought there was one
more here, this one here. I'm happy with all of these because I think the
gingham would even be too busy. You can go ahead and cut
up to three layers of designer series paper at one
time with this paper tremor, if you recall, just trying to
get rid of the glare here. I have different kinds of LEDs and ring lights in my room. My cra frame, I have
different angles that shows, but if you recall this, 5.5 and then we did 121
and a quarter here, what we have left is
four and a quarter, that's what this section is. This section here, we want to do a four inch piece
of designer series paper. We're going to go ahead and
take these and cut them 4 ". This is already 12 " long. I'm going to save
these, these are great scrap for
other card projects. Then we're going to turn it
and we're going to do four. Now we have all of these that we need. Those
are the great backgrounds. And what I'd like
to do is, because I'm going to be putting
them on my card, I think I'd put them this way horizontal with the
wood grain pattern. Maybe just decide how
you're going to put them. It doesn't really matter.
You could go up and down, but I think it looks better. Horizontal grain, These
are four inch squares. Again, we have some of the S. I'm getting all
my cards done at once. This is actually how I do it by the time I show you these cards at the end of this course, because the course takes longer than me creating the cards, I'll probably have already shipped some of these
off as my swap. But I will have enough
to show you as well. Okay, there's a little ledge right on the edge
of the trimmer. And so what I do is I push
up against that edge to get the paper to be straight when I'm cutting three
at once and then slide back over to
the four inch mark. Okay, they were all
together altogether. Now sometimes I
sing while I craft. All right, let's cut that. Okay, Turn, turn. I especially sing when
I get my stamps right. I'm very excited when my
stamps go on straight, when the stars align, when I'm crafting here. Now when I have shorter
pieces of paper like that, I always like to
push the blade up. Because when we push it down, sometimes things swing a little. Now I have these pieces
and I would line these up. I would see how
these musical notes, even though they might be
hidden in the background, that one might be
an inside piece. But still these don't
matter which way they go. It's good to have a
big variety of papers because when I look at
my cherry cobbler piece, I probably wouldn't
use this piece on here because it's
not enough contrast. It would be cute, but it's
just not enough contrast. I would use this piece here or a different
piece for contrast. That's how to cut the
designer series paper layers. And let me just shake it for this one and then we'll
do the specialty layers. We're just going to do
it all in the same via see, that's not enough contrast. I would take this piece, I would use it right here. That would look really
nice for contrast. You'll see how when I hear them. How this look later on. Okay. Next, I want to show you the specialty paper we're
going to create different, different sizes for here. These are all going to be, since we have this, let's
go back to this. This is a four inch square. This will all be in your
notes, so don't worry. I'm just telling
you conceptually, you'll need to conceptualize. This is a four inch square. The next layer is going to
be 3.34 ", That's the width. Let's go ahead and
get those three. I'm going to not cut
this one for now. For this, I'm going to go ahead and cut all
three of these at once. So what I want to do is turn
them horizontally the way I want to cut them. We
know they need to be. There's the holly, there's the musical notes,
there's the wood green. Stack them up, and I'm going
to make them 3.3 quarters. And don't do this to
all your paper yet, because some of it might
go a different direction depending on if you use
some for the margins. But 3.3 quarters, you
can cut three pieces of this at once as well, but for some reason
it's very thick. I think I'm just going
to do two at once because I'm not really
lining them up very easily. There we go. When
it's very thick, it's hard to line them up.
We'll do two of these at once. We're going to go and
this 13.3 quarters. Okay. Next I'm going to
move this one off to the cipher mement because that
one's a different height. These two, the wood and this one is going to
be one and a quarter. It's just easier for me
to just do 2.5 again. Use your little ledge
up the top as well. Line up with that ledge, 2.5, then it's easier
to slide it over. And then I have it
one and a quarter. One and a quarter. Now I'm done and we're just
going to show you, we will grab one
of each of these just to show you how
this looks really nice. On either page,
we have this one. This one, we can mix up
where you put the gold. Sometimes you might want to
put the gold on the top. That's the 3.3 quarters. Then what you're
going to do is you could put another one
of these in the middle, but I thought it
looked too tight. There wasn't enough of a
margin in this design. I made the middle section, of which we're just going to use the musical notes for now. But of course we're
going to change it up. Cards. Middle section
is going to be 1 ". I'm just going to go
ahead and do 2 ". And then I'm going to slide
it down and cut it into 1 ". And of course you could
do, if you have a lot of these papers you could. I'll give you a little
trick for this. Sometimes when you're
cutting small papers, you want to take a sticky note
because just when you shut the little carrier
for the blade, right? Sometimes everything shifts. If you put a little
sticky note there, then your paper won't slip. There's our 1 " pieces. Now let's show you
how this looks. Musical notes,
they're upside down. All right, So looking good. Now this one might not
contrast as much that one would probably go
on a different piece of paper, but you get the idea. I'm still going to use mostly the specialty papers for this, but sometimes I might just use a regular piece of designer
series paper behind here. But I really like the specialty
paper off to the side. What I think on the
shaded spruce card, you wouldn't want to put
this shaded spruce piece. This piece would
look really nice, but I'd have to cut the pattern
so that it be vertical. Okay, let's take
this last piece of designer series paper for
the very last measurement. Again, conceptually,
let's look at the sample. We have this area
that's 1.14 inch wide. We want to take a strip
and make it 1 " wide. Let's do that first. This is the specialty paper,
full specialty paper. I'm going to go
ahead and do 2 ". It's just, again,
easier for me this way. You can do things the
way you figure out, but I just like it's
easier for me this way. And then let's do our
sticky note trick because when we have 1 "
pieces, they tend to slip. Now we have our strips, they're going to look okay
on the shaded sprees as well because it's really
shiny. It's really nice. But they look much better on the cherry cobbler
because of the contrast. Now we have this card
and it's a two cards. When you turn it it's
4.4 Then we need to make these 4 " high because
the card is a four. In the little book bindings
that we're going to go, we already have the 1 " part. We're going to double them up. Actually, I would
actually triple them up, but for now we're
doubling them up. I would actually sit
down and hear all these. Watching TV and things. That's the part that I do later. 4. " Now before you get too
far you're like you just want to double check sometimes just to make sure.
Okay, that's good. We'll actually eat machine on this one just to make sure
you're on the right check. Okay, good because if you start cutting them wrong
and you do a whole pile, and especially if
you're doing swaps and you'll have
one pack of paper, then you might have to change all your measurements if
you don't cut them right. So always stop and double check. So now we have lots of these. This is single
sided paper because it's foiled paper,
it's specialty paper. This one was already
cut to the right width, so I don't want to mess
with that paper right now. I'm going to take the piece
that we haven't cut it off. Let's see how much
width we have. This is going to be,
we're going to go ahead and we want to make
them like this. 1 ", let's say 2 ". We can make these ones for
the shaded spruce 2, ", Why? And then we're going to
go ahead and cut it 1 " using my sticky note trick. Okay, You see how the pattern matters because of how
we're going to put this on the shaded spruce card with the musical
notes going this way. Looks nice. We're going to take these, turn them and make them 4 " high. Four, yeah, high. The pattern matters
for some of these. And the wood grain as well, I think just goes
better on a horizontal. But these musical notes,
they look nice vertically. Now we have little scraps
which use for something else. Good to go. Then
you're going to, oops, that was right
in the first place. Now you're going
to use glue if you want for this, or
rolling adhesive. Either way, you're
going to adhere all these pieces
together onto your card. That is the next
step of the process. A little quick. Layout gold, and then again, for this one. For this piece, I wouldn't be putting this over there
because it's here. I would take a piece of this and that could
go in the middle, of course, making
it three point. I don't want to
say point because we're not using the
scan and cut right now but on 3.34 wide. So we can take those
pieces and put them on there. That
is the layout. And that is how you make your designer series paper layers and how you make your
layer for the side. And how you can mix
specialty papers with your background papers. Now I want you to do all of your cutting and all
of your adhering. Keeping in mind a plan. Don't go cutting too much
of your specialty paper if you're not sure
how many you're going to need in each orientation. But for now, you can go
ahead and cut all of these if you know that
you're going to be using this only for
these sections. All right, that's all for now. I hope you enjoyed this and
that you're going to keep on making this card project and get a lot of your holiday
cards done. Thank you.
10. Decorating the Inside of the Cards: Now that we've
finished decorating the outside of our cards, I'm going to share ways to decorate the inside of our card. Now I'm going to use the paper that would have
been a shame to cover up, although I did use some
of it on these panels. That is the musical notes paper. And I also really love
this small holly. But you can use any
scraps you have. And we're going to
go ahead and create four inch squares as
we did on the outside. I just think that panel would be really nice
for the inside. Here's my trimer, let
me show you that again. I just cut four inch squares
right up to this 0.4 ". And I'm going to turn it
4 " because it's 12 ". The only thing to be careful of, or it doesn't matter
actually, it's a square. But if it's not
going to be a square and you're decorating
the inside, just make sure that the
musical notes are horizontal. But in this case, because
these are squares, it doesn't matter.
So here we are. Now, I also had other shapes that were left over when I was doing
the outside of the card. So I just made extra panels with sometimes I had 1 "
strips left over. So I make the panels
different sizes just to give you
an idea as well. So now I'm going to put
these inside the card. So this is the
outside of the card. I'm going to go
over here and put this pretty paper again. Let's see the musical notes right here in the
inside of the card. Just using rolling adhesive
which looks like it's out. Let's grab a different style. I have so many different
brands of this, but you're just going to put
rolling in here on here. Again, let me look at
those musical notes. Not that I know
much about music, but I do know that if the
notes are upside down, I can tell that that's really
pretty then on that side. So I'm going to be doing that to all my cards because
I have a lot of paper now before we put the white piece of
paper in there. Now for my swaps, I actually
did use white paper. And later on you're going to see some ones that have
already mailed off. Right now we're working
on the next batch, but because we're either
covering this up with an envelope or also because I didn't have
the scraps at the time, I just put white in
the inside and you can also put Merry Christmas
on the inside. So I'm not going to put anything
on the inside of those. I just want to show you
another way to decorate. But just keep in mind
that you can use your different scraps and things you could use if
you have one like this. This would be if you have a
left ear piece like that, you could put that on the side vertically or just horizontally. So I just want to
show you, this is a scrap that happens to
be the exact height. So I'm going to use my trimmer, the corner of my trimmer whenever I do corner
pieces like that. And this is how I line them
up or any straight edge. So that's one way to
decorate the inside. But I probably want
to put this one in the inside of the
cherry cobbler card. This one would be
a good one to put. That one's already has an inside on the inside of one of
my shaded spruce cards. See, that would be good. And then you have the white
part for the message. That's one idea. Now let's take scraps that are a little
bit longer like this one, and we'll put our white pieces. These are all, by the
way, 1 " squares, I mean, not 1 " squares,
four in squares. Sorry about that.
I'm going to put the adhesive on the card itself. Now I'm going to put this in
the corner of my trimmer, and I'm going to line it up like so this is how to get it
exactly the way you want it, put it around, and then
trim off the excess. This is a great way
of using up scraps. This would be on the
outside of our car. On the outside of our card. Then of course, you could
put your sentiment on the inside of your card
if you want a sentiment. But I think that, that
it's cute and it's small, and it doesn't really
need a sentiment. Now what I like about
this particular card is that we have
this kind of paper, and then I put a little
piece of gingham here, then this scrap is different. Now I have 123456 in the back, 77 strips of different papers. And I think that's more festive, I would say is my
advice as you're decorating the inside of
your cards is mix it up. If you have, for example, this piece, maybe not. Don't put this one on
the inside of this card because this is
already on there. So you can mix it up and
just use all your scraps up. Some are going to be
longer than others, sometimes I'm just
going to use this at the bottom like so because
that's the size of my scrap, so you don't need to cut
them any particular size. I'm going to, for the
workbook for this course, I'm going to recommend 1 " high, because that's 1 " by 4 ". So
that's a good measurement. But of course know that
when you're doing it, you're going to just be using up the scraps the way you see fit. So those are some ideas for decorating the inside
of your cards. Just be sure that the pattern is the right direction,
orientation. Add trim vertically
or horizontally. Depending on the way
the pattern goes, you can stamp a
sentiment on the inside. And I wouldn't add any blink to the inside because it
will poke through. But this is how we decorate
the inside of the card. All right, well, thank you. We'll see you in
the next tutorial.
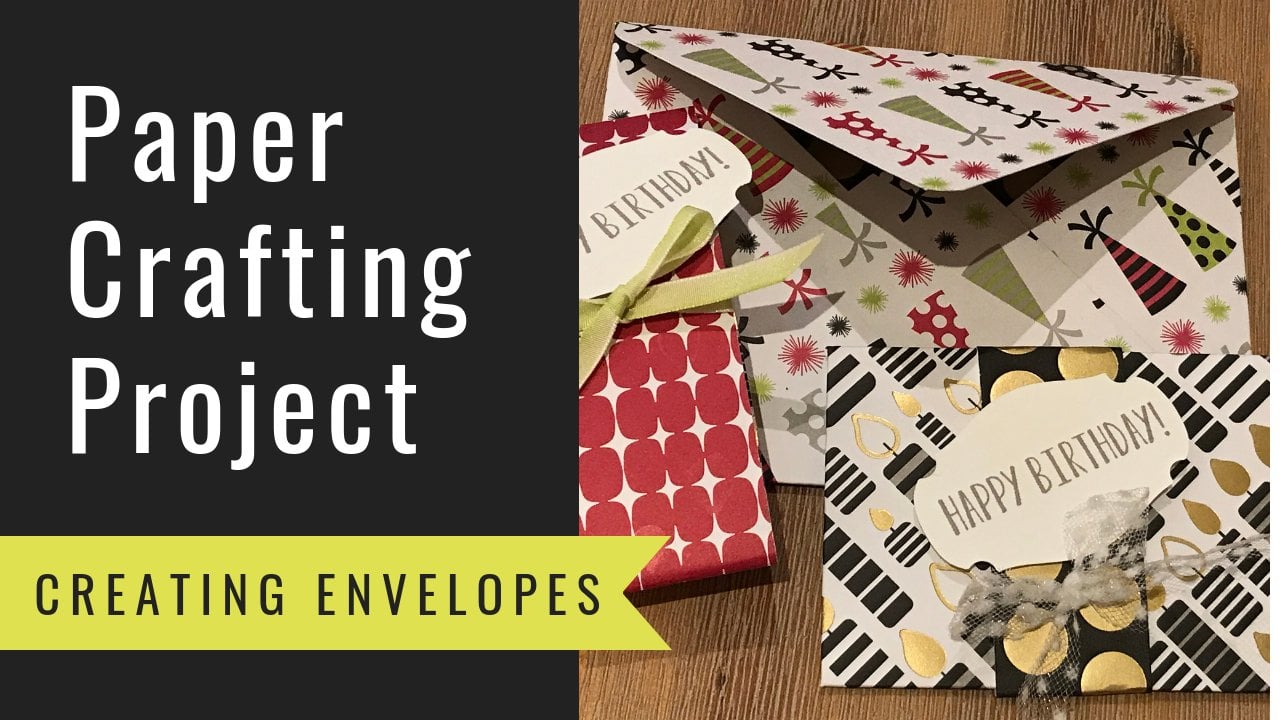
11. Creating Mini Gift Card Envelopes: In this tutorial, I
will share how to create the world's easiest
gift card envelope. We're going to start with a
six by six sheet of paper. You don't even need to do any
scoring for this envelope, We're just going to be
folding it and eyeballing it for your materials. You're going to need some gift cards if you don't
have new ones, I just save my old hotel keys, my old Disney tickets. And this was a real gift card
that we've already used. Here's a Amazon gift card we've already used.
That's what I'm using. You need one of those because that's going to help
you measure it. We're going to need
designer series paper. We're going to open up a new pack for this so
that I can show you what patterns are the best for making envelopes
or any kind of treats. Really, whenever you're
making something small, you want to look for
a certain pattern. The pattern you
want to look for is something that can
go in any direction. You also want to
look for patterns. This one I would say no,
because it's too big. The patterns are too big that you're not going to get
to see a lot of them. Although it would
work, you just see a little bit of them,
you'll see on the back. So it'll work, but
it's not ideal. This one is good because
it goes in any direction, but it's not very colorful. I would say no on those, and we're going to keep
going. So this one? Yes, yes, but I like
it for backgrounds, so let's not use that one now. This one, perfect small design
pattern, very colorful. And this one doesn't really
go in any direction, but that's okay, because you're only going to see it up here. So this is still okay.
Let's put that over. So let's put this on this side. Yes. And then we have this
one goes in any direction? This is perfect. Both
sides go in any direction. So it's perfect. This one, again, Gingham, I'm liking it. But this one's a
little more ideal because this one goes well, This one has a plain side
and one side that looks really good and it'll pretty much look good
in either direction. But we can see how that goes. And that was all. Let's
take those three pieces. 123, it was an extra. These coming packs of 12. And we're going to
now cut them all at once In the trimmer. You can cut three pieces of design serious paper at
once in your paper trimmer. So this has a little ledge
for the six inch mark, so I'm going to go
out to the six inch mark and I'm going to cut. And then I'm going to
turn it and cut again. Now I have paper
for six envelopes. We're going to keep using
this as our little guide, this trimmer, because
it really does help having a little edge when you're making
projects like this. Although we don't
need any scoring, let's keep that open
so we have some area. We're just using this ledge. Let's first talk
about this piece. We're just going to go ahead and the pattern that you want
is going to be face down. And then we have these
little tools for helping us fold a phone folder
or a spatula. The first thing you
want to do is make a triangle and then you're going to use these little either bone folder or spatula. Now if you start getting off a little bit before you
seal it all the way, I'm not sure why that didn't
when I used the ledge. But we're going to keep on going because this is
real life crafting. When you don't
really get the exact ledge or edge that you want, just get in there before you burnish the
edge of the corner. And try to fix it a little bit, because you really do
need a perfect triangle. Maybe I didn't cut it perfect, which could have been the case. Get it as perfect as you can. I mean, we're never
perfect. We're crafters, but we try to look professional.
Okay, that's good. So do that to all
of these if you're working on these
for a craft fair. People love gift card envelopes. They like things that are
convenient and look pretty. So these are a good item. Go ahead and do all of
your triangles at once. Make life easier. Don't
make one thing at a time. If you're not sure how many gift cards
you're going to need, you think you need
three, Make six. Oh, I forgot about, you know, my mail carrier or my UPS
man or, you know, whatever. You want to give somebody a gift card for the
holiday season? Anybody, maybe you
get your hair done at a certain place and
it's the holiday season that would be nice to give
them a little gift card once a year and tell
me, appreciate them. And of course, your friends and family always appreciate it. So we've now created the
triangles that we need. Let's do this one now. I don't know, I like the
greenery on the outside. You'll still see a little
bit of the inside, but I like the greenery
on the outside. Let's now we'll take this one, we're going to put
it across like this. I'm even going to open up
the arm of my trimmer just to give me a little more
room for a moment there. Now, what you can do, you look at this if you want
to make it perfect. This is going across to, you could like
center it and try to get this point to
center at the top. But I don't do all that.
I simply go like this. I make my point and I just eyeball it and it seems to always work out when
I do it this way. You could do it
where you're like, I'm going to make my point
go exactly to the middle. So this is like 8.5 and
you want to your point, it's 4.4 for example. It's actually a
little bit more than 8.5 but you get the idea. You can actually eyeball
it and make it straight. That's the first part
of this little project. Now you're going to
take your gift card. As I told you, we don't
have measurements. We're just going to lay the
gift card in there, like so. And that is how big you're
going to make your envelope. It's going to hold
whatever you want to hold. You're going to go
left. Actually, let's not burnish the edges yet
and we're going to go right. You want to leave a little room? So you want to leave
a little bit of room so that this gift
card can slide in and out. Maybe not too close to
the edge will eyeball. It still slips in and out. Push, make sure this is flat to the bottom. I think
this side is good. We're just going to go ahead
and finish it like so good. Then I'm going to put
this there as my guide, fold this side over. You want these to be
even across the top. But you see, I just eyeball
it. I never measure. It's just very easy. Now, at the end, you're going
to going to tuck it in. And you can do it a couple ways. I'm just going to show
you this really easy way. So you could just
tuck it in like so. And you have your little
envelope so easy, and you put your gift card right here inside this little flap. When I do this
activity with kids, they say, oh, I love it. There's so many cute
little pockets. So that's really easy pay. Now, you also have a pocket back here and nothing will
slip out of that pocket. So actually you could put
two gift cards in there. But my students,
when I did this, they're like, we have
so many pockets. Look. And they went and show me they had this little pocket. And then you have
this little pocket here where I was just
showing you to put it. You have this pocket
that goes through. This one opens up, but you
have this little pocket this side and this side,
It's a little pocket. So they were really
excited about that. Okay. A couple more
things you can do. Let's open this up. You
could if you wanted, do this and put this down over the top, but I
don't really like that. I'm going to put that
down at the bottom and then you also can glue
this on the inside. Let's get a little bit of glue so you don't have to tuck it in. Well, you still
should tuck it in, but I'm saying you
can put a little glue on here so that when you tuck it in it doesn't come apart. That means nobody can dissect your little craft because
you've glued it together. So now you have a
pretty little envelope. We'll decorate this
envelope as well, but that is how to do it
now, just for reinforcement. I'd like to show
this one more time. Again, we're putting
the gift card in this little front
section, like so. Of course you can use
this for other things. When I was teaching
little kids to do this, we started out with 12
by 12 pieces of paper because or you can even do 88 inch because the
bigger the paper, it's easier to teach
someone the concept. And we just call them little pockets reading
called gift card holders. We just said we're
making envelopes and they really
love the activity. Now this one, I just
want to show you a couple things about
this other paper and we'll do another
envelope now. Peek in, Okay, perfect. It's going to be green
on the inside, right? Peek in, perfect. It's
screen on the inside. So that one is fine, the way it is this one. Let's peek in. Okay, there's
musical notes on the inside, but they look upside down. So you're going
to turn this, and you're going to turn
it this way and say, okay, there's musical
notes, they're upside down. Wait, how can they both be
upside down? Wait a second. Okay, hold on. I'm going to
get my thoughts together. Well, I guess they're
going to be upside down, and then if I turn it this way, they shouldn't both
be upside down. All right, this is not going
to be a blooper on my show. We're just going
to cover them up. I guess they are going to
be upside down either way. Whether I put it this way Yeah, because
they're upside down. You know why? Because
where were they were? Right side up. I
did the triangle. Okay. So we should have
been noticing that, that we covered up the one Yeah. Upside down up. Well, this
one's a little better. It's the way you make your
triangle in the first place. All right, little blooper, But we're going to
keep on rolling. So we're going to
fold this down. Okay, we're going to fold this down and then we're going
to put the gift card here. We're going to go to the right. Left to right to left. We don't have bloopers in my card making classes
because we just like to keep it real
and just keep going. This is the way
things really are. I either record all again because I forgot to
turn it on the camera, but when I do it, I
like to keep it real. I like that now these are
not really upside down, but it just that's
why I probably wouldn't have chose that paper to begin with because of that. You can either tuck it in or
put a little bit of glue. You can put your
gift card back here, and you can put another
one up in the front. Or just little notes
of encouragement and messages and that's
how that works. Or tea bags candy. There's lots of
things. So what I'm going to do now is
make some more. I'm going to continue
to make all of these. Maybe I'll even fold
up this other piece I have because it's already
cut as six by six. Then when we come back
in the next tutorial, since these are already cut
in our cutting tutorial, I'll show you how to
stamp this on there. And then we can just
add a little bling to it and you'll see
how we can finish up all these envelopes and
decorate them a little bit. And we're going to also examine how they'll look
inside of the card and how to create this
corner rounded effect, the envelope rounded effect. So that's what we're
going to do next. We're going to be embellishing our mini gift card envelopes. Please catch up to me,
make a pile of these, and we'll see you in the
next tutorial. Thank you.
12. Stamping & Embellishing the Mini Envelopes: In this tutorial, you
will learn how to stamp the sentiment for
your mini envelope. These have already been cut. We used the stylus shaped yes, and basic white card stock. These are already stitched
little shapes which are nice. And we're going to
use the stamp that says a little something for you with lots
of love from me, from the festive
and fun stamp set. You're going to put your stamp. This is a cling stamp, so you're going to put the
stamp rubber side down. This material will stick
to the stamping block. We're going to get
a stamping block, in this case it's a stamping
block C. I didn't mention these in the material
section because I couldn't fit
everything on my table. But when you're
stamping, you need a stamping block to go with
the size of your stamp. And you need a silicon mat. Well, you don't have
to have this, you just need a flat table in this case. Now you're going to open
up the ink like so we're going to flip it around and then I'm going to get
a little piece of scrap paper or a sticky note, something to stamp onto because you don't want to
stamp right onto the basic white paper because that's a bit more expensive
than the sticky note. That's just a little practice, and it came out really nice. So now we can go
ahead and stamp here. Now if we were to
ink up the edges, you would do that ahead of time. That came out really nice. It's nice and sharp ahead of time to put
color on the edges. I'm just grabbing
this for an example. You could use a blending brush, that's another
technique but that you would do before you stamp. We don't need to
do that for these because these are just for the mini envelope for contrast, you could put
something behind them. Notice how I mass produce them. And also notice a couple
other tips and tricks here. When you have ink touching the paper,
sometimes it sticks. You want to lift it up and you
don't want to pull it off. Because if you were
to slide it off, I'll go ahead and
illustrate the concept the next time it sticks. We won't actually slide it off because we'll mess up the ink. But say it sticks, I'll just do it like say this sticks to the bottom of
the stamping block. And you were to pull
it off, it'll smear. You always want to lift
up your stamping block and let it just fall off. Hold your stamp
for a few seconds. Good ink absorption,
if it does stick, just let it drop off
or just tap it off. I do all of this at
once. See, here we go. That's a good example
where I'm just going to take my finger
and tap it off. And that way it doesn't smear. Not every one of my cards is
going to get an envelope. But I think I probably
have enough for now. Because the ones I sent before, they did not have all the
extra things on them, such as the gift card
envelopes inside, etcetera. But what I already have
these, let's just stamp them. That's another thing is I like to always have
a lot of shapes, not just in case I mess up, but I just like to for all
my projects in this case, I can put these on
my stocking stuffers as well, not just the envelopes. And I can make extra
envelopes to hold tea and Giadelli chocolates. I will have lots of these
sentiments already made. Next, you want to
clean your stamp. There's lots of ways to do that. One simple way is a baby wipe. Another way is a
stamp and scrub, which I could show you that. Another way is a
stamp and chamois. This is a stamp and scrub. You put the in the
liquid, the wet side. There's a little
drips here that show the wet side and then
that's the dry side. I'm just going to put a
little bit of liquid on here. Usually sprays, but I
don't have my spray, my spray bottle, so I'm just pouring a little
bit of liquid there. It's called my stamp and mist. And what you do is you go into the wet side and you
clean your stamp. And then you go to the dry
side and you dry for stamp. It is such a good cleaner
that it's ready to put away. Another way is a baby wipe, and another way is
what's called a chamois. Those are ways to
clean your stamps. When you're done stamping,
I like that I can put this one away
and I'm all tidy. We're still talking
about embellishing envelopes. Do all of that. In the same tutorial, I want to show you a couple ways to make the edge
of your envelope. We have our envelopes. Just grab the pile here. You could go in to this heartfelt hexagon punch and you're going to
turn it upside down. You're either going
to go in there like so, or you could do it this way. But I think it's easier
to do it this way because of the way my hand
is going to punch you. Just get it even and you're just going to
round the corner. I like to use two hands when see that looks like the top of an envelope,
so that's really nice. I like to use two hands
when I'm punching, but in this case. I have to have one hand to hold this envelope. So I'm
going to do that again. I'm going to get in there to
the heartfelt hexagon punch. Get it even put it in there. That one's a little bit
flatter, that's fine. Then another way to do it
is with a corner rounder. This is like my industrial
corner rounder put. It's not really
industrial, it just does it to thicker
paper and foam. That just does a little bit
of rounding on the corner. Now the advantage of this
heartfelt hexagon punch, let me get one of the
cards, is the size. You can see how we. Now, that's not going
to contrast, is it? Let's put this one in
there for contrast. You can see how the, well,
that's going to fit in there. Now, this one might be a little, unless I put it down into this part of this
little corner round, it is not going to cut
enough off the top. It's going to stick out a. Unless I slide it
down, which is fine. I could slide it down
to this section also. This looks more like an
envelope, this little shape. I think it just better. I prefer to do it this way. All right. That's how to
get the rounded corners. You don't have to
do rounded corners, but it just makes it look
more like an envelope. Then lastly, we're going to add a little bit of bling to this. I also want to find
my dimensionals. One thing when you
decorate your envelopes, and I'm not leaving
the gift cards in there because these are
actually deactivated gift cards because
they are just for me showing for the purposes
of me teaching this. But when I do have gift cards, which I still need to
get this holiday season, I'm just going to put a few
little mini dimensionals. So you could just do
one big dimensional. I just want to show you
that you need to put the adhesive down here. Because if you put it up here, it, and it'll end up behind here will
stick to your gift card. It's going to be like
that. You're going to put sentiment right, like that. That way there's no
adhesive behind this part. You can put your gift
card in this section, which would be
nice, but make sure you peeks out a little
se could see it. You can put another
note in the front, or another gift
card in the front, or a Garadell chocolate, or a tea bag or something else. Now that leaves this
back part empty. Let's put a little
bling on there or just put a snowflake
or something. That's just one idea
on how to decorate it. Colt Let's just punch this one. Some of them are
flatter than others. Put a put a snowflake here. Yeah, we'll put a snowflake
and then we'll put some bling on it as well.
Center the snowflake. Then you could put, we're also going to use
these for cards. You can put some little
gold gems not there, because that's where the
sentiment is going to go. I'm just going to go
and put three of these. Put two up there
and one over there. As long as it doesn't
block your sentiment, which is going to
go right there, I'd like to do things
in groups of three. You can also add more
snowflakes to use the goal one. This is white in the background. Let's use a couple
of copper ones because we want these to
contrast with the background. We'll do a copper, and
we'll do another copper, since there's already gold gems that makes it fun as well. Lots of embellishments. Now, just keep in mind you have a card if you're going to
put a lot of stuff on this, including your foam adhesives, and you put it in here,
it's going to get thick. I always keep picking the one that doesn't have good contrast. Let's see, let's use
this one. Here we go. This is good contrast if you're going to be using
all of this stuff and there's some foam
adhesives in there and you shut this, it's going
to be pretty thick. You may need a belly band around your card to hold it shut
or another piece of twine. Or you may end up having to
use an extra postage stamp. But this is gift card holder
is great for care packages. All right, Now you know how to embellish your
envelopes in several ways, using sentiments, bling, and by punching
around the corners. Those are a few ways that you can decorate your envelopes. And now that is your task. If you haven't already
made your mini envelopes, your task is to go
ahead and make those, and then embellish stamp
them, and embellish them. And then we'll see you in the
next tutorial. Thank you.
13. Embellishing the Cards: Now it's time to embellish the finished and layered cards. We're going to use
the sentiment, Some linen thread and
then a few stickers. Pretty simple. We're going to pop this up
with dimensionals. But first, let's
just take a piece of linen thread and wind
it around the back. What I like to do is I'd like to put a little bit
of adhesive just right here. This is just rolling adhesive. And I'd like to take a piece of linen thread and just touch
it to the adhesive like so. Then you're going to make a
figure eight. Just go around. It depends on where you want the linen thread to stick out, but I don't mind if it sticks out in different
places all the time. Because each card is
unique in its own right. See that little bit can
stick out on that side. And you're just going
to go around and do the figure eight so that the
other side touches here. Now it's about a
foot, give or take. Get your pape, get your
snips, snip off the end. Now you don't want this to slip off the card because you have this cute little linen
piece here, right? You want it to stick
out the sides. You can be at an angle, but you don't want it to slip off. This is where you
would use dimensionals for holding it in place. You can use, I do think I
had some of the white ones. Here we go. We're going to take the bigger ones just anytime you see a loose end of
the linen thread, that's where you're
going to attach a dimensional that way
they won't fall off. But of course, that's
going to be wonky if you put that behind
your card legs. So maybe a couple more. Covering up a dimensional
here and there. Covering up the linen
thread here and there. We'll do this one more time, just so you can see now. That's how I hold
my dimensional way. That's how I hold
my linen thread. I'm just adding one
more so it's not wonky so that it doesn't move. It's also how I pop
up the sentiment. We're going to center that like, so then we, we'll just do one
of the shaded spruce cards. We'll just keep moving on. That linen thread is just
one extra layer here. This is already a
foot here, about. So again, we're going to put a little bit dephesive there. We're going to take the
end of the linen thread, depending on where you want
it to show up, which side, you may want to angle
it a certain way, but I'm just going to let
it hang out the sides. I'm not too worried about it. I'm going to loop it around and I'm going to
cut off the excess. Okay, check it looks
good. Turn it around. Take dimensionals and cover up the loose ends of your linen.
That's the first thing. And then use the
other dimensionals to steer where the linen
thread is going to go. So you can pull it
down a little bit over here, touch it there, that lets you know how
much it's going to stick out. Then a couple more here. These aren't as tall as the
white ones, these black ones, But at least it'll keep your circle from
getting too wonky. Then you're going to pull off the ends of them and you can use what's called a
take your pick tool. I'm just using my
fingers for now. Just know there are
better tools for the job if you have trouble
using your fingers. A hands on crafter
as you noticed. I like to use my fingers. A. That's that. Then we're going to
put that on the card, like center it on the
card that's popped up. There's already a little
bling on it in that there's some win castella
on the sweaters, so there's already a
little bit of glitter, but you can add some more bling. I just grab some gold ones here. These are nice to just
do three of these. Pop these on, just going to
get three different sizes. I'm going to put the
bigger ones over there. I put one of these
medium ones on the side. Let's see down here, because this already has
a lot of gold in it. And this one, you
can't really see it. That's how you can embellish
the card. Let's do this one. We can grab some snowflakes
is another option. Put a little
snowflake over here, that would be a cold snowflake. And then we put a copper
snowflake down here, and then a smaller
white snowflake appear that way you have. I'd like to use odd numbers. There's your three
embellishments. That is how to
embellish your card. Next, we're going to jazz up
your envelope a little bit. We'll see you in
the next tutorial.
14. Decorating the Envelope Flaps: Now let's decorate
the envelope flap using coordinated
designer series paper. The first thing you
want to do when you're decorating
envelope is figure out what size the flap is so that you can make the
paper a little bit longer. We're going to go along
the seam where there's a score line and we can see
that it's two and a quarter, but you want to do 2.5
because you really want to have a little extra leeway when you're cutting
around the edge. All right, And then it
would be 2.5 by five, it's actually more than 5.3 quarters, so let's just do six. All right, So we're
going to do six. And you want to do it this way if you have a pattern
on your paper. And then let's do 2.5 okay? So six by 2.5 And
now you're going to check that you see how
the pattern corresponds. So you have a
horizontal pattern. Let's do a couple more,
we can actually cut. Let's see how many envelopes. I'm not going to decorate
them all because I usually don't decorate the envelopes
unless I'm mailing it. But usually my
envelopes are usually I give my cards away
in little bags. I really like these
gingham ones for the edges of the envelopes.
I think that'll be nice. So let's go ahead and cut these. You can cut three
papers at once, but I'm going to do two because I only have three envelopes. I'm going to turn the paper. We have 6 " by 2.5 Now,
for this you want, you can use liquid glue, but I would say rolling adhesive
is probably a lot nicer. In neater, I'm going
to just turn it over. I'm going to put the glue on the actual envelope flap itself. We're going to turn the
envelope over like this. You want to, it's very
important to cover this edge real well so that
the paper doesn't fall off. And then the front edge as well, the middle really
doesn't matter now. So you can see how
it's lined up now, In order to get it to
all line up nicely, I'm going to fold the envelope back and I'm going
to get this piece of designer series paper and
I'm going to put it on the edge here of the trimmer or you can
use any tray you have. Let's make sure
you can see that. I'll do it again. You want to make sure that you line
up everything nicely? We'll do it a couple more
times because I do see that my camera angle might not have been
really easy to see. Now we're going to do the
one with the musical note. This one has to
be right side up. So we're going to turn it now. I could try to line
it up like this, but I find it
easier to bend this over to really get
it to line up. Well, either way,
if you have glue, liquid glue, it's a
lot more forgiving. Lined that up, that's good. See, it's perfectly
lined up to the top. And I should have
one more piece. Now, sometimes adhesive is so strong that it actually
starts ripping the paper. It got a little twisted. The show must go on. This is actually what
happens when it, when you're crafting and you just troubleshoot
and you move on. You don't stress,
you just go with it. Now, there you go. So again, he serve around the sides, push it against the edge. Now you want to get
good paper snips, ones that have good
precision. Flip it around. It's so easy to trim this off because you just follow
the curve of the envelope. Then you have a nice
elegant decorated envelope that coordinates
to your project. Coordinates with your project. That's just another way of
many to step up your project. There you have it. And
you're going to keep doing that because we measured
our paper ahead of time, 6 " by 2.5 we only have that
four inch extra leeway. We could have gone right to the edge there with the paper, but I like having a
little extra leeway. In fact, if you just
want to go with the two and a quarter trim, this you would end up
with a perfect line. But I like going around on the curve because I find it easier to cut the
whole thing out. I just find having
a little quarter inch is a little more forgiving. But if you want to just do six by two and a quarter,
that would work as well. You'd have the size of
the top of the flat. These were the basic white
medium envelopes and now your envelope is also
stronger reinforced. These look nice and
that is how you do it. I hope you will give that a try, at least on one of your cards. And you'll be surprised at
the reaction you get when you add all these little extra
details to your card projects. People are really going to
be in all of your skills. All right. That's all
for now. Thank you.
15. Packaging Cards & Some Finished Samples: I finished my first batch
of cards that I'd like to share with you
in this tutora. I'm going to show how
I package up cards. There are so many ways that
you can spruce up your cards, like decorating an envelope. But in this particular case, I'm sharing these
cards as a swap. A swap is when you make
cards and you give them to other crafters and they give you
a different card. We'll be doing different
holiday themes, we all get inspiration
from each other. The way I package up
cards to share with other crafters for a swap is
that I put them in a bag. These are, well, they're
called envelopes. They're called clear
medium envelopes. And I put them in this way
so that you can see it. Then I'm going to
take this piece of paper and it's the materials I've used in product numbers. Now sometimes I use shaded
spruce and sometimes cherry cobbler and I can only fit
so much on this paper. I just wrote cherry cobbler or shaded spruce for the card base. And then I included
the stamp set, the two different kinds of designer series paper,
the basic white, and instead of saying
exactly which colors I used, I just wrote what the
coordinating colors were and I put it in there. And then I take this off and
I seal this like so now, if I was giving
this to a customer, instead of saying, well, I still might put
what's in there, but I might say, thank you for your order, here's how to order. Or I might say thank you
for your order here, my upcoming events, et cetera. If I was giving
it to a friend or a customer as a gift or
thank you for an order, I would put it in an
envelope and send it on. That way I'm not including
the gift card holder, which we'll be doing
in this course, that's not part of
the swap project. And we can also decorate the inside in a
couple other ways. There's still more
to be done with. You're going to get to see all
of the final cards and how we spruce them up in a couple of different variations.
Let's show you these. You can see how each one is a little slightly different
because sometimes I colored with the skin tone
blends and sometimes I used the crumb cake
for the moose. Each one has a little bit
different personality. Sometimes I put the gold
wood on the bottom, and sometimes I put it like
for this one on the top. Then I use three different
kinds of adhesive snowflakes, and sometimes I use large ones, and I use different
sizes of those. Of course, for the
shaded spruce, you can see how I use the
musical paper on the side. And then for the
cherry cobbler card, I used this piece of
shaded spruce on the side. For contrast, I've used Win
Costello and all of them. And hopefully you can see that
in the light that there's a lot of glitter on the moose. These are the ones
I'm packaging up. Then I'm going to continue
making the cards. I'm not actually
finished this project, I'm just packaging these up so that I can get
them out on time because each swap has
a deadline and I can't wait to get back the
other cards later. I'm going to be showing
you other cards I've created using
this stamp set. So you'll get some
other inspiration aside from this design
itself. Thank you.
16. Swap Cards Received & other Card Inspiration: I thought it'd be fun to share some cards for inspiration. This one was by Carol Harris
has embossing on the back. These are swaps that
I received back after sending my cards into
the swap coordinator. She made this, her name is Lisa. Were I've already eaten the
original candy out of here. The kit, I just put a Hershey's
in there to show you. Okay, this one is from Deb Shaw. A nice autumn card. Pam, nice emboss card. Sometimes there's something
on the inside as well. Amy Whittaker, nice
designer series paper card. Dane Gillen with
the nice sentiment. This one I believe
was yeah, Jet. I like the fall. Look in the embossed
embossing folder. This one was Cindy
Pimleyw. Fun It is. With it's not a skip. I think it's called
a gondola. Right. Okay. This one really fun fold. I love it. Okay, let's see. We have a new, it should
be a name on this one. I'm looking for maybe the bag
that came in or something. Okay. Sorry, I can't
give credit for this. I thought there was a sticky
note on it with a name. And this one is Anita
Cook, with that. Oh, here it is. Sorry, I found it. It was Cindy Adair. Cindy Adair was the
horse and sleigh bundle, and then this was Anita Cook. All right, so that was
the pile from my swaps. And then this was my
friend Susan Edwards, my friend Hattie Nelson. Hettie is also the one
that created this, actually, she's on my team. This was part of
the swap. And then she created this other card
with a different swap. The reason I had this
one in this pile is I wanted to show you
this side by side. You can see that we all
have different styles and hat is very similar. She puts a big
piece of designer, she paper in the middle
with a background layer. So these are actually
the same cards. That's why I wanted to show
you that which I thought was interesting from one
swap to another. Okay, this is a birthday
cards easel fold card. And this was Janine Pullman. This was let's see if we have
Susan N. Gard, a fun fold. Okay. Jill Blanchet, Look at the embossing
folder on that one. Super cool. Rob Hornback. I'm taking this one out so you can see this embossing folder, and hopefully, I don't
lose who made what card. Okay? And this one, Debbie Hill. I went to an event in Las Vegas, so that's where these cards are from and I swapped
with different people. Okay. This one doesn't
have a name on it, but I love the layers
and the stitching. This one was Michelle
Barnes. This card here. Very nice. Then this
card was Seneca. Look at the clear
embossing powder over the top of that
background stamp. Janice Whiteman with nice die cut front with the
foil in the back. My friend Kathy made this one. Sometimes we just
do personal swaps. She did a couple
others as well like this one here because when you don't have
the same products, you can swap with someone that has different products in you. And then you get
more inspiration. And Bonnie Johnson,
that's this pile. And then I have a pile of
cards I've been working on. I had a workshop series
on the Barry cute bundle. And I'm just going to
quickly go through these, These feature Barry Christmas
designer series paper and the Barry cute bundle
which has a punch. The punch was only one shape. Sometimes I used the
brother scan and cut to cut out this little guy and that
little guy for example. Here's what's called
some memories and more card backgrounds
that was lots of fun. Then I had a couple
other winter cards here because I had a
card club recently, we made something
with the Winter Meadow designer series paper. So I'll show you those. These are simple
cards, you just need the sentiments and
the pretty paper. And do some layering. These I just cut out with rectangles. And then here's some
more from my club. You see how I inked around
the edges of the die. This one was called
Delightful Floral paper. These are some Valentine's cards I recently made because I attended a virtual event by stamping up and they
inspired me for that. Then here's some, there's
a Fluffiest friends. This is a fluffiest
friends card I made and a couple of
my friend Kathy made. I want to take one
of these out because the rocker card,
my friend Kathy, her last name is Smith, her last name Smith,
put that right there. This is a card where
the decled circles were used and then it rocks. You can rock the card or
you can just stand it up. It's a fun design. I hope all of these
things inspired you. And now we're going to take
a closer look at the cards that we created in this workshop and the little
Ni envelopes. Thank you.
17. Finished Book Binding Card Projects: Now let's take a look at our finished card project.
These are all the samples. I just want to show
you that if you do decide to put the gift
card holder inside of these, I'm just going to add a
glue dot just to hold it actually stamped
dimensional, I should say. Or you could add a glue dot
that will hold just fine. Then you can put it
in the envelope. And they can still remove this without really messing
up the paper too much because it's
only one stamped dimensional, that's an idea. Or glue dots as well, or even just liquid adhesive. This one has the twine
or the linen thread. Three snowflakes. This one has three stars thread in a
slightly different place. There's the inside K,
three little gems. This one has double twine. I found a couple of
different colors of twine or thread and
just used those up. This one has the DSP going in the vertical direction some more with the double
linen thread. The white and the natural color, very festive inside. This one. Didn't have the
piece down there, different size strips based
on the size of my scraps. Then you could see
that sometimes the fronts are a
little different as well based on my scraps
you're getting the hang of. It Depends on the way
the wood grain was. That's how I would attach
it in a certain direction. This one sticking a little, I don't know where
the adhesive was. This one, it's okay to have the sticking
out a little bit, and it shouldn't matter
when I filled it over. This one, I put the
specialty paper inside. It goes with that
piece on the outside. It's just whatever
I had, whatever I had left at this
point in the project. Then as you can see, also
the different color schemes, the different ways
I colored them. I did find the crumb cake later, so I was able to finish up
all the rest of those with the crumb cake color. But along the way I improvised. Here's some with different
color snow flakes. Okay, let me to just show you the gift card envelopes as well. Each of these are
slightly different. None of these gift
cards are active at. These are all just my
samples for my crafting. At one time they were active. Do we just use them all up? Okay, and then a few more cards. There's some with
the Navy Twine. Here are a few alternatives but with the same design,
almost the same design. You can see that sometimes the designer shows
paper scraps I had. We're not the same
size as these. This, there's bigger gaps in it. And this one I
just use stickers. Your friendship makes
this season sweeter. I put sticker on the inside, just coordinating
stickers I had. You can see that it's
almost the same design, but the scraps of paper
are slightly different and you can just decorate
it completely differently. That's one idea. These two stamps came from a
paper pumpkin tag kit I had. These sizes are
different as well. You can see that
the inside panels on these two are
taller than this one. Just more sentiments
and stickers that looks like it got a little wet there,
but that's okay. And there's nothing on
the inside of that one. This one has a sticker
on the inside. So this is the only
unfinished card. Okay. Next I want to show you, you know, maybe I did
leave that for a reason. You could put a gift
card holder inside. That was probably the
reason I did it or I was going to fix this
sentiment. All right. I want to show you that
you could put a lot of other things in
these fun envelopes. Here's a Gia deli snowman
and a candy cane. Here's a Gia deli
chocolate square, and you can see how
there's two pockets and you can put tea in
one of the pockets. You can put a lot
of stuff just in the back pocket and
leave the red showing. We have a Hershey's candy bar, tea, and a cookie. Those are all the
alternatives for that one. Now in the next
video, I want to show you some other
things that you can create using the festive
and fun stamp set here, envelopes we created just to give you a little
bit more inspiration. After I clear this off,
I'm going to show you some projects created
with a different type of designer shares paper with a different color scheme but the same stamp set we used
to create all these. I hope you will give
this project a try, the exact materials
I used or the materials from your thank you.
18. Other Festive & Fun Cards and Projects: The festive and fun
stamp set can be used to create a variety
of other designs. We're just going to go
through some that I created mostly with the Mary Bold and
Bright designer series. Paper, completely
different color scheme. This moose is not only
in a different shape, but it's colored with the
poppy preyed color as opposed to the Terry Cobbler
color on the sweater. Then this designer series paper has a different color scheme. The shaded spruce color
though, was the same. I thought it would
be fun to just share these projects with you in
the brighter color scheme. Here's one with the poppy prayed background and some stars. And some layered
designer series paper with a square from the
stylish shaped. Yes. These are ones that I
created in my card club. Again, the square for the
moose instead of the circle. Here's some more with a
different de coloring, with alcohol markers for
this one. Love the Draft. Here's the rhino again
with alcohol markers and some stamp and rates for the smaller items I didn't have the
alcohol markers for. Then we have the last one
I created in Card Club was this little happy
beaver. That was fine. That's actually, I
think, the same shape we used in this workshop series. That is, this one was an
embossed background where I cut out the rhino and used
different color scheme and embossed the
background and inked it up with a blending brush. And then this was a completely different color scheme with a crushed carry background,
different color tree. You could see like
this one here has the color shaded spruce and
granny apple green in here. But this one has the
old olive color, different color scheme, ore, very bold and bright projects. You can use the happy Christmas wishes for your
stocking stuffers. This is a sticky note holder, a popular craft fair
item this year. And then here are a few
nail file boxes where you can use a little
something from you with lots of love from me. Those are just some ideas on what you can do with the
festive and fun stamps. I hope you had fun with
the projects we created, in that you're going to
give them a try. Thank you.
19. Course Conclusion: I want to thank you for your
hard work and dedication to creating these bookbinding
cards and gift card envelopes. It was really fun just
to share different ways, to take the same paper and jazz it up differently with different embellishments
and twine, and then show you other
styles of cards as well. You can see that we use
different kinds of card stock. We use different
coloring techniques depending on what was
available at the time. We showed you different ways to put things in
these envelopes. You don't just have to
use them for gift cards, you can use them for
treats and as well, the key takeaways are
that you always need to make sure that no matter
what project you're doing, that you plan it out in stages. That you can make
lots of cards at once without using a
lot of extra time. I hope that you gather
that we do everything step by step and then it makes
everything more efficient. And of course, the other
key takeaway is always coordinate your colors so that your projects
look professional. Then make each one a
little bit different. That's okay, because each of your projects is a
little work of art. People are going to
appreciate the details. Now, it's important to also
send these cards out to your friends and family because that's what crafting
is all about. Sharing your crafts with others. That is your gift that you
have to share with the world, and I hope that you use it. I look forward to seeing
the projects that you create as a result of this
card making workshop. I hope you'll join me on another card making
adventure in the future. I appreciate you
being my students. That's all for now. My name is Kimberty Smith and
I'm the paper chef.
 Papered Chef, Kimberly Smith