Transcripts
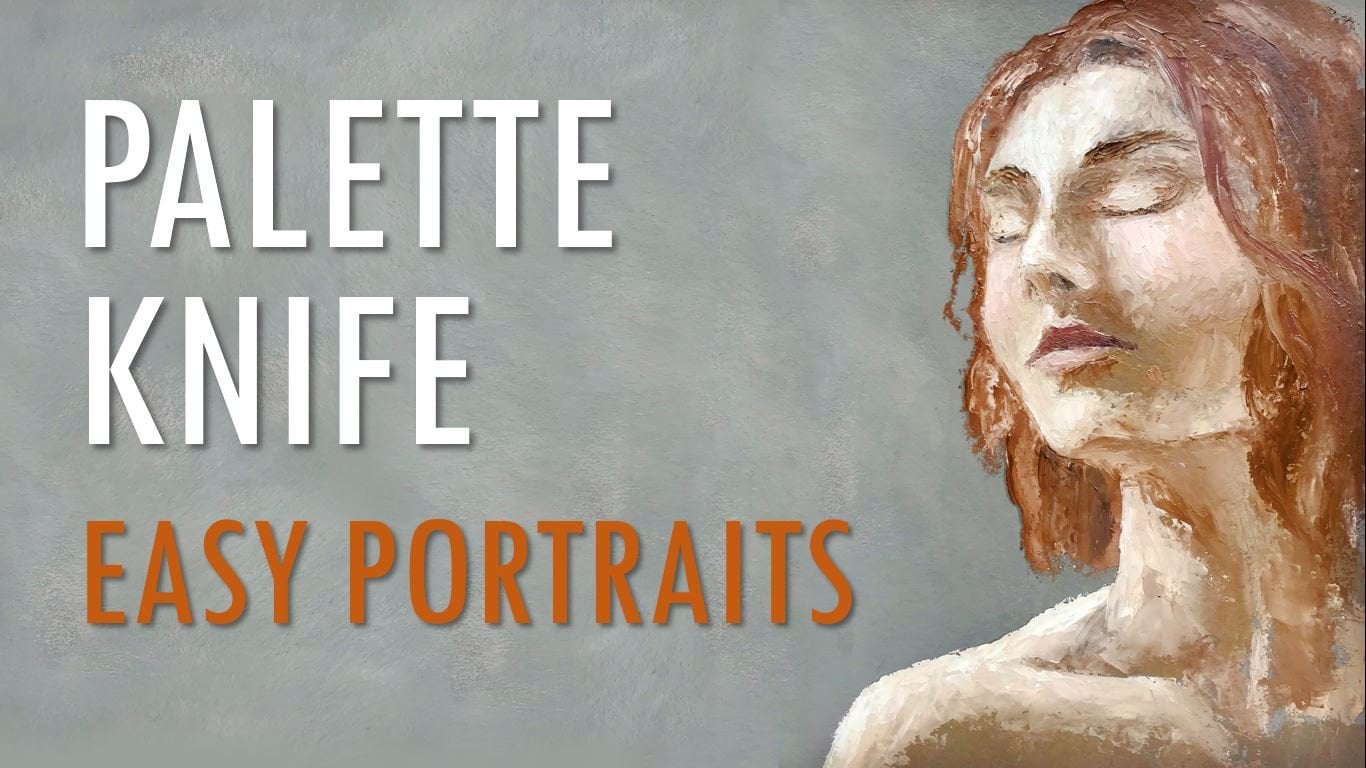
1. Introduction: For many, Beijing knives are just tools for mixing length or creative thinking to yourself impasto. However, this tool is quite versatile and can be used in many ways to create incredible effects. We can find knives of all shapes and sizes. Also, not many are required to start, because with one or two we can achieve a lot. Hi, my name is Martin Amis, colombian artist. And in this class, I want to show you some palette knife techniques, as well as the most common mistakes people make while using these tools. If you're a beginner, you have never used a painting naive, or you just want to see if there is something new. This class is probably for you. So I hope that you'll join me and I'm looking forward to see your projects.
2. Materials: The materials we need for this class are a surface to work on. When it comes to all paintings, the ideal is to work a very canvas or would. But you can also use cardboard or a thick paper. If you just want to practice. Remember that you should never use paper for a professional piece because the material won't last for a long time. A pilot, I made this one a couple of years ago. And what I like is that is very easy to clean. It's important to use his mood surface like this When we use a palette knife. Because with the time, bank can accumulate on the surface paintings, you can use oils or acrylics. For the technique that we use today. There is not much difference. So you can use the one you prefer. And we just simply need a thick paint that allows us to create impasto. And that doesn't correct when dry as supply additional to the paintings is liquid impasto are a cobalt dryer. This is a medium that speeds up the drying of the oil paintings. And it keeps the Bain's very thick. Soy, you can get a better finished. This is very useful when you are planning to work with a lot of texture. Or we, you are work nor layers and you don't want to wait too many days for your brain to dry. Your don't have to use it if you don't want to. Indeed, I'm not using this today. I just want you to know that it exists and it can be very useful. Next, we need some painting nice, when you buy some look for are flexible but stored blade, a comfortable handle, and a long straight edge. There are many different types of knives to create different textures, but these are the basics. And finally, we are using some paper towels.
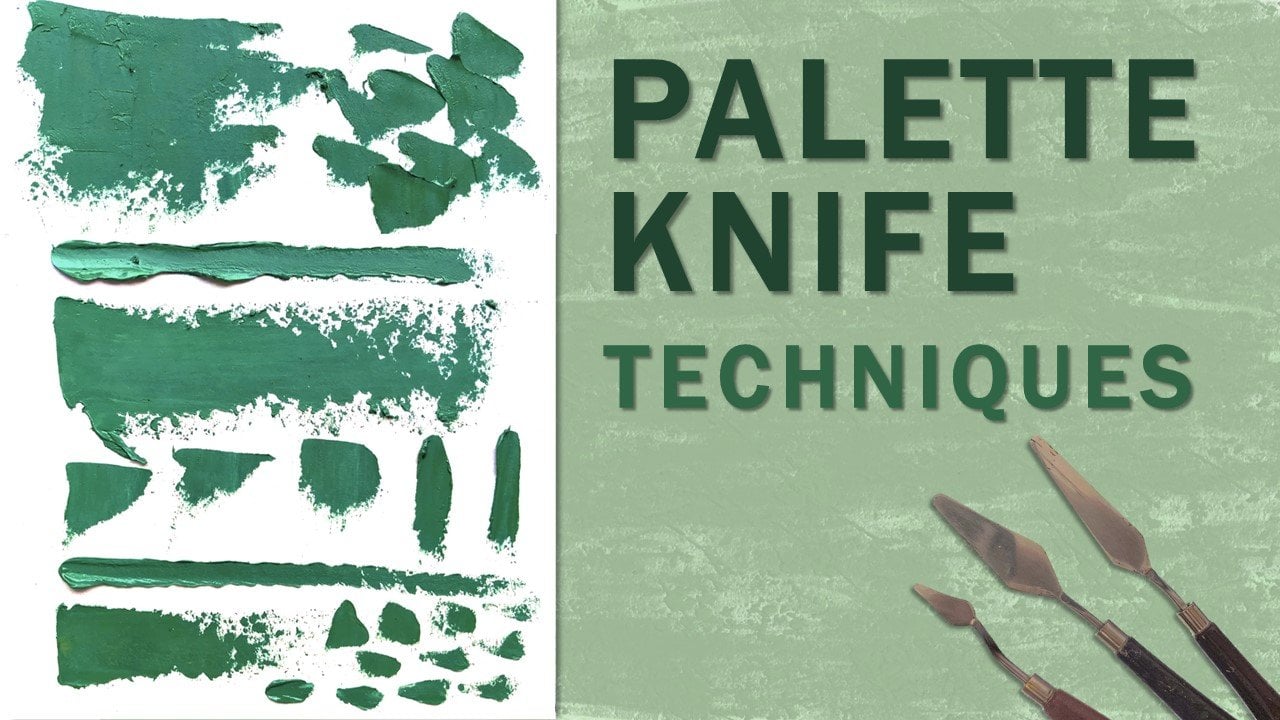
3. Palette knife techniques: The first and most obvious thing to learn is how to mix paint. Brushes are not nearly as good at mixing paint, as nice as these ones allow you to mix a more exact amount of pigment, making it easier to get the desired HW. There are also easier to clean, which allows you to maintain a much better color. To pick the color up with a palette knife is spread the paint and don't be afraid to blend the knife. Remember that this is why it's important to use a flexible blade. To take the paint cut diagonally with the palette. You will see that with this type of movement and more uniform amount of paint is obtained in the knife than if you did it only in a straight line. Knowing how to control pressure is essential. The higher the pressure you apply, the less amount of paint will remain on the canvas. We usually start by adding a little paint. Because if RPs has several layers and we start with a lot of impasto, the final result could be expensive. Also, note that when a layer of paint is applied over another that is still wet, we may end up lift in the first layer. For this reason, it is necessary to have control over pressure. Because sometimes when we apply paint with a painting knife, we only need to gently DOJ the surface. I recommend you to practice different levels of pressure before starting to paint. This will help you save time and materials. Load Texture. This one is great when you want to show the texture of the canvas or the material underneath. Get little paint on the tip of the knife and apply it using a circular motion. You can see that in the middle there is a very strong color. But as you blend it out, it picks up the nice texture of the canvas. And it shows that batter through. You can use a linear motion to scrape the painting away and create a low texture effect. Remember that not all materials have the same texture. So feel free to explore them because our rough surface can give you a very different result than a soft surface. This technique is not suitable for a first layer of paint because otherwise you might live the paint underneath. Dabbing highlights. This technique can be used to add interest to obese painted with the brush. Especially when it comes to elements such as rock, trees, wires, sparkles are for. Big debate with the tip of the knife and put it over the places that you want to highlight. Make sure you don't screw up the rest of the surface. Because in this case, which is one to add a thicker blob of paint to create a much more unpredictable shape. Batches. Palette knives are useful for applying clean patches of color onto blank canvas or over an existing drywall layer of paint. The blade allows you to swipe the lead of color onto the Canvas in a motion that recalls a bakery smoothing frosting over a cake. With a palette knife. You don't need to dilute your paint with medium as you would do with a brush. As a result, the color that you apply with a palette knife, it's more vibrant. If you make a patch of paint too thickly, you can scrape some color of using the edge of the palette knife, blade. This method booths off excess paint without weakening the colors statement. Lifting. To create some effects. You can use the background color instead of applying a new color. So over a wet surface, use the pointy part of the palette knife to remove the paint on top and expose the color on the ground. Try using different angles to get different results. You can even use and other things like a fork to create different textures in your artwork. Lines. If you load just the edge of the blade with paint and draw it across the canvas. You can make crisp rules, straight lines. This technique is helpful for depicting man-made objects in a painting, like fence posts or buildings. When we use a painting knife instead of a brush, the end result, it's more imperfect and random. This may not sound good or bad. It is actually a great advantage when you are looking for a less realistic style or when you want to avoid being too perfectionist and create a faster piece. By modulating the pressure angle of the knife stroke. You can turn these lines into fine shapes. Zigzag, and Zeno's curves. Edges in a painting are the places where I do shapes or colors meet. They are expressive places that can reveal what the artist wants to emphasize and the pace at which they want the viewer to examine the work. For a quiz page, load your palette knife with paint, then laid flat. And so the canvas that are hard edges and soft edges are hard edge may represent decision and aggression. While a soft edge is less formal. A soft edge it's made by lowering the pain together at the intersection of two colors. Just spreads the palette knife onto the boundary and move it back and forth to work the batches of wet paint into each other. To create a gradient. Mix the colors that you are going to use first. For example, I want to go from dark blue to white. So I will mix the intermediate color, which is a light blue. Apply stripes of each color together as the video shows. Then clean the blade and mix the colors a bit using very low pressure on the paint. This technique is especially useful for skies. You can use larger size tool to help you. Is commonly if you already have two shapes that create a hard edge, but you want to make it software, for example, to create the illusion of atmospheric perspective. Use the edge of a clean painting knife held at a 45 degree angle from the surface of the board. And connect the two arias by gently scraping the surface of the port to expose some of the early under painting and blend the beat of the two areas. This is a good way to change the edge without altering the rest of the shape. Broken color. By Lady loading, your palette knife would paint and then skimming it gently across the painting surveys. You can create a bed layer with small window-like openings that allow what underneath to show. The size of these openings is dependent on both the pressure of the stroke and the texture of the surface. If you are working on course canvas, you'll get larger windows. Dan, on a final grade canvas or smooth panel. Marbled texture is very interesting because of the vein it has. And with a palette knife, we can create something similar very easily, big two or more colors and mix them. But don't mix them very well. Because what we need is to be able to pick different colors at the same time. Low your knife with paint and apply it in one pass, creating a thick stroke of broken color. You can get a stunning effect if you use properly this technique, which is great to give interest to a flat surface. Pointillism. You can create the feeling of short brushstroke by adding paint with the tip of the palette knife. The amount of investor you'll get depends on how much paint you take. This technique is very useful for creating flowers and sparkles in the water. You can let the background colors show or fill an area with dots of the same color or different colors to create textures instead of shapes. And the last thing you need to know is just removing paint. If you are not pleased with the results, just take a palette knife. I remove everything you did before. Make sure you don't mix all the colors. That way. You'll be able to use them again. Art supplies can be very expensive. And this is something that might help you to avoid wasting pains and of course, wasting money. During the project lesson, I'll show you how these techniques can be applied to an artwork.
4. Common mistakes: Using thick pane to quickly don't use much impasto For the first layers. It is very hard to control live in by our experience, artists start with thin paint. Artists that create a thick paintings, you see multiple layers. Don't start out with a lot of paint. In fact, most of the paintings or start with thin layers of paint and mix successive layer is built up thicker and thicker. If you use a lot of paint early on, you will end up firing the paint and it will be almost impossible get the subdue L18. And you can end up with a painting that is overwork or with muddy colors. If your paint East too thick and you can work with it, take off the excess paint, a scrapie down with a pallet knife, and start again. Many times. Removing our Nexus paint can be a great way to regain the control of your painting. So don't be afraid to scrape away paint when it's necessary. And then go back into the area and repaint it. Using a plastic palette knife. Plastic tools are very inexpensive. So when you are just starting out in paint, you must be tempted to buy them instead of getting some metal knives, which are a 100 times better. The plastic palette knives are not sharp enough to scoop paint off your palate, the lift pain behind Western materials. So in essence, they end up costing you more money in the long run. Besides a plastic palette knife is super frustrating to use it as a tool for children to keep them safe. But if you want to work more professionally by a metal putty knife, as I said before, you don't need to buy a whole set. One or two, it's okay to start by Edison metal bottle knife. You'll never regret it. If you use a plastic tool, paint will adhere to eat very easy, especially if you're working with acrylics. And then you will spend a long time trying to clean it. Bad, it won't be the same. And another thing is that plastic knives are terrible to greed lines. They aren't as thin as the metal knives saw. You'll only get a thick lines. Not having enough materials on hand. It may seem obvious, bats, many people used to brush painting. Forget that the knife technique uses a lot more paint. So you may have to mix the same color over and over again until you learn to calculate the amounts needed. Or you might even run out of paid before finishing of obese. Focusing on details. It is hard not to fixate on the little details, but that's exactly what we do. We jump or riding and tried to define every one of those wonderful details. And for some reason it never turns are right. We need to start with the correct form shadows. Remember, those little details need to be on top of a layer of corrected values and colors. So when you begin painting, you should start with the basic light and dark values and colors of your object. Then continue to modify your colors and values to include the light tones, middle values and highlights, dark tones, and also the reflected light. Once you have all those form shadows defined, you can add the details. Also remember that when working with a palette knife, not usually thinking about the details. Instead, we rely more on simple shapes and expressive strokes. Using too many painting knives. When you're just starting out in pay dv, it is very likely that you want to buy all the art supplies you can buy. The pinky knife is a tool, so you should get used to it before you want to use another one's. Choose one or two baby knives of a common shape and a size matching what you want to paint. You will see that it can be less confusing to work this way.
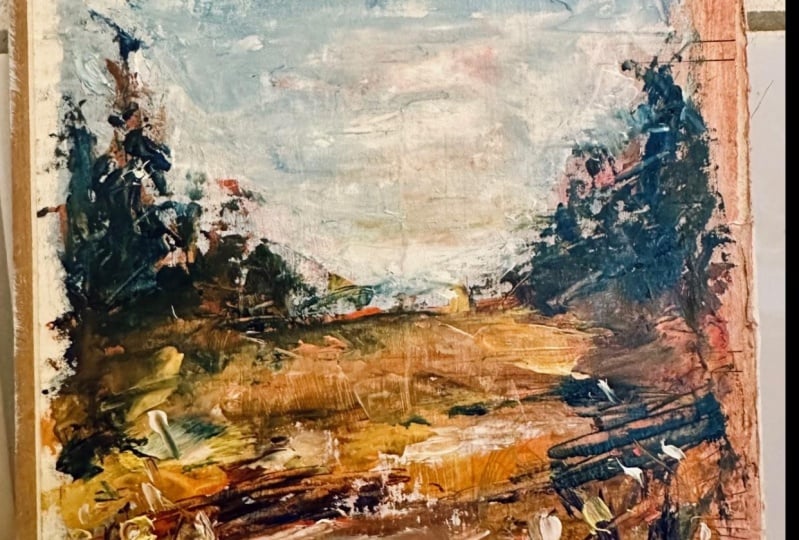
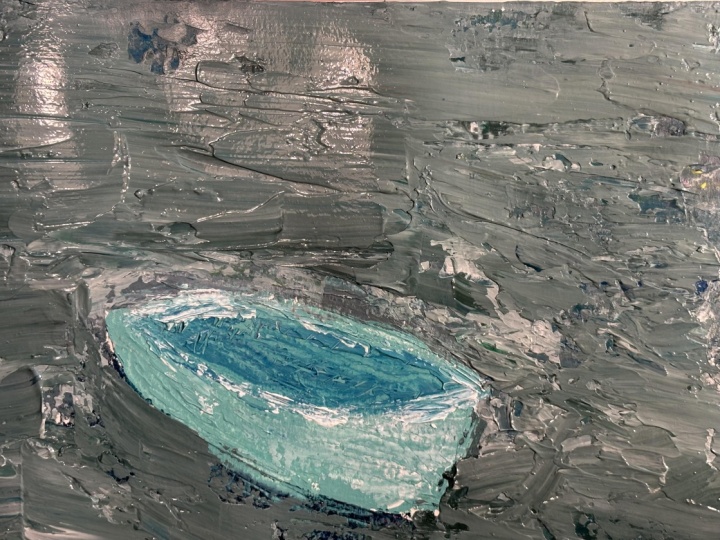
5. Project: For the project class, I'm going to pay that simple image using the techniques that I showed you before. I'll be telling you everything I do. So you can see how each technique can be applied to a Brady. You conveyed alongside with me to create your own BCE and then upload a picture of feed to the project section. So everyone concedes. The colors that I'm using to being displayed bought our ochre yellow, very million Rev, and cobalt blue. I already prepared the canvas with acrylic paint and escaped the match. Earth phones predominate in the vessel, saw further background. I mix blue with some red and white to create contrast. I don't want to bain de entire background. So the first technique that I'm using is low texture. And you buy batches of paint and then distribute them using circular motions. Notice that I'm trying to keep the edges with very little bait to allow the canvas texture to show through. I'm going to use both types of a gene in this painting. Inside the pot, I will only use soft edges, but to limit the background and the Glady elements, I will use hard edges. This will help me create that distinction between the two planes. The edges don't have to be perfect. If we want to, we can come back later and go over the diarrhea gain. But be careful not to overdo your painting. Now, I mix are slightly more violent tone to make the background more interesting and applied using the broken color technique. This way, I allow part of the color that I had previously applied to show without the variation being soy striking. I, you also want to give a very simple background without using too much impasto. Now, objects should not float in space. Or at least that is not want to have in mind for these small paintings. For the table, I will use the marveled Bay Estuary technique with the colors blue, red, and white. I don't mix much of them as a wan them to blend together on the canvas. Blight without movement just to color invite adding more red or blue. I'm happy with the results. Red, ochre, yellow, and some covalent glued to make it look a bit go. Scenes, I'm using these to create a gradient at the bottom, a blending the midtone, and then add more wide to eat to create the light shade and more blue for the dark shade. I placed the three tones in their respective RES. And with the help of a clean knife at bluer the colors to obtain as most gradient. Before be deemed needs dance. I'm going to set the values for all the elements you seen a thinly yourself paint. To do this, I apply a lot of pressure to the ballad knife. If I put too much impasto from now on, the paint would come off fast. There are several layers and I would certainly no longer be able to meet exactly the desired color. Igf each piece of clay as slightly different tones. Starting from the background to the foreground. I know it looks pretty bad for now. But once I add some details, the whole piece will come to life. I start to add some highlights and shadows. When working with arches knife, sorry, she's mold place. It's best to load only the tip of the knife with B8. And you use a short stroke to apply the paint. If you use an artist knife to mix beat on a ballot, you should call it a palette knife. Back when you paint with it is also the name you give. It does not really matter. If you find that distinction quite curious. Try to always keep your ballot queen bee bearing on the ballot in case it is too dirty or I don't have any time to clean it, I simply remove the paper and read feed with a clean surface to continue work. This is a fast painting. I don't really care too much about the details. So once I'm satisfied with the result, I go back to the beak, but where I rectify the light and shadows to give the fee your gradient definition. The original image has many details in low relief. So when I'm going to do is use the lifting technique to recreate some of these lines. As you can see, I am just a scraping the painting with it. Clean knife forming different lines and shapes. If you don't like the result, all you need to do is lightly stroke deserve. He's with that gleaned palette knife to reincorporate debate. That is one of the advantages of lifting the paint instead of adding lines with another color. It can be corrected very easily as it avoids unwanted painted mixes. And in general, it creates a much more subtle effect. Finally, I add some highlights to the clay basis and I being the shadows that the broadcasts on the surveys used in a mixture of cobalt blue, very million red, and then dash of black. Then I correct some bytes of the background to brief the definition of the elements. And this is the final result. I hope you enjoyed this class and he found these lessons useful. Thanks for watching. And if you liked it, please leave good feedback and follow me for future updates.
 Martin Jaramillo, Artist