Transcripts
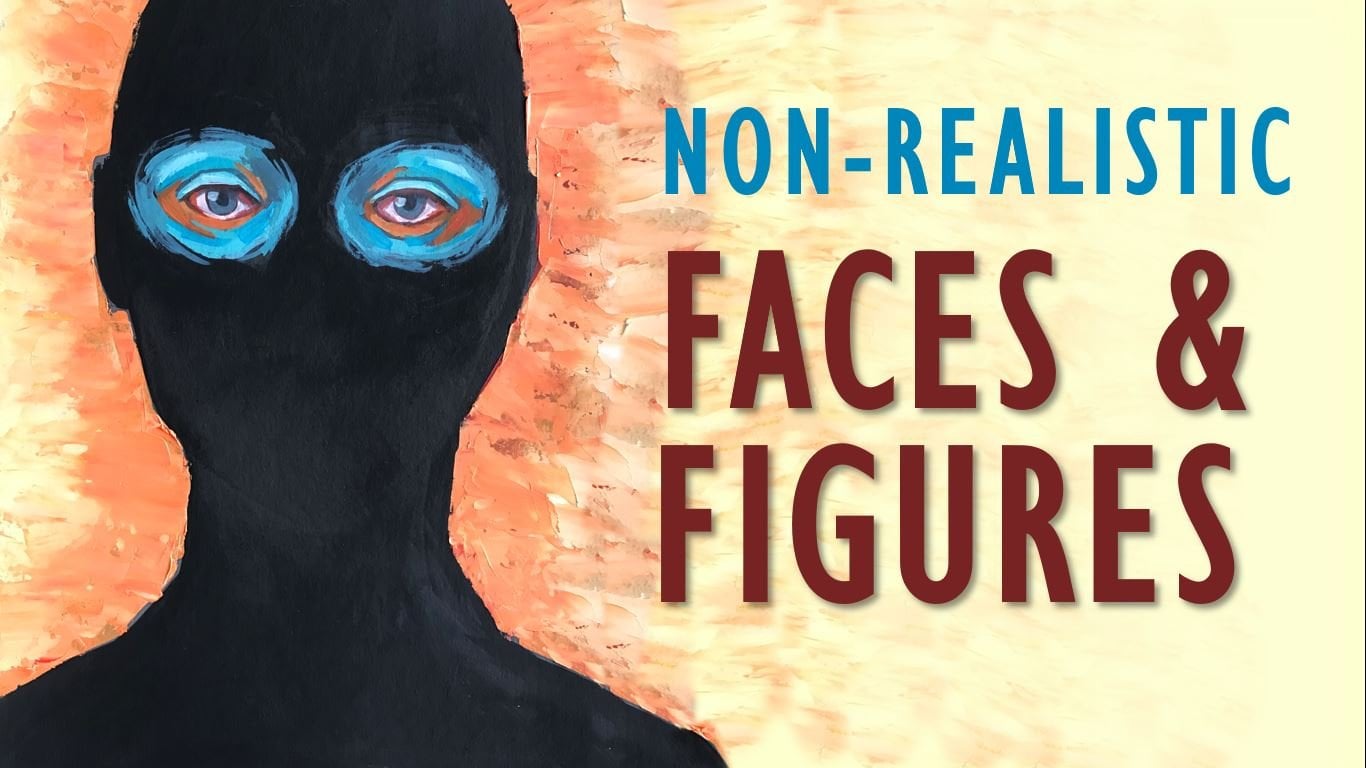
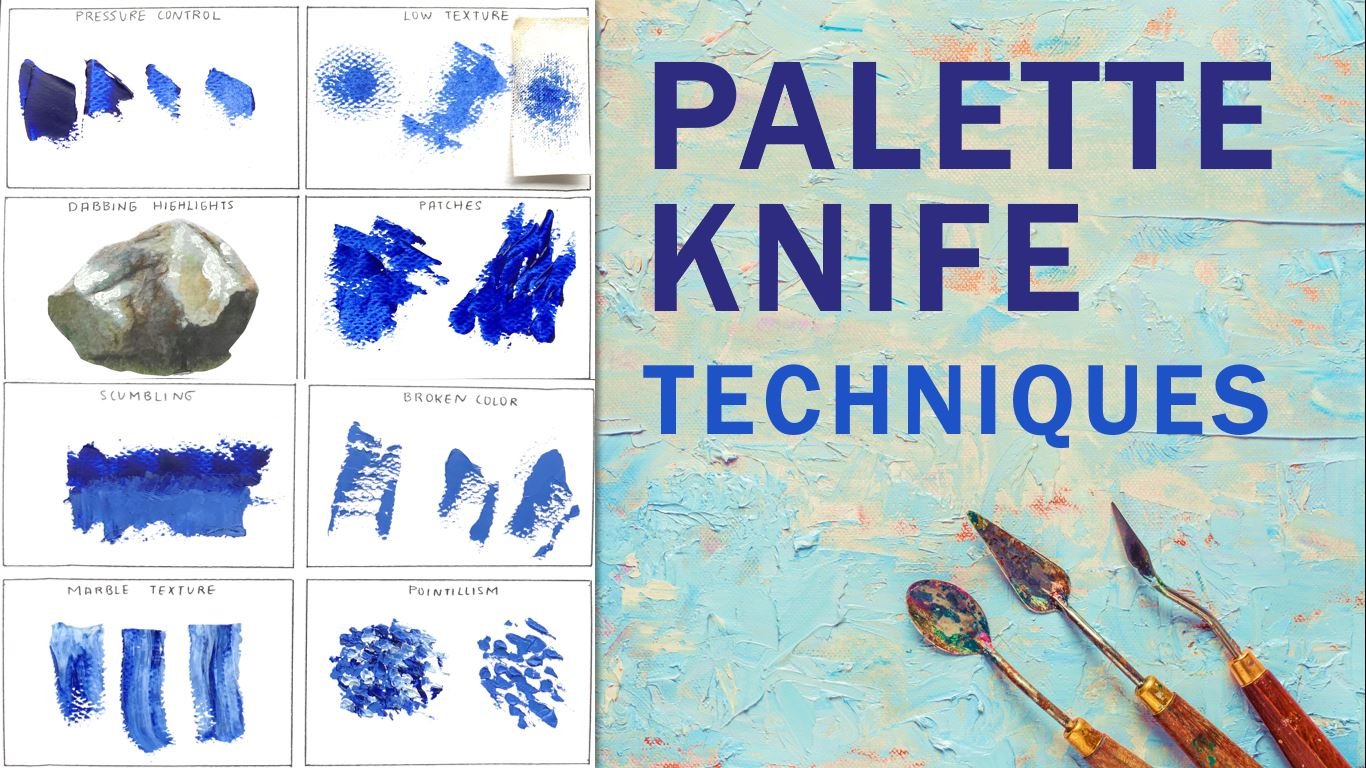
1. Intro: The ballad knife is the ideal tool to create simple images with expressive strokes. Although it is commonly used to paint landscapes and abstract art, we can use a bringing life to create all kinds of things, even portraits. In fact, painting a portrait with this tool can be easier than doing it with a brush. Scenes. We don't have to worry about all those little details of the face. You just need to know where to focus your attention. My name is Martin and a Colombian artist. And in this class, I want to show you how to paint easy portrait with a palette knife using oils or acrylics. If you're new to painting with this tool, I highly recommend you to check my glass on painting techniques with a palette knife. It might help you to see the different ways to use this tool and how we can apply them to obese. In this class, we will learn about two basic elements for creating a portrait, which are volume and color. Then we'll paint toolbar trades with a knife step-by-step. So I hope that you'll join me in this class and I'm looking forward to see your projects.
2. Materials: For this class we need canvas or paper or whatever surface you want to work on. For brock diseases are quick demos like these. I usually use cardboard or acrylics and mixing ballad or a dish with a flood surveys. Because remember that is very difficult to work with a palette knife on rough surfaces. Next, we need some valid knives. When you buy some, look for a flexible but story blade, a comfortable handle and along straight edge. And finally, where is in paper? Pencil eraser and some paper towels.
3. The planes of the face: The greatest difficulty we face when painting a portrait with a palette knife is to create details around the shapes that reflect the human face. Therefore, everything we do must be forceful. Also, we must be dismissive when applying the bank. Because if we use too many layers of impasto, we could create a mess and end up with muddy colors. To avoid this problem, the fundamental thing is to know the structure of the human face. Bad, this is not an anatomy class. And to paint a decent portrait, we don't need to know all the names of the muscles and bones in the face. And the fact, the only thing we need to learn is how the volume is distributed on the face and what are the planes that make up the term Blaine refers to a change in direction on the surface of an object. Each time the surface of an object turns towards or away of a light source, there is a change in tonal value. So each time we see a change in value, it indicates a different plane. That means that we use light on dark paint to create a 3D appearance. And for that, we first need to learn how to identify the different planes of an object. Take a look at these pictures. As you can see, it's very easy to recognize the different planes of these figures. Sees their faces, great heart edges to each other. However, if we see an object r is not itself composed of planes such as a sphere, we will see that it is more difficult to identify its planes. But if we play a little with lining, suddenly those planes become much more noticeable. Since agree, contrast is created between lights and shadows. This means that to identify the place of the human face more recently, we can play with the lining of the image. Now, let's try it with the Phase. One of the most relevant parts is the CIC, which is divided into several planes. The cheek bone can usually be found just by doing a curvy line from the corner of the eyebrow to the corner of the job. Usually we can give volume to the cheek with only three planes. A top plane close to the eye and to bottom planes. In a side view, we can see the same planes. Bad decides our modern notorious. Now we can continue with the mouth. We can quickly the limit this lecture with a circle. And the important thing is to keep the top of the circle to the wings of monomials like remains between the circle and the planes of the cheek are the muscles that vary the most depending on our expression. So when the muffin john or relax. It will look quite soft, but any tension, our expression will generate a lot of wrinkles and hard edges. The chain is usually represented with a circle and a small plane below the lips. In the case of the job, we have to fairly wide plains, which can show the bone in the lower part depending on the facial structure of the person and whether he's going to his death. And in the side view, this plane will get bigger as it gets down. Okay, now let's move to the far right. One of the most common mistakes when banks interface is to make the forehead tolerant slot when in fact it is composed of several planes. The first one is located by touching the corner of the eyebrow. So we have two side planes to middle planes in one center planes, which usually looks like a circle. The whole area above the eyebrow is actually going to be coming forward, creating this sort of triangle shape. Also, having in mind that the corners of the eyebrows are going to be common for a warrant as well. So as you can see, there are many things going on in the front. And we can solve them are exaggerate this features to create a more intersting key mesh. The nose is usually drawn with many planes. However, we can summarize all these in three basic planes. One week blame to connect the nodes with the rest of the vase at job Blaine and a separate plane for the wings of the nose. Ok, to sum up, the forehead is made up of several planes and it should give the appearance of being rounded. Rather than Flood. Theme or very well-defined phases are usually marked with hard edges at three points. On the cheek bone, on the Joe, and on the nose. The eyes are slightly sunken in the face. If we bring everything at the same level, it will look unnatural. Therefore, we should play with lights and shadows to give the idea of depth. I recommend you to search the internet for us arrowheads that are a bunch of reference tools that can help you better understand how the luminous intensity and the angle of vision can affect the different planes of the face. These types of images show the blaze directly. So if you're a beginner, it may be easier to work from these rather than from a real phase. Remember that one of the keys to painting portraits with AES is simply to understand the structures of the phase and how the volume is distributed.
4. Mixing skin tones: I think it goes without saying that using the band that so manufacturers called skin tone is a mistake. Sees there are an infinite numbers of skin tones as a versus people, nor a single received to make a skin tones. But rather a set of different Violet's with which we can create them. One of the best known is the Zorn palette, for which we only need 3 million red, ochre, yellow, ivory, black, and white. Only by mixing these four colors, we can obtain a variety of shades. This palette is particularly good for painting light skin tones and a worm compositions. By creating a colour wheel, we can get an idea of what we can obtain and the necessary amounts of each big men to achieve the desired hue. So before you start Beijing, I recommend you to make some mixes until you find where you are looking for. Another bothered that I like uses ochre yellow, some orange, white. And instead of using black for the shadows where that ultramarine blue, since blue and orange are complimentary colors, we can get many dark tones without making them look dole. Like we use Black in general. Ballots that use complimentary colors are quite efficient. For example, we can use our combination similarity Zorn's, but adding the complement of red, which would be green, or the ochre one, which would be purple. By Blaine with the ballot, we can create a greater number of tones. In addition to give much more interest to our works. During the class project, I will be using this palette that you see on screen. Okay, we already saw that we can create a skin tones using different. But the important thing here is that if we choose a palette, we have to stick to it to create all our tones. This way. The painting will look more cohesive. That is, if for example, I'm using the Zorn's ballot and I have a ready mix. My dark and medium tones. I should not replace the ochre yellow with lemon yellow to mix the lighter tones because dealt make the new color seem not to belong to the rest of the painting. One of the qualities of a great painter is to make all the objects in his composition seemed to belong to the same world and to be Buffett in the same light. Achieving this effect can be difficult at first. But if you work with are limited palette, better results can be achieved more recently. And another important point is that the more colors your pilot has, the more tonal variations you can obtain. However, using too many colors can make the process more difficult and give you less cohesive results. That is why to begin with. The most recommended are simple pilots, such as Soren's.
5. Project I: For the project class are Beijing to different portraits with a palette knife. You can paint alongside with me to create your own bendy and then upload a picture of feeds to the projects section. So everyone concedes, I won't use a photograph as a reference, but simply this image of an Asaro head, as this is the easiest way to identify the areas of the face and great volume. To begin, I sketch with paying the head completely define the planes to work on. You can do it freehand. Use our ruler to measure the sizes of the segments, or use any method you prefer. The essential thing here is to correctly define the proportions of the phase. When we're just starting in the world of portraits, it is best not to paid anyone in particular, but simply to try to recreate a face and understand its shapes. Doing this can prevent us from becoming frustrated and losing interest. Learning scenes carrying their resembles in the portrait can be very complicated, especially when working with a palette knife. On the other hand, beanie and using a photograph as a reference can be quite confusing. Sees all the colors and details of it may end up being a destruction during the process. Although some might think that this model that I'm showing you is a shortcut. It can certainly be very useful. And any tools that can help us to improve an artistic skills should be important. Despite being a shortcut. The colors I'm going to use our vermilion red, ochre, yellow, a dash of coal blue, white, and black. I start by mixing bluish gray for the light parts of the ice. Also, IGAD sometimes appear white. It actually has a slightly darker tone, and therefore, we should never painted pure white to avoid an artificial look. Cool grays are ideal for this area, while a slightly yellowish green can create that filling of illness. And the pale red can be used heavily on faces that reflect anger, creating the effect of bloodshot eyes. I will paint DREs are dark brown, for which I mix red, yellow, and a pinch of black. In general, it is better to start the portrait with the ice in the first instance because the eyes are the area of the phase with which we connect more easily. And therefore, it is the area that can help us the most to identify flows or irregularities in our painting. On the other hand, when painting with an artist knife. It becomes more difficult to create a small details. So it is easier to work from the inside out and from the back to the front as if we were building a subject bars, right, Barth? Well, once the iris is ready, we'll locate the BU bills by adding black with the tip of the knife and that blame him gently on the center of the Eris. Then we do the same thing with some small white highlights. If you want to paint well-defined eyelashes on things like that, it is best to work very large species. Because on one hand, the ballad knife does not allows us to make such delicate details. And on the other, if you bring details with a small brush after you're done with the rest of the piece, they will most likely Luke, and consistent with the style of the rest of the painting. In other words, the entire word should have a similar amount of detail. What follows now is to mix the skin tone. Use different proportions of each color until you get the desired shape. As you can see, the idea is to obtain free basic tones, light, dark, and a medium tone. First, I applied the darkest to do these. And look at my referencing mesh and identify the darkest areas. Then apply them to the canvas in flood thin layers. Simply following the outline I initially true. After these, I move to the lighter areas again and look at my reference and locate the color on the canvas. The idea of this technique is to take the basic concept of coloring books one step farther, in which we are given an image divided into small numbers, spaces. And then we are told what colors should go in each one. So divide your image into areas that allow you to easily define the eternal values of the face to create volume. And then just being polygon by polygon. The reason why the last color to be applied is a medium tone is because only with light and dark, we can get a general idea of the bendy and correct drawing errors. Maureen time. If you use as a reference a photograph that has few variations between light and shadow, it will be more difficult to carry out this procedure. So something you can do is just to increase the contrast of the image to guide you. More recently. Before starting to work, I applied two coats of gray acrylic paint on the surface in order to prevent the material from absorbing too much oil. That are different types of brains or ways to separate the surface. And this can help us preserve our work's. Acrylic primaries are the most used because g are very easy to apply and give the canvas flexibility. However, in the very long term, these materials can be somewhat unstable to changes in temperature. Another fundamental point is color. I'm working with a neutral gray base color so that it doesn't interfere too much with the band. But if there are unpainted areas left, it is not as shocking as whitespace. If we use a very saturated base, it could interact with the colors we apply. Even when working with a palette knife, as there are some translucent pigments that generate this fact. This technique in which the background color is used as part of the work itself is quite interesting as it adds uniformity to the bce. Either because the negative space is used or because it works, we transparencies. In general, it's best to avoid using white backgrounds, a very thin veil coat of paint, or perhaps a gray or sepia hue can improve. Your arthur lot asks for black backgrounds. You must be careful with them as they can observe the light from the work and all the rest of the colors. Although if we are aiming to create a darker, heavily Jodi BCE, it is undoubtedly upgrade option. Okay. I know that it still looks pretty bad at this point, but this is where we completely separate from that color by number style. We can already observe well-defined shapes and volumes. So the next step is to solve then those lines to generate a more organic appearance. And here's a tip. Instead of just blurring the edges, mix more intermediate colours to apply them where two different tonal Smith, this can give you a more professional appearance than just working the two patches of paint into one another. The Zorn palette has become very popular lately. Although it is quite old. It was named after nineteenth-century Swedish painter who use it in most of his works. Some say that he also use viridian green or Sierra Leon Blum. Although in reality, these shades are very inconspicuously in his work. The big question is, why yellow, ochre, vermilion, red and ivory black? Well, the reason is that these are unearthly version of the primary pigment colors. Yellow, red, and blue. Ochre yellow is earthy, bad, still mixes with red and black to create some very pleasant worm orange shoes and the cool green hues respectively. Vermilion wrath or cadmium breadth is reached on worm. Ivory black is cooled and acts like a very deep blue. That is why the result we obtain with this ballot are always warm. And there is something fundamental to take into account before choosing a bullet. Because although the skin has predominantly warm tones, we can create a colour image using colors such as Alizarin, crimson, Cerulean, Blue, lemon, yellow, and black. Innocence. It is about looking for a replacement for the primary colors. Do not forget to make such a slightly rosier tone for the leaps. I remember that when the light falls from above, the upper lip will always Luke much darker than the lower one. It is best not to spend too much time on a single part of the portrait, but instead gradually work the entire phase so that it takes shapes as a whole. An example of the importance of doing this is the correction of mistakes. In this case, I realized that they were right, I was too low with respect to the right. So to correct it, I decided to remove all the paint from the I I remake it. When you have to completely change our part of the painting, lift all the painting that aria sees when working with a knife. A lot of impasto can accumulate after several layers. And that makes it difficult to add more pain without carrying muddy colors. When we are going to paint our work in which several people appear, the best we can do is to mix the skin tone of each one individually. This is done to avoid that everyone looks exactly the same. Cause justice, we do not make the same features tool or we put the same color tool. There may be differences in skin tones. We do not necessarily have to paint the characters in the painting with opposite tones. Just said is light variations to give the bees and more professional Luke. The most reliable method is to use the same color palette to blend the different skin tones, but using different proportions of the pigments for each individual. This way, we can achieve obese that doesn't look boring. But at the same time, keeping a cohesive composition. Just keep in mind that even people who belong to the same racial group can look a little different. Maybe one has rosier cheeks, is more tanned or Hassan freckles. Of course, this is not a rule. It is only something to keep in mind if you plan to do one mirror complex work. And in fact, if you look at the words of well-known artists, you'll see that sometimes the differences in skin tones is hardly noticeable. What remains now is to adjust details. Sees painting with an artist life tend to be much looser dad with a brush. So at this point, humans decide if the person in the portrait has some wrinkles. If he has speeds, scars, if his nose is very prominent or his Joe is more marked. You cannot thick eyebrows, a bird and most stylish or wide sidebars. You can also add more weights to the subject, but making it shakes lead sharp or you can even other double Xin. The thing is that once the structure of the face has been defined, all these details can be solved in a simpler way, but with care not to ruin all the while we have achieved. And as long as you don't look for a two dramatic change, use for ofs of multiple peoples to guide you. And above all, tried to analyze faces and understand them rather than just mindlessly painting. Remember that although this painting technique is intended to be a simple guide for beginners, it is essential to analyze each step until you reach the point of being able to pay the phase without requiring any kind of guide. If you're using a photograph as a reference and you want to obtain exactly the same color. The first thing you should do is identify if the color but you use is warm or cold. From there, you need to know which are the predominant tones in order to mix them. Keep in mind that the color is not uniform on the face. But we can find free well-marked colored zones. Top of the head, forehead, and brown area are yellow or even white. The skin is thinner in this area and contains less capillaries. The chicks and nodes are red. This is the fleshy part of the face and contains more blood supplied, which result in those royalty tones. And finally, the mouth, Shane and Joe, our bluish or blue-green. For these small Beijing. I have not marked much difference between these areas because I'm looking for something quite monochrome. And I will live, will pay the hair with the same tones. Now, transferring the colors that we see in a photograph can be easier if we first isolate each color. I believe in taking advantage of technology to event spending. Often I use a 40 of my subject and imported into and didn't program. It can be PhotoShop or even banned or PowerPoint. I'll then take samples of some colors. You've seen a simple tool. Once I have each color separately, it's easier to mix them because I don't get distracted by the rest of the piece. Another thing to have in mind is that each color added to a mixture results in a dollar version of the same color. If while attempting to match a color, the mixture becomes markedly donor and the target color, then the mixture is likely a failure and you should start over attempting to bring a color back to life of the results in uneven and greater waste. And it is better to waste a little paint done a lot of paint. Some of baked beans, like oils or acrylics, offer an opportunity for color correction even after the colors have dried. Did technique for doing so is called glazing. A glaze is Athena down transparent solution that acts like a filter of our painting. And yes, this can be done even when working with a painting knife. But you have to make sure that the paint is completely dry before trying to apply a glaze. After building the eyebrows, nostrils accentuate the islet cell A1. I decided to add some brown hair to it. To be honest, I have never liked painting hair, and I usually paint other types of portraits in a not entirely realistic style. So I do not usually emphasize the straight. I'm doing a simple hairstyle, adding the paint in the same direction as the hair, and following the natural shape of the skull that I drew in the beginning. But what did he did a bit too, at the volume of the Hare. Think about hair as a single mass rather than individual strengths. Like we mentioned earlier, is start with the darker tones layer up to the lighter areas. Tries to keep your strokes as fluid as possible to create a natural look. Once you've laid the ground work, as in the highlights, using a lighter tone. For your first couple of birth rates, create a fairly simple background to make your birth rate the star of the show. Once you've had some practice, I'd like to include some objects that relate to the Cedar until the audience a little bit about who they are. In portrait, the backgrounds are usually minimum electro cropping for retitled my subject and blocking a color to keep it simple. If you haven't already painted in IIT, tried to choose a color that doesn't compete with your subject and added around the portrait to bright colors can be very good with a portrait. However, this doesn't apply for all the cases. And they are usually present in paintings are colourful with a very modern style. On the other hand, try not to add too much detail as that goods gives the background more dominance. It doesn't mean that you can use above-ground landscape, our room or a bookcase. Rather, whatever you choose doesn't detract from the baud rate itself. I ruled that might help you, is that the background should have less amount of detail than the foreground. Likewise, the degree of saturation of its colors should be well below that of the subject. In this case, I didn't even have any color to the background because I'm focused on the face. Besides, I really like how it looks with that base gray. After a few more lights and shadows, This is the end result. It took me around 40 minutes to complete the spacing. Although I'm sure that if you spend a little more time, you can get much more interesting results. Now, let's move to the second project where we'll see something faster.
6. Project II: Now I'm going to use this as a reference. It is good to try different angles instead of putting the same front view as usual. Or worse, using the typical IDE style for our portrait. Having the sketch ready, I quickly mark the main areas of the face, along with those that received the most light. Taken into account, the curvature of the face and the angle of observation that I'm using. I will apply the same colors as in the previous binding. But the skin tone that l mix will be very different. Because in this case, I led the yellows predominate more. And you also add some medium green to shade certain Bart's. Since in this case, the eyes of the my shirt clothes, I go directly to painting the darker areas which are found on the left and lower side, sees the light falls from above and bathes the right side of the face. Later, I add the highlights. And finally the mid tones. As you can see, I apply through layers of color in this first layer to facilitate the process. Actually, there are areas where a lead to great background show because I think it looks pretty good. To turn the piece a bit. I mix a more reddish tone and use it to emphasize some shadows. I paint the lips with the same color. And again, the upper lip is much darker than the lower one. The elements that complement the bar trait, such as the background, clothing, accessories, among others, are not so relevant. Especially when we're just learning some masters of portraiture, that these kinds of things are completely irrelevant. While others say that the are essential to balance a work. So it can be quite dependent on your taste. What is a fact is that if you paint a subject with detailed and world made clothes, but you fail in their proportions are the expression of the face. The whole work. We'll probably look back. While if you create a perfect phase, the mistakes you make in the rest of the elements will lose relevance, and the entire piece will look great. That's because when we look at a portrait, we focus on the face and spatially in the ice. Just like that, we get to the bones of adding details. Even though I'm following the reference, I want the face shape to be slightly difference with large run the cheekbones. So instead of using hard edges to define this area, I'm going to smooth it out until I get the appearance and looking for also and mix a more pinkish skin tone and a blight on the lower plane of the chicks. Now, I need to define the nose well, shading the lower plane and Baines In the nostrils. It's worth mentioning data. I shall, there are no elements to be this cost as flown in heads are not highly recommended. It is not very difficult to bend a neck and shoulders. Without adopt. They are elements that can help you a lot to improve the final result of your bees. In this case, the reference image only had a birth of the neck. So I yellow the missing BARDA faith. And I think it was an excellent compliment today, much in general. For this occasion, I chose to vein the subject with closed eyes simply because it is easier and yet it looks quite well. I didn't mean that we should delays. Of course not. But if we want to do it, we don't have to practice all the elements of the phase. Let me explain. It is common for people to practice Bayesian ice. You don't need to paint the whole face to learn how to make eyes. Because you can paint only one eye in a notebook or a piece of canvas. And you can also practice painting noses separately or even leaps or ears. But if you want to paint, cheeks are Joe's, then you must paint a complete portrait. And in that case, you can speed up the process by painting closed eyes, which are very simple to make, and it's unlikely that they go wrong. That way. You focus only on one yuan to practice. Okay, I think this is good enough for now. This painting was faster and more carefree than the previous one. Because the idea is to use the reference of the plains and the arrowhead to really understand how the face is a structure to the point that it is no longer necessary for us to recreate the person. I hope you enjoyed this class and found these lessons useful. Thanks for watching and if you liked it, please lift with feedback and follow me for future updates.
 Martin Jaramillo, Artist