Transcripts
1. Introduction : Hi guys. Hello everyone. I'm so happy to see all of you. What I'm planning
to do today is to paint in traditional
medium and in Procreate. So any tool you like, maybe you would like to
paint jazz in Procreate, or you would like to paint
with traditional medium. So this class is for you. Our today's topic. We'll be painting the
leaves in different ways. Like ways I was talking about traditional
and digital way. So what I'm talking about is that what you need for our
today's class is iPad, Apple pencil, or, or
an watercolor paper. Some paints, any paints you don't need to
have fancy breath, chest pains that you
might have from, from the school
types, some brushes, palette and lots of inspiration. I also going to share
this with brushes that I prepared for as a
watercolor paint and process in Procreate. Same visa sketch, same
visa reference picture, same visa paper, and what you're gonna do
during our today's class. First of all, I'm
going to show you some very simple exercises, how to use color, how to blend colors. Some lovely and very fast
exercises that will help you to jump into paint and process with
traditional medium easily. And the second part of my class, we're actually
going to paint with traditional medium,
some lovely leaves. And the thought part of our class will be
painting in Procreate. Let's grab all how to set V prepared for
our today's class. Have some good mood. Maybe we can turn on some music, listen to my instructions, and we can start
painting together. Let's do it. I will
show you step by step process creating lovely leaf illustrations
in watercolor style. And the process of adding
colors, shades, and highlights. And we will paint
different leaves in two ways with traditional
medium and in Procreate. And in the end of my class, you will decide which
style you like most. And as a bonus, the part where we
paint in Procreate, I will share with
you textured paper, brushset, color
palettes that I used. I will also add file of
my pictures that I drew. Feel free to use them for
your own Art projects. This is class is great
for beginner level and intermediate level for anyone who is interested in
painting lovely Leaves. And for those who
likes watercolor, I really want you
guys to join me. I tried my best to make this
tutorial font and creative. Completing this class
will help you to learn how to paint
in watercolor style. And hope also to have FUN
2. Reviewing Materials : I think we're ready
to get started. And as I told you in introduction
of our class, today, we're going to paint
lovely leaves into place, traditional watercolor
medium and in Procreate. And in animal class, you'll decide which
one you like more. We're going to start by introducing all the
tools that we have. And let's start with
traditional medium. For our today's class. I have color palette, I have some graph paper, also have some clean water. And speaking about medium, I'm going to use watercolors. Watercolors, this one. There's a squat shares, also paints that I'm going to use during our today's class. I will tell you all the
names, so don't worry. Guys, I'm going to use
a borons. Number five. I'm going to use Paul Rubens, British thin brush, a drill
bit Turner number six. And guys, I went to move
into painting process. I have the sketch book, Paul Rubens, this one. But first one, we're going to
jump into small exercises. Nicholas, Let's do it
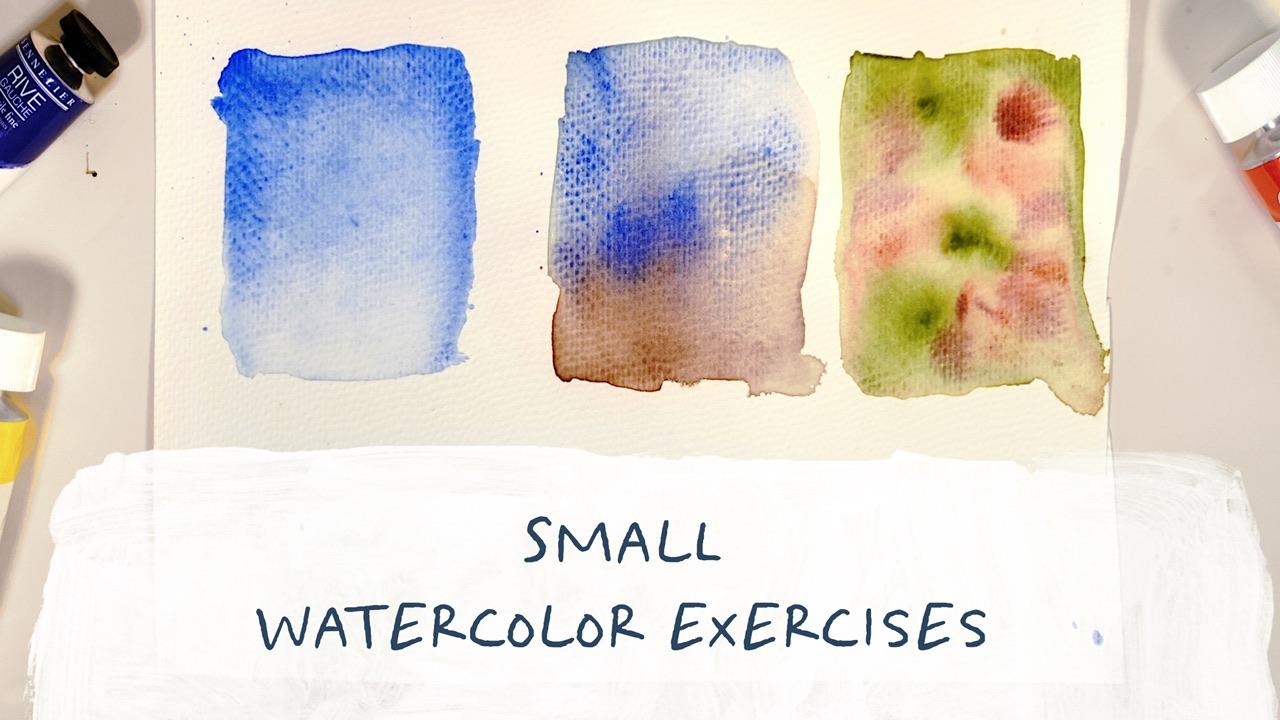
3. Watercolor Exercises: We're going to learn how to use watercolor and how
to feel what a car. And first exercise,
we're going to paint some squares like sad. And our first task will
be just paying gradient. If you want, you might draw
some kind of rectangle, grab a pencil. I wouldn't do it. I just add some
water because this is it doesn't require
you to be accurate. And let's grab some blue color. And little by little, from the top to the bottom, we're going to add the pigment. You see lexus. Try to add the biggest amount of pigment on the top of your art. And then you go to the bottom, tried to add less
and less pigment and add more and more water. So I clean the brush. Now I just use the
water little bit. I'm going to add more pigment. Once again, start from the
top and go to the bathroom. And you see it
thanks to the water. We can have very
beautiful booms. Guys. Colors that I'm using
is ultramarine finest. A number is 494. So by layering, I can
have darker color. Another thing, if
you're things that you added too much
pigment, in this case, you might grabbed some
kind of tissue and just absorb the pigment
with the tissue. Add more water,
grab more pigment. Just put pigment on a
tub and less and less on a button and draw exit. So this is a gradient and as you see from the top to the bottom, see how color fades. As the top you have the more
saturated amount of pigment, and in the bottom,
it's purely white. And as exercise, we're going
to draw one more rectangle. And here you will learn
how to mix colors. What might happen if we mix
color in some specific way? Such task, I'm going to
grab french ultramarine. This is 493. You see, thanks to the water
is a bloom is so beautiful. Like so water spreads in
a very unexpected way. And from another side, I'm going to grab sepia brown. Bear brown is 663. I would like to see
how they mix together. Or burnt umber is also
very lovely option. Let's grab one of those colors. And little by little, you spread the color right next to our French
ultramarine paint. Grab French ultramarine. And added a little bit next
to our sepia brown color. All burnt umber,
whatever you chose. Saying, you're gonna
grab burnt umber. And you see how lovely
it spreads colors. If you want the colors
to be mixed even more, you can just rotates
a paid a little bit. And another option, the third way is that we're
going to use to run my class. We're going to mix colors, but in different proportions. For this occasion, we're
going to add some water. Let's grab olive
green, yellowish. And some areas by just don't
feel it entirely basis color because it's
the sole object because to be going
to add another color. And thanks to water, color spreads very
beautiful way. Some of the paints
are granulated. And that will help
us to get some, additionally, some very
lovely stains effect. So I'm going to mix this
olive green yellowish, which is five to five, together with some other shade. And I think that burnt sienna
would look very, very good. Always like it's
this combination of orange and green color. If you want to have like pretty light mixture of
colors, add more water. Thanks to those blooms. Like when you just add deep the color into the green shade. You also will have very
lovely color combinations. So let's wait. You might add more shades. You see, by adding a
second layer of the color, you will have some unexpected
blooms and you will have more saturated color. So that's what you might
do if you think, okay, I want to have more shades or I want to make
it more textured. You can do it just by adding additionally more
saturated shape. You might add another shades. I grab Indian red, which is 645. You're going to use
this third way of paint and a lot to date
for our leaves. So let's wait until
it dries and after we will see very lovely effects. So guys, that's what we have. What we got in the end is
a result of our exercise. So the first one is you see this is a gradient and you
see it's a color, bleeds a little
bit to the bottom. And here we have that combination
of two lovely colors. And as you see in this part, we see us as diffusion. And the mixture is just amazing. And the last one,
this is the ones that we're going to use for
our today's class, where we grabbed
one primary color and then we're going to
add little by little, we can just deep
color into the paint. And you see here is
the spreading is also keeps us very loved and
unexpected results. I think this is the time for
started painting and lovely. And we're going to see which style you like more, of
course you might use. The second one is
also very lovely. You might just choose
two primary colors and mix them together. And we're going to
jump right into painting process of our life. Finally, it's time
for painting leaves. And I will do site. Here. I have some styles that I
created for my brush sets. We have blank paper
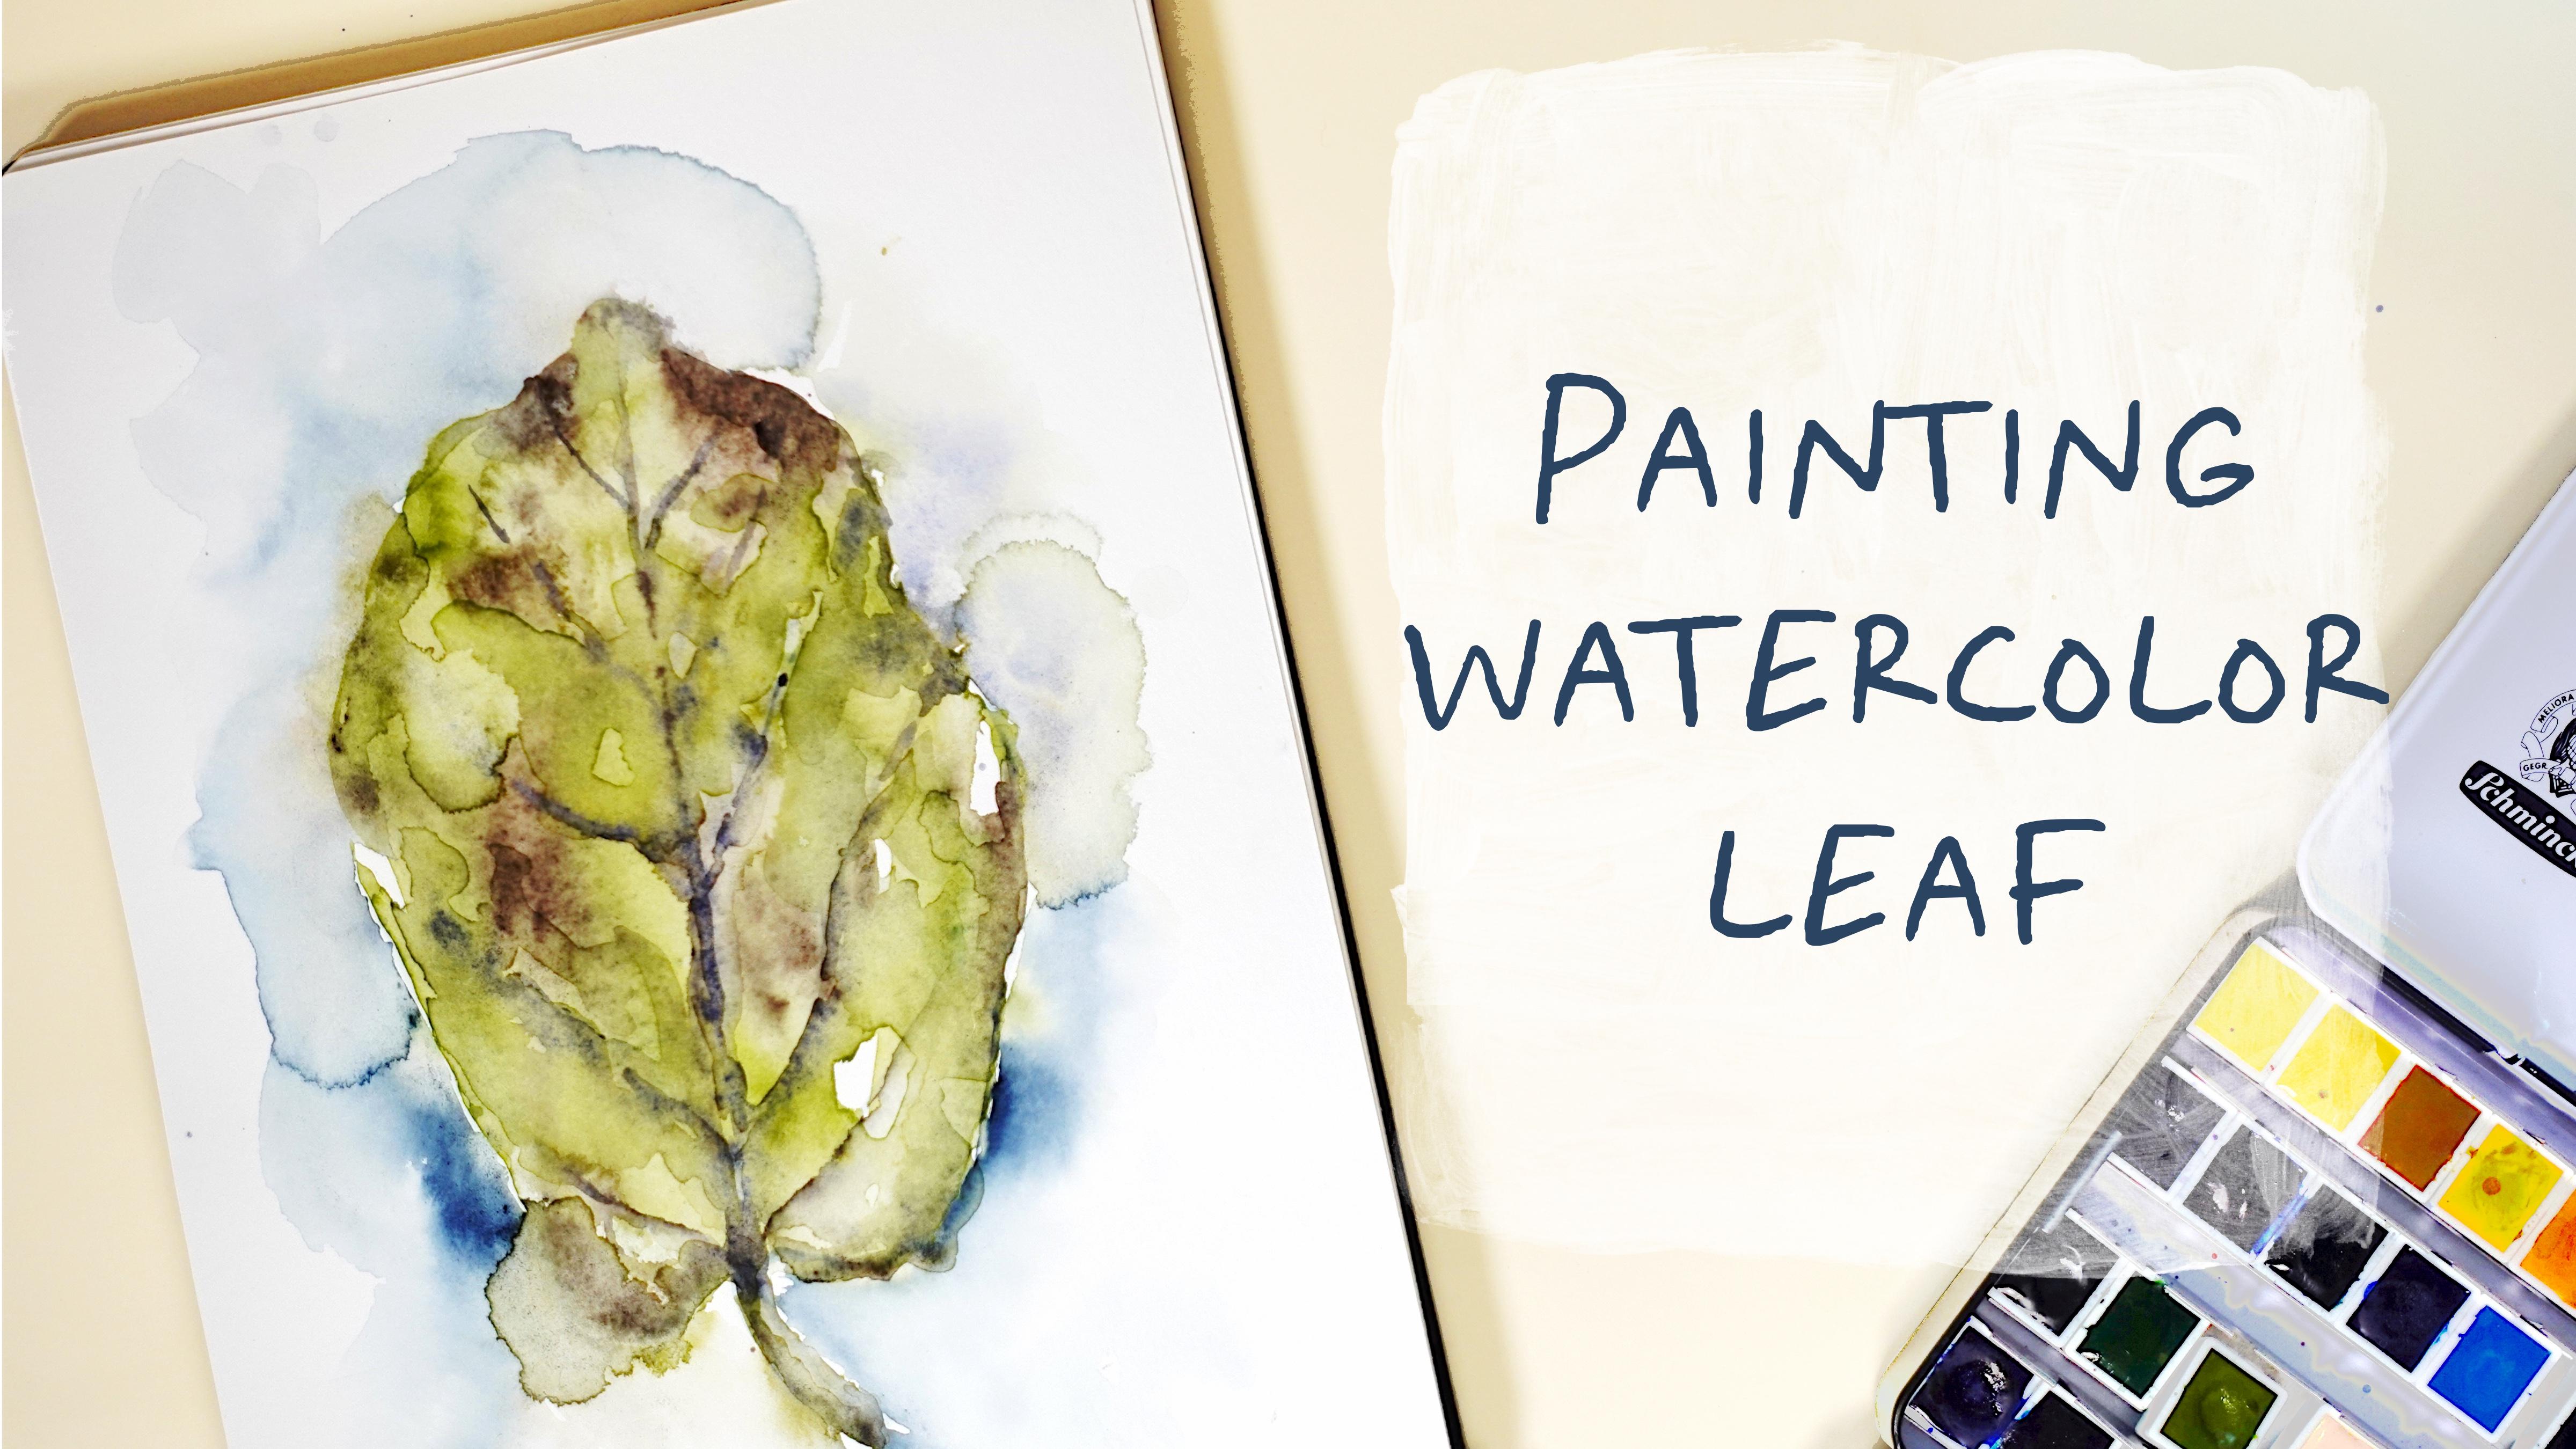
4. Painting Leaf with Watercolor: Finally, what I'm gonna do is either grab is
this pretty thin, Turner brush number six. For creating sketch. You might grab a color. I will grab in DKA, and I just want to show
you the shape of a leaf. And as you see right
here on the screen, this is a reference
pictures that I took. I will add all my reference into the projects and
resources section under the headline resources. And you could download vice away when you
opened my class, please do it in browser. It can be Chrome or Safari. Because if you do it
in Skillshare app, my freebies might
not be visible, so please pay attention to that. Barely seen gentle touch. You might grab a
pencil, it's up to you. You don't need to be
precise or accurate. When you paint with watercolor. You might paint in a loose watercolor
style. It's up to you. I just want to show
you what I draw, what I use when I'm
painting with watercolor. Painting leaves is the
best way of doing it. So guys, this is a leaves
that we have the sketch. The second step is
what you should do. As you remember, let's
just wait until it dries and after that
we're going to add water. And the third step we'll
be starting at and colors. And as I told you previously, you're going to use is a third
method of mixing colors. When you just add the
main color first, nafta, little by little, you start
it and some blooms of nasa. I think this option is best
for such kind of frustration. And I think we're ready. I grabbed borns
brush number five, and I just add some water
within the frame of a leaf. Now about color, I would
think in to grab my green, which is five to four, and olive green, yellow if it's the ones that
we already used. As if it was just to make green. I think this is too
unnatural if you just use just this color alone. So I'm going to mix it
with another sheet. You're also one more option
later I'm going to use this color is perylene
green, which is 784. This is for the second step where we're going to
start it and assumptions. And I truly like the way
how the shade spreads. But because of the water
you have too much water. You see is a pigment
is very unexpected. He sees a bloom we have here. Because I'm a huge fan of
loose watercolor style. So I'm trying to implement loose watercolor art altogether. Research kind of illustrations. As you see from the
original illustration, the color that we
have on our art is slightly greenish, bright. But because it is watercolor, you might add your
own style and I think this color combinations,
food, visit best. But you can go, go ahead and choose the colors
that you think might work better than mine color.
So it's up to you. You have freedom to
do whatever you want. It, guys, I like when
you are creative, I like to see how you like your art turned out
and so beautiful. Now, let's wait until it
dries. I can't grade. And about the second colors
that I'm going to use, I think Sylvia Brown would work perfectly
with this color. It's 663. So as you
see, you might, I might just look at our
reference illustration, reference picture, and just start adding some tiny shades of
the color all around. Then thanks to water, it's not set huge now, but still we have
this water that will let us have this lovely blooms Also be careful don't add
too much of this shade, don't let it spread
on a big surface. Mostly I will go to the edges of our leaf and I will start
it in this brown color. Because as you see
from our photo, we have lots of brown color
in the edges of the leaf. You might experiment, you
might add some shades like I think Blue would
work also very well. My suggestion, if you decide
to grab blue, indigo color. Now let's wait until it dries. And I want to add more green color because I don't want it to
be too too brown. No. So I would let it flow. Again. Let's just
wait until it dries. So the second step is
we're going to pay in. So swaying means for our lovely leave, let's
just put it here. And for that, I'm going to use second brown color
and ivory black 78o. But don't use too much of ivory black color because we didn't have truly
black color in nature. So I'm going to mix
it together with this indigo color bands
that I told you about. It's 485. I think in DKA would
work very well. We said that Brown also guys, I'm going to use to draw
violet color, which is 982. It's pretty special color is a combination of a few shades. You might grab some water
and spread the shade. Just a little bit. And ACT or SAT. If you've grabbed dark shade, don't forget about water and
let it spread a little bit. Excited because it would
look like artificial. Now let's keep paintings us wanes. Very tiny. Grab some water and
like I told you, to, lines should prefer soap. But also when I was at hand, this shouldn't be too obvious. Like I told you, it would
look not beautiful. Now, I'm going to switch
to Paul Rubens brush. This is number one. I will mix my green
and perylene green. Perylene green is 784, I think. So scholars might work very well because we don't
have water on our leaf, so we need to be careful. You might keep adding
water, It's up to you. Just want to emphasize
some green sides. Green shades. Add some water around
our leaf, you see? And because I added some water and some areas for us to lead, we have some colors that
went beyond the line. That's totally fine
because I want to add some loose
watercolor feeling. And I'm grep, indigo color because I think it might
work very well together. And also tune draw violet. In some areas. Don't add too much
darkness into your art. You always have a chance
to add more shades, but you will not have chance to remove them if
they're already dry. And some purple color
from this side. Also, if you want, keep adding indigo color and some sheets. This color is very,
very saturated. Yeah, I think it
works very well. Visit background color. Again. You're gonna give it a try
and you see it spreads very beautifully the parts that
went beyond the alliance. So let's wait until it
dries a little bit and jump into our final part
where you're going to add final details and said, When does it end for our, those watercolor art
in traditional style. Our final, last step, I have Turner brush because I think we need
pretty thick brush and grab your brown and
emphasize some of the shapes. I think yes, softer
brush will do better. Let's return to Paul
Rubens exhibit brown, this Tundra while it, and I'm going to grab a bowl
saw olive green, yellowish. So you add some
pigment and after add more water and spreads a
pigment created as a shape. And there are many ways
how to show the veins. So what I'm doing is just adding different shades to make our illustration
slightly brighter. Next segment, brown color. I feel about my bedroom. I have worked with some wet
surfaces, not dry ones, because I like to give
freedom to do the paint, to flow into some
unexpected directions. I mix tangible eyelid
with sepia brown. Like I said, I added some
contrast or our art. And I think we've done all
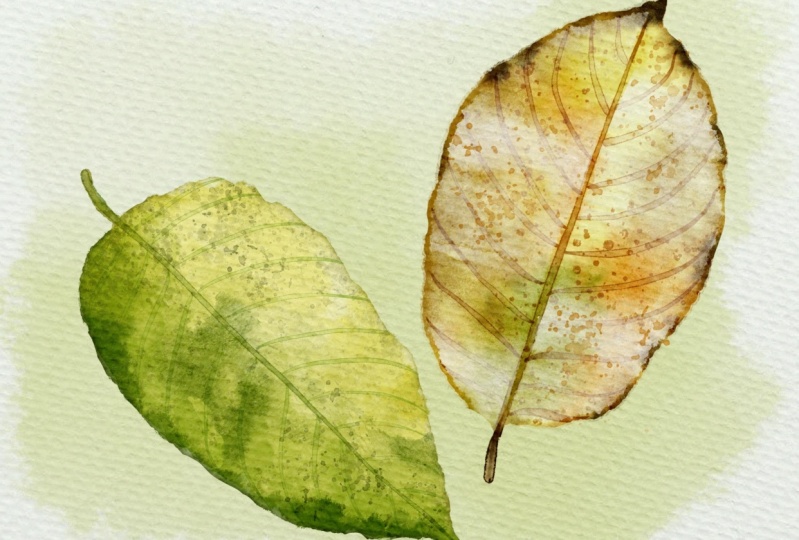
art is our lovely leave. So you might compare two
pictures that I took. This is a watercolor. This is a way how we paint
in a loose watercolor style. And I hope you enjoyed this part, these
traditional middle. And now let's jump into next
part where we're going to use Procreate for painting
leaves in watercolors
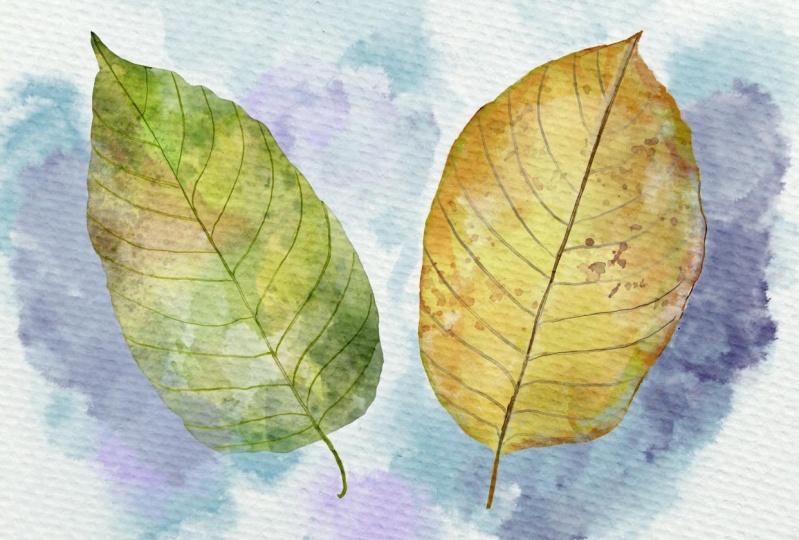
5. Painting Green Leaf in Procreate: Well guys, I think
we're ready to move to the next part
of our class where you're going to paint
those lovely leaves in watercolor style, in Procreate. And then guys have already
prepared for your sketches. You might find them
Emmons of freebies alone. These reference illustrations, reference pictures that I took. So let's get started
and first of all, I'll show you how to
create textured paper. Well, you need to open browser. It can be Chrome or Safari. After that, you need
to tap Plus and tear plus again and
speech prompt pixels into itches and nine
and write nine 11 " with 300 DPI resolution
and tab create. Rotate the paper because today we need horizontal orientation. And after that we need to
create couple of new layers. I created for your
color palette, this one, so we
have three leaves. Paine's a second and third one. Feel free to draw the first
one I feel like of course, and speaking about brushes, I'm going to use my
border color brushset. This is a combination
of my brushes of Procreate brushes and
some stems and paper. So how to expert paper,
what you should do? First of all, you need to
open my class in browser. It can be Chrome or Safari. Why you need to
open it in browser? Because if you do it
is Skillshare app. My freebies might
not be visible. So please open it
in Safari or wrong. And then you need to go to Projects and Resources section. And in the right corner under
the headline resources, you will find all my freebies. Okay, when you export
it paper, Wonderful. We're going to use
this one today. And as you see, it doesn't feed the size of our
canvas a little bit. So what do you need to do?
Jazz, move it to the sides. Here. After that, we need to
double-check cases layer, move one blend to Layer
Mode to Color Burn, and move another
one to linear burn. Then duplicate it and merge
together, large together. After that lowers
opacity of linear burn mode till 50, 60%. And then select two layers by swiping right?
And press Group. Now guys, I'm going to
group these layers, the 3y1 and press group. First Leaf, second leaf. So you're going to move
to the first leaf first. And then after finishing
the first illustration, we're going to jump
into second one. And now I'm going to import
this cage into the Procreate. Also call to action button, Add, insert a file and after Z
to go to Downloads folder. And you will find PNG file, that will be our sketch. I'm going to draw
those two leaves. Then I'm going to lovers
add passage of the sketch, enable them over to multiply. Go to the first leaf, I go to the basic color. So once we got our sketch, we have our reference
picture and we're going to paint those lovely
to lovely Leaves. And guys, I will show
you two ways that I use when I draw some watercolor
illustrations in Procreate. So you Nando my class, you will decide
which one you like most severe go to basic color. Then we go to Bluetooth,
the watercolor. And after that,
we're going to grab this pretty bright color. This one. If you have overlapping, it's fine. You can use blend into and as a blender I am using
boil water drops. You can also use this
brush as a brush, not just as a blender. And then have some varieties. Some options like cis, slightly darker
shade, blending tool Green shaped render. I likes as it's Blender
creates lovely blotches. Better ArrayList. Here, raise some of her Lepanto
furan beyond two lines. Let's return to yellow shade. And I'm quite add
some shade here. Second shade, second step, you go to the shades, a layer, and then I'm
going to switch SEMrush. And here I will grab
bull water drops. Now guys, I'm going
to set this layer as a clipping mask and moves Blender layer mode to Multiply. Go to slightly darker shade. Brushes, fairly
pressure sensitive. So if you want to
have darker shade, you're going to have it go to slightly lighter yellow shade. Likes it. I can. Next thing
that I'm gonna do, I will go to Adjustments,
go to curse. And here I can play visa
intensity of the shades. And you can also
play this situation. So that's what we had now, what we have right now. And I like how intense
the shades are. Next thing, I want to make
the edges a little bit dark. In this case, I will go and I'm going to merge together
those two layers create 1 mol or above. Rename. Again, multiply. Let's return to our
basic color layer and then go to the
selection tool, choose automatic,
and just tap once. Then go to feather and
press F4 around this one. Then go to hue saturation
and brightness. And loggers the
brightness till 25%. And turn off the selection. Now, if it turned off
the sketch for you, while you see here, we have dark edges. You can see here you see we
have this dark edges around. So that's what we just created,
these Digital watercolor. Okay, Let's turn on the
sketch layer again. Yeah, so we go to the
Shape Layer one more time. And here I will switch
the brush dense texture. Once again, this is
Multiply blend mode, and I will go to
the darkest shade. Guys, don't forget
about clipping mask. Just press likely. Guys, if you don't want to
have too much splashes, just go with some far
away from the leaf. If you want to have textured, like lots of splashes,
you can do it. You might also go
to post clashes. This is a second brush,
whereas a specialist, I know it's a dense so you
can just tap in any way. And then you can go to curse, go to curves and
adjust brightness. And final touches. Let's move to
multiply blend mode. Here we need to show us way. Guys, I decided to grab
the edge your brush. This brush is very
cool because it gives us is Fx that we need. You see like Z lines. What we have here from
the edges we have darker line but the
middle is pretty light. Brush gives us this African. Wonderful. We can
do the same ways. Another wanes. Let's go to a little
bit lighter color. So if you press lighter, you will have darker
pigment here. Likes. And final, final dodge. Let's duplicate shades
layer like this one, clear one layer which isn't clipping mask plane
the layer mode. And we're going to add some
very lovely final touches. So I'm going to grab
dark green shade. And now let's go to
the stem brushes here, the ones that we have. And let's just experiment and
see which stems would work. Great. And guys, because this is semi-transparent
watercolor brush, ones that we have
with basic color. It's a shades are not
set reasonable at first. But if you use curves
or duplicate the layer and you can see is it's a shades can be more visible
and more vibrant. I like it. I'm going to
duplicate this layer again. You see like when we duplicated
we intensified so shades. Now there are more
reasonable, clear. Now let's play with Watercolor
stamp for once again. Duplicate and you will have this lovely blotches duplicate. I like it. Go to curse. Make it darker.
Go to saturation. You can play this color. What about giving it this way? If you don't like
some of the standard, just simply turn them off. Also, you might go to
the layer where we have stamps and just decide to
buy you want to place it, you might rotate them, know whatever you want. Flip horizontal, flip vertical. I think as a stamp, looks very good
here. Go to curves. You might play with scars. Go to hue, saturation,
brightness, increased situation
plague the colors. And if you are satisfied, just leave it like sad. We can create one more layer. It's an clipping mask
blend the layer mode. Don't forget to turn on Multiply blend mode. Like that. I'm pretty much
satisfied you're going to leave the leaf like that. So you might see me. Now let's jump to
the second leaf and I will show you the fastest, easiest way how to draw it
6. Painting Yellow Leaf in Procreate: So guys, now I could go to another group layers and
we go to the basic color. And speaking about
the color palette, this is a lower one, so it will grab the brightest
color and grab edge brush. So guys try not to leave your Apple pencil
from the screen. Of course, if you
do it, it's fine. You might use blending
tool and blend overlap. First part of a leaf is done. Now let's move to second one. Leaves this tiny gap between two parts of a leaf
like this way in line. You see I lifted
my Apple Pencil. So I have some overlap pins, gray blending tool and
just blended this way. Now lover says Size and
finish paint in this part. Again, very bright
and lovely leaf. Then have even go to
the shades layer, clip it, change the plane, the layer mode to multiply. Likes it, grabs life
with darker shade, this brownish wall, and
grab both salted brush. You see we just go to the edges and add like falling
into picture. We just add a tiny
bit of shades. Edges of sending. Let's turn off the
sketch for a while. You see the don't need to create additional edges to our leaf because it's a brush
already did it as well. Go to the sketch layer, my axes. Let's create 1 mol
or in-between. It's automatically in clipping
mask Blender layer mode. Go to multiply. Rename. Likes that. If you want, you might
place it on a top. Now, grab a little
bit darker shade. Now smaller size, and go to
the edges to the darkest one and see where we
have this dark lines. Now my suggestion GREP,
very bright color. And let's start adding some
bright shades to our leaf. Even bright yellow. Now greenish shade. This part we will have
some Green shades. Tiny bit. Now if you want, you might
go and grab your brush. Bright brown, I think
when they Fine, go to final touches. Change to multiply
blending mode. Labours this size. And all what we did. Previously. My situation press harder because we need
to have it pretty bright, not dark tone. It also should be in
Clipping Mask Mode. You see because the
brushes semi-transparent and when we use clipping
mask because of xat, as it color is not that bright, but it doesn't matter
because we can just go and duplicate the layer. Now look duplicate. Now I want to create
another path. Move to multiply
also, right shades. And this layer, I
want clean edge here. Just want to show some machines. And now guys, we're gonna go to the shades layers they swell. Go to curse. And I want to make it slightly
brighter, event occurs. We can go to another Curves
Layer, shading layer. And also you can play
this shades here. So this is our original color Now I've turned out that's
a leaf is so colorful. I'm going to keep
it colorful way. Go to find out that
matches both brushes. Grab a reddish shade. Then go to curse. Makes it splashes. Very, very bright. And guys, we've
done is to leaves. Now, if you've want, you can create some background color. For sad. We will create one more layer, rename it right background. By example. I put it on the
needs of everything. Then I will duplicate
the second leaf. And you see it by
duplicating it, we made it even brighter. Let's turn off one
of the leaves. And then I will merge
together also layers. And I will merge
together ways to sketch. Now let's the same
visa first leaf. Also, you might duplicate it
and it's very, very bright. And I will go to one
of the layers of leaf. And I will mark it again. I will put it on a top and
I will merge together. This one we sketch. It's barely seen. So let's turn off
reference picture. And now I want to just
create lovely composition. In this case, I will go
to the selection tool, choose freehand, and I will change their position
of our lovely leaf. Or if you want, you can rotate this leaf and keep it like set. The second thing is
that we're gonna do if you go to the
background layer, my suggestion you might
grab book wash water is, is brushes very
lovely, neutral color. And just brushes lovely
because it can help you to add some texture. And if you press harder
with this brush, you will have more pigment. This is a first option trust
way what you can do when you create some background
Illustration color, you can clear it now, have the same color, but we go to boil
water drops, brush. Another thing you might go to both sorted brush and add
some lovely feelings is one. You might change the color
to a little bit darker shade and go to cars,
desaturated or saturate. But my suggestion, when
you search brushes, you might paint on an area
where we have our leaves, in this case, go
to the free hand. So select the area
where we have our Leaf, then three fingers
down and press Cut. You see those same
is another leaf. Like I told you, it's a brush to use the semi-transparent. So of course we have
some overlapping. And guys said was the end
for our today's class. And I hope you
enjoyed it and you decided for yourself which
style you like more, guys, I will be very happy
to see what you create. And if you want, of course, share with me we all
lovely Illustration. And during my neck class, we're going to paint lovely, lovely character in watercolor
style in Procreate CEO. This is the end for
our today's class, but I hope it was
enjoyable and you'll learn something new about the ways
how to paint in watercolor, how to implement
those techniques, it be used in traditional
media into the Procreate. And maybe in end of my class
you realized that, wow, I like to paint in Procreate more than in this
traditional medium. Or when the contrary,
you might say, I like to paint based
traditional medium more than in Procreate. Oh, maybe you like both ways. And I hope that my class was useful and you
learn something new. You realize something new
about yourself and your Art. And as usual, I will be happy
to see all your artworks. Give my own feedback
what you drew. And let's teachers and
next class, Bye bye.
 Inga Yoon, Digital illustrator and teacher