Transcripts
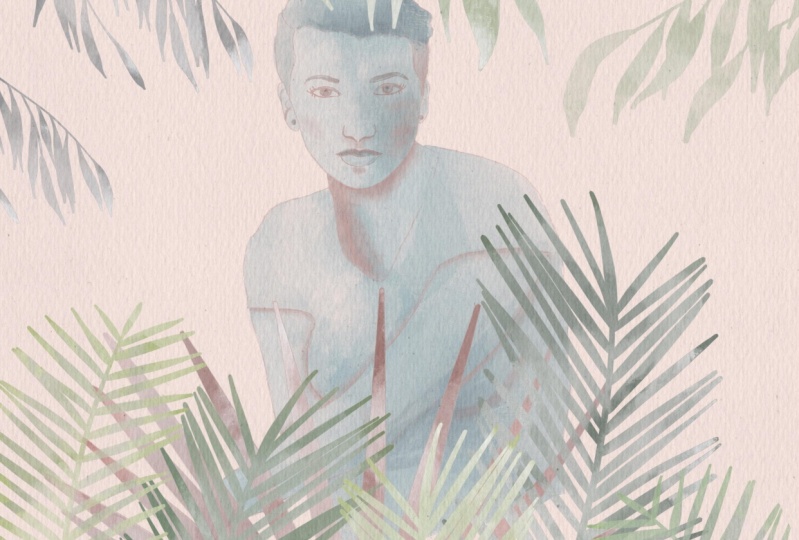
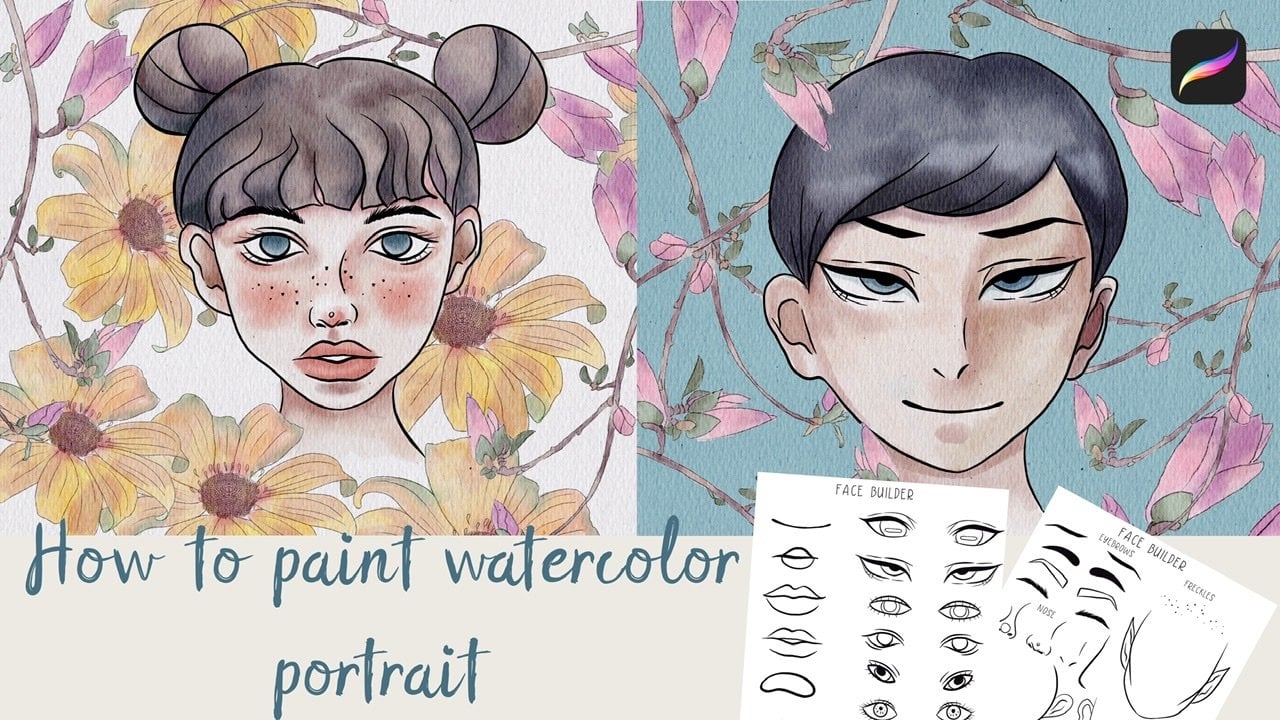
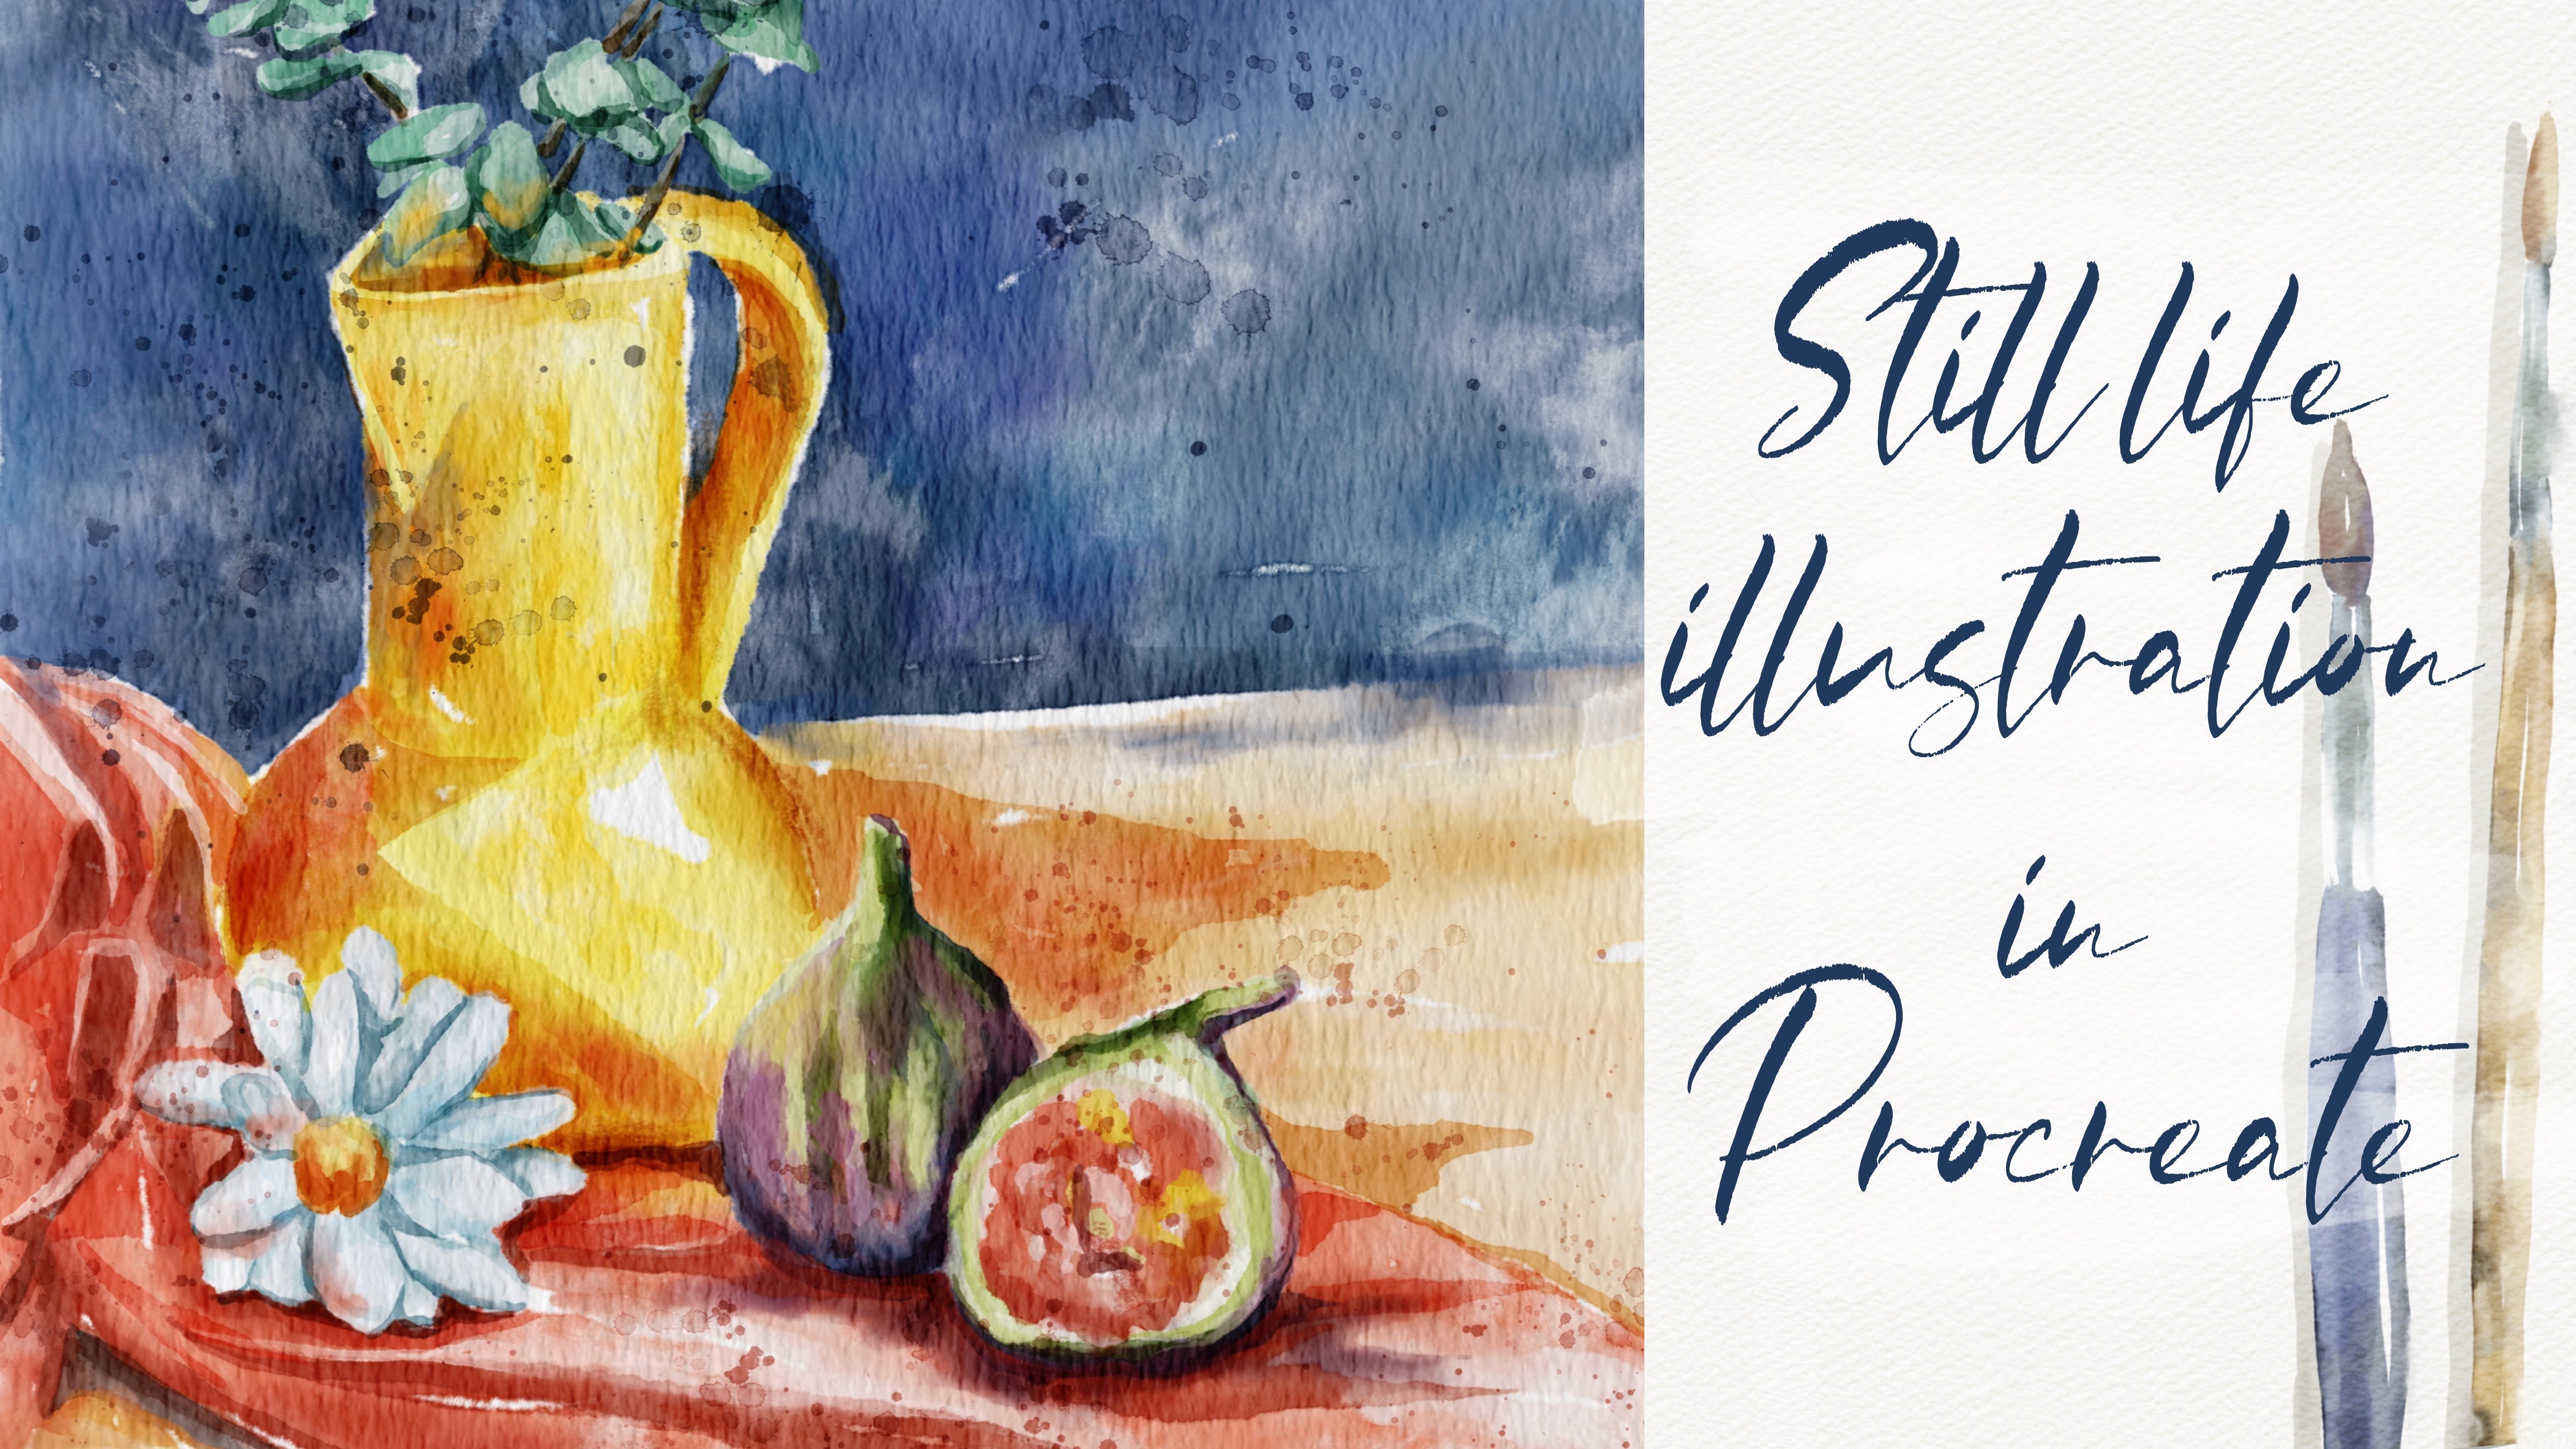
1. Introduction : Guys, welcome back to my class. During our today's tutorial, I teach you how to paint amazing watercolor portrayed in a monochrome style. That means that you use just one color and using differentiates one curl for Craig and a beautiful portrayed. And I also want to add the materials to my portrait and I'll teach you how to use it. So let's get started. Hi guys. I'm eager. Freelance illustrator. Welcome back to my class and lead spanned all together. Amazing watercolor portrait is botanical in monochrome style. That means we will use just one color for the whole illustration. You can pay into your own portrait printed later and put in a frame. Today I want to show you, is it watercolour? It's simple and that's a real fun. Today I will teach you how to create a texture paper. How do use original procreate brushes for watercolor painting? How to paint illustration in monochrome style. How to pay into your own portrait in watercolor style. I will teach you what is light and what is shadow, how to create a beautiful composition and also how to pay and botanical in a water color style. I will also show you two techniques of edX and shades. I will show you my whole process from start to finish. And as a bonus, I will share views you might texture paper, reference pictures, sketch and shade in layer along with my pictures that I drew. Feel free to use them for your own art projects. Because this class is more for intermediate level, even some experience artists can find here some useful tips how to paint watercolor portraits in monochrome style and of course, inspiration, your class project. We will be next, paint your own Portrait using the tips that I gave you today. I will use procreate for this class with his iPad, apple Pencil. So if you have it or some other drone pets or just regular paper with Spain's, please join our class and good luck.
2. Creating texture paper and sketch: So they say, I think I can start and frustrate all you need to create, say's canvas. And it will be something like 911 inches. And we have 300 dpi. So don't forget to switch from pixels to interests and create that. Now extra paper and said, I will create a couple of new layers. And after I go and press, Add and insert the file, and after either users my textured paper file. So we have, our texture paper is exactly the same signs that I have. And now I need to replicate is two times. And onclick is, should be somebody here. And after I switch mode to Linear Burn and color Perkins. And guys. And now we'll test case it two times. And large Color Burn together and leaner burned together. And also, if you want, we can duplicate it one more time. Merge and merge. And now I can lower sub positively axes. And Kohler Bernice felt something like 60 or 70 or sand and after group and rename a, call it extra paper. Great. So now we have our texture paper and we can start paint in both restore. Once again guys, I need to get my reference pictures that I found on our website on splash, so I will answer SAM S foul. And is the main feature of our today's class is said, you like unquote options, how to use procreate brushes for our watercolor painting. And for Asad, I'm gonna go and grab my paint and instead of mine, it's procreate sets. And I will go to pain to say and hear a VEVO goal and grab our goulash brush that we'll use as a watercolor. And also like Oriental birth, you are also used at one as well. And after the gold to artistic set. And I do like wildlife brush, it's, it's amazing one. Hence the eyes are ones that I like these old beach. So those precious we going to use today and I will teach you how to use it. But first of all, we need to insert our reference pictures. So guys, you can insert, you can use any picture you like. You can create portrait of yourself. Here I am showing you just as a pattern is a scheme. Once again, if you wanted to create your own portrait, go and grab your own picture and inserts it and use it for your own art project. Or if you want, if you don't care home you want to draw just one to practice. Go to unspliced.com and type portrait and grabs a portraits at two leg. And now, because I'll paint and it's not just about portray this also about photonic goals. And I want to combine girls portraits and botanical altogether. So now I'm gonna go and grab our botanical illustration. Now, we'll turn all we'll make into visable previous layers and we'll create a new layer. And we will lovers out passages Edge layer because we need to see what is going on and we need to trace it's properly. And this way, if you go to Sketch and said and crab HB pencil, It's a tough. Turns it off and now I sit in each layer, make our previous kitsch invisible. Once again on a new layers. Let's start. Tracing is fine as well. This looks like a feather. And now girl, perfect and sketching. Okay, so this finds, turns it on our own. And then I think this one is pretty easy equal. Ok. Same goto the sleeve. Now I increase up positive and nice. Let's start a into botanic goes first. Yes, it's here. And we need to be in the layer that is below our extra paper and keeps it in mind. And now let's start taken different brushes. So I wanted to start with sh. Sh.
3. Painting botanicals Pt. 1: Now let's choose a colours because we will need said. Let's plays at summary here. Increasing capacity to maximum goes winnings as colors. And now I want to move our layer slightly to the right. And I think now we can start coloring. And guys, it's very important to see the shades like the light side and dark side. But in our today's paint and we're not going to use we will not use set much color variations. We will use just one color and differentiates. So just means a smaller Chrome painting. And I want to show that it's actually very cold if you pay interest with one color using differentiates. And for that, I'm gonna go and grab, I actually want to use blue color and yank something like said. And I will use like mediums color like you see this one. And after I will use the same color but differentiate. And guys, you can go beyond the edges later. You'll just cut set. You can press harder. You'll have more shade, you will have more pigment. But like checks that pictures that you have and parts where you see color, our green color is darker. It's harder because we need some shade in that area. Okay, great. Now, what you gotta do is just Dublin city after the merge together. And now we're ready. I go and grab selection, go free hand. And now I need to cut some colors so that we don't need actually god cut. Okay, now let's go and grab our gland in torque. And as a blender or you're going to use old beach brash. It's pretty nice. Now let's start adding some shades. And I'm gonna go grab selection tool. And once again, it keeps it in mind that we have chess and feather. The edges C-shaped. You don't play this color variations in this very, very nice. Now let's start adding some highlights. A handwritten blends and sharp areas. Cox, Cool. She situation brightness. Now let's turn off, ask each layer. Pretty nice. Hazard, hue saturation and brightness and lowers the brightness. Increase situation. I went to shows us sharp edges. I don't know whether you see such a node. You see we can guess a sharp edges that can help us to reach those watercolor look really like it. So great. Now let's move to the next flora, next Britannica. And we have this sleeve. And let's increase the saturation and causes light to see light side and the dark side. And in this leaf is you see we have light froms and right side from the top and from the bottom and left side. So let's immediately will be in a shadow. You can, you can go beyond the edges in total. And let's erase parts of a neat stably Kansas players and have to march to cancer. Now let's start 18 sheets. Now highlights. But this is not the end. Next. So X1 to automatic, rather lower supply to this. And as you might see, is an esprit de and logical style. But guys, as you remember I told you it's a trivial use also as a brushes.
4. Painting botanicals Pt. 2: And guys, as you remember I told you is a two lawyers also as a brushes. And now I think it's time, so I'm gonna go and grab my hold. Beach brush. Not Mung artistic from artistic set, from procreate. And after said, you're going to go and press select. So it means that our leaf is selected. It looks at Pfizer, so I want to call it the buzzer. And after that, we need to go and create a new layer is it does involve our leaf. And now we can draw on that layer by the guys because the press select, you see become gold beyond edges. Draw just on an area that is selected. This very convenient. So I want to go and emphasize some shades. Perfect. Now I'm gonna go and grab my violet light and this Prussians and amazing. I don't know whether you've seen it on marred, darker shade. And I am showing some different details. You'll see it looks like feather through what it looks like Pfizer. And I think this is very cool. Now let's delete reference picture. Finished our first piece, and now we'll just smart set together. Now let's just same as our previous floral ones and create a new layer. And now we can paint. And I'm gonna go and grab all beach first. In this part, I don't want to add too much shade. The tail light. Now about why applied. Sometimes it's difficult to paint on top of our previous layer. So what I did already, as you might see, I already turned off our selection tool. So now when you do that, you can go and draw the young, our floral beyond its edges. So that's fine because I told you sometimes saying please in mask, you just need to turn off selection tool and just keep painting like when a new layer. If you want to reach the true saturated color. I like it. And as you see, this is a shadings had to be made. I would just marched together and we have one solid layer.
5. Painting portrait: So let's start and I will Logger set positive Al's Kitchen layer. I exist. And guys, I want to tell you like speaking about shadings and shading techniques. And probably some of you might ask for which side should be at lied. Froze says there should be a shadow. So dependent on where we have our light source. And I'll show you an IC50, have our girl and we have as a light source falling from the ride here in the front. So that means as this far to will be in a live. So it's good to pre, to lighter comparing to, to the other side. So and in this way, disease area, we'll be in a shadow. So this one will recover. Like actually what they have promises side. Here I have a shadow. This bars will belied through because here we have a bone from this side to have a chaise. It goes from our head in an egg. It also Danish shadow as well. And here we also have a shaved. And here you have a small shade. So perfect and obviously is, is part of a hair also will be in the shadow. And this one will be lighter. You might sit here equals slide calls promises side. This one is lighter and this one is darker because it's closer to the ear and so on. Same here also this bar til the inner shadow. Also we have shade here. Close the light side is here. So this is slide or this side is pretty to live. So now I hope everything is clear for you. I don't know whether he needs is shading technique. I can give it to you as well. So let's not arrays at one as well. And here we have shade because this area is close to 0 to check it. And this area is also in a Chenault. This area is in the shadow because because of a Chest. Same here. And we have shade from this side. So likes it, I hope now is clear. So let us start it in shades. And also like guys, keep it in mind and sit, opera is darker, sends a lower one. And we have a shade poems and noise as well. So I hope now is batch or like Zen descendant of the dispatcher. Start painting. Let's start with adult E if you need. I can also adds up to you to the description of our class, probably, yep. It might help you to understand, whereas a shadow should be, I would turns it off. And now once again, we need to create a layer just below our textured paper. And because the paint and, and grab our golf rush. And let's start in shapes and colors. But once again, first rules. Real edge, some basic shade, and grab all Beach brush. This one is easier. Keeps it in mindset to be neuter shortages patrons this picture as well. So in this area we have a lighter side. Here's Lightroom. Keeps it in mind that had T-Shirt is black. So I drill bit, doctor, try to add colors everywhere because later you will yet really the same techniques that we used before. Now you remember about techniques, what you can do just, you can go and return as shadings and just get shaded according to what I told him. Now begin turns into hope. And now it's way more better. You can use same techniques that I just used io ad to shade in part to you as well. Because I told them what he might do. You can go and I'm going to create this payer clovers passages likely enough to merge together, idolize if you in right now. And now, my Ease tool. At some details and nice, you're gonna go and grab all these first. And guys, for this class, we don't really need our color palette costs. You need to grab just one colors that you like and use a circle and just move throughout the so-called from lighter shade, darker shade. So actually, this is pretty complicated. But if you learn how to do that, it can easily alive significantly. I'm going to hold you while you're trying to make it as simple as possible so and save time because a known or basically didn't have so much time for P. And in all the details. So play with the shades. Darker side, darker shades, lighter shade. And I'll also guys, if behalf some calls, dress some subparts where I'll close as close to the skin areas. You'll have a shake. Like for example, now it's time to change and grab some darker color. Same color, darker shade. Very important. I am not changing the color. She looks very 3t. And various you can keeps us. Sketch layer is all up to you or you can draw an Yuan CFI into without Amy's kitsch players. Okay. Well, I think it's timeless. Turn off our sketch layer within it. So once again guy, so you can turn, you can leave the stationary, you can turn the talk. I want to turn it occupies. I wanted to add on some shades or our girl and let's start adding shades and intrasite protocol. My selection tool, free-hand to add some shades. And you remember how to proceed and shade here. And already after the professor 2% hue, saturation, brightness and a longer surprise. They think like Citizen Kane, so-called. Now let's keep adding shapes. Treasure, brightness, increase saturation and logarithms.
6. Final details: And the final details. And I'm going to go and grow pool or old beach possess. Right again, look at this picture. You have shaved here. You might see some from this side. Here, you see we have a shade. Here's a portrait. It takes time, english portrayed. But I like how she looks now. Very cool. Okay guys, now they can turn off reference pictures. And that's our girl. I will exit feeling. And you see we had before and now we have a swan and now's a face has volume. So I will merge together. And after guys, it would begin to move to the next part where we can play around and create a beautiful portrait competition.
7. Creating composition: So we replicated all our layers. And now let's play around and less creative, beautiful composition. And I'm going to go and put her in the middle. You can lower the size of her. My x's and I wanted to play around and USA Sirleaf, first guy, see, yep, now next thing is a very important bond is said, we actually need, you see our paintings at Transparent. And I don't want to have them transfer them to want to create ground for them. And as this way when you place leave an hour, gills poor portrait bond with each other. So they will not overlap each other. So what you've got to do things this way is said, Gaul and replicate our girl. And after I will go to the lower layer, hue saturation brightness, and increase the brightness to maximum. And add as uppercase it two times, even three times, then released. Do you have, as you might see, let's turn that off. Turn off background, picture, texture, paper and out girl. And as you might see, these two have some parts. It's not transparent, so we go to white color offset. And after I'll go and grab hold beach, brash. And let's keep adding some colors. Turn off our sketch later how a playground and let's merge together. And now we have our girl. And now, as you might see, she is not transparent anymore. So let's just saying vis our leaf. The obligate lower layer even to make bite them located two times, three times, merge together. Turn off our background textured paper. First layer now B sees it not everywhere, it's transparent. So they have a white color. And let us just go and feel some areas at and why that would be fined. Turn on texture, paper, bag, ground, leaf. And that's marked up together, say B's loss, just leave this one. Wk To make it wide replicated a few times. Merge together. Turn off our previous one, background, texture, paper. Press, select white color. And let's just grab some white colors. Perfect, now let's replicate it once again, posts beneath our pictures, not transparent background. And now we have our girl, she's here. And you don't need like two times cos, we'll create two different portraits. And I want to use this leaf first and our lifecycle being in front of the girl. And I wanted implicate that a few times and play around with competition. August, she's cool. I like sick feeling or like how it looks. And I want to merge together all the hairs. But I wanted to marched altogether with the girl. Guys. I lack our composition or what you can do. It's all up to you. You can keep it that way, or you can go and play visa background. It can be same. So as you might see, it can be black or extremely wide, or you can go and grab some Maza colors. And this is our first theme, Dean, and now it's moved to the next one. So turn off on these, and we still have our girl. And now I want to play around thesis leaf, this feather leaf. And now once again, I Chrome. Can be say dark. Also guys. What he can do is you can merge two Giza layers. Parish Disease Tool. And this, you can change the color of your leafs. We're gonna go and grab a green color is all up to you, for example, this one. And I will go and grab two layers of disc behind our girl. And in this variable to his situation, brightness and I went to go same. Color almost by slightly darker causes is bad. They hide behind outcome. You can be like that. You can change the color of goes well, she can be purple brown. I like brown costs. Very nice. Yeah, like it takes us. Well, guys, I hope you enjoyed my today's tutorial and now you know how to amazing portrayed Mason botanical combines it together. How to add shades about a light source, about different color variations. It's all up to you to paint your picture in your own style. Choose a god is a tool like a rose. It was the end of our class, guys. I hope you enjoy it. And I today's class, and I will look forward to see your own artworks. And if you have any questions, if you have some suggestions, please go ahead and leave your comment or your suggestion in the discussion section And let's see it as an x time. And guys, next time I'm going to paint with you being done in Japan. Nice tile. So let's see each other next week.
 Inga Yoon, Digital illustrator and teacher