Transcripts
1. Introduction: Hi guys. Hello everyone. Welcome back to my class. During our today's tutorial, I teach you how to paint for different watercolor invitations for different occasions. Such will be wedding invitations and birds. Do you limitations this useful for your birthday or some of your friends birthday. So if you are a designer and I believe you are, you can pay into your own invitation. And also if you are some of your friends also might have a wagon. So you also can visit person who could create vegan imitation. It also good for your own portfolio. And I created laws of brushes for today's class. And I believe you hit like Sam. So please feel yourself cause it take your iPad and what pencil or just regular watercolor paper and pains. And let's go. Hi guys, same Inga, freelance illustrator. Welcome back to my class and let's be and altogether, cool birthday and wedding invitations in vertical style. You can use the illustrations you'll create for Poston in Instagram, added to your portfolio or sell it on Etsy gum rod and so on. Today, I want to show you that vertical. It's so simple and it's a real Fun. And in the end of my class, you can see it today. Teach you how to create a texture paper. How to locate floral elements on a canvas in a beautiful way. How to use calligraphy brush, how to paint a picture from the sketch. You can draw your own sketch or use mine. How to use my default procreate brushes for watercolour paint in what is a process of creating bursty and the wedding invitations? What does a new answers you need to know? If you want to create an indication how to use more Caps. I will explain what is clipping mask and we're going to use it a lot of times. I will also show you different techniques of add-in shades and highlights. I will show you my whole process from start to finish. And as a bonus, I will share with you my new texture paper, new custom brushes, mock-up, color palette, sketches that I created. I will also add files of my picture that I drew. Feel free to use them for your own art projects. This glass is great for intermediate level and can define for beginners if you watched my previous classes and can be useful for experienced artists. Probably here, you can find an inspiration in new ways how to paint invitation carts in watercolor. Your class project. We will be next paint an invitation using ETFs and brushes that I give you today. I will use procreate for this class. It is iPad and Apple pencil. So if you have it or some massive drawing pads or just regular watercolor paper and pains. Please join our class and good luck.
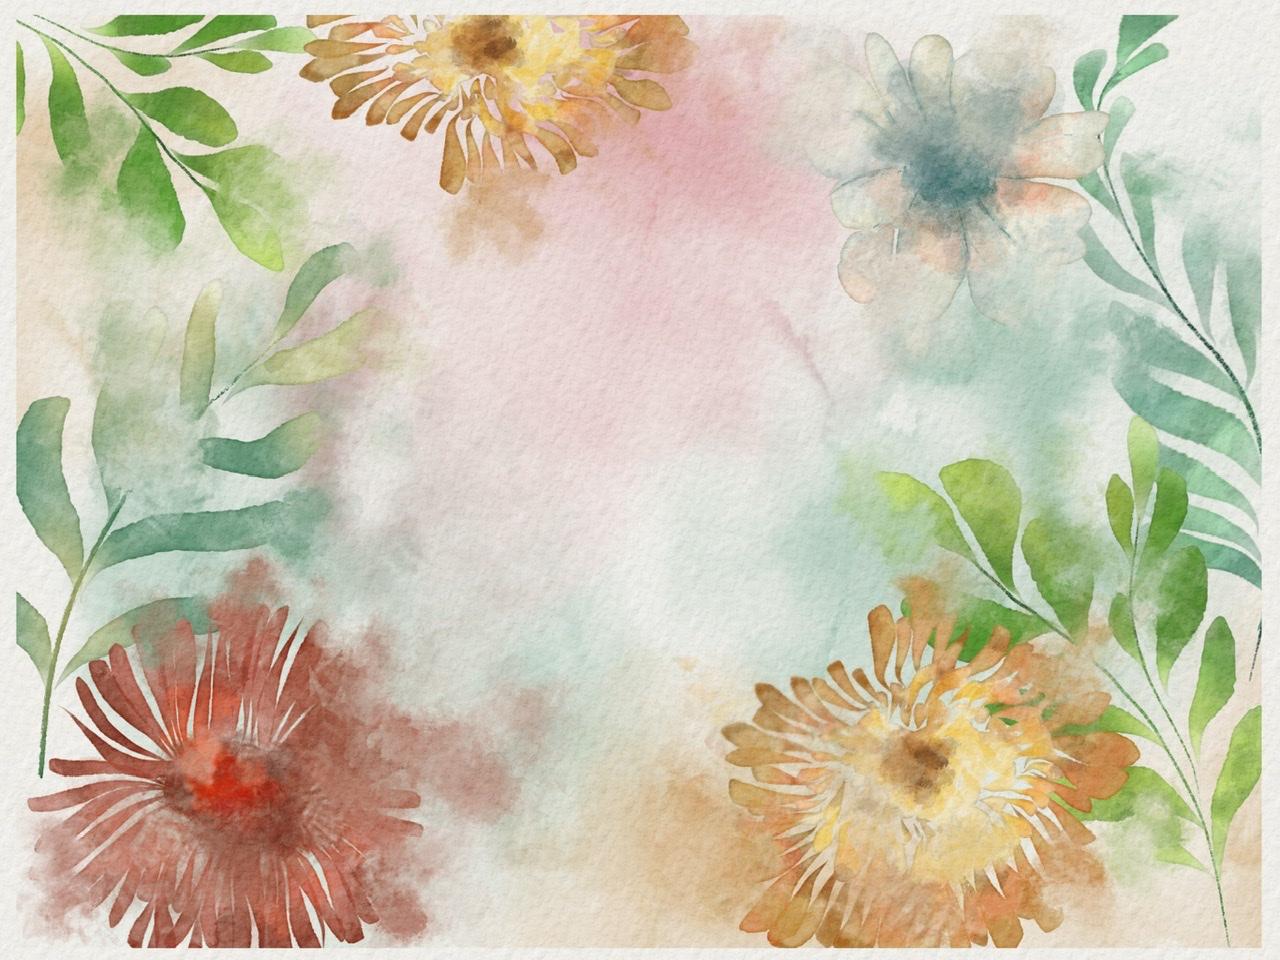
2. Creating textured paper: So guys, one stars and 15 that you need to do. Let's create texture paper and follow today's class. I'm going to use a new texture paper, USC's adherence, so, so cool. And as our paint and goofy and watercolors style, we also need to water cod textured paper. And you can find this paper in sources of projects section. So please go download and after you need to insert his picture in the procreate. So when you don't laws as file, your file automatically, you would be in a folder and downloads. And after said, let's just turn it off for a while. I had to go to that action. And after press add, insert the file. Enough does at your paper will be automatically downloaded into procreate. Our next step, he's less duplicate our texture paper and read the change them all to Linear Burn and to Color Burn. Enough to set replicate layers. And after merge Linear Burn together in Color Burn together. And we can just same if you want to add more saturated folk. So I will do same as Linear Burn and visa colorbar. And after said, idle to slow herself basicity anodes Prieto white color and say my elbow is a Color Burn maybe 75%. And next we need to group it and to rename. Great. So after sad, I need to put out texture papers, some here yet. And for our today's class, I have loss of the sources, resources like because you're gonna create wedding invitations and bursting. And so it's very huge topic. So I decided to give you lots of precious and some other supplies. So let's go.
3. Reviewing brushes and templates: And let's talk briefly about, about brushes, brush set. So I created with innovator invitation set where we have our previous brushes. Zed, original from, originated from procreate, Sosa, Blackburn, relay a brash and also guessing schemed and 6B pencil. So the rest of the brushes, those brushes that I created. So first brushes, Boolean, watercolor, as you're going to pay him today. Laws of lovers we definitely means is brash. Once again, you need to paint ending needs our texture paper. So next brash. And it will be blue, white, and calligraphy. This brush one has moved favorites all secretes that recently. And you can control everything here. And even if you are bad in calligraphy and help you to become better. And guys for those people who actually who are not counterfeited in painting, Kelly currently stuff. So I created for you samples that you can use as well. So bursty invitation First and Second is very invitation. And also laugh. We can change the color and everything so auditory. And next brash is poor water color background. Splashes pre two, lovely a trust, our thinking about creating stem brash, but to spread it's better because you can control the capacity C, and at the same time you can add some water. And it's actually what we need for, for invitations. Especially you saying what lifestyle and whammo brushes Cooper her colors small. I think you remember this browse Pro my previous classes. I created that recent day by dispersion also is one of my favorites. So next on his marshmallow watercolor. Pretty simple brush, also watercolour brush. And the last one is booleans, which led or texture. This brush can help us to create an amazing texture if you're going to paint or add textures to our but invitation. And as you might see, this perfect, so clear. So all these brushes if you're going to pay and they're going to use today. And I will shave is uses said, all say confines brush said in sources and projects section. So next is, I actually already created some sketches in order to save time. Doesn't even have a chance to paint your own flowers. So first one is, this is as far as I grab an example. So we're going to paint those flowers first. And I also paint in this picture, it's very lovely. Help you to create some regional invitation and some simple flowers. I think it would be great to add as fun. And I think later and we can also add some branches. And now guys, I also have for you a special Prieto code sample template, right? That will help you to understand what is the standard size for invitations. So for example, when you create a design for your invitation enough, do you need to print IIT? You need to have it in special format, special size. So thanks to this template, you know already what is it size for your invitation? And as you might see here, we shouldn't cross blue line. Yeah, it's like if you can call it save Tulane. And red line is a cut line. So as you see here, we have a small gap, so we weren't being behind height like. So, as you might see, our canvas is slightly beaker, so keep that in mind, said later, bupropion need to cut your canvas slightly. Or when you print, you might use this template and up to just like cut it. Yeah, great. I just simply want to erase some parts I didn't meet. So I just use a frame. And keep in mind, we can cross blue line. Theoretic. Suddenly, locket. First themes that I'm going to do is, let's start paint in Florence.
4. Painting wreath: And also guys in NO class, I will share with you some free mock-ups that you can use for your own portfolio. Or probably you wanted to create your wedding invitation in some way. So please go ahead and uses mock-ups for free. And let's go in 13. I think I wanted to start his Reith. Can I need to create layers that is underneath our and probably I need emphasis, color. And I'm gonna go and grab who leave watercolor brush. And as you might see, it's imperative for repairing wonderful calls us. Pedals up all these controls, this size controls that paucity of guys. Go and grab Blackburn brash, and I'm going to add some branches. And once again, you should end up perfect to create color to blue one. Here let's keep paint in wreath. And we need to credit poor leaf watercolour brush pressure. So if you want to have like seeker part, just press harder. And it's a blending total yearly use Terrell EIA brush. Wow, cooled. Now let's turn off our reference there. And it looks very, very cool. My next step is I actually need to be in some shades and possess who gold as a freehand. I'm gonna select some areas like we did before. Phasor, percent, hue, saturation, brightness and layer. It can increase brightness. You can lay is color variations like sand. And also automatic. And we'll select our sharp edges. The Press profesor, maybe 3% of the hue saturation and brightness. And now I want to make the sharp lines, sharp register. Remember we did. You can control the size. Me, this is high and now this is pre to sharpen a lighthouse books and steal. I wanted to add sand, highlights and sheets. Freehand factor. Perfect for him getting more. I do legs AS colors. I'm pretty satisfied is what we have right now, is speaking about this read. I actually want to add some splashes. I wanted to finish itself making replicate it and keep one breathe in this way. And another one, we will go to Terrell a, a brash. And we can just blend some parts. And let's create one more layer that just undoing nice ovary. And we will go and grab green color. And I will go and grapple with the color background. So no, i'm going to create some beautiful variations. Let's return to our wreath and discipline some sharp lines. Make it tomorrow and what color style? So now once again, if you have a few options, first option is said, they have normal grief with these one and another one. And we blend together some Lyons sharp line and it looks just amazing as well. So my next step is either go to Selection Tool press automatic. And I went to select some parts of the IHS blend. 3% attrition brightness layer. Let's go talk to your part. And you see it looks just amazing. And I have the nozzle one. Let's move as a part of IV painted our playground and let's just say increase situation. Okay, cool. I'll just blend together everything. And that's it. Okay, so you have two options to different wreath. First one is pretty simple one, and another one is, was it color ish.
5. Painting bouquet: I saw guys, our next step is let's ban this couple. And we may need to try to be pretty fast. And I don't go and grab a marshmallow watercolour brush. And you guys don't worry in end of a class either. Shave is you my color pat. And blend into the feet have some sharp lines. Barraged. Perfect. Now let's get eaten at edX and more details. I went to be on a new layer. Ok, kills stress will be a light, something between white and blue colour. And wonderful. Occupy. Now guys, what I'm gonna do is I will duplicated in a lower layer, I will go to hue saturation brightness, and I'll turn it to white color. So now I'll lower player is. And as you remember we, from my previous classes, we'd need set in order to add shades. If you want to use clipping mask. And if you guys, if you want to learn more about clipping mask, my suggestion is to watch my class since I created like previous one about gets. Now I've looked replicate our hands. I have a lover SAT passage till 50%. I want to march it because I wanted to have it more saturated. Yeah, I like it. So I will I will duplicate it one more time. And lower layer, we go to hue saturation, brightness, press layer and activity to move brightness to maximum. Can eventually, you have also a wide layer, wide color of cilia build replicated Couple of times enough to merge together and eventually merge together. Sis layer. But if you have a skin colour. So we need to create one more layer for our flowers. Told. Yeah, on same layer and I'm going to go and some color variations to our flowers. Same here. Guys, as you might see, I also added some chaise. He says, uh, strokes, digital help. You joined us. Very shadow. And I hope it will be used for given Dr. Very, very tough for our next step E. So let's paint flowers, hoses. And you didn't need to prevail at the tail goes, this is watercolour, and later I'm going to be intense in some particular style. And I will show you how to make lovers February beautiful. He would even this out all those details. What are you going to do a sudo, just duplicate our floral allover positive slide, the optimum merge to kids or duplicate one what time? And lower layer because the his nutrition brightness and v, we'll turn it to white colored as we didn't before, to domesticate it couple of times grade and that does it merge together. And now, as you might see, our green color is not overlapping. Wave of Flaubert's snow covering how flowers. We should put. Same ONE through here. I can write. Now we can blend together everything. You need to try to blend into one each other. Let's go watercolors normal Y axis. So you see I am trying to create this feeling of watercolor. Now guys, I'm going to add some color variations and what a color texture Doha painter. So how are you? And by using clipping mask. So Festival need to be unrelated to a bow, our closest and VDD to press clipping mask. So and after that, I will go and grab a light blue color and either grab Terrell, i approach. And as you see, I want to add some colors. And you see it's perfect sexually like in watercolor style. And I'm gonna go and grab darker color. Hence, you seek Here, we have more shades. Rises. Same here. Oh, she's here. Perfect. And often said we need to go to the Hence same press clipping mask on a new layer that disavow heads. And as you see, I already edit. I show it on the sketch where he's shaded part. And you feel like you can even go and gripped, given darker in color. I can do. Now is just saying these flowers create a new layer. Clipping mask. Go to cream colored third cream. Maybe even blueish. Now red color and bluish color. My accent. I think this is what just perfect. And guys won lot themes that you can do it. He's set, if you like, you can deselect the KINOMEscan after your houses. You see beautiful flourish effect. And you can do same everywhere, like just deselect, leap in a mask. Same here as the rest is just wonderful. How, what I'm gonna do AS I will just go and grab a blending tool. You remember we have Terrell EIA brush. Our final step goes, if you go in and turn of this is very beautiful, but I wonder at some details, do emphasize hands and so on. So give me some time. We need to create a new layer is at rest. We already can blend, were merged together one by 11 by one. Yep. And now we're gonna go and grab Blackburn brash. And let's just add some lines to this kin for hoses. So as you might see how today's invitation cards and see if it would be so in watercolor style, I want to keep all the splashes and make our invitation card. It's the unique. So guys also like overstated this band and you might use just for wedding invitation. But we'll also create more flowers. And we can add Sam to our births invitation guards. And you can create your own birthday card and send it to your friends and say what the so heavy own creations. I think Eric, Dave, let's turn off our kitchen layer here. And now, actually when the blend some part because I think it's too much, it's too sharp. Keys for me is it's just perfect.
6. Painting 2nd bouquet: So we are ready to pay in this flower and it's just amazing. And I will just move it here. Ok, it's enough space mixes. And you also can use clip nebraska today as well. So I create a new layer and I see all those pictures. And let's start with green color, I think so, right? So right, Theme. And we're gonna go and grab for perfect color smoke. You couldn't go into grabs HIS light color and to deliver. So if you wanted to have more bigger just like press tap like this, did it editor? It can help you to keep, to add more pigment to painting. Control the size. Now we have looked at the color summary here. We can also get pink guy here. Keep if done. Now this to everything that we did before, let's duplicate it. And she situation and brightness turned to white color. And let's keep duplicate. And if you times merge together, can merge together. Perfect. Now let's do the same. Let's create a new layer. Clipping mask. Terribly and fresh water colored next trillion. Great. Now let's add some final details. And first of all, if you like, we can turn off, we could mask and is just so amazing and I wanna keep it such way. You'll go and grab Blackburn, brash. Okay. I can now you're ready to turn off our kitchen layer. We can impose a terrible, terrible I approach once he can get nice 202 and some shades here. Well, I think we've done muses painting as well. My suggestion of what else we can go to school, which is a selection tool. Freehand. Kaiser Institution prime. Thanks is visor is hook it of highlights here. Basis. So we've done business. Flowers were held it. So I think monos tiled. Here. I keep beautiful glass, just turn it off for a while.
7. Painting botanicals: So unless pains OS, three farmers, can we need to create a new layer. So let's try paintings. His flower, leaf, what color crash. So simple. Well, you see so simple and so perfect. Now meet Elle. Click a lighter side and darker. Entering into quadrupling total MOOC, starting to peach color. Now I'm going to show you one trick away. How can you beans as Father layer by layer, you need to create a new layer. Turn to lie to yellow color. And it can't be. Well great. Now my next step is I go to goal and W cases layered and lower layer, I will turn to white. Color is vetted before WE KD merge together and merge together. And now as you might see, I don't ever left. And we've previously seen legacy sent up to merge the killer. Now because the last flour, white color, obviously white color. Put e, replicates it. Make lower layer wij turned to white, indicated a couple of times enough to merge together. Great. We need to create a new Layer, press clipping mask, and go to terror lab brash. Let's keep it in some color variations. Here. Now let's turn off us kitchen layers. We have Lawrence and we can emerge it together because ultimately you are percent tuition, brightness, lover, uprightness, increased situation. Now as you see, we have a sharp edges, but does this flower? I think we need to add more lines enough to blend in tool. Carol Lam Prakash, I think here in needs and had some should the predator 6B pencil. Okay, they've done so. And our last step, final details. He is we need to pay in some bees to have 6B pencil plans. Fish are starting to change their color. Places. Now and so on is to light green color increases size. Now this is a tradition, kindness. Thank seems machines as long term prime that is treat and nice. See I am going to do Agile Coach is automatic. 3% hue saturation, brightness, law of uprightness. Chris situation. And you see so sharp and like 18 you Layer press, clipping mask. Terrible, a, a brush, fire. Good. So now that's merchant to cancer. And you remember, we'll dedicate said, oh, so nice. How does it get mucky Zhuangzi can't situation pragmas, flow of uprightness duplicated couple of times. And the became to be half. Alice just separates them up, put them on a different layers. Rick ten, go cut and paste. Saying go to this flowers. Okay, although Sam on different layers as well. Now, it's time to create a vetting composition. Finally, let's just read burst invite, an invitation composition. Lets go.
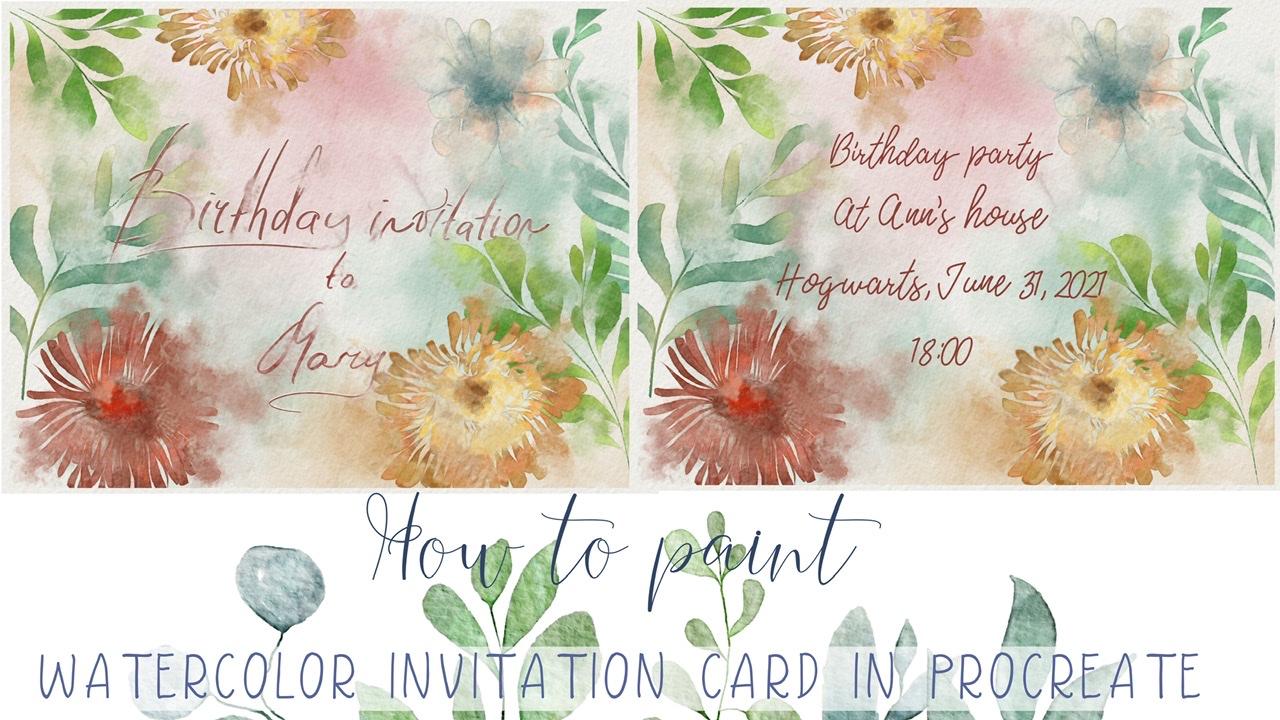
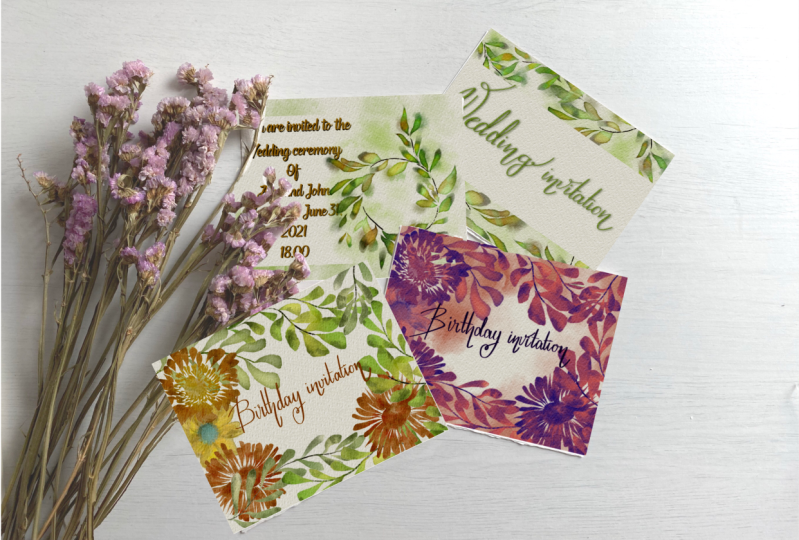
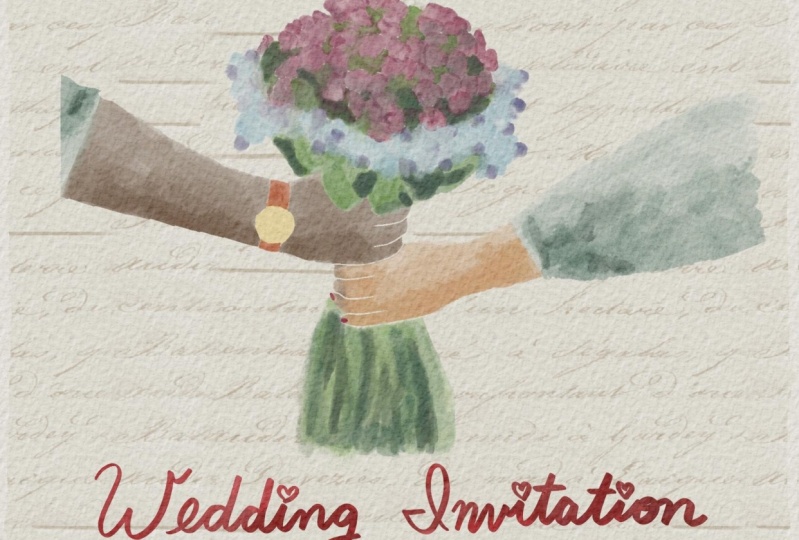
8. 1st wedding invitation: Well, I have lots of ideas, lots of plans, and I hope you would have enough time for Although it, and first of all, I want to end range of rural elements in a beautiful way and phys ed as all of you know what you're gonna do it we need to duplicate all our floral elements in order. You need to use them second time. And definitely the needs it. I first met an invitation. You'll be pretty simple. And I'm going to use these painted facade. And it's a totally true watercolor registration guys. I just assumed that and makes a size lower. And as you see, I don't cross. So flight line, say. So blue line is so perfect. And as you know, in our wedding invitation card, we have two sites. Our first side and opposite side. So here, first theme, our thrust Bart, to build dethroned picture. And we don't pay any details on this part. So what you're going to do is, I have this amazing pain teen enough. Do I need to be on a new layers that is underneath our painting? And I turn to light beige color. And I will go and grab moving THE letter texture. And as you might seize entry overlap with our comeback. The ground jazz. He raises part. So it's very, very soft. And if you want to have even more saturated is you might see you can replicate a layer. And I actually wanted to do so. I like how it looks now. And our next step is we're gonna go and ride like something like wedding invitation. And for that we have we have already simple and I'm going to use it and I hope woods assemble underneath out extra paper layer here. So what I'm gonna do is I press Select. And after I want to turn to green color and after P, The Press Feel layer. And if steel, if you want to add some color variations, you still Kunduz it how? Just press, Create a New Layer, press. And the mask and grab Terrell EIA brush. You can grip lighter colour and add some a watercolor effect. What if our splashes, Oh, they didn't invitation. You can go and grab darker color. If you want to add some shades. Let's just merge it together. And if you like, it can lovers out by city and make it nods at pride. Now, our first part of Vedic meditation is ready, and let's move to another one. So what you're gonna do is evil chess have merged together. Although it like if it turn your invitation from XYZ aside, you also need to have something. On the other hand, we will have all those details and I will turn it off foil. I'll steal. I need to have same background. So go to poor vintage letters, go to light beige color. Okay, the rest is quoted. And here we need to add some. What do we need to write? And also, I will go and grabs is green colored. I think it would be nice. And at text here we need to add some details. And festival. We need to write place and who is getting married first toe. And time, of course, is that you are invited. So perfect. Now we need to change the font and still keep in minds as it should be in a watercolor style. So our next step is we need to create hopeful lovers here while they're around. And I'm going to use source clubbers. So to be created here. I will replicate it once again. So there's keeping in mind says his part like filaments, that red line will be erased. And also my suggestion what else we can do with jazz? Also create a new layer as it is underneath of everything. And you can go and grab pore water color background brash, and add some color variations. And if you think it's too dark hue saturation, brightness increases duration. Six. As for me, it's pretty preteen lumpy. So now next step together, all of it. And we created our first dragon invitation. So from's at first sight we have say, some amazing watercolor painting teeth is our second one, who I divided preservation of Anna Android.
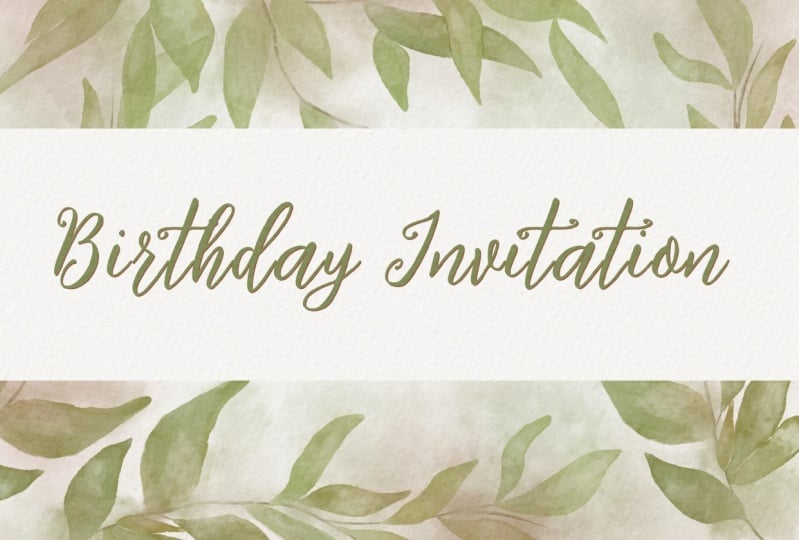
9. 1st birthday invitation : Well, next theme, Dean, our next invitation guards will be devoted to birth date. And simply Also, if you like Spain tin, you can also turn it to read an invitation as well. And what we're going to do next, I have all our flowers. And our next step. Next sees that if you're going to do, is I actually want to make beautiful watercolor compositions, thanks to Sam. So first is just duplicated couple of times, once again. And if you want to change SIP position ofs and planned and go towards hip hop magic lined up to zed liquefy, push. Well now let's merge all of it together here. Here. So as part and I think that seek to yep. Okay, we have our planes and I'm going to theatre foe of what a color splashes. What to color by crowned. And keep it in mind that a need to cut it later. And I'll show you how to mix it. And I went to blend some parts. I want to make lobbyist precious. You know, remember what ATD. But the thing to court color painting. And now my next step is I need to merge all of it together like you did before, and we need to cut it slightly. Yet teal, Red Lion. Perfect barista invitation. So if you're going to put it under Nice thanks Chip paper. Barest invitation. Just place it here. And same, if you like, you can change the color. Select I think dark red with the perfect backfield layer. Saying what else we can dope? Just blended. Said we've done with our bursts irritation. And probably you can also add some like to marry fuzzy set. We need to go and grapple bedding, calligraphy brush. We need to be on a new layer. And you might try to predefine to marry summary here. Becky. So after said van we've done, we can emerge it together, turn it off. And from the opposite side you might still keep same pain team, but you need to add text here. You can know right, where you ram memory needs to go in order to attend your birthday partake. So you need to go and grab and add text. Same and write. Something like I like how it looks. Okay, criticized or whatever we like. And it looks like that. So you can add more different color variations. You can write to some other wars, maybe additional information. It's all up to you. And guys was often Next invitation card.
10. 2nd wedding invitation: Well, our next step is you're going to paint an amazing wedding invitation. Wes, our brief. And for that, I will go and grab and duplicate wreath and I will duplicate and nasa wannabes out all those lions. And enough does IT need to decide where you're going to want to put it? Maybe here. And an asset 1's here. Enough to merge all of it together. I'll go and grab green color. Grab for what to color, peck crowned, nurture, love it. He can create till they are undone. Nice, so it likes it. So and my next tab is idling, merge it, all of it to kinda create a new leaves, disavowed everything after it crept quite color. Go to Selection Tool press, Eric ten GOP. And I wanted to pay instructing go select rectangle right in the center of our paint enough to fail to be Spica. Okay. And so to our invitation, you feel like you can even turned like sad. I wanted to keep it said 20 and here I will write it in intimidation. To once again, you can change hockey, This is just perfect. And you can change the color Select and the pill layer. You might add some shade. I will show you how to make it. So we have one layer and be duplicated and now we have two layers. Now you'd go through his duration and brightness layer. And as before, we turn it to white color. Now I'm going to turn it to Dar, other maybe 18% of brightness, just 18. And now go to Selection Tool. You are on a layer, but you have our shadow, not to go to the magic wand and Go and grep, goal Shun blur layer. And you see here, we can just create the shade in up to say, you can look for safe passage to slightly because I don't want to have it set sharp. Okay. So for now I do like this wedding invitation, how it looks. So and this our first way, what we can do a now the hands up opposites one. So we need to ride whom you're going to invite and who's read and as it. And it's the next step is I wanted to merge all of it together. So prohibit ground or you might use the spec round such we have in front here, right? Or we can create our own background still up to you. And I actually want to change it slightly. So I've put one opposite Reith here, froms or right side and from the left side and no one to add some shades. Oh, perfect color, watercolor. Thanks Ace. And I go gold. Grip of white color selection tool, creating new layer selection till the wreck ten go. And I will create a new layer, white colour. And I need to fill it with white color. And I need to be about everything. So like say, if you like, you can put the link in this way, guy, so, so up to you. So let's change it slightly. And that goes right to your invite. Invite EDTA, and say we can do what we did before. Let's just duplicated. And one layer, we can go to hue saturation brightness. And if you want yvonne, he's attrition brightness even brighter. But I can say what you can do, just go just the darker color, press Gaussian blur layer. Then you can play shades. We lower it and make it nonsense with pride. And that's it, guys. I hope you enjoyed our second meditation part. And the last one, we'll be first invitation. Let's go.
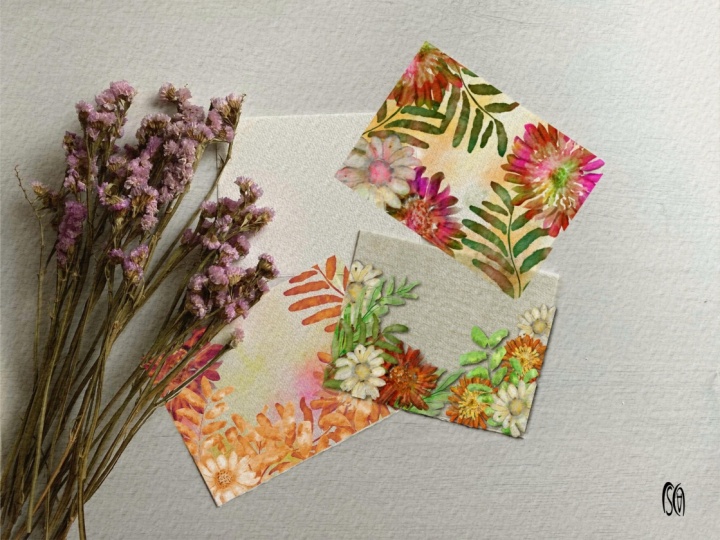
11. 2nd birthday invitation: And this last birthday invitation. And because this notation I'm going to pay in beautiful floral composition as well, like we did before. So you have flowers and let's just arrange them in a beautiful way. Okay. Hello. Well, that's just perfect. And guys, I'm going to show you on Magic Tree hotels you can do in order to make your painting more interesting. And my suggestion to replicate what you just create it. Or you can go, you select our layer. And after you go to gradient map layer and go to a place where you can go to new anys. I do like Manet's how it looks. I'm going to keep it that way. And for me it's pretty good. And I said I wanted to create something like monochrome pain team. And we finally did one with themes that you can create or you can go, you need to create a new layer and go to political background and add some pipelines. And if you like, just go to the selection tool. Press free hand. Feather is attrition. Brightness is for me that's preserved in ice and legs is bright color. And now we're gonna need to write that in, levitate our Burst invitation. Here, salary here. What else they can do with a Medicaid goal to lower layer situation brightness. Wait a second. Turn off previous one. Fuel situation. The brightness. If you like, you can just press this poster imitation here. You see you might create a shadow. I like say feeling. So I will just merge together. Or you can keep saw us our colorful way. Guys, it's all up to you. You can keep it said tray or you can get consistent way. I'm gonna keeps his or her own Pea Team and same I will from the other side. So select a layer and we can replicate it. You remember? Ok, and go with those filtration brightness layer. Create enough to add shadow. Thanks. That is the end of our class. And once again, you also have more cops said, I will share with us, well, so wait a second. So I will just merge, although it together can merge together with our background. Same Paypal to here. And if it turned off our lines, it's so nice.
12. Using mock-ups for portfolio: Well guys, I will shave is use a mock-ups that I made. So you can use it for free. Definitely don't worry about it. Already can do if you like, you can increase the brightness. Yep. And as you see here, we actually have a few papers. So I'd set it to grabs his birthday invitations and last one that we created. We can may accept hand layer slightly transparent because later we need to cut it. And I don't want to cut too much. I will increase the size set. And now we're gonna need to create a second layer here. And I reset by city before increases size. Well guys, why you need it? I think mostly oil portfolio. And also here you can grab and add some wedding invitation. So I'm going to use the spit invitation. Has an exemple over SAP positive and erase some parts independently to overlay API key. And okay, that's our vet an invitation. And now you know how Japan different annotation cars in completely different styles in watercolor. So I will look forward to see what you're going to create. This is the end of our class, but now you know how to pay in four different invitations using different brushes, using different styles and code pellets. And I hope you'll like that one. I will look forward to see what you're going to create an guys. If you have some suggestions, recommendations, some questions, please leave them in the discussion section. And the other thing is that I want to tell you all my sources, all my brushes, papers, sketches, my own pain pins you can find in project and sources section. So please go ahead download them and use them for your own purposes. And I want to see you next week. Bye bye.
 Inga Yoon, Digital illustrator and teacher