Transcripts
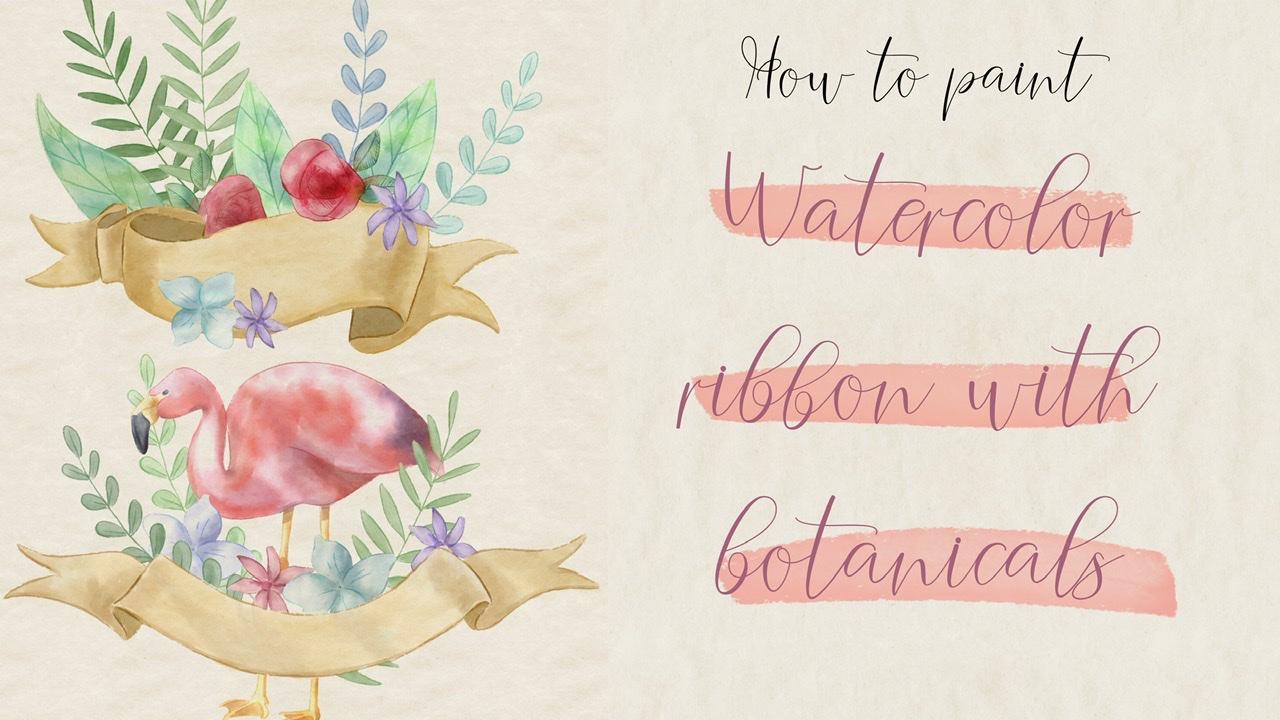
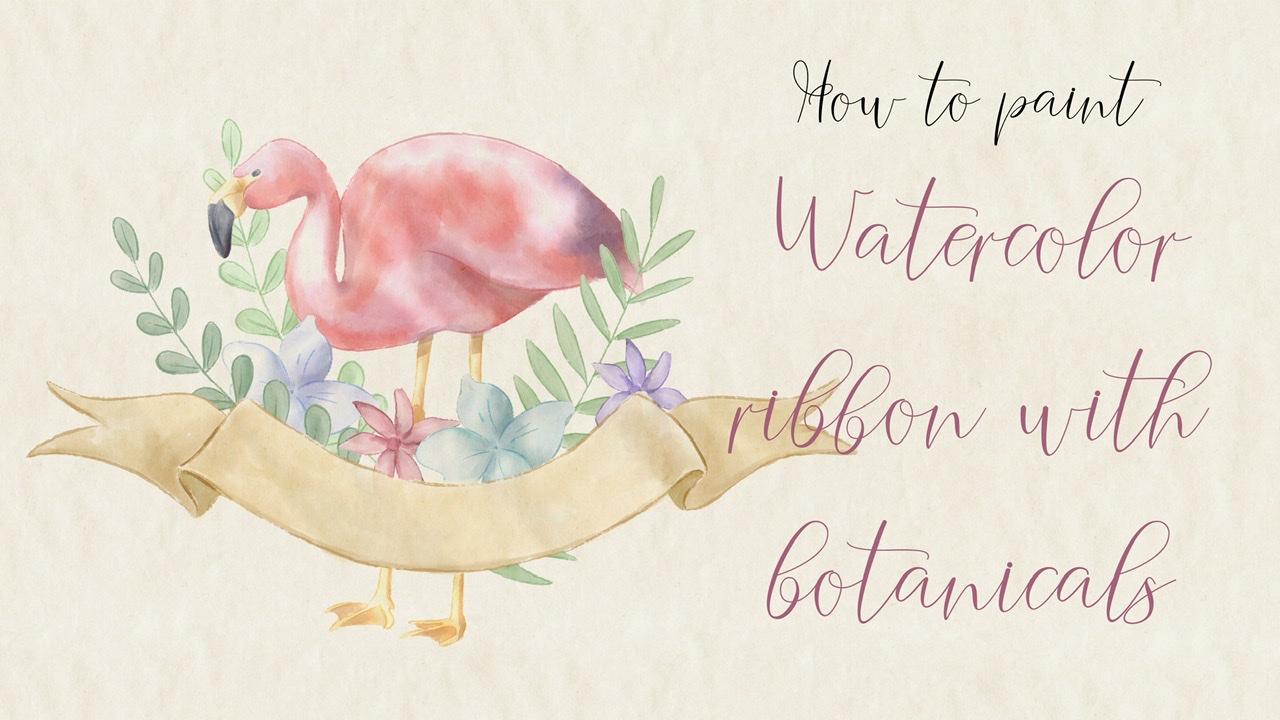
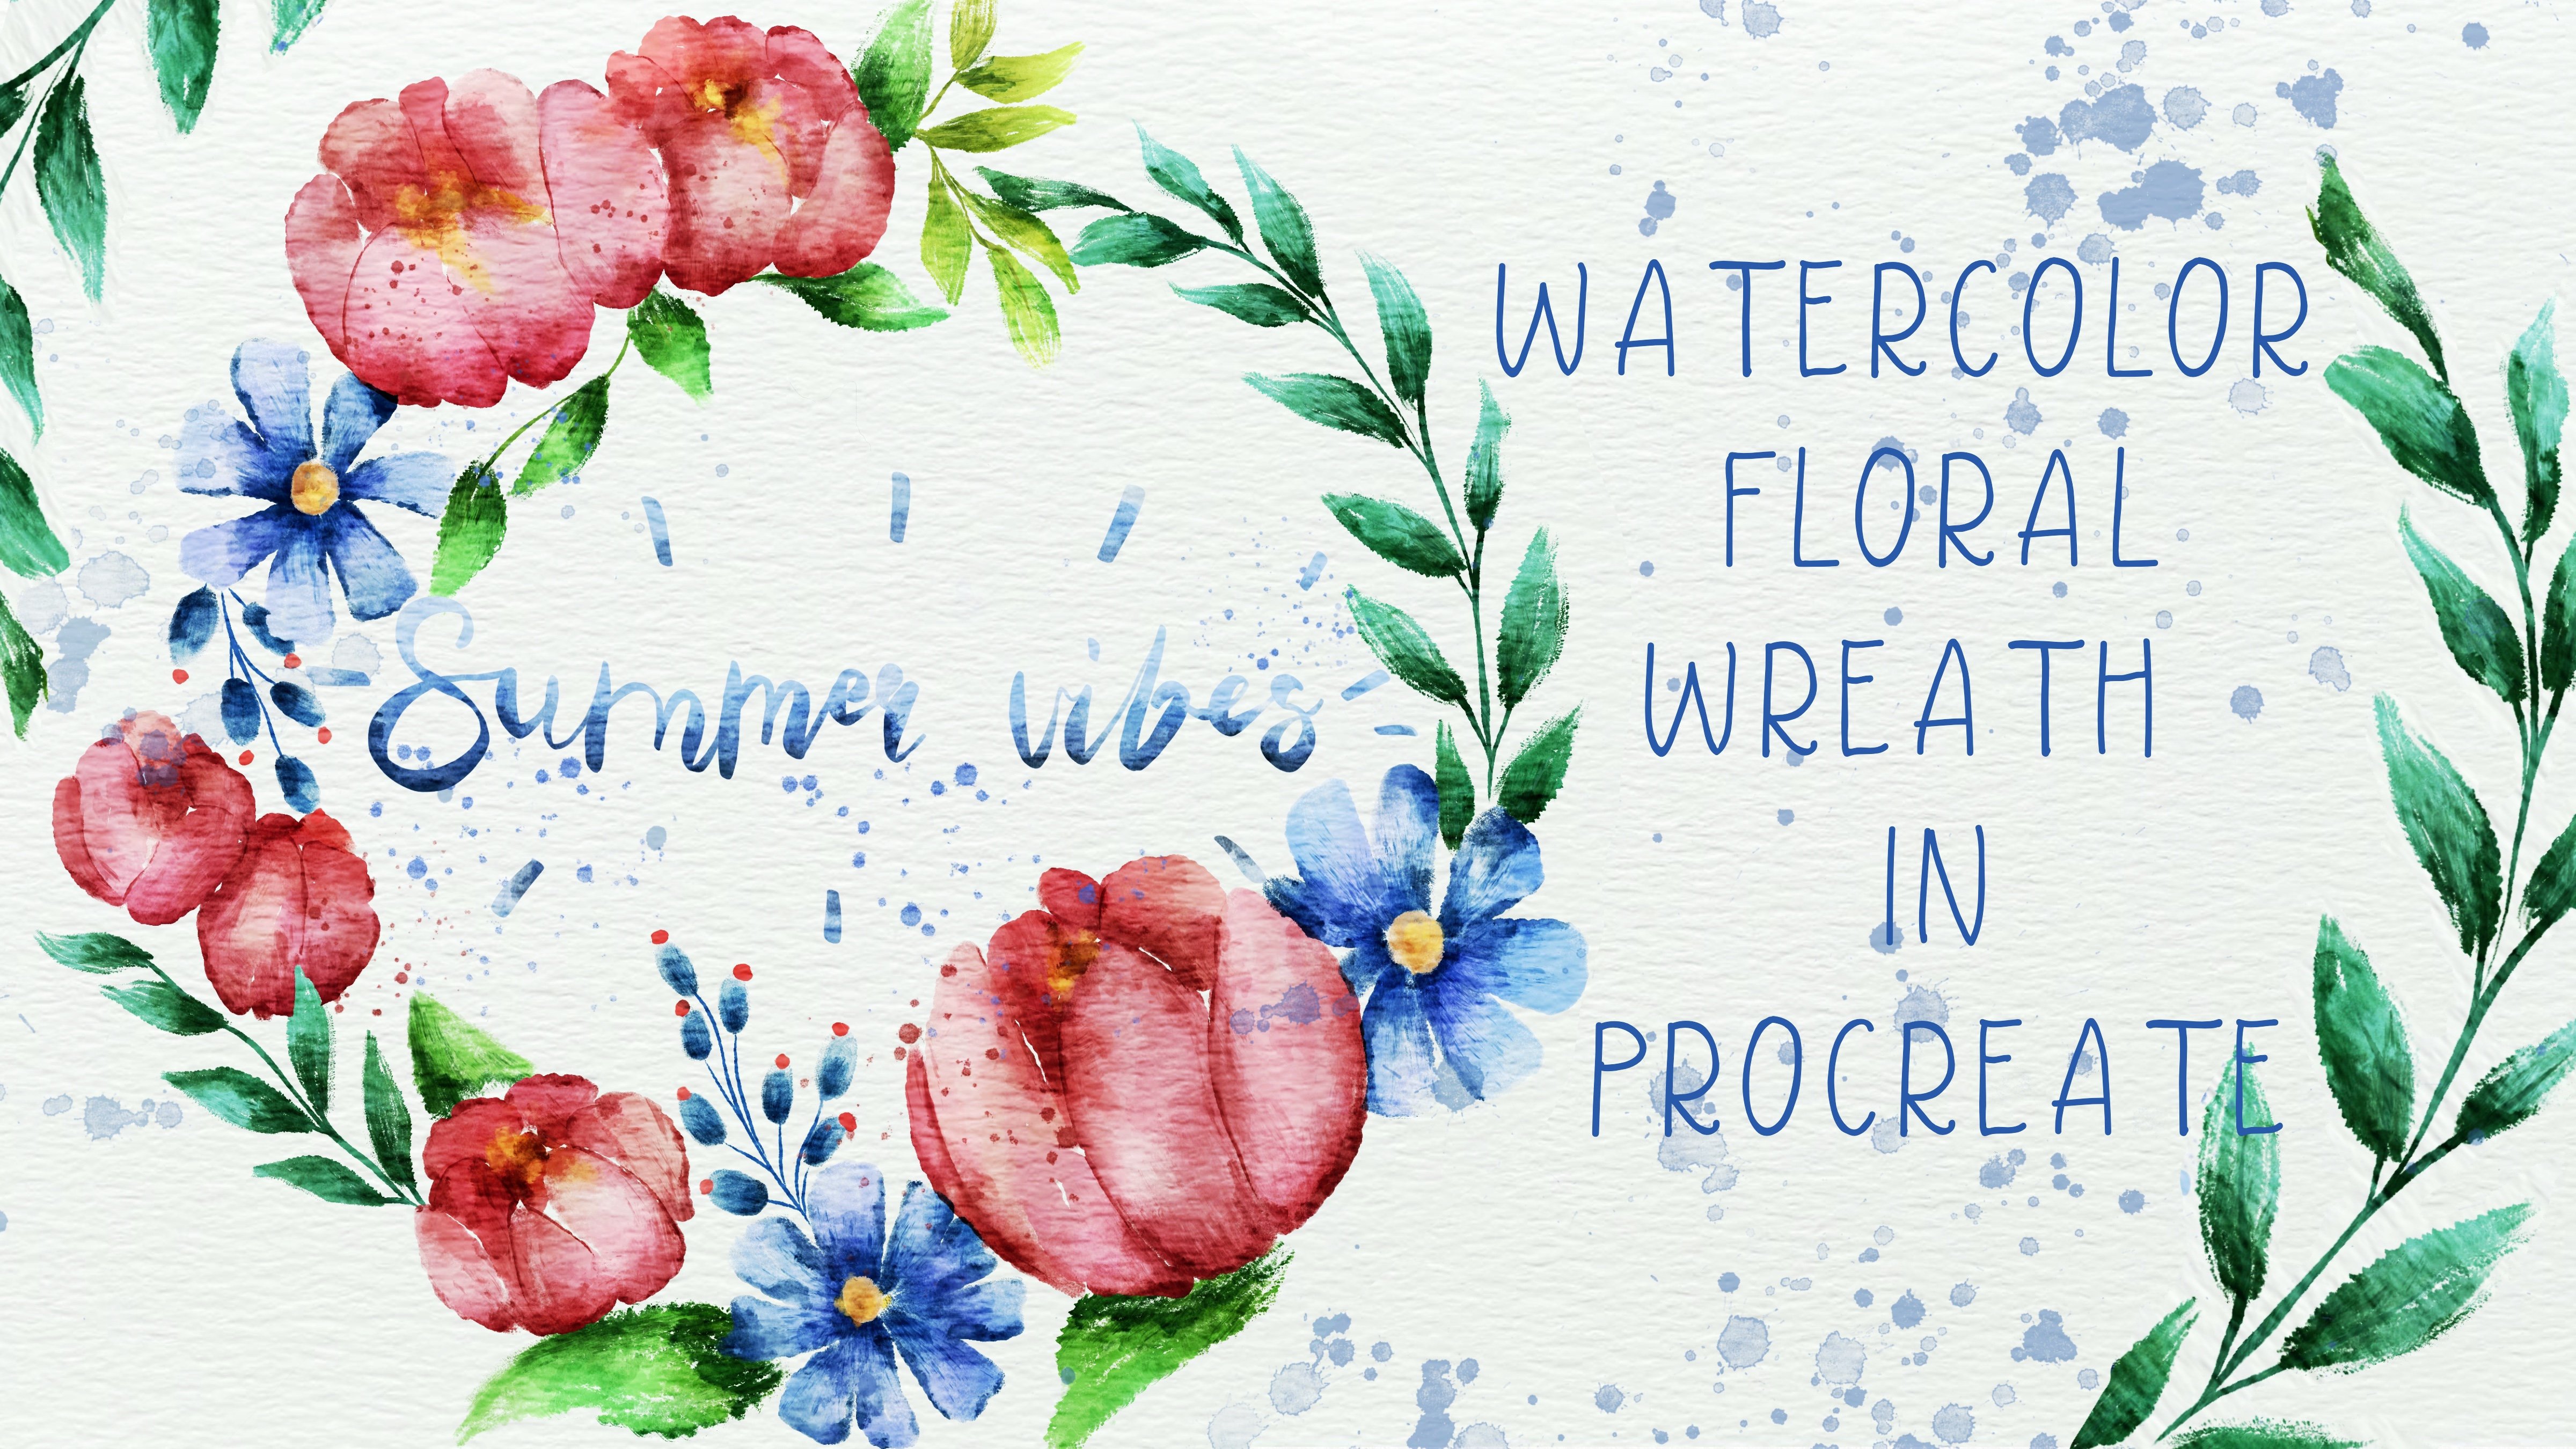
1. Introduction: Hi guys. Hello everyone. Welcome back to my class. During our today's tutorial, I will show you how to paint ribbons in watercolor style altogether is botanical us, Flores, and Philomel girl. And I promise usage will be very interesting in their direct glare. So you'll pay in two different regions with different floral and botanical settings. And guys, we're gonna paint as well, each botanical, each element step-by-step. And I'm going to show you how to mix it in. And we will create an amazing floral composition. And I will tell you what is composition actually, how to place them in a beautiful way. So let's go. Hi guys, I'm Inger, freelance illustrator, who I'll come back to my class and let's paint altogether pool illustrations of ribbons with Florio's in watercolor style. You can use the illustrations you create for posting on Instagram, added to your portfolio or sell it on Etsy gum rod and so on. Today, I want to show you is it watercolour? It's so simple and it's a real Fun. And the class, you can see it. Today, I will teach you how to create a texture paper. And we have an U1. How do acute floral elements on a canvas in a beautiful way? How to pay in picture froms is sketch. You can draw your own sketch or use mine. How to use my and default procreate brushes for watercolor painting, how to pay and floras and botanic gas. What is a process of creating floral composition? I will explain what is clipping mask and selection tool. I will also show you different techniques of AD and shades. I will show you my whole process from start to finish. And as a bonus, I will share with you my new textured paper, custom brush, color palette sketches that I created. I will also add files of my pictures that I drew. Feel free to use them for your own art projects. This class is great for beginners, also can be useful for intermediate level and for experienced artists. Probably here you can find inspiration and new ways how to paint ribbons, fist Florio's in watercolor. Your class project will be next. Pay into ribbon using zt ribs and brushes and says, I gave you today IOUs procreate for this class with his iPad and Apple pencil. So if you have it or Somoza drawing pets or just regular watercolor paper and pains. Please join our class and good luck.
2. Creating textured paper: So I think we can start and even a bean today, a rebel is lovely flowers. And for me, I already created hell lots of sketches, but you hands a here. And this is for me because if you're going to paint and all those caches will be available, I will add them to the projects and sources section. So go ahead and download them. So it's pretty simple. Guys. You're going to use my brushes and native procreate brushes. So you can use both of them and also Tour events that we're going to use her out. And so papers that you're going to use is also one of my new papers. And I also will add it to the description of our glass. And let's start. First of all, we need to create the extra paper. So how can we download this paper? You can go to the actions, insert a file, and you go to Download section and download section. You'll go and grabs his paper. Is the name of the paper is paper wrapped. After that, you need to annotate it and fit the screen. Size of the paper is right what we need for our today's class. And our today's class size is nine per 11 inches. Raise 300 DPI resolution. So after you downloaded your texture paper, you need to move some mods to Linear Burn mode and colorbar. And after duplicated, one time, leaner born and onetime colored burn enough does its merge together and merge together. After that alleged, Lorber said basicity of a leaner burn more like sad. And yep. Now you need to group said, rename. The legal moves are texture paper on the top. And now ready to paint everything underneath our texture paper layers. So I'm gonna go and create a funeral layers and guides visit away. Also, I will share is your color palette for today's class that you also can find you in project and sources section. So I think recreated texture paper. We have all our sketches and notice go.
3. Painting 1st ribbon: So let's start this history band. And you might keeps this pencil. And so sketch or you might move to enqueue part or whatever, like I will have. I will show you a few options. So first-price edge we're going to use is my brush case called Bombe marshmallow watercolour brush. I can now start coloring this part. And also I showed you these sketches. You see, we saw strokes. I showed you where we should have a shadow. You also can use Marshmallow with the color as blend into. And you don't need to erase everything. You might have some sharp edges in some parts. So pressure can legs, head. And now guys, we need to replicate it one time. And I will love potato 50% Nocturne north sit together that replicated once again, moved to his brightness. Wk that couple of times. We need to have this ribbon not transparent. Okay? So our next step is I'm going to go and add some chaise. And for zeta go to Selection Tool freehand. And I want phasors. Ed, Here's attrition. Brightness lowers a brightness, you see it's so nice. Increase iteration. I can now get have shade from this side. And we need to just same premises area as well. But for set part. And choose another method of adding shapes. So I will go and press select. I will just go and grab slightly darker color. And as you might see, I can pay in jazz on our UC rebar icon, go beyond the edges. It's very convenient. And I can add shade here. And I can add shade promises. This hand here. Control the size and blends it slightly. Great. Now let's turn off our selection tool. I think this is pretty cold and I still wanted to add some color variations, some highlights, hazard 7%, and some parts I just wanted to blend to draw INSEAD and grab a Blackburn brash. And I need to create a new layer, keeps it in mind, controls the size. Surpass it in mind. Darker. And now let's turn off us kitchen layer. And for now, I'm pretty satisfied with what we have right now. And now we can merge together. So as you see, this is without our and this is pretty lovely as well. And just pay engineers without our layers are lines. If you like, you can lower Zab capacity of cell lines. And for me it's lovely for every load. And after said, you need to merge together all of it together. So I duplicated in case if I need one more rebound result lines. And arcade. Perfect. Now let's turn it off. We have another rerun. I will loader sat prosity.
4. Painting 2nd ribbon: And we can start by, by adding sharp lines from the beginning in order to save time. Now let's go to lighter color. Now we can create one more layer and grab my brush. Crash. Hagel be slide Hill knitr. Now plantain. So now this to save real complicated flow over capacity of fun layer to 50% in San merge together. And now we need to replicate it one more time. And lower layer go to hue saturation and brightness press layer and turns a brightness till maximum. So now it's wide and I need to replicate it couple of times after, replicate once again and up to duplicate it again in order to make it not transparent. Now, press select and you can pay in transit area, go to darker color. And let's just paint here. Great. Blend into kickoff. Now deselect can click, go to selection tool, press freehand. Can select the area is dark, is Chegg, press. Go. And divine Professors Ed Hughes, attrition, brightness, brightness increase situations. It can be even darker. As for me, that's perfect. And once again, guys, you can use it. Now. Let's turn of sketching layer and gaze. Once again, you might use it without any lines since it's a, it looks also pretty, pretty nice. So it's all love to you. I'm going to use it, likes it. And now I will merge it together. And we have two ribbons. So my next step is ready to pay in flamingo, loggers adiposity. And same. We are going to use the same technique for paint. And let's go.
5. Painting flamingo: So you're going to go and grapple marshmallow, watercolor, brash, pink color. Now let's code orange color and paint. And now you need to use actually bullet colored. But because this is nature and you need to remember that in nature, you don't have bled color. Maybe jazz in a close as it evens out because I was a reflection and because of the lad, he also didn't have solid black color. So it can be dark brown, dark blue, dark purple, dark green, but not Black. So when you're going to pay in some animals, guys, try to avoid using lectures black color. Grep is badly to grip. Dark purple, dark blue. Okay, now we are ready and we can blend some parts. And our next step is let's create this duplicated as we did before. One longer one layer to 50% margin together. After said CO2 lower layer adjustments, his tradition brightness turned to white collar. Replicated many, many times. Nafta merge together. A canal of the mean goes not transparent. And we need to create a new layer of paint and bow. And we're gonna go and grab Blackburn crash in drawing. Just Sammy's. They're neat house kitchen layer so we can turn it off pretty loudly, but still we need to add lots of shade. So press Select as TUV gonna go grab the car crash. And here you'll have shades. Pb premises side. Right? And let's turn off our kitchen layer. And this theme, he's pretty lovely. Says a service out our Lyons. Once again, you can keep it. Result lines, make EBIT race lines. It's all up to you, not also lines. You can allow yourself by sit and make some notes at VS after merging together and go to the selection tool freehand. And we're gonna add some highlights and shades. Her 12% attrition prime. And now I need to add highlights. I either don't have a percent brightness. Highlight. This house. I mean gum, and I'm pretty satisfied with what they have. Now let's move to hasn't barked.
6. Painting botanicals: Well next we are going to buy into his botanical. Acetate. Killed 50% creates a new layer that isn't in these hours. Kitchen layer goes and graphical marshmallow watercolour brush and either gone crap, green color and beamed in Florence and botanical slurry will be fostering these air. Despite the fact that we have a lot of sound for our today's class. You'll be pretty cool to create a new layer. And I will go to drawing part and grab Blackburn brash, lower SAP passages slightly. Nafta said turn off hours kitchen layer. This part. And as you might see that it's just amazing. And now let's merge it together now. Now let's go to the nasa one. This botanical and I will love her surpass a t as I am on a new layer. And i'm going to go and slammed it slightly change the color. And I will go to tubal marshmallow watercolor brushes. Val next is Blackburn branch. Likely did before you go to join park, grab lectern, brash, and let's add some lines. We can turn off hours kitchen layer and finish our painted. Well, pretty loudly and almost done. He's, it's part. Now this just duplicated lower layer, go to hue saturation brightness, turn it to wide, duplicated couple of times and on with time and often merge together. And let's just say these hours, previous plumber, gated lower layer is attrition pride, white color, replicated Couple of times, one more time and after merge together. Well, perfect. Now let's go to another farmer. And one more leaf is here. And now I'm gonna go and loggers out paucity of our leaf, create a new layer. And I will go to my paper, to my brash commercial watercolor brush. Okay, pretty good. You're gonna go into same drying part. We can do it and same layer. After that turn off kitchen layer. Let's draw a line. S1 is prerecord domesticated. Nutrition pride is quite counter to replicate and march together. If you like, you can go and add some color variations to our leaf. Thanks. I think you've got to create a new layer. By layer. You layer. Have to code to try hard. And black parent grabs is brash. Now, turn off sketching layer. Now Selection Tool, freehand, tuition, brightness, likes this. Same them located out to merge together. Okay, great. And now you have last part in flowers is Harvard. And let's tactic.
7. Painting flowers : I think I want to have this flyover, something between collide line blue suits to this flower. Perfect. Now, let's just say we'll deprecated one layer, turn TO 50% after March to get duplicated. Once again, go to his tradition brightness turned to white collar. Demarcated Couple of times. Merge together, merge together and merge together. After that, press Select. And now we can pane here. After blending tool. He would have shade here. Shade here, shade on the side, and go to dry part black, turn at last details. So for that I need to turn off our schedule layer. Perfect. Now Marcela with together go to Selection Tool three. Pfizer. She's attrition Brian as well. Great. Now I'd like to turn it off. We have unmoved floral here. And I'm going to increase the size of this R0. And after lovers have passed fatigue for marshmallow watercolor brush. We need to just same lower layer, turn brightness to maximum. Select. Darker counter. Next is drawing part that burn. A turn off sketching layer. Selection to move faster, packing and made it preachy and bright. So we're gonna go and grab marshmallow pen green color. Now as just same, replicate. Merge together to replicate. Once again, use attrition pride as to might color. Okay, great. Now I will go out and grab a leg, turn brash. Now a slightly darker color. Now we can turn our sketch. Let's add some sheets. And I'm going to go and add some highlights as VT to p4. And shades. Now highlights. Came your plans had part now highlight. And at his attrition brightness is arose. And now let's create a second one. We duplicated. Replicate once again together, merged together, merged together. Now, you need to call the drawing part grab, earn brash, cramped, dark, dark green color. And now Selection Tool. Situation, brightness. Brightness. Chris situation. And now highlight your welcome. So if you've done his SaaS flowers this fall, and now it's time to paint, to create beautiful composition.
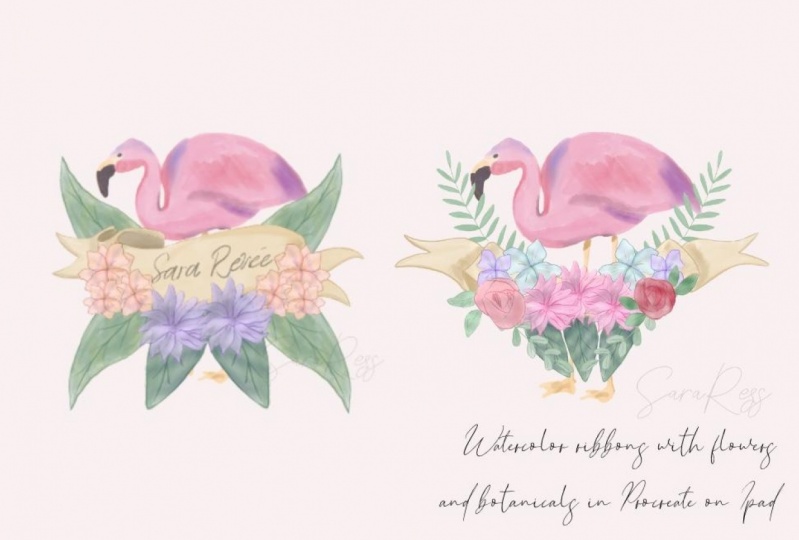
8. Creating 1st bouquet: Well, our next step is a my suggestion is to delegate all how paintings. One month time. Yep, great. Now, let's start with our first three months is one. Displace it summary here in the center. And thanks to our previous actions, all our objects are not transparent, so we can play around and place it in any way you like. So let's just place it here for you while if you want later, we can just change their position. Can it's completely fine. And I'm gonna go and use my half humming. This painting. Definitely could push him behind. Go. What else we can do? We can go sit and take same clover and after said, go to hue saturation and brightness. And clave is color variations. You can change the color. Can be Pincus belt. So plays his position. Can be lighter. And you can play these colored regions. And also same. And next thing you know, what else you can do? Just quote his tradition, brightness. Wave is a counter variations. And this you can place behind everything. And it looks so amazing. Ten, you can place him in front of this forum. And I think this is pretty good. So I guess we're done with our first composition and now let's go to another line.
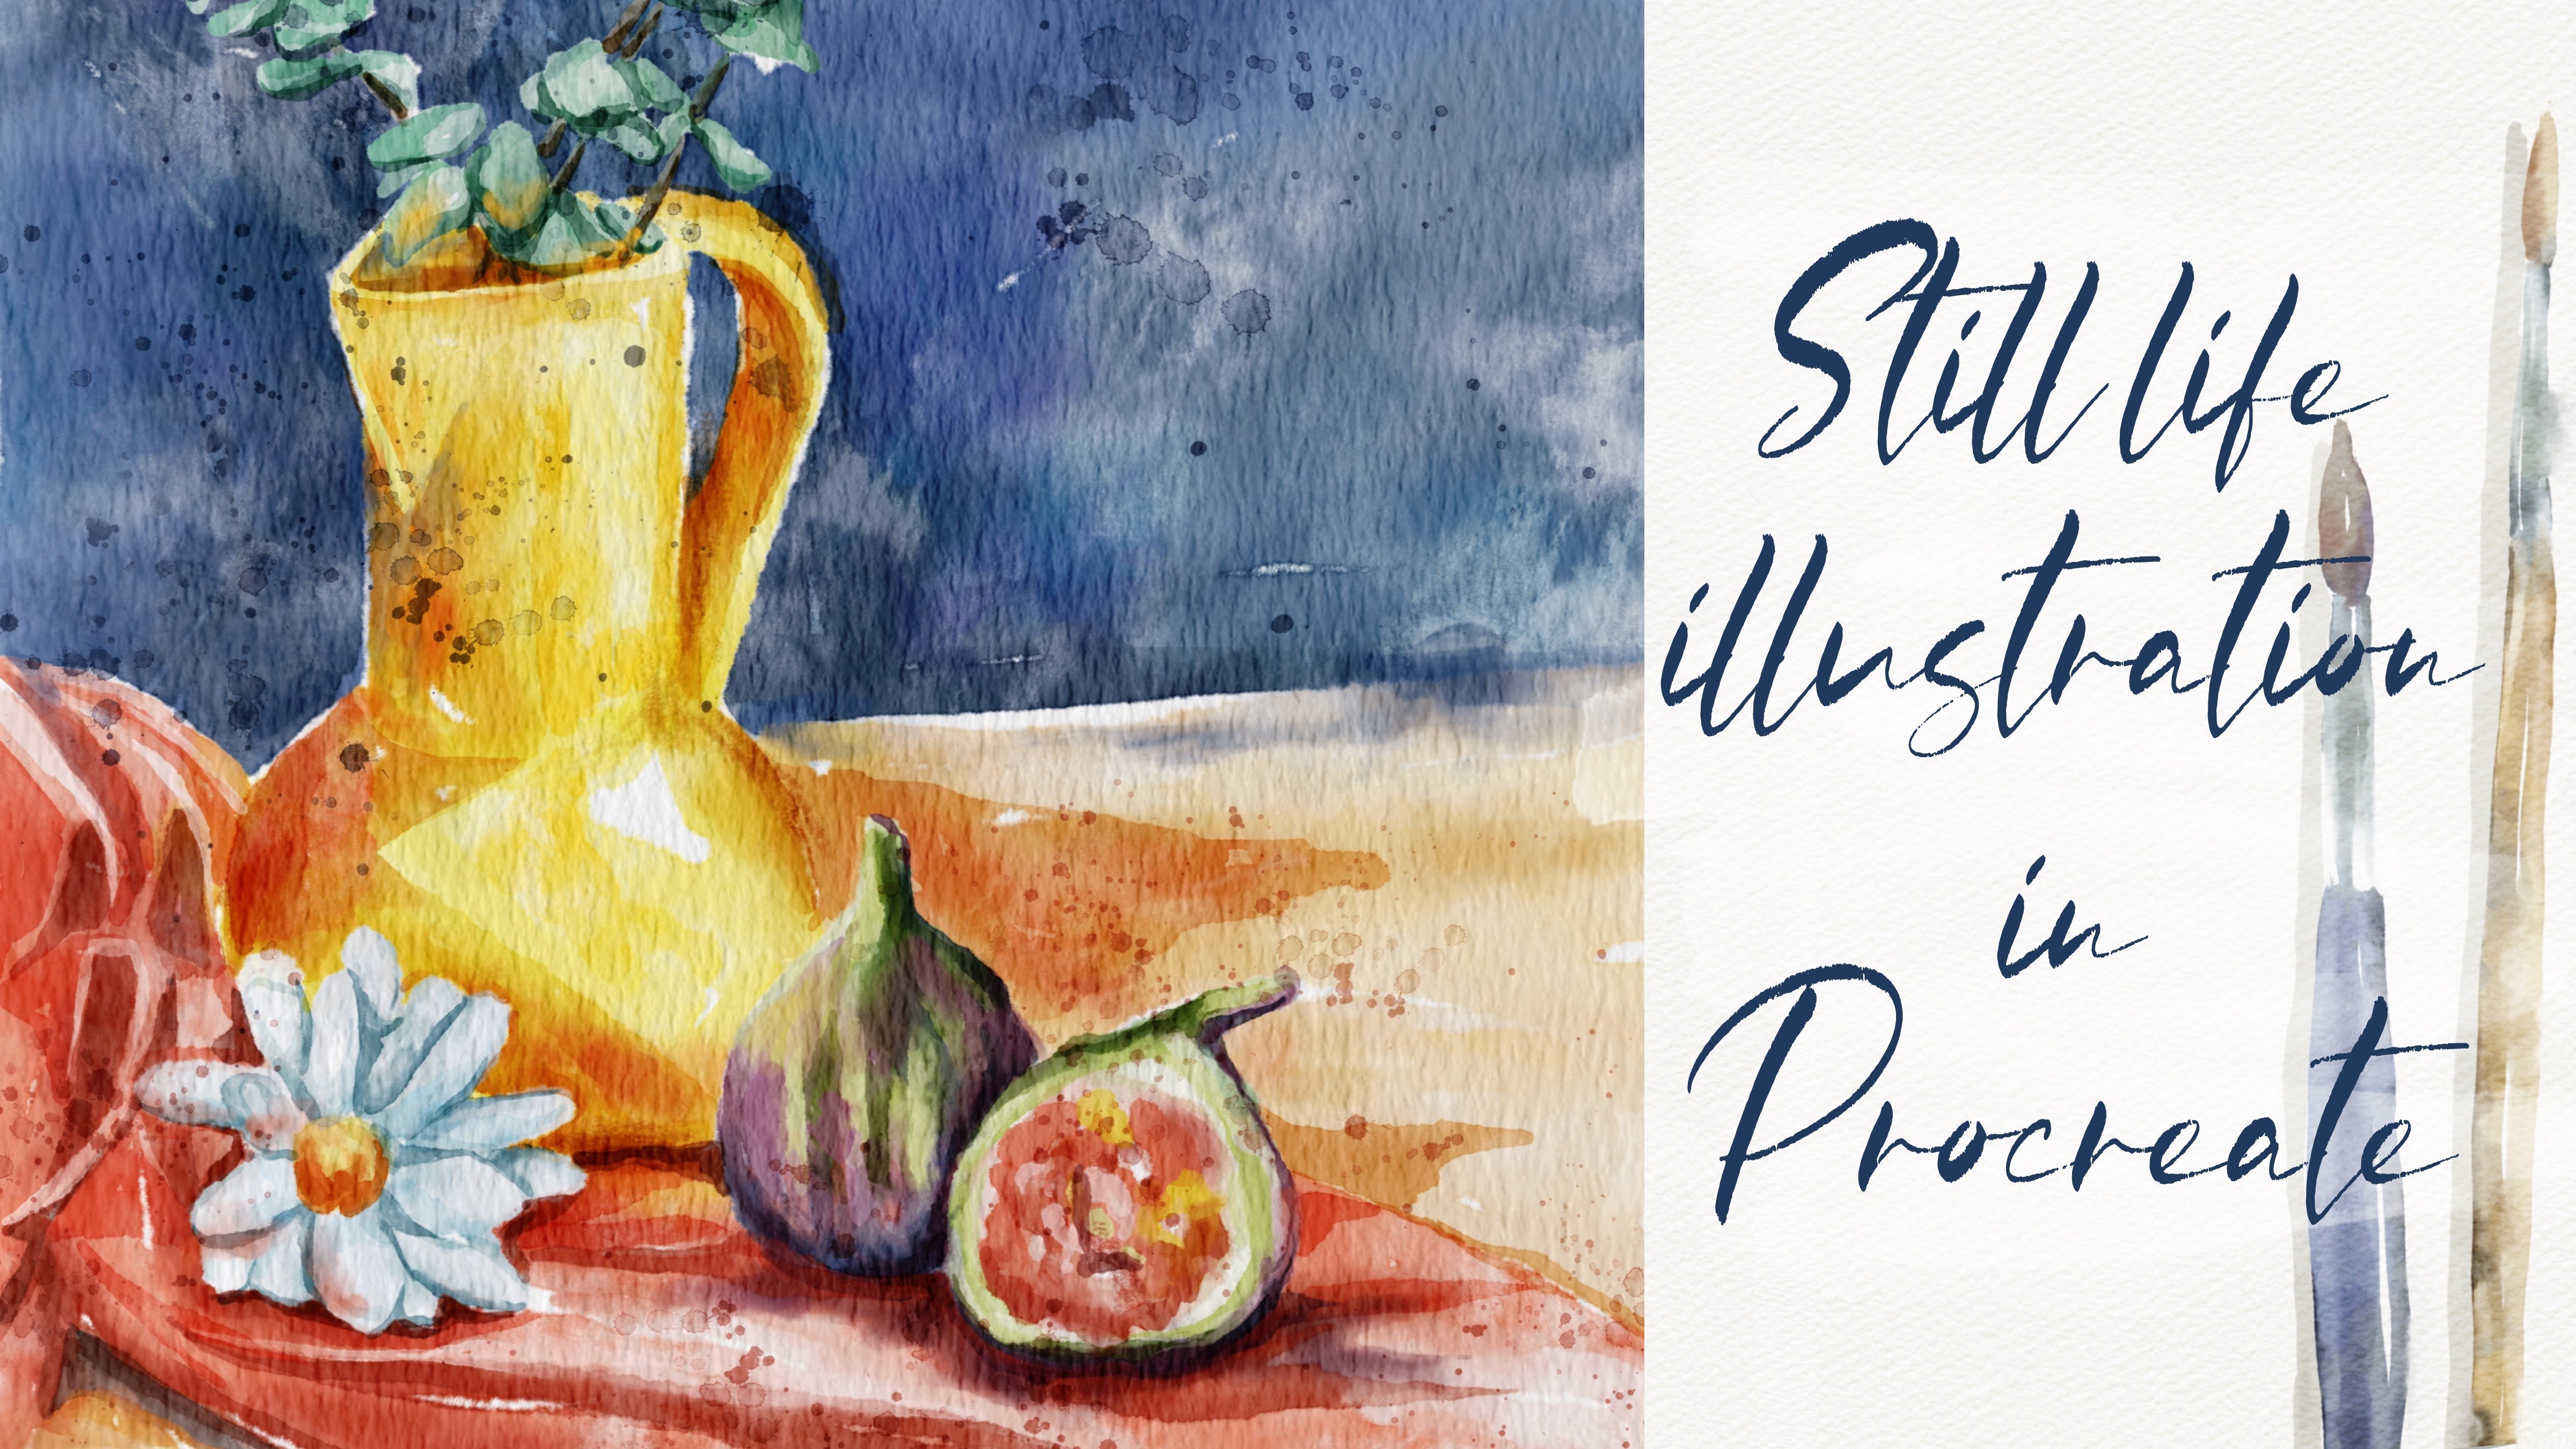
9. Creating 2nd bouquet: And the last one, I'm going to go and duplicate it as well. And keep one layer here. And now let's start beamed in hand plane gets composition and color variations. I'm going to save his sleeve or have it pretty colorful. Makes it okay. Okay. Okay. I think we've done business partners and it looks pretty loudly, but this is the end of our class. But now guys, you know how to play in tune query runs in watercolor style and you know more about composition and how to pay in forests and Bertani cause. And I hope you enjoyed my today's class. I will look forward to see what you can a create and let's see chairs it in next class.
 Inga Yoon, Digital illustrator and teacher