Transcripts
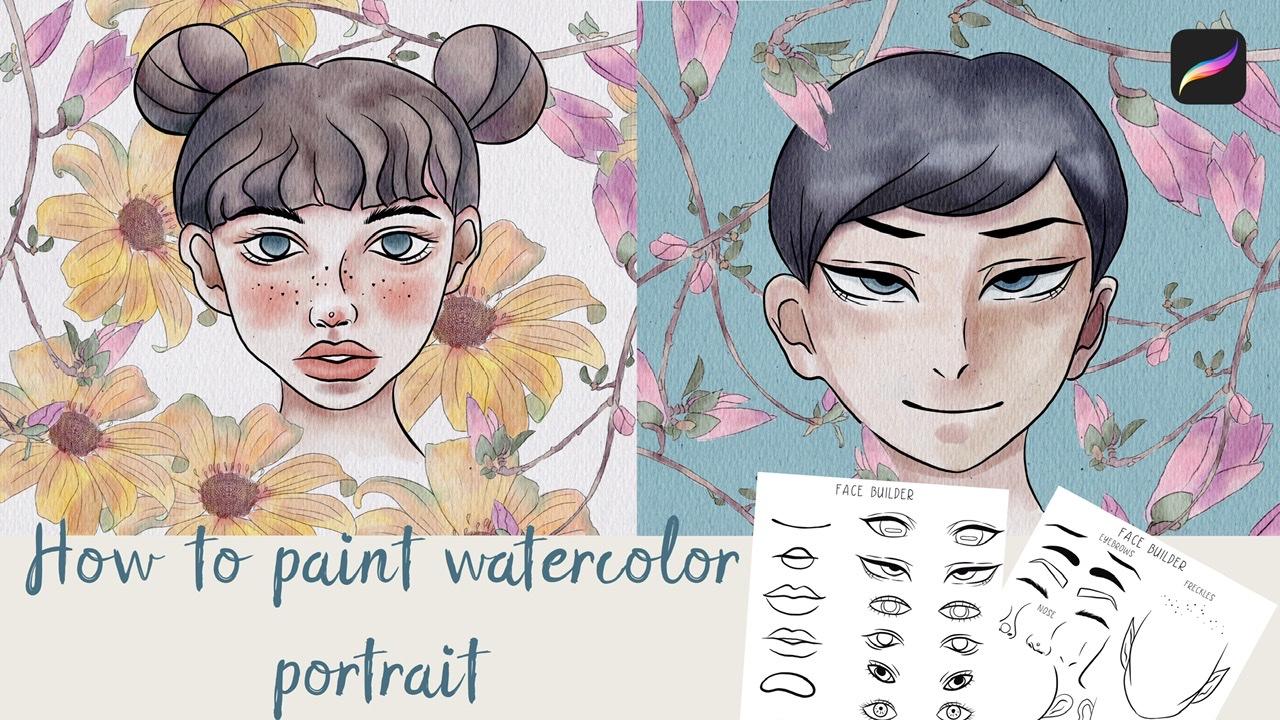
1. Introduction: Hello guys. I'm glad to see all of you here at my today's class and our today's topic we'll be about being in a vertical portraits in different styles. I've created for you a face and builders sets that can help you to easier job. And B because a stylus and actually CO2. And also probably thanks to my class today you can create value portraits of the whole word, or maybe some of your close friends. So and I promise you it will be fun. So let's get started. Hello guys says freelance and later ansatz, Our next class. Today I want to show you how to pay into watercolor portraits in different styles and says a real fun. We will use my face builders sets that I created. And Xij will help you to save time and chose a style that suits your. Today, I will teach you how to create textured paper, how to lead early Beall to your portraits, gauge, and also how to pay in flowers in a watercolor style so that we'll use for our background, how to locate them on a canvas in a beautiful way. And finally, how to paint to watercolor portraits. I will also show you two techniques of aid and shades. I will show you my whole process from start to finish. And as a bonus, I will shave is your mind. New custom brush is as I created. I will also add being gif files of my phase builder sets. The extra paper and portraits. Use Florence is a tie beamed. Feel free to use them for your own art projects. This class is good as for beginners, as for intermediate level and even some experienced artists can find here some useful tips how to paint portraits in a watercolor style. Your class projects. We will go next, bend your own watercolor portrait using the teams and brushes said, I gave you today. I will use procreate for this class, Ms. iPad and Apple pencil. So if you have it or some Rs are drawing paths or just regular watercolor, paper and pains glaze. Join our class and good luck.
2. Face building set and texture paper: So guys, during our today's class, I'm going to show you how to create your own portrait in watercolor style. Maybe not to your own, maybe some of your close friends. So sell any alike or you can create the portrait, watercolor bought in different styles. Sofa Zed, I created actually some face build-in set, if they can say so. So as you see, this is the first one and I drew for you like different options, different eyes and leaps. And there's a second set is. So you might see I also created freckles, eyebrows, noses, different shapes over phases. I even created an ALF for you. You might seize it. And the last option is a shape of a face. Also. Because I want actually guys, you to use your imagination all probably you want to create different characters in different styles. So I give you options for doing said and I will add all sauce set. Phase builders does a description of our class so you can use it in anyway. And let's get started infrastructure. We need to create a texture paper and phys ed and to be a new layer. And we go here, press add, insert the file. Freight, moves our paper to the corners and OK to set, replicates it two times. And moreover to Linear Burn and Color Burn. And now let's replicate it as well two times and merge together two layers and Color Burn, reduplicated and merge two layers together. And after that, I went to lower self paucity of our canvas. And now I want to group set and I can write something like textured paper. And we are ready. They have all variations. I serrations knows is said about texture paper BAD when your start painting, they need to be below our texture paper. And for that we created a couple of new layers. And guys, also I wanted to tell you is it actually will create portrayed as its first theme and the second part of alkalis. Like I wanted to create not a average background. So I wanted to feel our backgrounds, space visa flowers. So let's start.
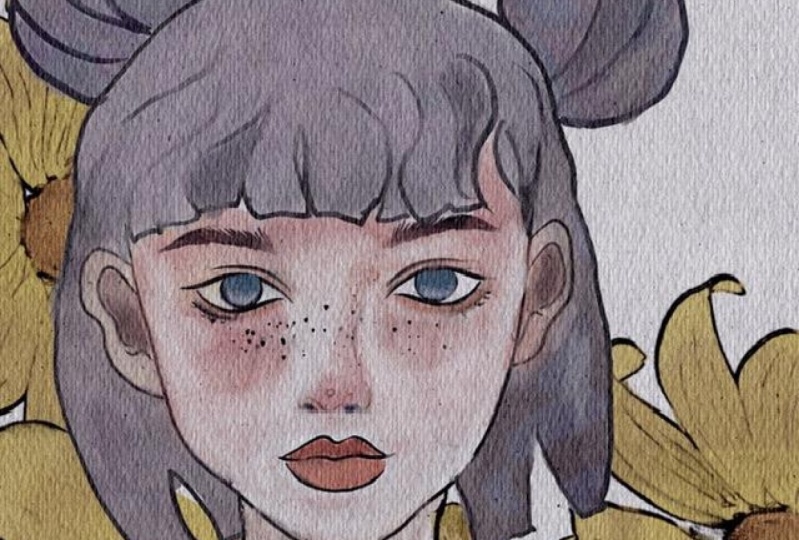
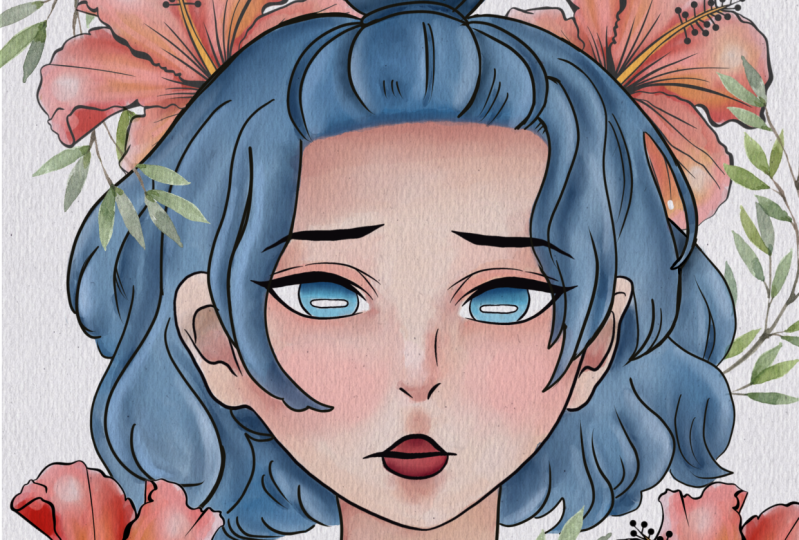
3. Portrait 1: building sketch : And first of all, I'm gonna go and grab face it a like and a guy is assist PNG files being just said. So as you might see, is a paper that said that I added to the description of the class is also VCE transparent background. So you can just simply copy set and have to pay send. You can use this face as his sketches without tracing them. Once again, it can easier job. This face is pretty average one. And what you're gonna do, I will just emphasize Aswan and after three down and copy and paste. So now we have our phase and I can increase the size of the head. And now let's keep adding ice. I want to add, and I want to draw, say some ice. And as you might see it because I like Japanese art and I also edit for your some coupling for examples is true. This is Chinese-style Chinese Eyes is a Japanese iss ands is like an average, pretty popular. Different ice styles I variations at it's, it might be pretty interesting. But once again, I'm gonna use this one. And I'm gonna go and grab saw sleeps. He likes him. Copy and paste. Okay. Turn it off. Turn off this builder said. And let's move to the last one. Wherever you have eyebrows and freckles, I like freckles, so I want to use them as well. I will choose that one semitone line. Also the most average copy-and-paste. Turning it off, returned to our layer, main layer. And now lets choose eyebrows. Copy and Pete, Great. Now let's turn off our builder said, we have our eyebrows. Now this is our face. And let's start painting. Let's start building. So today I try to create some funny class for you and I hope you will enjoy this at one. And let's increase the size of our eyebrows, like sad. So as you might see, I didn't add too much eyelashes because probably idea NO, whom you want to create is a boy or girl. So I decided to give you some freedom in choosing us. And now leaps quantum of our face slightly to the left. And now we need to create a new layer and start painting. And guys, if you're happy with what you have for now, let's just merged it together and have one solid layer is perfectly fine. And now to create a new layer, new layer, we need to give edit some details, something that you want to add to your paint. And so for me, I wanted to add nag and hair and I wanted to finish painting eyes and nafta. We'll move to maintain parts where we'll add some water color cop, watercolor colors. What color paints? So let's do that here. And after that you just go press liquefy after zed and, and to smooth slightly so-called. But now I want to keep it like that. And after that I want to merge together our layers. So now we have our girl. And next step is the colors that I have my brother said I will share with you guys as it is called pool marshmallow watercolour brush. And we can start coloring Oligo.
4. Portrait 1: adding colors: So the owner new layer a, grab our Bu marshmallow watercolour brush and guys, I created for your color palette. Because some of you, you're asking me to those debts are color palettes that to B ends up colors that we are going to use today. And it's called portrait. And I will also add it to the description of our class. So now let's go and grab color. And I think we need to start from pre to light one. And I'm gonna use this 1 first. So you need to start from y, test colours to darkest one. And you can leave some blank spaces, the areas where you will have just white color. And also how white-collar for you here. And we need to use white color with the need to leaves us white spaces. And I actually think that I'm going to, yeah, I'm slightly out. Girl. Met Kip paintings at some shades. And guys. I'll show it to options, how to do that? Yes, the simple wanting, more complicated. So we'll start from a complicated one. Nowadays. Of course, kitsch layer. She's very lovely. Darker color, shade in a year. Correct. Paint. All my painting just on one layer. I don't want to create lots of players and up to be messed in all of it. And when you draw a real which color, you had just one paper. And you don't have many options. Of course, like digital apps can help you to easier job and can save time. But I want to keep it as simple as possible and as close to the real watercolor painting as possible. Okay, great. And my count here, you have got a pet. I'll start from the largest one is usual. And here you can lift your finger from the paper. It's fine. Our lab is colored blazer bill blends them, has totally normal. If you just keep adding differentiates or brown color. Now blending told speaking about hair. So guys here, there is an options what colors you can add to your collaborations. But I'm gonna show you soon. Second options that I told you about. That is pretty simple and it can easier job and can help you to save time. But if you prefer to draw like in more traditional way, as I do so just use also scholars said, I added to the color palette. Something like that. So now my second option end, but guys, I want to make our picture more saturated and in this way, I'm going to go and replicate our pain and, and you see now is pretty saturated. And I can lower SAT passage slightly enough travel marched layers together. So now as you see, our painting is very, very situated. Second options that I was talking about and because to the selection tool. And we start with shades under the neck here. And after that, you can press. But this time I will not do lead and hue saturation, brightness and loggers upright as increased situation. And after you see we have a gap between colors, a US blending tool and just blends it slightly like this. So now we have shading is pretty simple and it can help you to save time. So guys, you have to auctions as I told you about. So after that, you'll grab like you selected one year after you can press Add in R, you can select second year. Lexis. And next. Next, if your situation and brightness became lowers the pride that he can play this colors. Turned off post-election tool and blend the rest. And then after hue saturation and brightness increase situation. Knows I can at some pink color. Now as a last part, E is hair. And say, I'm gonna be a selection tool and keep grabbing and some shades. Here. Brightness, increase situation. Play this colors and access purple on enough to plan some sharp edges. Then went to highlight some areas. Percent hesitation and brightness. Now you can increase brightness. And then the sharp edges. Okay, this preteen. And next step is I'm going to change as a color of ours kitsch layer is here. This one is Q would like to keep it black. It might be. So guys who likes this black color, you can keep it that way for those who wants to change the edge. So what it would do, I will just duplicate one turned off, one black, black colored sketch. And next step, I want to change the color. Here. Now is way more better. It can actually go slower sound passivity and keep it situates all up to you. But I think we need to do something with this hybrid. And same. I wanted to do something with these eyes. I went to make some darker. And I've just said Cut and Paste in current and merge that together with rest. And have hair. And I think for the hair and eyebrows, I will just lower SAT passage is lightly. First option. And you see it's lighter. It's more like an watercolors tile. He can keep it like said, or you can just leave, sat with a black color. As I like, Vout done without girl is painting and I like how it looks. And actually guys, I want to add some background picture. I want to decorate. Our goal is a plotters and phys ed, I'm gonna go and paint. This is our first wait, let me turn off our girl. So I'm gonna go and pains at Flour.
5. Portrait 1: painting BG flowers: Well guys, I want to add this flower to our painting. And first of all, let's start sketching. And I a lower capacity, I will have black color. And I actually think it would be great to use just a pencil. So I'm gonna go and grab 6B pencil. And let's give a Tracey. Well, if our first let's turn it off. And you have second thoughts that I like to Swan and we also can start tracing said as well. And our aim now is to be created two layers at just below textured paper. And let me use a slightly to the meadow. Once again, you air, grab mine, crash. The Nike. Now brown color. Now and dark gray replicate positive. And after march together. And let's keep adding eight K. And I went to highlight now some areas. So Dan, who is our first Flour and I like how it folks. And let's return to the second flower as it sits one. And let's colors at finest file. We need to be on the layer. Once again, they just underneath our extra paper. And I'm going to go and grab my bowl, marshmallow watercolour brush. And I will use, say, as a pellet. Make most traded. Let's plant some part. And now I want to add some shades. And in this way, you call grab our selection tool and just randomly grab some colors. Where we start here. And I have to Azure, his clutches brightens at slightly. And you can play with the colors. And now let's keep adding some dark shades. And maybe like set Taiwan to march sets like next step, I just wanted to citrate to whole bar. If we turn on our painting here. And you might see our goal is pretty transparent. Saying visit farmer to if you will, pull flower here, it's our leptin release, asa colors. So we need to create a transparent background. So what we gotta do it in this way. First of all, I want to merge two layers together. And now I don't duplicate set and lower SEP passivity to merge layers together. And once again, I'll duplicate and I will make one layer in the visible. And second, I will press Select and going grip white colour. And after that press fill layer and same select layer. So now it's transparent. It's wide. And I am gonna go and turn on of lager and merge together visa white layer. Okay, great. You want to make it not transparent Anansi sway, what I'm gonna do is I will select, say thin enough to copy and paste. Now I will go and grab white color. Press Select and after fill layer. So now it's white once again. And now it's completely white. And as you might see, and this our pain tin. So let's just say it without girl. Louisville. Duplicate our girl, turn off our first layer up to press Select and fill layer. Same Select Layer. And now we can decorate out portrayed. Let's play around and see. And also we have the last oh, flowers here. And I also liked such as valve. So let's play around and Marta together and create a beautiful clerical positions. Guys wanna magic tricks that I want to show you when to change the size of my canvas. And in this way, I'm going to go to cannabis after the crop and resize and move it slightly because I need more space for all my servers that we have here. And so it's great. And now we need to move our texture paper as well. And in this way we have our textured paper. Just move it here. And let's just say, OK. I think we can call this piece finished. And I hope you enjoyed our today's tutorial and now you know how to create a watercolor port trades and how to degrade it was beautiful flowers as well.
6. Portrait 2: building sketch: So if you finished visit first bees, and let's move to the second one. And I think for the second one, we are ready to create, Boy, it would be fair. And let's start with Ace. And second part of our class, let's create something in Japanese style. So copy and paste. Turn it off. S increases size. Likes it. Now think about I sand everything. So I think I will draw eyes, eyebrows, copy and paste our eyebrows. And now I want to create and I want to pick an knows. So I prefer to choose different styles. And in this way you might love to board space expression. And now I want to merge all of it together. And think about the hairstyle. Okay? Now one to merge two layers together. And I like to feel it in my how he looks.
7. Portrait 2:coloring: Now let's start coloring in NVO on a new layer. Pillow out extra paper. And as you remember, we have our pellet as so. Let's start with a brush tool, marshmallow watercolor brush. Speaking about his brush, if you press harder, we'll go have more color, saturated color now and to move to the other one. And for Germany's anymore, you don't really need to put too much differentiates just to emphasize the shade. And also any size. Savile take lighter color. Here. Speaking about hair, I think his hair should be very dark. Now blend into. Speaking about chase, let's use methods that I showed to you. So good press selection tool. And first of all, I'm going to show us it's, this part is actually the shadow. Okay, we show a slide, very light shadow. And let's say MB's care. Okay. Situation privacy, rights and that's fine. And when it's not enough shades, or you want to do it by combining two times using his brightness enough to add in my strokes. Okay, cool. Now I went to light in some areas and highlight what he created now. So this our second character, second portrayed in totally different. And now I want to add our flowers that we already created as a decorations. And I think we also need to create, as you might see, like white backgrounds that might prevent from overlain different colors as we did before. So in this way, I will duplicate our voice layer or, and I don't like that. And I have a lovers have positive slightly. And after I will merge layer and I've traveled applicants and second time, I will turn off one layer and second layer, I want to feel these white color. So selecting and fill the air, same-sex. So now we can merge together. And now we can play around and create beautiful composition. Okay, we've done our second portrayed. And guys, I hope you enjoy today's class. And I hope it was useful and now you know how to create to portraits and completely different styles. And please go ahead, use my phase builder said and creates a portrait that you like. I will look forward to see what you create and let's each other next week. Bye bye.
 Inga Yoon, Digital illustrator and teacher