Transcripts
1. INTRODUCTION: Hello, I'm Vivian. I've been a professional
mixed media artist in Scotland for 20 years. I'd like to show
you how to paint beautiful and striking flowers using watercolors and charcoal. I use a variety of mixed
media combinations of my art, and I find that watercolor and charcoal complement
each other really well. You'll learn how to
use watercolors and charcoal and how to layer
them for maximum impact. I'll show you step by
step how to achieve stunning results
whilst encouraging you to develop your
own painting style. This class is a small project you can put your learning
to good use straight away. After experimenting the
techniques I show you, I suggest you create
a floral pattern of any kind with charcoal
and water colors. Let's create paintings
together where flowers come alive and where mixing up your art materials on paper
becomes second nature. If you've never used two totally different art materials side by side on paper before, then this will be
super exciting. This is going to be fun.
2. ART SUPPLIES NEEDED : I'll show you the art supplies
needed for this class. You don't need a lot,
basically just watercolor paint, brushes and charcoal. We allow you to
create beautiful art, but I'll go over
now, in more detail, the materials that will
give you the best results. This is my selection of materials that will
need for the class. First of all, we have
the watercolor paint. You can use a box
variety like this, or you can use watercolors
in liquid form. And say for beginners, it's better to use
the box version, it's easier and
just more compact. You can also use these
bits as a palette as well. It's more user friendly, but feel free to use the paint in liquid
form if you prefer. Class title suggests we're
going to use charcoal. You can see we have
thick and thin pieces. We can make different
marks with them. If you don't like the size, you can always snap
the charcoal sticks. You can snap it into tiny
little bits and rub it in. Even the smallest of pieces can be used in
future art projects. I want to tell you
about the putty rubber. You might know about
these already, but I highly recommend
you getting one, especially for any artwork
that uses charcoal. There's brilliant and far
better than normal erasers as they lift off the charcoal or graphite so much more easily, you can even mold them
into a particular shape. When you warm up
the putty rubber, it goes so you can shape
it to whoever you like. I'll talk about brushes now. It's good to invest
in a selection of different ones if you're
going to paint regularly. However, for now, as
long as your brushes have smooth and soft
bristles, you'll be fine. Here we have our brushes. You've got your fan brush, which is a gentle one. It comes in different
sizes and can be used to create a
variety of marks. You've also got your
flat headed brush. They create a marks and are good for
drawing straight lines. A rigger brush, good for pulling the paint along the
paper smoothly. It's got long bristles and it really is quite
helpful for watercolor. This is just a
general rounded one that is good for many things. This is probably
my favorite brush. It holds a lot of water, covers a lot of space
on the paper easily, and it's so soft. Lots of different
brushes to choose from. As I said, you don't
need to get all of these to start
watercolor painting, but it's good to know
what's available for your paintings
to look their best. You'll need watercolor
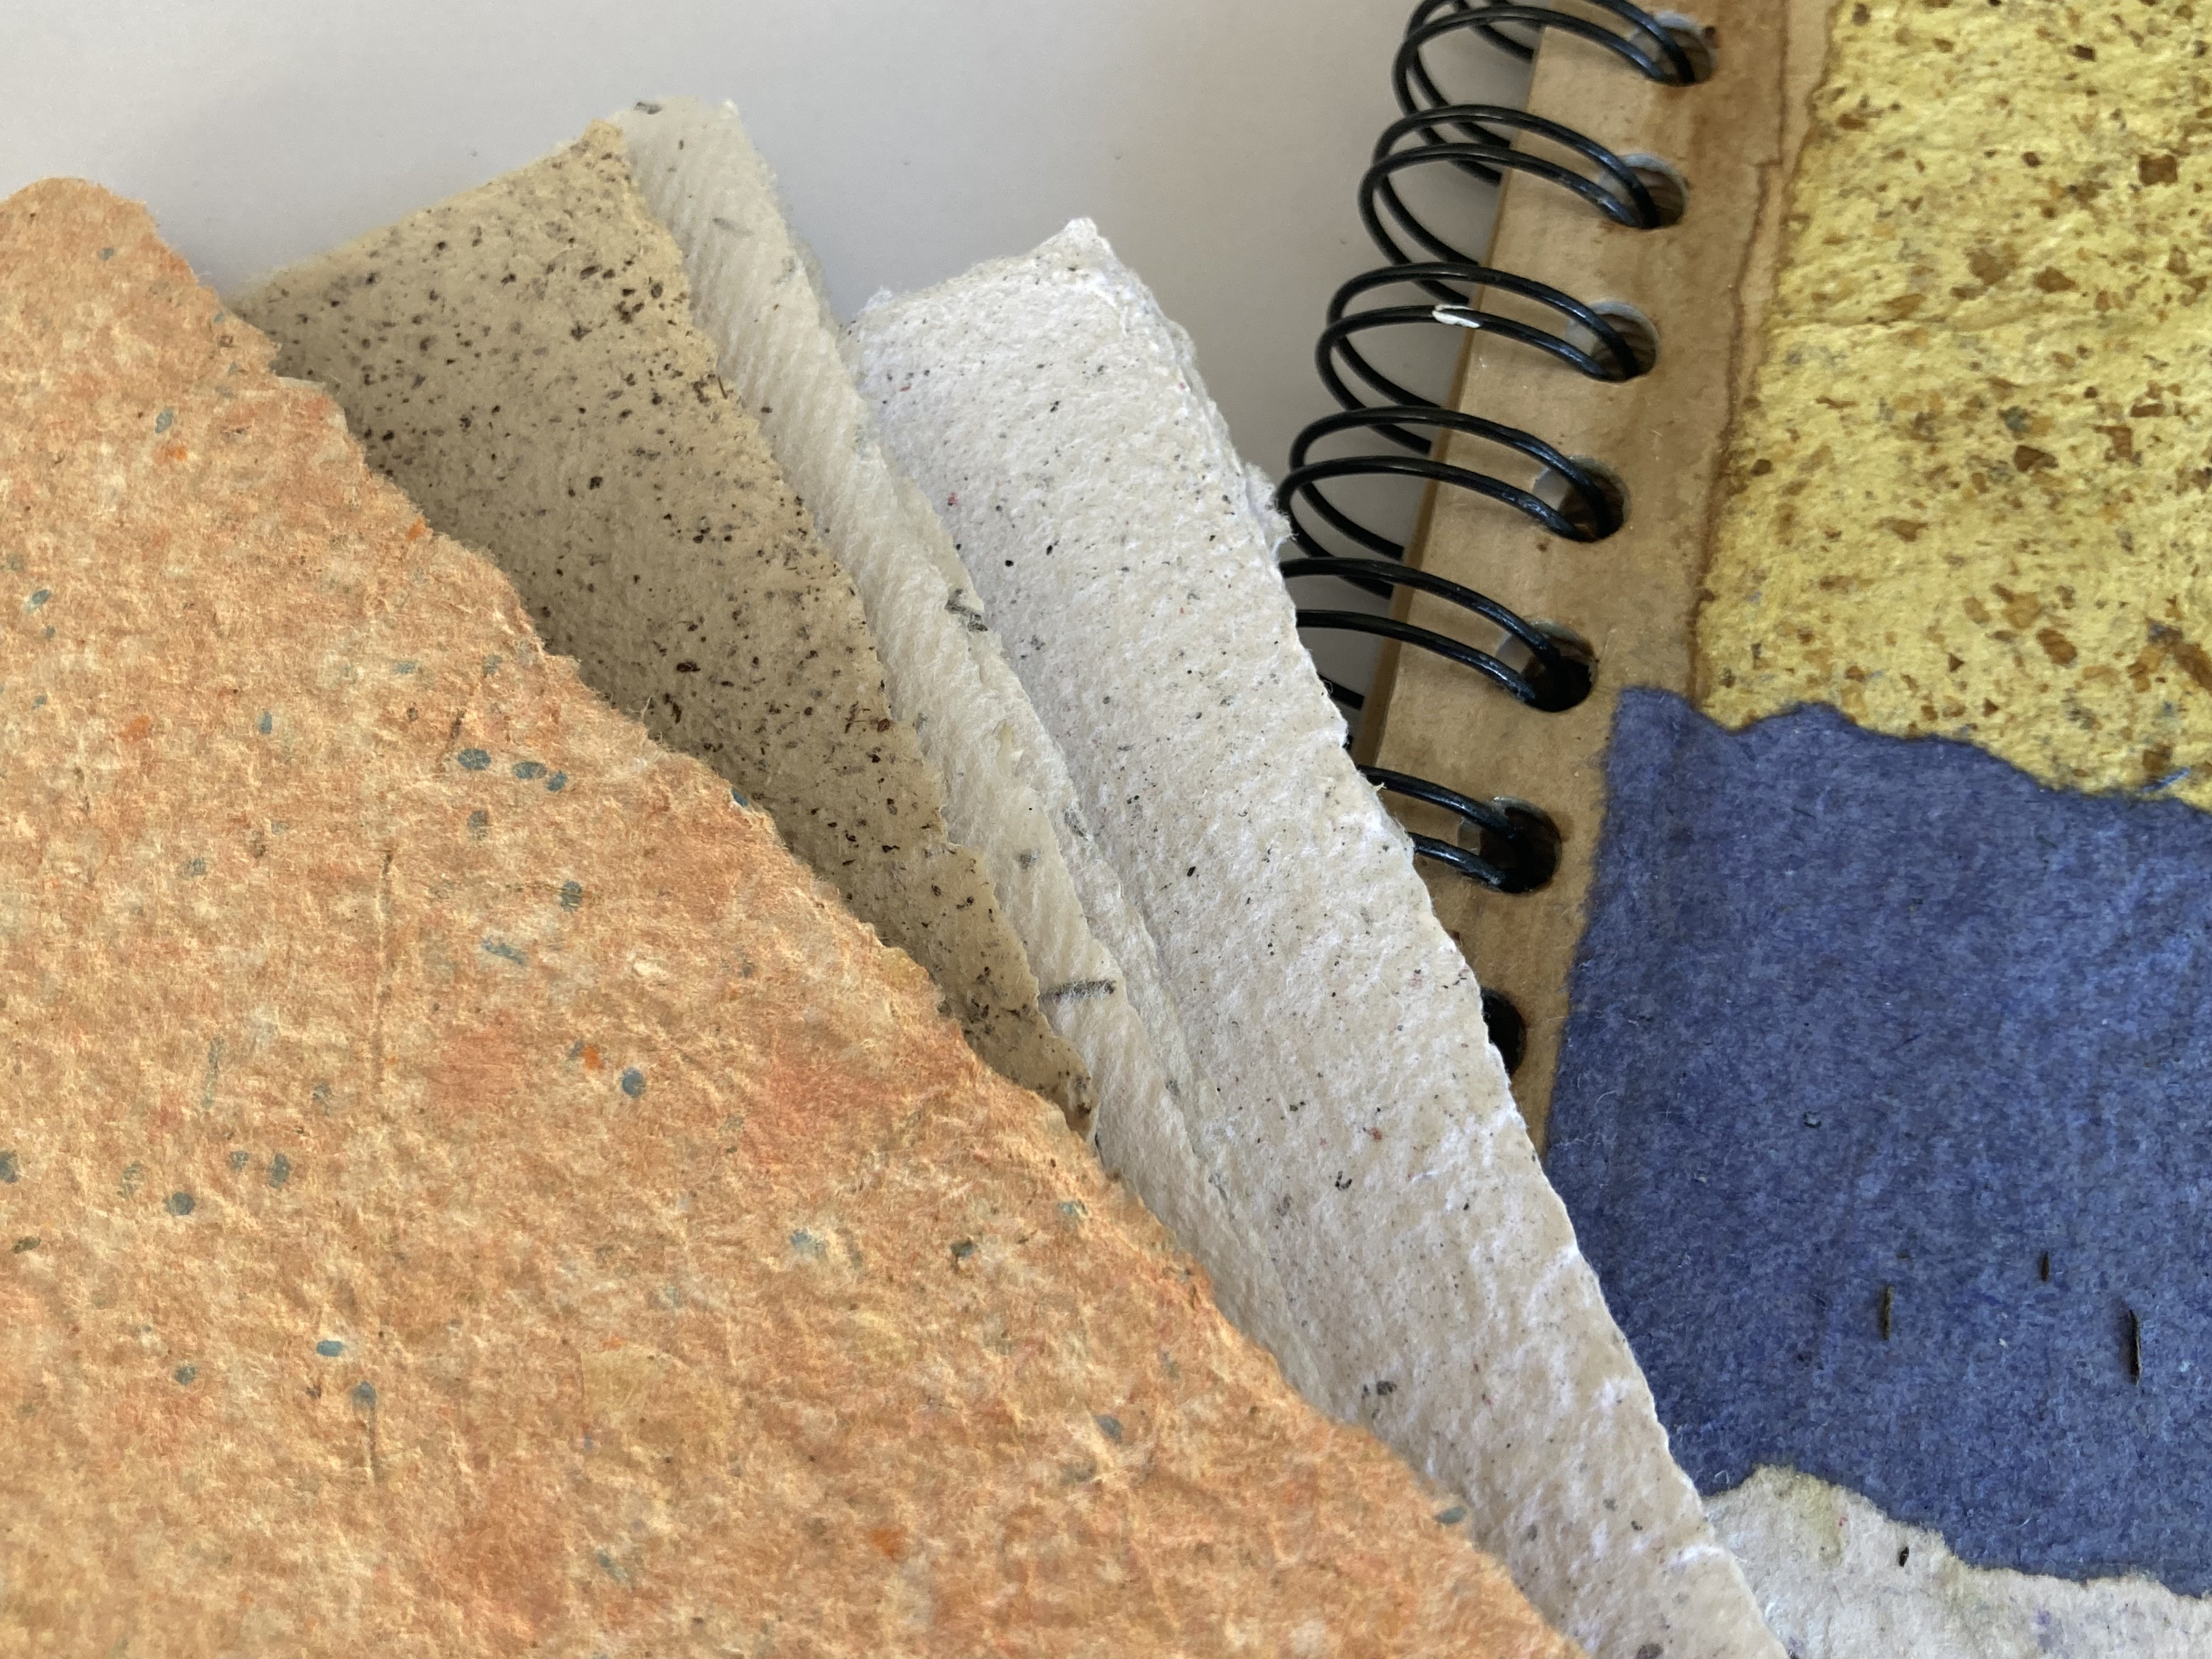
paper or mixed media paper. These can both handle
lots of liquid. As they are thicker and more textured than ordinary paper, the water is absorbed
down into it. The paper I have here
is quite smooth, but you get watercolor paper
that's quite textured. And bitty is the smoothest
watercolor paper or mixed media paper
that you can find, as this is the most
compatible type for charcoal, despite the spelling of the
word watercolor on this pad. This sketch book will be perfect
for our projects because the paper is thick and
it's also smooth on top, good for charcoal spray. Hold your materials in
place on the paper. I recommend using this, especially at the end, to seal your painting once
you're finished. That would be a fixative spray that's suitable for
pastls or charcoal. In the next video, we'll look at what to do for
the class project. Please check this out before
starting the first lesson.
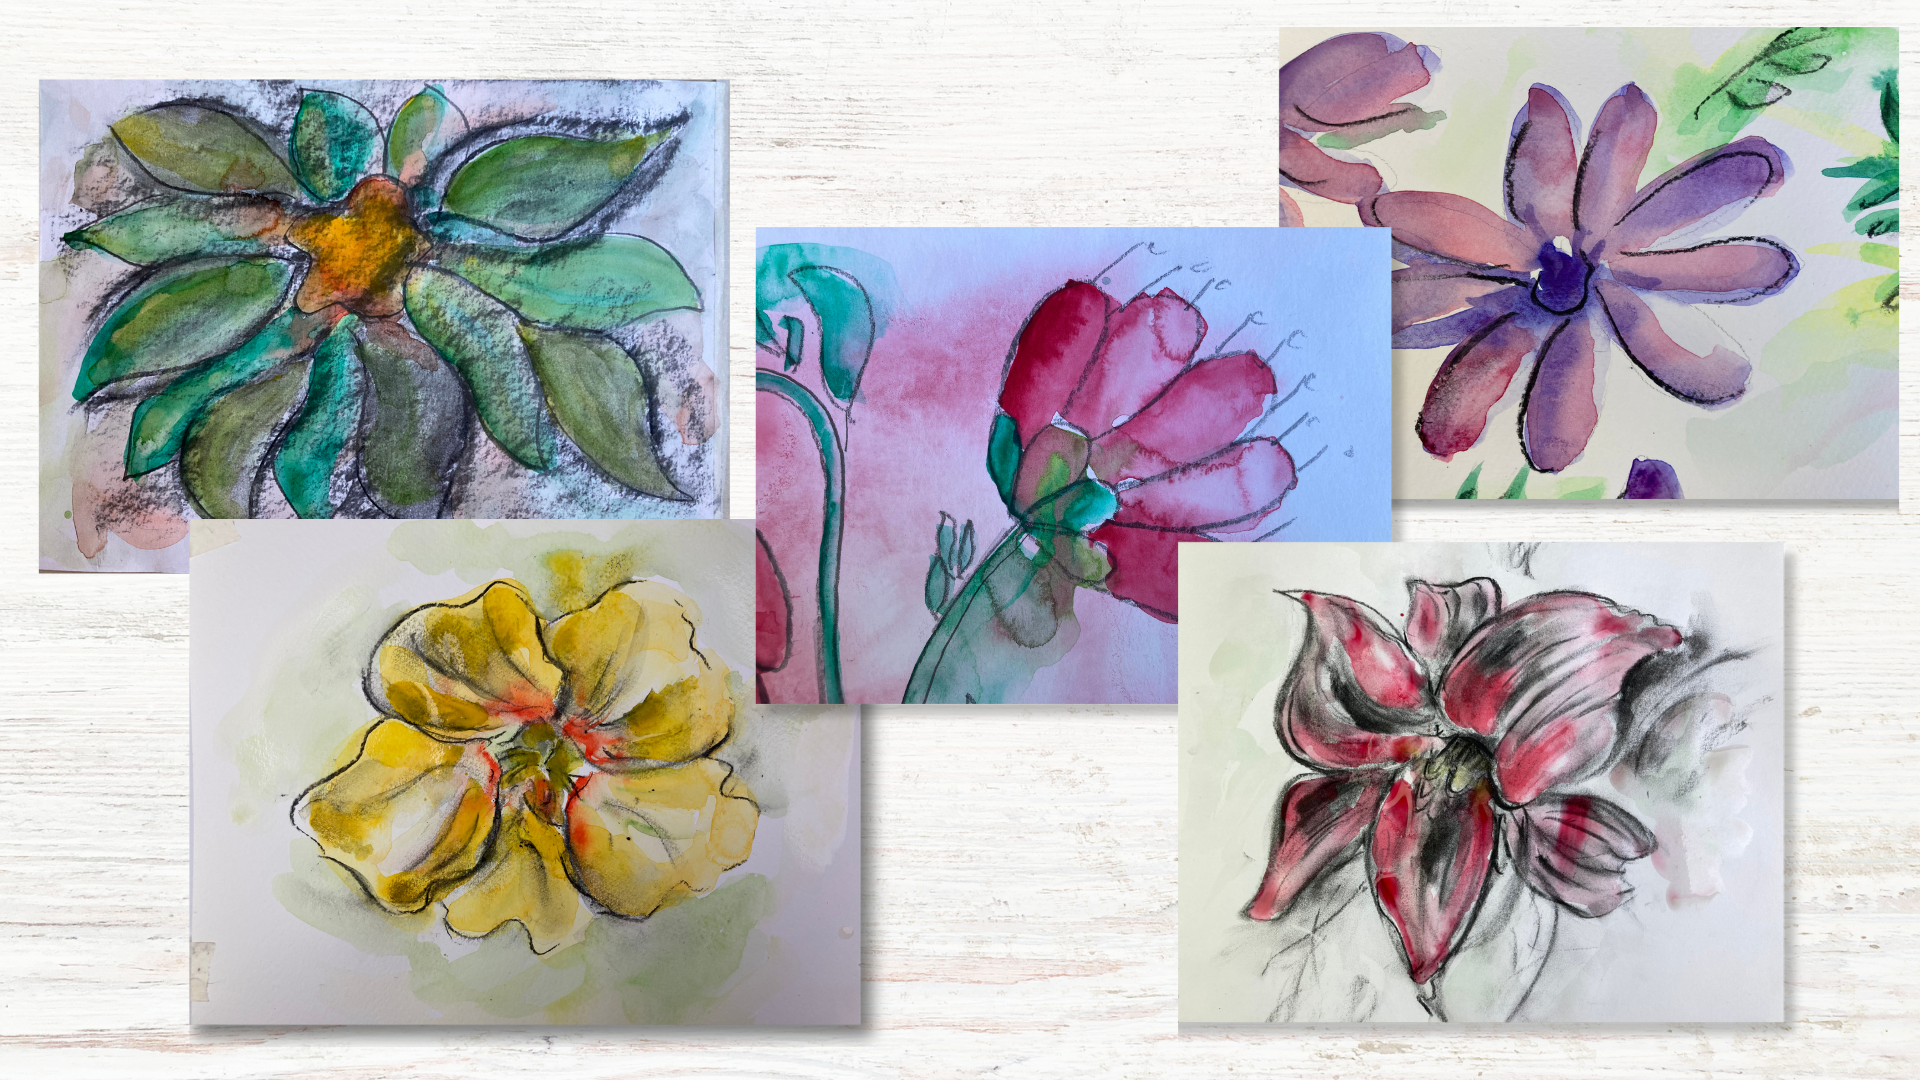
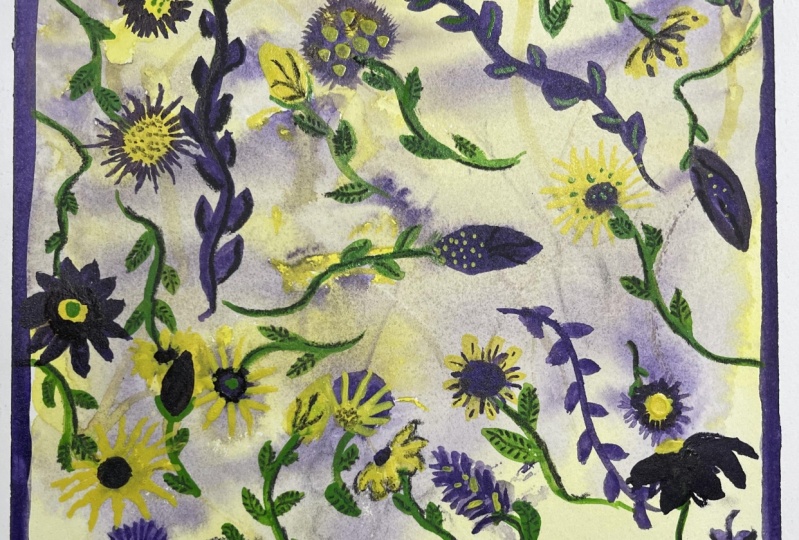
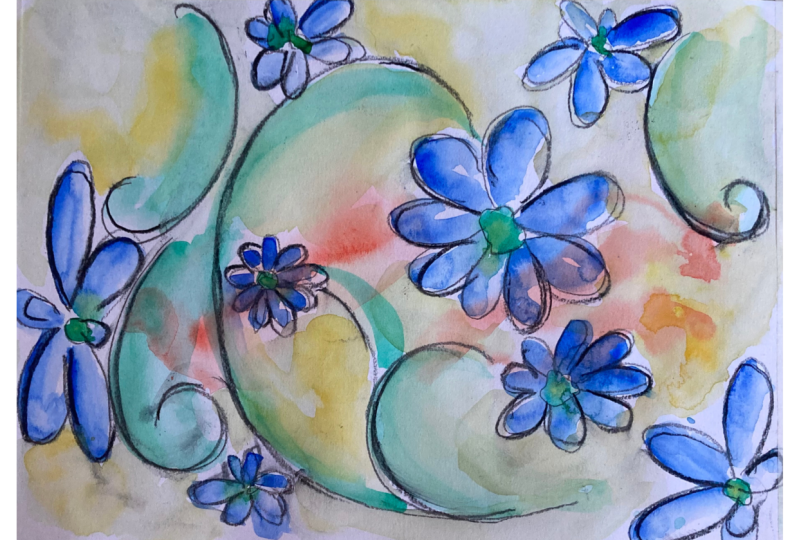
3. CLASS PROJECT: For this class project, I would like you to create
a floral pattern using the techniques and tips that
you'll learn along the way. After experimenting with your
watercolors and charcoal on paper and learning about the different
ways you can use them, you'll easily be ready to
create your own floral pattern. There is a lesson devoted
to pattern making. In this class, we'll
give you extra ideas and even shows you how to use AI
when you're feeling stuck. There are all sorts of floral
patterns you can invent. Some will use gentle subtle
flowers for camming effect. Others will include bold, striking flowers that
grab your attention. Once you let yourself
be free and just go for it and worry about
it looking a certain way, you'll find pattern making a
fun and addictive art form. You can download and
print the floral template provided in the
resources section has a good starting
point and you can make it your own by using lots of different colors and add depth and texture
to the painting. I'd love to see the
outcome of this class. I would really appreciate
it if you could upload some of the images of your work in the
project gallery. The more artwork
people share there, we can learn and be inspired. The next lesson,
we'll look at why exactly do flowers
inspire artists so much. This lesson allows
us to pause and think about our subject
in a bit more detail. Before we start to
create our art, I'll give you six big reasons why flowers can be
so captivating.
4. WHY FLOWERS INSPIRE ARTISTS : I love painting flowers
so much so that I had a solo exhibition completely devoted to the subject
called The Blossoming. You can see some of
the paintings from the exhibition here the shapes, depth of color and
the rugged beauty of them just fills my
mind with inspiration. If I'm painting them outdoors, it can instill in me a piece. I love painting nature,
It's very caning. I'm now going to
name six reasons why flowers can lead artists
to create amazing work. I'm sure you'll connect
with one of them. Firstly, flowers are colorful. The depth and
variety of color is immense and provide so
much for artists to study. Second, flowers are beautiful. They will catch your eye and make you want to
study them more. They have shapes, colors, and textures that combine
perfectly and motor. Third, the scent of
flowers can grab your attention and make you want to capture this
in your artwork. Fourth, flowers have
a natural ability to make you want to touch them. How can we grasp this
concept on paper? Which painting
techniques will work? That is for you as an
artist to explore. Display shapes glow flat, curvaceous, rippled or
spiky, to name a few. You could have fun painting these shapes as there
are no boundaries. Lastly, flowers are often connected to memories
or times of year, such as Valentine's Day. This may bring certain emotions, whether it's sad or happy, to the surface and that
can spark creativity. I've just mentioned
a few reasons why artists are
inspired by flowers. What artists do with inspiration can lead to million
different avenues. But in this class, we'll be
using our inspiration from flowers to create a variety of paintings made from
watercolor and charcoal. Continue onto the next video
where we start to have fun experimenting with watercolor
paint catch books.
5. WATERCOLOUR TECHNIQUES: Experience really does make a difference when using
watercolors to paint with. This is where mark
making in sketchbooks, before painting your subject for real can really benefit artists. In this lesson, we'll
do mark making with our watercolor paints and see how many effects can really
be achieved with this medium. I've created two
workbooks that you can download and print out to
help you this activity. You can find this in
the resources section, I will quickly show you six main watercolor techniques
that will help you greatly when it
comes to painting any subject with watercolors. I'll go over these
fairly quickly, but you can pause the
video if you want to try out one technique before
starting the next. Firstly, let's look at experimental mark making
brushes by swirling, applying different amounts
of pressure to your brush. Just getting to
know your brushes can open up a confidence
When painting. When you know the
marks that you are capable of making in
your sketch books, you'll be much better prepared for you to try to do a more
polished piece of work. Look at these examples and have a try in your
own sketchbooks. This is purely experimental, There's no right or
wrong way of doing. Secondly, there's a famous
wet on wet technique. I find this to be the most
advantageous technique when using water colors. You can dampen the paper first
with your brush or sponge, and then when you add
another layer on top, the colors spread naturally. Can't create this effect, usually acrylics oils, but
it's so easy to do here. This technique is
perfect for things like skies or rivers, where colors blend
smoothly into each other. The delicate nature
of flower petals can be achieved by using the
wet on wet technique. When the colors mix with each other or blend into the water, this is called bleeding. Basically the colors
lead into each other, That's around with the
different amounts of water in your brush and on the palette
to see what's possible. Thirdly, there's the
wet on dry technique. We simply use watercolors as you would any other to paint, just mix the pigment a water
and apply it to paper. I would use the wet on dry technique for
painting sharper detail. You can also use
this technique to create deeper, darker colors. As with each layer
of watercolor paint, you apply, when it dries the
paper, it becomes bolder. Fourthly, I encourage you
to try color grading. You can see how if you
apply color at one end and then use a wet brush to guide
the color one direction, the color is pulled away and
it gets lighter and lighter, and the water helps
make this flow. Remember that watercolor
paint is translucent. The color of the paper will shine through when the
paint is downluted. Fifthly, we have splattering. This could be used to
create a speckled effect that sometimes see on petals, or use it as part of
the background while painting your main
subject on top. You can also flick the ends of your brushes for a similar
effect but more messy. The last technique I want you to try is layering washes of paint. When using watercolors, you build up the painting
layer by layer. You can use a hair dryer
to speed up the process or to guide the paint in a
particular direction. Do not rub the paint on as you can do with
oils or acrylics. Let the paint easily
come off the brush, let it flow onto the paper. You can see in this
clip that if you apply a layer upon
layer of washes, the color becomes
darker over time. Paintings are made by combining all the different
techniques you've learned by practicing
in Sketchbooks. First, you'll approach
your painting with confidence and continue to
develop your own art style. I hope you have fun messing around with the
watercolor paint. There are many more effects that can be achieved
with watercolors. For example, you can
use things like salt, cotton wool to create
interesting marks on paper, But the techniques I've shown already all work well together
for painting flowers. Join me in the next lesson
where we'll do the same with charcoal and discover effects that can be used in
your floral art.
6. CHARCOAL MARK MAKING: Within this lesson,
I'll show you the different marks you
can make using charcoal. I encourage you to
look at my examples, but also to discover your own way of doing things
with charcoal on paper. We are getting super close to, we can actually start
painting flowers for real. I know you might be itching
to just get started, but I encourage you to take a little time to mess about
with your charcoal first. Charcoal is a much easier medium to use than watercolor paint. The mark making is much
more straightforward. However, if you've never used charcoal before or
even heard of it, then it's definitely worthwhile experimenting with it
in your sketchbook. I hope you've found
experimenting with both watercolors and charcoal in your sketch books to be useful. A lot more will be explored
in the following lessons, but what you've achieved so far will stand in goods stead.
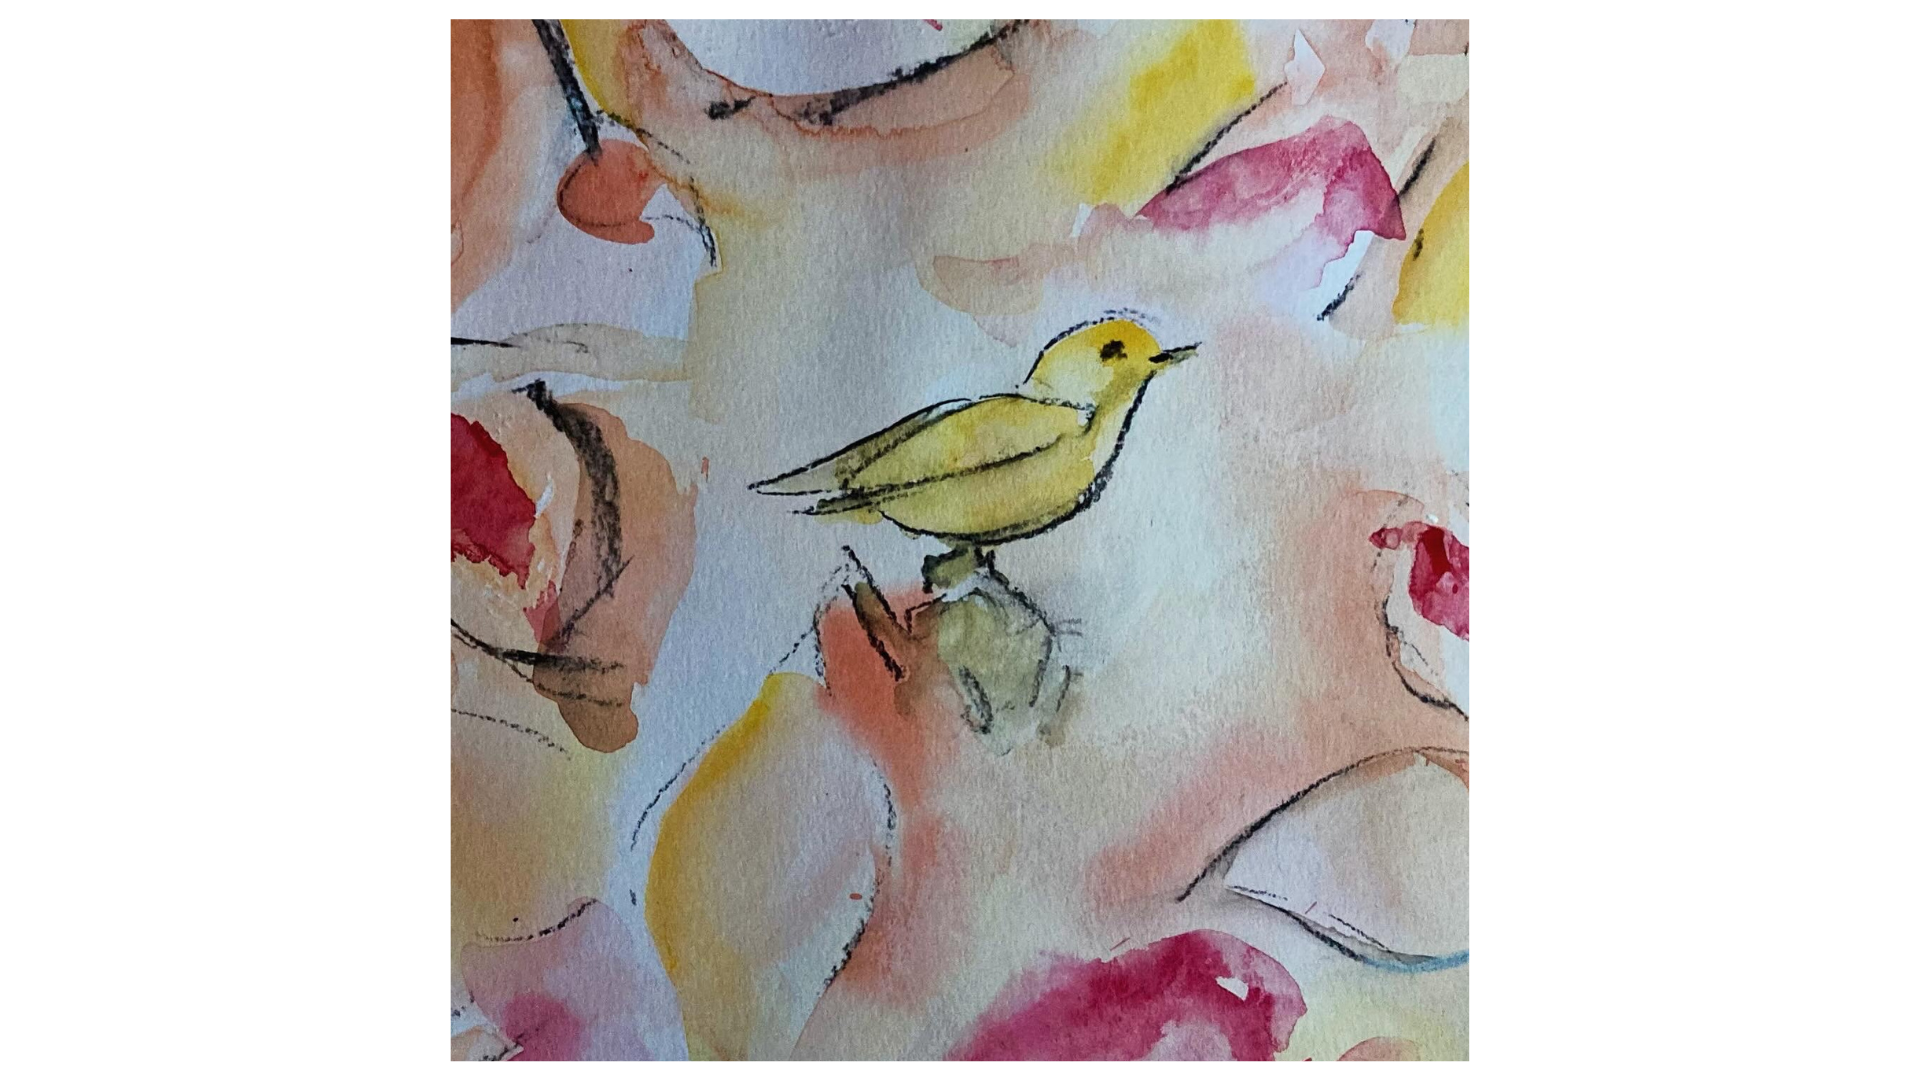
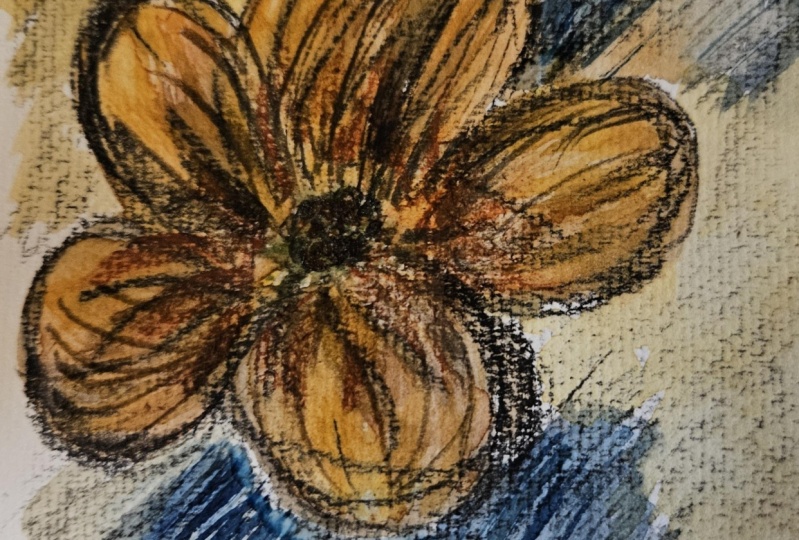
7. METHOD 1: USE CHARCOAL FOR FIRST LAYER: Now that we know more about how to use watercolors and charcoal, we can now move on
to the exciting bit, creating floral art,
using both at once. In this lesson, I'll
show you how to paint flowers by using
charcoal as a first. Obviously, you can
use them as I win for this class will make
charcoal the base layer. I'll show you four
different examples where to use charcoal
for my initial were. Each one is painted
in a different style. I'm using the tip of the charcoal to draw the
basic shape of the flower. You can see I'm
drawing the lines in very particular directions. I don't just work
from left to right. I'm drawing the picture while
at the same time making it three D by smudging it where there is
shadow on the leaves. This is giving my flower
shadow and shape. Be experimental with your lines, just like it did
in your skeptics. Some people are more expressive than others
with their drawing. It's totally up to you
how you want to do it. If you're thinking, wow,
it's getting a bit dark. Now, I thought we were going
to use watercolor paints, so I thought it would
be nice and gentle. Then remember that most of this can be taken
off easily with a putty rubber if it
looks super dark. Just now I've smudged in most of the charcoal and reinforcing the deep,
more important bits. Now that I've smudged
in the dark bits, a few more wiggly lines here and there to give us some
detail and some character. This is me just warming up the putty rubber to get
it into the right shape. I'm just going to lift it off. See how clearly that lift off the charcoal from the paper. I'm using the putty rubber
to draw it as well. As I go along,
I'll keep smudging it to take bits away and
to build up the picture. Gradually I'm just giving it a
bit of background. Now, it's not a floating
shape on paper. You can see that it lifts
the image off the paper. If you give it a bit of
background in shadow, just to put it in context, there we go. I'm just about to add
the, this is exciting. I'm going to add color
to our charcoal picture. I've already diluted
the paint with water. Here we are. Nothing dramatic or crazy is happening.
Everything's under control. The paint is just
sinking into the paper. It's doing all the things
that we experimented with. Our sketch books, you'll see
all happening for real now. While you paint your flower, you can use tissue
paper to dab and lift off any bits you don't like
or if there's too much water, it's good to have
the same colors in your background that you
have in your flower. It makes the whole painting
come together as a whole. The different bits,
isolated incidents, they're all part of
the same picture. There we go. There it is. My watercolor sketch book. I'm going to use my box paint. I'm adding water, just
pure water, to my palette. And then I'll add
as much pigment as I like until I get the
color I'm happy with. Again, I'm applying it to my
charcoal picture this time. I'm not aiming to add so much color like I
did to the last one. I just want to give hints
of color here and there, just so it's not a pure
monochrome picture. Similar to the last painting, we use a quick and
messy approach. We use a stronger color
for the second layer. I really like charcoal sketches,
but for this one here, I'm just giving it
some added depth and interest by using some
water colors as well. Similar to the last painting, we use a quick and
messy approach. Use a stronger color
for the second layer. I'll show you a
quick and messy way to use water colors
to paint a flower, draw a basic flower
shape and charcoal, and use the wet on wet technique to give a messy but bold flower. The colors naturally
bleed into each other, which means you don't
need to do anything else. Just wait and see what
happens to the painting. In the next lesson, I'll
show you how to build up a painting by using water
colors as the first layer. So hop on over to the next
video and we'll get started.
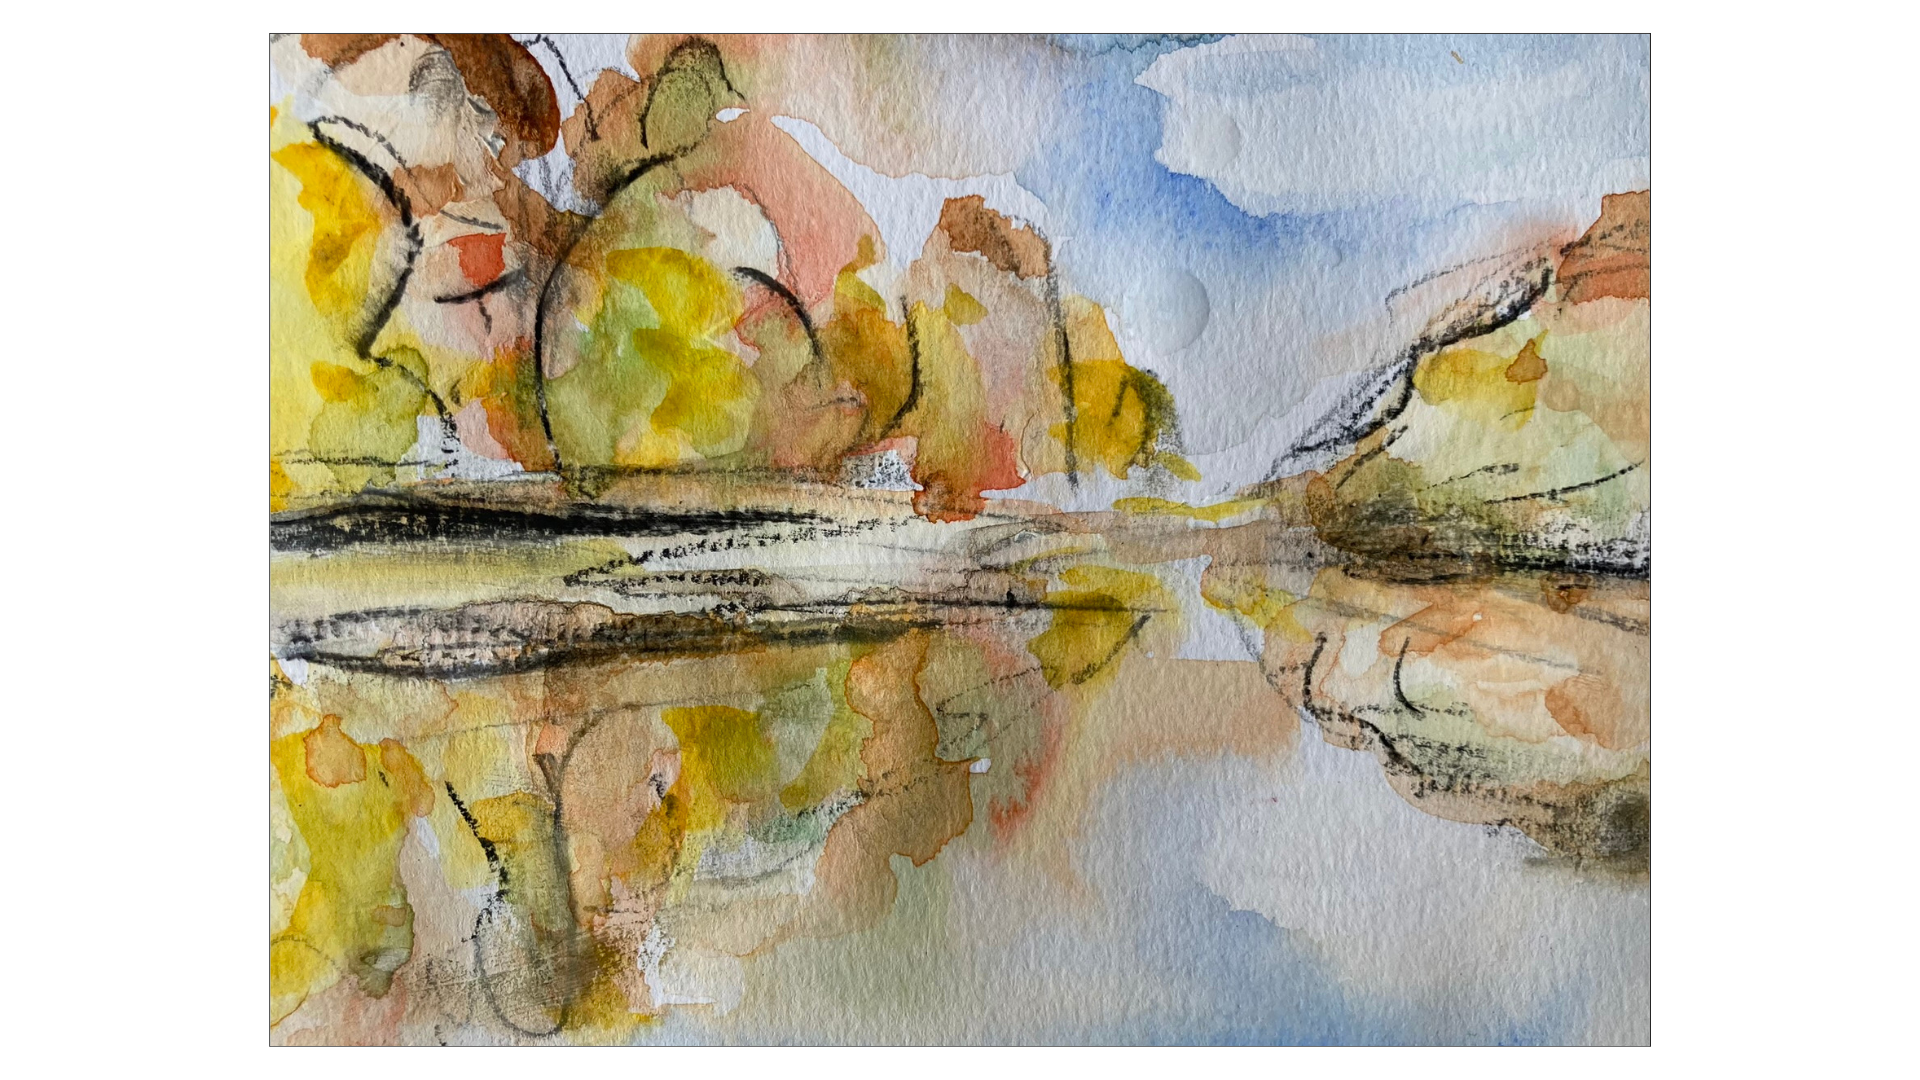
8. METHOD 2: USE WATERCOLOURS FOR FIRST LAYER: Let's look at how
to build a painting using watercolors first,
then adding charcoals. We go a long, I'm just going to apply my first
layer of watercolor paint. I've already mixed
up my color with the water and I'm putting
on fairly loosely, really worrying
much about whether it's the right size or whatever. I'm making a nice
fluid painting here. I'm using water to
plead the color out. First, there was paint,
Now I'm using water in a separate brush to
pull out the colors, add in a second color while
the paint is still wet. This will also bleed
into the yellow, creating a nice natural effect. As you can see here, I've
changed the brushes. This is the rigger
brush, which is perfect for pulling the color in the
direction that you want. You can see again that
the paint is still wet. It's bleeding with the
background color to make a natural petal look by adding water to your
brush, pure water, You can drag out the color and you can see how fundamental the orange
bits are in the middle. They really add to the shape and to the look of
an asturtium petal. Just look at the
strong colors and bold pattern found
in these flowers. Watercolor paint can be used
to capture this beauty. Use layers of paint and
build up the picture. I'm going to add some
green to the center. This is a wet on wet technique. Works well if you use the same colors throughout
your painting, it unites the painting. I want to reinforce the yellow. Once it's dry, I'll put
a separate layer on. This is also giving it depth. Deeper, darker color will make the petals
look more shapely. The second layer will also adds more color as the colors
have become lighter, as they dried and
sunk into the paper. You can see already this is
giving a three D effect. It makes the flowers stand out. You're using a variety
of watercolor techniques to build up here. I'm using the water to bleed the color out that unites it. I'm now going to
use charcoal to add clarity and depth
of this painting. This is why I chose
to use charcoal to complement water colors
in the first place. Now that we've got out
our basic flower shape, we're going to use
charcoal to sharpen up and give you more
shape, more clarity. As we've learned in mark making, there are lots of different
ways to use our charcoal. I'm just outlining the petals here to give the basic shape. Some people might
want to stop around here if they're happy with
the look of the flower. You don't need to be so heavy handed, you don't need to apply. It's so dark. I like
using charcoal. It's one of my favorite mediums. I think it can really
add some spark. You can see by looking
at this petal, the light and dark
bits of the petal. That's what to look out
for when you're painting. Keep an eye out for the
lights and darks shadow here. I'm just using the colored water on the brush to add
some background, a background color so it's
not just floating the water. Even though it's being
used with charcoal will still move the particles of
charcoal in the way you like. The color won't
bleed or anything. It will just reinforce the lines and the shapes with your brush. Here, I'm thinking I
want to add shadow, but I want a bigger
brush to give more bold and striking
shapes or confident lines. The little brush was
good to start with, but I want something bigger. Now I want to
reinforce the green. I've already waited for
the first layer to dry, and I want to add some
more green again. By having it in the background, you can unite it altogether. Here I'm adding
deeper, darker colors. On top, you can see
more depth is arriving. Now you've combined hand in hand charcoal with
watercolor paint. In the next lesson, we're
going to look at how to make a floral pattern using
watercolors and charcoal.
9. HOW TO CREATE FLORAL PATTERNS: In this lesson, I'll show
you how to make a variety of different patterns and show you how to gain inspiration
if you're struggling. The project for this
class is to create a floral pattern and to
share it in the gallery. This lesson will
be super helpful. This shows a pattern done
in pencil, more to fill. This pattern was just made
by looking at a flower and repeating the shape in
all different sizes and putting all of the paper. I'm starting with
red. I've already got water on my palette. I've just added a
bit of the deep red. This is dry paper using, I've not added any initial
layer of water on. I'm just using a very
light color to start with. This is a deeper color. I'm going to add this on top. It will bleed a little
bit because the paper is already wet from the first
layer of light color. This is me adding
pure water to it. This is really going
to make color bleed. This will fill out the petals. Instead of having one
strong line adding water, it's creating the whole petal at this stage is felt like
painting by numbers. I'm not doing anything very expressive or
different right now. Here we see the
bleeding technique. This is quite a subtle,
delicate pattern. I'm using a little
brush to keep it nice and neat and to
fill out the edges. This can be quite satisfied. You're basically coloring in the areas that you've
already penciled in. Then I'm going to
add some yellow. We're just building
up the flower. I'm using the rigger brush, which is perfect for doing
thin, delicate leaves. Now onto an exciting bit, We're going to use the
charcoal for definition. We're going to use it throughout the pattern so it's all united. Again, I'm reinforcing it and giving it even more
three D effect. Even though I've already
got shadow with the paint. People might be thinking,
oh my painting. But since we've already
decided to use mixed media, it's good to experiment. You could stop here
if you want it. If you think that's
enough charcoal, I've got enough clarity here. That's my finished pattern.
I'm happy with that. I'll now show you a demo of me painting a more bold
floral pattern. The color is added
with less restraint and there is more
contrast in this pattern. I'm going to use the liquid watercolor paint for
this flower pattern. The pigment is often
stronger in tube form, so you don't need a lot. Don't worry if your paint
dries on the palette, you can still use it by
adding some water on top of your brush color will
come back to life. It's not like acrylic
paint that drives super fast and can't
be used if it dries, I'm adding the background first. Usually if you do want
background colors in a pattern, it's easier to add
this first and then you can focus on painting
flowers on the top. The background will
already be dealt with, it won't ruin your flowers
if you try and fill it in later because we're doing an
organic floral base pattern, greens and yellows
will be very common. Background colors, you can just use the pleading
technique to cover areas. The flowers are really
the focal point. You don't want to give too
much detail to the background. So we're going to build up the petals similar to
the delicate pattern. We're going to do
the deeper color. And then I'll use the water to pull the color, to
fill in each petal. It's a quick and easy way, especially for
painting a pattern. So here we go. The second color, pinks and purples often go together and they are a good combination
for this pattern. See the we flower tip there? Add it to the tips, that
makes it look three D. Now we're going to
use the charcoal. We're going to give
definition to the petals. You really can be as dominant or as light as you want
with the charcoal, depending on how much you think. When I use charcoal for the
first layer in the painting, it was much more dominant
than when we use water colors first,
more delicate. That's me giving
definition to the leaves. Don't forget about
the background. If that's important
for the painting, you don't need to do much. Just a few real lines
here and there. And that can be enough to give an impression of an
organic background. I'll point out that the
paint is dry at this stage, so it's safe to
smudge the charcoal. The paper won't be ruined. I use the AI facility on Canva. For those of you that
haven't heard of Canva is an online graphic design
tool, is easy to use. Getting to Canva is a
useful activity in itself as it can be used by artists for a whole number of things. Creating social media
posts, blog posts, flyers. I use it to edit many of the video clips that I use while making classes like this. I'll see you in the next
video where I'll show you how to use AI to
get pattern ideas.
10. USE AI FOR PATTERN INSPIRATION: In this lesson, I'll show
you step by step how you use the online graphic
design tool called Canva to come up with
ideas for pattern making. First of all, go to
the Canva home page, go up to Create a design, and scroll down to
Facebook Post Landscape. That will make a
particular shape for you to fill with pattern. This is a good general
size to fill in. You can choose any size
to fill with pattern. Then click on Apps and scroll down and you'll come
to one called patterned. I then type in a description of the
pattern you'd like. I'm putting in a
watercolor flower. You could put in flower
pattern or flowers. You can decide how many patterns you'd like camera to give you. I'm just going to go for one
click, Generate Pattern. It takes a few seconds and it will create
a pattern for you. You can zoom in and out to get a better feel
for the pattern. Click Add to Design. There it goes, it
fills the shape, it fills the rectangle. And then you can just download
it, so you can print it, or you can just leave
it on the screen, Sketch your pattern from
there if you prefer. It has given you
a starting point. What I want to point
out is that this can be a good tool to use for ideas. But for me personally,
I find no joy in making a manufactured
image. The final product. I want to create art that has been inspired by
things around me. Yes, but the actual painting
of it has to be done by me. I love getting my hands
dirty and covered in paint. I would want to
take this AI image and make it my own on paper. Join me in the next
video where I show you how to seal and
protect your artwork. You don't want your
beautiful floral art to be destroyed within the
first hour of making it. Find out how best to easily preserve your artwork,
you and others soon. Joy in the next lesson.
11. WHY WATERCOLOURS & CHARCOAL ARE AN AMAZING COMBINATION: As we've learned,
flowers are one of the most recognizable and
beloved subjects for painters. When watercolors
and charcoal are combined on paper
to paint flowers, the results are often
breathtaking and full of life. In this lesson, I'll give
you a recap of why using this combination
will help you to develop your own art style. First would be charcoal can be used to give definition
to watercolors. If your watercolor
painting needs tabs, clear lines and bits and
charcoal is perfect for that. Having clear, crisp lines can be important when
painting any subject. This is a handy tool to have
ready to have on your desk. Two, using charcoal helps
watercolor paintings look more. Three D, strong shadows, that charcoal mix easily. We'll give your flowers life and look like you just
pick them off the paper. Three, charcoal helps to add contrast within a
watercolor painting. You can create old marks
with watercolor alone. But a much speedier
way to achieve contrast is to use a
medium like charcoal. The fourth, combining
watercolors with charcoal is a good starting point for beginners learning
mixed media art. You may feel intimidated
by the thought of mixing lots of mediums on one
piece of paper or canvas. Using charcoal
alongside watercolors is an easy way to break
free of thinking. You have to stick to
using one art medium. Mattie. It's almost time for you to get cracking and
start working on your own. I'll see you in the next
video for the class round up.
12. SEAL AND PROTECT YOUR WORK: Once you're happy
with your painting and have decided it's finish, which is often a hard
decision to make, you will want to
seal your painting with a fixative spray. This will hold the
charcoal and place. If you don't seal your artwork, the charcoal smudge, you touch it or it'll come off
the paper over time. You can buy fixative online that is suitable for
charcoal and pastels. You'll be able to use
it for other projects, but a cheaper alternative is
just ordinary hair spray. It will hold the charcoal
on to a certain extent, but often leaves
a sticky residue and won't give a
professional finish. I use this as a student, but I wouldn't do it
for my proper art. Well, we've covered
a lot in this class. Sadly, it's almost over. To recap on why
using watercolors and charcoal such a
fantastic combination, take a look at the next lesson. I'll give you four
big reasons why using these mediums can work
wonders for your art.
13. CLASS ROUNDUP: Hi, well done for
completing the class. I hope you've enjoyed experimenting
in your sketch books, exploring different
techniques, and I've become more confident in
mixing up your media. As we have seen,
there's no need to stick to only one art medium. And it can be
exciting to discover the effects that can be
made when mix and match. I'd really love to see
your floral patterns. Please share some
photos in the gallery. It is amazing that after
watching the same lessons, artists come up with
such different artwork. I hope to see you in some of
my other classes as well. You'll find the information
on my skill share bio painting for it.
 Vivienne Edgar, Mixed Media Artist