Transcripts
1. Introduction : Hello, I'm Vivian and I'd
like to show you how to turn rocks into pieces of art
and garden decorations. I'm a mixed media artist
from Scotland and I've been creating and selling
my art for over 20 years. I've exhibited in
lots of galleries, a work on commission,
teach art online, And of course, I'm
also a rock painter. I paint and sell my rocks from my Etsy shop and also
locally at craft fairs. So I have lots of
experience when it comes to share rock
painting skills. This class will start with
the basics of rock painting. No previous
experience is needed. Then I'll show you the
best techniques for creating your own more
advanced pieces of rock art. This class also
includes lessons on how to use acrylic
paint and paint pens. These mediums are perfect
for rock painting and for many more art projects
you'll have in the future. You'll be a confident
rock painter in no time.
2. Welcome to the Stone Painting Class!: That's the way, the skill. I'll now get to the studio. Here we are welcome to my studio and to the
rock painting class. In this class,
you'll learn how to create simple
garden decorations, such as ladybird stones
or fairy houses. And also gain the knowledge to enable you to take
your soils further. I promise to give
you the best tips and techniques for
painting on stones. There's also a large selection
of free documents to download that will help you to design and create
your painted rocks. It's a good idea to
check these out. Please feel free to ask about anything you're
not sure about. You can ask me
questions directly by clicking on the
discussion panel. This rock painting class
has a main project. For this, I suggest
that you make an ornament for your
garden or a plant pot. I will show you several
examples and encourage you to experiment with designs and share your work with the class. You will find out more about
this in the last lesson. While the enthusiasm about rock painting is still
fresh in your mind, it's good to put it
to you straight away. The class project will
help you with this. I'll see you in the next video where we'll learn how
to get our stones ready for painting and take a look at the art
supplies needed.
3. Supplies and Prep for Rock Painting: As far as supplies go, you don't need that
much for doing this. You need, obviously, rock. You need some stones to
paint on. You need brushes. I've got several types. I've got a rounded one, a flat headed one, That's called a rigger brush. It's got long bristles, that's good to pull a
long stone like that. A palette for
mixing your colors, and a whole selection
of acrylic paint. Here, you can go crazy.
There are so many colors. There are cheap ones,
Expensive ones, just like any with
any art material, I'd recommend practicing with the cheaper ones first just
to get to know how they are. Like acrylic paint, it's quite
creamy, it's quite thick. You got to learn how to
mix that with water. Fully blend it, and keep that creamy consistency while
you're working with it. If you're used to
working with watercolor, it's totally different. You use a tiny bit of paint and lots of water, and can blend in. Whereas acrylic paint is thick, it's bold, and it's creamy. It's a lovely
consistency to work with and perfect
for rock painting. You'll obviously need
some stones as well. The best stones used for rock painting have
smooth surfaces. Any shape can be used
for rock painting, but ideally, you want the part you'll be painting
on to be smooth. If you find it hard to
find some smooth rocks, you can buy them from
garden centers or online. You can even make your own using a strong clay with a cast. You just pour it in and
wait for it to dry. This is fine if you're going to place the painted
stones indoors, but I wouldn't recommend
it if you're going to make some garden decorations because they're not weather
tight as reels, stones scrub your pebbles
until all the dirt, grease, or dust has
been washed off. It's important that you
don't skip this step, as your beautiful
work will just be ruined when the dirt
underneath flakes off. Taking the paint with it. Make sure your rocks are fully dry before you start
to paint them. That will be you all organized to allow you to get the
most from this class. I don't just want you
to follow step by step instructions a bit
like painting by numbers. I want you to understand the art mediums that
you'll be working with. That's why the next
two videos focus specifically on
working with acrylics. This information
is really valuable for any type of
acrylic painting. It's worthwhile taking
a few minutes to focus on this before we
start the actual painting.
4. How to Use Acrylic Paint: Before we start painting
designs and pictures on rocks, I'd like to teach you how
to use acrylics properly. The reason we use
acrylics for painting on stones is that the paint has a strong and thick consistency
and dries quickly. I'd say that acrylic paint
is the easiest to use. For beginners, it is
more straightforward. You don't need to use chemicals
to wash your brushes, like you do with oil paint. And it's easier to control
than watercolor paint. The thing you have to
remember though is that acrylic paint dries fast, dries quickly on your
brush and on your palette. This is a bonus for
artists who like to work in layers and hate
waiting for paint to dry. But it's not so
good for people who like to take their time while deciding on the next brush
stroke as it dries quickly. I would advise
that you don't put lots of on your
palette at one time. You'll most likely
end up wasting paint. Here is one of my
palettes where you see some of the paint
has dried on it. You can see how when you peel off that is
quite plastic key. This is also a good
reason for using acrylic With rock
painting, with a coating, with something as robust
as acrylic paint, your painted rock has a
better chance of keeping its original color and also makes the design
more watertight. As I swirl my paint
brush in the jar, you can see that
the color doesn't immediately start to
leak into the water. It actually takes effort to fully get rid of
the paint again. This demonstrates how acrylics
are perfect for painting something like a
garden decoration where the paint needs
to be quite strong. Now I'm going to show you
the correct consistency of acrylics that is best
for painting on rock. You don't want it too watery
as you'll end up just giving the stone a wash of
color rather than painting it. This is fine when you're
working on paper, but the color will
hardly show up if you just apply thin washes to stone. You don't want the
paint too thick either, unless you want
dominant strokes of color that will add
texture to your stone. Once you've added some
paint to your palette, swirl your brush in the water, get it completely white, and then add it to the paint, Mix it thoroughly, then decide if the consistency
is right for you. You can see here that I'm applying quite thick
strokes of paint, quite close together, leaving
dominant markings behind. If you're aiming for
a flat covering of paint with no obvious
brush strokes, you might find
yourself in trouble. If you do this, using
a dry soft brush to blend the marks together
is the perfect solution. The dry brush will gather the paint and blend it
together naturally. As the brush has no water on it, it won't leave any streaky, diluted color behind either. When painting a larger area where it's all going
to be the same color, then load up your brush fully with the paint
so you can have consistent and unblotchy marks if you're just focusing
in on a small section. However, just adding the paint to the tip of the brush
should be enough. I recommend experimenting with your brush and paint on paper, you get the feel for the medium. For example, your
brush up and down. Pull your brush along
long distances on the paper to see how it looks or make criss crossing marks. All of these will help you get to know the medium
and your brushes. This is recommended
for all mediums, whether it's watercolor
oils or charcoal. Now that we've had a quick look into how to use the paint, we'll move on to using another method of applying
acrylics to stone. That would be using
acrylic paint pens.
5. How to Use Acrylic Paint Pens: In this section, we'll
quickly look at how to paint an image onto rock using
acrylic paint pens. Now, one of my favorite
things to do that helps me feel a piece is walking
through the countryside, especially during autumn, when the trees are all different
colors and textures. I often can't
resist taking homes on the leaves or taking
some photographs. The natural pattern,
colors and textures always fill me with inspiration and the walk helps
to clear my mind. This inspiration led me to paint an autumn leaf
onto one of my rocks. The color and pattern were
just too good to let this idea go as I took some photos and painted
the leaf with acrylics. When I go back to the studio before I show you my
autumn leaf stone, I want to show you how
acrylic paint pens work. Like a normal pen, where you just take a lid
off and scroll on the paper. Acrylic pens are
quite different. You have to push up and down with the nib to get
the paint flowing. To start with, you might
start to think, hey, I'm ruining my paint pens as you have to push
them down quite firmly. But you have to do this to
get them working again. I recommend using this
technique on your paper first, just to see what
paint pens are all about and the best
way to use them. So let's look at my
autumn leaf painting that I did onto stone. I'll talk you
through how to build up an image using layers of color and markings so you can do the same with
your future projects. You can see here we've
got the autumnal colors. First of all, we'll just
draw our design onto the rock pencil is
probably best for this. Then I'm using the
acrylic pen just to get the frame in so I know the
basic shape that I'm after. Then we'll want to
apply a white coat of paint to the entire
shape of the leaf. This is, so when I
paint the leaf on top, I've got a nice clear
background paint on and the colors
will show up more. Also, you can see
that the color from the pen is leaking through
the white acrylic paint. That's also a really
nice touch and that will come in handy for
later effects as well. That's me almost finished
the leaf in white. I'll just put in a wet in
there to keep it in context. I'll just keep the edges nice and sharp because
that will make it look crisper and autumn like I'm just adding
my first color. I've chosen yellow
to start with, but there are other colors
you can start with, like yellow or brown.
It's up to you. But generally with painting, you start with the lighter
colors first and build up. Here we have the brush.
I love doing this. You put the acrylic
pen on first, then you use the brush
to blend altogether. Now I'm just adding orange
pen marks and layers. Obviously, I've
speeded up the video. I'm adding brown
and darker tones. This will help it to look more three D and I can see
that I've done some dark bits around the edges that will help the leaf to look like
it's off the stone. You'll see more of that later. Now I'm adding my
fourth color, red. This is a deeper color,
not necessarily darker, but that will also help it to make it look more three D
and give us more interest. This is also a
speeded up version, but you can see the leaf
is starting to take shape. Even though I put
lots of layers on, they're all coming
together nicely. And I'll use my
brush to blend it. Obviously, if I didn't use
the brush straightaway, the acrylic paint
wouldn't blend. It would be dry and it
would stay as it is. There's me just
blending altogether, leaving no white
patches underneath. I wanted to look
like a three D leaf that you can just
pick off the stone. I'll just say that this is
quite an advanced painting. I don't expect you
to do anything of this level if
you are a beginner, but I'm just showing
you what can be done with the pens now. I've added some white bits and
I'm smudging all together. It's almost finished.
And I'm thinking, yeah, I quite like it, but
it might need more detail. Can you see it looking good? Can you see the
shadow underneath? I've added water to a
brush to help the colors bleed a bit more and that
they don't get too thick. There we have it. I have one more example for
you of how I used acrylic paint pens on rock
to build up a picture. This is of a completely
different subject, but again, born out of something
I totally love dancing. Join me in the next video
where I'll show you how to do some popular or simple designs that are perfect for beginners.
6. Example 1: Bee Painted Stone: I find gardening to be relaxing even in the
Scottish climate. And I think that adding
painted rocks to the garden can give it
some extra personality. The first example
I'll show you is how to turn your stone into B. As this is a beginner class, I'm starting with a very
simple but specific design. This will be easy to follow
but will allow you to gain confidence so you can
try out your own virgins. The colors will be
more vibrant and clear if you paint
on top of white. Initial white coating also gives support to
your next layer. The paint will stick better
to your first layer than it would if the design was painted
directly onto bare stone. Either use white
acrylic spray paint or a large paint brush with soft bristles for
the initial coating. Using the spray paint will
give a more even finish, but it doesn't affect the
overall look that much. Having a soft brush will help
to not leave thick marks, which you don't really
want for an undercoat. Here is our pebble, with
its initial coating of white acrylic paint. We leave a bigger bit for the head and to give
space to draw the eyes. Use your ruler to mark out
where the lines will go. It looks better if the
stripes are the same width we sketch in the eyes and mouth. Now these lines just
act as a guide for your painting so your drawing doesn't need to look perfect. It's as best to paint
the yellow areas first, as when you use the black paint, it'll be very difficult
to paint over it. Always paint the black layer. Last, let's use our
acrylic paint and brushes. You can see I've already done the head yellow and I'm
working on the stripes. Since I'm after a bold design, we'll keep this nice in net. Add a second layer
of color if need be. Sometimes if the paint
color is very strong, you need to do a second coat. The more layers you add, deeper the color will become. I'm now going to
use my acrylic pen to add some definition. I'm going to be
using black paint. In a minute, I'll draw a black outline to
separate the colors. It makes it easier
to fill in the gaps. If you use the pen
to start with, look at that luscious
black. It's lovely. The contrast makes
it quite stunning. I'm now painting the eyes. I'm getting rid of
any pencil marks as I don't want them to show. You need a steady
hand for this stage. If you really make
a big mistake, you can always paint over
the area with white paint, leave it to dry and start again. Experiment with different
facial expressions first on paper so that you don't need to paint over
and over it or start again. It's up to you. If you want to make the happy, or sad, or angry, just use your acrylic
paint pens to experiment and draw
the faces and wings. You can download the
sheet provided that gives simple facial expressions to copy for your pebble creatures. I'm making my bee look cute and pretty with her lovely,
long eyelashes. I'm going to give
her a nice smile. I want it to be happy. Something happy to look
at to make me smile too. Now we're going to
add some wings. You don't need to do
this as generally, people know by now
that it's a bee, but I think it looks cute. They can be any shape or size
depending on what you want. Then to make the wings
come together a bit more, we'll brush on some water that lets the color from the
underneath still come through, but it makes the wings look
separate from the surface. Now, give them a
spray with varnish. Two coats if necessary
if they think they're going to be out in harsh
weather for a long time. There we have it, our
cute little polished bee, all ready to display
in the garden. To help you design your
own rock creature, I've created a simple template that you can print out and use, experiment with
different patterns, facial expressions and
other styles on the paper. So you're all ready to go
when you paint onto the rock. Join me in the
next video where I show you how to turn
rocks into flowers.
7. Example 2: Flower Painted Stone: Do you like flowers? I do. I'll show you how to build up the
foundations of a flower rock. I'd like you to follow along, but think about how you
would personalize it. Which colors would you use? Would you be happy just using brush strokes or are
they acrylic pens? More your thing? Just have
a thing because you see my demo and think I like
that, I might leave that. But I've chosen a
rounded and smooth rock, which will be perfect for
turning into a flower. After you have given your rock a coat of white acrylic paint, draw your design on top. Just draw a simple
outline if you want to jazz it up,
you can do that later. When we use the paint, I deliberately chose a stone
that was slightly uneven, as flowers are organic and
therefore an imperfect rock. We'll just add to
that natural feel. I'm going to paint
the underside and the edges green before I
get started on the flower, it helps to hold
the dry areas of the rock quality paint so you don't smudge it and get
paint all over your hands. Some people place
their stones onto sponges to raise them
up off the table, but I prefer just to hold them. Here we have our flower. The background and
outline have been done. I'm going to paint the
first layer of the petals. Since I'm giving you
some simple designs to follow so you'll build
up your confidence, I'm going to stick to using just one main color and not do anything too
way out just yet. You can see that I'm being very neat with my base color here. But remember, you can add
as many layers as you like. We are building up
a painting here so we have more than one chance
to make it look good. To give your
painting more depth, start to add different shades of color to your flower.
Have fun with this. I'm showing you the basics, and so I'm using a
limited palette, but you can layer
up all sorts of different colors by adding in different tones of color. Your petals will start to look three D, which is really cool. Much more interesting
than a flat looking rock, it starts to come
alive when it looks three D. By adding in
some lights and darks, you will really gain that
effect. That's really good. That's what I'm doing
with the brush. You can use your imagination
to a certain extent, but if you're having
trouble with that, then just look at
a normal flower or anything like an apple, and you'll see that one side is darker, one side is lighter, and that you to shadow
and that makes it look three D. That's what we're
doing here with paint. You can see now the difference
that's starting to make, That's only with using
different tones of one color. Imagine what you can do and
use lots of different colors. But for now we're
sticking to the basics. And one color will
do is just fine. I'm dabbing some yellow and
white paint in the center. By dabbing the paint on
with the tip of your brush, you can add texture
to your flower. I'm now using my acrylic
pins to add detail to the flower and outline bits
that I think need tidying up. If you've made a mess or
got it carried away with the previous stage with
your lights in your darks, then this is a good
time to clarify things and to get
your image together. Again, making it look more convincing,
More like a flower. You can use water
to spread some of the acrylic paint marks to add in more areas of
shadow and depth. Do this when the
paint is still fresh. Fairly soon after you put it on, otherwise it won't work as acrylic pens are
generally fast drying. Do it while the
paint is still wet, just smudge it
about, and you can see that that's making
it look even more. Three D here is
our final product, which will look lovely
as part of a display in your home or as a garden
feature to give color. In the winter months, you can see the difference
between the quality of artwork when comparing
these painted rocks. By adding layers of
different colors, shades, and textures, you can turn a
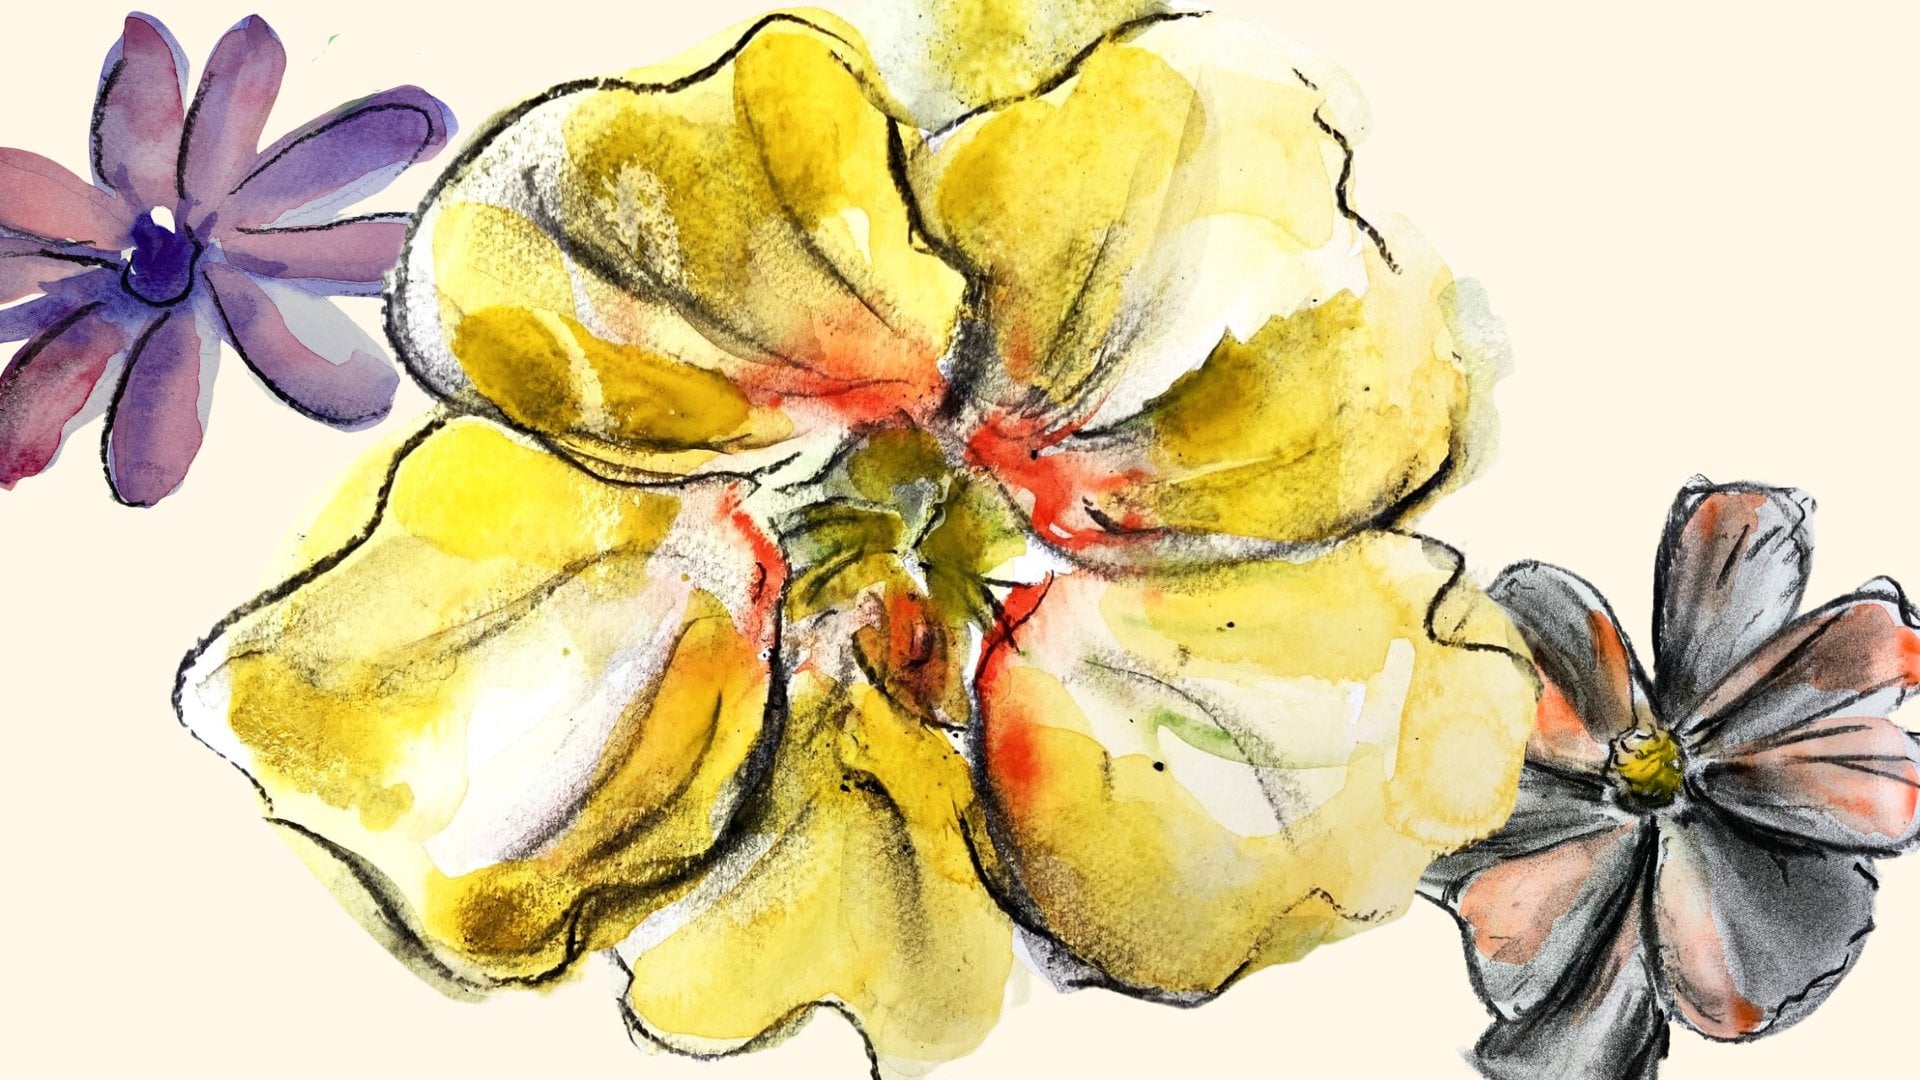
simple flower design into a stunning piece of art. You can download and print the included document that has watercolor sketches
of flowers on it, and you can use these
as a starting point when creating your own
painted floral rocks. A collection of
flower painted rocks can make a beautiful
tabletop display. Also give your garden a
colorful and cheery look during the winter months
by placing them outside. I'll see you in the next video where we paint our third garden ornament popular with adults as well as children, fairy houses.
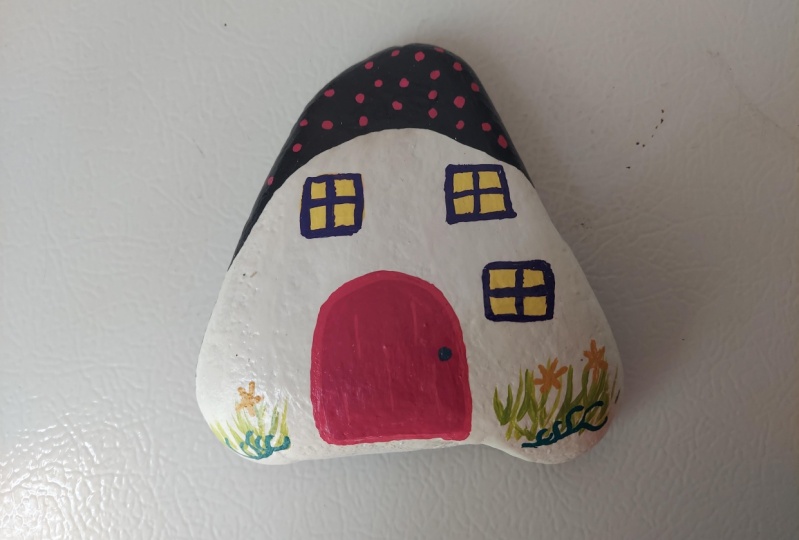
8. Example 3: Fairy House Painted Stone: I'll now show you
how you can create a fairy garden ornament. When my daughter was
wanting to plant some seeds and make a fairy garden because
they're really in, there were lots of
plastic sets to buy. But I thought how nice it would be if we had a hand painted one. This again, let me try
out designs onto stone. When creating a fairy house, have someone in mind that
would really enjoy having one. It may be that your child or grandchild would like one
for their fairy garden, or a friend that just
likes cute and fun items. I find having someone
in mind help spark the inspiration and
keeps the fun alive. I often do a sketch of a
fairy house on paper first, to make sure it fits
the shape of the rock. Fay houses look extra good if they can stand
up on their own. You have to work with the
natural shape of the rock. There are lots of
different features you can add to your fairy house. Generally, you want to
include doors, windows, a roof, maybe some plants growing up, the
size of the walls. Pretty basic stuff, but
you can make them look totally different just
by changing the colors. Instead of having a brown
door for your Fay house, we can use a bright
pink door instead. You just have fun with that. You can add stars and
make it sparkly as well. Something you wouldn't usually
see in an average street. Just leave up to your
imagination and just go for it. You can see I'm adding some plants and I've
added some stars. Once I get the
acrylic paint pens, that's when I can really give it some detail and make it
look more fairy like. But for now, you're just adding in the general
outline of things. I'm now painting the roof
with a deep metallic pink. The metallic paint will give it an extra shine and make it look just that, a
little bit different. See how I'm using my brush to weave it in amongst the
little textured bits? I just want to make sure, again, even coverage of the paint, sometimes you need to give
your brush a little bit of a wiggle to get the
paint in properly. Obviously, if you have
a super smooth rock, which is ideal, that
doesn't really matter. You don't need to
wiggle it in so much, but sometimes those rocks
can be hard to find. You can see I've
painted the door, the windows, and some stars. Now I'm going to add some
greenery over the walls, and I'm going to
keep the background white to give some contrast. It's also the easiest color to do when you're
first starting out. If you're like me and usually work on a larger
scale when painting, you can find this a bit tricky. At first I felt like, wow, this is a tiny
canvas to work on. For years, I've worked on large canvases for
our exhibitions, but I did get used
to working small. That is where the paint
comes come in really handy. You can see in the clips
that they are really good for adding detail
in small spaces. I'm going to use my brush
to do the bigger sections, so I don't need to
squiggle my pen around for ages trying
to fill in the gaps. That's where your brushes
come in really handy. So I'll just do the path brown and then I'm going to
make the grass green. I'm using very
traditional colors here and to keep the fairy magic
to the fairy house itself. Here we have our
finished fairy house, and I'm finding a nice
spot for it in the garden. I think it looks cute there. And my daughter can sew some grass seed around it
to make it look extra snug. In the next video, we'll
look at common problems people come across when rock painting and how to solve them.
9. Fixing Common Stone Painting Problems: In this video, I'll go over the common problems
people come across when painting rocks and how to easily correct
those mistakes. The main mistake the
beginners make when painting rocks is trying to paint on stones that are just
not smooth enough. This is fine if you're
just doing rock paintings, a fun activity, but if like me, you're professional
artists and crafts person, you'll find this a waste of time and it won't lead to
impressive results. If you cannot find
any smooth stones, you can try and level at the
surface of your rocks by giving them several coats
of white acrylic paint, letting each layer dry
before adding the next. This helps, but it still
won't look as good as a naturally smooth stone w
and is quite time consuming. The second main
mistake people make is when they apply the paint too thickly with their brush. I absolutely love
working with texture. When doing paintings on canvas. However, I find
the painted stones will look better and the design will last longer if you don't
use thick brush strokes. I've already spoken
about how you can fix this if
you're aiming for a smooth surface with using a dry brush
to blend the paint. You'll find more
info about this in the video entitled
How to Use Acrylics. If you try and paint on top of another layer that
hasn't dried yet, you'll most likely
spoil the work you've already done and
end up with thick, messy markings on your rocks. This might be the exact
look that you're after. You can also get the color showing through and
you put wet onto wet. But that isn't always
everyone's intention. I'll show you now how to color mistakes so you can redo
the bits you don't like. I have pointed to a mark
that I want to get rid of. I was after clear
straight lines, so I thought this
looked out of place. What I've done is
just covered it with white acrylic paint that
was just done a while ago. Once it's dry, take the
brush with yellow paint, the same colors the
background, and go over it. Obviously, if your background
color has two coats on it, then give this two
coats as well. So it turns out the same color. Now that we've looked
at how to use acrylics, and I've shown you several
examples how to paint rocks. I have a further idea for you. How about making positivity affirmation stones
from your rocks? I have to admit, I
was surprised at first that how well they
sold at craft fairs, but it became obvious that
others like the idea as well. Watch the following section
of The sound of having a homemade uplifting self help
tool is appealing to you.
10. Make Positivity Affirmation Rocks: If you find positive
affirmations, help you when you're feeling
stressed or worn out. You can put a collection of
plays stones to good use by writing a positive
word or not on each one, I'll show you two
ways to make these. One where you cover the
entire rock with paint. Then a quicker version, we
just include the word and the simple floral pattern
to go alongside it. This is the first version where
I cover the whole rock in metallic acrylic paint and
then add the word on top. My method is quite messy as it involves smoothing
out the paint with your hands as well as brushes
is quite a nice feeling. Getting right in
there with the paint. As you can see, there are some bumps
in this rock surface. It involves a little
bit more wiggling of the brush to get
a full coverage, I want to blend the
two colors on 1 stone. This makes for a
more interesting background to the affirmations, especially because it's
metallic paint that I'm using. Here's another example using
metallic pink and purple. Now we'll look at how to
make the affirmation stones, but we just write the
words straight onto the rock surface leaving the natural stone
color underneath. You can see the
stones are very thin, this makes them
easy to carry about if that helps you with your day. For these stones to be useful, I recommend building
collections of words which emphasize the
same mood or theme. For example, here
are a selection of words which promote
the feeling of calmness. What is this collection
Here would be useful to look at when you
are lacking motivation.
11. Stone Painting Project: For your class project. I suggest that you make a painted rock ornament place in your garden or a plant pot. You can obviously turn your stones into
anything you like, and I'd love to see that too. But I think this is a
good starting point. This is a very broad
topic as you can put all sorts of
decorations in your garden. For example, you could turn
a stone into a fair house. A garden marker, a ladybird, a bee, or a flower. I had fun experimenting with different locations
for my rocks. Decide on what you'd
like to create. Find a nice smooth stone that would fit your idea
and get painting. I'd love to see
your painted rocks, so I really hope you'll upload them onto the class gallery. I know I've said that before, but I would really
love to see them. I'll see you in the next video where we have the
class round up.
12. Class Round-Up : I hope you have found
this class helpful. And I've been inspired to give rock painting a
try for yourself. Remember, you can download free documents to help you
with your rock painting. Find facial expressions,
to copy flowered examples, a rock painting
checklist and planner, and positive affirmations
for writing on stones. I've really enjoyed
making this class. I love rock painting. I think it is great fun and I
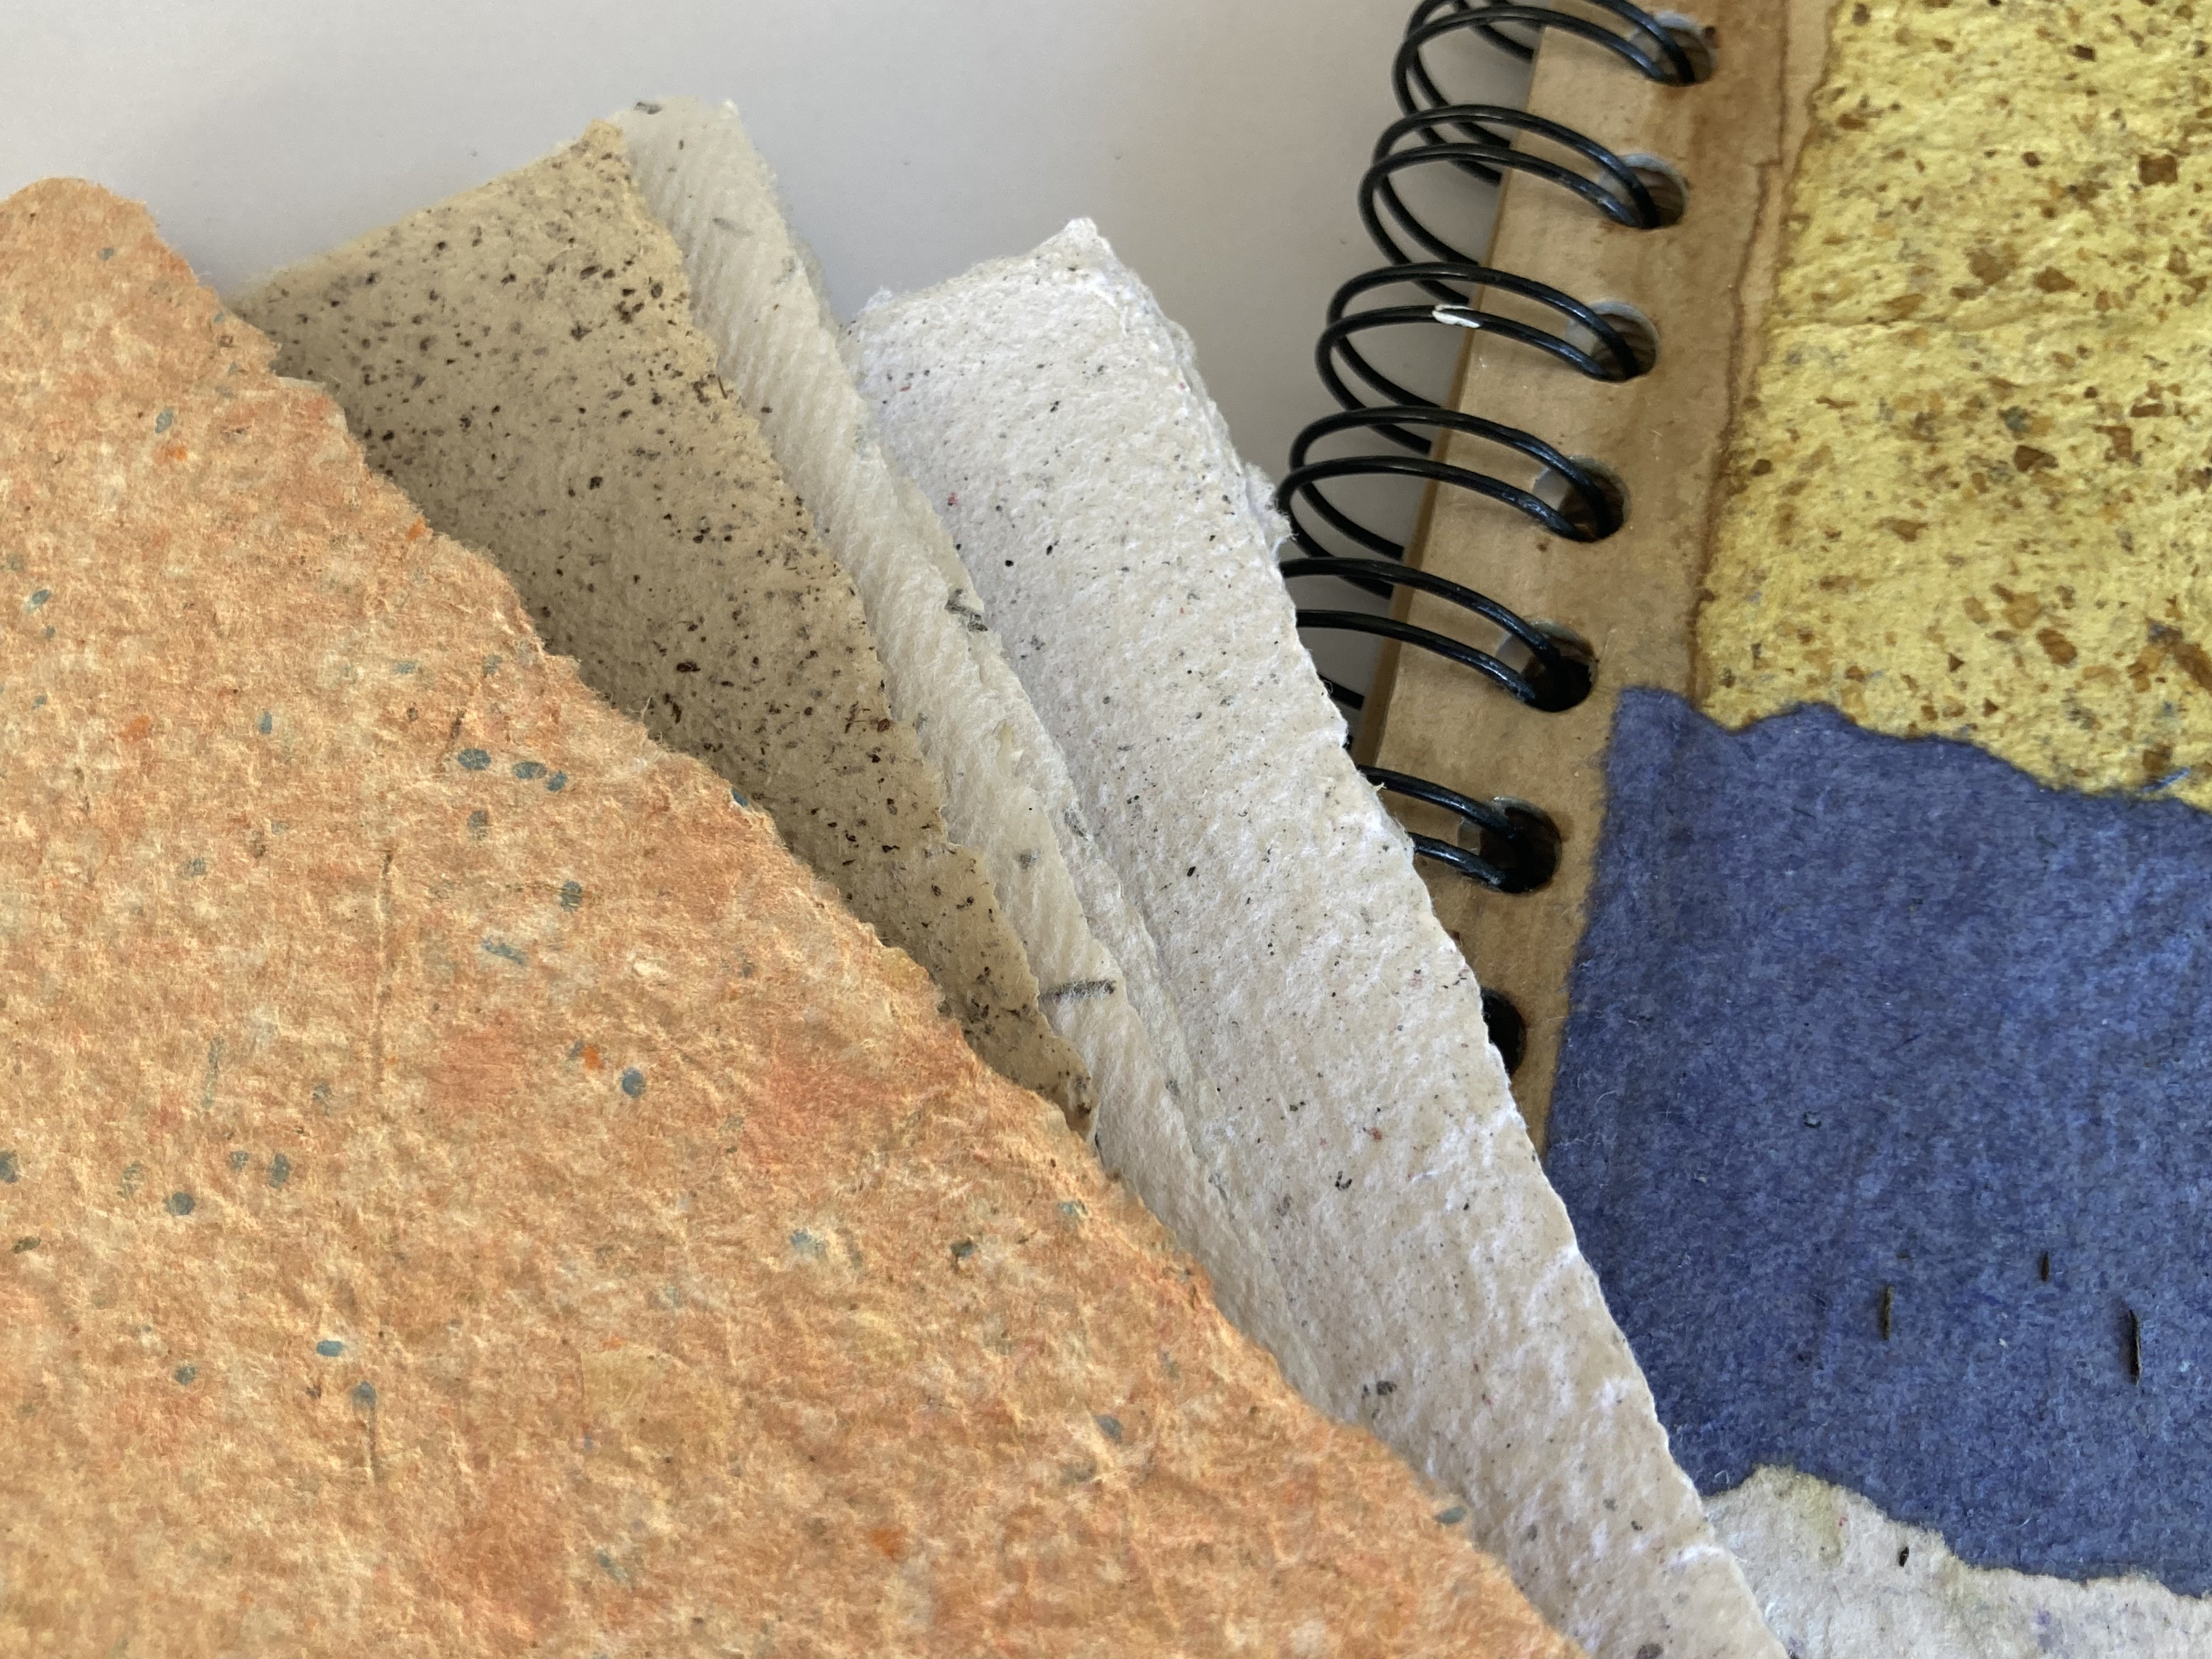
hope you'll give it a shot. I have another class
on skillshare, showing you how to create
handmade paper from recycled and organic
materials such as plants. Check out the short
clip for more details.
 Vivienne Edgar, Mixed Media Artist