Transcripts
1. Welcome: Welcome to another
gorgeous painting class. In this class, you
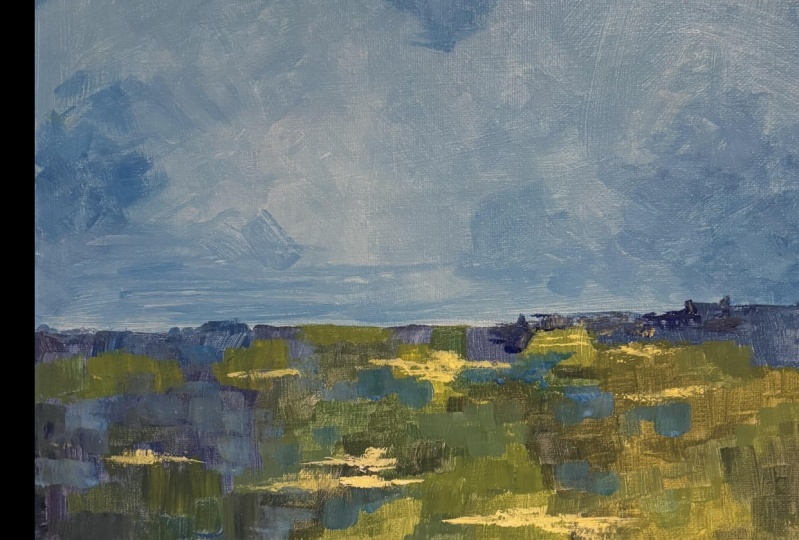
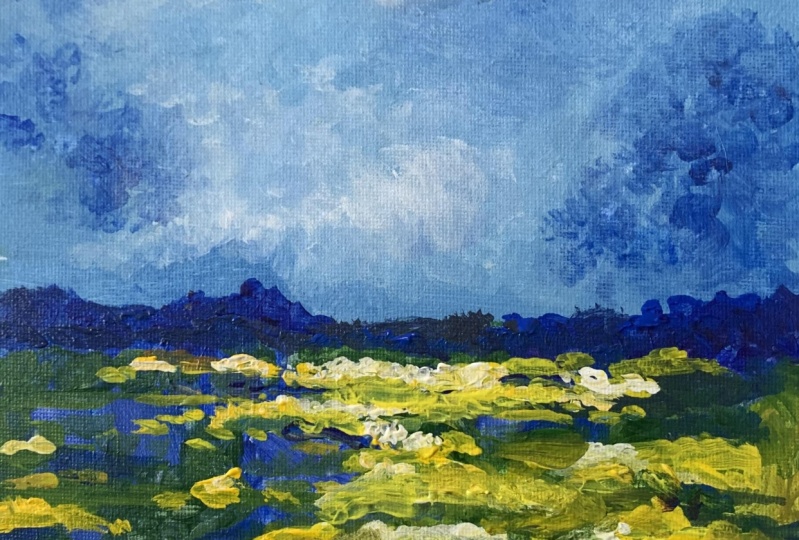
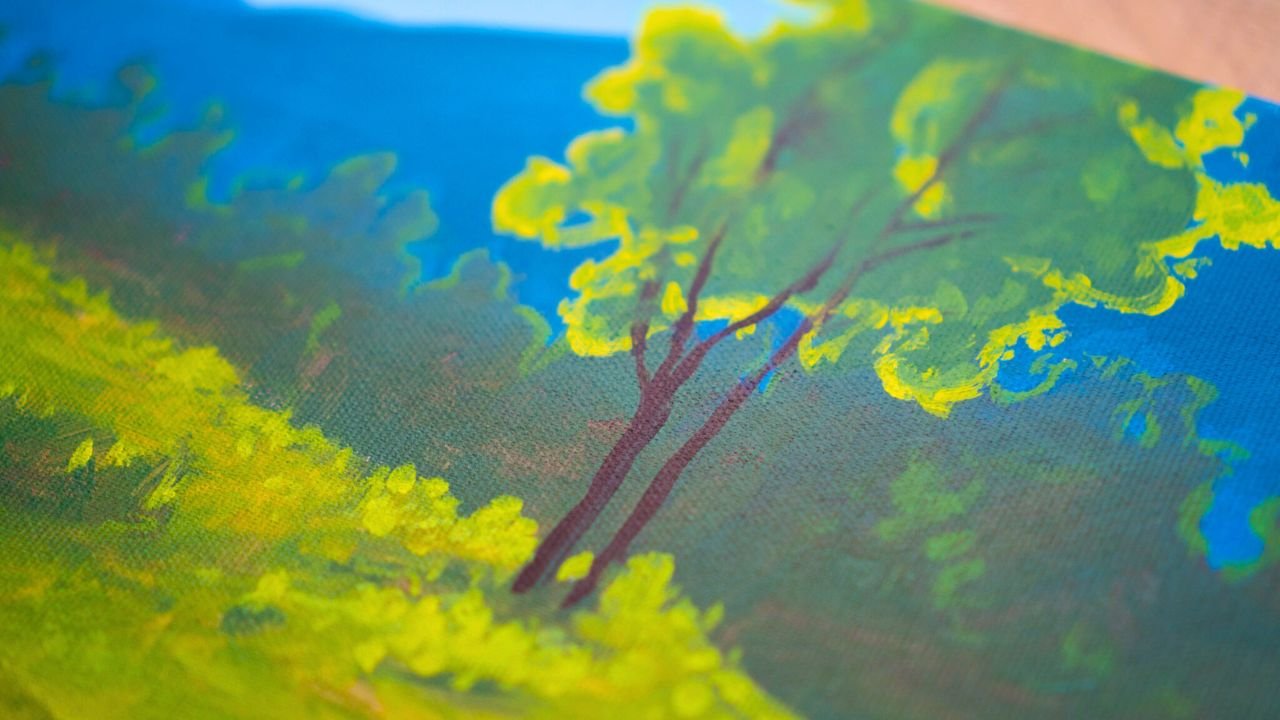
will learn how to make this painterly landscape. This composition might
seem complicated, especially if you
haven't painted before. But this class is specifically
designed for beginners. You'll understand concepts like composition, color harmony, and brush handling in order
to create a beautiful result. Hi, my name is
George, and I've been a professional artist
for over ten years. Six years ago, I've fallen
in love with teaching. Both online and
in person classes with adults and children. I've developed a
very interesting way of teaching that
focuses on making engaging projects such as this and having a lot
of fun while doing it. If you are ready to explore the wonderful world of
landscape painting, let's jump into the class.
2. Materials needed: One welcome to another beautiful abstract landscape
painting class. In this class, you
will need a canvas. It can be a square,
just like this one. This is 30 centimeters
by 30 centimeters. You will need a mixing plate, some water to clean
up the brushes. You will need some brushes, a big flat brush, a
medium flat brush, and a small flat brush. You will also need some
paper towels, some napkins, to clean up the brushes and maybe clean some of
the canvas as well. You will also need
acrylic paint. This is titanium white from
Amsterdam acrylic paints. This is carmine red. This is brilliant blue. Some brown, also known as
burnt umber, and some yellow. You can use lemon yellow. This is Azo yellow medium. It's just lemon yellow with
a little bit of red into it. And that's all you
need for this class.
3. Blue sky: First step, you will need
some blue. Maybe a bit more. Just over here on the palette, I don't know if you
can see the water. Let's place the water
properly over here. Let's add some red on
the opposite corner. Just a tiny bit because red
is a very intense color. You will also need
to add some white. And a touch of yellow. Protip. If you hold
your paint upside down, it's easier to put on the plate. Now, for this step, you will need to mix
some blue with a lot of white just mixing
it in together. Notice, there is a lot
more white than the blue. Don't go with one color
inside the other color. Find another space where you
can mix the colors together. That will save you a lot
of time and headaches. Mix it well together, and let's add a touch
of yellow into it just to make it a bit more different
than just two colors. Let's add a bit more blue
and a bit more white. Mix it very well. Notice how the brush is very loaded with
paint, un mixed paint. You should press down
and mix it together. Once you have this
beautiful baby blue color that has a yellow tinge to it. Let's add it to the top of
the canvas until about here. And just think of it as a sky. And you should go a bit faster, take some water to
lubricate the paint. If you don't have enough paint, don't worry, you
can mix some more. Once you've added the
paint to this side, continue on to the middle. Take some more paint,
take some water, and just drag it around. The goal of this first layer of paint is to have
an opaque layer, an opaque surface that you can paint later on in the next step. So just focus on the edge and on all the pores that are
still showing onto the canvas. You can do it very, very fast, or you can practice some brush strokes like
this, just practice some. Notice how the brush can be handled in so
many different ways. And then you can
cover it all with a fast and loose
painting technique. Once you've done that,
you need to focus on the areas that have too much texture and smooth them out by
dragging the brush, barely scraping the canvas,
barely touching it. Just caress the canvas from left to right or from top to
bottom. It doesn't matter. It will create this beautiful, let's say, gradient,
but it's a flat color. And that's all you need
to do for this step. In case you have some hairs, you can pick them
up like this and brush them onto the
side of the plate. Now, let's go into
the next step. You don't need to
let the paint dry. You can paint immediately
after this step.
4. Painterly clouds: This next step, you will mix some colors straight
onto the canvas, and that color will be white. Just take some white, find
another space where you can mix it with the
blue of the brush. The brush still has
some blue in it. And now you're going to go onto the canvas on this
beautiful side and start adding some of
this color. Don't worry. It doesn't need to
be perfect at first. All you're doing now is figuring out some areas to
build a gradient. Notice how this gradient
is a bit broken. This is called a
broken gradient, and it's a very
painterly thing to do. You take some white that is
mixed with a bit of blue, and then apply it,
change the brush, apply it in a
different direction, and then you go
further and further. And because the paint is wet underneath it, as
you go further, It picks up some of the
blue from the background and creates this interesting,
painterly feeling. All you're doing right now is going like this,
and then over it, this is so you can
mix the two colors, the one that is in your brush
and the one underneath. Notice how there isn't any more paint taken
from the plate. That's because you want to build a bit of a gradient as you go. And when you feel the need, like, for instance, over here, let's add a bit more color to break that gradient and
make it more visible. Once you've done that,
you can focus on making some whiter colors, some lighter colors onto
the other sides that are untouched of the sky. This will make a very
interesting sky color. Okay. Let's take some more white this time,
mix it together, notice how it's much more
light and add it over here, continue to play around
with some textures, maybe add a few touches with
the corner of the brush. And you can also break the
gradient a bit more around here just so it doesn't feel as if all the white
spots are on this side. Notice how if you go lower, They need to be a bit longer
and smaller, the lines. They are like beautiful
little lines. And as you go up, you
can make bigger shapes. Don't worry if you go and make
a bigger shape over here. There isn't any rules. We are not really making
traditional painting. This is a more
abstract painting, a more abstract landscape. Let's say, We are mixing
in the colors together. And if we see something
we don't like, like, for instance, this, we can go
with a brush mark over it. This is how you break that
idea of just working all of the surface and baking painting
that is very tiresome. You are making small, little, interesting brush marks. And all of these brush
marks contribute to making a painterly landscape. And you can break it
even more creating these interesting
textures somewhere around here and here. And you can then just
brush over the background, take a bit of water if you
want to make it more smooth. And these brush marks
are very unique. They have a different
vibration and direction, which makes them
way more appealing. And that's all for this step.
5. Contrast and of painterly recap: For this next step, you need to clean
up the big brush, with some paper towels and some water just
squeeze the paint out. Don't clean it too
much. Just a tiny bit. It doesn't have to be perfectly
clean. Take some blue. Put it somewhere
on the plate where you can mix, take some red. You don't need a lot of color. Once you've mixed this,
the painting is still wet. So you have to work on the wet surface so that it creates beautiful and
interesting textures. Now, with this color, you
can go in this corner and start making the same
kind of brush marks. Now, an added and different type of thing that you're going to do now is clean up the brush. Take some water, squeeze it with some newly fresh paper napkins, take some more water, and then start to play around
with this color. And as you go, you take more and more water on the corner as soon
as it dries out. You will know that it dries
out when it starts to make textures that are and
it doesn't glide anymore. And as you build, just going further and further, you can go in between
these marks as well. You can also pick up some
more color and continue to add this color and extend it, take some water with the
corner of the brush just to blend those colors
together a bit better. Break it down. Notice how it's very It's just in one
place as a sticker. You need some runaways. Take some more
color and continue. You can break it down, make some runaways in order to break the monotony
of the painting. Just play around
with the colors. You will find it very relaxing, will be a very interesting
way of painting. You are not thinking too much, focusing on the
middle, on this side, and now let's balance out the composition by making
some of this color on the right side so that it shifts the composition
a bit this way. Okay. Just mixing it in slowly. Notice how the brush is not gliding and it's
making textures, so we need to take
a bit of water just to make it more blendable. Okay. Try to avoid making pillars or distinct brush marks. If they look like something, like for instance,
this is too long, it needs a break
somewhere and it needs some runaways
over on this side. It just created this
interesting look. Notice how this is very angular. We can break it down a bit, just so it doesn't take a lot of attention
from the viewer. Let's take some more
paint and add it to this side and notice how
the brush is almost dry. So let's take some
water and mix it in. Okay. Look at what a beautiful and
interesting painterly sky you've done in just
a few minutes. Let's add some more color. Let's actually mix some more of this blue to change
the color a bit, and you can add it over some
areas. Take some water. Let's add it over here and then over this area just to change the hue because
the hue variation is what makes the
painting interesting. It's just subtle shifts in hue, make the painting
more than what it is. And it's such an easy way
to improve a painting. You just shift the color
just a touch and you create a new and interesting
dynamic composition or balance or however
you want to call it. It's just a shift in color, but it can change your
painting tremendously. Continuing with
the same motions. Just taking some water
and adding it close. Don't go overboard
with all of the marks. You can also chill some areas by going with
some water over them, take some paint, and add a
few brush marks over top. Creating this interesting sky. Now, let's focus
in on some lines maybe in the distance
and over on this side, giving the impression that
it goes in the distance. So the lines will create this distant look
of the painting. And that's all you
need for this step. So until now, you've
learned how to lay down a flat color and then make it painterly by using
white over top, and you've learned how to work with light colors, dark colors, and change the hues in order to create a
more interesting look. Notice how these colors
play well together. That's because they are friends. They are called
analogous colors. And that's why they
play well together, because they mix and
match in the same family, in the same friendship. It's very important to
understand the ways that colors play together so that you can obtain a specific
effect that you want. You've learned about brush
vibration and how to create a painterly look and
how to make things appear more complex
than they are by just brushing and making different marks
and understanding that if you make
a sticker shape, then you have to break
it apart and make some runaways in order
to make it more complex.
6. Dark deep blue: This next step, you
will build upon some more darker values this time on the lower
side of the canvas. Let's take some blue. Mix it over here. Let's take some red and make
a dark, beautiful purple. That is a bit towards the blue. It's important that
it's towards the blue. Now let's make some
interesting shapes. You're going to learn
about beautiful shapes. Start by making a simple
shape and then make it more complex by adding
and subtracting, well, adding because you
cannot subtract on this shape. Just create some edges. Notice how they were fuzzy, over here, it's quite fuzzy. That's a great opportunity
to just go and create some sharper edges. As you go, you can think
of this as a big shape, and now let's create a
smaller medium shape. Okay. Small, medium shape,
medium shape, actually. And let's add a small
shape over here. So big, medium, small. Now, let's create on this side, let's create a huge shape. Let's take some water
and create a huge shape. This will be a big,
big, big shape. So let's fill in with the color. It's important to have
a good edge at the top. The bottom doesn't really matter because we can change
the hue later. Take some more blue
and some more red, even though the color might
not be perfectly matched. That's fine. It creates
a more color variety. Now, you're going to notice
that we are focusing on the edge and creating
interesting shapes on the edge. Just adding with the
corner of the brush, some interesting, maybe these are some cliffs or
something else. We do not know. We
are just building, and it will look quite good as you go and
add more and more colors. A. And as you do that, let's focus in on this corner and brush all
the paint out of the brush. Well, squeeze all the
paint off the brush. Let's take some of the
debris left from the color. Take some water and
add it over here. Notice how it's too
much of a square. Let's take some more color. And Ask yourself before
you paint anything. Ask yourself, how can I
turn this in not a square? The answer might be just make something that looks
different than a square. But another different
answer might be, let's take some blue. Imagine the square
being over here. You can take some blue over
on this side and add it over, and this will break
that down even more into a different shape. Since you've taken some
blue from over here, let's add it in the
middle right here and building up another
shape over on this side. Notice how these two are quite similar and in size and shape. So let's make them a
bit more different. You don't need to worry too
much on the fuzziness of each shape because you can also bring other
colors into the mix. Now, this shape can be
broken even more by adding some colors inside
of it and some textures. This is another way to
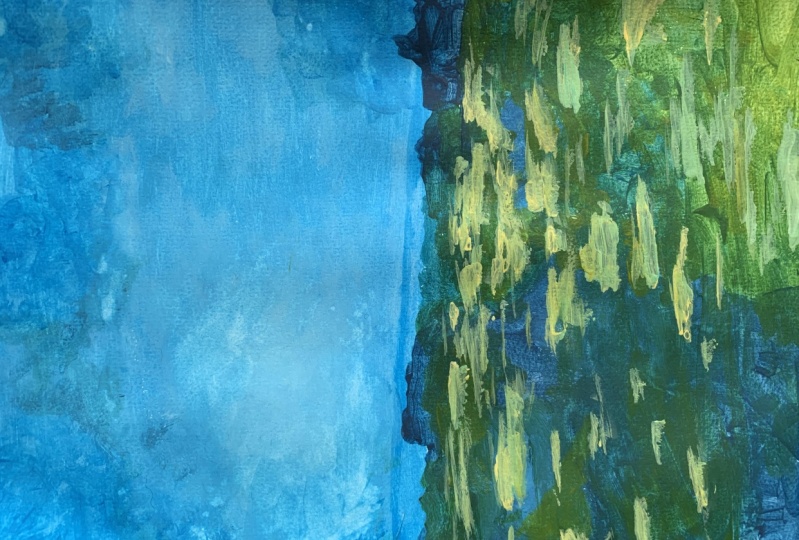
break a shape and a mass, exactly like you did at the top. And over here as well, let's add some color variety. And you can do the
same for this one. Over here, just adding some
more of that dark color. And that's all for this step. You've learned about
edges, about big, medium and small, and
you've added a lot of textures and broken things
down to be more organic.
7. Emerald green: This step, we need to squeeze
the paint out of the brush. We don't need to
clean it perfectly. We're changing just a little
bit of hue towards green so that you have a bit of a
darker green at the bottom. For that, you will
need some yellow, and over this blue over
here, you can add it. You can also make it
if you don't have it by adding blue and
a touch of red. And then some more yellow to create this wonderful
dark green. Notice how the color is not immediately changing
to another color. It's slowly shifting. So you can also add
it over these colors, and it will not feel lien. It will not feel as
if it doesn't belong. Just add it and
make some shapes. Notice how this can
become a big shape. And then let's add
another one here that is a smaller shape. We have one over here, so big, medium, small, we can
make this a bit bigger, since this is the medium one, and you can break
things down a bit more to make the edges
a bit different. Now, let's focus on this shape bringing some more of this
color over on this side. Just breaking these shapes a bit more by adding
some color variety. You can also focus in on the soft fuzzy edges and
make them a bit more crisp. And you can also take
a bit of water on the corner and add
different shapes, like create new shapes and connect some
areas if you want. So this is a medium shape. Now let's add a
smaller one over here. And a smaller one
over on this side. Now, adding in more yellow will shift
the color even more. And you can start to
add this color just over here. Creating a shape. Notice how it's too
mechanical and fuzzy. Let's add some more interesting
textures to the edges. Let's take some water, bring in some more yellow, and add in between the
blues and the greens, the dark greens, some of
this newly found color. And just take some
more water with the corner and some more paint
and connect some of these trying to achieve and find a place where you can
put some color and cover some of the
canvas on this area. Notice how the painting is dictating where the
color should go, especially when you
have white spots around the shapes. Okay. And going on this side, making some more greenery. Let's add a highlight in quotes
for this shape over here. And that's all you
need for this step. You've learned how to shift the colors towards
another color palette, and in the next step, you will shift it even
more towards the green, eventually ending into
a beautiful yellow, white, yellow, green,
very light color.
8. Highlight green: Need to clean the brush,
just take a bit more yellow and mix it in to this pile of color and add
it in between the shapes. Even if you pick up
some of the blue, it will create a turquoise, which will be very
beautiful. Mix it in. Once you pick up
some of the color, in order to have it be more
bright and more Interesting, you need to mix it onto
the plate once again, the color you've picked
up and add it mix, add mix and add Notice how the distant ones are a bit more linear and small
as you go to the top, and you are still keeping
the shapes almost intact, but the big, big one, we've broken it down a bit more. Okay. Let's break this
one down a bit by adding some shapes to the sides and
maybe over on this side, creating a sort of a bridge. Take some more
yellow this time on a fresh side of the plate and mix it with the green
that you have in the brush. This is a beautiful light green, and you can start to
add it continuing to fill in the canvas. You can even fill it in
completely if you want. You take some water and
fill in the rest of the canvas and the sides in
a very fast and loose way. Okay. Now, this color, let's mix it again and add it to this side just so it brings
some of this yellow onto the other side as well because
it needs to notice how it created this very
big green area. So you need to add it onto this side to balance
out the composition. You can also go and build
a bridge in between them. And another thing that
you can do is grab some blue and a touch of red and some more blue and add some of this
darker color onto the side. So you can bring the blues over here and
the greens over there. Just focus in on creating
some more balance. You balance the composition by covering all the white
spots and bringing this dark blue over on this
side, the darker spots. Let's also brush in between
to bring some of that blue. A cool trick you can do is
clean up the brush a bit. Take a bit of water and then just go and
brush it from this blue and back and forth to create a
beautiful little line, and then you can
fuzz it up a bit, just to create some textures. Okay. And that's all you need for this step. For
the next step. You will need to let it
completely dry so that we can put brighter and lighter colors
on top of these ones.
9. Let there be light: Step, you will need to add some yellow to the mixing plate, and the painting is
almost entirely dry. There is some yellow
still wet over here, but yellow is fine. You will need the medium
brush and some white. Let's add some white over here and add some
yellow over it. Will play around with
more yellow first, just to add some
interesting colors. Let's start in the darkest
areas over here and add some beautiful marks
over on this side, and then continue to
add it wherever you see some white speckles of canvas. As you do that, it will
build just a nice, beautiful layer of yellow. As you go further
towards the horizon, the lines should
be a bit smaller. And going from the outside with a bigger shape on this side, taking some more color, squeezing that brush
down so you can take some more thick paint
and add it over here. Notice how on the green, it creates a beautiful
harmonious color transition, and on the blue, it is a bit
more visible and contrast. It has more contrast. So let's take some
more color and add wherever we see some white, and then let's build
a bigger shape just over on this area. More smooth on the
bottom and more texture. You can include some of these
textured marks by rotating the brush and then smooth
the bottom of the shape. Just add some interesting
shapes and then smooth. Let's go over here and
add some of this yellow. You can pick up some more
yellow and blend it in. Creating some more
lines in the distance. And over here, breaking some of these shapes into
different colors. Let's go from the outside going in and over on this
blue, adding some more. Perfect. Now let's
take some more white. It has a bit of blue in it. That's fine. And mix
it over this yellow. Let's actually take a bit
of blue and mix it in, add some more yellow. Notice how this color is a
bit more towards the green. It's a very interesting
yellowy color. Mix it very thoroughly, and you can add it over
top of the yellows, creating a transition between
the greens and the yellows. You can also add some of this color in places that
don't have any yellow. For instance, over here, coming from the outside and
over here in the middle, creating this interesting field, this interesting color
full layer of paint. Okay. Let's add some
more long strands just going towards the horizon. Perfect. And over this blue. Now, let's clean up the brush. And we're going to go with the small brush and do
the same thing, but with thicker paint
and lighter colors.
10. Finishing touches. Thank you.: For this step, you will
need a small brush. You don't need any
water, yellow, find another space to add it, and with just yellow
on the brush, create some textures,
barely touching. Notice how there is a lot
of texture in the brush, a lot of paint in the brush, and just place it on top, barely scraping the canvas, barely touching it just with the paint to create
some ridges and some textures going
over these colors. And don't worry if
they are very tall, they will dry a bit flatter. Let's add some white
to this color. And going back, creating
some more textures. Barely touching the canvas. Let's add some more texture, some more paint to
the paint brush and create some more
texture in the middle. Notice how it's in the
middle of the canvas. This is purposeful, so we guide the viewer towards
the horizon line. Let's add some more
textures over here. And over on this side, the left As you lose
some of the paint, you can start to go a bit and smooth the bottom edges
of these textures, just leaving the texture on top. Notice how I'm
dragging that paint, and you can go in
other areas picking up some more color and
going and adding some more textures
over extending these colors towards the left and the right and
the bottom as well. Notice how all the
textures are here. In fact, let's take
some more white, mix it in over the yellow
and take some of that paint. L et's pick up some more
paint and add it, well, not that much and add it over
continuing these texture, these textures,
creating a sort of like a texture gradient and
building some distant light. And you can go over here as
you lose some of that color. Now let's go back
to the yellow and add some more yellow
on the plate, and in this area where you've
created this light yellow, and add some more
texture over the top, creating a play, a
dance between colors, going back and forth with lighter yellows and
darker yellows. That's maybe too much texture. Barely touching the canvas. You just want to leave a
little bit of texture onto the canvas and create
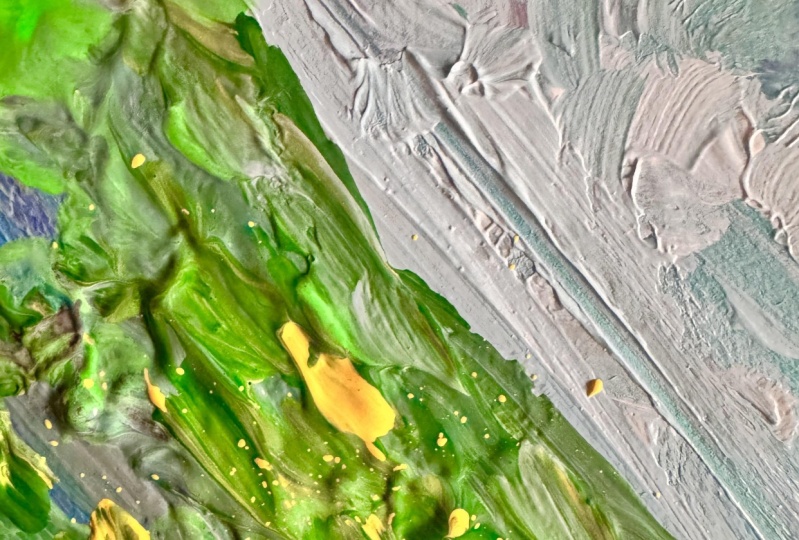
interesting painting blobs. They are very beautiful
and textured. Let's go even more light
by taking some white, mixing it here on the right
of the paint of the yellow, taking some of this
color and adding it, brushing it over the textures. Notice how it's magnetically adding itself to the
raised textures, and it also blends as you go over the textures
over the paint. Let's take some more color
and continue over on this side and over on this
side over here as well, and maybe over here. Perfect. Let's create some
more texture over here, adding some of this color
over on this area as well, and over on some
of these shapes, just creating the illusion
of some highlights. You can also take
some yellow and do the same with the yellows, just adding some
more texture on top. And over here, there's
a bit of a blind spot. And let's continue this line. Perfect. And that's the course. Just a beautiful, painterly
textured landscape, a very simple one. You've just created a beautiful brushed and interesting sky by mixing in and adding a flat color and then going with white over it
and brushing it, so you leave these
textures and then going to a darker
color and adding some broken shapes around the you made some distant lines, just so it feels as if
this is a big vast sky. And then there is a bit of
a distance with the lines. So the contrast in between
the shapes that are big and the small line create
a distance in the sky. You did the same thing
for the bottom part. Where we've created bigger
shapes and then started to add small little lines
and textures over top. You went from blue to
green and then to yellow, and then to a lighter yellow, adding the texture where you
want the viewer to look. And you've created these
interesting abstract shapes. You didn't think of
them as a field, you didn't think of
them as a mountain. You just added textures
over each other until you've arrived at this beautiful
abstract landscape. Learned about analogous colors. And you've learned that
if you want to jump from darker shades of color
to lighter ones. You need to wait for them to dry for the dark
colors to dry. And if you also want to shift
the color palette to jump from something that is let's say an orange to
something like a blue, you also need to do the same
to let it completely dry. And that's all for this course.
Thank you for watching. And if you are gracious enough, please leave a review. It will really help others know that this course
is for them as well. See you in the next one.
 George-Daniel Tudorache, Together we will create amazing things.