Transcripts
1. Welcome to another beautiful class : To a new short and
sweet painting class, where you will be
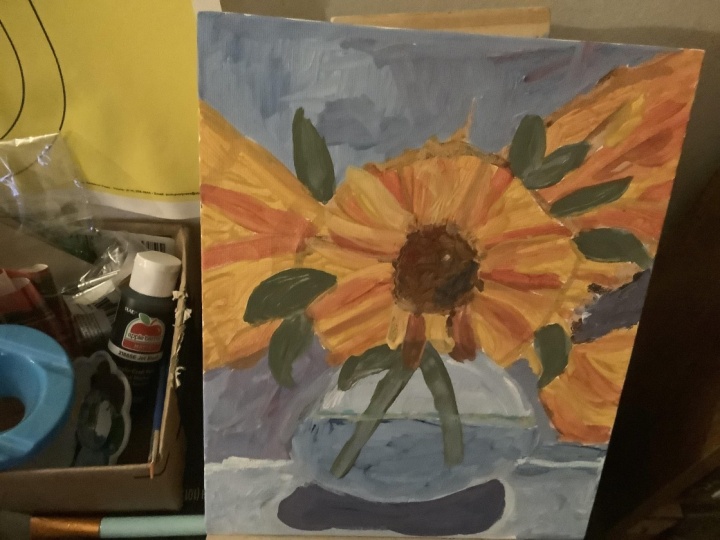
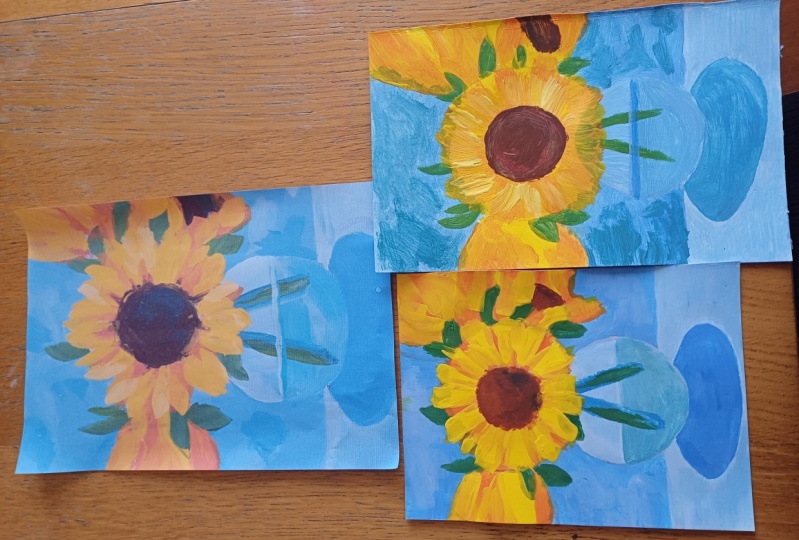
learning how to make this beautiful vase
with sunflower. Painting is one of the most complex skills that
you can learn. But with the proper guidance, it doesn't have to be
a cumbersome process. It can be a short one and a
fun, beautiful experience. Hi. My name is George, and I've been a professional
artist for over ten years. Six years ago, I've fallen
in love with teaching. Both online and in person classes with
children and adults. I've developed this
interesting way of teaching. That focuses on fun and
engaging projects such as this while learning about new and interesting
painting concepts. This composition might seem complicated. However, it is not. And with the proper
guidance and encouragement, you will finish it in no time. By the end of this
class, you will be amazed at what you've created. Let's just jump into it.
2. The Materials getting familiar with Acrylic : One, welcome to another
beautiful course. This course will focus on clean colors and how
to paint faster. You will need some
acrylic paint. This is Titanium white from
Amsterdam acrylic paints. You will also need
some brilliant blue. You can use ultramarine
blue as well. So lemon yellow. This is actually
Azo yellow medium, but you can use lemon yellow. This is just a yellow
that has a bit of red. Speaking of red,
this is carmine red. And of course, some brown, also known as burnt umber. You will need one big flat
brush and a small round brush. You will also need a
plate to mix your colors, some water, and a
beautiful canvas.
3. Creating the Sketch: First rule of painting faster is to pick
a smaller canvas. This is 20 by 30 centimeters, well, 30 by 20 centimeters, and use a bigger brush than
you need, not too big, but you can see it fits just
about 11 times over here. So that's a way to put it. It's one tenth of the
surface of the canvas. And the next thing you
need to know about how to paint faster is a sketch. Doing a sketch, With some brown. Let's add some brown to the
mixing plate over here. And we are not going
to tint the canvas. That's just to save time. We are going to skip that step. With the small flat brush. Well, with the
small round brush. Let's take some water, as well as some paint, mix it well together. And we are going
to start to make a beautiful line just over here, a dot, and a dot over here. And then another one
over on this side, and another one just over here. Okay. I'm going to peek over
to see if it's perfect. Okay. And once I do that, I can start to make
a beautiful circle slowly and surely
connecting the two dots, then going to the other one. So notice how in order
to make a circle, you are going with the bristles and going towards the shape. It would be much more difficult to go the
other way around, because you are
going towards you, and then let's go on this side. Let's pick some more color. The trick here is to not rush. I didn't put this.in
the right place. It was too much to the right, and this one was too much to the left so I can make
a perfect circle. Another way to make a
perfect circle that's about the same size
is to actually take a can of paint and start
making a circle this way. So that's a way to speed up the whole painting
process super fast. And you made a beautiful circle. Okay. Once you've done that, we need to paint
some sunflowers. Let's make this sunflower. So you've understood
an interesting rule, which is limitations. We are limiting this flower
to be about this big, just a bit bigger than the vase. And then at the top, it's going to be until here, and then it's going to go
over the vase like this. Maybe a bit lower, so it's until here and here. You can do a circle if you want, like this to have an idea where the beautiful flower will be. Now let's do the inside circle. You can do it free hand. It doesn't really
matter. It just needs to resemble a beautiful circle. Now we can do some lines. We can do some lines just
like this to indicate where these petals will go
and the fact that they go towards the
middle right over here. So that's an idea. I know it doesn't look like
a wonderful sunflower, but in time it will. Now, the next sunflower
will be on the right side, and it will be
kind of like this, a curve going like this and another curve going like this. And we will cut it out to be a bit like this first and
a bit like this first. So imagine this is the center, and the petals just
go from the center. And now to indicate that, we're going to have some
petals going this way. Just from here to
here and to here. Then indicate the middle. Let's take some water and some paint to indicate
the brown middle. Can also take some brown to indicate the middle over here. Notice how fast you can fill
in this color over here. Okay. And now let's place
another one on top. This will have some leaves, super simple to make
leaves with a round brush. Just add like a small dot with the finer tip of the brush, press, and then take it out. And then you can do the same. You can practice this on a canvas board or just
a piece of paper. Notice how if I take
a piece of paper, I'm adding the tip,
going, pressing, and then exiting the
shape, well, like this. It's a misconception
that you have to paint faster in order to well, to hurry up in order
to paint faster. You actually don't have
to hurry up that much. Let's make this flower and the edges of the
flower just like this. Let's indicate the
petals going this way. This is going to
be from the side, a flower from the side. These are very simple shapes. It's a round circle over here, round circle, as if they were square circles
or something. And another oval over here, but with an indent Notice
how it's creating an indent. And then some lines, lines like this indicating the direction of the sunflower. Same here, indicating
some leaves. You don't have to
be super precise. That's the beauty
of doing a sketch. You can really take
advantage of the fact that It's a loose sketch. Now, let's do another
one over here, and let's simplify it even more. So let's go like
this and like this, and maybe go a bit like
this and a bit like this, so we make it smaller. And then some petal, some leaves, just going
over in this way. Now, for the table, let's add a line, just a straight line going
across super simple. You don't have to be
perfect with the line. All you have to do is kind of measure if it's
at the right size. Noe how on the left
side, it's not perfect. And now let's do a
bit of a shadow. Now, this shadow will be a beautiful circle just
going around an ellipse. It's called an ellipse, and we're going to do that. And that's all for the
sketch, all you need to know.
4. Making the background : Fight this painting,
you will need to understand what is in the background and what
is in the foreground. So we have the
background itself, which is the background,
because of the name, and not only that, but yeah. And we have then the table
which goes behind the vase. The vase is next, then we have the main flower. And these flowers are on
the same plane as the vase. And then we have the shadow, which is in front of the vase. Notice how it's going
behind and then in front. Okay. So let's take
some beautiful blue. In case you are using
ultramarine blue, you can add a bit of
yellow and more white to get the same effect
and the same colors. Okay? We need a bit more
white. And some red. And you might think
that we are going to cheat and use very little
colors and very flat colors. But there is a bit of a trick
to make more color variety. Let's mix in some
blue right over here. Let's add in some white. We need to mix quite a bit. Don't forget to not mix
right where the color is in case you need
it in the next steps. That's another tip
to paint faster. You mix in the colors. You add a bit of red. Be careful. Red is very intense, and it makes the colors. Notice how if you
use the ultramarine, you might not need
to add the red. So just like this, now, take just a tiniest amount
of water and mix it over. Now you need to go and
add it to the background. This will be the color
of the background. Let's fill it in quite generously with a lot
of paint in the brush. Notice how this big brush is
taking some of that brown. That's fine. It's get adding
a bit of that color variety. Also, you need to
go over the sketch a bit so that when you
go and add the yellows, and the yellows of the flowers
and foliage, the leaves. It will not seem you will
not have to concentrate too much on really going right next to the blue.
You will go over it. That's why we paint in this way. We paint the background first so that the quality
of edges that you get are very nice and varied
and in the correct order. It's quite important to have
edges in the correct order. Notice how you can go quite fast and not pay attention
too much on the sketch, just add the colors in. Take some more color. Don't worry, if you
don't have enough color, you can always make a bit more. And even if it's a
different color, it's fine. Nothing will happen. We are actually, it's encouraged to
have different colors, and you are going to add
this different color that has a bit more blue as
a brush just around here, just add it, and notice how
you can break this color. And that's how you
add color variety, and you make the
painting look a lot more diverse and a
lot more complex. Okay? Another way you
can add color variety is to just lighten up
the color quite a bit. Because you already
have color here, you have to adjust and
add a bit more white so that when you add
it and it mixes with the colors on the canvas, it really shows that
it's a lighter color. So it's more evident. And because we've painted this beautiful light white
color, bluish white color, we can mix even
more white into it, Just add a bit of white, mix it very well, press on the brush, so
it mixes very nicely. And then you can start
around the shadow. You can go inside the vase a
bit and over the background, trying to make that
line straight. Don't worry if you
pick up some of the brown because you have
so much color in the brush, it will be very nice. Just fill it in, go a bit over, but do not go over the
actual background. Okay. You can go and add
a few brush marks if you want and then squidgy
it with the finger. But let's add this color
onto the left side. So this is just a
simple like we're just the only way we can move so fast is because you have a
sketch already done. So you can really pay attention and notice how if for instance, paint in the next step, I'm going to explain to you how going super fast is
not really necessary. If you have
deliberate movements, you can really paint super
slowly and attentively. I've painted a bit
faster so that you get a bit looser with
your brush marks. Okay. And now in the next step, you are going to paint the vase.
5. Circular vase: This next step, you don't
even need to clean the brush. All you need to do is get this white lighter color and clean up the
brush on the vase. Trying to remake that
sketch a bit more visible. Don't worry if you pick
up some of the brown, trying to remake it and clean
up the brush over here. Doesn't matter if it's
as opaque as mine, because in the next few minutes, you will understand
what we are doing. We are changing the color a little bit by
adding some yellow, just a tiny amount of
yellow and some blue, and some white to create
this very light turquoise. And with this light turquoise. We are going to indicate
the water line. Over here, indicate
the water line. And then we can go with
some brush strokes. That's why it's important
to have some blue color showing in the actual vase. Okay. So we're just
following the sketch, even though I ended up making it a bit
bigger. That's fine. Now, let's add a bit of blue to this color
to make it darker. And now let's add
some darkness right over here onto the right side. You can also add some darkness
right underneath the line. And then let's add some
white to this color. I'm going to take
a bit of time to mix this color very thoroughly. Notice how it's building
up more and more color. So that's good because we
are building more textures. So let's add this
beautiful highlight. If you are not comfortable
with using the big brush, you can use the small brush. But I'm going to use the flat brush right over here and add a high light
right on top of the water. We need way more white. Just over on the side,
some more white. Perfect. Okay. And because we have a napkin
right over here, we're going to squeeze
all the color. Perfect. And let's take some
of this white and mix it with the blue
with some blue, mix it quite thoroughly until
you get a very light white. And we're going to put this on the edge on the top
edge of the circle, just going down closer to the water and making the
circle as nice as possible. Notice how it's super slow. And in fact, let's
demonstrate something, which is that if you squeeze
the color from your brush, and then you take some blue, and some red and mix it over on this area to get a darker
blue than the background. You can go very, very slowly. Notice how just
following this and pressing Even though
you're going slowly, you can really add and go a long distance
and be very accurate. And in just a few brush marks, very slow brush marks. I think that took
what, 20, 30 seconds, and adding it over here, let's take some more color. The only way this is possible is because the brush is
loaded with color. Then you can brush some
spaces that have white, and then you can go with the
shadow because in front, the shadow goes over the table. Slower. Perfect, and
making it bigger. And if you have
something like this and the table is still wet, you can do something
with your finger. You can start some
finger painting. Okay. That's all for
this beautiful step. Let's clean the
brush just a tiny bit and go into the next one.
6. Leaves and greenery: Only reason we are able
to paint this freely is because all of these colors are in the same family.
They are friends. They are called
analogous colors, and that helps us to paint over each other
without any disputes. Thus the name, they are friends. Once you've done that, you need to add some beautiful blue and some wonderful yellow
over it and some brown Okay, a bit more brown,
a bit more blue, just so we have a
lot more color. Okay. And now it's
the beautiful trick. You're going to take
a bit of water, and you're going to make some stems over what you've painted. You're going to wonder,
what are we doing? We are going over the
highlight of the water. That's fine. Because the
vase is not really done. Let's add more white over this, and by white, I mean yellow. And let's add a bit
of a highlight. Maybe a bit more yellow to add a bit of a highlight
over the stems. Perfect. And now let's add just a beautiful
leaf just over here. And you can add some
leaves over on this side. Notice how the
Wonderful flat brush can really create leaves in a very interesting way
by going on a diagonal. So again, notice the fact that you don't
have to move fast. You can be super
super precise and create some interesting
leaves super easily. Just by having the right color, and let's make another
one over on this side, and by doing the
movement very slowly. So you don't have to hurry up when you're doing a painting. Let's add another one
over on this side. Okay. And there is another
one sketched over here. Again, going inside
of the middle flower. And maybe making this one a bit bigger because the
flower will be over it. Let's Let's make
another smaller one here with the small flat brush. You can take the
small flat brush and add another one over here. So I'm going to go
over the leaves so you understand and
see which leaves I made. I started over here and made
one leaf going this way. I started another one over here. I started another
one just next to it, this one a bit longer. So let's exaggerate that. And now one over here. One over on this side, and going slower
over on this side, going this way from here. So you can start in
both directions. You can start from
here and go there, or you can start from
here and go there. All you have to do is have this idea in mind that you shouldn't
go against the bristles. You shouldn't go like this.
You should go like this. Notice how because you
are moving so slow, you can go over a leaf
and precisely re make it. Without adding any more shape. You can go over it and add it. Okay. For the next step, you will need to leave
the painting to dry, especially these areas
around the flowers. For that, you can speed up the whole process by having
a beautiful hair dryer. It really helps, and it makes the painting dry ten
times 20 times faster.
7. Yellow petals : In just about 2 minutes, Well, to be more precise, just about 1 minute, we already have a dry
surface. Well, let's see. Nothing to be shown,
especially around the flowers. I didn't concentrate
on this area with the hair dryer because we
don't need this to be dry. We only need the areas around
the flowers, the leaves, and let's squeeze
some of that color just off the big flat brush. Let's squeeze it out.
Whoops. Okay. And once we've squeezed that color out, we can go ahead and mix
some colors. Let's go in. To the Yellow. Grab some yellow. Find another spot on the plate, add some red to this yellow. Well, we need more yellow. Okay. That's quite red. We need to add a bit more
yellow to the plate, right next to the Wow. That's a lot of yellow. We could be painting like five paintings with that yellow. Let's add some
yellow until we find this beautiful orange color. Now with this orange color, we can add it around the middle of the flower,
the middle flower. We can start around it Yellow is quite a
transparent color, so we need to add quite
a bit of thickness. So you need to understand
that some colors are very, very transparent. Notice how I'm taking account of the fact
that there is a middle and the beautiful petals are
going towards the middle. You can actually go
from the middle, don't touch, and then
touch and then go out. You can go all around making
these beautiful petals. Whips. I picked up some red, but that's fine, just a
little bit of color variety. Now let's go down and make
some petals right over here. And going this way. You might be wondering why
orange and not yellow. This is just to build color
variety and to have a bit of depth and shadow and light and make some
beautiful colors. So we need some orange. Now going on this
side over here, and there you progress
into the painting, the more slowly you should move. Like right in between
these two leaves, just barely touching them. And then going outside. Can also go right from here to connect these two
and going straight down connecting to that leaf. Torry, if you go over a
leaf or over something, that's just a painterly look. Now, let's go over on this side and create a bit of a
round shape behind, and then going with another beautiful petal this
way and going into the blue. It doesn't matter if you end up covering all of this orange, because you need to
cover all of the white, as well as go into the blue. So now you are going
actually over the blue. And because yellow is
such a transparent color. Notice how you can see the blue. You need to do two
layers, two thick layers. So in this corner, I'm just following the sketch. Imagining the sketch over on this side and covering it all, can also clean up the
brush a bit on the canvas. Now let's clean the brush and do some beautiful yellower
color. A bit more yellow. So we are going to pick
up some of this yellow, find another spot, and just
yellow like this is enough. So quite a bit to have
that beautiful paste. So when you go over the blue, notice how it's super obvious, and it doesn't let The blue show. And
if that happens, you need to go
back to the yellow and add a bit more paste. Slowly adding some petals, keeping in mind to really
focus on that middle. So going towards the middle, you can either go from
the middle and go outside or you can go from the
outside and go to the middle. Okay. Can add some
more paste over here. Notice how transparent
this color is. Okay. And going on this side, just so you don't have the
ability to really think. It's exactly what stops us. If you are thinking too much, you are not doing enough. So if we jump around
like from here to like, right over here and
make another pedal and then go over
and make some more, then we don't have enough
time to O mind doesn't have enough time to really think and focus on each brush stroke. So let's go over on this side. Let's make a bit more color, and going over here just
so we bamboozle the mind, going slower around the leaf and going over the
blue with this color. And over on this side, creating some more
leaves, and by leaves, I mean, beautiful petals,
going over the blue. So you are concentrating on
making and adding some of this color right where
transparency is super intense. So notice how there is
a lot of transparency, for instance, over here. Now there is very
little over here, the same So you let the painting dictate
where you put the yellow. Also, you can add right
where the white is. Notice how you can vary the brush strokes
to be smaller to accommodate for
the fact that you are adding it over the white. Like, notice over here, just making a small
little petal. That will make the painting
look more interesting. Notice how this one
is quite transparent. Let's make it more
thick. Even thicker. So that's a lot of
thickness, and over here. So you let the painting
dictate where you put the color until it feels
very nice and beautiful. Once you've done that, you can clean the beautiful
well, not clean. Let's add some white and add
some more highlights on top. So it's the last layer
for the flowers. Well, for the petals. Let's add some white
over this yellow. Notice how it needs
quite a bit of white, just because we have to again, accommodate for the fact, like you did for the blue
to accommodate for the fact that this yellow and this
orange is still wet. So it's going to mix with the color that you
have on the canvas. So let's find some areas, especially right at the edge where the blue and
the yellow meat. This color, you
should only use very sparingly and only on
the middle flower. Let's add it over here. You can always just
caress over the colors, so you just leave the color, so you don't press too
hard, just caressing. Very tenderly. Go
right over here. Let's add a few
more on this side. That's quite nice. In the next step, you
will make the middle of the flowers and redo
the line of the water, and you will be finished with
this beautiful painting.
8. Middle of the flowers: Clean the big flat brush. We don't need to clean
it very thoroughly. All you need to do is pick
up some of this brown. And because brown
is a dark orange, we don't need to worry too much about the yellow and the orange. It's going to really
play very nicely with the beautiful yellow and orange
of the wonderful flowers. So we are covering this middle section with
just brown for now. And then after
it's wet and nice, we can add some red and add some squishes just going this way and
a bit of texture. And then some blue. If
we have some, we do, add some blue and mix in a very dark brown and go on
the opposite side, M also some textures. And since you have this color, you can go in over here right in between and make this
appear like a circle, a semicircle on the outside and then going very
slowly like this. Clean up the brush
with just one napkin. Let's not waste. We are echo
friendly right over here. And because you have a
lot of blue over here, you can add some red into
an orange and some brown, or you can just add brown and red and add some of
this over on this side. Okay. Now, for the
last few things that you're going to
do is take some water, just a bit of water with
the small flat brush, and just add some water right at the
intersection in between the middle and just going a
bit outside in some petals, just going with some little
brush marks like this, picking up some of that brown and going in between the petals, just a little bit You can
go from here, not a lot, and then let's go
over and add some more roundness to this
to undo what we've done, about 90% of it. And go into the yellow
a bit with no color. So all it's doing is blending
all of those colors. If you don't have
yellow or orange, you can just take
some orange and achieve the same effect
by going close to the brown in some areas like this and making a bit of complexity over there,
as well as here. Notice how this is
just a flat blue, so we can add just a
tiny bit of transition, where the petals
from the inside of the flower meet the
middle, not these ones. The ones on the outside, we don't have to touch. Perfect. Now, let's
clean the brush.
9. Finishing touches: And we have to remake
this beautiful color. I already have it here, but I'm going to do it
again by adding some blue, some yellow, just so you
know exactly how to make it. And let's take some white And that's almost
the same color. It doesn't have to
be the same color. All you have to do is add
a beautiful line over. It's fine if it's transparent, then if it's not perfect. And then going with some white because this is where
the beauty comes in. You've added a color light, a color of the water, and now we are going to do the highlight over
the top of this. Perfect. Now, just to top it all off for the last thing that you can do is add a
bit of this color. Onto the table and around
the shadow just a bit to accentuate that shadow
and that end of the table. You can also add just water, just clean up the brush and mix in some of this water with
the color that you have on the sides of the
shadow and going in to the color to add a
bit more blending. That's just a pro tip for making a bit more of a diverse
color onto the actual table. And trying to just
make the table a bit more straight.
That's fine. And I think we are
done well, almost. Let's now we can take
a bit of time and just go over with some blue and
add where we see some white, just add a bit of blue. Don't worry if it's
not the same color. You can just go
with your finger. Be careful that you don't touch any yellow because the yellow
is still wet probably. So let's add some more of
this over on this side. And here, just touching it. I can add some water to it, so it doesn't seem out of
place if it's too different from the other color because water will make it transparent, and when it dries, it's not going to be so evident that you've
put another color. Another trick that
you can do is go ham. And by going ham, I mean, you can go and purposely add
this color in more areas. So it seems as if you've added this color from the
beginning. So like this. Notice how now it's
part of the painting because we find it everywhere
in the background. Speaking of that, let's add
it to the shadow as well. Just adding a bit more color
variety onto the shadow. And I chose to add it to
the shadow just because I wanted to fix this
white spot over here. Perfect. You let it dry, and you've done another
beautiful course and another beautiful painting. So let's go over what
you have learned. You have learned
that you can make a beautiful background, and you can really hurry up in that background
because you don't need to take care of the sketch. It's actually encouraged
to go over the sketch so that you create these
beautiful edges, this beautiful
overlapping of paint, because we tend to think of paint as being
two dimensional, but it's actually
tree dimensional, as you can see over here. And it's very
noticeable when you put a layer of paint first,
and then you add it over. Like, for instance, here,
this quality of edge is not really notice how
it's not really soft, because we've added this
color and also this color. It doesn't really matter
that much because overall the shape is on top
of the background. But it does matter. So you have to break it down, break the whole painting down, and understand in which
order you should paint. So first the background, then the table and the vase, then the shadow,
then the flowers, leaves, and all kinds of things. You've learned how to make
these beautiful leaves. And also, it's the same
shape for making the petals. You've learned how to make
color variety in the petals. And as well as the
background and the table. But for the table, it
was a bit different. So you've used different colors, a lighter version,
a darker version, and then the main color. So it's not just the flat color, it's a more painterly color. You've learned how to add
that color variety into the flower by adding
orange first in all areas, and then going thicker. So you understood
this concept that is very important in painting, which is painting
thick, over thin. You've also understood a
very interesting quality of yellow that it's
very transparent. So you need to be a bit thicker, or if you want a flat painting, you need to do more
layers over each other until you have the
yellow that you want, and you've also learned how to make these leaves
and these stems going with the water over it again to add this
highlight onto the water. And all of that in a
short period of time, And the most amazing thing that you've learned is that you don't have to paint fast in order
to make a fast painting. You actually can
control every movement. You remember that we've
done these leaves, and we've done them very
slowly and deliberately, as well as other things doing
them very deliberately. So you don't have to hurry
up to make a painting. But at the beginning, when
you're making the background, you can hurry up as
much as you want. Thank you for watching. I
hope you had a lot of fun. I know I did. And if you
are gracious enough, please leave a review to tell other people and let them know that this course is
for them as well.
 George-Daniel Tudorache, Together we will create amazing things.