Transcripts
1. Welcome to Paint & Frame It: Many people have this notion that art is something you can only do if you are an artist. If you've practiced for
years or if you have some formal training or
some kind of art degree. And because of that belief, many people never
even try it out. Hi, I'm Taparia, a
chartered accountant, a mixed media artist, a creative business
entrepreneur, and a mom to a toddler. And today, I'm here
to break this belief. Welcome to my new
Skillshare class where I prove you that
anybody can paint. All you need is the willingness, and you just need to
pick up some pen, markers or paints
and try it out. What I love about this quick
DIY project is that it is completely customizable as per your liking and as for
your color palette. You can experiment with colors, you can experiment with designs, you can experiment with layouts, all according to your
choice of taste and style. And by the end of this class, you may have not only created a beautiful handmade
décor piece, but you'll also see for yourself
that art can be simple, relaxing, easy, and
accessible to all. Without a further ado, go grab your markers or
paints and those mini papers, and I'll see you inside
the next lesson.
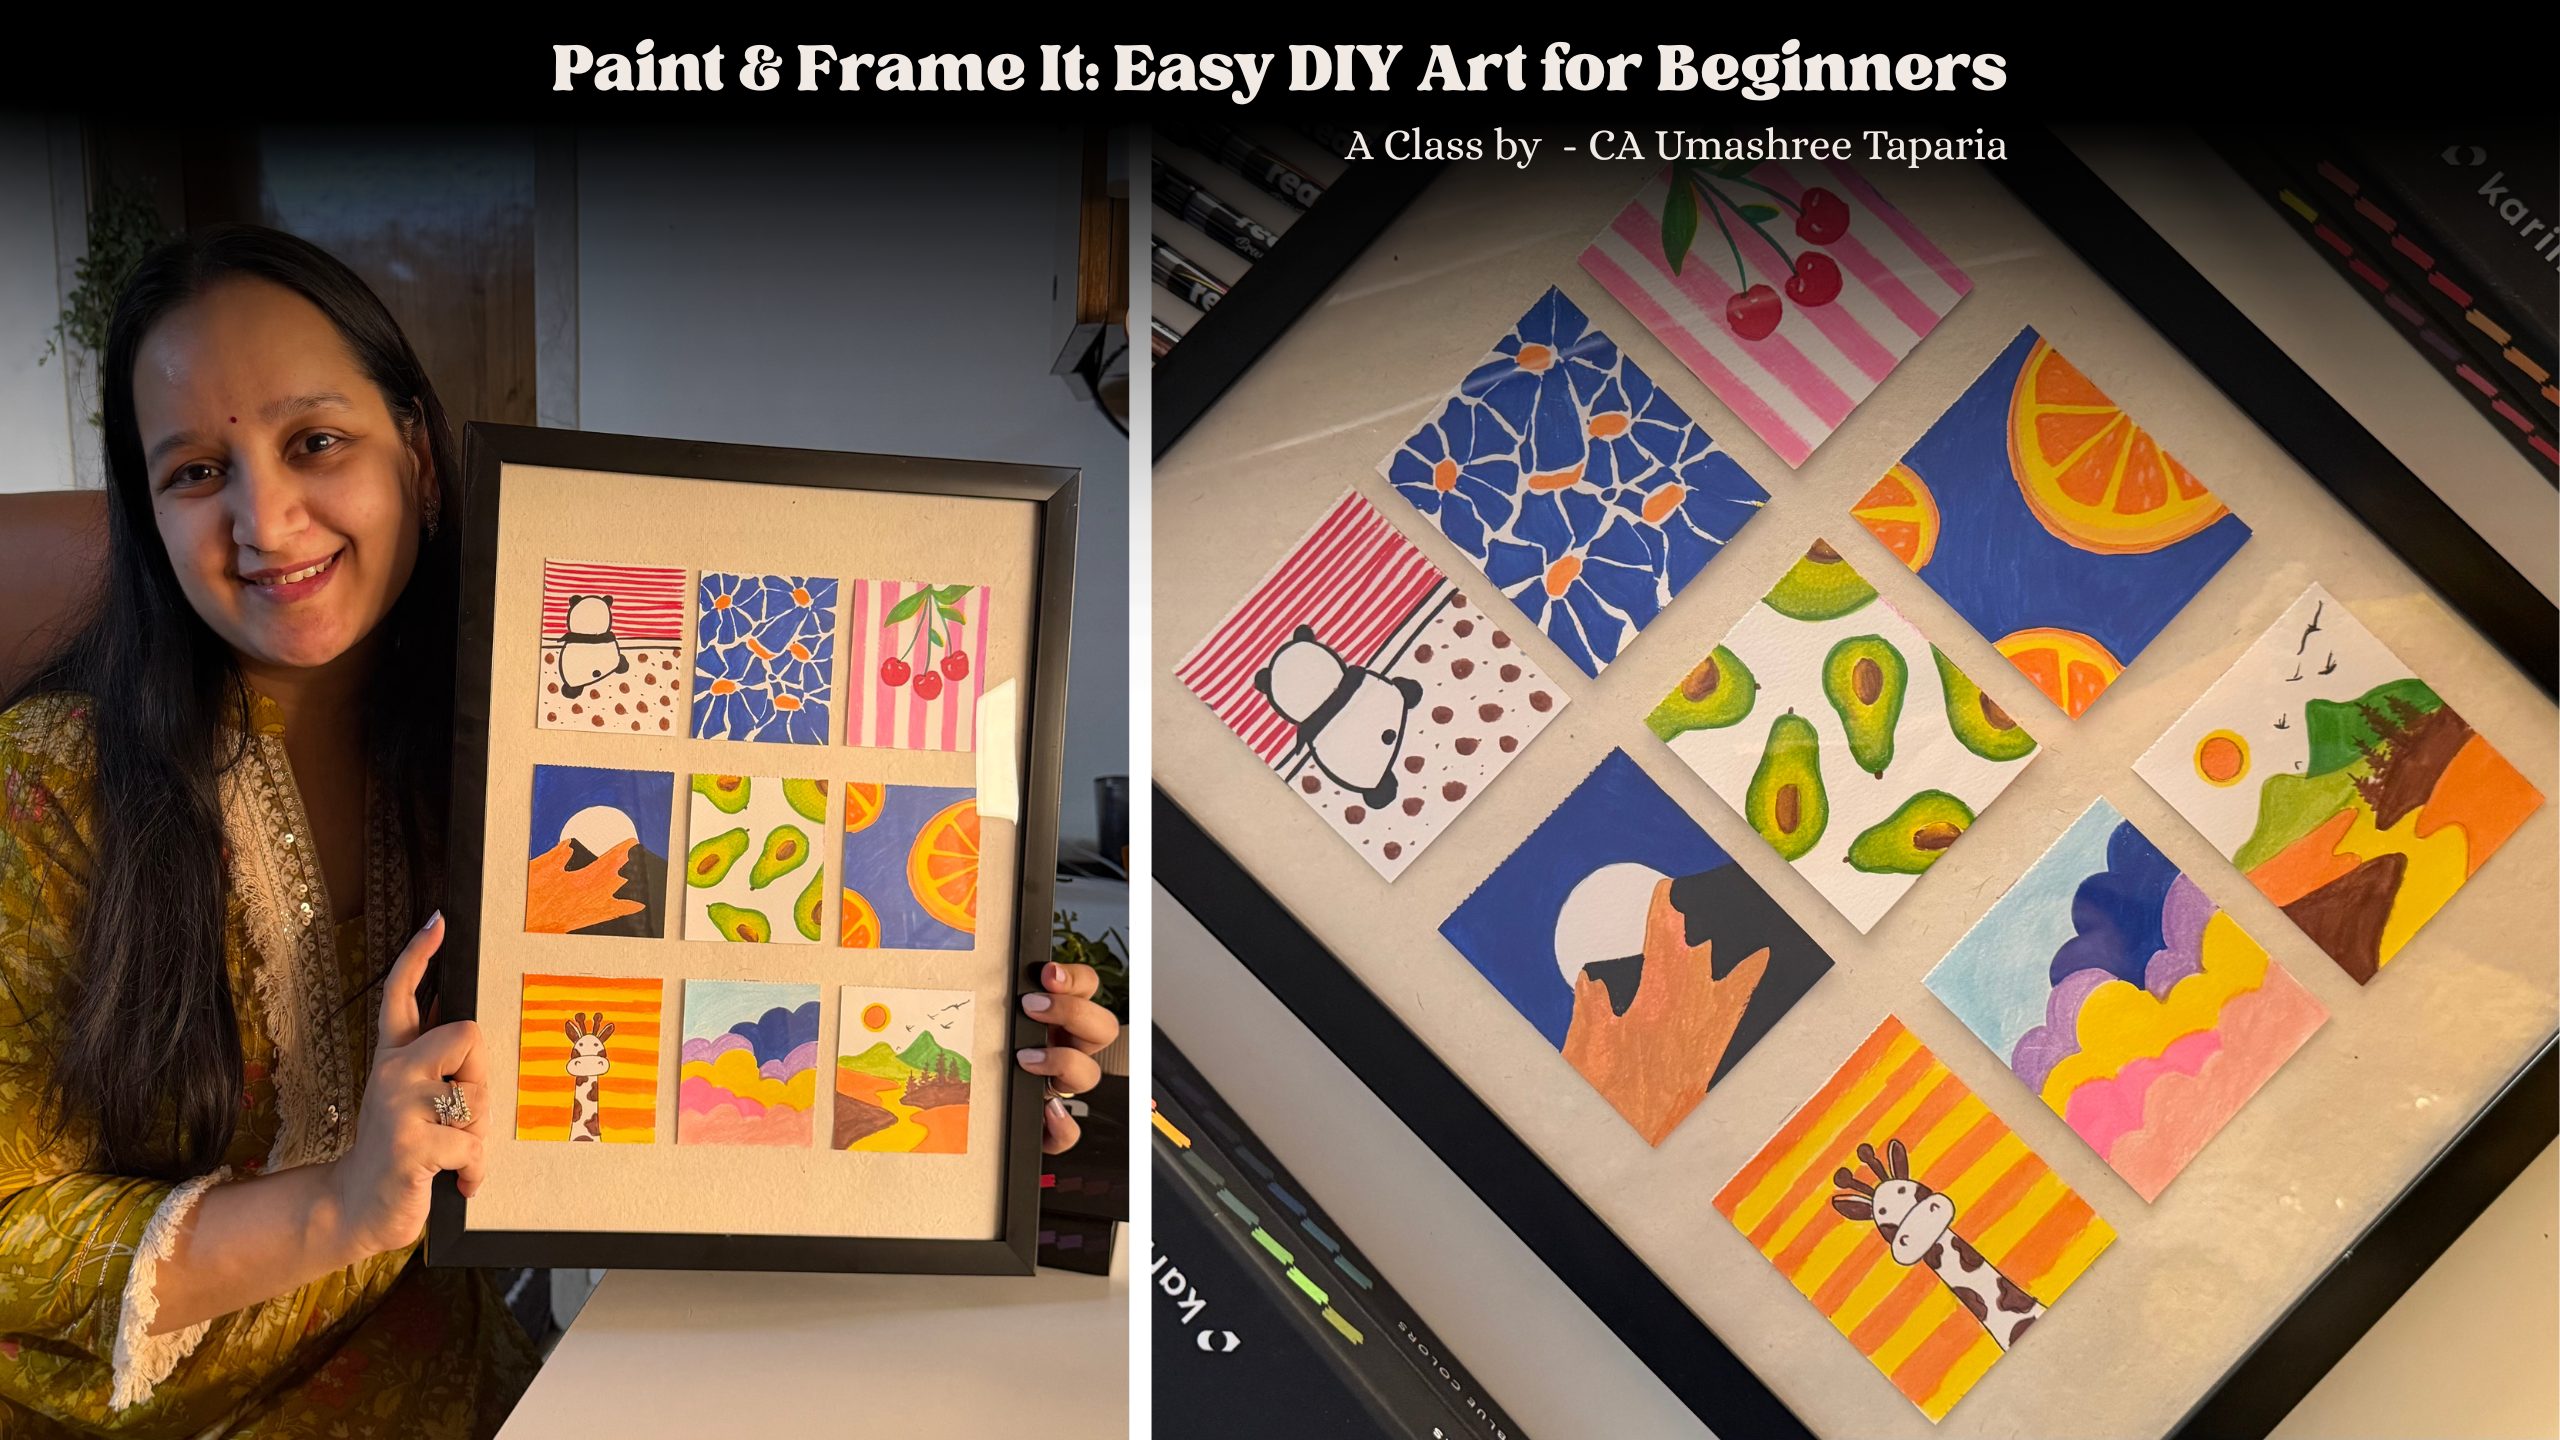
2. Materials you'll need: So before pining, let me give
you a quick material guide. This class is very simple and with very basic supplies
that you would be needing. First is, you would be needing
a surface to paint on. I'm going to be using in
this a seven size book pad. So this is 200 GSM. 100% cotton paper. You can see it has
a little texture, and this is perforated, so I can just tear it off. Now, I have this pad with
me, so I'm using it. You can use even your basic, um, 150 GSM, 100 GSM paper
of bigger sizes, paint everything together,
and then cut it into pieces, or you can even use, um, such small painting
cards like these. So like here, I'm using one
for watching the colors, seeing the color combination, what's working out,
what's not working out. So these come very handy. You can quickly use
swatch or create your, you know, thumbnail first and then go ahead with
your main layout. So for the paper, you can go with any paper
available with you, any size which you
want to work with. Nothing specific or that you need to use the
exact same one. Up next is the medium that
you want to go ahead with. So as, um, I will be going ahead with
these acrylic markers. These are pigment, real
brush, acrylic markers. So that nib of this is
like an actual brush, giving you precision
and easy control. Now, it comes in different
color sets combination. I have all of them. You don't really need all of it. You can either use brush pens. You can use crayons,
pencil colors, watercolors, wash, acrylics, oil colors, whichever
medium you want to use, you can just go ahead with that. You can even use color pens. You can even use just
black and white medium and create tonal variations. Everything is possible because we're just going ahead with very simple doodling
and simple patterns to create in our DIY frame. All right. So I will be
using these brush pens. As I told you, you are
free to use sketch pens, brush pens, watercolors,
trellors, wash colors, crayons, oil pastils whichever
medium available with you, color pencils,
everything works out. And you would just
need a pencil for some pencil outlines
that we'll be doing to understand the designing of the concept that we'll
be going ahead with. And that is all the
supplies that you need a simple medium
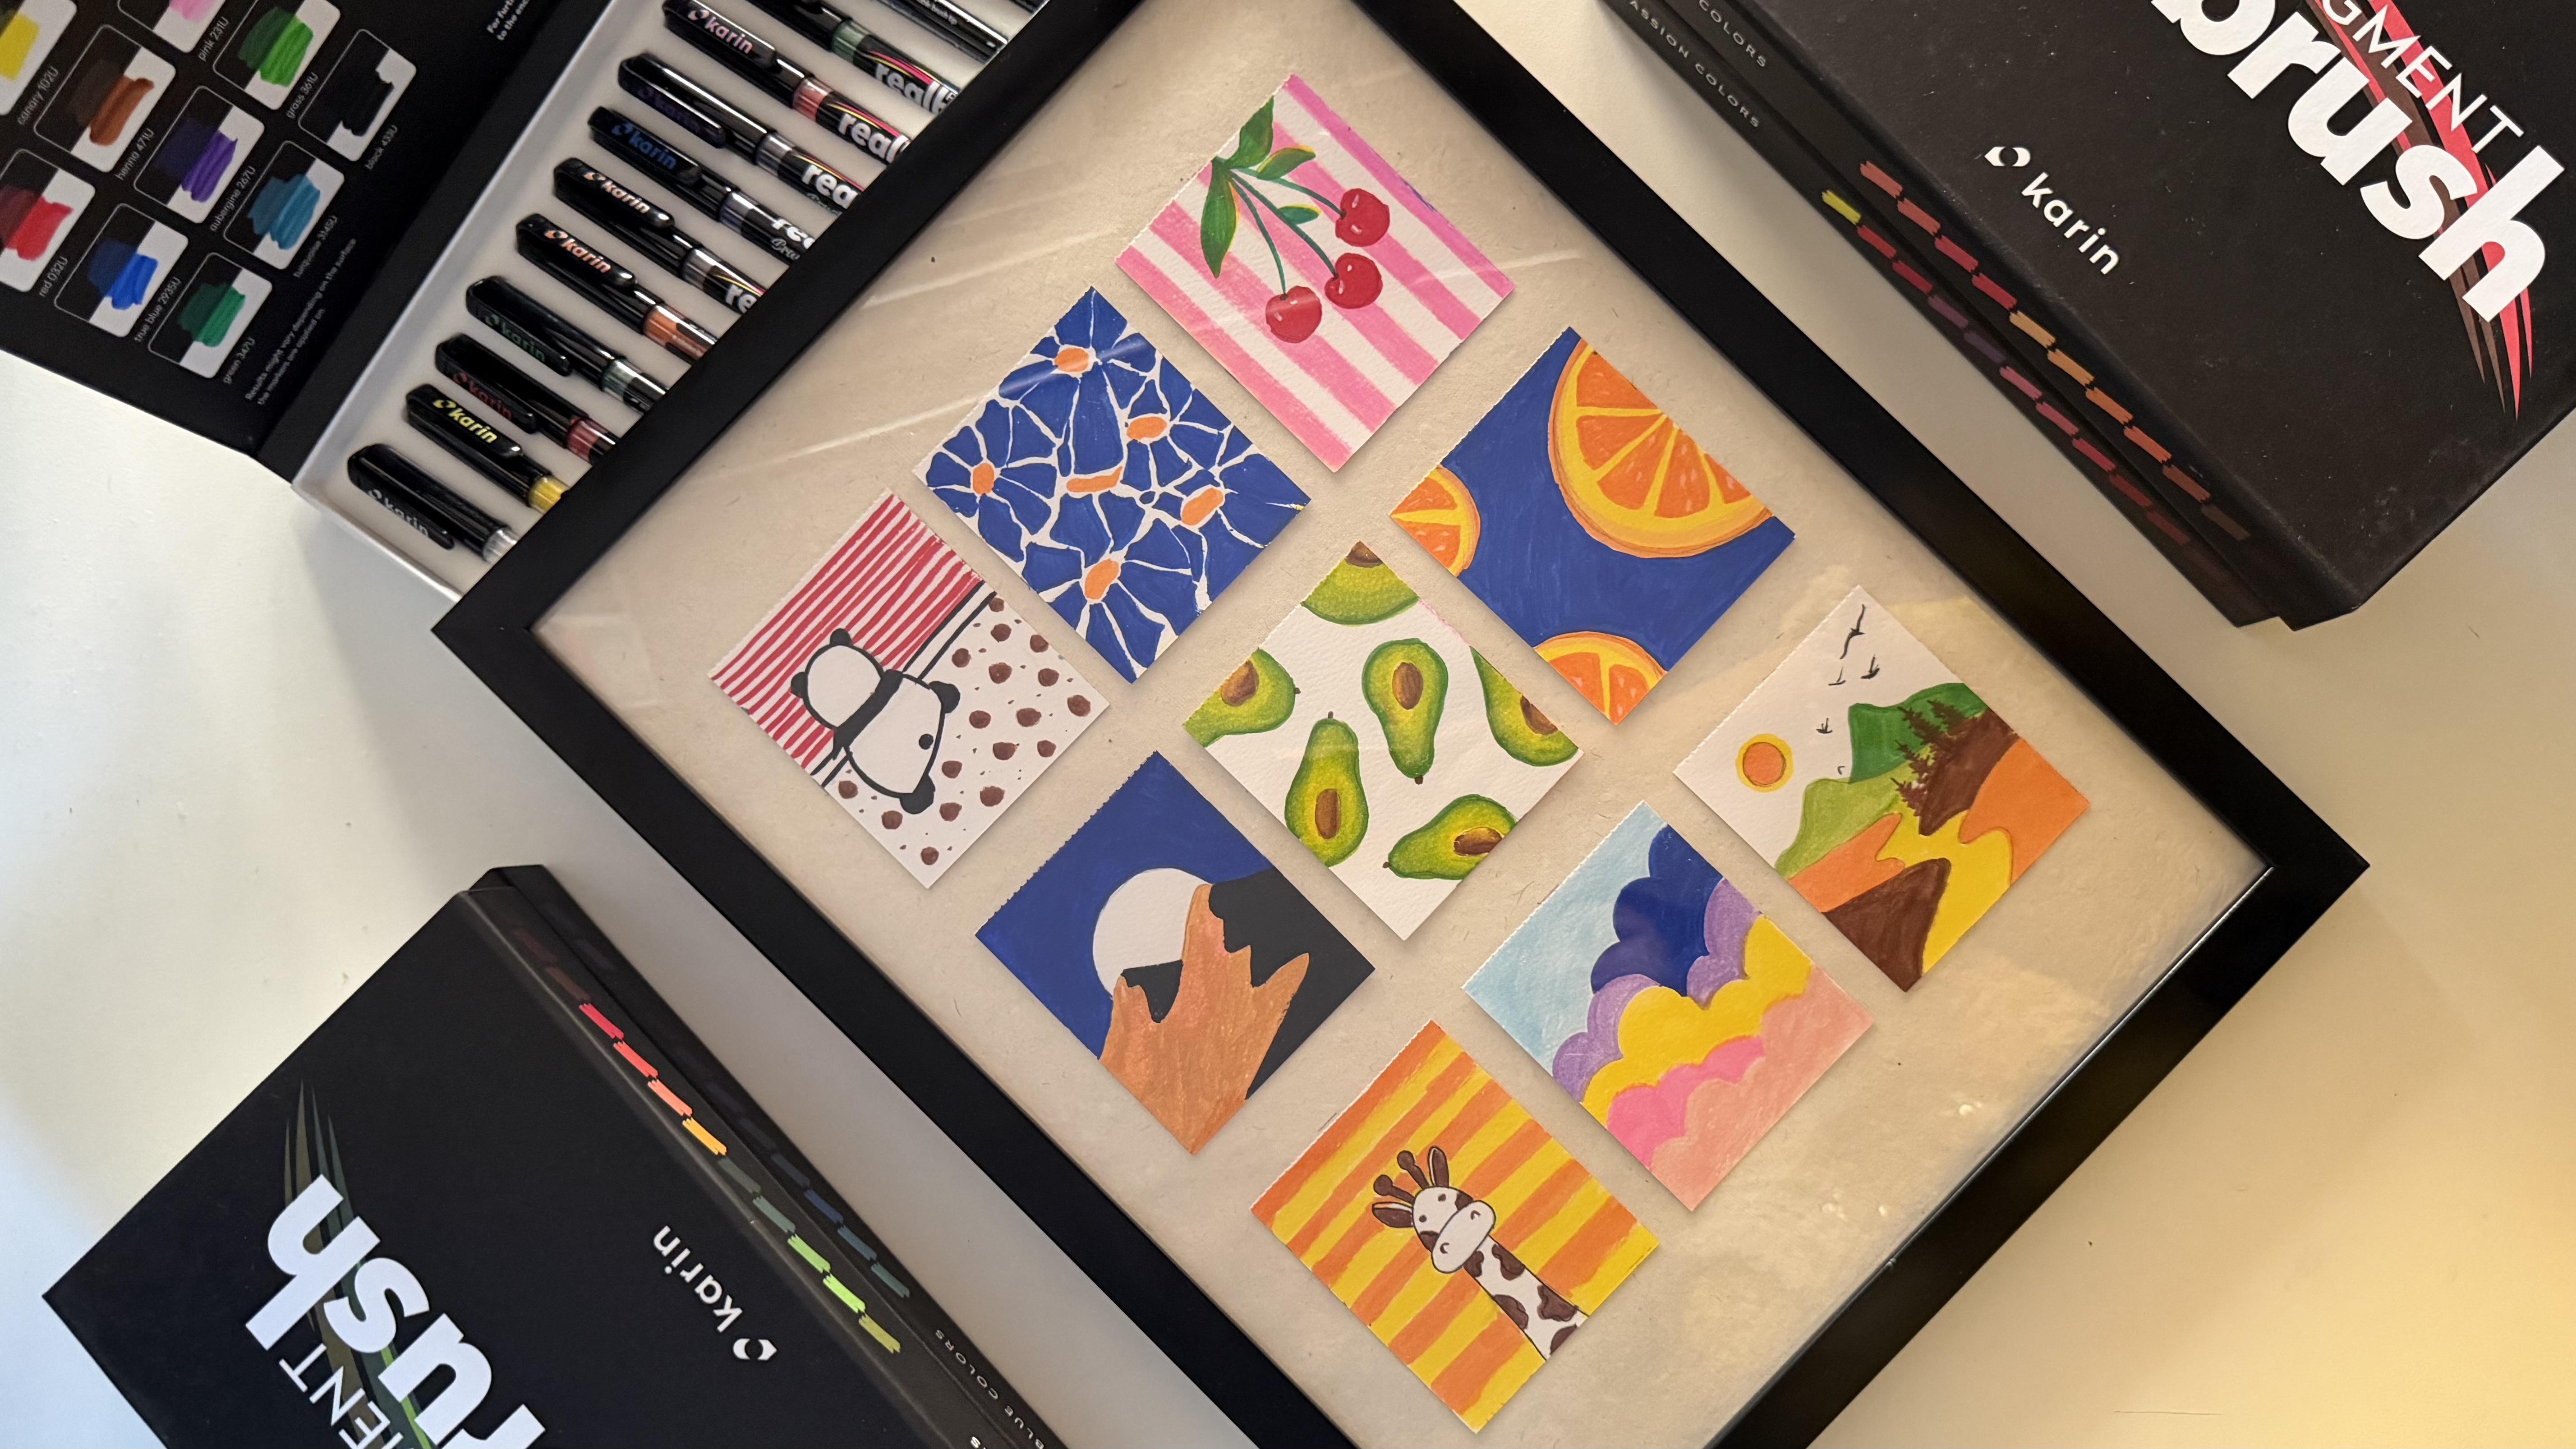
to paint with, a simple paper or a surface that you want to go ahead with, and we are ready to go ahead. And after that, if
you want to frame the final artwork, here, I have used this
black border frame, and I have framed all
the artworks here. So in case if you want to also go ahead and frame your artwork, then you can choose the
frame of your choice for framing of your artwork,
and that's all you need. Let's begin creating
in the artworks now.
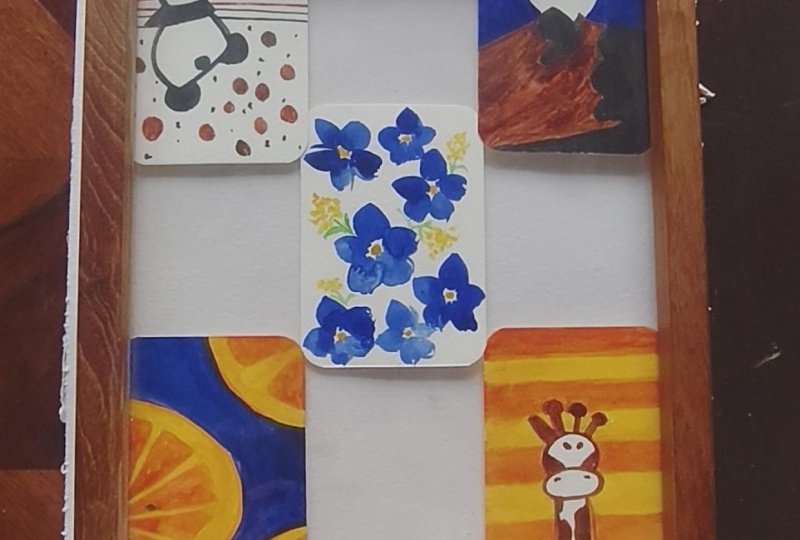
3. Project 1 - Mountains: Oh so for the first painting of relaxing with art brushes, we are going to go ahead with a simple mountain landscape. I will just begin
creating an outline to the mountain that we are going
to be painting. All right. And as we go ahead, I'm just going to create the separate sections to
the mountains as well, the darker and the
lighter shadows. It's going to be very quick
and five minute exercises. And on top of it,
we are going to go ahead with a
beautiful moon space, which we will let
it be white only. So for this, if you
want, you can even use a tool to create this
half semicircle effect. I will just go ahead and
erase out the extra lines. And now going ahead
with the colors. So first into the sky, I will go ahead
with a blue shade. Make sure that you have your brush markers
in the right stage. Going to be filling this entire
space with a blue color. You see with these
acrylic markers, you can just move in any angle
and direction and create in those beautiful blends
marking the outline. Now, since I'm using
a brush tip pen, you will notice that I can get these fine
details as well easily. I'm going to fill the rest of the sky again quickly
with the blue colour. If you're using
an acrylic marker which is not having
a real brush tip, the process may seem a little more quicker
because of the, you know, nib size that
you would be using in. But since I'm using in a
brush that has a brush pen, which has a brush like nib feel, you see at certain
spots it takes out time to fill in the gaps. Now for the mountains,
I will be picking up this orangish brown
color from the nude set. Alright, so let me just
pick up this color quickly, which is this beautiful
orangish red brown color. Again, just going to
activate the brush pen. Now going to fill
the bigger part of the mountain with this color. You see the brush nib gives
me the edge for outline, making it seamless to give an outline to
my mountain space. I'm going to quickly go ahead, fill in this entire space. These are quick and easy
five minute exercises to just help you
relax and get into the flow of art and have an easy activity without the pressure of
learning to paint. These activities are perfect for anyone who just wants to, you know, get into the flow
of relaxation with art. Now using in the black color, going to fill in the smaller
edges of the mountain. So you see the brush like nib gives me the perfect
finishing edge, and now filling in this space. Same way, going to go ahead with the next space here on
the right side as well. I'm going to fill this
space as well completely. And just like that, you
see in under 5 minutes, you have a minimal landscape ready with limited
colors and no knowledge, no art experience needed, an easy follow
along art therapy, which is perfect
for you to relax, unwind, and enjoy the process. So here's to the first painting where it is about you
don't need talent. You just need to follow along. And that everybody can paint. I hope you guys enjoyed
painting this with me. I will see you into
the next painting, where we create another
minimal landscape with simple acrylic markers. See you guys into the next one.
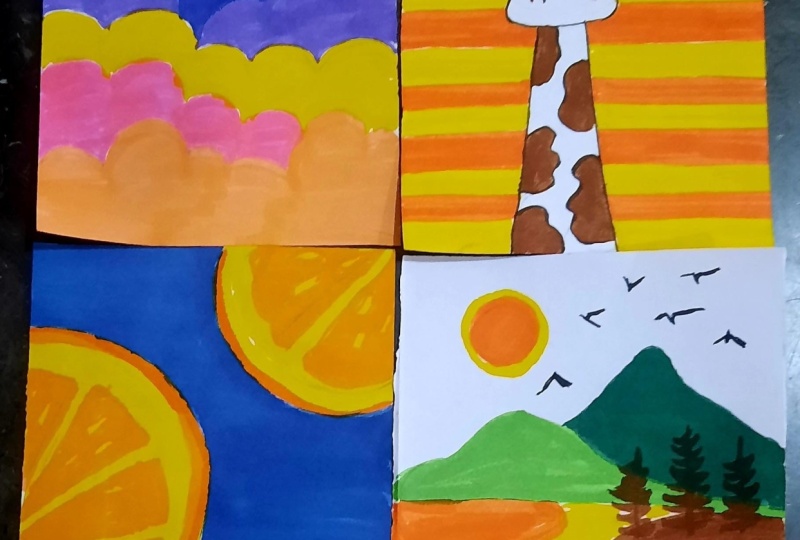
4. Project 2 - Clouds: Welcome to the second painting of Anybody can Paint challenge, and today we are going to go ahead with another simple sky, which is going to be a
pretty beautiful pastel, fluffy cloud sky. We are going to go ahead with
random pastel colors and going to be building in a
simple fluffy cloud effect. So I'm going to begin in
by the colors directly. Alright, I will just begin outlining and creating in
some cloud outlines first. And with every layer, we'll just go on filling
in these layers. This class is all focused to prove that anybody can paint, and art doesn't
always need talent. It just needs that willingness to start and follow
along and relax, filling in this entire space. If you use a smooth grain paper, the process becomes easier. My paper has a little texture, so you see I love
the texture effect, but of course, moving the
brush on a texture paper makes things a little
bit difficult. Alright. So I'm done with
the first color. Moving on to a pastel blue now. Or I will first move on to a
little light or pink color. Just going to have a small
half cloud on this side. The brush like nib of these pens makes it easier
to get this outline smooth and precise because of the pointed tip
precision that it gives in. Now I will move on
to a yellow color. You see, I'm going with random
outlines for the clouds. It is not the same cloud size or the length that I'm
falling for each color. Go ahead with the outline
at the base again. I'm moving to a bit of a lilac color or a pastel
violet that you can choose. You see, giving caps in between so that it looks more beautiful. Just defining the outline well. Now I will move on
to a blue color. And it is not necessary
that you really need the same acrylic colors
to go ahead with these. You can even begin
with color pencils, oil pastes, any medium
that you wish to, making it an easy job for you
to follow along every day without the hunt of some detailed supplies or making it difficult for
you to follow along. And at the top now, I'm going ahead with this light
sky blue color. This is not a real brush tip, but it is from the same
brand caen markers, and it has a normal tip. So you see the tip is
not that flexible. These are their first range
of the décor brushes, and their second range had
these brush like tips. The same colors are available
in both the series. Going to fill up completely. And that is it, just like that. In almost 6 minutes, we are ready with
our second pattern. Here's a pattern for
day two in this simple, anybody can paint a long series. I hope you guys
enjoyed painting this. I will see you guys into
the next month tomorrow. So
5. Project 3 - Oranges: Hello, everyone. Welcome back to the third pattern of the
Anybody Can Paint series. And today we are
going to go ahead and paint a simple
orange pattern, and I'm just marking the
outlines for the oranges. So we're going to have in like one half and two small parts
of the oranges coming in. And this space, we'll be
adding in with the blue color. And these we'll go
ahead step by step, adding in the color
tones or one by one. Now, since I'm working
with acrylic markers, it's easier for me to just go ahead and lay over the
colors on each other. So first, I'm going
to be beginning in with the orange color. Sorry, first, I'm beginning
in with the yellow color. Go ahead, filling in the entire spaces with
a yellow color first. Again, the whole motto
of this class is to ditch perfection
and to go ahead, paint loose and free. You will notice I will
be going ahead with minimum pencil
sketches and letting the colors do the
job on their own. All right. I've done the
first layer of colors. Now for the next
thing, I'm going to be picking up the orange color. And with the orange color, let's give all of these
a beautiful outline. Now you see my brush like
nap makes it easier for me to just glide along
and given the outline. That's the beauty of the pens, which have a brush like feel, making it easier to dye. In case if you do not
have a brush like nap, it's absolutely okay because the only difference
that you will be having is that you will have to take a little thicker outline. Now marking out the
insides of the orange. You see, simple triangles
that I'm marking out. Now we'll fill in these spaces
with orange color as well. Now, again, the shades can vary from person to
person set to set, so it's absolutely okay. You can choose any set of warm colors that you
wish to go ahead with. Much All right. Now the next thing that
we're going to do is picking up a little bit of
a yellowish orange color, which I will be picking up from the next thing
that I'm going to be doing is picking up a little
of a yellowish orange color and going to give
an inside outline. All right. Just one tonal
variation of the color, but you will observe how
it adds much more depth. Now you see the pencil lines that are visible
at certain spots. I know I cannot do much
about it right now, but I'm still liking how it has turned out with all
of the things around. And now, lastly, going
to be picking up the blue color and fill in the rest of the
space with the blue colour. Going ahead with
precise outline. You see, the brush like nib
makes it so much easier. And now quickly going to
fill this entire space in you see, art does not need time. Neither does art need all
the talent in the world. It just needs a willingness to let play with colors and let the colors create
magic on paper or on canvas or on any surface
that you intend to. Quickly fill in the remaining
space here as well. You see how the orange and the blue contrast colors
create so much detail. And lastly, to add in
a little more element, going ahead with
the white colour. Just little highlights. And just like that, we are ready with our
painting for day three. I hope you guys enjoyed
painting this with me today. I will see you
into the next one. Thank you so much for
joining me into this. Anybody can paint challenge
and painting along with me. Oh.
6. Project 4 - Valley: Hello, everyone. Welcome
back to day four of this. Anybody can paint
challenge where we are creating our easy mood board, perfect for hanging
DI wise or using these simple paintings
that we are creating for décor or adding in as
gift tag to your gifts. I'm just going ahead
with outline for a simple walkway between
the mountains, right? And, you see the outline
that I'm following along. Now at the top
here, we are going to be painting in
some pine trees, simple ones, which I will directly be adding
in with the paints. And here, I'm going
to be having in a small moon or a sun, whatever you want
to consider it as. Alright. Now let's go
ahead with the colors. I will let the top
of the sky be white. I will not go ahead
with any colors there. I will first begin in with the orange color
into the sun here. You will see even how white spaces add on to the
beauty of the painting, moving on to the orange
into this space. Orange out here at the bottom. Now, I will go on
with some greens. So first green here in
the back of the mountain. And for the next, I will
just pick up a darker green. And I will just mark the outline here filling up this space. Now, into these rest two spaces, I'm going to go ahead
with brown color. Or you can go ahead with a yellow ocher
or a yellow color. I will go ahead
with a brown tone. And with the same
brown color here, I'm going to go ahead with
some pine tree outlines. You see how quickly
just a minute or so and the pine trees
are ready there. You just need to move
your brush crisscross, getting in a tangular shape, moving from the thin foliage at the top and moving downwards, just increasing the
length of these. And into this bottom
space here again, filling it with
the brown colour. And now I'm going to pick up the yellow color and fill
this entire pathway. And to the sun as well, just going to add an outline
with the yellow color. And lastly, using
in the black pen, going to add in a few
birds into the sky. Just simple silhouettes. And with that, we are ready with our painting for day four, a simple, easy
abstract landscape, proving anybody can
paint and just needs you five to 10 minutes of your day to create such
beautiful outcomes. I will see you guys
into the next one.
7. Project 5 - Panda: Hello, everybody.
Welcome back to day five of Anybody
can Paint challenge, and today we are going to go ahead with a minimalistic one. I'm going ahead with
a simple outline. What we are going
to be painting is a beautiful animal
that is panda, and it's going to be a
pretty simple outline. So I've just gone ahead
with a single line first, and now just going ahead with a back silo hit of the Panda. A simple pencil outline. And at the top, since
we are painting the back of the panda, so just going to go ahead with a simple head and the yours, So you see such a simple outline that we've gone ahead with. I will quickly just erase
this center line of the panda because the panda is majorly going to stay white. Now, we are going to fill in the years with
the black color. The next pace and lastly, the legs now. Now to the rest of the panda, we're just going to go ahead
with a simple outline. So for the outline, you can use a technical pen as
well with a fine tip. So I'm going to use
this 0.1 nib pen. You can first go ahead with
the outline if you wish to and then go ahead with
the black filling details. So I quickly just thickened
up the outline using the black real brush marker only because it seemed more
better and appealing to me. And now in the rest
of the space to create a little bit
of the contrast, I'm going to use
the red colour and just draw simple
lines like these. And now in the bottom space, I'm just going to be doing in some simple Polka dot patterns
with the brown color. Dropping in some smaller
dots in between the pattern. And just like that, we are ready with our
pattern for day five, a simple animal pattern. These make the
perfect gift cards to add as tags
onto your gifts or presents to anyone with simple messages and
notes that you can write here or on
the back as well. Easy, simple, and proving that anybody can paint
and be creative. So you guys into the next one.
8. Project 6 - Giraffe: Hello, everybody.
Welcome back to Day six of the Anybody
Can Paint challenge. And today, we are
going to go ahead with another animal
silhouette being the giraffe and just going to go ahead with
a simple outline. It's going to be a abstract one. Alright. And just going
ahead with the top now. So we've marked the neck, we've marked the mouth space. Now, this is the eye space
and going to add in simple s. You see how quick and easy it is to
create these patterns, and you don't really
need any kind of knowledge or
experience with art. So you see we are ready
with the outline, going to add in the two eyes, the details onto the mouth. Some details into
the yours as well. And onto the body, just going to create
in the giraffe print. All right. Now, this time, what we are going to be
doing is we'll first begin outlining this entire
giraffe that we've done. Now I'm going to use
the 0.5 nib marker. So this is basically a technical
pen that I'm using in. I'm just marking the outline, not the inside details for now. Now after this,
onto the outside, I'm just going to
be going ahead with simple patterns of the
orange and the yellow color. So I will just begin with
simple orange lines. It is not supposed to be
a straight, simple line. It can be as crooked and
as mastu as possible, then moving on to the yellow. Now, if you want to play
along with multiple colors, you can add more shades of
the yellow and orange here. Next, moving again
to the orange. Yellow across the figure. Go ahead, outlining it. You just need to keep
altering between the colors. The details of the
giraffe on the inside, I'm going to go ahead with
shades of brown and sand. Hence, on the outside, I've used contrasting colors of
orange and yellow, which will, you know, lift up the darker shades on the inside that
we will be using. The brush like tape makes it easier for me to
give those outlines. If you want to make it
a little more quicker, you can choose to go ahead
with just one color and fill the entire space instead of creating in the
stripes pattern, but it just took us another minute extra to create in the striped
pattern along. Now, let's go ahead with the
details of the brown color. So I'm going to fill in
these shapes with the brown. You can choose two
colors of crown tone. I'm just going ahead with one. And just like that,
it took us 6 minutes. We are ready with
our simple pattern. And proving again,
anybody can paint. It's a simple, easy
pattern to paint, adding in as perfect gift cards, or gift card tags to the gifts for little
ones that you ever give. And if you want, you can just go ahead with some more
line patterns like this, criss crossing the colour marks, creating a more visually
appealing effect. I will see you guys
into the next one. Thank you so much for
following me into this. Anybody can paint challenge
and creating these easy, simple paint cards with me.
9. Project 7 - Florals: Hello, everybody. Welcome
back to Day seven. And today we are going
to go ahead with a simple floral pattern
to go ahead with. I'm going to use in the two
colors orange and blue, and we're just going to be creating in simple
floral patterns. So I will first begin in by marking the buds of the florals. So you can choose random spots that you wish the bud to be at. I'm going to go along with
some five to six bud spots. If you don't have
an orange color, you can choose to go
ahead with yellow. If you don't have a blue color, you can choose to go
ahead with violet. You can use any
color combination. You can use red and yellow as well as a color combination. I've gone ahead with five buds, and now we are going to go
ahead with the floral leaves. You just need to go ahead with random shapes
of the petals. But the only thing
here is that you just follow along the outline
of the pattern shape. So here, say you have a curve, take the next pattern here in a curvy way so that it all
looks aligned together. Now, some patals you can
even take them longer. You see I'm going with
very random outline. But making sure that each petal is perfect to the
outline of the next one, creating in that entire
floral look come together. Now, same way, we
are going to go ahead with the rest
of the species, but every flower
petal needs to just be in line with the
next flower shape. So the outline that you have
to follow remains constant. You see some bigger petals. See how automatically
my patterns of the petals take outline, depending on the
petals close to it. We're just going to
quickly go ahead, create in the next
two set of petals. I'm going ahead with
the outline first, and then I will fill
in these spaces. See the random shapes that I'm falling along
for the petals. Mm. There is no right or wrong way. You just need to make sure
that the patterns are aligning with each
other's outline and following the shape. That is it and you just
can fill these in. You see, 10 minutes of relaxation and just following
along these strokes make it so much more calm to your mind and also makes you believe that art
is easy, simple. I will just add in an orange bud here to sink everything in. And another small pattern
here to fill in this space. Now you see how the outlines
are following each other. And just like that,
it took us 7 minutes, approximately six to 7 minutes to create this
beautiful pattern. I will just fill up this
yellow space here as well. So here's a final look at
our painting from Day seven. I hope you guys enjoyed painting this abstract floral
pattern with me, and I will see you guys
into the next one.
10. Project 8 - Apple: Okay. Hello, everyone. Welcome back to
the next painting of This Anybody Can
Paint Challenge. And today, we are
going to go ahead with another simple
fruit illustration, which are going
to be the apples. So I'm just going to begin
in with simple outline. So just beginning it with some simple outlines
with apples. Again, these are also abstract that we are
going ahead with, so you won't be having much
details, simple outlines. Now, to these, we are
just going to pull them up and going to be giving in
a few leaves hanging out. Okay. Add a small one here. And into the rest of the space, I'm going to be going ahead
with a simple line art. For the line art, I'm going to be using in the pink color, or I will go ahead with the
peach color rather and just begin with simple line art
first of the peach color. Now I'm going to
leave some white caps and going to go ahead with
the next set of lines. Now, if you want, you can leave the apple and the
leaf spaces blank or if little colours
go in there because since I'm using a very
lighter color right now, I know with acrylics, overlaying will be easy. That is the reason I'm not
going much with precision. But if you want, you can leave those caps completely empty. Next one. And the last one
that will be here. So it seems my peach color
is running out of ink. I will shift into a simple pink tone so as
to make things go better. Okay. So I will overlay all of these strokes again
with this pink color. I wanted to actually maintain the peach theme that would
have turned out much, much, much better, but it
seems like the color is out. I will quickly fill
these four again in. So I quickly overdid all
of those spaces as well. Now I'm going to begin
with the apples. I'm marking out some
simple white light spots to depict some light falling in. All right. So leaving in these
small gaps first before I begin filling in the rest of
the apple with a red colour. S. Leaving these caps, just go ahead, fill in
with the red color. Or if you want, you
can later on use a white highlighter to
highlight those spots. You see simple patterns, but when put together, they create such
beautiful pieces of art. And if you create them in
a bigger, larger size, they are perfect for hanging as beautiful pieces of art
in your homes as well. You see, even when we've not added in the rest
of the details yet, this entire thing put together still looks so
beautiful and elegant. Now picking up the brown color, we'll just add a small detail
at the top with the prown. And now I will move on
to a green colour and begin adding in the leaves and the connecting to all of these. Now filling in the leaves
also with the greens. I will shift into a few more
green tones for the leaves. If you don't have
multiple tones of greens, it's perfectly okay
to just use one. I have used two
different tones here. See how slowly the entire
pattern is coming together. Now I will just pick up
a little hint of the yellow and create some
highlights onto the leaves. And with that, a pattern for
day eight is also ready. A simple pattern,
simple techniques, no detail, no drawing
experience, nothing needed. Perfect again to
punch out here on the edge and hang it as a
gift tag with a message on the back or even to frame these together in a frame
and put it up on your wall. I hope you guys
enjoyed painting this. I will see you guys into
the next one tomorrow.
11. Project 9 - Avacado: Of Hello, everybody. Welcome to the last
pattern of this follow along Paint challenge
where anybody can paint. And for today's pattern, we are going ahead
with simple avocados, and we're just going to go ahead with simple silo heads of the avocado and just going to paint them
a simple pattern. So I'm just beginning along with the outlines for the avocado. Now you can choose to place
them as per your choice, not necessary to follow along the same placements
for the avocado. I'm going ahead with a
simple outline first, and then we'll go ahead
filling these in. Now to the center of each, I'm going to add in the seed. That is it for the pencil
outline that you need. Beginning in with the yellow
and the brown color first, I will begin into
the seed space, going to add a small yellow
highlight on one side. So I will just add
23 first and then quickly use the brown
and blend it in. Again, pick up some yellow and run it over the brown and
the yellow meeting point. And you see the blend
that you've created. Same way going to
quickly go ahead into the rest of the seeds. You see how easy it is
to blend these colors. Quickly filling in the
rest of the seeds. So as you can see, I
didn't really want, like, a yellow, yellow spot, but I needed that light
or blowing spot effect. That is the reason. I've taken help of the yellow
color to blend it all in. Now let's move on to the
body of the avocado. For that, we'll again be
kneading in the shades of green. I will go ahead with this beautiful light
green color yellow, a medium tone of green, and then a dark tone of green. You can simply go ahead with a light green and a dark green. No pressure to use
multiple colors. Now, I just need to
clean this because you see how my nib has
some brown color. So I quickly cleaned it
up and now going to go ahead with a center
outlying yellow color, moving to a light green quickly. Blending it onto the yellow. And now to a medium
tone of green. And on the outside, I will go ahead with
the darkest tone. A very fine outline. Now, I need to
just go ahead with the previous colors and
blend the colors in. So first, I'm going ahead with the medium tone and now
with a lighter color. See how everything gets
in that seamless blend, creating in the different
tonal variations. And at the top, I will give a small tip
with the brown tones. Same way, I'm going to go ahead, paint all of the avocados now, beginning in with the
yellow light green, medium green, and then a
fine line of the dark green. Now blending it all in again. I'm loving how this last pattern is turning out so realistic. Do you really think
you needed any kind of skill to even paint such
a detailed avocado, or do you just needed the right step to follow along so that you
could create this pattern? As I told you, if you don't want to go ahead with
such a detailed look, you could just simply
use in two colors, a very light tone of green and a medium tone and create
this entire look together. And since I'm using
acrylic markers, they even dry out quickly
making the process faster and no drying time or time to
wait for things to dry out, which sometimes makes
the process longer and people get bored
with the waiting time. But also the
complication that comes in is that since the
drying time is quick, you need to be quick while
blending the colors in. Like here, you can see how I blend the darker colors quickly, creating in that soft
and smooth flin. Almost through one
more to go after this. Oh. I would love to know
in the discussion below, which was your favorite
pattern to paint from the nine days of
creating your mood board, proving that anybody can paint. So drop them into the
discussion below, and let's share with each
other which pattern you loved, the reason why you loved it, which was easier for you
to make and what was challenging or what you
enjoyed through the class. Anything that you would
want your audience to know, you would want to, you know, keep the discussion going on. And like that, we are
onto the last avocado. This pattern took us
a little extra time, but you can see the detailed
look that we've got in. And now, lastly, I
will quickly use the brown color and just add these little details.
And that is it. We are ready with our ninth
pattern of the mood board. In the next lesson, we'll assemble our entire
mood board together and see how our moodboard has come to life with
simple paintings, making a perfect piece of
art for your homes. Oh.
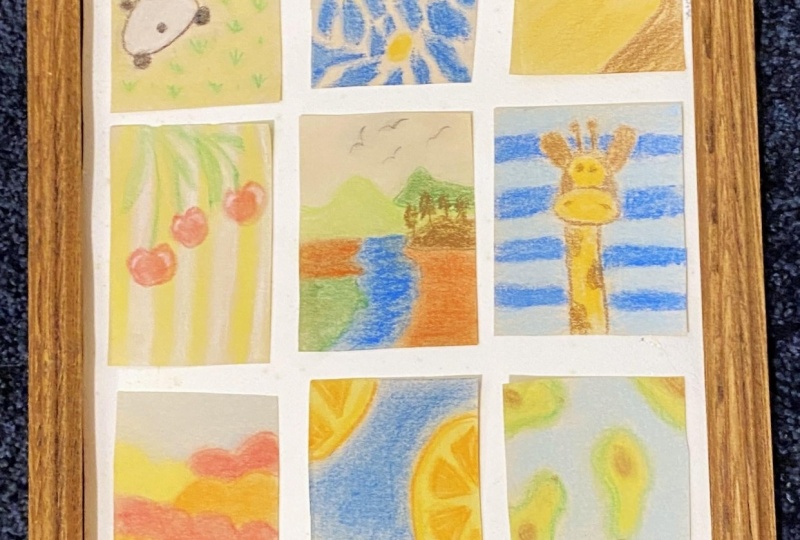
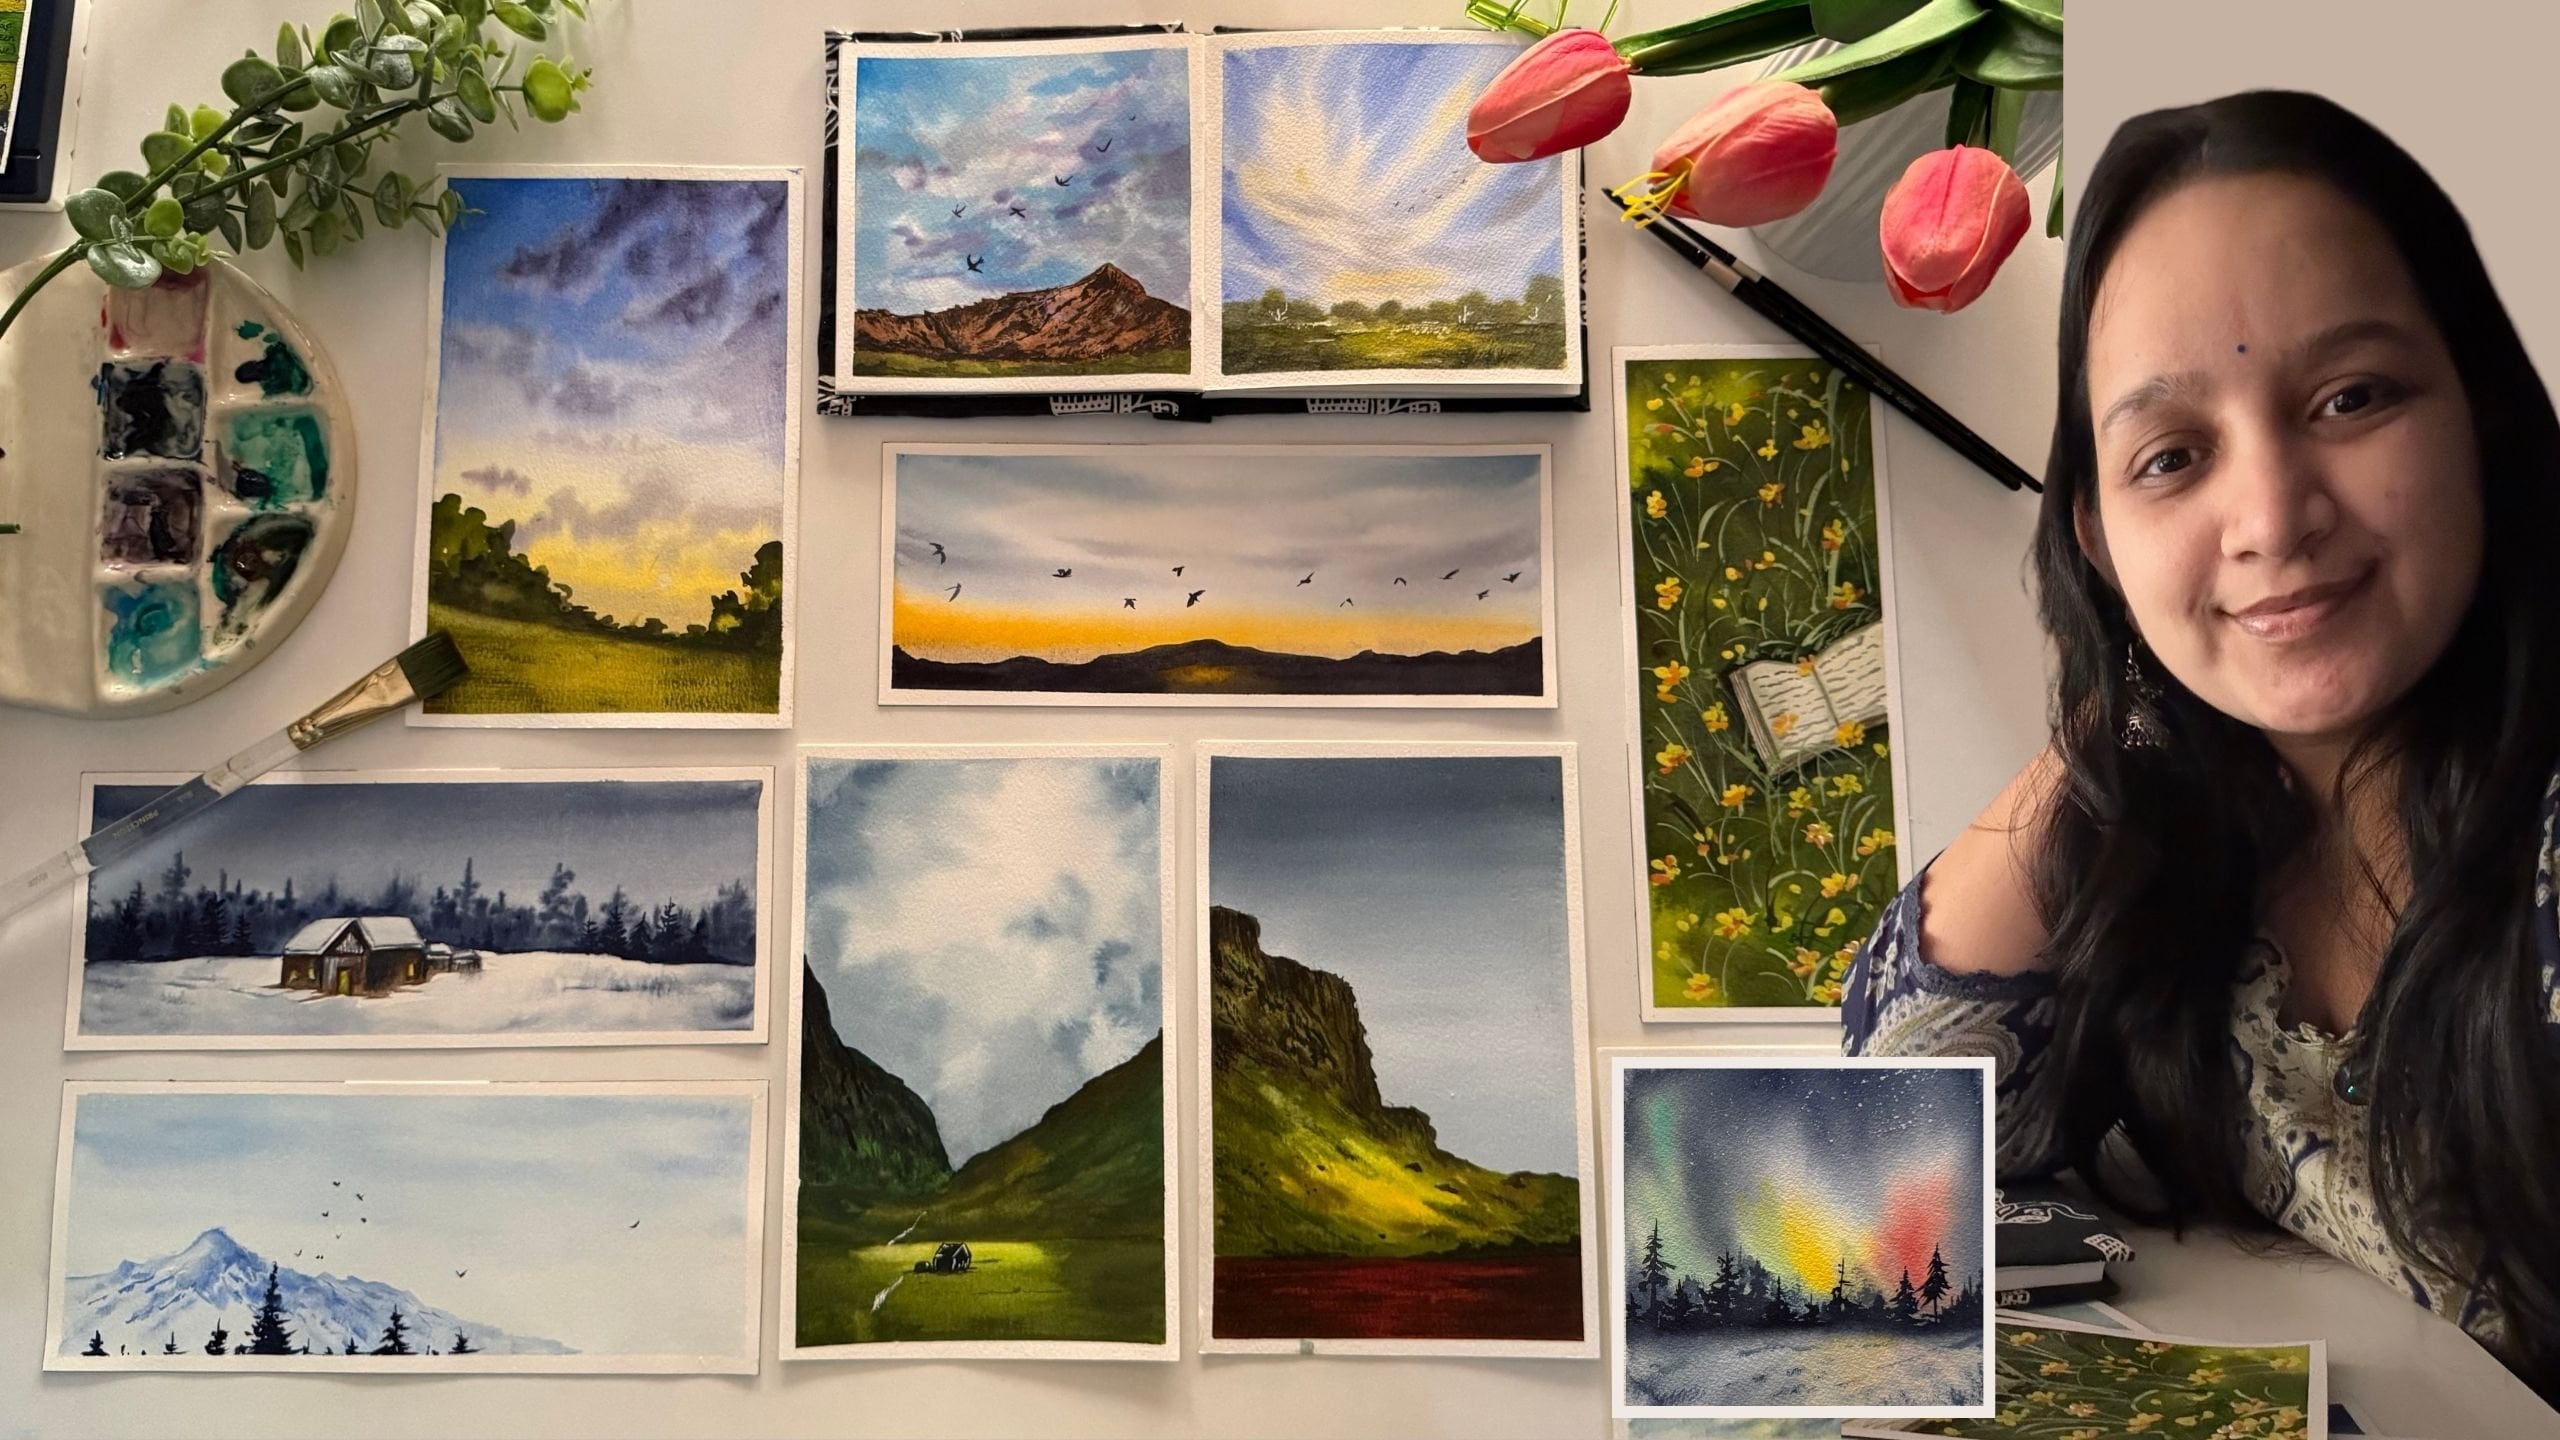
12. Let's Frame It: And just like that, all
these tiny simple pieces come together to create
something so beautiful. What started as small, effortless strokes
has now turned into a piece of art that can
truly transform your space. And that's the magic of it. It doesn't have to be
complicated to be meaningful. You don't need perfect skills, expensive supplies,
or an art degree to create something like this. You just need to take
that small step, pick up whatever you have because art was never meant
to be limited to a few. Art is for everyone.
 Umashree Taparia, Artist, Art Instructor, Entrepreneur