Transcripts
1. Intro: Hi, I'm Ann, and I'm
so happy you're here. I absolutely love birds. They one of my favorite
subjects to paint. One little visitor that's
been showing up at the bird feeder
on my garden plot recently is a woodpecker, and he became the
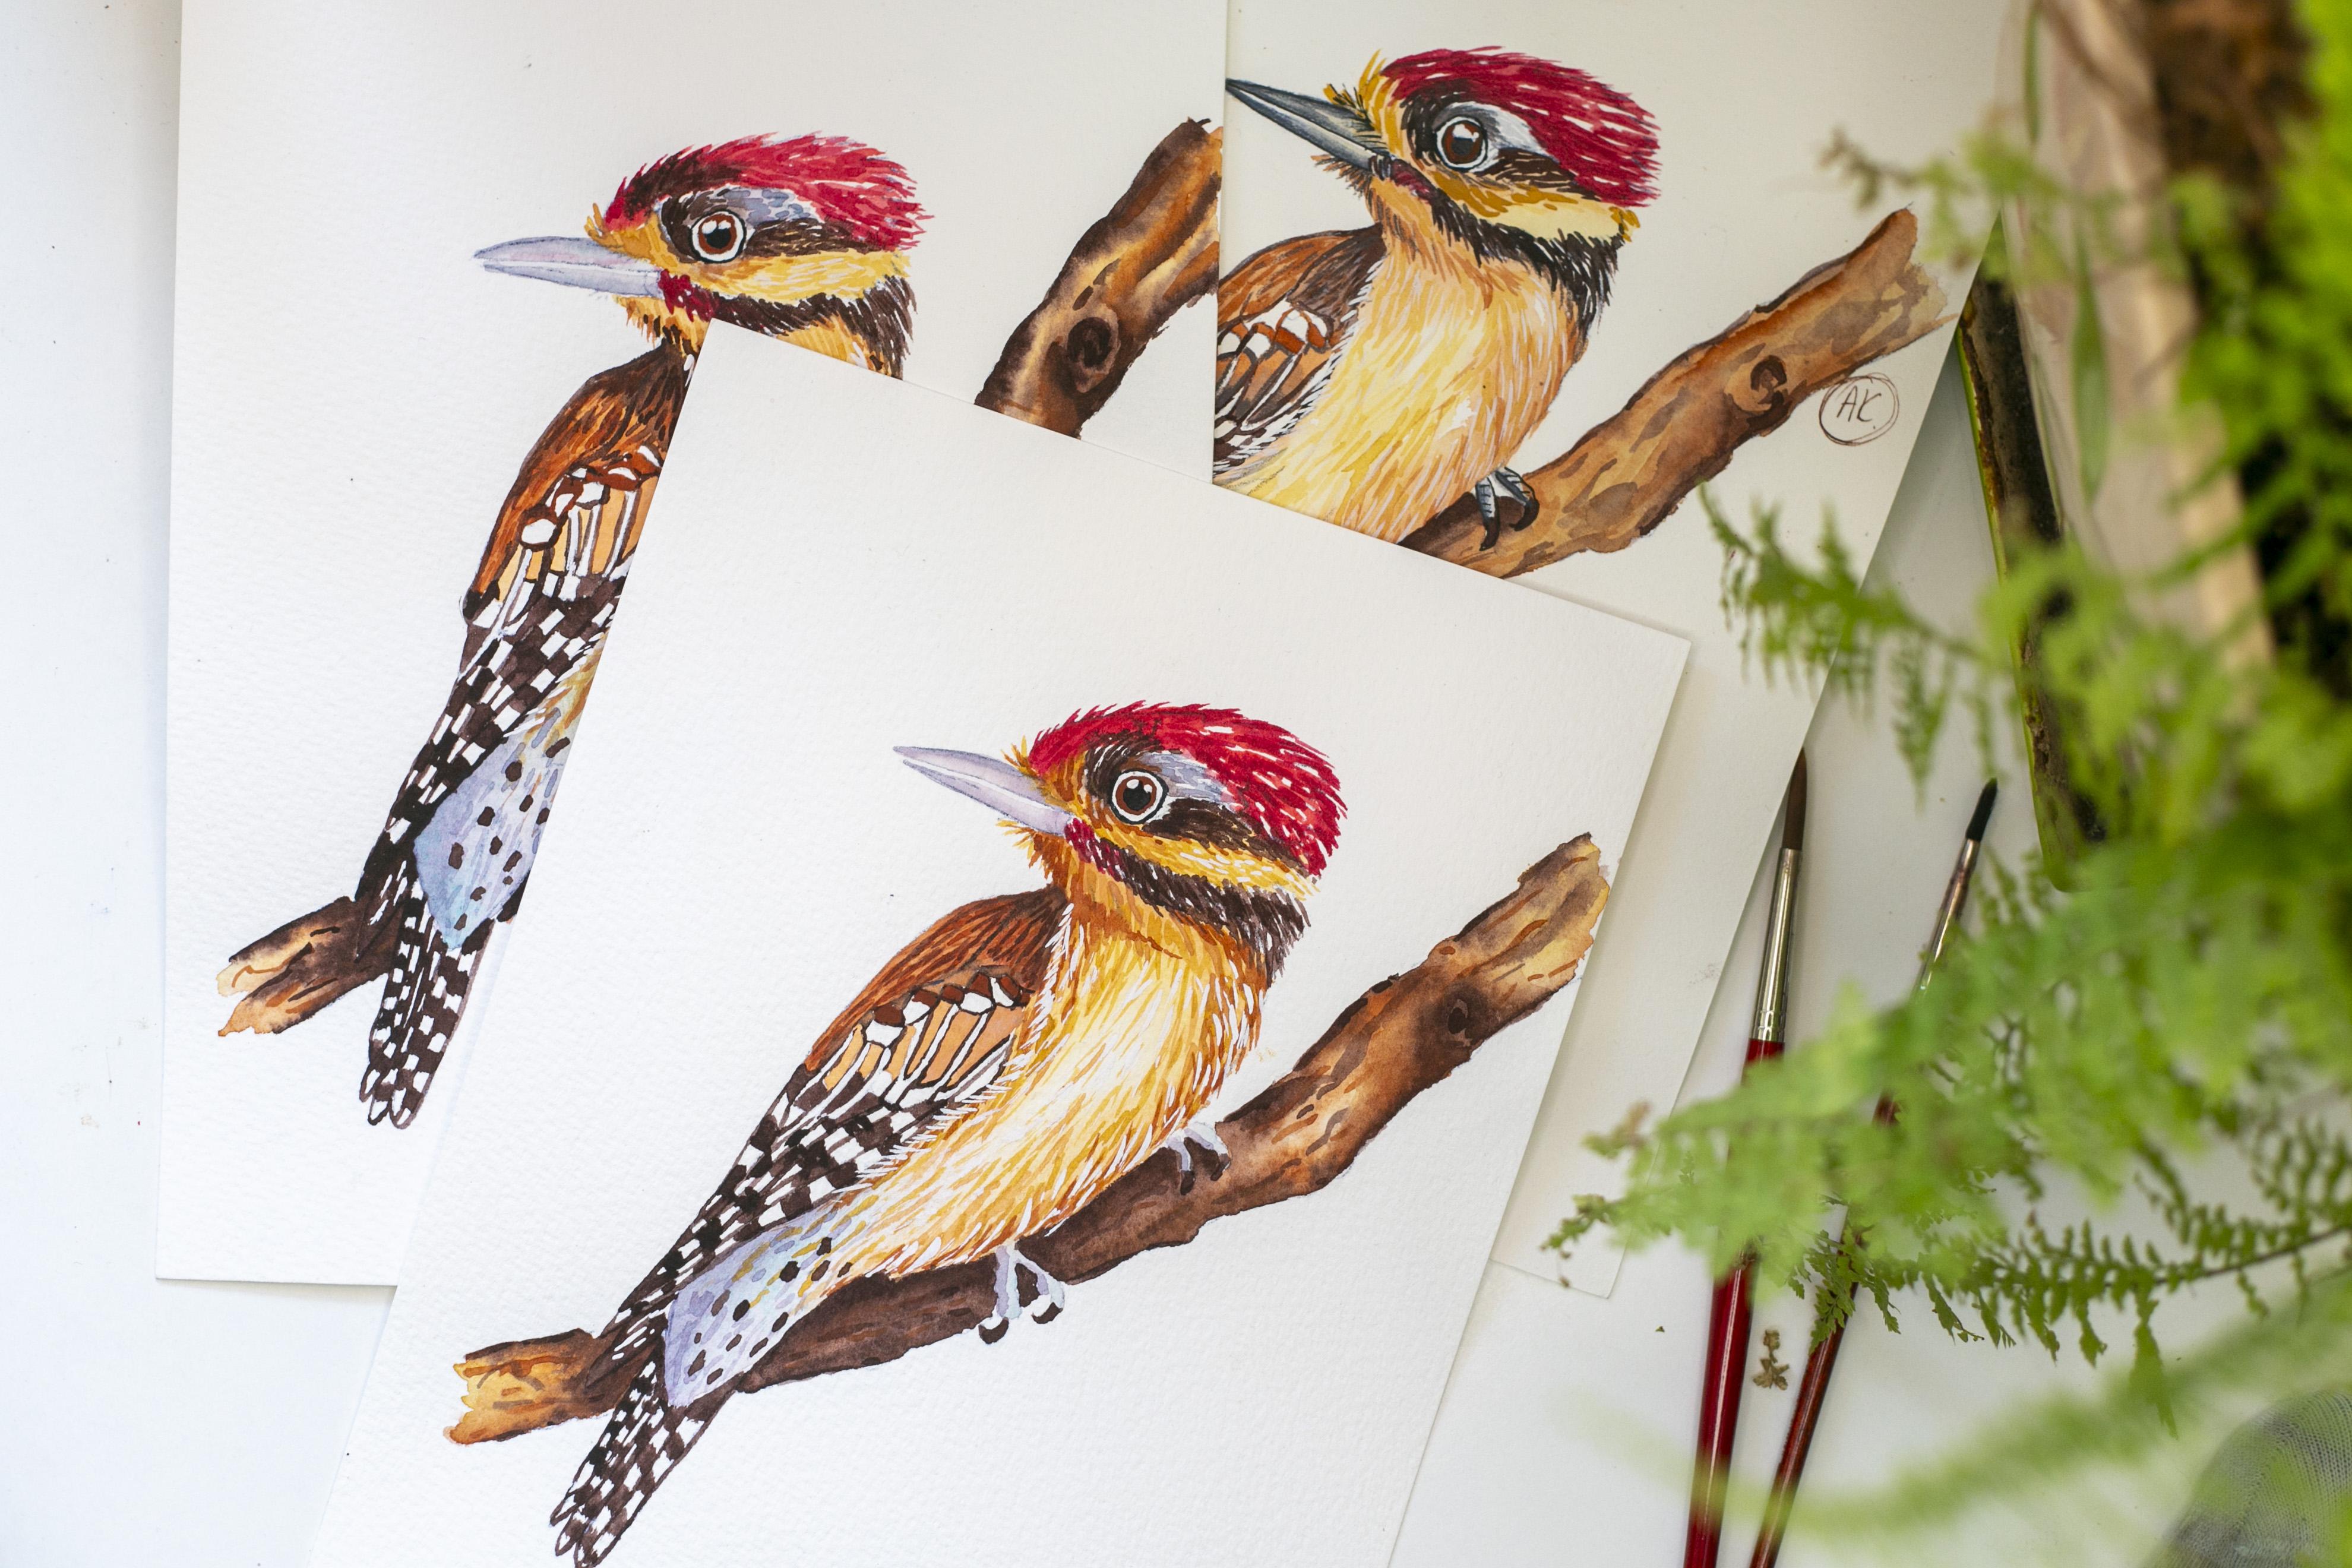
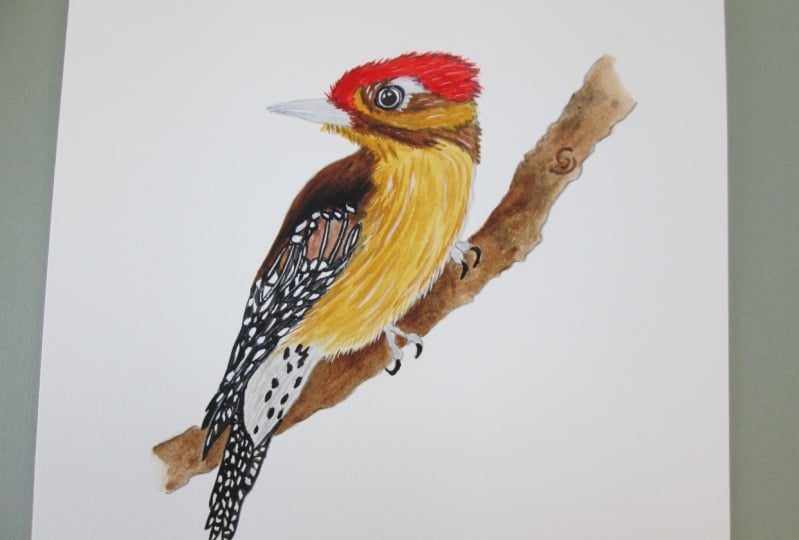
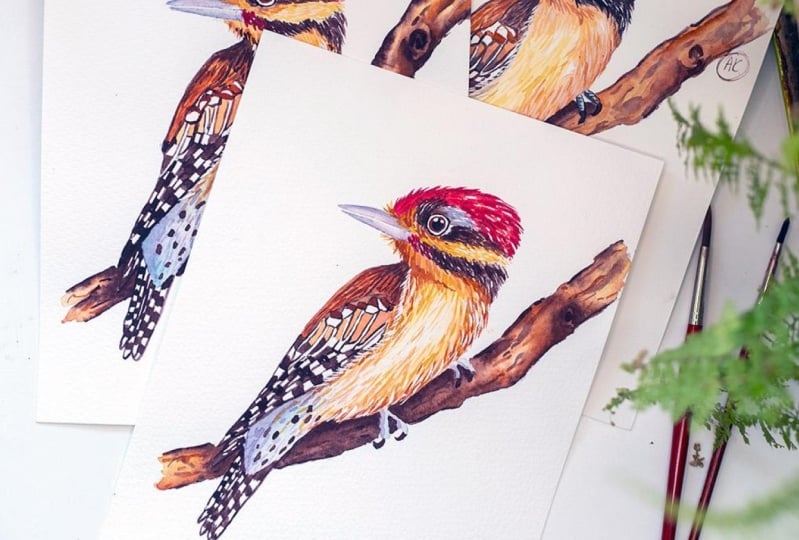
inspiration for this class. In this class, we'll paint a colorful woodpecker
together step by step. Whether you're just starting out or already have some
watercolor experience. This project is a great
way to slow down, build your skills, and
enjoy the process. We'll start with a simple
sketch and work our way through layering colors and adding details to bring
the bird to life. So grab your paints, brushes, and a cup of tea, and
let's get started.
2. Materials: What materials we will
use during this class. First of all, we need
some good quality paper. I will use watercolor paper 100 cotton and it's called press and this
one is called press one. Just like you see,
it's not a four size, it's little bigger
than a five size, it's approximately 190
on 260 millimeters. So good quality paper is
always a good choice. The second one will
be watercolor paints. I usually use two brands for my classes and I usually use the same colors
over and over again. These are my colors. I
mainly use two brands. One is white knight paints and the other one is Roman
Small's a polish company. Very good quality paints. If you have the ability
to buy one, just try it. I will use mainly the
set, these colors. If you watched my
previous classes, you will see that these colors are the same, almost the same. The third thing, we
will need some white. I will use white quash, and I usually use permanent white designers
quash from Winson and Newton. We will add some white details on top of our work at the end. We will also need some crayons and we will use only
gray and brown shades. I will use number five oh
seven and it's paints gray, 60% from luminance the other one is also from luminance
nine oh six, Sepia 50%. Also, we will need
some fine liners, and I will use figma fine liner, and I think from the set, we will use this three or two. They don't have to be
waterproof because the crayon and the fine liner will be the last
step on our work, so you can use whatever
liner you have in your home. See you in the next lesson.
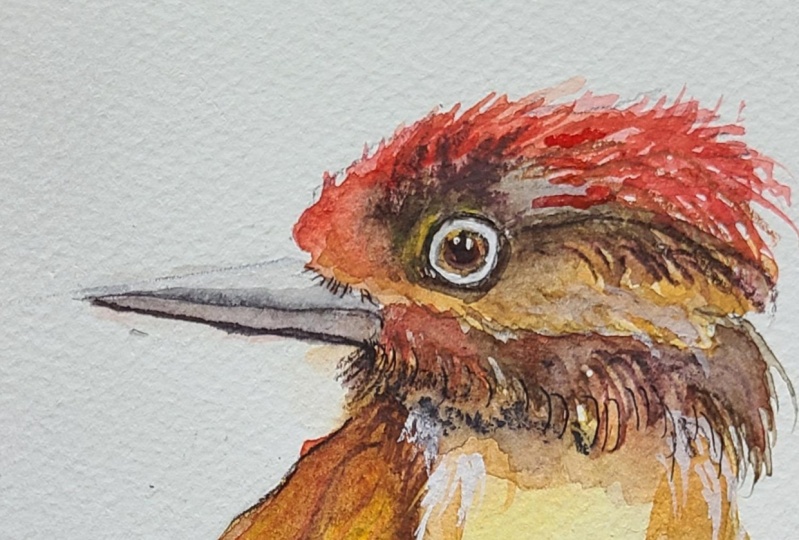
3. Head: So high in the first step. So we will paint our woodpecker in a
step by step process. So first, we will
start from the head. So we need to mix
our colors first. So first color, which we
will mix is Siena light. And we will mix all of our
colors in 50 50 ratio. I call it 50 50. It is 50% of water
and 50% of paint. This is the middle middle ratio. This is my first color. The second color is apples yellow, reddish,
apples yellow. If you don't have apples, yellow reddish, but you
have apples yellow, just add a little bit of orange or a little bit
of red, but not much, just a bit to your paint to have this napples yellow
with more reddish tone. This is my second color. We also will need
a Brown for brown, I will use and I
will use red her. This is my red ocher, but I won't mix
it on my palette. I will use it straight
from the pan. I just simply add
water to it because I will need thick paint. That's why I don't mix it
with water on the palette. The fourth color will be rose. We need two red colors. One is a medium value
and this will be rose. The second one, a darker tone, and this will be Alizarin. These two are nice
with each other. These two colors work very nice. That's why I usually
use both of them. This is my darkish
red and what next? We need a dark brown. For dark brown, I use October 2023 from Roman
Schmal Aquarius Roman Schmel. This is my favorite dark
brown and it looks like this, and we need it to
be rather thick, lets water more paint. If you don't have this
particular color, you can use whatever dark brown
you have on your palette. This one is more with a reddish. The last one will be will be misty morning
also from Ramon Schmalt. This is one of my
favorite colors. I used it in toucans class in the class
where we painted a toucan. But if you don't
have this color, you can mix paints gray with a lot of water to create
very light shade of gray. So these are all of our colors, and let's get back to our work. Perhaps at first,
at the beginning, let's paint our bird's eye. I will take my red or her
straight from the pen. I know that this is a thick, this is thick paint. I will try on the scrap paper if I can
paint a straight line. I also tested the thickness of my paint on the scrap paper, and let's paint the iris. We leave the center of the eye unpainted at the moment
because it will be black. But the iris is brown, so let's paint it. Okay. Let's begin with
this gray color, and let's paint this area. We paint all the time, when we are painting our bird, we use these simple
line strokes. We can touch them
to create areas, but we want to achieve
this feather effect. That's why I usually paint them with just the simple
and quick moves. In all areas, we
will paint that way. So I just add my gray light
gray in here, clean my brush, make it dry, so I will
add it to paper towel, and I will pick my darker
brown and I will add it here. Around the eye. I want it
to bleed with this gray. Okay. Let's pick our senate and let's start with this area only with this
first color at the beginning. I will add some water to it
because I want this color to be lighter while we
move on to the checks. But still remember that
this is a watercolor, so it will get lighter. And now I will pick
my apples, yellow, reddish and add it in here and around the eye to create this transition
between colors. Okay. So let's try with
the red right now. I will pick my rose color and I will add it to
the heat of the bird. I know that it will
bleed while I will touch with my red to the
yellow, and that's okay. It doesn't matter much because remember that this
is the first layer. But still, if you
want to avoid that, don't touch it right away. Wait for a few seconds, and then add it and remember to paint with
the rush strokes. Okay. And I see that my yellow is not as wet as it was before, so I will add my red in here. And right now, I will
pick my Alizarin and add it in here because
this area is much darker. And I will add some strokes
in here with Alizarin. I want this birds had
to be in few colors, not with one color flat. Don't worry if you leave these white areas
because they create illusion of light reflecting on a bird's feathers, it's okay. It's even better if you leave
that white areas in here. Clean our brush, make it dry on paper towel and
pick our dark brown. And I know that
this is still wet. That's why I will paint
this area at the moment. And with the same brown, I will add some details in here. And I know that if
I go to the red, it will bleed, but that's okay. But I don't like this
bleed on the yellow area. That's why I will clean
my brush, make it dry, and I'm trying to pick my brown where this went. Again, let's start with
the dark red lizarine. Add some details in here because the woodpecker
had a red spot in here. Clean my brush, make
it dry on paper towel, pick my dark brown, and for now, I don't touch this red because I
don't want it to bleed. I just paint the rest
of this area all the time with the short strokes and while this red dries a bit, I can add some brown here. Okay. We will paint a beak
of this moment. So we will take our gray color and paint the upper
side of the beak. I will make this
line, clean my brush, and with just the
water on a brush, make this transition because I want the bottom of this
beak to be lighter, and we will do the same on
the lower side of the beak, so I will place a
line, clean my brush, and only with a wet brush, make this to create
a transition. The last thing, I will
treat my palette, add just a drop of the
water to my paint scray. I will test I'll test it on the scrap paper if the scolor is thick enough to
paint the line. If it's okay for me, I
will paint the iris of the eye And I will circle this area around the eye. Okay. That looks quite nice. So this is all for this stage. In the next stage, we
will move on to the body.
4. Body - first layer: Today we will be painting
belly of our bird. So as a first thing, we of course will
mix our colors. Just like you see, I've
cleared my palette because I was recording the head the previous week and we
had a holiday in between, so I cleared
everything on my desk. But if you have colors
on your palette, you can use them because we still go with the
same set of colors. If you have your colors, you can miss this stage. But if you don't
have your colors, you can mix them with me. We need three colors for that
stage, just like before, the first one the first one is Senate and I will mix them in 50 50 ratio. This is my first color. The second color will
be reddish apple, yellow, just like before. Just like I said, if you have
this color on your palette, you can go on with them. This is my second color
and just like before, we need some light
gray and in my case, it will be misty morning. Misty morning I'm mixing
with a lot of water. I needed to be
quite translucent. Okay, so first thing we need to do is to cover
the whole area, the whole area of the
belly with the water. So we are layering. We will be painting
wet on wet technique, so we need the layer of water. Okay. The first color which we will take
is our sienna light, we will put it in
here, make it flow. We need to make the center of the belly
the lightest shade. I will put my light
sienna in here where we have the edge
with our wing and in here, I will play some water
in here because I see that this area already dries. Once again, some water. Next, I pick the
reddish apples yellow. Once again, add it in here
because we have some shadow in this area and our belly from right is in this reddish shade. Something like that, perhaps a little in here because we
have a shadow from the wing. Let's clean our brush, make it dry on paper towel, and let's take our misty
morning or greyish tone, if you have, and add
it at the bottom. At the bottom of this part. Don't do this upper down most. Just do instead, do from bottom to up because
in this bird, it's better when
this gray flows into the yellowish tones than yellowish tones
flow to the bottom. Once again, I will pick my misty morning
and add it in here. Because I want this
area under the wing to be a bit darker because we
have some shadow in here. Paper is still very wet, so this color flows into
other, that's okay. Right now, let's switch
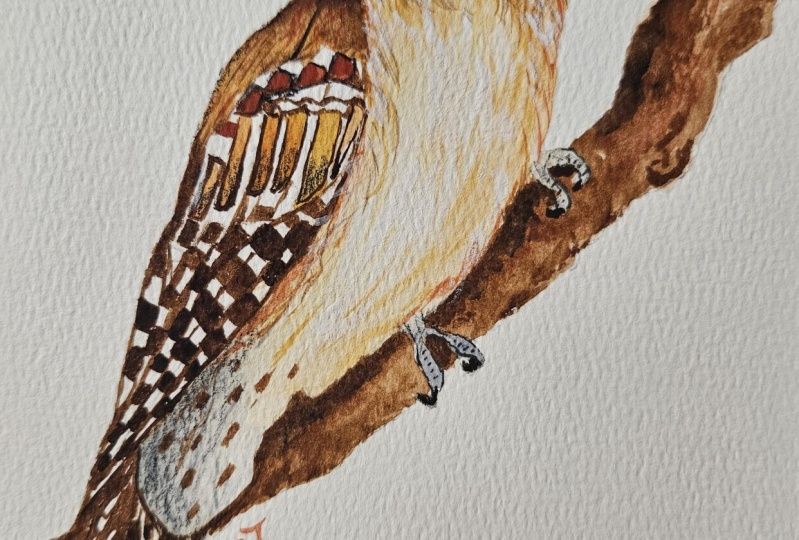
to the smaller brush. I will pick my number three, and we will paint the legs. Once again, I'll take the Mr. Morning this grayish color, and I will paint. But my belly is still wet, so I'm starting to paint my
legs from the right side. I will leave the area which is near the belly
unpainted for now. We will do some trick in here, I have painted
without this area. Now I'm cleaning my brush, make it dry on paper towel
and with a dry brush, I'm moving slightly
this color to the edge. So we don't have this flow
from belly to the leg. We do the same with
the second leg. So I will put the paint. This paint has a
lot of water in it. I will put the paint on my
bird's feet, clean my brush, make it dry on paper towel
and with a dry brush, I'm moving my colors Mm hmm. Or perhaps I'll add
some here. Okay. In the next stage, we will paint the first
layer on a branch. So to do that, we
need this area to be dry because we don't want the paint from the belly
to flow to the branch. And here, I'm trying
to clean my edges. Okay. So see you
in the next video.
5. Branch - first layer: Hi, the phone gave me a surprise and after I dump the
recording to disc, it turned out to be corrupted. Therefore, do not be
surprised that my woodpecker, which I will paint in
the step is unpainted. In this step, we will paint the first
layer on the branch. So to do that, just like before, we will prepare some colors. This color these
colors are red ochre. The second one is my middle
brown and dark brown. As a dark brown, I
mainly use October 2023. This is my dark brown. And my light brown. I mix them in 50, 50% ratio, so they're not translucent
and not very thick. This is one color, and this is the other one. Let's go back to our work. We will start with water
and with this short area. We will place water
onto our branch, and we will start with
the lightest tone. Auditing here. Clean my brush and pick
the darker one and add it here in places where
we have mostly shadow. So we need these
areas to be darkened. Let's move on to this. The side. Once again, let's
start with water. I will add just water. We are painting wet
on wet technique. Once again, start with the
light color, light value. Okay, clean brush, pick
the darkest tongue and add this darker value to the
edges, make it flow. And also, don't forget
to paint this area, so I'm picking a smaller brush. And with the brown
straight from the palette, I paint this little area on dark brown. Okay. The rest of the branch. So again, water Light brown. Make it flow. And perhaps I will switch to smaller brush and I will
pick my dark brown, added here in the place where I left the smarks on a sketch and add some to the edge of
the branch here and here, perhaps somewhere in between. And let's leave this for now because this area has too much water for
me in this moment. But this dried a little, so I will pick brown
straight from my pan, and I will add this darker brown in the places where there
should be a shadow. For example, to the edges. Once again, I pick my dark brown straight from the pan and I
will add this brown in here. And under the bird because
we have a shadow here. I don't want this brown to mix much with
the lighter brown. That's why I'm picking
it straight from deepen. Once again, let's add it here and perhaps in here. You can do this marks, and we need to leave
it to dry now. And before we move on, we need to leave it to dry.
6. Wings: This time we will paint the
wings and just like before, we will use only
our three colors. We need to prepare if you
don't have on your palette. I don't have it because I
just have cleaned my palettes because I was filming the
previous part last week. Then we had a holiday
long holiday in Poland. And right now I'm back to
filming the rest of the class. That's why I have
cleaned my palettes. But if you have your previous
colors, you can use them. I will prepare my colors
right now and this will be first one, it will be reddish,
apple, yellow, and I need them to be rather
thick than translucent. Less water, I will use
less water, more paint. So apples yellow,
redish is first one. The second one is red achar. This is I call it also
light brown color. This is the second one and the third one will
be dark brown. I usually use October 2023 from Aquarius Roman
SchmalPaints. This is my favorite dark brown. At this stage, we will
use smaller brushes. I will start with number
two from Princeton. I will start from
the lightest color. And with the slightest color, we will paint right
now the areas, this little because it will
be easier for us to see what is what in our painting because the sketch is quite
a detailed one. That's why if we
start from this part, it will be easier for us. Let's start and
paint these areas still if you forget or
don't see on your sketch. These little white areas. So don't worry. We still can paint
them back with our gouache color or posca pen or some kind
of gel pen if you have. So don't worry if you
accidentally paint on this, Okay. And still with this color, we will paint this
upper area of our wing, and we are painting
to this area. I will outline it with my
paint to see where I should stop and I'm painting only
with my lightest color, slightest shade
and do this part. And right now, I pick
my medium value, medium brown and I will add
it in here to make it flow a little and also in here because we have some shadow in
this area of the bird. Okay. Let's switch to
the dark brown right now and even let's switch
to smaller brush. So I will pick number three, this one is much sorry for my dirty fingers because
I usually when I paint, I have dirty fingers and, um, this one is smaller than the thicker brush than
the previous one, and I need to be able
to paint very declines. With my tip of the brush, I will paint the
dark brown lines. As a first thing, we
will outline our wing and be careful next to this
area because this is still wet and the color will be
just like it did on my work. I didn't exactly want
that, but it's okay. If that happens, it's
not a very big thing, so don't bother if
it happens to you. I'm picking paint straight from my pan because I
want it to be very thick. And I want it not
to flow as much as it does when it has
more water into it. And I will draw the marks on the wing. It's almost like chess table. Just be aware that you shouldn't be painting these
areas next to each other. For example, if you
have these two wings, don't paint like that
because it looks strange. Try to make shifts. If you have these two areas, try to make shifts between the brown
areas, the brown spots. Let's start. For example, this will be dark and I
have some spots in here. For example, it's easier
when you do the first one. To the end, here I see that it should have one
more line because it's too wide in this area
and I will paint the rest of these brown
spots with a shift. Don't think too much
where you place them. They should be the
same size should be, but not always. It's possible. But just like I said before, don't think don't overthink
how you will paint them. Just paint as it goes. I need a thicker
paint than this, I'm picking my paint straight
from the pan and right now, I will outline these areas. If you have even a smaller
brush than mine, for example, number zero or number one, it will be easier for
you to do this with this even smaller brush,
but I don't have it. This is the smallest
one which I have. So Okay. And while this is still wet and we have our dark
brown on the brush, let's move on to
the rest of detail. So let's paint this area. So first, I just outline my area and then I'll
try to paint it, but I will leave
this white spots. Mm. To simulate these
white feathers. The rest of the tail, I need a brown paint on my brush and with
the sticker paint, I will just at the beginning, outline my my tail on this sketch, you have some spots done for
you so you can paint them over You can add some where they are needed. And I will outline this word. Perhaps I will add one line between in the
rest of these two, I didn't sketch any marks, any, we have to do them by
ourselves and remember about shifts This one it's easy for us first to
outline this shape. Then make it into two halves and then
paint the spots. I usually start from the
darkest spot in here. We have the tail done, and this part is still wet. That's why we will move
to the spots in here. So we will stay with
the same small brush. I just make it clean, pick my red ocher, my medium brown, and I want
it to be thick, this color. That's why I'll pick it
straight from my pan, and I will paint these areas. Okay. This part is still wet. But we will add to it. It's not very wet but still
wet but not very wet. But we will add to
this area a bit of dark brown because
this area is in shade. It doesn't flow as much because the color doesn't have
much water in itself, but I will blend the edges with brush and I will add some water to my
brown on the palette. I want this to be more translucent this time because we will add details
to this part. With a smaller brush, we just add this
simulation of feathers. Okay. And once again, we will pick dark brown, but straight from the palette, I'll pick it from there. I want it to be thick. We will add details
in this area. But remember that these
brown spots are still wet, be aware of that and
be very thorough. Also, I will paint this line. Okay. But I think we need this light. Light brown and
we will add it in here because this is too light, that the white is too
bright in this area. That's much better. That's all. In the next step, we will move on to adding
details to our head, we will get back
to our head again. See you in the next video.
7. Body - second layer: This step, we will paint
the details on the bird. We need to prepare our colors. We will use all the colors which we have used so far
during this course. The first one is naples
yellow, reddish. And we will mix these colors to be rather
thick than transparent. The first one is
reddish apples yellow. This is my first color. The second color is red ocher. This is my second one. The third one is dark brown. So in my case, it's October
2023 from Aquarius. So the dark brown The
third one is a sienna. Sorry. I started
to mix a yellow, but it was a sienna light. This is a sienna light
color. Sienna light. We also need some dark red. In my case, this is
Alizarin crimson. One red for the
head of the bird. So as are in crimson
and the last one is misty morning also from
Aquarius Roman Schmal. This is my last color. Today we will paint only
with the small brush, so I will use number three. Let's start by adding shadow in this area
because this is too light, so I will take my mist morning. Mist mourning is
a grayish color, but this is a granulating one. That's why it creates this
effect, few tones effect. But if you don't have this gray, this misty morning color, you can use gray. So instead of misty morning, you can mix paints gray, diluted with water to
create this gray color. Still, if you have some
other grayish tones, you can also use them. I will pick my misty morning, add just a line in here in the place where
there should be a shadow, I clean my brush, dry it a little on paper towel and blend the edges
of this color. Okay. This is one thing. Let's start from the top
to the bottom of the bird. It will be easier because
we don't smudch anything. First color, let's pick
isarin and we will paint on a bird the simple
strokes with the tip of our brush to create the
simulation of feathers. Let's start from the head. And add some details in here. With the same color, we will add some lines also
in here and this brown area. Now let's switch to
the dark brown color. Let's add some details in here. The same. We can even add it too to the red and
with this dark brown, we will also add
details in this area. Also, still with
this dark brown, we add details in here. I clean my brush, pick my gray tone, and I will add some
details in here. With the same color, this one is already dry, so I will add some
details also in here. Don't draw them
as stright lines. Try to curve them a little. And still with the same color, let's move on to the beak and I will add a line of that color
at the top of the beak, clean my brush, dry it a
little because I don't want to have very much
water on my brush. With this slightly wet brush, I will dilute the
edges of the beak. Let's do the same
on the lower beak. I will make a line,
clean my brush, and with the slightly wet
brush, dilute the edges. And still with the same color, let's add some
shadow on our feet. Here, this shadow is just a
line on the feet, birds feet. That's all with this color. We don't need it anymore, it's okay if it ends in my case. Let's start with the
lightest tone we have. It's sienna light. We will pick it and we
will add details in here. Okay. And with the same color, let's move on to
the bird's body. I'm trying not to add as much details on this area
where there is very light. With this Siena, we can also
move to this grayish part a bit here on the
side of the bird, I'm curving my lines to create some simulation
of round shape of the bird. And still I'm painting with
the very tip of my brush. I try to achieve very
thin lines with my brush. Sometimes it's
hard, I know that. But try It looks a bit strange if
this area is empty. That's why I will add, not much, but some
lines in here. The biggest shadows are on site here let's create some simulations of the feather. Okay. Let's clean our brush. Make it dry on paper towel and pick reddish apples yellow. Once again, let's
add some in here, not much in here because we
have a shadow under the head, this area will be darker
and the same goes in here. Some simple strokes. Okay. Clean my brush, make it dry
on paper towel because I don't want to dilute my paints more with
water from my brush. Now I'll pick my red ocher and let's add details
on the wings in here. Still with the same color. Add some brownish details in here and in here just a
few strokes. Not much. And here in here, we will create some shadow. This is the line where we create the
simulation of our head, the roundness of it, and with this reddish ochor, we will add some details
in here and on the side of the bird because we want to create the usion of
the shadow in this area. And next to the wing, because this side of the bird
is a little in the shadow, so something like that. Few strokes in here
and in there to create more interest because
the work will be more interested if we have some
other values in this area. The same in here, just a few strokes, not much. Again, let's go back to the
dark brown and once again, add some details on the wings. On the wings, we
have some details. And I will add the third layer because I want some part of
it to be darker. That's why I'll add the first layer of my
brown and the same in here with my dark brown, we will create the
spots on the tail. This area is already
dry so we can add them our bird so and again, we have this case. This is my work which I recorded for the Polish
users on my own platform. Just like you see, this area
on the branch is very dark. If you have this dark area, you can leave this step. But if you have
this light branch, the branch is light in this area where there should be a shadow, we need to put second layers. If you have this light
area just like in my case, we will need to add more
shadow in this area. In this way, the bird will pop. I put my brown in here, clean my brush, make it dry a little on a paper towel
and smudge the edges. And we will do the same
here under the wing because there will be a shadow from the bird on
the branch in this area. And perhaps in here. The last step on the stage, we need to take dark brown, which we will very thick, so I will pick it straight from my pen and I will paint
the nails of the bird. Okay, that's all.
8. Branch - second layer: We will move to the details
on a branch right now. To do that, we need
only two colors, still, these are the same
colors which we used before. First one will be
red or her and I'll add more pigment to
my mixture because I want them to be rather
thick and translucent. And the other one is
my darkish brown. It's my dark brown, so I mainly use October 2023
from Roman SchmalOce again, I need this to be thick, so I will add more
paint to my mixture. When the paint is thick, it don't flow as much when the two colors
meet with each other. If there is not enough
water in the mixture, they don't flow, they
don't flow as much. And I need that effect. I need the colors to
stay where I place them. That's why I need the
colors to be fixed. I take smaller brush. Number three is my
smallest which I have, the smallest which I have. On the reference
photo which I had, I had some details in this area and I want
to stick in that. First thing, we will use
this light brown red ocher. We will add marks on the branch. This should be randomly
shaped details. It shouldn't be a straight line. Still, if you want to add some details like
that, you can do that. But I will blend the edges. I'll simulate a
shadow in this area. I will add more of this red brown here and
I will blend the edges. With the clear wet brush, I will smooth the edges, but not the upper edges, only the down part of the edges. We do similar thing
with the dark brown. I will pick my dark,
add some details, perhaps on the edges
of the branch, some more Mm hmm. I simulates that branch
has some texture on it. If you see that you don't like some lines which you placed, you can simply dilute
them with the wet brush so you can make them less
visible on your work. Once again with this dark brown, we will paint half of
the circle in here. And add this dark brown in here. Still, we need to blend
the edges on both sides. So something like that.
Perhaps we will add more of this lighter brown to create more depth in
here and once again, blend blend the edges. Once again, let's add
this light brown in here and perhaps in here. That's all. In the next step, we will move to details
with guash. See you then.
9. Gouache: Okay, I have my other palette because I have guash in here. I usually have it
squeezed into my palette, and we will add just white
details with our guash. If you have posca
white posca pen, or other, for example, sakura white gel pen, you can use al pen. I think it will be easier
for you because we need very thick details.
Very thin lines. And I simply add just
water into my uh, mix it on my palette, and check on the scrap paper if the color is thick enough, if the color is opaque enough, and if I can draw a very thin lines with
my with my brush. On this scrap paper, I usually test and check if the paint is in the right
stage, I might say. First thing, we will go
from head to the bottom. If you don't have
these two dots, these two lights on the eye, you can make them visible
again when you wash. For example, like that. If you don't have this
white around the iris, you can also paint it again. If you have it, you
don't have to do it. On the beak, we need this very thick and thin line between up and the bottom half. On the wings and tail, if there is a space which you painted and there
should be a white spot, you can paint it with the guash. Or for example, if
something is too narrow, you can widen it
with your white. Make it more visible. I think the rest is okay, and we will paint some details
on the belly of the bird. Between wing and belly, we will add these little marks. These lines should
be very thick. Perhaps it will be easier
if we rotate our work. Okay. And we also add some
details here on the belly. Once again, I need
to take my white. I'll check on the scrap paper if the paint it's okay and we will add some
more details in here. Remember, rounded
lines, simple strokes, simple, quick moves.
Don't overdo it. So on the belly, and here on the cheek. Just a few lines. Not much. Just a few lines. Okay.
There is only one step left. So in the next stage, we will add finishing touches
with crayons and liners. See you there.
10. Final details: This is the final stage. This time we will add details
using crayons and liner. I will use Pigma Micron
three liner for this step. Why we use liner and pencil
Because some details are so thick and thin that
it's easier for us to make them by
crayon or liner. As a first thing, we will
draw details on bird's leg. I'll just outline them. With my liner and make the small dashed lines to
create the texture on a leg, and we will do the same
trick on the second leg. So with the liner, will also outline the Rs and see how this eye
pops from the picture. Sometimes just the little
details make the difference. The last thing we will
do with our liner is some details in
here and in here, this simulate the
feathers and we can add some little strokes here and
we will outline the beak. Draw under this
white gouache line. Next, we will move
on to crayons. I have number 57 paints
gray 60% from luminance. This is a dark gray color. With this color, we
will add some details. Again, on feet, we
will add some shadow. We will add some shadow in here. But don't press the
crayon too hard. Just draw with low pressure
to make this shadow. And if you want some
area to be darker, just draw around it a few
times more to create a shadow. And we will add some shadow in this area because the wings
spread the shadow in here. So without the pressure, just smoothly and delicate and with our pencil, we can still add more lines, some more details in this area. Still with the same crayon. Let's add some
shadow on the beak, we have here and next to where
the beak touches the head. Let's call this this way. In this area and in the same style on the
down part of the beak. Let's create illusion of
the shadow and convexity. Okay. Now I switch my
crayon to dark brown. This is like brown gray color and it's number nine oh six
Sepia 50% from luminance. With this color, we'll
also add some details. For example, we just
add a small amount at the top of the beak and
at the bottom because we need this to be not
in a single color, but like a dual toon color. We achieve that by adding
our pencil let's outline our wing at some lines over here and let's draw over
these areas which are dark grayish brown. We have our woodpecker
ready and one more thing, if you don't have
enough shadow in here because I will show you my previous work and I have
a lot of shadow in here, a lot dark tones in here, so I don't add
anymore to this area. But on this piece, this area is quite light. If you have this situation, you can add some more
shadow with the crayon. This is optional,
so I'll just add some shadow with my crayon. We have our woodpecker ready and see you in the
summary lesson.
11. Outro: Congratulations. You did it. I hope you enjoyed this
class and had a peaceful, creative time painting
your own woodpecker. If you like this class, I'd really appreciate if
you could leave a review. It helps a lot and lets other students discover
this course, too. Don't forget to upload your finished painting
to the project section. I'd love to see what
you've created. And if you're in
the mood former, check out my other classes. You will find more
beautiful painting project that I will guide you
through step by step. So see you next time.
 Anna Krupa, web developer & graphic designer, mix media artist