Transcripts
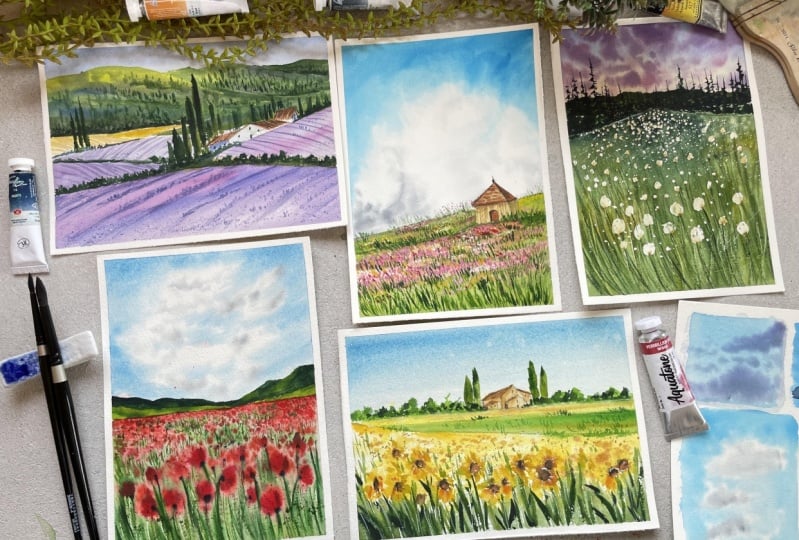
1. Class Overview : Spring is the season when landscapes come to life
after the cold winters, there are stronger sunlight, emperorship against the rise, and these get longer
during the season, the natural world revives. After the cold winter months. The plant and the
flower would bloom, making everything look
brighter and happier. This spring season, Let's paint five different flower
fields using watercolors. I have used five different
approaches to paint. All these paws protect. In each class, you will learn unique way of
painting Flower Fields. By the end of the class, you will be able to paint any flower freely from
the reference picture. As always, I will
walk you through each and every material that you
will need for this class. We will talk about the papers, the brushes, and
also the gallows. Once we have studied
about the materials, we will move on
to the technique. I will eat you. All the basic it links
that you will need to paint five different flower
fields using watercolors. Once we are done with
the techniques part, we will start painting
the landscapes. I will share all the colors and the alternative of the scene
just before the class. So don't worry if you
are a complete beginner. I have designed the class
in a way where beginners, as well as intermediate
artists can follow. I am explaining each and
every technique in detail. My ending, the class is
structured in a way where you learn different
watercolor techniques in each different class project. We will be learning how to paint different types of skies. We will also be
learning how to paint, use flower fields,
using watercolors. Known with that, we
will also study how to let it go and let the color
and mortar do their magic. On the contrary, we
will also study how we can control water and
paint on the paper. Why working wet on wet? So if you are struggling with basic watercolor
technique or you just want to have
fun with colors, then this class is for you. Come join me and by
the end of the class, you will learn how to paint this five beautiful landscape
cruising watercolors. Hello everyone. I'm Surya, are full-time artist, art educational, YouTubers and Skillshare
detail from India. You can find me on
Instagram under the handle at the radar to
share. On YouTube. My handle is paint, which we'll come
join me and let's get started hoping to see
you guys in the next class.
2. Materials You Will Need : Hello everyone. Firstly, I'm so happy that you
decided to join the US. So as you know, we will be learning five different landscape with flour friends in this glance. So before we start, let me walk you through all the materials
that you will need. Your IP using 300 GSM cold pressed 100% watercolor
paper from Bruce, true, you can use any paper, but I would highly suggest
you to use at least a 100% confident and
300 GSM paper. For this class, you will need five A5 size paper
and few route sheets. Next, you will be
needing brushes. I'll be using to
natural hair brush. That is from silver black
velvet, size eight. And then I'll be using to synthetic brush that
is size to size 00 is quite thin and long drag that brush will be
mainly using to paint the bushes and the grasses. Like you see, you're in
case you don't have them. You can always use a
round brush size 0. Next you will need or white gel pen to paint the
highlights, the urine. Then in case you
don't have this, you can always use
white watercolor or white gouache
to paint the same, then you will also need
white watercolors. I'll be using Chinese
wind farm family. Then you will need
two jars of water. One to clean down your brushes and add the full-fledged supply. Next you will need to show. So I will be keeping to
issue or to rap with me. One, I keep it on my left
just below the brushes and one I'll keep it either
on my right or on my hands. Reason being when
I clean my brush, I'll just drop it on my tissue. That way I don't know, end up screwing backdrop
as well as that. It's easier for me to dry. Next, you will need a pencil and eraser ruler to draw those straight lines
like the horizon lines. Then you will need a
masking tape to tape down your paper on all sides. This is important. When you're working with watercolor to get
the clear edge, then you will need a boat
to stick down your people. On all four sides. You can use anything, cool writing pad or a cardboard, anything we will have. Then you will need
a rough people to swatch down all your colors. You'll have just used those
grabbed papers to do that. Then you believe what values? I walk you through all the
colors just before the class. That way it is easier plus
you don't get confused. And I'll also share the alternate use in
that class itself. Then you will need and that way you can mix down
all your colors. So overall, we will be
using either pans or tubes, and moral less than b, using only nine to five
with colors for the class. You will need a
masking fluid for what of the class project in
case you don't have this, you can use the white rags
or white watercolor instead. Lastly, you will
need watercolor or the Chinese white spray bottle. I will show you how you can re-wet your
people using this. Grab all your materials. Let's get started with
our very first landscape. In the next class, I will see you guys there.
3. Watercolor Techniques You Should Know: All right. So before we start
just letting you know that I'm using the random name from my ballot because you'll be are mainly focused on learning new techniques rather than the. Carlos So you're,
I'll be teaching you different techniques
which we have used in the ice bridging. If you are taught over
basic techniques, then you can definitely
skip this part. If not, I would suggest you
to just have a look and brush all your basics so that whenever you beat
it would be easier for you. All right, so let's get started. The first one we will start How to be flat wash using
red on red technique. So first I will apply even
layer of water on the people. You see this shine
on the people. There is no parties
forming on the people. There is even layer of
shine on the people. And this is exactly how
great your people should be. Once you have applied even
layer of water on the people, load your brush with paint. Use any brush and
anything you want your. I'll be using the blue
color from my father and I will start applying
that color from the top. So during my brush with the blue alert and I
will start from the top, moving my lead down using the seam motion that
was left and right. If you feel like there's
no color on the brush, load your brush with being again and start from
where you have stopped. So I've already completed the
whole area in one stroke, so I will reapply the paint from the top to increase
a bit of saturation. That's how simple it is to
give a flat wash so you can be seen using wet on dry technique as you see
your reduced rate on red. Let me show you how to do
the same using red on dry. So again, this time we
won't read the people. We will directly load the brush with the paint and
do the same left and right motion on the people as there is no water
on the people. The colour would
look more saturated. So I'm doing the
same thing using the left and right motion and giving the flood
wash on the people. To get the even coloured, you can always
prepare your colour on your color first and then paint so that you don't get different values
of the same colour. Now you'll see that I told
you that when you were doing red the colour
looked lighter and when you did wet
on dry it looked good. But you can get the same result. That is, you can get
a little colour on the people when you are
using red on dry as well. All you have to do is make
the colour lighter by either adding white or water or
whatever you are looking for. Okay, so I just showed you that. You just beside that. Now let's study how you mean
gradient wash Britain dry. So what I'll do is I will first apply the paint
directly on the top, then I will clean off my
brush and with that colour down and repeat the same
one more time and you see that you will see a gradual decrease in the value of the same
colour on the people that is darker on the top
and as you move downwards it is getting lighter because
you added water to it. Now let's do the same
thing red on red. So let's first apply evenly
all of water on the people. Once you have done that, load your brush with the colour, make sure that it is of the highest saturation you want and then start
from the top. Once you reach the middle
or one third of the people, clean off your brush and then just all the leftover
colour on the bottom. No, I'm just moving
my branch again from top to bottom to
get it even more small. So you see, while the
pink and paper is red, it is very easy to move the clothes on
the people. All right. So these are the
two washes which we learned which will be
using for our iOS project. That is this is
the gradient wash which we will be using to clean this guy for
our sunflower field. And this is the flat
wash on this guy, which we will be using for
right now in the field. Right. Right. Now while
this area is still wet, let me show you back
on wet splattering. So I really want my brush
with the yellow color and why my blue
thing is still red. I will splatter some
yellow color on top of it. So splattering is simple. You just have to
load your brush with any color you want and then
just top of the brush, either with your hands
or with either brush. To do that, you're
I'm just tapping off with my hand as I want it. Small splatters. I used smaller brush. But again, if you want
the largest black dots, you have to use a larger brush. Same way I'm splattering
clean water on the baking area and you will see that it will create the blooms. And as we splattered
on the wet people, the yellow and the what could be applied just
blended together. So these blanching
technique will be using a lot on our upcoming
class project. Now, let me show you what the effect of
splattering wet on dry. So I would splatter
the same yellow color on this area and you will instantly see
the difference of both wet on wet
and better on dry. We will be using this technique a lot in almost all of
our class projects. So yeah, it's simple. You don't have to
practice a lot. I love this technique
because it gives you the most natural look in your baby like you
see you. All right. So I'm super excited by. Before we move on, you painting a class project? Let's start with you.
More techniques. Now let's study how to paint
the clouds in the sky. So I would bet we area
with clean water as we will be painting
those kiva clouds using red dawn red
technique only. So let's fold up like evenly
layers water on the people. Always use a larger
brush to apply water so that you will be able to
cover the portion faster, the more fast and you will
apply the water on the people, the more quickly you
will be able to work. So let me just draw or just get letters and first
draw the clouds. So the cloud area, you will have to leave white. The area around the cloud, you will have to paint
the blue and you will also have to paint the lower portion of
the cloud with a bit of shadow to create a
bit of effort to do it. So this is exactly what
we will be painting your first lit paint or
Shadow of the Clouds? John I would just add a bit
of light in my mind screen. You can add letting that
go right through your black if you don't
have mind gray and. I will dilute it or make it lighter by adding a
lot of water to it. And then I will start adding those shadows to clouds
on the people again. If you'll notice,
I switched to my synthetic grown brush size too, as it was glued to my
brush with being apple. All the Xs on the. Pilot as well as on the issue. And then I will
start painting on the people as my bridge doesn't have a lot
of water to it, it will spread a lot less. So never forget to remove the X's on the sides of the pallet. And even if you do that, don't forget to remove
the excess on the tissue. Now. You see, I already created
the shadow of the cloud. The rest of the area
around the cloud. We will be ending it
with the blue color. But remember to leave
some white guides around the shadow because
you don't want to paint the white clouds
with the blue color. So now I switch to
my larger brush as we have to cover a lot
of area with blue color. So I started painting from
the top and you will see, I will also give
a bit of shape to the clouds using my brush set. Now, this would be a little
difficult for the big noise because the blue kind
of will spread all over the paper as
the paper is red. So what I would suggest is
let's suppose if you want to leave one inch
of the year white, I would suggest you to
keep a two inch and then the left or what area
with the blue colour. Because eventually
the blue colour will flow down and you will end up leaving one inch of the
white space on the people. I hope you get my point. Right. So leave most
B's then you think you want and then go the rest of the area
with the blue color. All right. Now, as
we have covered the rest of the area
with the blue color, I will make you clean
brush and move along the edges to make the
edges a little softer. And this is how we
paint softer looking, fluffy clouds on the sky. All right. While that is drying, let's move on to the next. That is how to paint the
grasses with the brush. So I will load my brush
with green color, then I will hold my brush
at almost 90 degree angle. So that way you just do the
tip of the brush to paint, and then I will just do
the small, small strokes. Oops. You cannot see. Let me just switch the angle a little and let me
show you again. So holding my brush at almost 90 degree
angle, you see that? I'm just using the tip of my
brush to find those strokes. Now sometimes what
you can do was flag your brush and separate
all the blisters, load your brush with
paint and do it one more time and then
start painting the crosses. You will get multiple strokes. But one swipe. So you can do this as well. Oh, what you can do is you
getting any ruined brush I'm sure you would have and
think the grasses but that. Or you can always use a
friend but do pay no taxes. So I will leave it
up to you guys, what you perform
and what you like, and then I will let you decide which acne or which brush
gives you the best result. You can just go
for it. All right. I'll be majorly using
this Crown prices to obtain the prices on all
of our class projects. Now let's learn how
to soften the edges. But don't try. So
let me voice draw a rectangle and leave it there. And then I will paint one more
rectangle just below that, and I'll show you how you
can soften the edges. This is one of the most
important anything, because whenever you paint wet or dry or we while layering, you will need this technique to blend the edges to make
it a little softer. So you see that I painted
those second box. Now, as you see that
the paint is still wet. So what I'll do is I
will take a clean brush. It is a big dam. It has a little water. And then I will just do this wiping motion
along the edges. Then you see that the color
look blended with the people. Now let me show you how
it looks on the paper. Let's suppose I want to paint a mountain on this guy area. Let me just painted this way. And you see that it looks so bad and it looks like you have
done some kind of mistake. So. So to avoid that, all you have to do is soft on
the edges using the brush. This way it looks
like it is a part of a painting and you have not
accidentally added anything. So I'll just drop one more
mountain just on one of the script and not blend it so that you know the
difference between the two. It's not necessarily
like you have to do it every time you
paint, but you will. Have to learn this technique because you will
need it quite a lot. Right now. Next, let's study the
values of the same value. So in what values? Whenever you want to
make any color light, instead of adding white, you can always add water
to it to make it lighter. So what I'll do is I will first watch already saturated indigo, then I will add a little water to it and just watch
the same color below. And with each watch I will add
more and more water to it. And you will see
that the color will gradually get
lighter and lighter. You're adding more and
more door to door. Seem so that I can just
show you this technique. But if you will add less and less wardrobe
with each swatch, you will get multiple
values of the same color. Now the same technique. I will show you
how you can do it directly on the people
that this voice. I will add a very dark
or saturated indigo. Then I will clean my brush
and add water to it. Again, I will stop
with your clean my brush and pull
that color down. You know, I again add the
water and pull the color down. So instead of adding
water on my palette, I directly added water to my
people while I was painting. So this way also you can study different values
of the same color. So I would suggest you to draw the or paint or values
of the same color on the paper so that
you will understand how many colors you can
get from one single thing. Plus, this technique is
very useful for learning. Like I'll show you an example. Right. That is, let's just
mean the roof of the house. So you're I'm just writing
all little triangle. And just below that,
I will draw out lines to create the holes. Don't go on the skids. You're really just learning the techniques and
understanding the subject. So we will be the
whole of the rules using just one alone
at this point. So let me just watch. Already saturated. That is the darkest
form of ****. On the top, you see your. Now we will paint a very diluted version of the theme on the roof
for our first layer. Now in what clothes
understand as this is a transparent medium and
not an opaque medium. So you can never go
from dark to light. That is, you cannot leave your lighter color on
top of those dark. I know you will always have
to start from light and gradually move darker and
darker with each layer. So this is exactly
what we will be doing. That is I just
applied or flat wash of light brown color on the
people and just on the edges. I applied under the
angle to create a little shadow and then I
will let it completely dry. And once that is dry, we believe that the
color of to see. Okay, so let it dry. While that is
drying, let's study. I know the technique of
painting the clouds using colors that this last time we did the white looking
clouds. This time. Let, let. And Gordon
candy clouds. All right. So along with that, I will also show you how
to rewrite your people. So I've already applied
the blue color there. So I will very softly apply even layer of clean
water on the people. Again, I'm not putting
a lot of pressure. If I put a lot of pressure, the underneath layer will reactivate and you
will restore that. Leo. So just fully do that. I will load my brush with
the open color again. I will double all the excess
on the sides of the palette as well as on the
tissue before I will apply it on the
people. All right. So loading my brush. With been removing
all the excess on their tissue and then painting
the clouds on the people. You see, there is
even a layer of water on the people and
there are no puddles forming on it and there is no space on the people
which doesn't have water. All right. So make sure that whenever you are applying water, do it slowly and
applied properly, then you will get
the best result. Okay. Now, let me show you
what happens if you don't tap of the excess on the
ballot and the issue. I have loaded my
brush with paint. Now my brush has a
lot of water and then I put it on my paper as my paper was read and as my paint also
had a lot of water. And because of that, the water flew a
lot on the people. So to avoid that, remove the excess on the island
as well as on the brush, let's use a synthetic brush. That way you will have
a normal android. So let me show you one more time taking on the
color that is indicative of the excess on the tissue
and then creating a bit of shadow on the lower part of the clouds using
the darker color. And so you can think those
guy as well as clouds in one course that is using
the red on each model. I wanted to show you how you can rewrite your people and
do the same thing again, because I understand
that you all are not using the right people and your people get
dried off quickly. So you get always the
word and a slower. Right. I hope that
this will help. You know, my roof area
has already dried. Now let's add
another layer to it. To this time we will add
more and more rectangles, making it look like bricks. And I will take the same color, but I will add less
water to make it a little darker and I will
thin that on top of it. You see, you will
always have to go from like dark whenever
you while layering. That's how mono chrome
paintings are done. Okay, so let me
show you those new which we have been before
one of our last project. We have just one follow and we have used
it multiple times. Will create the depth and
the details on the roof. All right. So this
is how you knew. Okay, so now let's
study how to add different colors
on our mountains and the foreground part, as well as the birches
while the color is right. Okay. So I would just draw a tiny
little mountain on the right hand
side of my people. And then we will paint the mountain with different
greens and see how we can blend different colors while the underneath
layer is still wet. Okay, so first I will start
with the light as always, and I will apply the light
green color on the mountain. When applying that, I will
gradually go a little darker. That is, I will take
the olive green color, which is different
to what I have used to write notes and apply
it on the mountain. Same way once I applied
the olive green color, I will take this green
color which is even more darker and I will reapply that. You see, whenever I am
applying a different color, I'm leaving some
gaps in between. I'm not covering the whole of the underneath or otherwise. There is no point in layering because everything
would look flat. So make sure that whenever
you are layering, you are leaving the underneath
layer as well so that you can see different layers
of paint on the paper. So this is exactly
what I have done. That is I applied color, but every time I applied, fade. Okay, so that's all
with the technique, but these are all
the main techniques. But you will need to paint
our class pretty well, right? I'll see you guys
in the next class.
4. Red Flower Field Sketching : Before we start,
let's first apply masking tape on all four
sides of the paper. As I told you earlier, I'll be using an almost A5 size watercolor
sheet from Bruce through what I've done is I
have all huge A3 size paper. I did cut it into half, that would be evil
and that info size, I did cut it one more time
to make it even smaller. So it is almost 21 centimeter by centimeter or slightly
smaller than usual A5 size. Alright. So you don't need the exact same size
like I am using. If your paper is slightly
smaller, It's okay. If your paper is slightly
bigger than it is. If it is two or three
centimeter larger than mine, then don't cut it
because you will any means end up wasting
that size of people. Use whatever you have. Then start applying
the masking tape on all four sides of the paper. Once you have done that, just run your finger one
more time to make sure that you have applied the
masking tape properly. Once that is done, Let's roughly sketch inking. So to make it easier, what I'll do is I'll first
divide my paper in half. But now one more thing. I'm not taking all ruler
to measure the exact half. I'm just using my hands. So you can do that as well. So you don't have to be
really specific about it, but just eyeball it. Once you have drawn
the half-life, then I'll draw the horizon
line just below that. Help. All right,
Once that's done, let's draw the full
mountains on top of it. I have kept the final painting on the right-hand
side so that it is always easier for you to share for that when you
were sketching out. And that's it with
those sketching part. Now let's know which all color we will be using
for this painting. So for this guy will be using several in blue
from White Nights. So in case you don't
have serene blue, you can use cobalt blue, ultramarine blue, bright blue, even cobalt, turquoise, whichever sky blue
light color you have. Then to paint the red units, you will need flaming red. That is quite bright red color, and other would
be 1 million red. That is lightly a cooler red. Again, if you don't
have been scholars, you can use cadmium red, Barlow red, bright red instead. Alright, so you don't need the exact same colors
like I'm using. I'll watch all the
colors later so you can always find those similar
sheets you have in your ballot. Lives be painting
though flowers. In case your flowers are slightly different than
mine, that is fine. Right? Next I had to list out nucleus green
from Art Philosophy Co, and now I'm squeezing
out in your loop. This is quite a warm yellow called warmer than
cadmium yellow as well. In case you don't have this, you can use cadmium, get low as well. Now I'm just watching all the colors that we'll
be using for this painting. So the first one
is civilian blue, flaming red from a client to see how bright this color is
in case you don't have this, you can always mixed post light orange to the red
to make it brighter. Million read to you. We are using different
types of rates who create the shadows,
and often ours. Then you will need Indian
yellow or a warmer yellow. I love this color because when I mix it with
two hookers, green, it creates amazing
light shades of green. Next, you will need to go green. You can use any green
that is sap green, or you can always
mix your greens by mixing blue and yellow. Next you will need indigo. And lastly you will
need binds green. I may using my inspiration
from White Nights. But you can always use black
instead of pints gray, or you can always make a
bit of indigo and a bit of black to create your own
pints gallon, right? So these are the colors
which we will be using for our forest landscape
that is beyond infamous. So let me repeat one more time. Certainly in blue framing red, blue, red, and green, yellow. Who goes green, indigo and finds green graph or new colors. And let's get started
in the next class. I will see you guys did
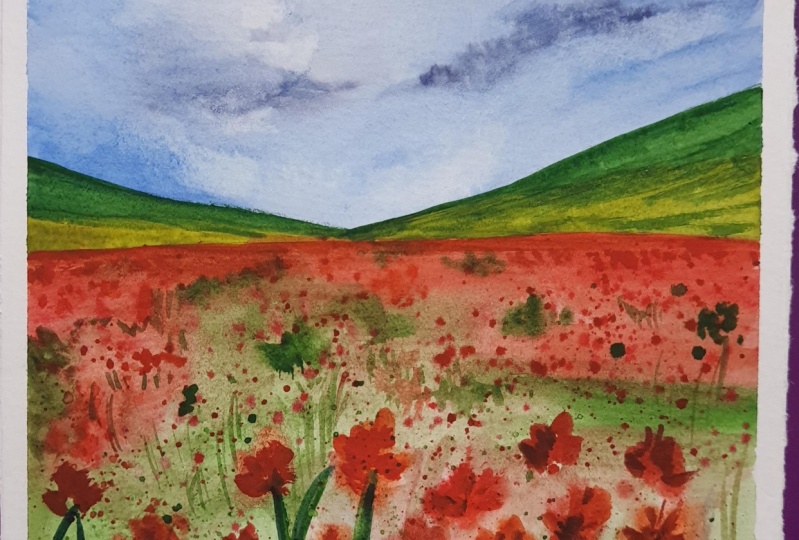
5. Painting Red Flower Field: So we have our people ready, we have our sketch ready, and we have already squeezed out all the colors
are not parallel. Now, let's get into
the painting part. Let's first start with the sky. So before we start, let's first prepare all
our colors for this guy. So that when we are painting, we don't end up mixing our
colors and wasting our bank. Alright, so first
I'll be preparing the grid Carlo for the
shadow of the clouds. So what I've done here is
I took the white color, I mixed it with the
pines gray color, and then I've added a lot of
water to make it lighter. Same way for certainly in blue, I just added a bit of water to make it to
the right consistency. As we don't have to
add anything we'll be using directly that
follow on this guy. Once I've prepared
the blue color and the gray color for this guy, I will start applying water on the sky area using my
long brush, size eight. As to paint this guy, we will be using wet
on wet technique. Just applying water
in the left hand, right motion all
over the sky area. Make sure that you have
applied evenly or of water. There are no parts it's
forming on the water. Plus you have covered each and every part of the
sky with water. This process to which slowly, if required, you can always
do this multiple times. That is wet your paper, leave it for ten seconds
and then re-wet it. That way your people who'd stay wet for a longer
period of time. Alright. Once I've
wet the paper, I will take my
synthetic round brush and I will grab the Greek alone, which we add all good and mixed. And I will start
applying it on this guy. You'll see whenever I grabbed the color on my
brush, I'm tapping, remove all the excess on
the block so that I do end up applying or not on the people because as a paper is still wet, the color would flow a lot. So that's the reason I'm just
tapping it on the block. One more thing,
what I did is I am using a synthetic brush that we brush holds less water compared to the
natural hair brush, which gives me a lot more
control on the paper. Once I've applied
the first layer of the gray color on this guy, I just do call it a bit of mine screen directly
from the palette. Mixed it with white and green mixed which we
had already prepared, and then applied the
same color urine there on this guy status. Then I will grab those
circled in blue. Hello, start applying
it on this guy, leaving the few gaps in-between. The reason we painted those
shadow first is that we, we would know where to
leave the white gaps. You don't necessarily
have to paint those shadow in exact same
position as I've done. Just understand the
technique and then you can do however you want to do, which you'll see once
we have started in general in blue color though
clouds are digging shape. Once I've applied the first
layer of civilian blue, I'm just cleaning off my brush, tapping off all the
excess on my cloth, and then I'm just softening
the edges of the clouds. Once I do that, I will reapply those
civilian blue color wherever I feel is needed. Then I'm grabbing the same
color and I'm applying it on the top portion
because you see that watercolor gets lighter
when it is dry. I'm just reapplying
the same color so that it doesn't lose a
lot of saturation. One stride. Now one tip. If you feel like you're
clouds are looking, effect, then just move
back and stop it there. Don't overdo it
because believe me, if you would not stop
adding the blue color, the whitespace which
you have left, would completely covered with blue color in like ten
to 15 seconds, 100. Stop it if you'd like, the clouds are perfect. Don't overdo it. At the YZ will end up with
no clouds in the sky. Now, I'm completely happy with
how clouds are looking at. Thinking of very light value
of green and adding a bit of shadow to create a bit
of depth and dimension. I'm just softening the
edges urine and that's it. I leave it to dry. And while that is drying, we will move on to
painting though. As people wouldn't be able
to paint the mountains as. Is still wet. Let's paint the Peony
in a very loose style. To do that, we'll be using the same wet on wet
technique that this we will apply even layer of
water on the foreground part. Like I said earlier, take your time while
you are applying water. Don't hurry this process. The more you will apply. Even hear of water, it would be much more
easier for you to control the water and paint on
the paper. One multiples. If you feel like some part
of your paper is dry it off, you can always take
those and apply there. Water in that area. That's where this spray
water comes handy. But we don't need it right now. Let's just focus on applying
the water foreground part. And once we have applied
the UN layer of water, Let's start with
painting though. I took a very light
value of leaving red. That is, I just
added a lot of water to the car lot and
make it lighter. I'm just applying
it on the feed. Like you see, I am always using the brush whenever I need a
bit of control on the paper. You can also remove the
excess paint on the brush, either on the sides of your
palette or just dab it on the tissue before
applying it on the paper. Once I've applied the
flaming red color, I applied hookers
green in the same way. Then I took the darker value of those same flaming red
color and reapplying it in your I'll do a lot of layers. That is, I started with
the lighter value once I'm satisfied with the position
and how it is looking, I will leave it with the same color or different
color on top of it. Once. Then let's
paint the flowers. You'll see that the
flowers which are near the horizon line up quite
far away from our viewpoint. That's the reason we are
not able to identify. We just see the red color. So that's what we did. And as we come closer
to the foreground, all new to the viewpoint, we will be able to see
the individual flowers. For that, you just
have to create the tiny little dots using the same wet on wet
technique that is might be, but it's red and
my paint is wet. The color will spread under div, but that is fine because we are painting in a loose style. One status then I'm
taking vermilion red color on my
brush and the wing, the same dots in the background. One more thing to keep in
mind is though flowers near the horizon line would be smaller as they are far
away from our viewpoint. The ones in the foreground
would be larger as the near to us. Then what I did
is I just covered this guy area with cloud
and I've just plotted the red color in the foreground part to create those multiple
flowers in the background. This way you will be able to cover the whole
area quite faster. To do that, we'll just
have to load your brush with paint and then just either tap it with your
hand or tap it with the brush to create those
plateaus on the paper. Don't forget to
cover this guy area. Otherwise you will
end up getting the red dots in the
sky like I did. I'm just trying to lift off. Hopefully I'll be
able to fix it. Now I'm pretty satisfied with
how my field is looking. So let's add the leaves and
the stems of the flowers. My paper has called
dry to make it red. What are the ways
I think this gray border and I will split though water just at the lower portion of the paper
because that was drawing. Now I'm just taking the
hookers green color. I adding a bit of Indian yellow to make
it a little lighter. And then I'm just
applying that color on the lower part of the vapor as well as in-between the fields. I am still using synthetic
round brush size to paint. As we are doing small, it's more than ETAs plus
B are working wet on wet. I'll keep on repeating
those same steps. As you will see that the paper will drive with each layer, the color will spread less. What I did is I just do blue, green color and I'm adding
that color in between the flowers in the foreground. I'm adding the green
color in a way that it looks like those
stems of the flowers. That is, I'm holding my brush at most 80 to 90 degree
angle, just using the Of the brush to
create that strokes. If you end up covering the whole area with
the green color, we will keep on
adding darker value of green color, the top of it. So to make it the algo, I just added a bit of indigo
to the same green color and repeating the same steps of adding those stems
of the flowers. Now, this time,
leave though gaps in between that you will get different layers
of being alone. And it will help you create
depth in your painting. One set of light, the darker green garden
gleam of my brush and I'm sure you'll find amazing
technique that is used need. I will just scratch it on the paper that way the name
will lift off the paint, creating the white highlights
is you don't have nails. You can either use a palette knife or even
cathode to do that. But just be careful
while using the cut-off. When status then you see we
are painting though flowers, meaning for more than
five to six minutes. So my paper is almost dry
that it is still wet. But if I apply a
thick color on top of the colors would
spread locked list. I will take the war
million color on my brush. I will lose a very
thick consistency of paint that is tiny
bit of water to it. Then I will create the shape of the flower using
the same column. And this time you will
see that the colors will spread a lot less. One status. Then
I've been thinking indigo color directly
from the bench. I will add tiny little
dot on the flower. This is where those stem
is meeting the flower. Remember we are still
working wet on wet. My paper is still
wet. My paint is wet. Use a thick consistency of
paint that it will spread less in case you feel like your paper has
already dried out, you can do it wet
on dry as well. Then I'm begging the darker
green color that just mixing a bit of indigo to my green to make
it little darker. And adding the stems
of the flowers. This is already
looking so beautiful and this is just the
first-class printer. Wait for the next project. You are gonna love painting
this. I call this. I have kept holding my
videos in New York. I have not even
edited by mistakes. If you're watching this
for the first time, then I would suggest
you to watch it. You can do easily before
you start painting. Because there are times when I just change a few things
while I'm working on it, less, I ended up making lots of mistakes
while I'm mortgage. So to avoid that, you can just watch the whole video and then
you can paint. That way. You won't make the same
mistakes as I made. Now to create a more
details on the load, I just added a tiny bit
of indigo to my median. Then I'm just being thin. Lines urine there on the
front of the flowers. Next, I'm just adding
more DDMS on the flower. That is, I'm using
different values of red. I'm just adding lines on the W2 make it look like adults on it. You don't have to
be very precise because you're painting
them in a loose style. You don't have to
be perfect with it. That's the fun part of this. Sometimes you might feel like US painting style is more
difficult compared to the one in which you do DPS because you know where and
how to add the details. But believe me, once you will do this loose
style of painting, you will enjoy this
to give it a try. If you haven't tried
it earlier, who knows? Maybe you will end
up liking this too. Once we have added
intermediates on the flower, we will start
adding those stems. Now my paper is completely dry so you'll colors which I
apply over it borne spread. Those strokes which
we will be adding would be quite defined. Let's add the stems
of the flowers to IP, taking mix of glucose, green, and a tiny bit of indigo
to make it darker. And then I'm using
the same brush size. I'm holding my brush at
almost 80 to 90 degree angle. And using just the tip
of the brush to make the in stroke
looking at the stem. Once that is done, Let's add tiny little noise
in the background as well, because that area is
looking quite flat. Let's add tiny latent boards
using the same color. But I will just lighten it
by adding a bit of water. I will just add small, small, making it look like
far away a few hours. Once we have painting the
flowers in the background, Let's paint those stem as well. I'm just adding a bit
of yellow to my green. I will add more than
stems in the background. As you move that the stems in the foreground
will be larger. The larger, whereas the flowers in the
background are smaller. So seemingly those stems
or would also be smaller. That's how we create the perception of those
flowers being flawed. Viewpoint. In case you are not comfortable
painting it with no seam branch or
size two brush, you can switch to
a smaller brush, maybe size plank or
size 0 in this stem. Now, you know what
you have to do. Realize you are also
aware of the materials you when you feel like the brushwork
using as not giving you the exact same
result as you want, then you can always change and experiment with other printers. Same way if you feel the color which you are
using is not working, then you can always change the color or
change the technique. You have to take those
points more decisions, and experiment with
your painting. You don't have to exactly
follow mean that is, you don't have to use the
exact same number of brushed. What the exact same
Carlos, like I'm using. Just experiment. I may be by using the frame
brush or different color, you will get the exact
same result, right? So don't stick with the idea that you don't
have the exact same but either like I'm
using so you won't get good results which
you are looking. Just dry, paint,
experiment, and practice. You will be where I am today. All you have to do
is you just have to invest some time and efforts. While we will talk
to you about this, I just painted the mountain
in the background. What I did is I just added
a bit of blue to the green and paint a mountain with the lighter colors
while that is drying. I'm just adding few more stems. Foreground. Once that is dry, we will paint the
mountain on top of it. Though darker green color. To make the darker green you already know what
do you have to do? You will have to
add indigo to it. In case you don't have indigo, you can always add portion blue or even any bit of black
to make your green darker. But I would suggest
you to add a bit of blue color to make
your green backwards. I agree It will get
better green mixed. I know the process of
painting this gravel field is low because you have
to add a lot of Legos. You have two stems to learn, but believe me, you
will enjoy this prisoner's do it slowly
do with coming in. Like, you know, in
our earlier classes. I said like painting pine
trees is therapeutic to me. That seem anything this means the stems of the flowers
is so exciting because, you know, the deans will bring the whole
painting together. At the end, you will be so pleased and happy
with your work. Just don't give up. Keep on adding these
tiny living beings. Now what I'll do is I will first cover the sky area
with my flawed. I won't repeat the same
mistake of not covering it. And then I will do
those flattering on the foreground part
using the right value. But this time we will be
doing by turn dry that this might be paper is dry
and my paint is instead, we'll be using the same width that is loading your
brush with paint. And I'm just using my
hands to tag. That way. You will see that the jobs of red color will
fall on the paper. Same way, I will split it. The green color in the
foreground as well. Now we are almost done
with the painting. We just have to
paint the mountain. Then B will do the exciting font that is removing the masking
tape and see the end result. So let's paint the
whole mountain forest. I just squeezed out
the hookers green directly from my tube
and I'm adding a bit of indigo to which you may get Danko using that color to
paint the foreground mountain. Then I'm adding a
tiny bit of yellow to green to make it let it go. And painting the same on the other mountain on
the right-hand side for starting apply that lighter
color and then I'll take your darker color
and apply it on top, and then just use my brush
to blend it together. That's it. Lastly,
I'm just thinking red color and applying
it on the horizon line. Just adding final touches. And then I will let the whole
painting completely dry. Before we mean off
the masking tape. Before I peel off, let me show you though
close-up of how it is looking. You see the details
on the flower and they are looking for just let us remove
the tape at an angle which is away from the papers so that you don't
end up editing it. This is how I find
it interesting. Okay, let me show you
the blues have fun mode. Then let's move on to our
second class project.
6. Wild Flower Initial Sketch: Hello everyone. We have already completed
our first class project. Now let's start with a second. This time we will be painting flowers surrounding
tiny little house. Before we start,
let's post apply masking tape on all four
sides of the paper. As usual, I'm using A5
size watercolor paper. Make sure that you
apply masking team. The paper is completely
straight to the board. If your paper is tilted, you will end up painting the horizon lines and the
lines slanted as well. That's the reason I just
changed because I felt like the paper was a little
bit on another node. I never strikes about the colors and the
brushes I'm using, but I always just a lot on
what people you are using. That is because there are
so many techniques which works beautifully
on a 100% cotton, 300 GSM cold press
watercolor paper, especially the wet
on wet technique. Because whenever
you wet the paper, if your paper is
not a 100% Court, the paper dries off quickly. And when that happens, if you get less amount of time
to work on your painting. If you're just starting
with watercolors, I would suggest you to first
invest in your papers. If you have already done that, you would instantly see the
difference in your work. We have already applied them, I think gave on all four
sides of the paper. Now, let's first do
the sketching part, and then I will walk you through all the colors that we will be using for this class project. Alright? Cycle, always be forced, always draw the horizon line is the line which divides
the paper into two parts. The upper part as the
sky and the mountain, and the lower part
in the line and the houses or the
leaks and waters. We just drew the horizon line just below the
half of the paper. And this time we are drawing
it in a slanted position. Then on top of it we will
draw a tiny little cabbage. I'm keeping the final painting on the right-hand
side so that you can always refer to it
by you are drawing. You will see that I will make lots of changes in the shortage. Like you see me draw right now and you see the final work
and it's quite different. That's the reason I always
tell you to let me complete the whole thing and then do it because I ended up
changing a lot. Because when you sit to
sketch or when you do pink, you realize that there
are certain things which doesn't look good as you
have planted in your head. That is totally fine. You shouldn't be disappointed by yourself or you
shouldn't be like your painting is
looking exactly same as your reference image or
as you have planned. You are the owner
of your painting. You can do with
anything you want. You can make the
tiny little changes as you feel like doing it. And as you feel like it
would look the best. We have already
drawn the quotation, and I'll just roughly draw
shape of the cloud with the pencil so that I know that the top portion would be covered with the blue
and the lower portion, I have to keep it white, but do it really lightly so
that when you start to paint, the pencil mark doesn't show up. Now, let these watch all the condos that you will
need for this class project. So if you have seen all Leo, I have used speaks ten
colors of pink and yellow, but I didn't want
to add in order of colors to our projects. So what I did is I just
added Chinese white to my vermilion red and flaming red to create my own
page still change. We will do that directly
when we are painting. You're just watching
the original colors that we will be using. For. The first color is more million grid that we'll be using to paint the flowers. Next we will be
using certainly in blue to paint those guy. This one is from White Nights, and we will be also using
seven blue from bad goo. This is quite different
from whitening. It is quite bright, and I love this color as well. So we'll be using
both civilian blue from different brands
to paint this. First, I will watch White
Nights, civilian blue. And just beside that I
will watch Van Gogh's Evelyn blue and you will instantly see the
difference between the two. Once again, if you don't
have to say, Fine, I'm using because the sediment
do from White Nights is LED light and I want to read
a bit of depth in this guy. So that's the reason I've added one more blue from Van Gogh, but you can always use bright blue cobalt to
go bye guys to do that. You don't need this. Penny. Next I'm watching umbo. Then I will be using Indian
yellow from solider, who goes green from
Art Philosophy, go to the grasses
and the dual part. So these are the six
colors that you will be using to paint the landscape. And I forgot to add. So we'll be using
indigo and binds GRI. That has really are, these two categories are
always there in the painting because these cool colors helps you to create any color darker. I always prefer using indigo and pines gray
instead of black or white. So these are the colors
that we will need. Grab them and let's get started.
7. Painting Wild Flowers by the Cottage: So now we have our
alkalosis ready. We have our sketch ready. Now let's get into painting, but we will start
with this guy first. We'll be using wet on wet
technique to paint this guy. Let's first wet the whole sky edf using or larger brown brush. I'll be using science eat. But you can use even
larger brush to do that. We will apply even layer of
clean water on this guy area. I will do it multiple times. And I've also made sure
that I have covered the whole area
with even layer of water that whenever we start painting the papers th bed
for a longer period of time, and if the paper stays
wet for a longer time, you get more time to paint. You will note that
you are only able to work with watercolors while
the paper and paint this bit. Once both drives,
it is very hard to rectify your mistakes
as well as to paint. That's the reason it is
very important for you to try and keep paper
wet as long as possible. So there are two to three ways
in which you can do that. One is using a 100%
coordinate paper. Second is wherever you are
applying more to do with 23 times so that the
AICPA has a lot of water. And the third is not to use fan or easy while
you were working. Alright. Now let's start with those shadow
part of the Cloud. So you're like we did
in the last class. We will do the same thing. That is, I mixed my
white width a little bit of pines gray column
and diluted with water. And now I'm just using that color on the bottom
part of the clouds. I have kept the final painting
on the left-hand side, and you will see that there is a huge white cloud
at the bottom. If you leave that area
completely white, it won't look like cloud. That's the reason we have to
add a bit of shadow, do it. I always prefer starting
it with those shadow part. It is easier for me. But if you're not
comfortable doing that, you can always start
with Skype part, that is the blue part. Then you can create new shadow. Try both ways and see which
one is working for you. Here I've already painted
those shadow know, I M thing though blue part, the larger round brush size. And I'm taking
civilian blue painting that color just at
the top of those guy. Do these steps
slowly and make sure that the blue color which you
are using is NP very thin. That is, you haven't added
a lot of water to it. Because if you do that though, color would spread
a lot on the paper. As your paper is red, it would be very difficult
for you to control. Use thicker consistency of blue color when
you are painting. Skype art. Once you've applied
the color on the top, clean off your brush, remove the excess on your issue. With the help of the damp brush. Dry blending that
color with no clouds. So that isn't sharp edge
between the sky and the clouds. And if your paper is still
wet and the color is red, it would be very easy
for you to do that. You don't have to do
a lot of pressure on your blog. Just solve. Move your brush along the edges of the
sky and the clouds. And you will see that
the kindness would blend in beautiful
with each other. I'm just darkening the top of this guy and I leave it there. Then I clean off
my brush and use the damp brush technique
to blend the edges. Now I'm satisfied with how
it is looking right now. I will just add blue
in there and just choose didn't embrace technique to blend everything together. One more thing, if you
read like you have added a lot of green or
blue and yellow, you can always lift
off your paint using the same ****
brush technique. So what you can do is you
can clean off your brush completely remove
the excess water on your issue or raft load, and then just use the damp brush on your paper
wherever you want to. Lift off your paint and use
that brush to lift it off. Every time you lift off paint, you will have to clean your
brush so that you don't end up applying the color
which is there on the brush, again on the paper. All right. I'm done with this guy again. I'm loving how it is
looking right now. So we will have to let
it completely dry. And while that is
drying, let's move. The low portion,
the ground area. Now, I would suggest
you to let your sky completely dry before you paint the ground part because you will see that the green color
will flow onto this guy. Although the bottom
portion of those Kai wasn't a lot wet because
we painted fit those dots. But still I would
suggest you do lose a hairdryer or just keep it under the fan if you
want impatient like me, that you don't end up having green color
on this guy area. Or just leave or tiny
little white gap, the sky and the ground
while you are painting. And once you've seen the
sky has completely dry, you can always reaping. You seeing your color is
flowing on this guy in here. We will fix that by adding
the grasses on over there. But you can avoid this by just letting the sky
area completely dry. I just started with the
very light color of lean. That is, I added
engineer yellow to my green and I started
painting that color on top. And in-between are also
painted around the host. Now, let's paint the
back round of flowers. So I added a bit of white
to my woman when I'm just adding that color first so that whenever we paint
flowers on top of it, we don't have to add white or a lot of pink
dots on top of it. So basically I'm just creating
or lighter background. Then we will paint laurel
flowers on top of it. You'll see that I'm purposely
leaving some white gaps in between that is
because we will be adding white flowers
on top of it. If you are able to do
that, That is awesome. If not, don't worry, we can always paint onto it using Chinese inspite of
pipe question. All right. So don't take a lot of pressure
when you are painting. Just go with the flu. We have solutions what
everything. Don't you worry. Once we have painted
the pink color, it will paint the lower portion, the ground that the green column will be using the
same mix of green. That is, I will add a bit of Indian yellow to my green
to make it lighter, and I will add less green
to make it a little darker. And I will paint
the blue portion but differentiates of greens. Once that is done, I will switch to smaller
round brush size two. And I will mix my
pastel shade that is mixed white to my warming and red to make it
like don't intrude. See the proportion
is 20 minutes to AD, that is 20% of paint
and 80% of white. I will start painting small wild flowers
on top of two pink, which we have already painted. By doing that, I will keep on changing the pink color
that then sometimes I will add mobile million to it and sometimes I will add white
to it to make it lighter. In case you have pasted
colors with you, you can directly
use that. Same way. If you want your color
to be more lighter, you will have to
add white to it. And if you want the same
color to be led and download, then you can either
add pink or red. Those same Goddard. Also, if you don't want
to paint pink flowers, you can always switch
the colors that you can paint the whole
figure with yellow, maybe purple or orange. Makes sure that the
background color, which I painted earlier, you paint that diagram like if you want to paint the
flowers with the purple color, then apply a light wash of
purple in the background. Same way if you want it
to be yellow or orange, do those same thing. Cure you have on the board, it will choose the
color which you want. I just went for pink
Plus I will also add yellow and white
column flowers. Now the process is quite simple. You will have to add tiny, tiny little thoughts near the house as well
as in the back. While we are doing that, I will also start
painting though grasses. I will take the mid
value of green color and I'm using the same
long-range sides do. I'm painting though tiny
little prices one-by-one. Now this process
is quite lengthy. Days you will have to run dot for the
flavors plus you will have to add by one
grasses the brush, but you can always use or friend brush or to make
this process posture. But I feel like you don't
have a lot of control on that brush and you
end up finding a lot. I prefer doing this. Those single brush and
painting 11 stools. You will feel like it
takes a lot of time, but it doesn't because you don't have to be very precise with it. And you will see
that it will hardly a ten to 15 minutes to do that. Alright, so I started with
the lighter green color. That is, I added yellow to my green color
to make it lighter. And I'm urine starting to add the stems of the flowers
as well as the grasses. So you'll see that
the grasses in the background would be smaller, whereas the grass
on the stands in the front would be needed larger because they are
new to our viewpoint. That's the only thing which
you have to keep in mind. To get the thinner
looking stroke, either use a smaller
brush to paint things. Stands. Hold your brush at
an angle which is almost 8090 degrees
so that you're just using the tip of your
brush to paint it. I'm using silver black
velvet size two brush, which has a unique good, although it is science too. But the tip of this brush is really amazing and
that's the reason I'm able to paint such tiny
things to process that. But if you don't have this, you can use a smallest
sides priced at this, either one or maybe
even 0 to do that. One more thing, keep on
changing those shades of green on pain of the glasses. But one color that is either add yellow
to make it lighter, or sometimes even add
water to make it lighter. And sometimes add green
to make it darker, or even indigo to make
it even more darker. So keep on changing
the values of bleeding so that the whole
area doesn't look slide. You will see that each layer, and with each step though
painting come together, you will see the depth
in your painting. I know that these are
quite time-consuming, but needs the gains. Which brings the whole
painting together on which you were able to differentiate from
normal painting, the painting which you
are doing right now. Believe me, you will
enjoy doing this as well. Always see trust the process
and enjoy the process of painting rather than
worrying about the womb, 1000 steps or even
the end result. If you will enjoy the
process of maintaining, you will end up loving
the end result. Plus you will do so
much better as well. All right, let's get
back to the painting. So I've already added
fourthly years of classes. Now let's get back to
adding the flowers. Again, I'm adding pink flowers near the house as well as
on the left-hand side. Like I said, though, grasses in the background
would be smaller, whereas the grasses and
the front would be larger. Same way though flowers in
the background would be tiny. So just draw tiny
little thoughts. Whereas the dots
which you create in the foreground would
be alerted larger. Don't make it look
a little bigger. Now, I'm making vermilion. I will add that color directly on this lava to
make some Legos darker. So that's the reason I love making my own
based on shapes. I have a wool set
of White Nights, leads to achieve color, but I never have ended
up using that color. If you'll see my
pasting color class, I have created my
own these strategies from the normal column. Like when you're
mixing my own genes. Because then I get a
whole range of color, which I want that is I will
get the darkest value as well as I can make the color
as light as possible. Reform, making my own
page turn Sheets. To do that, I would just
suggest you do either get whitewashed
or Chinese white. So those white will help you to make your piece to
shift more opaque. And whenever you
want to leave it, it would be much more easier. Get one color that is
guage or Chinese white. And you will be able to create n number of
patients sheets. Alright. Now I'm adding or very light yellow Carlo
flowers on top of it. So what I did is I added
a bit of white to mine, Indian yellow to
make it lighter. So that is, it is hardly 5% of yellow color and rest
ninety-five percent is white. And I'm starting to add that color of flowers
on my painting. While doing that,
I will add few, most plateaus of the same color. Now you know how to add lactose, that is load your
brush with color and then just tap it with your hand or use another brush to do that. Hover your sky area
when black drink, as I'm using very
thick time systems, he often mean the GI
know that it will end up falling right
where my brushes, by doing that risk. How sky AVR, when they were, you know, I added a bit more. We get to those seem to make
it darker and make it a bit. I'm painting the flowers
using the same column. Now, I've been
made darker green. I'm mixing a bit of indigo
to my hookers green. I will start adding those
stems using those same column. You'll see your B are
doing a lot of layering, which started with
the lighter color. With each step we are
going darker and darker, especially in each of
those times and grasses. We are doing this
multiple LEO to create depth in your painting. But one thing which you have to keep in mind when
you are leaving, never covered underneath
you with the darker color. Otherwise, there is no
point in, you know, layering if you have to end up using one
column, all right? If you end up using
the one-color, it would look completely flat. So whenever you are learning, make sure that you keep
the underneath layer. Now you will see that same
way we will aim to house. So first we are just applying
lighter value on the rules. And you'll see that I applied
lighter value on the roof, the same color I
applied earlier, darker value on it. That is, I use more of or less of water to paint the
door and to paint the roof. I did complete opposite. I added water to make it inside. You see you can do so much
with one single pane. Like you will be able to
paint the whole house using one single color by just
changing the value. That's how monochrome
painting are done using just one
single color, right? So we unlocked doing
that right now. I'm just understand like
how you can create depth in your painting while that roof and then
do area is drying. Let's add move trusses in the foreground part using
the DOM computing Hello. Now let's paint the house. So I will take on Dumbo. I will take the
Indian yellow and white mixed much I already
had in my palette. I will create my
yellow ocher Carlo, somewhat similar
yellow ocher color, and I will dilute it
with lots of photos. And then I will paint the walls of the house using
the same color. Why is that this drying? Let's add details to our roof. So I'm taking bond on both from my pan and I will
paint that first. Then I will add tiny bit of indigo to make it little Danko. I will create the left-hand
portion of the house using the darker color because that's where the
light is not hitting. That portion would
be a little darker. Same way the wall below
that we will make it darker as well once
it is completely dried. Next, let's add a
brake light shape. I'm thinking yellow ocher color which we have already prepared. I would draw a line
in the front of the how's as well
as on the back. Same way I'm taking the darker brown color
that is mix of indigo and adding a shadow just on the left-hand
side of the house. Then I'm using the damp
brush to blend the color. While the house is drying. Let's add more yellow flowers
in the foreground part. I add less of white to my
yellow and I will start adding that color in the
same way as we did earlier. You will see that I use very
thick consistency of paint. That is, I have to do it and thicker the paint
you use and be moved a bit. So that's the reason I have it. I didn't want to do it. Now let's add splatters of
the same follow-through. I will post covered the
top portion but the fluid. And then I will
just that my brush to green, yellow flowers. You can stop at you, but I will add few more
meetings along the hose ADL, as well as final few touches on the house and the
foreground part. And we are almost done
with the painting. You're I'm adding. Bush knew the house. You just have to do
the tapping motion with the same brush. Create the bush
around the house. I'm just talking about
grooves on the back-off. As women as a bit of shadow. Then adding darker green color. I mixed a lot of indigo to
my green to make an alcohol. Stems. In the foreground.
And the background. I'm taking a mixed. I'm adding a few mornings, adding few more grasses
on the horizon line. So you can skip this step. I'm doing it because that's when I just wanted to fix that. I'm just adding tiny little
crisis on top of it. I will just add a bit
of pink to make it look like flowers on the
one I use in my image. And then last D just adding, we are done. Looking gorgeous. Isn't it? Let me just show you a
close-up of this painting. Right now. I cannot wait to see your
version of the scene. Alright? So please, please paint. Like I always say to me, well known from looking, you always have to practice
what you have learned. So don't paint it and if you do, then do post it in the project section of the
class so that I can see it. Alright, so now let's remove the masking tape and
see the final result. Then let's move on to painting
our third class project. I'll see you guys
in the next class.
8. Loose Sunflower Field Sketching: So let's start with our
thought last project. This has to be my
favorite class project. As we have main thing,
bright, beautiful sunflowers. In this class we will be
painting loose tie sunflowers. So let me show you how you
can do that. Like always. Take your E5 size
watercolor paper and let's apply masking
tape on all four sides. The Press your
masking tape so that there's no gap in
between the paper and blue masking tape, otherwise you won't
get the fluid. Looking at. What I do is I usually apply marched
in and press it down. But before I start painting, I will run my finger
one more time so that even if there is a gap between the masking
tape and paper, and the paper and the masking
tape is completely stuck. So it's basically
double-checking. I've learned from my mistakes. You don't have to do
the same mistakes. What I've done, double check
it and you would do three times so that you don't
end up regretting it when you are done with your painting and your painting is beautiful. And you've put on lots
of efforts doing that. But one thing that is you didn't apply your masking
tape and it ruined. Always double-check. Now let's do the sketching
part. It's quite simple. You just have to draw the
different lines areas. So first we will draw the larger full-grown pine
and just below night, we will draw two more lines. And then I will draw a tiny little house on
top of the horizon line, which is in the background. You will see mean change of few things while
painting the house. Never give an impression of the artists are doing
good things in one go. They know exactly
what they want to do. We do, do mistakes, B2 loan, and we use an eraser
while we are sketching. Seem UNI or seen. Never give an
impression of that. I'm learning. You are learning. So it's okay to use an eraser
to shop your mistakes. If you screw it one time, it is good to do
it all over again. As long as you are
putting efforts, as long as you are learning and growing,
everything is fine. All right. One more thing is I
always draw a little darker so that you all can
see through the camera. If I draw it like you
won't be able to see. But for you, make
sure that you draw it as light as possible so that
whenever you start painting, you don't end up seeing though pencil marks because watercolor
is a transparent medium. If you will draw a doctor with a pencil mark would
definitely show up, especially when you are using the lighter color
was like Jell-O. Make sure that you
are either using it lighter hand when
you're sketching or you were erasing of all the x's until marks before
you start painting. I have drawn the houses. I've drawn the tiny
little trees around the houses and the
bushes as well. Now, let's draw though in
there of the sunflower, which are in the foreground. I will just draw the
fringe shapes of round. I'm drawing this
show that I know where I have to paint
the attention of the flower as we
will be using wet on wet technique to paint flowers. It is important for me
to know where I have to draw the petals and flowers. This is just for my guidance and to make the process
a little easier. Alright, I will
draw a few circles. Rest of the thing we
will do directly, but though, paint and brush. Alright, so now we have
done sketching part. Now let's move on to the colors which we will be
using for this class project. The first one we will use
lemon yellow, this color. I'm sure that you all will
have in your palette. Same way with yellow ocher. I'm sure that you can
have it in your palate. Then we will be
using hookers green. Don't worry, I will share
all the calories and I will watch each and everyone
just in few minutes. Your I'm just squeezing of
the color from my cube. Let me just watch
it down for you so that you know how
they look on the paper. If you don't have these sheets, you can always find some similar sheets
from your palette. The first one I'm swatching
right view is sap green. Next one is who goes green? I'm swatching lemon yellow, and besides that, I would
swatch Indian yellow. Next you will need a logo. If you don't have this sheet, you'll know how to make
it like we did it in earlier class at this
mixing your burnt umber, a bit of yellow and white. Next I'm swatching bond, AMO, indigo finds Guinea. And lastly for this guy, we will be using
sand Rollin blue. So now you know the alternatives of almost
all the colors, like for several in blue you can use bright blue by the boys, or even cobalt blue. For the greens. You can
either mix your own brains by mixing your blue and yellow
in different proportions. For engineer low, you can
use cadmium yellow as well. To make it a little darker. You can add a bit of orange to your cadmium yellow to make
it a little Indian yellow. Alright, so that's the colors. Now that volume ideas
and let's get started.
9. Painting Sunflower field : So let's get to
the painting path. Like always, we will start
with this guy part false. I always like to move
from top to bottom. So whenever the top
portion is drying, I can always walk on the
bottom part if you do it otherwise you will
have to wait for the bottom path to dry. Otherwise, your Hinds
will keep on touching the lower part which
is still wet or dry. Doing it from top to bottom, it would be easier for you. Well, let's first
start with this guy. Your, we will be doing
gradient wash of this guy. So I just wet it the whole sky area with clean water and
then I just deleted my board by keeping a
masking div just below that. And then I'm taking certainly in blue directly on my brush. I've started applying
that on my sky. I will start from top to bottom. Whenever I load my
brush with paint, I will start from top so that all the color you will end
up settling on the top. And as I move downward, the brush will have
less and less of paint and that way it will
get lighter and lighter. That's it with this guy part. As I wanted the focus of this painting to be
on those sunflower. We didn't pink a
lot on this guy. We just kept it simple. While that is drying. Let's move on to
painting though. Sunflower field,
like I said earlier, we will be painting using
wet on wet technique as we will be doing a very
loose die of sunflower. So let's get started. Let's first apply clean
water on the flower. Now wet on wet technique is sometimes quite
frightening because you don't have a
lot of control on your a branch and your paint
and water on the big book. I want you all to note
that control news that, and let the colors
do their own magic. It's okay if you want not getting the results
which you want. I will share a few of the
techniques in which you can control the water and paint. But believe me, you will be able to control to some extent OD. So I would suggest
you to just get to width and let the paint and what you do their
own magic on the people. All right, Once I had
applied water on my paper, I took my lemon, yellow and yellow ocher
color mixed together and added a lot of water
to it to make it lighter. And I started applying
that on the paper. Now whenever you are
using very watery paint, what you can do is firstly, use a synthetic
brush if you want a big nerd so that your brush will need less of photo and the lesser paint would
flew on the paper. Secondary, whenever you
are using watery paint, remove all the excess either on the tissue or on the ballot itself so that you don't
end up it on the paper. So I applied the color urine, they're leaving some
white gaps in between. Once that is done, I took
the same color and now I'm just plant that color
using the same brush. And this time instead of
doing it with the hand, I'm just tapping
off my brush with my finger and you will see that the drops of yellow color
will fall on the paper. You can do it with
your hands as well. It's just that those
chiral still wet. I'm not able to keep the
paper on it otherwise, the blue color would
stick to the issue. Continuing the same
purposes of splattering lower yellow and
yellow ocher color and also the mixed of people. Now, I will repeat the same steps of
creating their doors. But instead of splat drink, I believe the width
with my brush, that is, I will take the mix of yellow
ocher and yellow color, lemon yellow and apply it
with my brush directly. And this time you'll
see that I will create a petal shape around two circles which we
had already created. Why we were sketching. If you remember, we created the center of the flower
just in the front. But what about the flowers
which are in the background? You can still see those
center of the flower. It's just that you are not
able to see them clearly. That what I do is
I take the umbo from her palette and I'll
start applying this small, small dots in the
background to make it look like there
are more flowers. Words the horizon line as well. Now as my thigh area
has completely dry, I keep the cloth on top of it and I'll explain the
burnt umber color. Then I will also splatter
clean water on top of it. You will see that it will
create the blooms on the paper. This is the different,
completely different technique. We are creating different flattering and wet
on wet technique. If you will. With each step it will get harder and harder. What I'll suggest is
just get over your field and really enjoy the process. And if you don't do it freely, you will be more happy with your result and you
will get better result. Just don't fear
what will happen. You will just end
up screwing though, painting and that's okay. You can always redo it. I really want you to just
give it all to this painting. I'll be just repeating the step. That is, I will add
those plateaus. I will add the patterns along
the center of the flowers. We have to repeat this step because whenever you are
working with watercolor, you will see that whenever
you will add one color, but it will get the shape of it. You will have to redo it. With each layer, you
will have to use thicker consistency of paint that it spreads less than, less. One more thing which happens at with each layer the paper is also drying and you were also using thicker
consistency of paint. Spreading of the paint on
the paper reduces gradually. Next, it creates, and
those of the flower, I mixed my burnt umber with indigo to make it little darker. Then I'm ending the
center of the flower. And when I applied, I realized that it is way too
dark for the first layer. I just took the burnt
umber directly from my band and apply
that color first. And once I will
apply that color, I will leave it with the darker mix which we
have already prepared. At this time. We
will not cover no, whose center of the flower
with a darker color? We'll just apply it
around the edges. Once I've painted the
center of the flower, I've been started painting. I'm thinking Indian yellow. And I'm painting around
center of the flower. Also in case you don't have Indian yellow mixed
dynamic range, New York cadmium yellow
to make it more darker, then you can feed it. So painting the flowers and you just have to
paint those troops. You don't have to
be very precise in this because we are
painting very loose tie. Just do this small, small strokes around the center of the flower and that's it. Once that is done
while that is drying, we will add more, but let it dry a little.
While that is drying. Let's paint the stems and
the leaves of the flowers. So I'm mixing my sap green with yellow ocher color and I'm painting
the lower portion, but that value, you
will see that I'm using my size eight brush, but I'm holding it at
almost 90 degree angle. I'm drawing small and
then take strokes. And I'm trying to leave
some white gaps in between. But it's okay if you're
not able to do that, I will show you one more
trick in which you can create highlights that
there's those scratching. We'll do that later. First, let me just paint the bottom part with
the green value. Again, start with the
lighter value and that is add water to
it to make it lighter. And then we will always leverage it with
the darker color. Like right now, I'm mixing a bit of yellow ocher to my hookers green and
making it a little thick. Adding one more layer of the
green color on top of it, doing the same thing that
is adding thick strokes. But making sure that I'm not covering the
underneath layer. But while I'm doing that, I will also add green
color in the background. Now I'm making my permanent yellow or
pink color from my palate. I think some ideas
with the same color. I didn't show you this Carlo when I was watching
all my colors. But as this color was
already on my palette. So I ended up using
that as well. Now I'm adding a
bit of indigo to my burnt umber and
making it darker. And then adding the same colloid on the center of the flower, you see that the
paper has almost, it is still wet, but it is not so wet. With each layer
you will see that the color spread
less and less and you will see that the
details coming together. Then I also switched to my smaller brush while I
was doing the detail part. Now let's add details to our stems and the
leaves of the flowers. So I added sap green color
to my already mixed color. And now I'm doing the same
thing which we did earlier, but this time I'm
using echo consistency of paint and using
a smaller brush. We are painting the leaves and the stem of the sunflowers. Now having me back I know even darker by adding indigo to read. And I'd also add tiny
bit often goes green. Yellow ocher. Color palette which I'm using
doesn't change a lot. And then doing the same
thing all over again. Now as I feel like those centers of the
flowers which we had earlier added using those flattering technique
has completely thrown. It has completely blended
with the background. So I'm just making a logo
color and drawing the small, small dots and just using my fingers to blend it
with the yellow color. I'm really hoping that
you were enjoying and learning some new
techniques with water values. And I'm also hoping
that I'm making, working with watercolors
are little easier for you. I know this is tricky medium, but it is one of the most
fun medium dual, right? If you're watching this, then make sure that you practice all the techniques
which I have shown that once you
practice and do it, it will get easier and easier. I was so excited
to film this glass and all the class project
turned out so beautiful. I really can work with
your opinion on it. Make sure that you leave
a review as well so that I know the few
enjoyed it or not. Alright, so we are done with the flower field now we
will let it completely dry. And while that is drying, let's paint the house
in the background. We have already done the tough part now
it's quite simple. That is the painting,
the house and the land area around it. Now let's post paint though
first layer of the house and then we will let it completely dry while
that is drying, we will paint the
surrounding India, that is the bushes
and the trees. I will take the sap green color, and I will also take the lighter green color
for darker green. And then I will just drop in the darker blue one
side of the tree. Then I will repeat the
same step. Older trees. Now while that is drying, let's paint the line
area just behind that was to do that. I've been mixed
launch off the yellow to my green to make it lighter. I will just apply
the flat wash of that color on the line area. You're, I'm just using my round brush size eight and you'll see
with just one dip, I was able to cover
the whole area. While that is drying, I just switched to my
smaller brush and I will just apply the darker green
color. Just add the top. And I will blend
it with the brush. That land area is drying. Let's paint the bush
around the houses. We will start with the lighter
color of green Valdes. I mixed a bit of them in
yellow to make it lighter. And I'm painting the bush around the houses
with the same color. Now you'll see that
I'm just using the colors which are
there on my palette. I'm not very precise
about the greens. If you are not able to create the exact same Carlo
like me, It's fine. There will be a 100% or different from what
it is right now. I am. That is totally fine. The ones already
about that allot just start with the lighter color and as we will be hearing it. So we will go darker
with each layer. That's still only basic thing that you have to keep in mind. And other thing is
to make your life do you have to add yellow to it and to make your
green dark or you will have to add blue to it. Okay. Once we have painted the fourth layer of the bushes while that is drying, let's paint the
roof of the house. So I took the point
onboard directly from my pen and I'm just
painting the roof, wants to hose with that. Along with that, I will
also paint a vault of the left-hand
side of the houses, but just a little
darker brown color. One would name, which
I wanted to touch on. You'll learn a lot by observing how the artist does
moving his garage or how it is applying the things which he or she is doing before applying the
paint on the paper. These are the things
which is quite hard to explain because artists do it. Because they have
a habit of doing. They don't even realize
that they're doing it this way and that's the reason they are
getting this result. So the more you absorb, the more you will learn. Because not everything
can be explained. You have to watch
and learn as well. Okay, so once we've completed the movement study
painting though, secondly, you were
of the bush this time I build darker green color. I'm doing the same
mapping motion. Apply that color
on the bush area, just making sure that I'm
not covering the whole of the underneath Leo with
the darker green color. Means I've applied
the second layer. I will start applying the third Leo using
even not Googling. Now, let's paint the last
portion of this painting. I will mix my yellow
ocher color with lemon yellow to make
it lit in ideal. I will paint that on the
remaining part of the lung. As I want that motion
to be very light, I will add lemon yellow to it. Then you create a bit of shadow. I added more yellow ocher, and I will also add a bit of
permanent orange on the top. As the color is wet, the colors will blend together, giving if those software look, if that's not happening,
you can just run your brush along the edges
to make it look blended. Then I just add tiny. In grasses background area because that area is
looking quite flat. And to give a bit of
dimension, I will add. Whereas with using the
different shades of greens, I completely missed it
sharing the highlight part, which I said you can do it
with those scratching motion. So like winded obese
clause you can do is you can just use your
kneel to lift off your paint. But this wasn't quite necessary because I have already
left though by apps in grass and the stamp
area in the foreground. But if you feel like
you still need that, you can always use those scratching motion
with your needs. Or you can even use
palette knife to do that. If not, I will show you how
you can create the highlight using the white pen by
the end of this class. Alright, So while
I was speaking, we just added the
doors and the windows of the house using the
dark overhung Carlo. Now I'm just adding
final view mode touches with the brush. Then we will add few
more highlights with the white men. That's it. Let me first as usual, show you the clue of how
it is looking right now. I was just observing
it and I thought like, I still need to add few
more details. The width. So I just took the
darker brown color and I added a little bit of depth to the center
of what that is. I'm just applying it and using my hands to blend
it a little bit. Now let's add few
highlights with the pen. In case you don't have this pen, you can always use
white watercolor and use the tiny little
brush to do that. I'll just apply a bit
of highlight new those center of the flower as well
as in-between the petals. In case you haven't lived
a lot of whitespace in the down portion that
is near the stem area. You can use the white
pen to do that. You just have to paint those
lines like I'm doing right now to create the highlight. We are done with this painting, so let's remove
the masking tape, just make sure that
before peeling off your painting has
completely dry. Once it is dry,
peel off your dip and then angle
which is away from the paper so that you do end
up getting it. All right. I really hope you enjoyed the bright and beautiful and
flowable. Fill it with me. Now, I'm looking forward
to your painting as well. Alright, Complete this and let's move onto other flower
field in the next class.
10. Lavender Field Sketching : Great, So let's get started with our fourth class project. And this time, of course, we are painting lavender field. Don't you think paintings of him without lavender is incomplete? I have always loved
painting lavender field. I've painted so many. In fact, what I'll do is I
will find few pictures and attach it away you so that
you all can see as red. I'm also teaching one of the different kinds
of labyrinth of me in the last class
that the sky glass, so you can definitely
check it out. And these are the views which
I have painted in the past. I'm super excited for this one because this is one of my
favorite subject to paint. That's it for now
you can check out the other paintings
on my Instagram page. So let's get started
with this one. What I did is like
always I started applying masking tape on all
four sides of the paper. Now I'm just running my
finger one more time to make sure that it is
completely stuck to the paper. One status. Then let's get
to the sketching part. Till now we have all the
painting in a vertical form. Now this one, we
will be doing it in a horizontal form or
a landscape style. Alright, let's get started. Let's first draw
the horizon line. Once that is drawn, hybrid game though
mountains on top of it, then let's draw the
different line fields. The foreground part. I always try to keep the final painting on the screen when it
will be sketching or whenever I'm showing you what we are doing
so that you can always referred to what the final picture
would look like. Plus it will also give you an idea of why we are doing it. All right. So I'm hoping
that this is helpful. If not and you find it digital distracting then
do let me know in the review section
and I would not add the final ending
in my next class. So let's get back to
those sketching now. I'm just drawing
the house foods. Now you will see
that I will again erase everything and do it all over again because I didn't
like how houses were looking. Engage us getting along with me, then just stop it, let me complete it. And then maybe you can just
pause the video and do it. Because, you know
how much I keep on changing different things
while I'm sketching. Just stop it and maybe do
it once I'm completely done doing it, your eye go. I will completely erase it and do a different
structure of the house. That is, I will draw domain with a house on the center
and on the sides. I will just short
two smaller ones. Once I've sketched
out don't houses, I will draw the trees
around the house, but the pencil, just
draw one line that I'd note that where I
have to paint trees. If not, you can skip this step. You can directly do it though. Brush. It's not necessarily
to sketch it out. It says that you get
an idea of where you have to aim the trees. Next, I'm just drawing the lines which you'll
see it on the painting. The lavender. I'm drawing it very lightly because
if you draw it dark and you won't erase
it before painting the pencil mark would show
up and you don't want that. Alright, so do it
very, very light. If you are drawing it, then just erase it off
the full painting. All right, now we are done
with the sketching part. Now let's see what colors you will need for this
class project. The fullest one is sap green. Again, if you don't have
the exact same color, you can use any green you want. Just make sure that it
is not way too dark, then you will need
ultramarine blue. Somehow my ultramarine blue
had some other color on it. It didn't swatch properly. So I will just read what does besides that and you
will see the difference. Next, you will need a pen to make the perfect
laminar Carlo. You're, I'm using permanent
rose from Winsor and Newton. It is one of the cardio
from Gottman's knees. Engage, you don't have this. You can use anything. Hello, or you can use a red color which is
more on a cooler oocyte. Then you will need
that oxide purpose. Again, if you don't have this, you can always mix your
pulpal by mixing your red and blue or pink and blue in
different proportions. Alright, next, of course
you will need indigo. I mean, by now you
would know that this is what no permanent
color in my palette. Then you will need
burnt umber paint. Those roof of the houses. Lemon, y'know, last day, Indian yellow for the land area, as we are less to make idle. These are the seven
colors which you will need to paint those
11 goofy age, grab your cover, Louis, and let's get started. The next fats are the
two you guys that
11. Painting Lavender Field: Let's get started as usual, we'll start with
this guy forced. Again. I don't want the
focus to be on this guy. That the reason
we will just give flat wash to the sky
using ultramarine blue. So I will directly
take my brush size a, and I will apply algebra in blue color directly
on the paper. So this time we are
doing wet on dry that we are not
writing this guy area is the portion is quite small so it will be able to cover
the whole area quickly. Plus B are using or larger
brush. That will help. Simple. Just give the even layer of
ultramarine blue on this guy. Now is drying. Let's paint the labyrinth of
meeting in the foreground. So to do that, let's first
prepare our purple color by mixing pink and the
ultramarine blue together. If you are a beginner, I
would suggest you to prepare all your colors beforehand
before you start painting, that you don't end up
wasting your time while your paper and paint
this red in making. I'm mixing the colors. I just prepared my
open color by mixing my bank and blue in
equal proportion. Once that is done, I will apply that color on
the paper and in-between, I will also take the pink and ultramarine blue directly from the pan in a lighter value
and apply that on the paper. As I don't want the whole area to look on color and light. That's the reason I am adding different
colors in-between. But make sure that
you are adding the color from the same family. That is the color which we mixed to make our
lab window color. That's the only two column
which I'm adding on the area. Once that is done, I will make the same
purple under the Bianco. I'm mixing just a
tiny hint of indigo. I will start painting the lines which we drew
earlier with the pencil. But I'm doing it while
my paper is still wet. So you will see that it
will spread alerted. And that is exactly
what we want. You just have to go
one or two shades darker to the color which
you have already applied. So don't make it very dark, otherwise it would look
way too prominent. And that is the only thing
which you will be able to see, which we don't want. Even if you add indigo to
width, added very light. And if you feel like the
color has got way too dark, then just dilute it with a
pink and ultramarine blue, and then apply it all to make sure that you are
applying it while the paper is still wet so that you don't get harsh lines on the right. Once that is done, let's paint the bushes
on top of the field. I'm mixing my green color, sap green with Indian
yellow to make it lighter. And then painting the
smaller brush on top of it. Using my smaller brush
is high St. George. And just to make the
tapping motion, the brush. Once we paint the bush area, those guy would have
been completely dry. Now let's move on to painting
the background mountain. Thought that the mountain
area was quite huge, so I won't be able to cover
the whole area quickly. So I just thought
it adding water to it that we can do wet on wet. But then I quickly
realized that it won't be that difficult
to do wet on dry. I didn't apply water
to the bottom version. And I'd started applying
those sap green, yellow on the mountain forests. I applied to sap green color and then I apply a lighter
value of the same. Now, you just have to keep
in mind that you have to use differentiates of green to paint the
whole mountain. You will see you on
the left-hand side where I've kept the
final painting, you see that the
whole mountain looks 3D because we have used
Differentiating of green. Create that depth and
dimension to you. Just have to do the same thing. Don't give the whole
mountain one color. Keep on changing. If your colored paper is wet, it will be very easy for you to blend all the colors together. Also use a larger brush. Right now, I'm
using a size eight. This brush holds a lot of water. In. Your brush doesn't
hold water or paint. And online you can use
even larger brush than this so that you will be able to cover the whole area quickly. As we are not doing
a lot of these days. We are just adding differentiate your
screen and blending it together using a larger
brush won't be a problem. While we were talking, I added like the green condo
on top of the mountain. That is the mix of
Indian yellow and sap green mode of Indian yellow and less off sap green
to make it lighter. And then on the right-hand side, I added Danko value of sampling. That is, I added a bit of
indigo to make it back home. Now to differentiate two different mountains,
what I'll do, I will take or darker value
of green color and I'll draw the line on top of the mountain and then I will blend it
on the left-hand side. You see I'm doing right now. You instantly see that there are two mountains student doing
everything wet on wet. Then I took algebra review
and applying it on the bottom of the mountain just to
create a bit of dimension. For now, you just leave
your mountains to dry. We will add more details. Once it is completely drug. While that is
drying, let's paint the other lavender field using the same technique
which we did earlier. So that is enforced,
prepared my color. I will apply the purple
mixed to it and in-between, I will also add pink
and ultramarine blue. Again, you have to
use very light value of all the colors
that you're using. You need to be able
to see those people. That's how transparent
colors should be. In the same way.
I will also paint the avenue behind the houses. Once lattice none leftover line. To paint that I will take Indian yellow forest
and we'll apply that. Let's clean my brush and
spirit all the color, the leftover lined area. And that way the top
portion would be the log m. The rest of
the area would be like, no way everything is drying. Let's paint the
roof of the house. We will have to add more. Leo is to procreate
three-dimensions, but we cannot do it right
now as the paper is right, we would add all the details
using wet-on-dry technique. Just before painting the roof, I decided to add more to the
mountain to I just created the line using the
darker green color and then using the damp brush to blend it with the vacuum. And this way, I just created different mountains using by just adding those
lines and blending it, you are now able
to see that there are three different mountains in our painting seem vague when we added like the color on
top of the mountain, which is on the left. This Make it looks like that is where the
sunlight is hitting. Whereas the mountain which
are on extreme right? It is dark because the sunlight is not
anything that mountain. This is how you
create the effect of light in your painting. Why we were doing that? Same way. I differentiate it, the line just below that. So I painted the
Indian yellow color on the right-hand side to
create a look of that. There are two different lines. Alien. Now, let's
paint the bush area. It owning the fingers to make it look like they're
Alt-A for inland areas right now is you'll see the
labyrinth of theory behind ours is looking as
if it is though. One area budget doesn't want to differentiate
it or to make the partition moving
out bush along the borders to make it faster. What I did is I just
created the line forest. Then on top of it I will
do the tapping motion. Make it look like Bush. If you don't know,
this technique is widely used around the world. That is to divide the land
by creating the partition using different types
of glasses or bush. So that way the note that
this portion of land is of one corner and the walls are not created in
the line theory. This is how we get the right. Less if they are using animals
for the work on the field. The broad Atlanta, which they
can eat like multipurpose. They divide the land
as well as that grasses are being
eaten by farm animals. Why we were thinking, I also did a bit of darker
color on the bushy, which we are impaired
in this dot. Now let's paint the horses. Weren't on board
directly from my iPad. I repaint over we're
using that color. You wouldn't be wondering
why my candidate is dim light if I'm taking
it from the gun, That's because my brush
hard Lord of mortar. And I just did a tiny
bit of the paint. So that way the color is nipple in case you weren't able
to do it from the pan. I would suggest you
to put your colors on your palette and add water so that you are
certain about it. I am very used to and I get an idea of how my color
would look on the paper. You will get the new order
of practice and experience. But for now, I would suggest you to mix your
colors in your palette. I'd be so general biology. That is joining, Let's
add Mauboussin around the line to paint the bush. Again, I'm using this
morning for us to do that because we are
painting small coaches. If I use your laws of brush, I will cover the whole
area with just one stroke. Change your branch
when it was windy day or whenever you are
painting smaller subjects. Now let's add these into
our lavender field. I've been mixed my lavender, my mixing ultramarine blue. And you'll make it go. And then I would create a beginning watering
mix across the scene. Then I would just draw those lines which we had
earlier drawn with the pencil. Do it with one stroke that this load your
brush with paint. Then just do those
wiping motion. And also hold your brush at like 80 to 90 degree angles
so that you are just using the tip of your
brush to draw these lines. Whenever you are
painting one line, you don't end up getting
the whole line. It's okay. We want the effect making
it look imperfect. Do it, like I said, just do one stroke and engaged. If you missed some
alien, that is fine. Using the same technique
I really felt board. Next, let's add bushes
on the horizon line. That is the line where the
mountains are starting. The green color. I will directly take a darker
green color that there's a mix my sap green
with indigo to make it an uncle would start painting the bush on
the horizon line. Again, you have to
paint them small because these Bush's Albania, far away from our viewpoint. It will have to make
them look smaller. Otherwise they would
look like there are trees over there
instead of bushes. Once I've made in the bushes, I will just use my
finger and damp it, and this will help the colors
to blend with mountain. Next, let's add the trees. As you will remove forest, add those like DO value. That's why I've mixed my
lemon yellow with green, and I will first apply
the lighter color. Then on the left-hand side, I will apply the darker color to create a little shadow
and depth on the trees. I will repeat the same
steps for all the reviews around the houses as realized where the
trees which are behind. Now we have painted
the trees and we know exactly where we want. Let's add more details to it. I will make a very
dark green color by mixing my theme colors, that is indigo and sap green. And I will add one more line to all the trees to
create more shadow. Colors behind the trees are
already in green value. When we painted them on, the trees weren't
looking more prominent. Studies really hard to add more darker green
color over it and show it on a painting that is drying. Let's paint the
walls of the houses. So I want the world to
be completely white, but of course we can
walk in with white. It looks very light value
of ultramarine blue. Just paint that on how to
create a bit of shadow. This is hardly do President
of Maine and rest. Everything is water.
I'm doing this. A little bit of
color on the house. Once I've applied
ultramarine blue color, I just took the purple mix which I already had on my palette, using the same
watering mixed and applying those rules to create a bit of shadow of
the roof on the voids. Then I'm leaving it
to dry. This drawing. I'm adding more details in
the UNC that I also used the issue to lift off paint on the walls when I felt like
I didn't have color to it. So you can also use this
technique of lifting the condo from the book, but make sure that the issue
is completely dealing. I know mine is dirty, but I used the white part
to lift off the paint. Otherwise, what will happen
is though on the tissue will go on the paper
instead of lifting, you will apply the color
on the roof, right? Be sure about that. Now I'm adding more
shadow under the roof on the boy using
ultramarine blue color. You can also create though
Greek or no by mixing blue. And then create the shadow on the wall that Kylo
would do look good. But as we are using
a very light value, I will just directly use the blue color to
paint the shadow. Now when that is drawing, Let's begins to Amonton's. First. Let's just
differentiate the mountain because right now we are not
able to do it completely. So what I did is I
applied the darker green and created their own line where I wanted the
suppression of the mountain and then I'm
just using the damp brush. Then with the background. I know right now
it's looking way too dark and unknown, true. But let it be. We will add movie begins to mountain and then
everything would sit down. You can see it on the left-hand side wherever one's attention to
final painting. So don't worry,
just as you've been the process of painting
and confidently, that even if you screw it up, you know what to do next. Whenever you are
painting, be happy. Do it for fun so that you
will enjoy the process more. You love to end result
in when Congress. Once we have drawn the line. I will use those same
color which I have on my brush and I will
just start adding dots. Or you can see this once more. I'm adding this because
I want to make it look like there are lots of
trees on the mountains. As far away from our viewpoint, we don't have to do we just have to make it look like
there are two 0s on that. So I'm using the green color. Again, I haven't used very
dunk value as Dublin. I've used transparent green
by adding water to it. And I'm adding NAD mountain. I've been covered the
whole of the mountain using the same
stroke in-between, I will keep on changing the
value of the green color. In some part I will
paint it banker, and some part I will make it. The technique would be
seen that this adding small lines all
over the mountain. Also when you are painting
the trees in Mountain, make sure that you are
painting some small, some thicker, some
larger. And some denotes. Don't be very certain
about how it should look. Roughly do it and do it fast. That mean you will get different strokes and it will look more
natural. The course. Team sites do it
faster and believe me, you will get the result, what you are looking for. If you do it slowly, you will think a lot. But if you do it fast, you want things and you will
get natural looking strokes. Now I'm pretty happy with
how it is looking right now. Let's add few more
details on Windows, which is in the foreground. Again, I mixed my
lavender garden by mixing my ultramarine blue. I'm using the same
small numbers. I'm just adding small
and small grass strokes. Lines, which mean I've already created the column that is
very lighter value ladders, adding the water to make it
fit into my painting this on the portal to create texture at both the exits on the issue. Then creates March
one rectangle issues. If you're not doing
it with your brush. You can always use
complex pen to do that. But slowly and steadily try and do everything
with your brush. Don't add to your painting
and make it complicated. If you load, it would look
more and more natural. It's not that difficult. It's just chart knew me to get under control on your hands. That's it. And with practice, you will be definitely
able to do that. Once that is done, I took very light value
all burned on both, created this seam lines only
loom back the line ADR. We are almost done
with our painting. I will just add few more
strokes urine there. I don't know when to stop. Always be like I need to do more than just adding drunk with strokes on the drink
is not all degrees, but some of the dreams. Same way I will do it
on the bushes as well, so I will add the darker hello. Now, you can paint off your masking game maker
just adding the nucleons, all corners of the paper
is dry so we can peel off. I didn't angle
which is away from the papers so that you
don't end up getting it. Right. Let's see the final
results of our lab window. And it is looking beautiful, especially loves the
mountains in the background. I know it was a bit of work, but it was totally worth it. And I hope you liked it. I'll see you guys in the
final class project.
12. White Wild Flower Sketching: Oh, my God. I'm so happy that you guys reached in your SO. Welcome to our last and
final class project. And this has to be my
most favorite one. So this time, we will be using my influence to
paint those flowers, which we saw earlier. That is the white flowers. And yeah, in case you
don't have my word, you can paint them using
the white wash needle. But if you are in
the water close, like since a long time and
you are enjoying this medium, then I would suggest
you to buy one masking. This will help you a lot less. It is not that expensive. You can buy it from the blue
or some other brand and invest a little and it will make keeping the right
piece a lot more easier. Also, one more thing
that you have to keep in mind when you are using masking through it is that you have to use
the right people. If you will use hide,
make people anymore, you will remove the masking though people would
come out with that. So to avoid that, you will have to use paper
which is not handmade. And if you are using handmade
people or any people, Fauci just tried like just apply or thought
of masking fluid, let it dry and then remove
it and see if the paper is friendly with the masking fluid and then maybe you can
start your artwork. All right. So I'll share
more tips later on. But before that, let's start the sketching part I
have already started. That is, I applied
the masking tape on all sides and I
started painting. I first painted the
horizon nice and above that I painted
two mountains. Then I just draw the lines towards the
center of the horizon line. And you see that on that line
will be joined by injuries. Next up, I'm just drawing
small, small circles. On the foreground part
that is the flower. And on that thought we will be applying masking
to the way you see those dots or those circles which are in the foreground
would be larger. And as you move towards
the horizon line, it will get smaller and smaller. You know, the logic behind that, that is the flowers which are in the foreground would
be nice to us. That's why they are larger. Whereas the flowers, which
are near the horizon line, would be smaller because
they are far away from my viewpoint. All right. So that's the basic logic which
you have to keep in mind. You can still think the smaller fibers in
the foreground do, but make sure that
you are painting larger ones as well. All right. I will alter draws
those stems of the lovers, but not necessarily. You don't have to do that. I just did it. Okay, now I'm just taking the masking fluid on the cap and I will
start applying it. Also, whenever you are
applying masking fluid, make sure that you are using old brush or a brush
which is of no use to you because it is very hard to clean the
masking fluid from the brush. Even if you are washing
your brush right after that it is still difficult because it
sticks to the crystal. And if you will use the issue for the masking
fluid, believe me, you won't be able to use that for anything else. So you are. I'm just using a small round
brush and I'm just applying the masking fluid on those circles which we
have already drawn. And once you will apply
the masking fluid, you will have to wait for the masking fluid
to completely dry. You cannot use your
hair dryer to dry that you will have
to let it air dry. Otherwise, if you
will use a hairdryer, then you won't be able
to pull it off easily. So avoid doing that and it
won't take a lot of time. It will hardly take
30 to 40 minutes to dry to let it
air dry completely. So first we will apply
the masking fluid. Once that is applied,
we will let it dry. And while that is drying, I will walk you through
all the clothes that you will need for
today's class project. And I will also. Sure you don't mixes, which we will be using
for this class project. One more thing is, while
I'm applying masking fluid, I really not only apply on those logos which I
have already sketched out, but I will also apply it at home that because I didn't
want to sketch every day, I needed to, I thought
I will directly do it with the fluid it says. So here I am, just adding tiny little dots near the
horizon line because I want to showcase that there
is a huge wide field. You saw that studies and we will have to draw a
little white flag. Listen, I didn't end up getting everything because
that would take a lot of time. Plus, that isn't necessary. So you're I'm just adding white dots directly
with the my brush and masking would but if
you feel like you need to draw first and then
apply the masking fluid, then you can do that as well. But believe me,
it's not necessary. You just have to ignore judgment and just keep
one thing in mind. That is the flowers which are in the foreground
would be larger and the flowers which are in the background would
be a little smaller. And that's it. All right. Also apply a thin
layer of masking. If you will apply a thin layer that will dry much more faster, then if you will apply a
thick layer of masking limit. Many times I've seen people
adding a bit of water to your mask in which you dilute it a little or to
make it a little trendy. I haven't tried this method, so I'm not sure if that works, but if you feel like
you're masking flu, it is way too late, then maybe you can
try doing that. My no masking fluid
is quite liquidy, so that wasn't necessary. All right, so, yeah, try everything before you do
it on the final painting. Okay, now let's study all the colors that you will
need for today's class. So the first one is my
favorite and my most used. I think you'll already
know that is the Indigo. Next I'm watching
Ultramarine Blue. So this color we will
be using again to paint the cloud and to mix
apple blue color. Next is permanent
Rousseau, Mr. and Newton. Again, you'll be
using this color to paint the clouds and to mix. Up next is flaming red. You don't need this
exact same fella. You just need any kind
of bright red color. Because we would be
using this color. It would be straight up, Opal. I'll show you. Next, you
will need green. One, Dumbo. Yellow. This one
is from St Helier. In the envelope to mix
our little greens. Lemon yellow. Again, you
mix the different shades of greens. I'm sorry. So these are the loans which we will need for this
class project. Now let's study how to mix up
open kind of model clouds. So first I will take my client that is bone and choose
from instead of new bin. And I will mix a bit of. Ultramarine blue to. First iPad output will gallop. Now when we mix
Ultramarine Blue, you will see that it is
looking way too bright and I don't want to
cry to look right, because my main focus
is on the flower pot. Plus, I want to make it look
like an evening sunset sky. So that's the reason
to exaggerate it. I just added a tiny
bit of flaming red to just dilute that color
and decrease the saturation. So I've swapped it for
you and you will see that it is instantly looking
so much lighter. Now we'll be also using our
beach clothes from the sky. So I mixed my flaming red with Indian yellow and I add
a tiny bit of white to it. And this is the peach colour which we will be using
for the sky as well. Lastly, we will also be
using all the Irish actors. I will take my ultramarine blue. I will add tiny bit of
white and very light, tiny bit of flaming red as well to make it a
bit more populist. And this colour also we
will be using for the sky. All right, so that's it. Now grab all your colours and let's get started
in the next class. I am hoping to see you there.
13. Painting White Wild Flower Field: So my masking fluid
has already tried. So let's get started. Let's first start
with describing. As always, I have already prepared my colors while I
was watching for you guys. That is the open mics
on the beach mix. So let's get started. We will be doing
wet-on-wet technique. So I will first apply
water on the sky area using my round brush size
a. I will do it twice, or you can even do it
multiple times, that is fine. But make sure that
you are covering the whole area with
even layer of water. It's okay if the color
goes the mountain as well, because we will be painting those mountain in a
darker green color. Layering, that
won't be a problem. Alright, while water is
settling onto the paper, I will prepare my lavender color that is mixed ultramarine blue, white, and a tiny
bit of naming grid. And I will start lying that color from the
top of the sky. Again, I'll be using very
lighter value of this color. That is, the color will have more of
water unless of paint. As you can see that
you were able to see the underneath people
just below the colors, and that's how transparent
you want your color to be. Once you have applied
the color on the top, I will start applying
the mix of engineering, flaming red and tiny bit
of white from the bottom. I will also lift off
the extra paint which has accumulated on the
side of the masking gave, if you will not do that, the color will flow back to the painting,
creating the blooms. Once we have created
the base of this guy, we will start
painting the clouds. I've already prepared my colors, so this is mixed with
ultramarine blue, pink, and tiny bit
of claiming red. I've already shown you
how you can create this color in the
previous class. Or one status done, I will take my synthetic
round brush size two. I will load my brush with that pain and I will start
applying that on the top. Again, like I showed you in the practice glass or
the technique lines, you have to remove the excess paint from your brush before you apply it on your epo, as well as uses synthetic
brush to paint the clouds. You're asked though color
is not that journey. Aicpa has also tried alerted. That's the reason
though clouds which I'm applying on your thoughts
are not spreading a lot. But I would suggest you to go through the steps that
this uses and that will remove the excess on your palette as
well as on the tissue. And then paint the clouds. Again, if you feel like
you're underneath layer has dried or it has almost try, then let it dry completely. Then you can rewrite your paper as I showed you in the
technique section. Once you read the paper, you can paint the
clouds on top of it. Alright, once we have painted
the first layer of clouds, Let's add the shadow
on top of it. So you're mixing
the same volume. But this time, I will
add lots of water and mode of ultramarine blue
to make it little Danko. And I will paint the same
color onto the clouds. The shape of the clouds
is quite simple, wider on the top, and as you come towards
the horizon line, it will get narrower
and smaller. This is what you
have to keep in mind when you are
painting now gloves. I will also draws smaller, tiny Lucene allowed
near the horizon line. To do that, you just have to do tiny little dot on the paper. And automatically the color will spread auditor making
it a little larger. That's it. I will stop your boat over the
world if you would, with the underneath layer
which we had painted earlier, not as though opened on the beach color would
not show up and the guy would be covered with
the darker purple color, which you don't want. I also forgot one thing is why we were
painting the nodes. I did eg the line
might be more that is, I applied masking
tape underneath to create this landing position. That this landing intuition will help the colors to fluid known. Now let those sky ADR completely dry
while that is drying, let's paint the foreground. But before you start
painting the foreground, check if your masking fluid
has completely dried. You either the color of the masking fluid
would have completely changed or if you will
touch your masking fluid, it won't come to your hand
and it will still sticky. So that's how you can check if your masking fluid
has dried on node. If you are confident that it
has dried, and let's start. Let's start by applying water on the whole of the
foreground area. So I'm applying the water
multiple times because that is quite a large portion of
the people and we will have to work for
quite a long time. So I'm just making
sure that my people would stay wet for a
longer period of time. Alright, so why would start
with my lightest color? That is the yellow ones I've applied the
ending and local law, I will start with the sap
green color from the top. Again, you don't have to
be very precise of way. I'm applying the color. Just roughly paint the colors as we are painting the flowers. Okay. Change alert. We don't have to
do a lot of ETAs. We are just applying colors
and creating, in contrast, the forest bagging on here, I'm using a larger brush size that I can cover the whole area. Once I've applied those
that bring cargo, i's duly increase the saturation of the same color on the view. At this, I wanted though ocean, which was near the horizon line, to be earlier than the
one in the foreground. I wanted it to be
a little lighter. So you and I am painting the
lighter colors like yellow, yellow ocher in the foreground, whereas the darker greens in the background that is
near the horizon line, as the paint and the paper is rare to whatever
color you will apply on top of it would
be easily blended. Now as you see why low people
was in normal position, the color was really on
the DHAP towards the sky. So to avoid that, I just did my board. So you can apply masking tape ballooned to tell if
you're bored. Right? Now. Let's paint the
stems of flowers. I'm just taking my smaller brush and using the back of the
brush to create the stem. And you will see
nitrate will create a little dent on the paper, which will make it look like
the stem. That is done. I will mix my sap green with
yellow ocher and I will start painting the stem of the flowers and go
full grown part. Moving to keeping mine is I'd
be using the consistency of paint so that the paint will spread a little
less on the paper. This is just a background
layer. For the stem. We will have to paint more layers of the same
as the paper is random, color would spread alerting. You will have to do
with multiple times. You'll see in the finite
picture on the left, you will see that ocean, which we have left white
would be a little darker. Anyways, I decided to just drag the green
color all over it. Then we will paint that area. Doug. Now why my
paper is semi wet. I will use my name to create
the highlight on the paper. All you have to do is just drag your nail on the big board. This technique will only work if your paper
is seeming wet. If it is to read, the color will flow and
you won't get this effect. So make sure that your
paper is about to dry and then you are doing
this technique and this would give you an
amazingly highlights. The same technique
I use to create those stem on the field as well. Now I'm just taking the
plane model and dropping that water onto the paper to create little rooms
and a bit of spectrum. Again, doing this, why
might be but as red. So that if I will
splatter sampling motto, it will create the rooms. You can see it on the
right-hand side of the table. That is done. Though color is almost drawings. Who I will just remove those on the board and keep it flat. Now using those teams
between painted earlier has already spread on. Again, I retake the
sap green color. I will use very
thick consistency of paint and I will start
painting the stems again, using a smaller brush
size to paint the stems. And holding my brush at almost 90 degree
angle so that I'm just using the tip of my brush. Paint the stems. You see I'm painting the stems in
different directions. Sued. You have to do the same to make it look
other than natural. You can draw random lines, but makes sure that you
are also connecting some lines with the flour
to make it more realistic. I'm just checking if my video is dried and it has completely dry. So let's being the fourth
moment on top of it. So I'm mixing my
sap green, I know, but indigo and a bit
of yellow ocher. And I'm using forest mountain, just giving the flat wash clean mixed which we created
within the mortgage. While that is drying, I'm using my name's to create a highlight
in the foreground. But if you don't have needs, you can always lose. Button knife or even
a palette knife or any sharp object like skill. To do the same, all you
have to keep in mind is the people shouldn't
be way too wet. Because if it is too wet, the color would flow in the mocks which you are creating right now
won't be shown. And that's it for
the fourth layer. Now let everything dry. Once it is dry, we
will move on to the detailing part and
painting the rest of the AVS. You'll see once it is dry, it gets a shade like whenever you are
working with watercolors, make sure that you ain't one shade darker than what
you actually want. Now let's paint the mountain
on the horizon line. So this time we will
paint it like I'm mixing my lemon yellow and tap bring together agreed or
lighter green color. And then every use that color to paint the mountain
on the horizon line. It will also makes a
tiny bit of burnt umber, do that, make it under the OD. Then using my smaller
brush size tool and painting that night drink
Gallo the mountain. Once we have completed
the mountain pod, Let's remove the masking fluid. You can remove the
masking tape using your hands or you can use
an eraser to do that. If you're doing it
with your hands, just make sure that
your fingers are clean. If it will have a color, it will go on the paper
and white flour would turn into the color which
will be there on your hand. Dean your hands before doing it. Just lonely and
you will see that the masking fluid will
be easily medieval. People. Now I will just take over larger dry brush and just
remove the masking fluid, which is there on the paper. That's it. Now
once that is done, Let's move on to painting. Why you flowers as
I don't want it to be complete white as it
looks very unnatural. We will apply color on it. But before we do that, let's take the rigger brush or, or smaller sized round
brush and paint the stems of flowers using the
term dry technique. If you'll see we have done all the stems didn't
know using return rate. Now let's add more meetings
to painting using wet-on-dry. You're, I'm taking
no green color which was already there on my palette. I'm using very small branch
that is size the row. This is from stationary. I am loading my
brush with paint and using the same motion
that is holding my brush. And I had almost 90 degree angle and distance of the language. I'm also connecting few of
those flowers with the stem. It will make it
look more natural. Now I'm mixing darker green. I'm mixing a bit of indigo to my already green mixture
and painting the stems, again using the darker green. Apply this color or Lord, I will just apply it
for few of the stems. Now let's paint the flowers. You can keep the flower
white if you want, but I am not liking
it. Complete white. What I'll do is I will take a yellow ocher color and I will apply it just
at the bottom. Then I will take the brush and take a little bit
of water on my brush, and I will spread that
yellow ocher color to the whole of the flower. I will repeat this
for all the blob, especially the ones which
are in the foreground. This will give a little bit
of color to white lovers. If you want, what
you can do is you can create a very light value of yellow ocher color that
there's ADD lot of water to your yellow ocher and it
will be lighter data. You can apply that color for all the flowers rather
than, you know, applying it at the
bottom and then blending the color on Blackboard so
you can do it either way. I just preferred this
way because I didn't want all the flowers
to look similar. So that's the reason
I'm doing it this week. But at the end, I realized that if I would have just applied light value of yellow ocher
color in an applied Sports, I'd been bored with
the same color. It would have made
any difference and it would have been a
little more easier. I split. You then do that. It will take less time to paint all the tiny
living flowers. The flowers in the background. I will just take the yellow
ocher color directly on my brush and start
applying it randomly. You went everywhere,
no two flowers or even most days white
completely, that is fine. You don't have to apply this
color for all the flowers. While that is
drying, let's paint the pine trees on the
sides of the flower field. So for that, let's
first mix our green, sap, green and I will
add a bit of indigo. It to make it little darker. And then we will start
painting the pine trees. Now understand one thing though, trees which are towards the horizon line
would be smaller, whereas the Dewey's,
which are away from the horizon line would be
larger as the unknown to us. This is one thing
which you have to keep in mind why painting
the pine trees. To paint pine trees,
it's quite simple. I have shown you this technique a lot of
times in my earlier classes. So if you have watched it, you will meet with
painting pine trees. Let me just guide you
how you can do it. What do we have to
do is first draw a straight line
using your brush, almost 90 degree angle. When to have drawn
a straight line, you will have to draw strokes
from top to the bottom, but starting from smallest
strokes on the top. And as you move downwards, you will have to increase
the size of the strokes. Pine trees are
triangular form that is narrower on the top and
wider at the bottom. That's the reason you
will have to paint it. This way. That is, strokes which will be on the
top would be smaller and as you move downwards it
will get larger and larger. One more thing to keep
in mind when you are painting is if you will use a brush which
has a really good tip, painting pine trees
would be easier. You can do the whole of the pine tree
using just one brush. If you don't have it, what you can do is
you can use size 0 or size one brush to
draw those straight lines, as well as to draw the foliage on the top
with the smaller brush because you want that stroke to be smaller and as
you move downwards, maybe you can switch to
your size two round brush. Continue painting pine
trees on both the sides. Making more and more natural, what we can do is you can change the directions
of the pine trees. That is, paint some trees, land paint some little larger and thicker paint
some trees smaller. That way by just changing the size and the shape
of the pine trees, you will be able to make it
look more and more, not June. Stop it if you feel like the
painting looks complete. Because if you overdo it, you won't be able to identify that you have painted the
pine trees over there as it would look
way too crowded and the strokes which
you have been there would be completely gone. If you will start
clearing it because we are anyways using a
very dark green Carlo. So you won't be able to use lighter green
color on top of it. I'm just painting few
more smaller pine trees near the horizon. Then we will be done painting Your, I'm just adding
fuel most dense to the flowers, losing unclean. Lastly, let's add
few more splatters and the flower field, so forth. We really adds plateaus, all fleeing follow forest, I recover their top issue and then I will load my
brush with paint and starch, splat, drink no
color on the people. A lens that is moving
do the same thing. That is repeat the same process. Using lemon yellow. I will add a bit of green, which was there underneath to
make it light green color. And I will start pledging that on the board some
of our photography. The same thing. We will repeat one more time using
the white color, and this will add few more
flowers to our flower field. I love adding those
to the painting. Beautiful, extra, one stride,
lines, menu, character, you get different kinds
of dots on the people, which makes it look so Nigerian. Let me clean my brush and then let me just
remove the tissue. And let's see how our
final painting looks like. Isn't this beautiful? This has to be my most
favorite last project. It has now gone to paint and posted in the project
section of this Diaz. Now once it is dry, let's remove the masking tape. I didn't angle which is
away from the paper. But before that, let
me show you the close up of how it is looking. Now my painting has
completely dry, so I repeat from all the sides. This is how gorgeous
painting, heist film. Or let's wrap this up. I will see you guys
in the last class.
14. Thank You: I'm so glad that you
all reach the new. Firstly, thank you so
much for taking out your precious time and
watching this class. I hope you enjoyed loaning
painting along with me. I'm also hoping that I made, working with watercolors
are little easier for you. Now, it's your turn
to paint and share your painting in the project
section of this class, I will be eagerly waiting for your painting in
the project section if you liked this class. And don't forget
to leave a review, as it will help me reach
more number of students. On right? I'll see you guys really soon in the next class. Bye.
 Shreya Gada, Artist