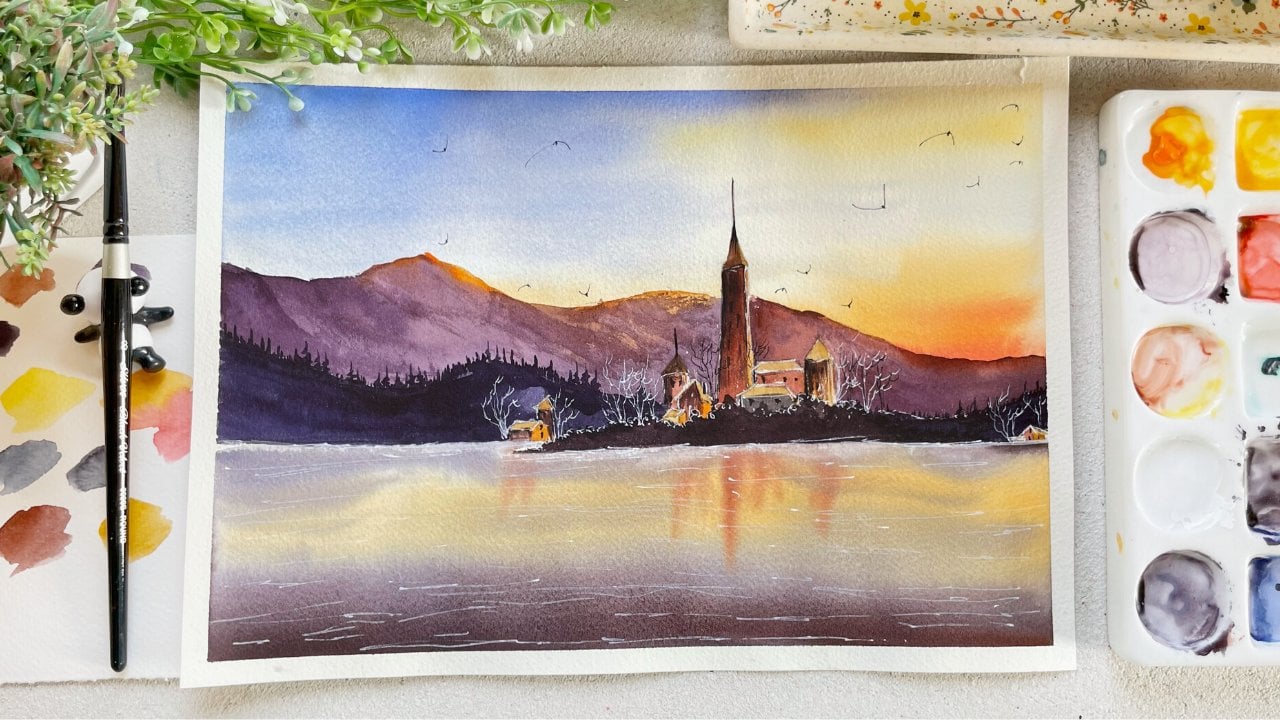
Transcripts
1. Introduction : I use someone who really wanted to get started
with watercolors, but never got the right
opportunity to do that? Or are you someone who was really scared to start
the journey with the Palo is someone who has been working with this medium but not satisfied
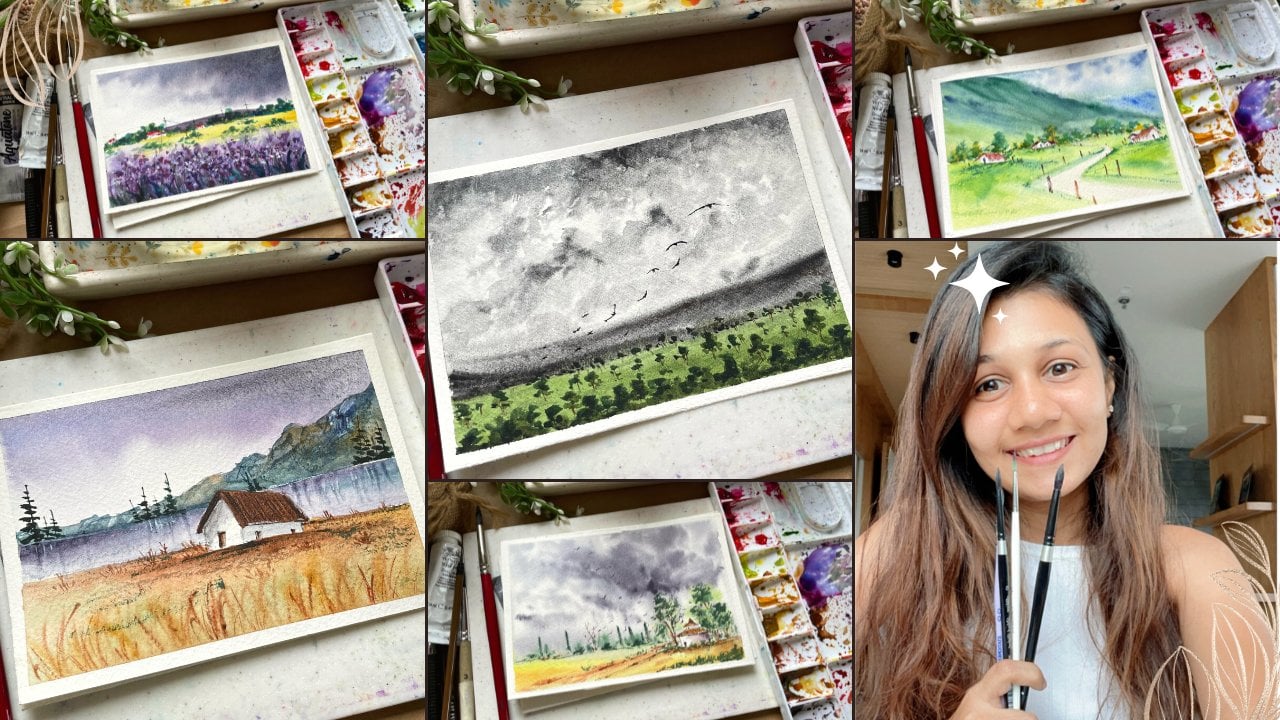
with the result, then this class is for you. I'm sorry, I couldn't afford it. I'm artists, art educator, skin shaking and
YouTuber from India. So today I am
welcoming you to join me for 15 days, many
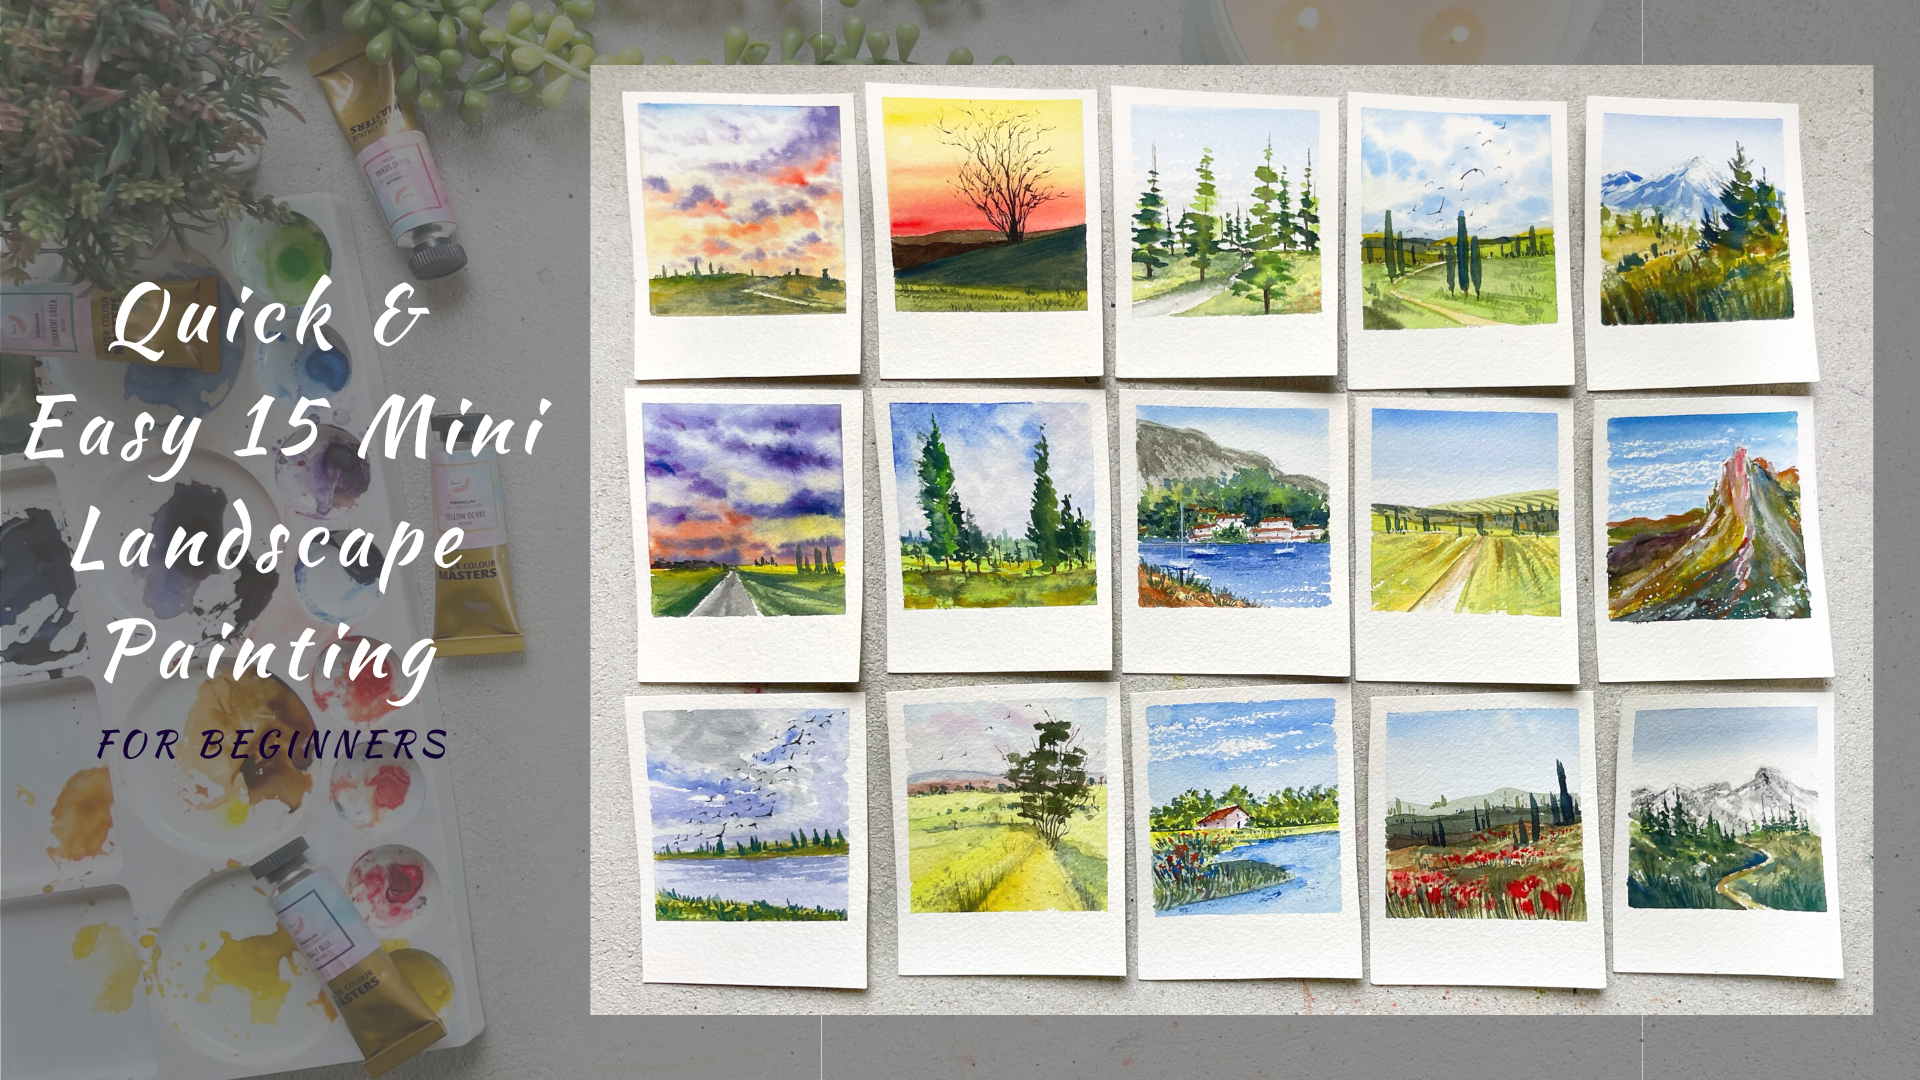
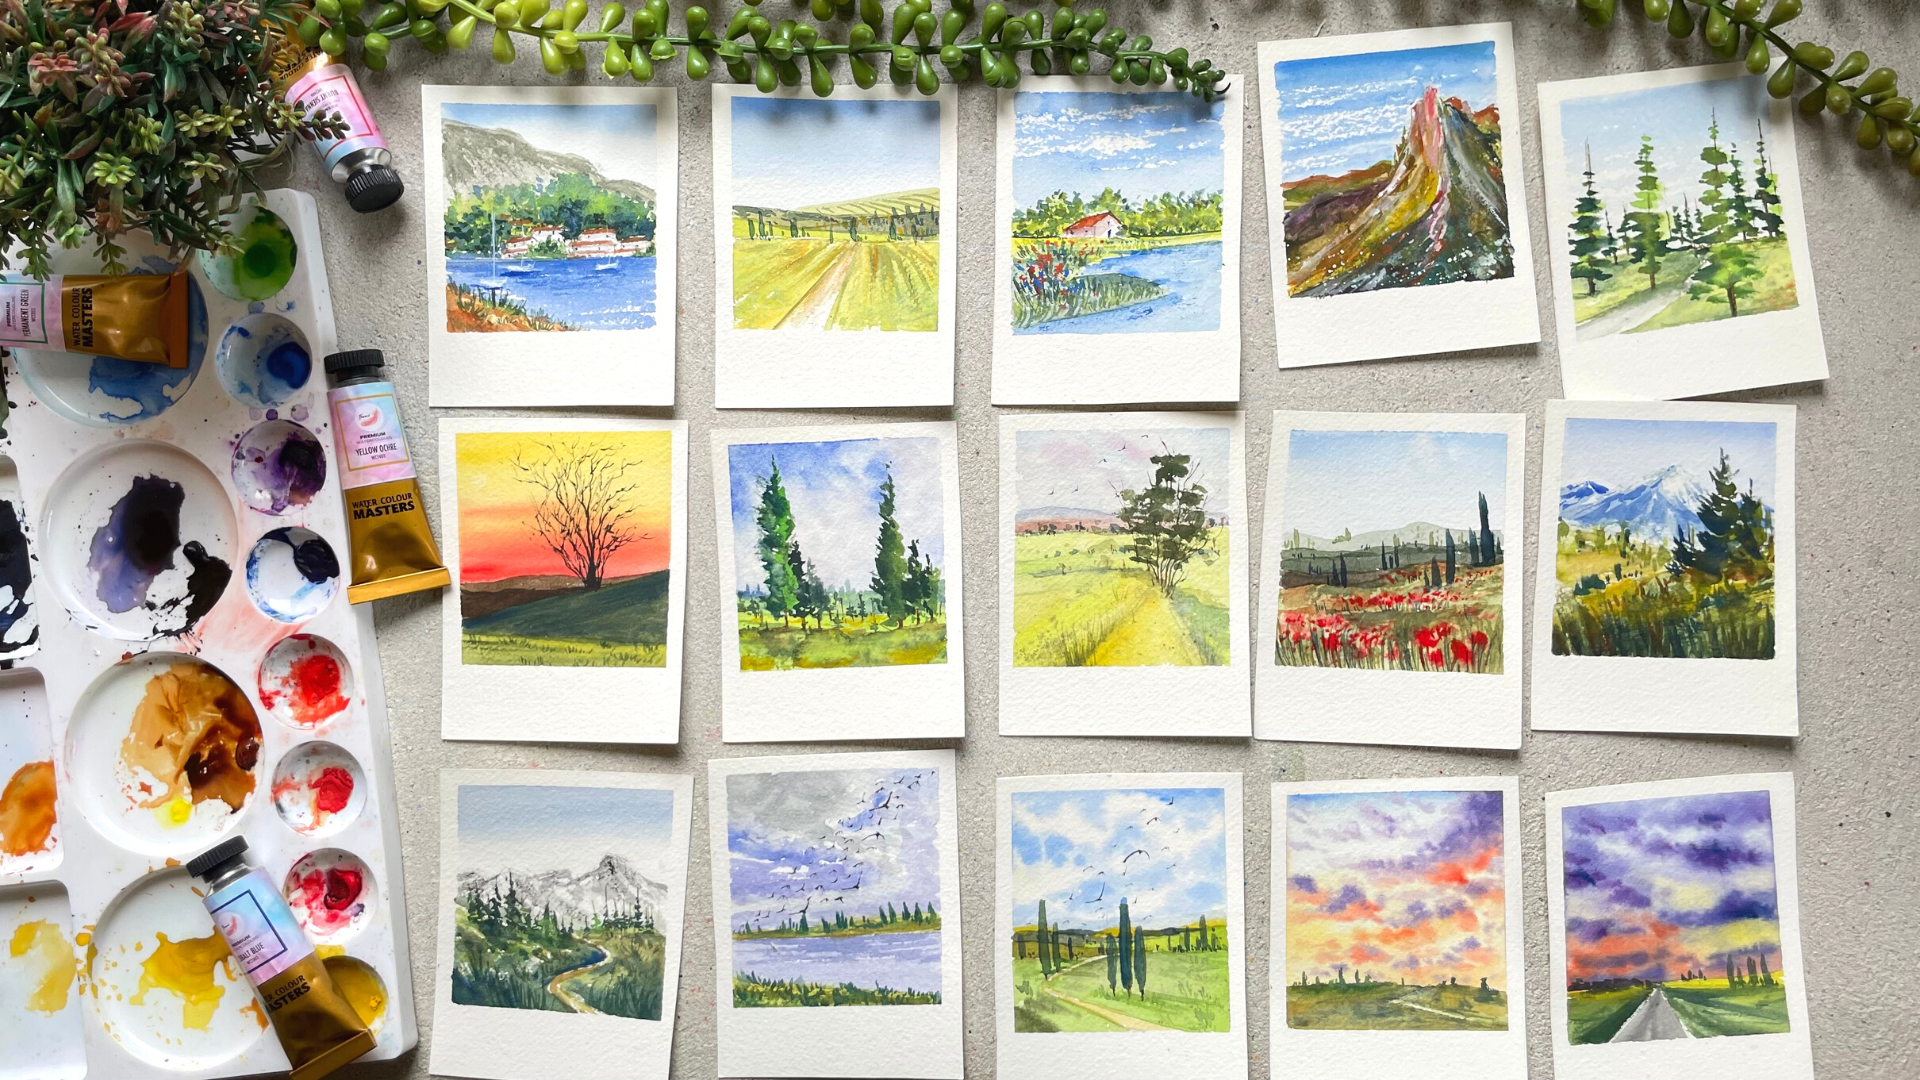
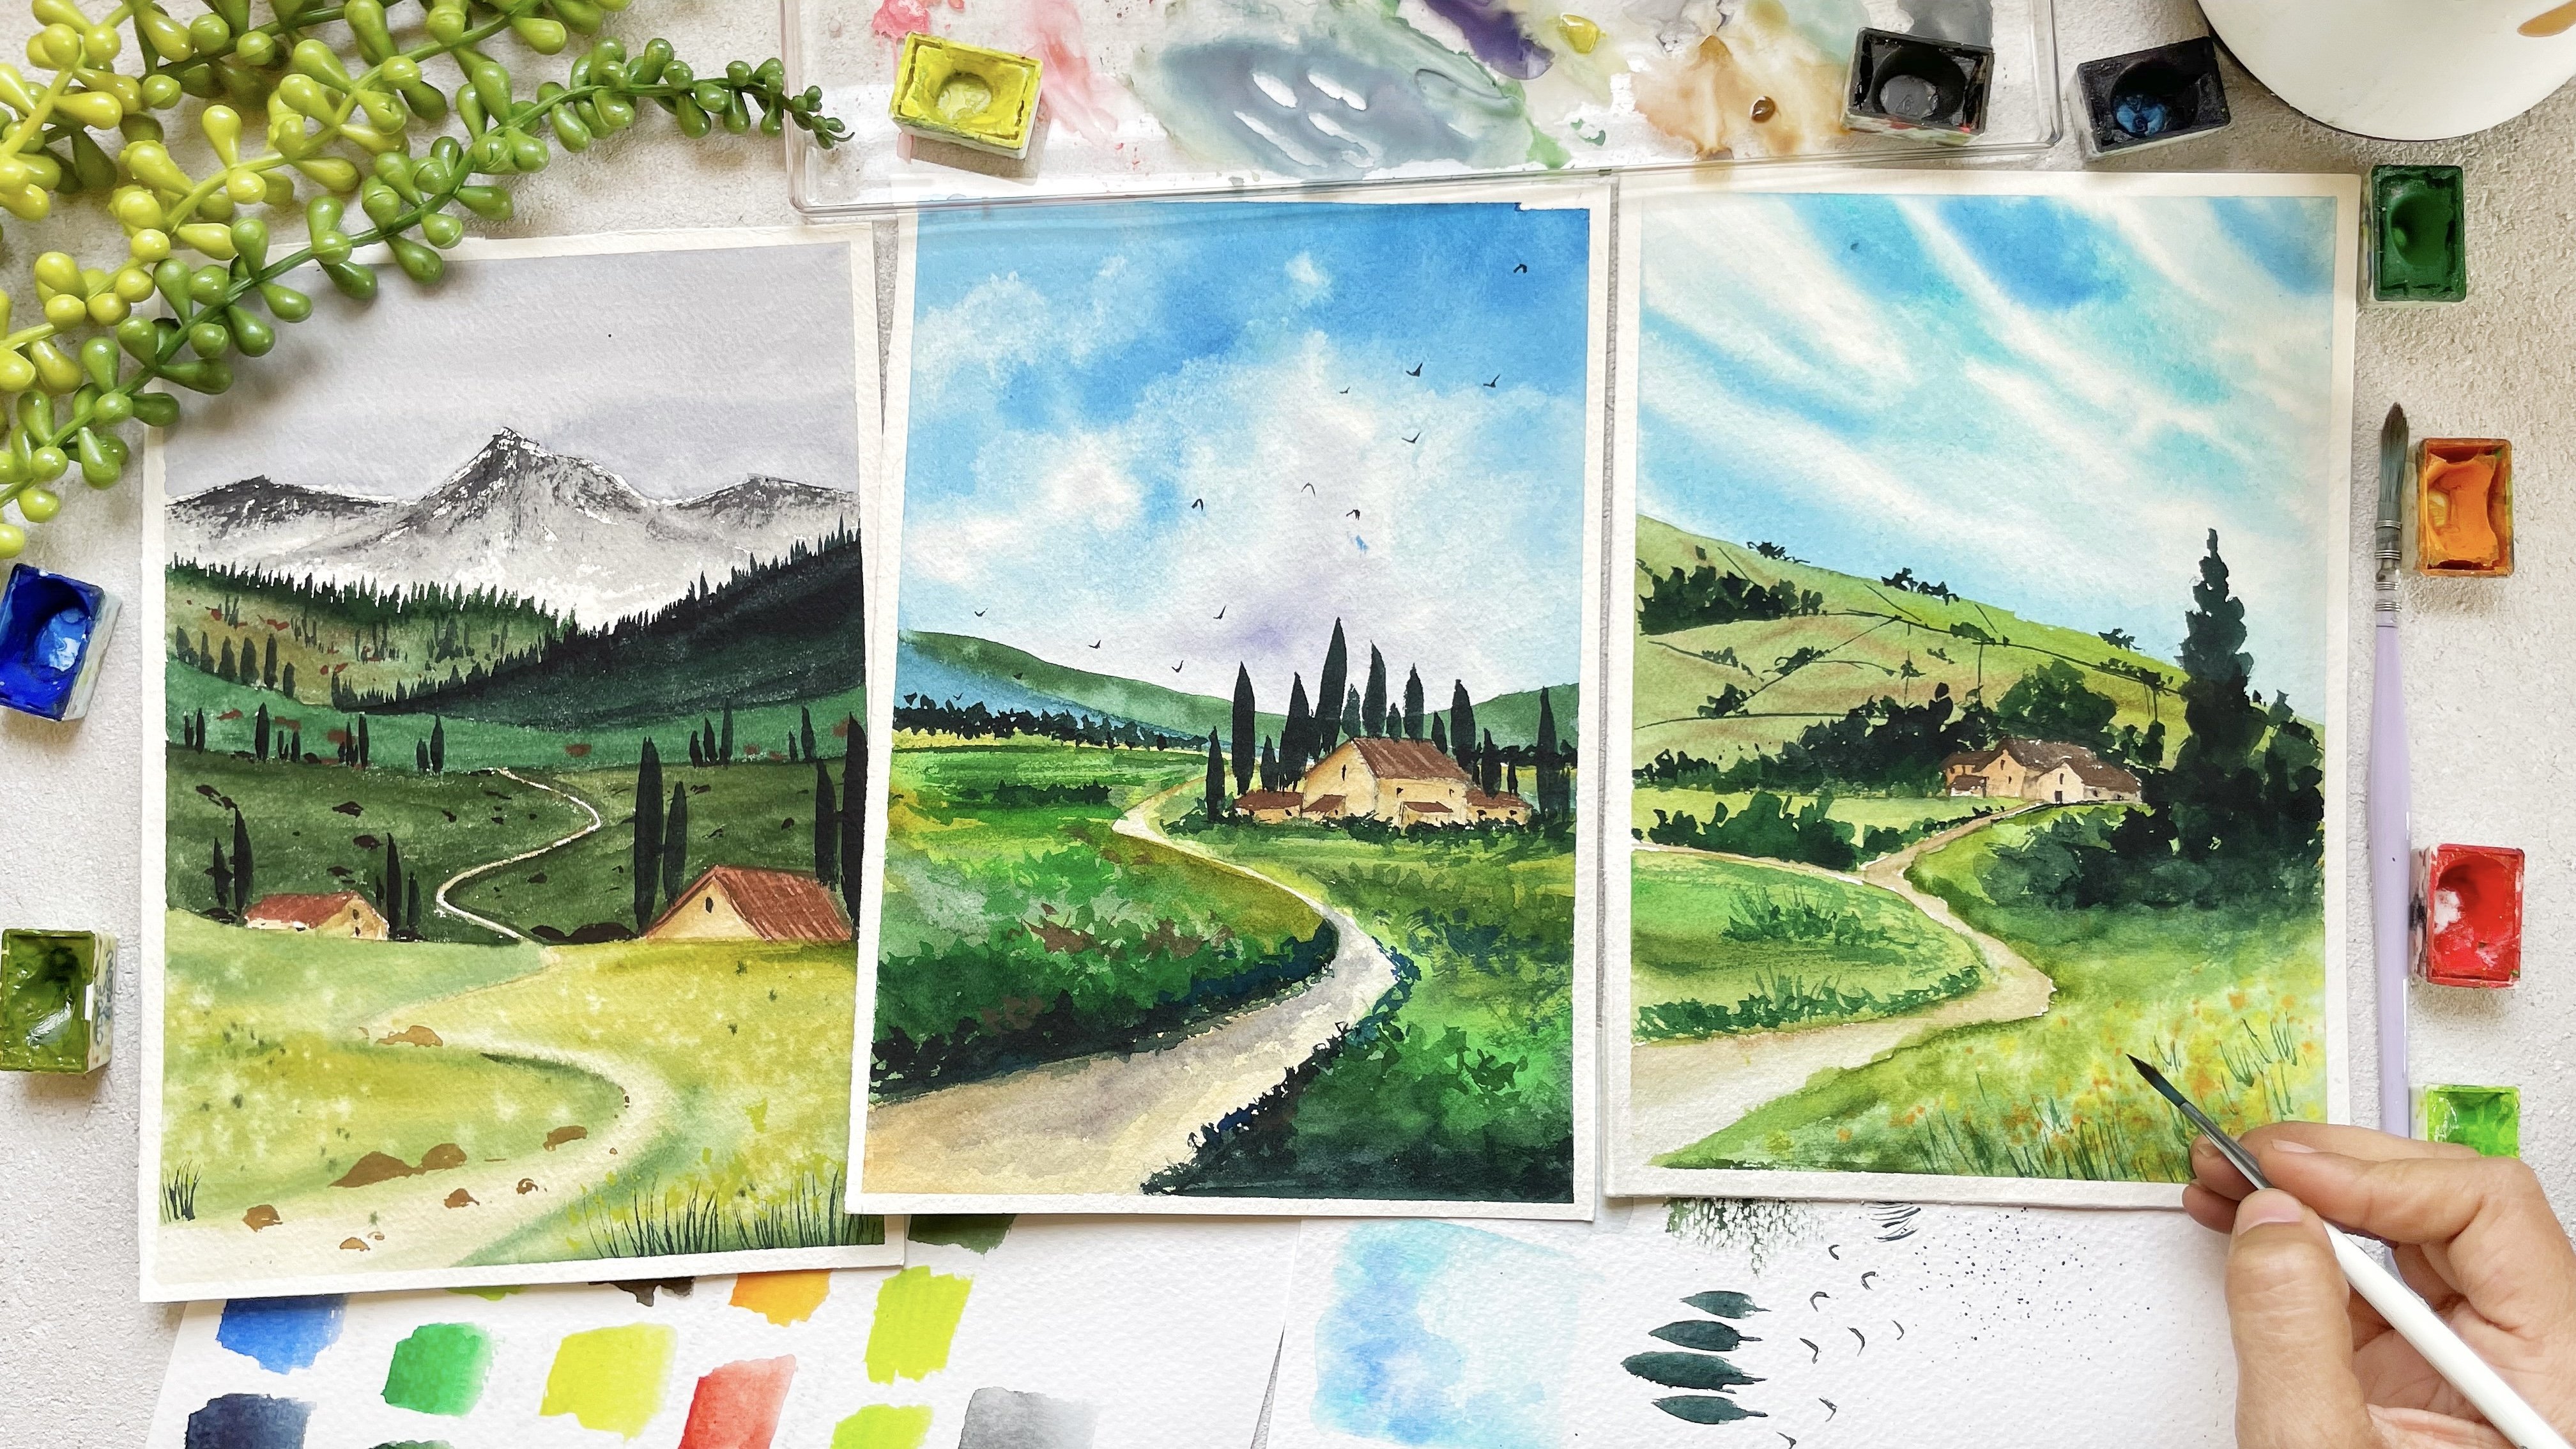
landscape painting. In this class, we will
learn how to paint 15 gorgeous painting
within 15 minutes. Each class project is unique, beautiful in its own way. You will get to study a lot of techniques, tips, and tricks. In the class. We
will study how to paint different subjects
throughout our class. Different kinds
of sky, mountain, different kinds of trees, clouds, and so much more. As usual, we will start with the materials
that we will need. I have fused minimum
art supply for the whole class so that
everyone can join. We will talk about the brushes. Once we have talked
about the brushes, we will talk about the colors that we will
need for the class. We will also study the
color mixes and how to mix our own Carlos using
the palace we already have. Once we get caught
up with the Carlos, we will talk about the most important thing
that is the people. Once that is done, we will start with our
15 days of painting, mini landscape and
polarized style. So if you really wanted to get into the
habit of painting, you really want to
name this medium. Then this class is for you. I have made each
step easy for you to follow so that even a
beginner and join the blast. So come join me in this
journey of painting, quick and easy mini
landscape for 15 days, hoping to see you
in the next class.
2. Class Overview : Hi, I'm so glad that you
decided to join this class. Alright, so in this class, I will give you the
overview of what we're gonna do for the force. As always, we will talk about the materials
that you will need. I have used very
minimum art supplies so that all of you can join. Next, we will talk about how you can get a
larger sheet of paper into the preferred size in which we are going to paint. We will be cutting
an A3 size paper into these small, small sheets. I like walk you through each and every step and no further class. Once we have all our
materials ready, we will start painting. I have walked you through
each and every technique and the color combination and
everything in the class. So you did not worry
about anything as though thing which
you have to keep in mind whenever you are
working with watercolors. This is something which I have learned throughout
my art journey. One is to use, right kind of people that is at least 300 GSM cold pressed
and a 100% cotton paper. Once you use the right paper, half of your work is done. The second most important
thing I learned is to have fun whenever
you are painting, to just enjoy the process of painting and not
think a lot about it. So these are the two important
things which you have to keep in mind when
you are painting. Other thing is, I have kept all the class
project quite small. That maximum of 15 minutes
and minimum of eight minutes. So it is in between eight
to 15 minutes class. So I would highly
recommend you to take at least ten to 15 minutes of your time throughout the day
and paint along with me, you can do one
project at N1 day. Alright, so I would highly
recommend you to take 15 minutes of your
time throughout the day to just relax and paint. Watercolor month. So there is no other reason to get your watercolor paints
out and paint along with me. Alright, I have walked you
through each and every step. You just have to watch
me paint and follow my instruction and rest
all, leave it up to me. All you have to do
is paint and enjoy. Alright, so that's it for now. Now, let's study about the
gallows and the materials. And let's get started
with our painting. I'll see you guys
in the next class.
3. Materials You Will Need : Hello everyone. I'm so happy that you're decided
to join the class. So before we move on
to the painting part, let's first study about the materials that we will
be using for today's class. Like I always say, using the exact same
materials is not important. Focusing on The
Technique bought and brush strokes is more
important than the materials. All those techniques would
upgrade your skills. But only thing which
I will put a lot of pressure on is using the
right kind of people. Because if you use
right kind of paper, when working with watercolors, half of your work would be done. Brushes, not important. Papers, very important. Not so important. Alright, so only one
thing which I will put a lot of stress on is using
the right kind of people. Alright, so let's
first talk about the paper which we'll
be using right now. You're, I'll be
using a 100% cotton, 300 GSM cold press
watercolor paper. Why a 100% cotton paper is because if you use an
represent content, they put that paper stays wet for a longer period of time. And watercolor beam,
or water-based medium, it does require your
paper to stay wet. For you to work for
a longer period. Using a 100% cotton paper will let you work for more time. Right now as we are doing
the smaller paintings, It's okay if you will use
50% cotton tape would do. But for better results are
being used 100% cotton paper. Now GSM is the thickness
of the people. So this is 300 GSM, which we will be
using right now. Alright, so what
I've done is I took larger A3 size paper which I had and I did measure and I did cut it
into the size which we want. Okay. Now next you will need to
stick down your people, but the masking tape
that's when I'll be using. You can use any
board that's fine. And masking tape will give
you a clear looking edges. Alright? Next you will need
a tissue to dab off the excess paint and
water from the brush. You will also need or any sharper object you
can use palette knife, so you're using card
to draw some textures, which I'll show you
in a later class. Then you will need a pencil
and an eraser to sketch down your painting and to ease off all the excess pen pencil marks. Next to need brushes. For the whole class, we'll be using just
three brushes. The first one is round brush. I think it's size two or four. I think it's for nothing
is mentioned on the brush. Or even if it was mentioned, it is rubbed off. So I'm guessing it is
size four round brush. Next to you will be
meeting size two brush. Right now I'm using single black velvet size two
brush for all the details. We'll be using this one
to draw the details in a painting and lasting
need or liner brush, pedestrian be using to paint
the grasses and the board. And this one is from the
pigeon later on, right? Next you will need
to Bordeaux wine to clean or dirty brushes
and one for fresh supply. I'm super surprised by the
Clean Water at device. I always end up making
both the water jars dirty, but I'm quite
impressed by myself by keeping one jobs
really keen on right? Next you will need a
ballot to make sound all your colors and
also the colors to be majorly using this from the
brand to V. That is this one. So let's talk about the colors. And I just watched each one
for you in the next class. So let's move on
to the next class. So let's just wrap it up. That is who you will need. Watercolor paper,
board, three brushes, masking day, tissue,
pencil and eraser. Two jars of water and pallet
to mix down all your colors. Right now in the next class, Let's talk about the colors.
4. Color Swatches & Color Mixing : Alright, so let's talk about the colors which we will
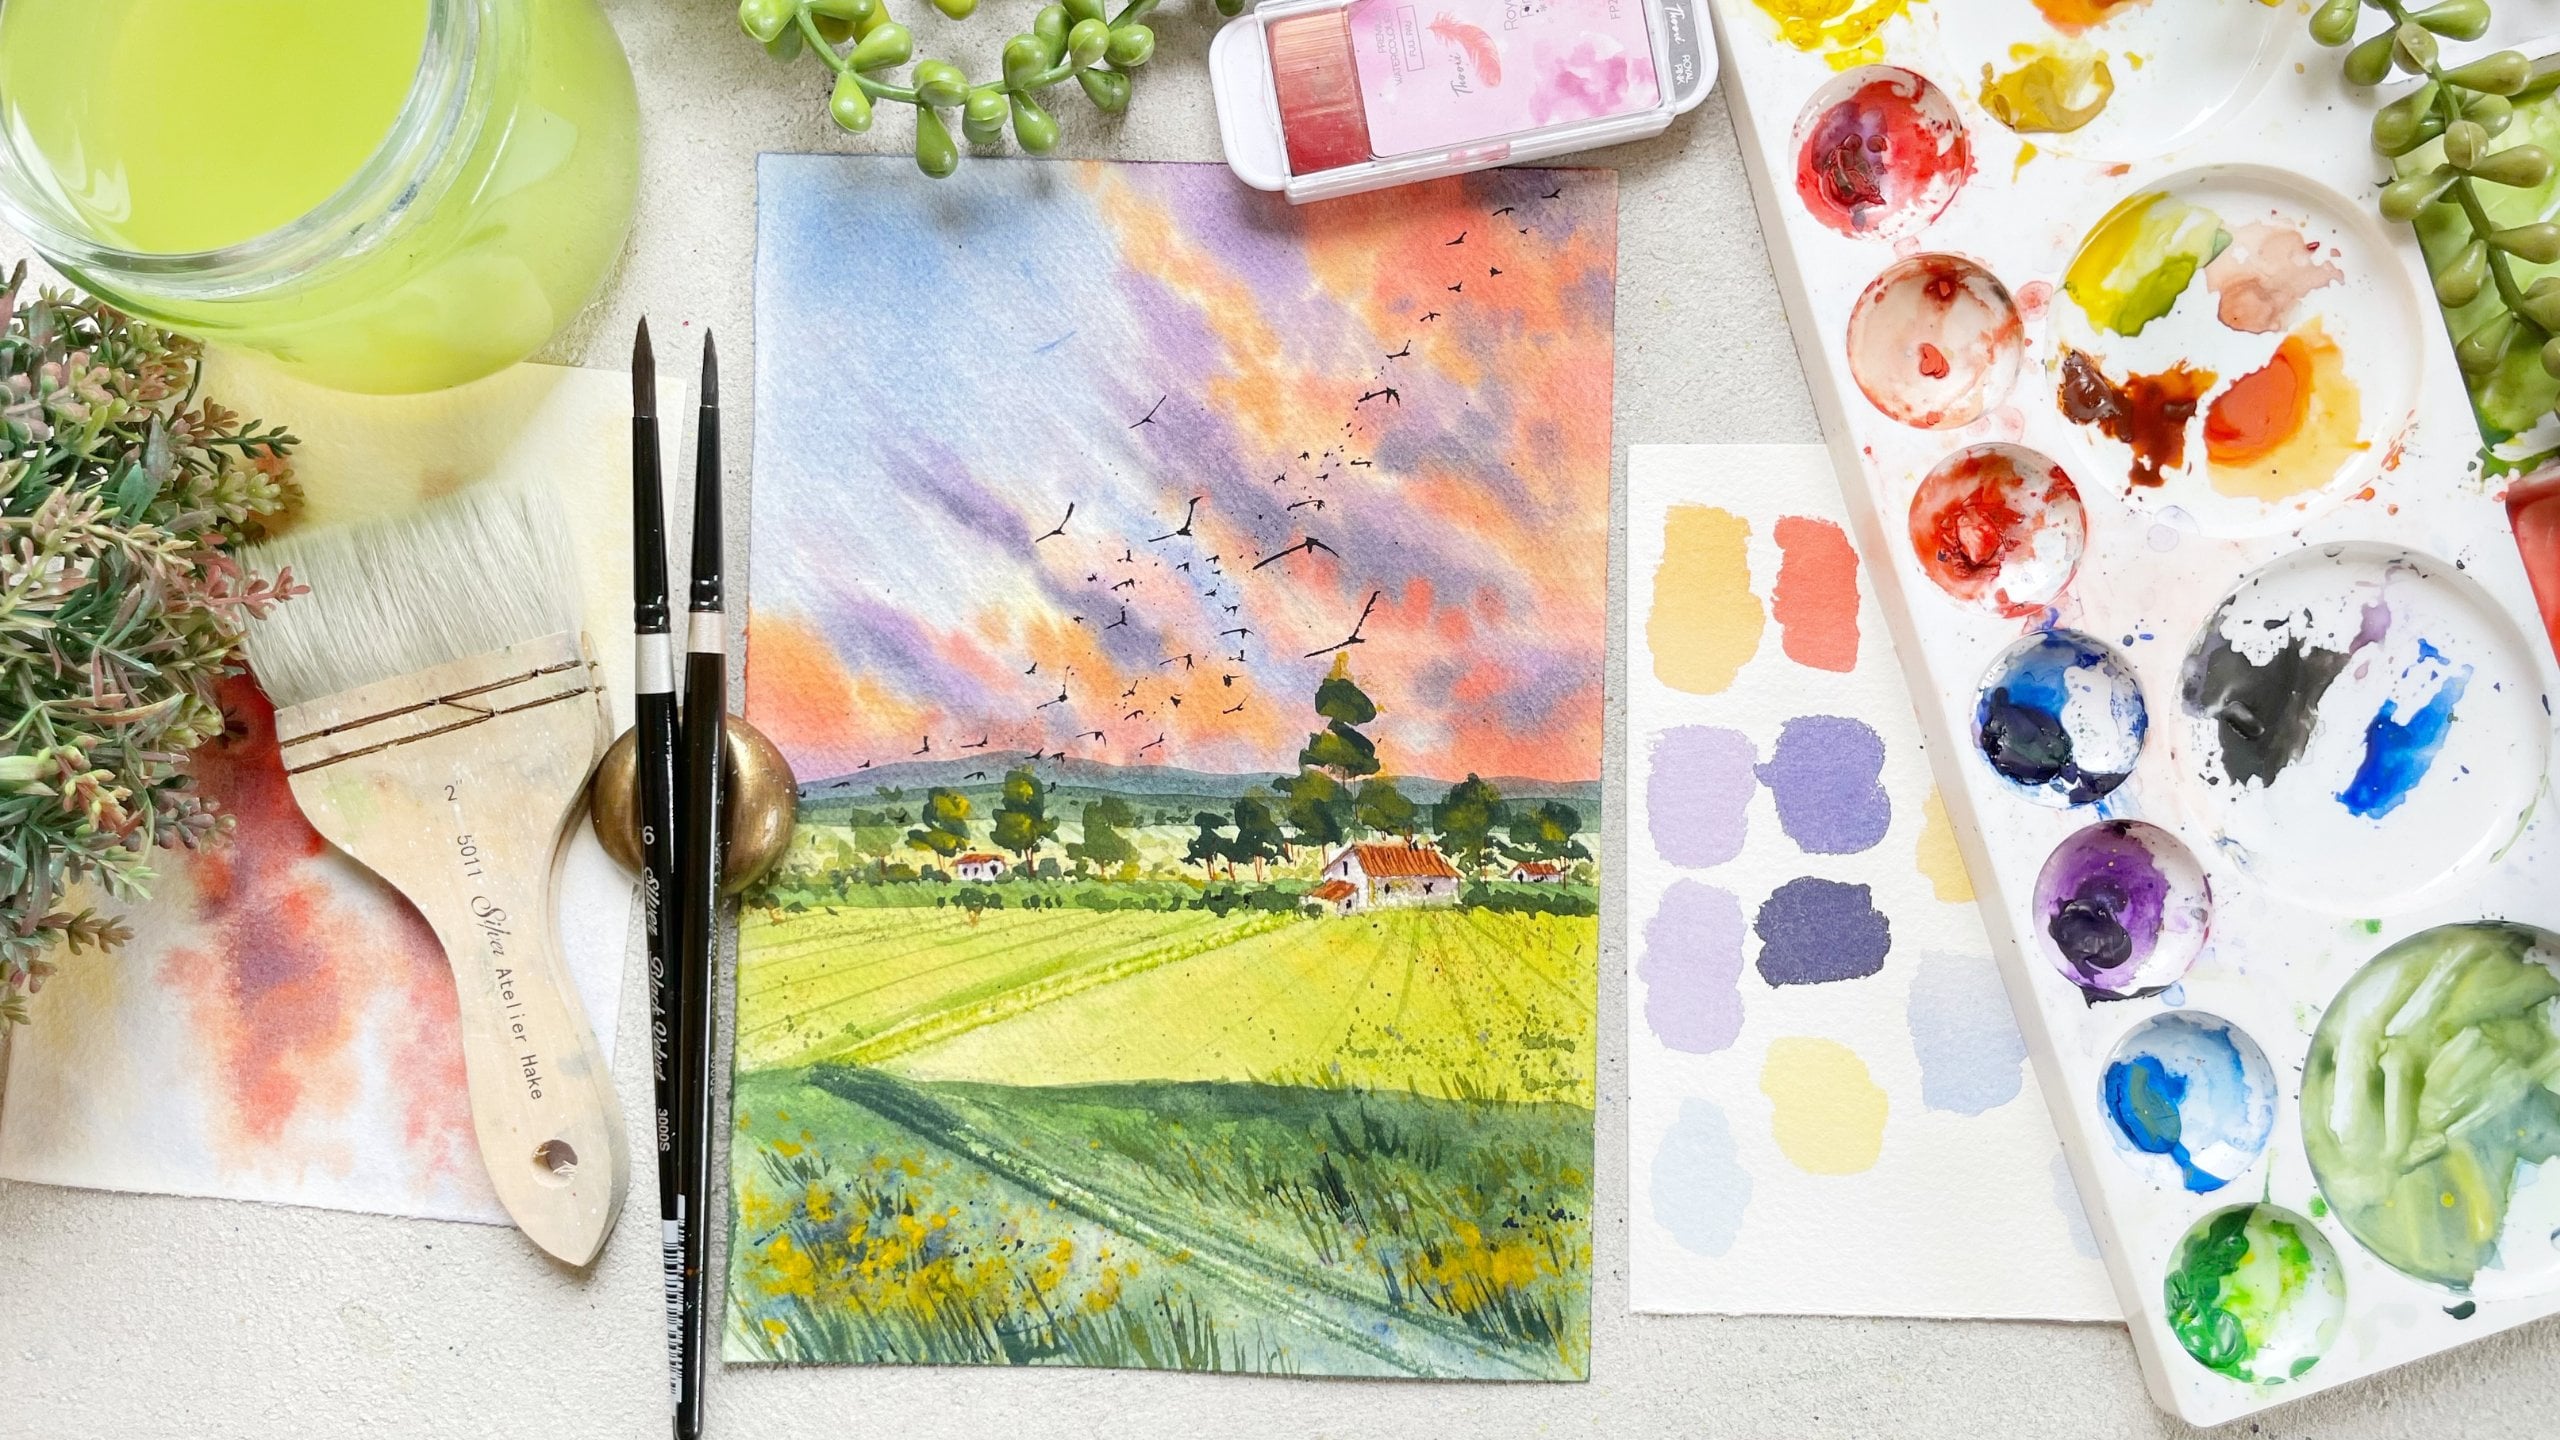
be using for the class. So overall, I'll be using only these 12 sheets
to paint landscapes. These set has these 12 colors. That is warm, yellow, warm and cool, red, warm and cool blues. So overall, this palette is quite sufficient because
they have to order Carlos, like burnt sienna, yellow, ocher plus warm
reds and yellows. The only color which I find
is missing is no cool here. That is the lemon yellow. So that when I'll be using
from the brands in India, indigo, that is
the darkest blue. Into that. I'll be using from White Nights and binds grade. So this is my preference, but if you don't have this, you can totally
use black on red. So you can always substitute binds green with black color. Alright, so next new swatch, all the colors down for you, and then we will create
mixes using these colors. Wondering, the first one
which I'm swatching is again just for you so
that you will know the exact FanDuel and you will also get the
close-up of all the colors. All right, so the first one which I'm swatching is
permanent yellow deep. This is quite a
warm yellow color. This color gives you
beautiful warm greens. Next one which I'm
watching is scarlet lake. This is a cool red color. Reds and oranges. I've used quite less in
all of the class project. So don't worry
about these colors. You can lose any reds and
oranges you have with yourself. Okay, to the next one which
I watched was 1 million. Now, the next which will
be swatching is fulminant. Great. So this is quite
a warm red color. The next one, which I've
used quite a lot to mix our greens as well as
for water and sky, is the ultramarine D. Next one is permanent violet. This is a pre-mixed color in
case you don't have this, you can always mix
your reds and blues in E coli quantity or in different quantity to
get the bulk sheet. Right. The next one
is cobalt blue. I use this one to paint
the sky and water a lot. Next is permanent green. Then he had an Oracle. I used yellow ocher. So I use yellow ocher or not to just decrease the
saturation of the green and to give a little
bit of color to all doing well and sienna, I use both these nodes. Prepare a green balloon. Next one is I really bag, which I haven't used
for this class project. So I'll just watch
pines gray instead. Next one is indigo. Again, if you don't
have this color, you can always replace this with abortion blue or any dark
blue color which you have. Okay? And lastly, I will be swatching is the
lemon yellow from San Diego. These are the colors
other than white, and I'll be using the white
color so you can use my gosh, white watercolor, which I
will bite you have with you. Okay. So now let's just make our agreements
and let me just show you how I mix my greens that you wouldn't have an idea
of how to do that. Okay, So just
accessing my camera so that you can see what
I'm doing on my bad. Okay. Alright, So I think
even to see all the colors, we'll, so let's mix our
green color, so forth. What I'll do, I
will take four deep and I will mix my
sorry, so forth. I took permanent
yellow deep and now I'm mixing my
permanent green to it. You'll see you get a really bright green color when you mix these two shades. To just say minks, I will use a tiny
bit of ultramarine and we will see
instantly that color will get a little darker. Now, let's mix the green
color using ultramarine blue. Well, when India started, just mix these two
colors together. And you will see you will get very dull olive green color. Just to add a bit of water so that you can see
the lighter value of cosine. Now, let's mix cobalt blue, permanent yellow deep. When you mix these two colors, you will get a bright
greeting, olive green color. This is a bit dull, but if you mix cobalt blue with the permanent yellow deep, you will get a little
bit of a brighter color. Okay? So same way, Let's make our ultramarine and
cobalt blue with lemon yellow. Okay? So first what I'll do is I've just divided
it into two. And the one Manx, I
will add Ultramarine. Get away forest green color. Now, I will add compile. And let's see which makes me get this one a little bit brighter. Now to the same mix, let's add a bit of sepia. I added a note.
Let me just wash. Next. I will add bond simply. Now, I've added a lot, so I'll just mix my
yellow as well as blue. And you see you will get
beautiful or doing green bio. Same vein, I will add
tiny little bond or mode to ultramarine and
lemon yellow mix. How it just saturates. Next up, let's just add the blues to
our hominin green. So let us just state the permanent green color and just add a tiny
bit of cobalt blue. Then the green color, which we get to
the same combined. We will add a bit of algebra. You will get a little
bit of darker green mix. Now, let's add the proof. Yellow ocher. You will get
a dull olive green sheets. So you get my point, right? What do you have to do
to make your gleans is you have to add blues
and yellows together. And to get it done. Or you can add yellow
or yellow ocher. Sometimes I even add
the appropriate sheets. So I'll just add a tiny bit
of purple shade with you. And you see it instantly
the saturates and you get a very clean green value, right? And to make all
the greens darker, I reduced tiny bit of indigo. Or if you don't have that, you can always add
portion due to it. So this is how you mix
your colors on it. I'll also show you how
you can mix the Pope is sheet if you don't
have premixed fopen. So what I do is I will take scarlet lake and
other forced mix, ultramarine blue to
wait for the foot. And you'll see you've
got the pulp issue. Now. I will add, instead of
ultramarine blue to the other half. This
is what you'll get. Same way if I mix
these two reds, two blues, I will get
a differentiator. So these are the Carlos
hand mixes which we will be using to paint
on our class project. I've used very basic colors, but I think almost
on pallets have. Okay, so let's move on
to the other class.
5. Cutting The Paper : Hello everyone. So before we start, let's first cut down the
paper to our preferred size. So as I don't have a
smaller sheet of paper, what I'll do is I have
my A3 size paper, so I'll cut it down into
the preferred size I want. You would already know the
paper which I'm using, but I'll repeat
it one more time. You're, I'm using a
100% quartile three and GSM cold pressed watercolor
paper from plus two. So this is almost
A3 size people. So what I'll do is I will draw horizontal and
vertical lines. That would be around ten
inches by eight inches. And once I've drawn
all the lines, I will cut it down witticisms. I usually prefer to buy
a larger sheet of paper because that way it is much
more economical for me. So that's the reason I have
such a large sheet of paper. I've already drawn the lines on the back-end
side of two people. So all you have to do with whichever size people
you are using a Mac door, just measure three
inches by four inches, then cut it down with this. And so now you will find
like there's a small, tiny little gap which is left on the left-hand
side of the paper. So don't worry, we
won't waste that paper. That paper we would use for
watching colors or anything. Alright. So whatever size paper you
are using, like I said, you just have to cut it down to three inches by four
inches and then just take out your
scissors and just follow the line and got
it. I'll do it slowly. Don't have the disturbed because if you
will having doses, it will move urine there and
then you will just to waste your expensive people
which you don't want. Your eye will get around 15
rectangular shape people. And as we will be
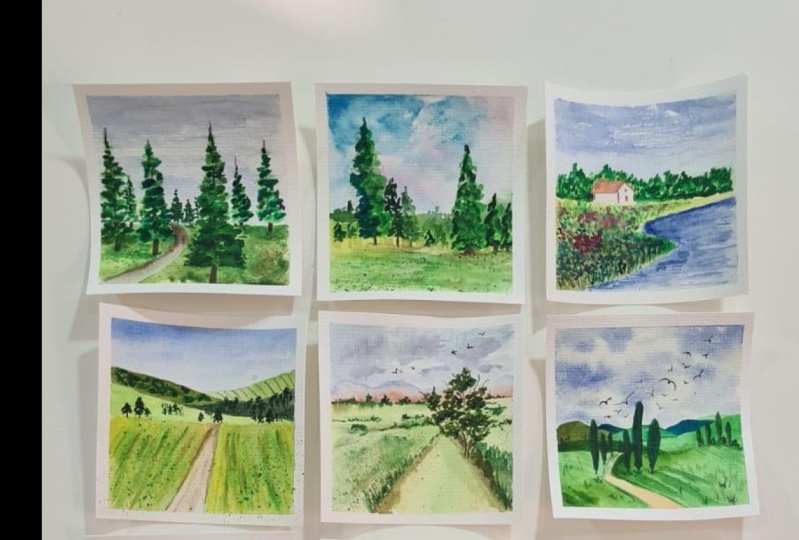
doing 15 landscape, this is exactly what we want. This was so much fun to do. Just cut all the 15 shifts altogether and do
one by one painting. And by the end of the challenge, you will have roughly
15 landscapes, which you can frame it together, or you can make a
collage on the wall. And it looks so,
so, so beautifully. I've already done a similar
kind of a challenge. If you are following
me on Instagram, then you would already know. But that we have done
even smaller people. It was almost like two inches by three inches smart people. And we did around 14
landscape on that. And it turned out
to be so beautiful. I thought I would do it one
more time for you guys. But this time we will learn
a lot more techniques and a lot more details
with each painting. Alright, so we have
our, our peoples ready. So let's not waste that time and let's get started with
the forest painting. So I'll see you guys
in the next class.
6. Green Fields : All right, the next time
we have everything ready, so I will remove
one painful from my stack and put it on my board. And as always, we will first apply masking tape on all
four sides of the paper. But this time what
we will do is I spin quantum painting to look
like cupola, right style. So we will apply a thick layer of masking tape at the bottom. And as usual, we will apply
masking tape on the sides. If you will notice
of Polaroid picture, you will see that there's a
thick border at the end photo and very small white borders
on the other three edges. So this is exactly what
we are trying to create. Alright? So once you apply the
masking tape on all sides, make sure that you
press it down so that there's no gap between the people and the masking tape. So always, always, always pay attention when you
are applying masking tape, otherwise you won't
get your looking edge. So I take this step, racist history of
applying masking tape so that I don't end up regretting at the end when I
don't get cleared. Alright, so have already applied the masking tape
now I'm just running my fingers on her own to make sure that it has completely
stuck to the paper. Then, as usual, we will force
to draw a simple sketch. So I'll take my
pencil and draws, draw the horizon line. So I will leave more than
half of my people for the mountain and the sky area. And the rest of the area
would be for the line. I have drawn the horizon line. I will draw for the exact
lines on top of it. Those will be my tiny
little mountains. And I will also draw two
across lines on the paper, making it look like
there's a row of V which is going towards
those mountains. That's it for the
sketching part. Once that is done, Let's
move on to the painting. But before we start, I will see if I have all
my colors in my palette. I didn't have lemon yellow, so I will squeeze that out on my palette so that
whenever I'm painting, I don't have to waste my time removing the
values and everything. So once I'm ready with all my materials as
it start painting. So we will start
with the sky forced. So we will give a
gradient wash to this guy that is darker on the top
and you add the bottom. We'll be painting the sky
with cobalt blue so forth. I will give a very
light wash to this guy. Ones I've given one flat wash, I will take the darker value
of the same and start from dark black color down that way you will get all
the color on the top, and as we move downwards, it will get lighter and lighter. Why this guy area is drying, we won't be able to
paint a mountain, so let's paint the bottom part. So I will take lemon yellow
and I will start painting the first layer of these
are basically draws me, I'm painting right now. Alright, so I'm Given
a wedding night, one, lemon ghetto
on the Bordeaux. So I don't know if you know
about the values or not. But whenever I say light value, that means I'm using very watery consistency
of the paint. The paint will have more
water and less often, which will make it lighter. And whenever I see that
I'm using a darker value, that would be I'm using more
of maintenance of water. Alright? So I've explained all of these techniques in
my previous class. So make sure that you just
attend the technique part. That it will be titled
with the basic techniques. Alright, so what I've done is force that applied the
lemon yellow color. Once I've done that, I started applying the
permanent yellow on top of it. And when I apply that color, I mixed a tiny bit
of permanent green to my yellow and then I
reapplied the same color. If you'll notice, I have left on the tiny little
gaps in between so that the underneath
layer is still visible. Alright, so that is exactly
what you have to do. And once that is done, I will paint first mountain. But the mix of yellow or green and then
having let it dry. So while that is drying, let's create more texture
at the bottom part. So I'm mixing my green with a little bit of ultramarine
blue to make it darker. And then we will do the
splattering technique. But before we do that, always make sure that you cover the dark portion of your paper. So once we have
covered the papal, you run using my smallest
brush and I'm loading my brush with paint
and then just tapping adult with my hand. To create splatters
of green color. If you'll notice, I use two
different types of green that is a mix of ultramarine
blue and green. And the other one was a mix
of green and yellow ocher, which was already
there on my palette. The reason I use a
smaller brush to do the splattering
technique was because I wanted smaller
splatters on my paper. So that's why I would
suggest you to use smaller brush because we are working on a very
small unfaithful. Alright, so while
that is drying, let's paint the second mountain. So your eye just makes a bit of burnt sienna to my green banks. And I painted that mountain
using the same color. Then to the same green, I will add a bit of ultramarine
blue and make it darker. And then I will paint
another layer of mountain and then move
in, let everything dry. So you'll, you'll be seeing me paint different subjects of our painting that this
sometimes I will paint the sky and then I will directly move on to painting the bottom part. Once we have painted
the bottom part, I will start painting
the mountain. That is because when
one layer is drying, you can move to other parts of the painting and it will
be much more quicker. And you don't have to wait
for each layer to dry. Hi Trey. While I was talking about that, I also painted one more layer at the bottom using the burnt sienna and the
road part also be painted with buoyancy and reducing a very lighter value
to paint the role because I don't really want
to focus all of the road. So that's the reason we are
using wedding date value. It's okay if some part of your painting stays
white, that is fine. Actually, that is
the best because you will get a
beautiful highlight. That's why you will see that
the bottom part of the road has been completely white. I'm not applying
any paint to it. So yeah, that is okay. I also painted the final layer with two Greek color to create a bit more
dimension to the painting. Alright, next up, what I'll
do is I will take the lemon yellow and mix of
green and I will paint the last year of
mountain using that color. When I say that I loved
my painting completely dry is because I use my
hairdryer to do that. So don't miss that step. Otherwise, you
will end up mixing all the colors in your
painting, which you don't. Now, it's time to add the final
details to our mountains. So what I've done is I used to darker green color and
for the top mountain, I just two lines. For the second
mountain, I'm taking the same dark green color
and I'm drawing small, small dot making
it look like there are grasslands on that. For the third mountain,
I'm creating small, small lines that will
indicate that there are trees or pine trees
on top of that mountain. And I'll do the same thing with the yellow color, all
permanent yellow. And lastly, we will paint more
larger trees in the front. So you're, I'm mixing
my permanent green with ultramarine blue to create
a bit darker green color. And I will start painting
the larger trees in the foreground using
my smaller brush size. You will see that
whenever we are painting or drawing
the details and the mountain that
would be smaller in size and ISB come towards
the foreground pile, the size of the
trees will increase. So that will create a bit
of that in your painting. That is, the objects
which are near to us would be larger, whereas the objects
which are far away from your viewpoint
would be smaller. Alright, so that's it
with your painting now, you will have to let
it completely dry. And then you can remove
the masking tape at an angle which is away from the paper so that you
don't end up telling me. And I'm super excited for
you to see the final result. So let's first quickly remove the masking tape and let
me show you how it looks. By the end, you'll
see it hardly took me 12 minutes with a trying time
to paint this landscape. So I hope you enjoyed painting
and I'll see you guys in the next class where we will paint similar small painting.
7. House By The Lake : Hello, hello, Welcome back. So let's move on to
our second painting. So it says take one paper
from your stack and apply masking tape on all
four sides of the people. Remember to apply
masking tape at the bottom and on the
edges of the masking tape. So I'm just using the masking
tape which be used for the last project
because it had a lot of blue and it was perfect because we just used
it for ten minutes. So I'm just reapplying
that masking D. Just reusing the stuff. That's not bad. Alright, so once you have
applied the masking tape, we will start onto the painting. But this time we are painting
a small, tiny little house. By the way. I'm hoping that you
all are enjoying this ten to 15 painting session, which we will be doing
throughout this class. All right, So as usual, first draw the horizon line. Once you have drawn
the horizon line, Let's divide the bottom part. And to do that, this
one would be the line and the right-hand side
would be the Lake area. So draw that. And then we will draw a tiny little house on
top of the horizon line. So the idea for this class was to get you into the
habit of painting, as these are just ten to 15
minutes painting sessions. I thought you would enjoy
it less water column. And what? The better reason to start
painting with watercolor then? The whole month dedicated
to this medium, I'm telling you this is
the right time to start. Thus, we are using
limited odd supplies using all the calories, but we usually get in the
palate so you don't need a lot of supplies to start
with handwriting. So let's get started. So I've already drawn a small little house or the horizon line and
surrounding that, I do lots of glasses. What speed you're
done doing that. Let's move on to
painting this guy. So this time they will
paint the sky using dry brush technique
and create clouds. So what I did is I loaded
my brush with paint, remove the excess on the tissue, and then just dropped by
a dry brush on the paper. And then you will
see that it will create tiny little gaps
of white in-between. Those will be our Cloud. So this is one of
the new techniques which I don't do
paint the clouds. So definitely try it out. And in case you are not
confident doing it, try it on a rough paper
first and then do it. I'll find the bending, right, and I will use the
same color that is the cobalt blue
to paint the leak. So first I will apply
very light wash of cobalt blue for all
of the Lake area. Once I've applied that, I've applied a darker value
of those same cobalt blue around the land area
to clean it a bit of shadow of the
land on the water. Once that is done, I
will let everything dry. Then we can move on
to painting the land. So now that everything is right, I will take my small round
brush that has size two. I will mix my lemon yellow and then green color to create a
very light shade of green. And I will start painting the bushes behind the
house with that color. So this is the first layer
that we are painting. So I will paint the whole of the bush area with this Carlo. Once we have painted it
with a lighter green color, we will start living with the darker green color on top of it to create a bit of depth. While we are painting, I will keep on
mentioning there are different techniques
which we are learning and using while painting so that you will know
what we are doing. So, like I said before, we used dry brush technique
to paint the sky. Then we used wet on dry technique to paint
the first layer of doing lake lake
area was still wet. We applied one more
layer to create the shadows to land on the water that would be
wet on wet technique. Right now, we are using layering technique
to paint the bushes. So what we did, this was to be applied very light green color. Now we are using
darker green color. On top Beaufort. With each layer, I will go
darker and darker and darker. I mean, I will keep on adding ultramarine blue to my
green to make it darker. So to paint the bush, all you have to do is
tap and lift your brush, tap and lift your brush. And that is exactly
what I'm doing. Not dropping my brush a lot, just tapping it and pulling
my brush off the paper. Remember when you're
layering not to cover the underneath
layer completely. Otherwise you won't see
different colors on your paper. And you will see just one
cargo which we don't want. Alright? So why cave paintings? We will start painting
the land area, so forth. I will apply lemon yellow color using the wet on dry technique. And then I will keep on changing the color as
become further ahead. That is, once I've applied
the lemon yellow color, I applied a very light
wash of green color. And then I opened
a ray of light, the darker green
color at the bottom. And you will see that I
do not rub my brush a lot when I mix two
colors because I don't want the colors
to look muddy because that's what happens when you try to blend
the colors a lot. So I'll just leave it there. And if the paper
and paint is wet, it will automatically
blend together, making it look much
more fresh and bright. Alright, so that's what we did. We just applied
differently as of green at the bottom part of the paper. Now, let's add few more novel by dose in the front end
of the blind area. So to do that, we will again use those
splattering technique. And this time, I believe
they'll kind of choice to you that you can add flowers of
whichever color you want. But this time I will be
adding the flowers with PODD, blue and red colors, so forth. I will add it with two cobalt
blue and then I will take the red chain and I will start splattering the right
color on top of it. So you already know how to do this splattering technique is that is load your
brush with paint, remove the excess on
the edge of the palate, and then just use your hand or other brush to
tap of your brush. And you will see that
the drops of color would drop onto paper. Once that is done, we will
start adding those times of those flowers using the
same smaller brush. In case you find to size
two brush a little larger, you can switch to size one or maybe even science
needle to draw the stem. The main technique to do that is holding your brush
almost 90 degree angle, or maybe 80 degree
angles so that you are just using the tip of your
brush to paint the stem. So we will add more
details to the lower part, but let that dry. While that is drying, let's paint the house. So I will paint the roof
with directly burnt sienna, which is there on my palette. Low portion of the house being
want it to keep it white. So we would just add the shadow. So to add the shadow, I just make my purple
with cobalt two. And to that I will add
a very tiny bit of red. And it will create a
very dull purple color, which is great for
the shadow part. So I'm using very light value
of that color to paint. How's the front of the house? I will just paint
the top portion because that is the shadow of the roof and
the backend side, we will completely
paint with the Chateau. Got low. Alright, and then we
will again start adding the grasses and the stem of the flowers in
the foreground. But while I was
adding the classes, I realized that the whole
of the blue flowers, which we had added earlier gone. So I will just take a bit of cobalt blue on my brush and I will the tapping motion and
create the smallest one, tiny dots to make it
look like flowers. You know, I always used to
feel like you will never be able to collect your mistakes menu when working
with watercolors. Once it is done, it is done. And that's the final thing. But that's not true. You are able to
connect your mistakes. It's just that you should
know how to do that. Like we just saw that all of
the blue flowers were gone, so we just added a
thicker blue layer on top of it and we are able to see the blue
flowers on top of it. So same way you can rectify
if you will feel mistakes, which you have done
in your painting. So never put a lot of
pressure on yourself. Enjoy the process of
painting so that you will learn more and you
will enjoy painting. While I was talking about that, I just added a tiny little
window and go to a house. And I also added fuel dry brush
strokes on the lake using the ultramarine blue to create a bit of texture
on the water Eva. And I'm just adding more darker green bushes
around the house area. How's up? So you know that you can lift
the lighter color. Window background is more dark. So that is exactly
what I'm doing. Is I'm just darkening the bushes around it so that the
house would be lifted. And we are done with
our painting now, let it completely dry. And once it is dry, you can paint off at an angle which is
away from the people. This is how our second
painting is looking. I hope you enjoyed painting along and you learned
a few techniques. And see you guys
in the next class. Bye.
8. Giant Tree Forest : So welcome back. And let's start with our
third mini landscape. The people and
stick your paper to your board or writing
pad or anything, and apply masking tape on all
four sides of the people. In this class, we will be learning how to
paint larger trees. You will sync French style, so we won't have a
proper structure. We will just use our
tapping motion with the brush to create
the wolf trees. That is one of the
important learning which we'll be doing
in this class. Alright, so have already
applied the masking tape. So now let's first
sketch the painting. So first I will draw
the horizon line, and through that line I will
draw a small role which is leading towards the horizon
line and towards the forest. Once that is done, I will just draw lines. So the lines which are in the foreground with the journal, and as we move towards
the horizon line, it will get smaller as it is
away from this viewpoint. So that is one thing that
you have to keep in mind. The trees which are far
away would be smaller. Same way the trees which are
new to us would be larger. So I'll just draw
the lines because rest all will be doing
it without Carlos. Once that is done,
we painted the sky using a very light
value of blue. That is the simple thing
that you can do it. And then I will completely
dry off this guy. Once that is dry, we will move on to painting
the lower line area. So first I will apply lemon yellow color at the bottom even though
lode area on touch. And once I've applied
the lemon yellow color, I will take two
green color which is already there on my palette. And I will just reapply
that on the buffer, leaving some space
in between so that I can see two underneath
kilocalorie as well. So I will keep on taking the
green color from my palate. Or I might add a bit of cobalt blue, ultramarine
blue, yellow, ocher, burnt sienna, or
even permanent yellow. I've already taught you how
you can mix your greens. So I think it would be
much more easier for you. And don't worry if you all green is slightly darker
or slightly lighter. That okay. It doesn't matter that much. So don't worry about that. So once I've done that, I just plot some burnt sienna and green color
covering my sky area. Alright, so that I don't end up having
splatters on my sky. Once. Now, let's move on
to painting though trees. So what I've done
is first I will start with the lighter color. I mixed my lemon, yellow and permanent green together to create or
lighter green color. And then I'm just taking my brush and doing
the tapping motion, starting with smaller
dots on the top. And as I move downward, I'll start losing the belly of my brush to create
the larger dots. So I will repeat the same
step for all the trees. As we have already
drawn the old lines. We know how tall
or large arteries. So that is one of the important
thing you should draw, which will help you
or between guide you to know how large
or small trees are. So whenever you are painting, you won't be confused. Okay, so once we have applied
the lighter green color, I will start delivering
that with the darker green. So I've just added a bit of ultramarine blue to make
it a little darker. And I am applying
that on top of it. Remember not to cover
the underneath layer completely leave some
gaps in between. I will also change the color of the green for
different trees. That is, I will slightly add
more blue to some trees and slightly less to others so that you get a little variation. The painting looks
much more interesting. If you will just
use one color it would look like
which we don't want. Alright, so that's the reason
we are changing the greens. Let's add though
trunk of the tree. So I will just add a
little bit of ultramarine blue to my burnt sienna
to make it little darker. And add tiny little line at the bottom of the tree as
well as in between the trees. So that it's nice you can see a bit of trunk of
the tree in-between those bushes off in-between the foliage of trees,
which looks beautiful. Alright, so just repeating the same step for all the trees. And I realized the
middle portion was looking quite empty. So I decided to add few
more trees over there. So first I'll just draw
the trunk of the tree. That is, I'm just
drawing the lines with the brown color which we mixed as I already
had that on my brush. And then I'll take
the green column and add tiny little trees
near the horizon line. So we are done adding all
the details on the tree. Now it's time to paint the road, as well as to give
a little bit of dimension to the line area
which is at the bottom. So I took very light
value of the black color. It doesn't almost like
two to 3% of paint. And just this one too. I just use that color
to paint the road area. And you'll see that I've
loved few gaps in between. I've just roughly done it because I wanted
that look on it. Alright. Fine. Status done. I'm just repainting
the branches. You will run there
with my rigger brush. So once that is done, I will take the green color on the same brush that
is the rigger brush, and apply that color
with the tree line area. And I will blend that a little. So it will look
like the land and the tree are connected
to each other. And that's it. We get done. Now, let your painting
completely dry. And then you can
remove your deep at an angle which is
away from people. So let's just revise what
we have done over a year. So we studied how to paint the trees using a
very freestyle, using the belly of the
brush to paint it. We studied how we can create the interests and
our painting by just changing the different shades
of green on the trees. We also studied
how to give that. I'm painting by changing
the size of two trees. That is two trees which
I knew would be larger and the trees which are
far we would be smaller. So this is all the loan in which we're dead in this class. This is how our final
painting looks. I hope you enjoyed
painting and learning, and I'll see you guys
in the next class.
9. Countryside Landscape: Hello everyone. Welcome to our fourth
class project. Believe me, when I see that this one is my
most favorite one, you will see why. I will explain you by
the end of the class. But yeah, let's get started. Let's not waste any time. Let's first apply
masking tape on all four sides and we already
know how to do them, right? So let me just walk you through what we will
be learning in this class. We will learn how to paint the sky using wet
on dry technique. We will learn a different
kind of tree which will be the main focus of our painting. The clotting, which we will
learn is how to paint or how to layer colors on top of it without
making it look muddy. And the last thing is, we will also learn how
to paint the shadow. Alright, so let's get started. I've already started drawing so forth I to the horizon
line and on top of it, I draw the tiny little mountain. Now I'm drawing the branches
of the tree and rest. We will be doing it
with our Carlos. You already know that, right? Yeah, let's do that. Once that is done, Let's start with this guy. So I will take very light
value of blue color and I will start applying that you leaving some huge wide gaps in between. Once I've applied that color, I will clean off my brush. And I will just
use the damp brush to blend all the blue
edges with the people. Then I will take
the purple color, which I already have. It is already pre-mixed
and my palette, and I will again take a very
light value of that, Carlos. And I will start applying
that in the middle portion, again using very light
hand to do that. Once that is done,
cleaning off my brush, I'm using the damp brush to
blend the colors together. Now when I planned it, I felt like all the
fulfills Gallo was gone. So I'm reapplying that
paint on top of it. I would suggest you to use
a smaller brush to do that so that you don't end up applying lot of
color on this guy. Okay, so use size to, or maybe size one to do that. One status then let this guy
dry while that is drying. Let's move on to
the bottom part. So JOB we'll be using wet-on-wet
technique to do that. So what I'll do is
I will first apply clean water on the land area. Once that is done,
I first started applying lemon yellow all over it again using a very light hand and a very light
value of the color. You can see that I can
see the paper through it. So that's how light
the calories. Then I'm repeating
the same steps with the permanent green color, but yet keeping that very light. Next, I will take the mix of permanent green and lemon
yellow and apply that. You're just applying,
differentiate soft yellows and
greens on top of it. And you will see that I'm
not dropping my brush. As my paper is wet. I am just letting the colors
blend into each other. I'm just helping it
around the edges. That's the key to not make
your lowest look muddy. So don't mix your
colors on the paper, leave it as it is, and let them blend together. If you will, overdo it, you will see that by the end, the gallows would look muddy
and you don't want country. So while we're doing it, I switched to my smaller brush
and I took a dark green. That is, this is the mix of permanent yellow and
ultramarine blue. And I am creating or which is heading
towards the mountain. And then I query
the view grasses. Now I'm doing splatters. So this is just me creating different actions on the people while the paper is still wet. Again, using a very
thick consistency of paint to do these
tiny little details. Because if you use the
consistency of paint that is less of mortar and mode of
pain and your paper is wet, the chances of spreading
the color would be less. Hallway. Use almost 80 to 95% of pain
and five per cent of photo. Do this tiny little details. I liked doing the
details which are in the background but
don't read because it gives you a softer edge. And it also helps
you to identify that those details are
not the focus of a thing. So that's the reason
we're doing it wet on wet so that it is under the load. Okay. And as the tree is the main
focus of our painting, we will do that too wet on dry, which will give
you harder edges. So that is the
logic behind that. We find we'll be
talking about that. I also painted Going on mountain with very light value
of ultramarine blue. Then on the bottom, I intended the burnt sienna and I'm just blending
that together. Now, I will let everything dry. Before we move on to
the detailing bot. Once everything is dry, I will switch to my
smaller brush sites do and I would think
the green color and I will start adding small, small trees and bushes
in the background. All you have to do is just draw tiny little dot to make it look like there are trees and bushes
in the background. Don't know what the
word I will just draw them on the horizon line
and few and the foreground. Once that is done, let's create the green
color for our main tree. So I will mix my permanent
yellow, my burnt sienna, a little bit of permanent
green as well as ultramarine blue to create
or darker olive green color. Then I will use the
same brush size. And I'm taking very thick
consistency of paint. And I'm just doing
the tapping motion as the paint is a little thick, it will give you dry
brush strokes in between, which will make it look
even more beautifully. So you will get
some rough edges. Urine there, which is okay, which is exactly what we want. Alright. So once we have painted
though foliage of trees, we will switch to the
small round brush. So I'll just use my
regular brush to paint the trunk and the
branches of the trees. So here I'm mixing
my burnt sienna with ultramarine blue to make it
light and dark brown color. And then I would
just use the tip of my brush to paint the branches. You'll see that I'm holding
my brush at 90 degree angle. We have we just use the tip
of my brush to do that. I didn't know what I
really love this brush to, to do these crosses and the
tiny little yellow lines. Because as it holds an order
of water because it has low, it helps me paint
these lines in one go. So using the same brush, I will add few more
detail is that does, I will add few more trees and
bushes in the background, as well as I will also add few more lines using
the same brown. Now earlier I totally
forgot to mention that we have also drawn to
shadow of the tree. On the very end of the paper, you'll see that I've
drawn a green color. So that is the shadow
of the G which we already did while we
were painting dome. You know, foreground
part, wet-on-wet. So you can stop it. But I will add few more details. And I will use my finger to
blend it with the background. And lastly, I will add
few more splat doing. And then I will wait
for the whole painting to dry before removing
the masking tape. You'll see using
minimum brush strokes helped the color to look
much more fresh and vibrant. So this is one of
the important thing which we learned
in this class that is not to wash up your
colors on the paper. Just let them blend on its own. Even if there's a little bit of harsh edge urine
there, that is fine. Because if you will
layer that on top of it, like if you will add few
more details on top of it, it would, anyways
wouldn't be seen. Alright. So here
I'm just adding a few more garage this
in the foreground. But, you know, I know
I Denver know when to stop adding tiny little goods and this guy using
the same rigor brush, and I promise this
is the last step. I will remove the masking tape, which is away from the paper. Let's see the close up of this one and then
remove the tape. I hope you enjoyed
painting this one. And I'll see you guys
in the next class. Bye.
10. Tuscany Vibes: Alright, so let's get started
with our fifth landscape. So think about your paper
and started applying masking name on all four
sides of the people. In this class. The one important
thing which we'll be learning and still
how to blend or beautiful looking sky with clouds using the wet
on wet technique on. This is the main thing. I didn't not move
unknown though, how to paint or
different kind of tree. And we'll also learn how
to create the shadow. Yellow. Let's get started. When you have applied
the masking tape, make sure that it has
completely pressed down to the paper
and there's no gap between the people
and the masking tape. Let's start sketching. So I've already drawn
the horizon line, and on top of the horizon line, I drew three mountains. And then I will draw a diamond, the road from the foreground, which is leading
towards those mountain. Then I will draw the overlooking kinds
of trees on top of it. So the thing which
we learned earlier, the trees which are known
to us, would be larger. The dreams with hard in the
background would be smaller. So this is one thing
which you have to have to have to keep in mind
whenever you are drawing. The same concept goes
with the road as well. And you will see that row which is going towards
the horizon line. It will go thinner and the way it comes
in the foreground, it will get thicker. Chondrite. Basic concept whenever
you are painting. Alright, now let's start
with the sky part. So as we are doing wet-on-wet, we will first apply
even layer of water. Once you have applied
evenly order of water just on the sky area, I will take my value of cobalt blue and I will start applying
dark color on this guy, leaving some gaps in-between. One thing which you have to keep in mind when you are doing wet-on-wet is whenever you
load your brush with paint, make sure that you remove the
excess on the tissue or on the sides of the
palette or I would suggest you do to both when
you were starting out. Right now, I know how
much paint my brush has. Sometimes I tap it off on the
tissue, sometimes I don't. But for you as a beginner, I would suggest you to do
the steps so that you don't end up having a lot of
paint on the paper. And you will have those
whitespace on, right? So this is the very
easy technique to paint the clouds that is, just wet the paper, apply blue color,
leaving some gaps in between and those
white gaps will act as a cloud on right now. Let it completely dry. Once that is dry, Let's move on to
painting the bottom. But I want it to
foreground to look right, because it is a
beautiful sunny day. That's what I wanted to
depict in a painting. So I took lemon yellow and I mixed permanent green with it to make it
lighter and brighter. And then I applied it
on the foreground. Once I have applied the
first layer of that color to create a bit of dimension. I added a darker green
color on top of it. Then first two blended together. Next, I would say
permanent yellow color. And I will mix it
in my dark green. And I will start
painting the mountain. You know, we have painted to 234 mountains on
the horizon line. So we will have to
pay them one by one. So if magma is dry, we will only be able to
paint the other one. Otherwise the whole thing will
get mixed with each other. So what I've done is I've painted the bottom
most mountain, and then I'm painting
the top most mountain. But ultramarine and a
bit of green color. Now I've let it dry video, we will paint the
other mountains. So what I usually do is I use my hairdryer to
dry off my paper. I'm very impatient when it comes to waiting for my painting to dry because I usually work
one painting at the time. I don't work on
multiple paintings. You know, anti-tank, especially
right now when it is been shown and it's taken
me to longer to dry, which is a good point when
you want to layer a lot. And especially for a
watercolor artist. But right now as we
are painting small, we need to work with light. And it just hairdryer back in case you don't
have a hairdryer. All the heating, do what
you can do with just deep. You're painting with a fan for five minutes and
it will get dry. But whenever I say that, meet for your painting to dry, you have to do that. Otherwise, you will end
up mixing all the colors. You won't see
different layers of mountains or the details
which you put on top of it. So if you are impatient like me, just use a hairdryer
or fine to do that. While I was talking about that, we completed painting
different layers of mountains with the greens. Now I'm taking a darker
green color and I'm starting to paint the
trees on the horizon line. As usual, I repaint
those trees smaller because they are further
away from our viewpoint. I'm using the smaller
round brush size to, if you feel like whatever
brush I'm using, you are not able to do
that or you're not able to get similar result
with that brush. Definitely change it. Like if you feel
like you're cutting thicker strokes than mine, then use a smaller brush and you feel like you weren't
getting thinner stroke and you need to change the
size of the brush to pick the one that I would
leave that up to you. You are the master
of your painting. You are the head
of the painting, so you should know what
you have to write. Let's see what the
only one who can take the best decision for that. So definitely doing that
in case you screw up, you will know what
to do next time. So don't worry, you always
learn from your mistakes. Okay, so once we have painted
the background trees, I, using the same brush and painting the larger
ones in the foreground. Just kind of shapes. And I'm just painting the
first layer of trees. You have painted
the larger trees. I will take the green
color, the same column, but I will just dilute it and start drawing the shadows of the tree in the
right hand direction because the sun is
hitting from the left. Just to wind very lightly.
One staggered stance. I'm just applying
what more layer of dark blue or dark green color on top of the trees from the left. And then I'm drawing two
trunk of the tree using a darker brown color
that is the mix of ultramarine blue and brown. Then I would take
yellow ocher color and I will start applying
that codon on the road area. Again, I'm just using
my brush to paint, but you can use size one or
size as well to do that. We are almost done
with the painting. Let's just add few more
details in the foreground. That enzyme will add tiny little grasses
and some splatters. You would already know
that I love adding splatters because it's
so easy as it goes. So much extra to the painting and just
adds a lot of character. I loved doing that
easy and beautiful. So you need to do right. So once we have from that, I will add few more
birds in the sky. So painting boards is quite simply use any brush which
has a really good tip. I would suggest
you do whose side? 0. If you don't have
this kind of brush, just draw a V-shape. Once we have drawn the V-shape, jaw, a tiny little
dot at the center. And that's it. It's quite simple, right? I never draw a few more votes. And this guy, I have
explained how to paint the brush in detail
in my previous classes. So definitely check two
techniques section. If you Austrian struggling to paint flying boats on right? So once we have
painted the bullets, I will add few more grasses
and dots in the foreground. And then we will be done. Once you're done painting and you're satisfied with your work, wait for your painting
to completely dry. And then paint of your tip at an angle which is
away from the paper. Just revise what we studied. We studied how to paint beautiful sky using
wet on wet technique. We studied how to paint
the trees and Shiloh. He also studied how you can use a hairdryer if you
are impatient to dry off your painting and
that is totally fine. It doesn't affect anything. Alright? And more importantly,
we studied how to take decision for your work and
how to go forward with that. Alright. Yeah, we are done. Now, let's remove the masking
tape at an angle which is away from the paper so that
you don't end up getting it. This is how final thing
and this is how it looks. I hope you enjoy watching and learning and I'll see
you in the next class.
11. Multicolor Sunset Sky: Alright, now let's start
with sex class project. And believe me, I know you all are bored with
the greens and blues. So let's change it
up and lengthen. And this time we will paint a beautiful sunset sky
with lots of colors. So as usual, let's first apply the masking tape
on all four sides. And while we are doing that, let me tell you what all we will be learning
in this class. We'll be learning how
to paint this time with loud using wet
on wet technique. I know we did study
it in the last class, but that was a
different kind of sky. This time we will paint the
clouds with different colors. Alright, so let's get started. So first let's draw
the horizon line and I will draw a few mountains. I won't draw it
completely straight. And that's all with
the sketching part. The main focus of this painting
would be on this guy and you will know why by the
end of the class, right? Like you know, whenever you are doing restaurant
where people will first have to wet the paper will always apply even
layer of water. Make sure that the
paper is wet evenly. There is no paddles
on the paper. If you feel like you have
applied load of water, just turn to your board. And that will help the water
to move down on one side. Alright? Once you have applied
the evenness of water, I will take very light value of blue and yellow and others aren't applying
that on the paper. So the blue color I will applied on the top and again
two on the bottom. I know right now you're
not able to see that. But believe me, I've got no. So that's how light you will have to apply
the first layer. Then I'm just preparing my
Carlos like right here. My orange color by
mixing my yellow, that is permanent yellow
and the red color together. And then I'm just applying that paint on the bottom
part of my paper. Again using very light value of all the colors that I'm
applying right now. Then once I've applied to a yellow and orange
color at the bottom, I will apply a very light layer of cobalt blue on the
top, just on the top. I don't want that color
to come down because if you will mix yellow
and blue together, it will tend to be green,
which I don't want. Once I'm satisfied
with the moist layer, I will start
painting the clouds. Now, when you're working
with wet-on-wet, there are few things which
you have to keep in mind. First, repair all your colors beforehand whenever you
have to paint the clouds. So I've already prepared
my orange color. Now, next is use a synthetic
brush to paint the clouds. If you are using a
nitrile gloves, do it. If you have already done it
and if you're not pregnant. But if you are a beginner, I would suggest you to paint the clouds wet-on-wet
using a synthetic brush. So what I did is I
took two orange color and I tapped off all the
excess on the tissue before moving it on the paper so that I don't
end up Applying a lot on the paper last time using thick consistency of the
paint is not way too liquidy. Alright, so these are
the two to three points, but you have to keep in mind when you are
painting the clouds. I've already applied
the orange clouds. Now. I'm painting the perfect
kind of on top of it. So let me just repeat
the things which I said, when you are painting
the clouds but don't wet the bed or your
Carlos beforehand. Second, use a smaller brush and a synthetic brush which
doesn't hold a lot of paint on it toward remove
the excess water and paint from the brush, either on the tissue
or on the palette. All to vote doesn't
matter if you are using or natural hair or
synthetic hair brush, you need to do the
step off removing the excess paint from the
brush on the tissue or palate. Right? So I'm just giving more and more
depth to our clouds. That is first I applied
to orange clouds on top of an applied
lighter, puffy clouds. For the third and final step, I am painting more darker
purple clouds on top of it. To make the carlo
look more natural, I just added a bit
of cobalt blue to my pre-mixed spoken
color so that it would look much more appealing. Right? Now, I'm switching to my
larger brush because we have already painted this guy and I'm pretty
satisfied with it. Don't overdo it. If you will, overdo it, the purple and orange
color will mix together and it will
turn muddy brown color. So let it be there. As the paper is wet, it will automatically
learn together. And if you feel like you're
getting very harsh edges, just use the damp brush. Take me to blend the color
along the edges, right? So while that is drying, let's start painting
the blue part. So I painted the wrong kind of forest and on Trump offered I applied green color. Now I'm just using my needs
to lift off the paint. And that will make
it look like there's a pathway which is coming
towards the mountain. Now, if you don't have names, you can use any sharper
object to do that is you can use your skin or
the palette knife, anything. Okay, once you have
drawn the pathway, I will just use
my regular brush, duncan to Asia
around the pathway. So the pathway would
be highlighted. Do this slowly. You will see that even I'm using the smallest rigger brush
to add the details. Because if you will
do it quickly, you will end up painting
the pathway as well with the green or whatever color you are adding to
the ground area. How traits can do it too early. And you don't have to anyways, hurry because you
don't have to fear about paper drying out
quickly because anyways, we are painting on a
very small paper and on that to be a painting
on a very small area. So you don't have to feel that the paper would dry
out way too fast. Alright? So one standard
turn on Drawing tiny little trees on
the horizon line. Or you can see on the top
of the mountain where though mountain is ending
and the sky is starting. Again, do it with
the smallest pillars you own so that you don't end up adding a
lot of huge trees. Because we want to focus it on us guy and
this guy must be seen. Otherwise, you will end
up hiding this guy area. Alright, that's it. We're done with this painting. Now, let it completely
dry before you peel off the tape at an angle which
is away from the people. And let's just remove the tape
and see the final result. This was, I think one
of the quickest class. And I really, really, really loved the end
result. I hope you did. Now, I'm definitely looking
forward for your painting. So do that and I'll see you
guys in the next class.
12. Dried Tree Painting : Hello, hello. So let's get started with our
seventh painting. Can you believe are most
halfway through class? So glad that you
want your painting and learning with me. Right? So let's get started. Let's first apply masking
tape on all those night. While we're doing that, let me talk a little bit about
what we are doing today. For this painting. Don't try three would
be the hero and moving paint over any salt sensitive sky
in the background. Alright, simple,
right? Don't worry, if you find it difficult, I will make simple for you. So let's get started. So first I will draw a mountain and then behind that door tools, wandering mountain, and on
top of the larger human, we will draw the tree. So one more thing that I really, really wanted to tell us, if you are watching this class, I would sensitize due to paint. The glass projects. Because you will be learning something or the
adult in this glass. If you will not paint
and if you'll just want, you would never
know what do I have studied and you will
end up forgetting it. So please, it's my request. Or you can say a
friendly suggestion that whatever you are watching, try to put it into
practice, right? So now we have
already sketched out. So let's start with
the painting part. We will paint the sky using
wet-on-wet technique. So I applied even layer
of paint on my sky area. And then I would start with
the permanent yellow color, directly taking that
color from the well. And I'm also adding a bit
of lemon yellow on the top. And then I will add the
orange color from the bottom. You can use more Megan or fulminant orange,
which for orange, you have in case you
don't have auditing, you can mix red and yellow together to create
your orange color. All right. Again, you will see that I'm not wrapping my brush on what? Wherever the orange and the
yellow color on meeting. Just face Lovely. Moving my brush and
then just cleaning off my brush and not doing a lot
of strokes on it. You know. Why? Because if you will overdo it, you will end up getting muddy texture
which you don't want. Alright, so I'm pretty happy
with how my skies looking. Now. I will wait for it
to completely dry prints. It is dry. We will move on to
painting the lower part. So I was trying I just prefer
my kind of on the mountain. So that is the mixed of permanent yellow and
ultramarine blue. And I am making my own green and painting that onto
dump of that landlady. You are not doing
a lot of textures and details on the observer part because our main focus
would be the three, don't worry, was just applied the flat wash
off the green color. Then I directed to
ultramarine blue on my brush and applied it on the green part while it
was wet as it was where I was easily able to blend
those two colors together. Alright, so while
that is drying, let's paint the audio portion. So I took mix of yellow ocher, a bit of green, which
was already dead, and Emiliano and I painted
that on the lower part. And again, once I've
applied to forced labor, I am painting, doping, follow on top of it and
blending it altogether. So I actually enjoy mixing the colors directly on
the paper underneath. Theorists. Bet you too
can do that if you don't want to mix all the
colors on your palette. But again, if you are not comfortable doing it
directly on the paper, you can always mix your paint, mix colors on the palette. Like before. I applied the
green color and on top of it, I directly applied
ultramarine blue. What you can do with the
ultramarine and green, Hello, mix it on your palette, and then apply it onto paper. But make sure that while
we're mixing your colors, your paper doesn't dry off
a little faster, right? So we also painted
brown color for two mountains which
were behind me. And I just applied
finally, once that is dry, we will add one
more mountain with a darker brown color which
we had already sketched out. Alright, now, let
everything dry. Once it is dry. Let's first pain. One more mountain with
the darker brown color. So to make it dark, I just add a little bit
of ultramarine blue. You can add any dark
blue to brown, darker, or you can add black or even finds great to make
your bones here no doubt go. Alright, so I just
added what I had. But you can add any
of these colors, which I mentioned earlier. Now, I will take my screen and I will mix it with my burnt sienna
to make it dark. And I think two or three, using my rigger brush, as it is small and
it has a beautiful, it will help me paint the branches of the
tree way to easily. So first what I'll do is I will paint the
trunk of the tree. Once I've drawn the trunk, I draw two main
branches of the tree. And then we will draw small
little branches which are coming out from the
main branch or right. So you have to repeat
the same step. That is first draw the
main branch and then along that are
following that you will have to draw smaller
and smaller branches. So remember the main
branch would be a little thicker when you are
drawing those little ones, but it would get thinner and thinner because those are small. 100. So just keep that in mind. Just draw crooked little lines. You don't have to
draw straight lines. Draw small, small, small, small lines and you
will get this effect. And just loosen up your hand. If you will have less
control on your brush, that will automatically
give you a crooked line, which is exactly what we want. One more thing, keep
in mind when you are painting these branches is remove all the excess from
the brush. If you will. Have lot of paint
on your brush to get a drop on the paper
which you don't want. Remove excess calcium
from the brush, and just use minimum color to paint this tiny
little details. Also don't have in
this step the width slowly at this is the main
focus of our painting. You want it to be
perfect, right? Do it slowly and you will
get the best result. I'm pretty satisfied with
how my tree is ducking. So I will stop it. And then I will add few more details as the green part is
looking way too flat. So I will add grasses and just a no foreground
part. Yeah, that's it. Once it is done, let your
painting completely dry. It would be almost dry. Only the tree and across
Asia would be red. So you can, anyways, rooms to masking tape because all the edges
per feet, right? Right. So to move to T patent angle which is coming from the paper. And let's see the final result. You know, the whole thing, thing comes to different life when you just remove the tape. It looks so **** beautifully. Would you agree to that? Let me know. All right. So removing the tape and let's see
how it is looking. Gorgeous, right? That's what you
should feel up to it. Every painting you
paint on, write. Complete this, and I'll
see you in the next class.
13. Green Forest Painting: Hello, hello, Welcome back. So let's start with
eight painting. So I'll end join that the stack of the paper is
getting smaller and smaller. Believe me, once we
got done with this, all 15 painting,
put them together, like frame it or just put
it together on the wall as a collage and you will adore
watching them together. Alright, so let's get started. Let's start with the eighth one. This time, we will be painting bright blue sky with
the white clouds. Why do huge cloud at the bottom? And then we will paint yards, tall trees in the
foreground, right? So let's get started then. Sketches, as usual,
quite simply just draw a horizon line and one
more line on top of it. Again, we will just draw lines making us understand that that's where the
trees with them. Alright. So this time we will study
different kinds of sky. Again, we'll be
doing wet-on-wet. You would see that for
all your re-used to paint the sky forced and
then the clouds. But this time we will paint the clouds first and then
we will paint the sky. Alright? So as to vote
though clouds are white. So we can paint the
white on white paper. So we will just paint the
shadows of those clouds, losing or gaining poeple follow. To create that, what I did is I mixed a bit of pines, gray, and red to my
purpose and diluted it with water and just
loaded that on my brush. Again, I'm using quite
large brush can do, but I'm able to control it. But I would suggest you to use a smaller brush when you are painting the
shadows of the clouds. One thing is remove
the excess paint on the tissue whenever you are doing that and when
you are painting, those shadows, apply
the purple color and leave some white gaps in
between while doing that. Once you have
applied the shadow, take ultramarine blue color on your brush and start
applying that on the job. Again, you will have to leave the white gap in between because those are
the white cloud. The purple color is to
shadow which we painted. The blue color is the sky. The white color is
definitely though. We will also learn how you can lift off your paint
with your brush when you end up applying
water color on the pink book. You want to remove that too. Like I'm doing a trade deal, is clean off your nourish, remove all the excess
water on the tissue, and then just drop your brush on the paper and lift and then tap it off on the tissue
and occasionally clean your brush with the water every time you lift
off your paint. Otherwise, you will
end up applying the same color on
the paper, right? Again, I'm lifting out a few of the ultramarine color which
I have actually applied. I feel like I've applied
a lot on the paper. Has this ultramarine
is non steaming. You're easily able to lift the color from
the people and you get almost white looking
people beneath it. So now I'm pretty happy
with how my sky is looking. So let's move on to
the bottom part. Again, starting with
very light green color that is mixed off my
green and yellow. Once I've applied that, I'm just darkening
the top portion. Then while doing that, I'm also just adding few trees using the same
color on top of it. Alright, so once that is done, I will switch to
a smaller brush. I will take the dark green color and I will add few
more grasslands, indoor back John
Mountain, Man status. Then we will paint
the foreground with really nice green color that is a mix of lemon yellow
and cobalt blue. Or you can also mix lemon yellow with permanent green
to make it like do. And we will paint the
foreground part with just one color for now. And then we will
let everything dry. Once it is completely dry, we will move on to
painting to larger trees. So let's first paint
or green part. And on the top I will also add lemon yellow directly and then blended everything to get them. Now, let's just try
everything off. And then we will move on to
painting the trees. As usual. If you remember, for
the earlier class, we started with a light green
color to paint the teeth. And then on top of it we
nailed it with a darker color. So we will be doing
the same thing. So right now, we will start
with a light green color. But this time we will do zigzag motion from
left to right, starting from smaller
strokes on the job. And as we go down, we will increase the
size of the stroke. So it is point here on the top, and as you move downwards, it will get a
little bit thicker. This is exactly what you have to do with each of the trees. So I just painted first with
the lighter green color and then I'm just darkening the
left portion of the tree. Again. Don't put a lot of efforts in blending
the colors together. It's okay if it is
talking and blend it a bit more abstract. That is okay with this, what exactly we want, because it is looking
so beautiful. So once that's done, I mean, doing it for
all the other trees. But again, I will keep
on changing the greens. That is sometime I will paint it darker and sometimes
I will make it like, do you already know how
to mix your greens? That is, if you want
to make it darker, you will have to add
a bit of blue to it. And if you want to make it, you will have to add burnt
sienna or burnt them. But I know who are pro add
making your greens by now. I trust you guys. Why we were painting
the piece I oil, painting the trunk of the
p using the brown color. And then I just apply the damp
brush along the edges with a trunk is meeting
the ground so that it looks a bit blended
with the ground. So again, continuing to paint the trees the same base on
the right-hand side as well. I hope you all are enjoying painting this mini
landscapes with me. This is my first time
being in paintings. Mono Glass protects. Usually my class will have at least 30 to 40 minutes
of each class project. But this time it is 15 maximum, it is under 12 or lemon. So I really wanted
to keep this short, especially for someone
who really wants to paint and want to get into habit
of painting every day. But as always, struggling
with ideas of what to paint. Or they don't have time, or they don't know
the techniques for this class is for you. And also, I have used limited art supply and for glass so that everyone
would have that with you. And I've also kept the class projects
and at the start and slowly I'm increasing the
difficulty with each class. I hope you all are enjoying
and learning along with me. Definitely suggest
this class to someone who really wants to paint and enjoy the
process of painting. Flexing, know what. You can give this painting on the wall altogether
or you can use it as a postcard and sent
to your loved ones. You can even use
this as a bookmark. Or you can also give
your friend Andre. Yeah, let's just
enjoy and learning. While I was talking about that, I just added a bit of depth and no foreground part that is by just Leo did different greens. Now I'm adding feel most plateaus of green
color and tomato. Remember to always
cover the top of your painting with the painful before we start
this blood-brain. Otherwise, you will definitely end up getting the
green dots on the top. So once that is done, I will add few more splatters
with the brown color. You know when to stop
with this planters. So we just stop it right now. Otherwise the will
or won't do it. So I'm pretty happy with how
it is looking right now, but I really wanted a little bit of lightness in the
foreground part. So what I'll do is while
the paper is still wet, I will add lemon yellow and permanent yellow
you and debt. And lastly, I will add few more branches are falling leaves on the
tree and we add them, then we will let it
completely dry before being off the masking tape
and see the end result. Everything comes together once you paid off your masking tape, would you agree to that? I think so you would write. So let's do the fun part and the most exciting
part of the painting. And let's see the final result. I hope you enjoyed and you
are painting along with me. So I'll see you guys in
the next class. Bye.
14. Sunset Driveway : Hello. So, but comeback. Firstly, let's start
with painting. This is something, you know, you just imagine that you are on a long drive and then there's
nothing on both the side. There's just two green lines. And this guy is gorgeous. So that is exactly what
we will be painting. That there's a road way
which is going somewhere but surrounded by
beautiful green fields and beautiful sunset sky. Alright, as usual,
let's first apply masking tape on all four
sides of the paper. Once you have applied
the masking tape, first we will draw
the horizon line. As always. We want to focus
more on this guy and that's why the major portion of the people would be
for the sky area. So more than three
foot of the paper is this guy dressed up to? Bottom portion is for
line down the road. Once you have drawn the line, we will draw our
triangle. At the center. That is the center of
the triangle would be on the center of
the horizon line. And we will do a
too strong claims. That's it for the drawing. But now let's pause, prepare on alkaloids
for this guy, for the last, I think, Project which we've painted the sunset sky with the clouds. I didn't prepare my followers. I taught, I will prepare
my color forced for this class so that you would
do the same along with me. So I prepared my orange color
as well as double that. There's some mix of
purple and cobalt. Blue. Lines have prepared
both the panelists. I will first vector whose area, as we will be painting the sky using wet
on wet technique. Always, when you want
to paint the clouds, you will have to go for this
method that is wet-on-wet, otherwise you won't get
those softer looking cloud. Alright, so once you have wetted those sky in here with
even layer of water, I will start applying the
yellow color from the bottom. You're, I'm using
permanent yellow. I'm using very light
value of color. Once I've applied that follow, I will use lighter
value of orange color and then apply that on the
left-hand side of the paper. Remember, whenever you
are applying the paint, don't rush the process and don't move your brush. Wait to speed. Otherwise you will end up mixing the whole of the orange
with yellow color. I'll make sure that you are able to see all the
different colors in the sky. Next, I'm just mixing
a little bit of white to my cobalt blue to
make it lighter and lighter. And I'm applying it from
the top towards the bottom. Once I've done that, I will reapply the blue
color one more time because I thought the last
time it was way too light. So just reapplying
the same color. Now, I will just tell the
board that is either you can apply masking tape
blue that I just did it with two To stand, which was already
the main reason for tenting the boat is that the water flows or the color food downwards instead of just
putting it on right? Now, switching to my
smaller brush and applying the popup clouds
on the top of the sky, which is already wet. You already know how
to paint the clouds. That is, you just
have to do to tap tap motion on this guide
as staff, lift up, tap and lift up your brush nasal far away from the
points that you will have less control and you will get softer and natural looking
brush strokes on the paper. Again. Synthetic brush to do that before using whatever
brush you are using, just tap off the
excess on the tissue and remove the excess
on the ballot before you damper on the tissue so that you have the least amount
of color on your brush. Once you have applied for snail of poeple cannula on this guy, I will darken dark color. And I will reapply the same
color on top of the clouds, which we have already painted. Still, my paper is wet and you have to do everything
while your paper is. In case you feel like your paper God tried
out in between, let it completely dry, or you feel like it just
a little bit portion of your paper is dry, then you can use the spray
bottle to spray on that. But otherwise, I would suggest to let it
completely dry it and who can be but
those sky area very lightly and then apply
the paint on top of it. So yeah, I applied one more layer of dark
opened by Tuesday. I'm still able to see the
underneath lighter color. So that you have to keep in
mind that is not to cover the whole area with
the taco button. Now, I'm taking even
more darker colors, but this time I
directly to the public. I know from my rent and
applying that on top of it. Now, I'm taking ultramarine blue and reapplying it one more time to make it
even more darker. Not doing it for all the clouds. Just forward. Do
three big applause. Right? Now I feel like my Thank God tried out and it's not blending. So what I did is I
cleaned my brush, tap off the excess water, and then just use
the damp brush tool. Blend along the edges, protect, it gets softer. Lastly, I'm just adding a bit of orange color at
the bottom because it just caught
hidden away between those popu clouds and enjoying wanted a little bit of
orange in this guy. If you'll notice,
I'm holding my brush pay too far away from the point. That is because the
mole five Julio brush, the less control you have on your brush and the less
pressure you put on the paper. So that's the reason I'm holding my brush a
little far away. Now, I just kept
my mood straight. So if you have applied
masking tape below, just remove that and let this
guy area completely dry. Once it is dry, let's paint the room and don't hand area
along the word ways. So again, I went for start
with the lightest color. That is the lemon yellow paint that near the horizon line, as well as on the
right-hand side. Once that is done, I will take a little
bit of darker color that is a mixture of
yellow and green. And we apply that on different triangles which
we have already sketched. Don't remember. Start with the lighter color, whichever it could be, it could be yellow or it could be lighter green,
and then slowly, slowly moves towards the dark because watercolor being a
transparent medium, I have, I think I already
told you cannot leave your lighter color on
top of a darker color. Acrylics. I know. I understand that you can hear lighter color
on top of any color, but in watercolor, you
won't be able to do that. So one of the principle is
always start with light. Whenever you're working
with watercolors, you move from light to dark. So you can see I applied
a light green color. Now I'm applying darker
green color on top of it. Whenever you want limiting. And remember one thing to use, thicker and thicker
consistency of paint. If you don't want your
paint to spread a lot. Otherwise you will end
up getting though, we'll patch with
one single color and the darker color
which you don't work. With every layer, use
thicker consistency and use less and less
paint on your brush. That way you will have
much more control on your paper and wet on wet
technique would be easier. File that area is drying. We won't be able
to paint the rule. So let's paint the few
bushes and grasses on the horizon line as the line is really far
away from our viewpoint. So we will make those bushes
and trees very small. Do tap, tap, tap
or dot, dot, dot. Or you can even paint the trees which are painted on
the right-hand side. Once that is done, Let's paint those always. So I will leave a tiny little gap between
the green and my role. And I will paint the mid portion with the wedding height
value of minds gray. You can use black, but add more water so that it
will look like gray color. It will simply write it twice. I know. I'm not sure that you are already PLO add
painting. All of these. Bye. No. Okay. Now, let your painting completely dry and
then let's remove the masking tape and seeing the final result is beautiful. And I know you're painting. Tool is amazing. All right. When Dan, I'll see you
in the next guess.
15. Blue Snowy Mountains : Hello, hello, and come back in. Let's start with painting, and this time we will paint. So we have already
covered long large trees. We have covered grasslands, make centered sky doorways. Now it's time to paint
snowy mountains. This time, we will paint the mountain with
different approach. That is, we will use layering technique to paint
this noise gate mountains. Alright, so let's get started. Let's first, as usual, apply masking tape on all
four sides of the paper. Really press it down. I do this step very
seriously because, you know, the regret when you
don't get cleared edge is way too bad. So press down. Alright, once you
have done that, Let's get painting, so forth. I will draw the two
mountains below, and on top of that, we will draw snowy mountains that is just a triangle shape. Once that is done, Let's start with this guy first. Why we'll use ultramarine
blue to paint the sky. But before we do that, I'm just cleaning out my ultramarine blue
because I know it will definitely have yellow and
the file directly use it. It will be green in color and I don't want green
color for my sky. So I just cleaned
my color first. And now I'm taking very
high value of green color, just applied it on the top, cleaned my brush and
pull it that color down. I'm also covering the
mountains because anyways, we will be painting those
mountains with blue color. But I just want the top of
the mountain to be white. What I'll do is I'll use the lifting technique that
is cleaning off my brush, pressing it on the paper, and lifting the color again, cleaning and North
and doing it again. So you can also use a clean
tissue to dab off the color. So what you can do is just take a clean tissue and apply
that on the top of the mountain and lifted
up and the color would automatically be
soaked by the tissue. But I just used the
rush to do that. Why did that area is drying? Let's paint the lower part. So you're I'm using very
light value of yellow and applying that color for the behind mountain
and for the front, I'm applying a darker yellow, greens using different colors. And doing while the
Calgary stale bread and blending all the
different cargos together. Now I will switch to my smaller round brush
and I will start adding the grasses while the paper is still wet so that it
will get blurred. And once it is dry, we can layer it on top of it, but then you will
get the base where you have to pay those
grasses contract. So why don't we go painting the sky and the
mountain in your code, dry dock so we can
add more details over there while the
lower portion is trying. So I took mid value of
green color eye and I added a little bit of burnt
sienna to make it little. And I'm painting
those smaller trees and bushes and the background. By now, you would already know that you have to paint those. So I won't explain that. But one thing which I
want to touch up on this, you will see that this is more of like an
abstract painting. That is, I will not hold a
lot of pressure on myself. On dues, brushstrokes, and the shapes of the
trees and the bushes. Because I want to make it look a little bit of
rough and abstract. This is a challenge. I'm telling you. It
doesn't come easily. Bulk letting go the brush and
the control on the brush. Give it a try. While I was talking about that, we just applied learning darker value of ultramarine
blue on those mountains. But I will leave the
top portion it in white so that it will make it
look like on that mountain. Like I said, we are not using dry brush technique for
this nose gate mountains. What I'll do with,
with each layer, I will go a little darker
with ultramarine blue. And you will see the
magic green by the end. You're, I'm applying the third
layer of ultramarine blue. The first be applied
with those sky. The second we did with
the lighter blue. And right now I'm applying
the third layer on the Knowing mountain using
even darker blue. Eyes always don't cover the
whole area with one color. Leave gaps in between, right? So now I'm pretty happy with how my mountains
are looking, so I will not touch that. And let's move on to the lower part and
add those details. So the bushes, which we
have already painted, the bushes and trees, I'm just darkening it, but though darker green. Again, remember, you don't
have to put a lot of pressure on yourself on those shapes
of the trees and the bushes. Just let it go. Grab your brush, move
your brush up and down, tap and lift it off the paper. And hold your brush
a little further away so that you will have
less and less control. And you will see the
strokes which you create when your hand is a
little loosen up. Those are the most beautiful, chose, it looks so
beautiful by the end. You can do a mix of both. That is, you can create
few strokes with control. That is, you can paint
the grasses with 90 degree angle land with control on your
brush and few strokes, you can just do it in a loose style and combine
both, two of the two. And you will see that by the end you will get
a beautiful result. Also, don't forget to use different shades of green
while you want to win that. Alright. Now, I will start painting the two larger trees which are in the foreground. So I prepared my mid
tone green color. And I'm just painting it with a lighter green
to what I did is I just did zigzag motion starting with smaller
strokes on the top. And as I move downwards, I just painted died plateau. And once I'm happy with the shape of the
tree and everything, I will use the
darker green Carlo and reapply that on top of it. And I will leave
it to dry for now. And I will again focus on adding more details
in the foreground. So I'm just painting those grasses using
the 90 degree angle. And with each layer, I will go a little
darker and darker. Now, I wanted to add a bit of
rocky texture on the line. So what I did is I
took burnt sienna, I read it at the bottom of the tree and then I'm just using my finger to blend it together
using the same color. I will paint a few more glasses, making it look like those
crises are dried out. So I'm just playing with
my colors and textures. And let's hope that it
turns out to be great. Sometimes it's all
about experimenting and having fun with the
paint and the subject. You never know you end up
getting something which is beautiful and you
will learn something. Maybe you will discover
a new technique. So never stop experimenting. All right, So while I
was talking about that, I added one more layer of darker green color
on those trees. The leftover paint, I just do
some glasses at the bottom. Now. I'm just adding
more and more layers to know when to stop. If you don't know what to do, you're going to stop. Just put your brush aside. Look at your painting from
far away and you feel like it's complete and
it is making you happy. Stop it, and don't overdo it. If you will, overdo it, you will draw in it. Alright, so this is the
last thing which I'm doing that is adding a bit
of yellow on the top. And that's it. Now, I will let everything dry. And once it is dry, we will be off the masking
tape and see the final result. I'm super excited for this one. I really love the mountain, like how the
mountain turned out. Usually I always go for
dry brush technique, but this time I tried some new layering technique
to paint the mountains, and it turned out
even more beautiful. Now, let's remove the tape
and see the final result. I'm hoping you will give
this technique are dry. You will at least try to loosen up your hand while doing that. Alright, so this is how
our final painting looks. So gorgeous. So, yeah, make sure
that you try it out and I'll see you
guys in the next class. Bye.
16. Mountains By The Forest : Hello, hello, Welcome back. So let's start with our
11th or the right thing. And as usual, we
will apply masking tape on all four
sides of the paper. Remember to apply a thick
layer of masking tape at the bottom so that we will
get tiny painting by the end. Alright, so this time
we will be painting. I'm done looking D. Now we have painted
bright sky and Sons guys. Since IT guys. Now
it's time to paint, are done looking sky. And let's see how the
color palette changes once you paint or dusky. Alright, so this
would be a main focus of a painting that how you can just change the mood of your painting by
changing the colors. Alright, let's get started. So this will be a
painting where there'll be snowy mountains
and there'll be a role which is leading
us towards that. So that's what
means canceled out. So I just first sketch
out the line area. And on top of the line, I drew a small,
tiny little rule. On top of it. I drew
this snowy mountains. I've also drawn the lines
that you already know. The trees, which we will
be painting later on. If you remember last time, we painted the whole mountains, that is the snowy mountains, using the layering technique. But this time we will
use both layering as Berlant's dry brush
technique to paint the snowy mountains handwrite. So let's get started. So I've already started
using binds Greek. Hello. I'm lying
very light value of that color on top of mountain leaving some white
gaps in between. Sometimes you will see that I'm just
directly dipping dog from the well and applying
it on the mountain. And you see I've applied a
very dark patch offered to. I've been lifted
off with my brush. So don't worry if you do that, you can always lift off. Your paint is still wet. Alright. I first apply one of dad and then I will
let it completely dry. So while that is drying, let's do Skype bot. As you know, we have to
paint on tan looking sky. So what I did is
I added a bit of Payne's gray to my ultramarine blue to make it a little darker. Then I applied a very dark value of that color on the top. I cleaned off my brush
and then just pull that color down using the
damp brush, simply, right? So this is how you get a
gradient wash. You can also add water directly on the paper and then
the gradient wash. But as the area was quite small, it would be difficult to better just to clean off your brush and use the damp brush
to pull that color down and automatically
you will get gradient. Right? So while the mountain
and the sky is drying, let's paint the bottom part. You know, as the color
of the sky changes, the ground covered also changes. Like if you will see, the greens would look
much more bright and fresh when it
is a sunny day. But when it is done
looking to eat, the greens also
look a little dull. So always keep in mind that
if the sky is cloudy or the colors on the
ground would also be at least ten to 20% darker
than what it usually is. So we will be painting our
ground with all the greens, but this time we will
use less of lemon yellow so that it will
get a little less. You know, you can always
add burnt sienna, burnt umber to make
it little yellow. So I just painted
the left portion of the rule using the
greens, different greens. Never been to line two
with just one color. I always keep on changing. Carlos. Whenever
I paint the land. This is exactly what I did. And you'll see that I have on to lift the tiny little
white gaps in between nato long they
will act as little, tiny little stones
to a few possible. Try to leave that white gaps. Right here. I'm just adding more
greens with each layer. Then they also added few
more grasses at the bottom. Once that is done, I will
paint the right-hand side of the road using the same technique
that I will start with, the olive green color. And then on top of it, I would start applying the
different darker greens. Be careful around the routing. Yeah. Because if you
will hurry this step, I'm sure that the
rule would be gone and it will be just left
with though Green Mountain, which you don't want, right? Yeah. Do it. Very nice to meet. You can switch to a smaller
brush than this as well, but don't do it very well. It's doing Your I'm just
darkening some portion of that. So once that is done, let's paint the road using
yellow ocher and burnt sienna. So first I will start with
the yellow ocher color, and then just in the middle, I will apply burnt
sienna as well. Now I'm switching to my
small round brush size two because we will be painting some trees on top of
those lines, India. So the smaller brush, which has a really good tip. Let's first mixing our greens. So I'm mixing my permanent
green with burnt sienna and a little bit of
French ultramarine to make it a little darker. And we will start
painting the pine trees. So it simple. Just had to do zigzag motion starting from smallest
troops on the top. And then as you move downwards, just increase the
size of the stroke. Now, you can use one more
technique that is first draw the straight line so that you will already know the
height of the tree. And then you will
be easily able to judge the thickness of
the drink or right. So yeah, that's what
I'm doing right now. That is first drawing
the straight line. And then around that line, I will start painting the
form gauge of the dream. I have explained how to
paint the pine trees. And we have paid a lot of pine trees in our printer class. So if you really
want to do them, making sure that you've
checked that out. Right. So yeah, I just painted view of the
trees on both the sides. Just changing the
size of the tree and the thickness to make it
look much more natural. And below that, I also drew the trunk of
those pine trees. Next. Those tones, that is the white gap
between left earlier. I didn't want it to
look completely white. So I took very light value
of the bonds Vietnam, which ones are really
clear on my palette. And I applied it in some parts so that it
doesn't look complete white. Now, let's paint a
few more pine trees using the line tool green color. So I will take bone in green
directly from my palette. And then Scott paintings, few pine trees using that color. Then on top of it, I will apply slightly
darker pink color. Now, time to add life
to our snowy mountains. So let's add few dry brush
strokes on those mountains. You already know how to do that. If not, let me just tell you. Load your brush with
pines green color. Remove all the excess
on the tissue. Don't forget to tap off
the excess on the tissue that your brush will almost
be left with very less color. And then use that dry brush
to drop it onto paper. And you will see that it
will create a rough texture. And this is known as
dry brush technique, where you are using almost
dry brush on dry paper. It makes sense, right? Dry brush technique. All right. Okay, so once that is done, you see the mountains are
already looking so beautiful. Now, time to add
the final details. That is, I will add few more
glasses in the foreground. Then we will let the
painting completely dry before we peel
off the masking tape. So the things which we
learned in this class is how those guide color changes the colors which
are there on the ground. So that was one of the important
thing which we learned. Also how by changing the
colors in your painting, you can completely change
the mood of your painting. That is also something
which we learned. And along with that, we also learned how to paint those mountains using
different techniques. Important loading of this class. Now let's peel off the tape
and see the final result. This is how it looks. I hope you enjoyed painting and learning and hoping to see
you in the next class. Bye.
17. Cloudy Sky By The Lake : Hi, Let's get started
with our class project as usual thing to people and apply masking tape on all four
sides of the painful. So can you believe me when I say that I'm
recording this class, this exact paintings
for the second time. I did it for the first time and the camera just tilted
and nothing was short. I thought I will give
it a try one more time. And I really wanted to
include this one because I painted those simpler painting or no larger people
few days back on. It don't don't feel
too beautiful. So I don't give wanting to include those smaller version
of the same in this class. But the first time I painted, I painted it with the blue sky. But I thought, let me
just change it a little. And this time I painted it
using the purple color sky. So yeah, I hope you are excited to paint
and I'll show you the bigger version
of the In thing which I have already painted. So this is exactly
what we would be, but in the smallest size. And we will also
change the colors. If you want. You can use
the same color palette, which is there on a bigger one. But I'm just showing you a
different version of the same. Alright. And the main will guns would
be though flying foods. Alright, so let's get started. So far as drawing
the horizon line. And on top of it, I'll draw
a tiny little mountain. And at the bottom I will
draw one more line. That would be the line. Now on this guy, I'm just cutting out loud so that I know that I don't have to paint
over that area. Right. So the cloud
would be thicker on the top and as you go
towards the horizon line, it will get smaller and smaller. Also, we will be painting it
using wet-on-dry technique. So what I'm doing yours
and just applying tiny bit of water
around the cloud area. Not inside the cloud, just on dope pencil line, which we have already sketched. So that whenever I paint or whenever I apply
that color on those areas, the color would blend. I took my cobalt blue
and mix a bit of purple, which I already
have in my palette. And then I'm starting to apply that color around the clouds. So applying that color
slowly in that too, I'm leaving some white
gaps. You're in debt. I'm intentionally leaving
those camps, right? So applying that post next
I will take the damp brush. That is what I'll do
is I'll completely clean off my brush to
remove the excess on the tissue and use that damp
brush to blend the color. Neo do clouds. Doing it varies normally. And I'm intentionally not
blending all the edges. I am keeping some as it is. Now. I'm taking the
same purple color, but I will add tiny little
bit of pines gray to it and dilute it a lot
by adding more water. And we'll apply that
color on the Cloud on cause I don't want to leave the whole atria
completely white. I will add a little
bit of shadow on those Cloud using the gray mix, which we created by mixing
the purple with tiny bit of pines gray and a little
bit of burnt sienna. Then just using a damp brush
to blend along the edges. Once I've painted the light
gray color is first layer, I will talk on that same color and reapply that just
on the center part of those kids to darken it because right now it's looking a little flat, which
we don't want. Alright. So you'll see I'm
just doing tapping motion. Just tapping and
lifting off my brush, tapping and lifting of my brush. Then I know few colors
would not get blended. Everything that
I'm brush and just try to tend it with the
background using a very soft. Alright, so that's it
with this guy part. While that is drying, let's paint the mountain
which is just below that. So I just makes my lemon yellow and get you
all go together. And using that color to paint, to put the line area. I think it had a
tiny bit of green as well because it is
a little bit greenish. So adding a bit of green, I spell to my lemon
yellow and near to omega. While that is drying, let's paint the league area. But first, try everything moves and then start
with the leg area. The late, I will paint directly
with the purple color, which we painted this guy with a flat wash of that cutoff. Then while that is drying, let's add the details
on the mountain. But first, let's prepare
our green color. As always. You are, I'm adding
a bit of cobalt blue to my already
pre-mixed green. And I'm adding tiny region
trees on top of that mountain. I will add few more grasses in frontline AVR using the
darker green color. So what happens sometimes
is I painted too well, but then there was a
technical issue that is, my painting was not
recorded properly, so I had to do it all over
again, but I didn't give up. And I really wanted to make
this one for you guys. So I painted it. I can guess what it turned
out even more beautifully. So this will happen
like you will paint it for the first time and it
won't turn out to be great. But if he will give up,
you will never get. So why not give it one more try or even taught dry and no. And get better and
better with each one. So please clean. They will give up the cost. If you will give up,
you will anyways, not get anything or any result. We have already painted
the grasses in no friend. Then what I did is I
took two purple color, but took it in a
little taco value, and I painted on top of it. Once that is done. Now let's move on
to the fun part. That is adding lots and
lots of foods on this guy. Again, switching to my smaller
brush or do rigger brush, loading my brush with
paints gray in color. And I will zoom in a little so that you
know what I'm doing. So like I said, draw the V shape and then just draw tiny little
dot in the middle. And that is exactly what we have to do to paint the board. But you will have to pay them in different directions
and in different sizes. So draw the V-shape in
different directions. Sometimes make it
the left, right, bottom, small, thin, thick line using different
kinds of boards. If you're not comfortable
doing it with your brush, you can always use
a black pen to do that because that way you
will have much more control. You can even try that out. But I would suggest do to at least give it a
try with the brush because it might look
hard, but it is not. So try it with the
brush as well. You can add as many
points as you want. But I will stop at you. And then we will let
the painting dry. We'll remove the masking tape. And let's see the final
result of this painting. It took a lot of hard work, but it definitely
gave the result. So I'm pretty happy with
how it has turned out. I'm sure that you will
also give it a try. What give up on if you fail
in the forest, go on, right? Let's see the final result. This is how a test done. Amazing, right? I hope you enjoy it and I'll
see you in the next class.
18. Abstract Mountain Painting : So let's start with
Putin task protect, Can you believe are almost at the end just to
more paintings after this? We will be done. I hope you
enjoyed and I'm hoping that I got you practice of
painting everything. Or even if not every day, I got to paint with
watercolors and made. Working with watercolors are
a little bit easier, right? This one is quite
often painting. You will do have to
think a lot about. You don't have to think
about it, Carlos. You just have to freely
move your brush. So let's see how well we can do. Alright, so I've already
applied the masking tape. Now, let's get it out.
So it's quite simple. We will just draw one
mountain that would be the main focus of our painting
and surrounding that drop, few more mountains which are
at the very back. Right? Yeah. I always draw anything a little lighter because when you're working with watercolors, the pencil mark shows up, especially on the sky and wherever you are
bending, light washes. So if possible, make your
sketch as light as possible. If not, just erase all the extra pencil marks before you move on to the team. But alright, I draw it, fill it in. Tau goes with that. One can see. But you always have to. Now, let's start with
this guy forced. So I'm thinking combined
blue on my brush and Apple, all the excess online digital. And then I'll drag that
brush on the paper. You'll see as my brush dry, it will dry brush
strokes on the paper. And you will see some whitespace on people which will
act as our lungs. So again, we are using dry brush technique to paint
white sky and the clouds. So this technique which we have already done in our
previous class, I think on our second
class project, if I'm not wrong,
don't leak one. So yeah, beautiful technique. Easier one and box. Right? So this is exactly what we will be doing
again in this class. One status. Then let's
paint the mountain. So first I will apply very light value of
burnt sienna and a little bit mix of
phones Hannah and purple on domain mountain than
one that is drying. I will paint the
background mountains using the mix of burnt
sienna and pull. On the top and at the bottom, I will add the
audio stream color. That is, my mic's
off permanent green, a little bit of burnt sienna. And I guess as it is,
like your environment. Once that is done, we'll start adding lots and lots of colors
on a main mountain. The only thing which you
will have to keep in mind is the darkness that you see, that the light is coming
from the left-hand side. The left portion of the
mountain would be lighter. And the mountain which
is on the backend, that is the right-hand side, would be a little darker. So the only thing which
we have to keep in mind while you are adding
colors to your mom. Lot. Darker green
color on the left or right-hand side of the mountain because people have to
leave that portion. Danko because that's
where those shadow of the mountain is hitting and there's no sunlight
reaching over there. Okay, So one thing
which I really want from you guys for
this painting is not to overthink anything
and just keep on adding Carlos because we want this one to be more
often abstract style. When you just keep
on adding colors. Just make it colorful and happy. I hope that it will make you happy because this was
so much fun for me when I was not thinking of why did adding the colors
which I really like, I need to add, you will see me add the brown folk who is under
different shades of green. I've noticed sometimes
switch to the smaller brush and start adding
small, small strokes. So this is all
about layering and. Adding the colors,
which means you have just one thing which
you have to keep in mind, which I already told you is the right-hand side of the mountain would
be slightly Danko. That's it. So far as to
what happened to us, I will apply the base. That is your I'm applying
lighter baseline was for that. I know that I have to, you know, Leo that with the lighter color only and on the right-hand
side of the mountain, I have applied a darker
green colors without I know I have to leave a
darker color on top of it. So once you have
applied the pastry, you can apply multiple
colors on top of it. So why foisting off my
mountain is drying? I will paint the
background mountain, but one more Leon because I
saw that once it dried out, it can't be too light. So I'm again mixing my
burnt sienna with Bobo and painting that though Mountain
which is behind that, I'd be painted with the
olive green color, right? Once that is done, Let's lot of textures and Northern
Canada was two domain. So taking my darker green color and adding small,
small towns, one, repeating the same quantum
bank loan amount and as well as the background
is dimpled, it is getting a little bit
blended, which is fine. Bidding the same
stuff all over again. Now, I will start adding
in gains with even darker. While adding the gains, I keep on adding
different colors. But when make sure that whatever color I have applied underneath, I don't cover the whole of it. So that is the only thing which you will have
to keep in mind. You can stop your painting
whenever you want. You feel like it is
looking beautiful right now and you don't
need to add anything. You can stop it
right there and then you don't have to follow
each and every step, which I noted arbitrary. Do you can just take that
decision for European thing. Alright, so I will just
keep on adding all do. Right now I'm adding
burnt sienna. Now with each layer I will use thicker and thicker consistency of paint because sometimes the colors would be
lied to and we won't be able to layer that on top of it using the thick consistency of the paint is
the only solution. So I will not think
about the colors like Who will add red color or purple color
on the mountain belt? I will add whichever color I
feel like adding right here. So I'm expecting
you to do the same. You think that this
color won't go, then you should definitely add that color on the
mountain, right, to this class
project is all about having fun with
colors and textures. Okay? So right here I'm
just doing the reading, but you can lift off some paint with the card or with your knees in some areas. You can also do splattering. Q can also use the crumble newspaper or grumbled this shoe to
create a bit of texture. Like right here, I'm just using my nails to lift off some paint. But if not needs, you can use your card. Try different techniques, try whichever techniques
which you have learned throughout this class. And maybe try and apply the Waco and see if that is
working or not. So like your eye will take out my card and while
the paint is wet, I wouldn't start scraping
it off with God. It's quite simple. You just
have to move your card in the area where the
paint is wet and the color would be
easily be lifted off. So doing that throughout
the mountain. And then lines that
is then I will add fuel most plateaus with different shades of
green and white. Then I will take a very
thick consistency of white paint and apply it where the mountain and on the left-hand side just to differentiate the different
mountains behind. Yeah, I think I'm almost done. I'm pretty happy how how
it is looking right now. So just adding few more
details with white and then just use my fingers to blend it with the
black background. This is quite rough
abstract kind of painting which
I'm loving it and I had so much fun painting it. So keep in mind, one thing all you have to do is just have
fun with this one. Stop whenever you feel like
because if you overdo it, you will end up spoiling the
whole thing. So stop it. When UV light, what done? So I feel like
I've already added all the colors in my
palette and it is already looking
****** beautiful. I will just paint off my
tape and I'll show you the final result
of this painting. Then once that is done, moving on to our
next grasp respect. I hope you enjoyed learning and I'll see you guys
in the next class. Bye.
19. Switzerland : Hello everyone. Welcome back. So let's start with our day 14. So I have already applied
the masking team. Let's get to the sketching part. First, drawing the horizon line. Once I've drawn
the horizon line, I will draw it at a slant line, which is towards the foreground. That would be the line area. The red portion
would be the league. And on top of the horizon line, I will draw a huge mountain. And then on the top
of the mountain, the colorizing line, we will
draw a tiny little houses. Just the roof and the
bottom part of the house. That's it because it's a little far away
from our viewpoint. So we will just draw them. What this reminds me so
much of specific language. I recently traveled
in the month of June. The whole of this land
was exactly like this. That there's mountains
completely covered with green process and flower
models and wildflowers. And on those tall mountain would be the tiny
little bones and hoses. It was so ****
beautiful like housing, food scene from The knew. It would be like the center of the Greenland and beautiful. So I thought, let's paint
this one right here. I'm just showing
tiny little houses. It's quite simple. You
just have before the vote. And the lower part of the house, That's it. That is done. Let's move on to the
painting part as usual, we will start with
the sky forest. Keeping this guy very simple. I'm taking to compile
blue color on my brush and applying
that on the top. Again using a very
concentrated blue on the top. And then I will use my damp
brush purple, the color down. Doing or gradient effect. Remember not to touch
the mountain area. Once that is drawing, we won't be able to
paint the mountain. So let's start
painting the water. I'll take the ultramarine
blue color from my palate. I will use that funded the
thing though. Naked you. I will just give the
flat wash for now, leaving some white
gaps in between. And that's it. Now, we will let the whole thing
completely dry. Once that is dry, let's paint the mountain. So I'll be using wet on wet technique to
think them all done. That's the reason
I applied Chine, even layer of water forest. Next, I'm using a mix of my black and burnt sienna
and a tiny bit of green. And I will apply
very light value of that color on top
of the mountain. You all I'm using wet on wet
technique because I want to create some blur
effects in the bushes, which is their
surrounding the houses. That's the reason we are
using wet on wet technique. Now, you will see
that I will apply the force level of the bush. Again, starting it
with the wiring, like this is a mix
of yellow and green. You already know how
to paint the bush. We have studied it in
our own dear class. That does with each layer B
will go darker and darker, and we will just do
the tapping motion. So you will see I've
already applied the first layer of
light green color. Now, I will switch to
my smaller round brush, and that will increase
the shade of green. I will start doing
the tapping motion. Once that is done, more even darker green color. And this will continue until I'm satisfied with
depth in our bush. You will see that by now
we have majorly learned all the techniques in our
previous class projects. Like No, we are using
the same techniques, but we are painting
different subjects. Like, let me give you
one example where we have used the same technique to think different subjects, like the dry brush technique. Use this technique to
paint the snowy mountains, to paint a bit of texture
on the lake. I spent. To paint the sky
with the clouds. Same way may have used wet on wet technique to
paint the foreground. Grass, land, to paint the sky, to paint the clouds, to paint the bushes. And so much more. We have used the layering
technique to paint the bushes, to paint snowy
mountains as well. Nice to give a lot of
details to our painting. You'll see we are using
the same techniques. But with different colors,
different subjects. That's why it is so a burden
to learn the techniques. First. Once you are done
with the thickening bond, you will be able to paint anything and any subject
in your own style. Alright, let's get
back to our painting. I'm already on to
my fourth layer of the green is for the
last layer directly to culture marine fuels
know my pen now from my palette and I'm directly
applying it on the bottom. Especially around the houses because the houses
we will measure dB, keeping it wide, so forth. They'll show up. I am darkening the
surrounding areas. While that is drying, let's paint the
roof of the house. So I will respond, Hannah, and paint all dog houses
with the scene below. And then painting feel more
bushes around the house. When status then I found that the mountain on the top was
looking on it in my door. So I don't The only thing I
applied it kind of underdog and then do my damp brush and pulling that down to
make it little dongle. Once that is done, I
will let everything dry. That is the mountain as well as the pushes and one
that is drying. Let's paint the foreground part. Painting the first layer
with yellow uncle. Then taking Poland sienna. I'm painting that at the bottom. Now I have a light color. So I'm just lifting
some of the color with my brush and spreading
it on your own. Then I will take my ultramarine blue while the Orlando
area is drying, let's paint a bit of shadow of the mountain and the
houses on the water. So Stokes meant value of ultramarine blue
color. And painting. Those exact lines
just knew though, ADL where the land is
meeting the water. Now, I will let everything dry. Once everything is dry, we will add more
darker green alone. Armando, How's email? So what I did is I
added a little bit of indigo to my green
to make it darker. Then I am just doing
the tapping motion. Neil. How's easier? Then? Use my finger to blend it. Though bushes. We are adding one more
layer to the bush, but this time we are
doing wet on dry. Once that is done, let's create those shadow
color for them houses. You're taking cobalt blue. I'm adding a bit
of purple to it. And off point CNO, those same banks
to make it done. Gray color. I'm using a very light value
of that paint to paint the shadow of the roof on the house using very light hand, just drawing one straight line. You do roof. And
that's it. We're done. Once that is done,
let's add a bit of texture to the mountain, which is their own store. So I will add few more dry
brush strokes. To do that. Loading my brush with paint, removing the excess
on the tissue, and then just swiping and dropping my brush
on the mountain. Be careful whenever the
bushes so that you don't end up adding that
color. Julio Bush. When Stan destroyed or
when Stan is drying. Let's add a few more
grasses to our line, AVL, which is the foreground. So I will use the leftover green's which are
there on my palette. And I will start adding tiny
living crosses in that area. Once that is done, Let's
add tiny little windows to our house so you can use any dark color which you
have in your palette. Right now, I'm just
using already gangrene, which I already hard in
my bag that you can use indigo black, anything is fine. You just have to do tiny
little dot micelle. We're not going to, you will
use you won't be able to identify that. It's okay. I just took the
darker green color. I used my smaller brush and Jews tiny little dots on
the house making it look like or the
Windows, those houses. Then I'm switching to my rigger brush and
adding few more details. That is the grasses
around the bush area, as well as in the foreground. Now you'll see that
I had a nephew, my gaps in between while I was painting to leave
that white gap, we will convert it
into the white board. Now, in case we're not able
to leave those white gaps, you can use white gouache
or white watercolor in a very thick
consistency and paint tiny little boats on the lake. So this is the first one, which I did and I just
added a line on top of it. I will repeat the same step and add few more boats
on the lake area. You'll see I'll also be adding the white
board because I was not able to leave a lot of
whitespaces and delete. So I will paint the board
directly with the white paint. Then I will add a straight
line on top of it. And once we have
painted double quotes, we will add a little bit
of shadow just below that. So taking the same
undulating blue using the same small
encourage and I will add tiny little shadow of billboard on the water
using the same brush. And we are done
with our painting. I know this was a little
bit of a longer one because we had to
pay on all subjects. That is the mountain,
the bushes, the houses, the leg to foreground, as well as the boat. Now to view only beautiful. Yeah. Once it is dry, you can paint off
your team. Lead team. The final result
of our painting. Don't you think it is
looking beautiful? It is. And I'm super
happy with that. Alright. Hope you enjoy it,
and I'll see you in a finance class project. Bye.
20. Red Flower Meadow : Hello, hello, Welcome back. Welcome to Finance
class project. I hope you all enjoyed
painting along with me. And I'm super proud of you
that you've reached the Leo. Alright, so let's get started. In this class, we
will be painting a red flower meadow on right? So let's get started. Let's first apply masking tape on all four sides of the paper. Once you have applied the
masking tape down thoroughly, your finger on all four sides before you start with
the painting part, so that there's no gap between the paper and
the masking tape. Alright, once that is done, Let's move on to
the sketching part. First, I will draw domain, which will be the
focus of amping thing and draw a straight line. And then on top of it, I will darn thing
to three mountains. That's it with the
sketching part. Now, let's move on
to the painting. Let's voice pain, this guy, your tool, we will be using gradient wash to paint this guy. Again, using cobalt blue paint. There's quite that will be darker onto top and it
has become downward. It will get lighter and lighter. I always make sure
that I left off the paint which is there
on the masking tape, especially when it is a lot. Otherwise, what
happens is sometimes that paint comes downward and create blooms on the paper which you don't want
in the sky, right? So when status then
we will let it dry. While that is drying,
we will start painting the lower
part of the painting. So again, we'll be using return dry technique who I
just met with the law London. And then I have started
applying differentiates with starting with
yellow and green mixed. Then another bit of
darker green bio. Last day I am painting a
little bit of buoyancy NYU and they're using a
wedding meant value, but a little bit of thick
consistency of paint so that the paint doesn't
spread a lot on the paper. I am not having a lot
of paint on my brush. That's the reason they
are not spreading a lot. And I'm still able
to see carlos, my people once I've
applied the potency and now I am applying a little bit of darker
green color around that. Then I'm switching
to my regular brush. Let's start painting
the red flowers. So first thing, though, red flowers in the background, as they are little bit
far away within them, smaller, and it has
become the foreground. We will paint them darker using very thick consistency of
paint so that it spreads. I'm using the smallest brush that is the breakup
brush to paint them so that they don't
spirit a lot on the paper. So I will draw a lot of them. You're painting them wet on wet so that they give you a
little bit of blur effect. When there is all dry, we really are quite
more time on the top. But right now we have to
paint them wet on wet. Just remember one thing is the flowers which are in the
background would be smaller. So leave a bit of
gap whenever you are doing the tapping motion. And as you come into
the foreground, the size of the flower
would increase antigen. Then I'm taking the green. I'm painting the stem
of those flowers using the same
recombinance to do that. So we are almost at
the end of this class. So I really wanted to know
from you guys that if you enjoyed watching and learning
this type of landscapes, especially those
smaller class project, which are like ten minutes max. So do let me know in
the review section. And I will try to
make more of it. Also, if you're
watching this glass, then I would highly, highly suggest you
do paint them. Because whatever
you have learned, if you will not apply it, you will end up forgetting it. And then there's no use of spending so much time
watching the glass. I have kept every we do in real time so that you
can paint along with me. One thing I would
suggest you to do whisk. You can watch the whole class, just one class project. At the wave speed so that
you know what we're doing. And then for the second
time you can watch it on a normal speed and
paint along with me. Because I tend to change a
lot of things while I paint. I really don't want you to
mess up when you are painting. So I would highly
suggest you to watch the clip and then maybe repeat
and paint along with me. That's how it has
always worked for me. Or what you can do is
watch me paint and then just keep the final painting as a reference and then paint. Keeping that in mind
if that works for you. Alright, so let's get
back to the painting. So I have added stems and
the crosses to the flowers. Now I'm mixing my colors for the background,
mountains, so forth. I will mix a little bit
of ultramarine blue to my burnt sienna to
make it they can taco. And then I will mix my green. That is, add a little
bit of burnt sienna and green and yellow
to make it a little. If you'll notice, I haven't used any bright green color in this painting
because I wanted to go for or the green color for this palette
and for this painting. So that's the reason I'm
adding either yellow ocher or bonds here and I do all my
green to make it little Audi. And you will see that by
the end of the painting, though red color pops up. But these greens, I'm loving it. Yeah, I just used
though mix of green, burnt sienna, and yellow to
paint the background Morgan. Now, I will let it
completely dry. While that is drying, I will use the mix of burnt
sienna and ultramarine, which we have created
to paint the mountain. Or just drop off the line field so that it
gets a little bit darker. Then I will take the red
color from my palate and I used to call it to
paint the flower modules. So I will just do the
tapping motion and apply it in some areas
to make it a little darker because the
color which we have applied or Leo was using
wet-on-wet technique. And if you know
the color fade out a little ones try,
especially in watercolors. So you will have
to live with them. Alright, so as Addison, I'm just adding a few more stems with the darker green color. And then we will add
to the mountain, which we have left. Here. I've used the green color which is there on my palette, and I will apply that color in the middle portion
of the mountain. I also added a little bit of darker brown color
while I was painting and I mixed it the boat
colors directly on the paper. Once I've painted that, I realized that this guy
is looking way too wide. So I really wanted to add one
more mountain on top of it. So I took the green mix, which was there on my palette. I diluted it with water and I painted tiny little mountain on top of it as I wanted
to make it look like the mountain is quite far
away from our viewpoint. That's the reason I painted it. A very light. Right? So ends that is soon you're mixing my
permanent green with ultramarine blue is the most fun with my ultramarine
blue on my palette because I've used
that color so much, especially to mix my greens. And we have to start color to paint the sky, the mountain. I spent as the lead alto, this color has a slight
bit of granulation, but when it dries on the papal gives you
beautiful texture. I really love ultramarine blue, especially for this guy
and no mountain pod. You have just fixed our permanent green and
ultramarine blue color together to mix a
darker green color. And I'm using that value to paint some trees
in the background, as well as few stems
of the flowers. Painting the tree is
quite simply we have already done in our
earlier classes. So just the oval shape. Tiny little trees. Don't overdo it
because we really want to focus on the flower. My dose that is too
bright flowers. You can stop it right here. The painting is already
looking completed, but I really wanted to add
a little bit of character. So I added a few more
Poggio trees on. I will also add tiny
little trees in the mountain as breadth so
that they don't look flat. So that's it. We are done. Then binds, it is
completely dry. We would be enough
though, masking tape. And then let's see the
final interest on it. Painting. Right? Let's do one by one
to which slowly, so that you don't end
up getting your people. This is how our final painting. I'm hoping you
enjoy it and I will see you in the final
goodbye class.
21. Thank you: Thank you for watching my class. I hope you enjoyed learning, watching, I'm painting
along with me. If you did, then please do
drop as a view in the class. It will help me reach
more number of students. Or if you have any
doubts regarding the art supplies or the
techniques or the paper, anything, just drop it into
the DMZ of my Instagram. That does a great
artist. She algorithm. All you can just
drop your questions in the discussion
section of this class. Lastly, I would highly
recommend you to paint each and every painting
which you have learned in the class that will
help you improve, as well as it will also help you implement whatever you
have learned on the paper. Alright? So I hope you enjoy it and I'll see you guys soon
in the next class. Bye.
 Shreya Gada, Artist