Transcripts
1. Class Introduction : Winters are one of the most
magical time of the year. The land covered with
fresh, white snow. The sun shining on that snow just makes everything look
so perfect and dreamy. Although painting
wental landscape and creating that soft
more isn't that easy. But over the years I've painted so many wental landscape that I've just cracked the
code of painting them. If you want to learn how to paint like me or you want
to learn all my secrets, then you're going to
have to join the class. Join me and by the
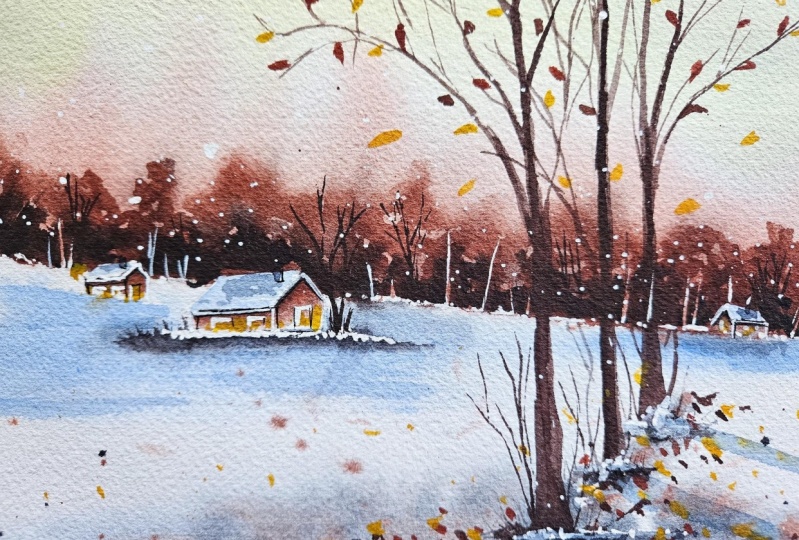
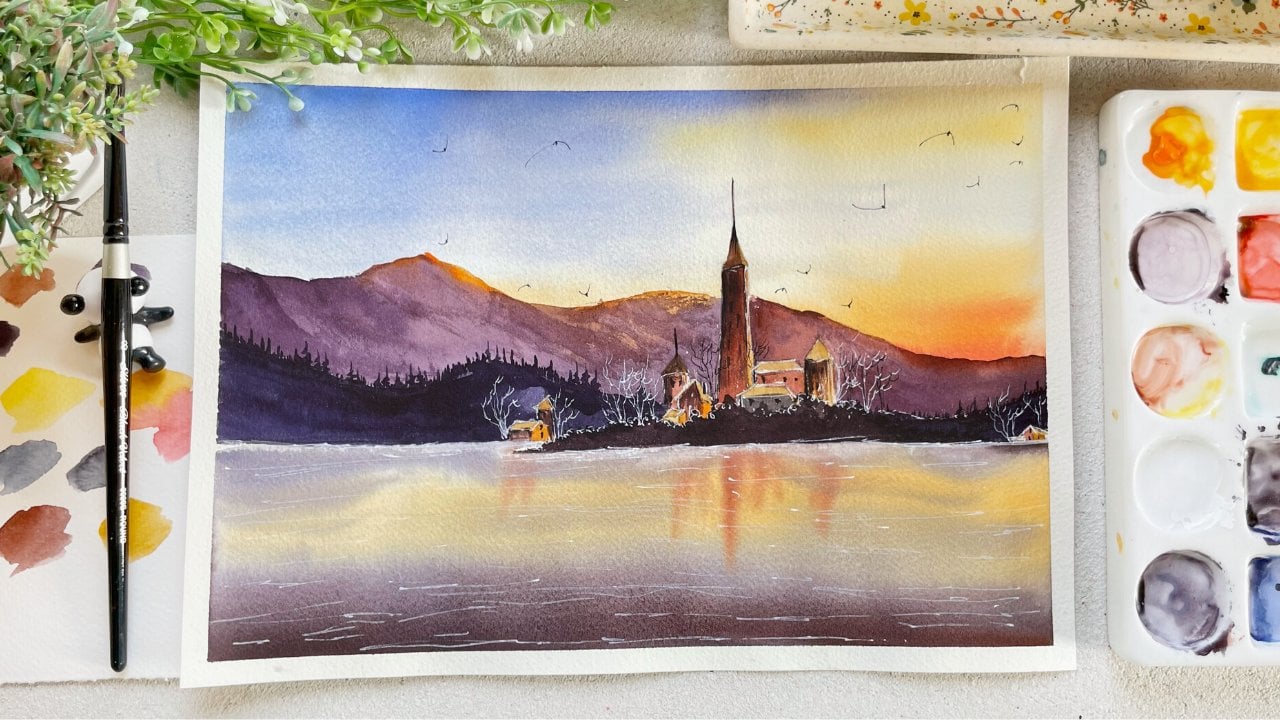
end of the class, we'll be painting this
beautiful landscape and that would be
our class project. Like always, we will start by familiarizing ourselves with all the materials
that we will need. We'll talk about the brushes, the colors, the paper,
and everything. We'll also talk about
the alternatives. In case you don't have these
materials, don't worry. We will be able to paint
with anything you have. Once we are familiarized
with all the materials, we will move on to a few of the important
techniques that we will need before we move on
to our final class project. Once that is done, I guarantee you you will not only be able to paint
this landscape with ease, but you will be able to paint any winter scene on your own. I'm hoping I made
you all excited to paint this landscape
and join you in the class. Grab your materials
and let's get started. I'm looking forward
to seeing you all in our first class
lesson for everyone. I am Sha, a full time artist, art educator, skill
share teacher, and a tuber from India. You can check out
all of my work on Instagram under the handle
at the right, artista gada. That's it for now and let's get started with our class project.
2. Supplies Required : Before we start with
our class project, let's talk about all
the materials that you will be needing for
today's class project. This is the final
class project which we will be painting by
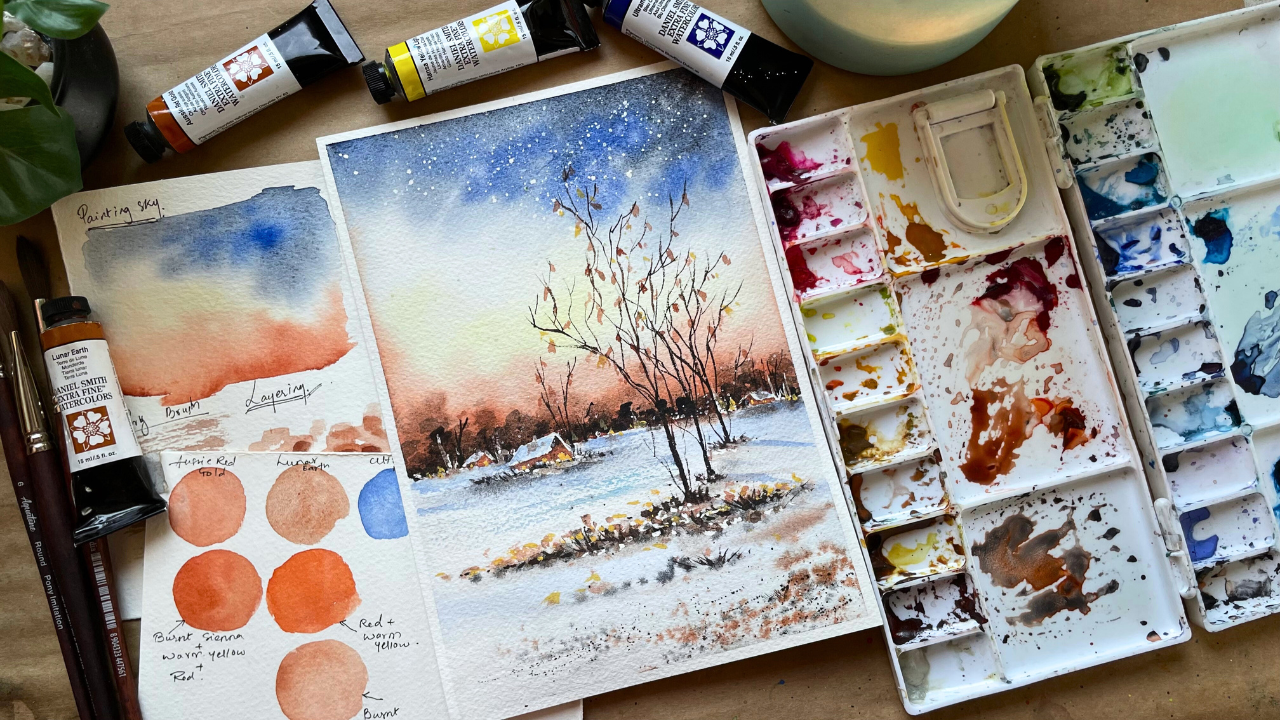
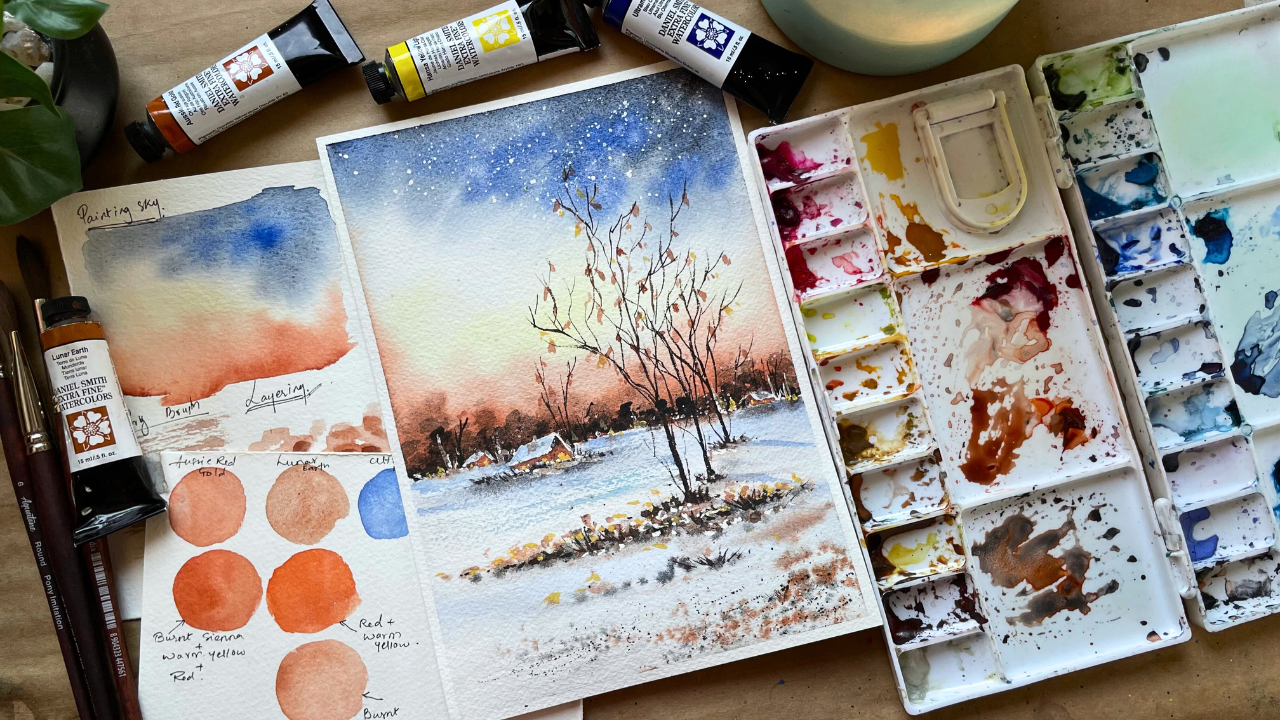
the end of this class. This is what we are
painting today. Let's talk about all the
materials that you will need. But most important,
let's first start with the paper that you will need
for this class project. I'll be using this 100% cotton, 300 GSM, cold press
watercolor paper. Using the right kind of
paper is so important, especially when you are
working wet on wet technique, to get the right result is very important to use
the right kind of paper. I would highly suggest
you to use 300 GSM, cold press watercolor paper. I understand not everyone
would have this paper. Bit expensive side, but you can use any paper
which is 100% cotton, 300 SM and cold press. But make sure that you are using proper paper and
not in handmade paper. Especially if you are going
to work with masking fluid, because masking fluid doesn't
work with handmade paper. If you're using masking fluid, then avoid using handmade paper. If you're not using
masking fluid, then you can use
any kind of paper. Let's move on to the brushes. We will be majorly
using round brushes. For all of our work, I'll be using size zero
to do all the details. Size 4.6 and lastly size eight. For different subjects.
In our painting, I'll be using a larger flat
brush to wet the paper. Can use any more brush or any larger round brush
to wet your paper. Just make sure that you're using a larger paper so that you
can cover a large portion of paper quickly and you don't waste your time while you
are wetting the paper. All right. That's it
with the brushes. Now you will need a used brush
to apply the skin fluid. This one is an old brush which I'll be using to
apply my masking fluid. I'll show you an very
interesting trick in which you can avoid ruining your brush. I'll show you when we will apply the masking fluid in our class. But always make
sure that you are using a used brush to do that, you'll also need a
little bit of soap. So this is a common bath soap which I'll be using to
apply the masking fluid. I'll tell you why
and how to use it in the later stage of
our class. All right? Yeah. Next you will need an eraser to remove
your masking fluid. I'll be using this addesive
eraser which I have. But again, if you
don't have this, you can use any normal eraser to remove the masking
fluid. It's fine. This is not an important tool which you will need to
remove the masking fluid. You will need a pencil and erazor to sketch
down your painting. Then you will need
a masking tape to mask down your paper. On all four sides of the paper, you can use any
regular masking tape. This one is, I brought it from an hardware store and it
works completely fine. And I've been using
this since years. Yeah, I'll be using that next. You will need a board to
stick down the paper. You can use any cardboard
paper or a cart board, a plastic acrylic sheet. Anything which you can move, don't stick your paper
to your table because we'll be using a lot of
movement to paint the sky. Especially use a board which you can move
while you are painting. Right next of course, you will need colors. We'll be using a very
limited color palette of six to seven colors. I'll swatch the colors. I'll talk about the alternatives and everything in
the coming class. Don't worry if you don't
have the specific shade. We'll talk about how you can mix that and how you can
create a similar shade. Yeah, we'll talk about
colors in the coming class. Yeah, these are the few colors
which we will be using. Next up, you will need a palette to pour
down your colors. The colors which we are using, I already have them
in my palette. This is the one which I'll
be using for our painting. But you can use
any palette Again, if you're not using
masking fluid or if you don't have
a masking fluid, you will need a white wash. If you don't have white wash, you can use Chinese white or
white water color anything. That's the thing
which you will need, especially to paint the snow. And to paint the
snow on the roof, you'll need very little of it. But make sure that you
have a white water color. Then you will need
two jars of water. One to clean down
your brushes and one for fresh supply of water. Again, you will need
a clean jar of water. We will be painting snow, which is white in color. I don't want you to use dirty water because that
would stay in your paper. So make sure that you have
a clean jar of water by your side while you are doing
your final class project, you will need a tissue paper to clean down your
brushes and everything. So do keep this handy by your side. All
right. So that's it. We have talked about the papers. It is 300 GSM coal press,
100% cotton paper. And we will be using an five size sheet to
paint our landscape. Then we have talked
about the brushes, the masking fluid. So masking tape. Yeah, I think I have covered everything in case
I've missed it. I will talk about it later. But yeah, this is
everything you will need. Go grab your materials
and let's get started. It's going to be a way fun and quick landscape
painting class. I'm hoping to see you
in the next class.
3. Choosing The Colors : All right, so let's dive into all the colors that we will be using for our class project. Let's study each one
of them in detail so that it is easier for
us in the later stage. This is the class project
which we will be painting, and these are the colors which we will be
needing to paint that. All right, so the first
one is aussie, red colors. So I'll be watching each and
every color side by side. Once we have watched
all the colors, I will talk about the
alternatives and I'll also mix the color for you that you know how
you can mix that. Okay, this is the aussie red
color from Daniel Smith. It is a very
beautiful warm color. This is somewhere in between Burn sienna
is a little bit dull, but this is a little bit
brighter than burn sienna, but a little bit
duller than orange. This one will be using. The next one which I'll
be using is Tuna Earth. It is a granulating color
again from Daniel Smith. I'll be using this color to
add a little bit of texture. If you don't have this color, you can directly
use burn sienna. Next, you will need
ultramarine blue. I'm sure everyone would have ultramarine blue
in their palette. In case you don't have this, you can use any
warm blue that is cobalt blue for your painting. Then you will need a
little bit of lemon yellow just for the sky. Then you will need indigo. So this is a very
warm, dark blue color. In case you don't have indigo, you can mix a little bit of pine screen to
your portion blue. Or you can even
use midnight blue, any dark blue color to paint. Or you can even add a
little bit of pines gray to your ultramarine blue to
make your blue darker next. And the last color
which I'll be using is the lunar black
from Daniels men. This is a highly
granulating color. I'll be using this color to add a lot of texture
to my painting. Again, if you don't
have this color, you can use pines gray. You can even use oxide black. That is also a granulating
black color. Okay? These are 123456 colors that we will be using
to paint our landscape. And lastly, you will
need one more color. This is the Naples yellow color. I'll use that color just to paint the doors and the
windows of the house. And to add a little bit of that color just
around the trees. It is very thick color
which is mixed with white. Don't have this don't. All you can do is
just add a little bit of white gas to
your warm yellow. That is, cadmium yellow
or Hansa yellow. Deep. Any warm yellow, add a little bit of white and
you will get this shade. Yeah, that's how you can mix it. Now let's study how you can
mix this Aussie red color. Like I told you, it is in
between burn sienna and orange. So it is a brighter version of burn sienna and a little
duller version of orange. What we can do is I have my
burn sienna in my palette. So I'll mix a little bit of red, add a little bit of
warm yellow to it, and you will get
somewhat similar shade. Again, if you don't want to
mix all of these colors, you can directly
use a warm orange. But add a little bit of very tiny hint
of blue to make it. Or otherwise, you can
mix this burn siena with a little bit of warm
red and warm yellow and you will get
similar shade to win. All right, this is the
color which we will be using to add the brightness
which is on the horizon line. Now what I'll do is I will take a little bit of red and I'll take a little bit
of warm yellow. And I'll show you
how this colors. Watch, you can even use this color to paint
the horizon line. Warm yellow and
warm red will also give you a very
beautiful warm orange. In case you don't have orange, you can mix the two
colors together. Or you can mix the two colors
a little bit of per sienna. Just experiment with
what colors you have. Swatch them all together
and see side by side. Which color would look better, and you will get a rough idea of which color you want to use. Okay, in case you don't have
lunar Earth in your palette, I'm sure not everyone
would have it. It is a very unusual color
to have it in your palette. You can use per sienna
instead of that color. If you have a little bit
of black oxide with you, you can add a tiny
bit of that color. Or you can even add a
tiny bit of Altmery blue to get a little
bit of granulation. All right, so that's it with all the colors
that you will be needing. Like I said, we'll be using a whale limited color palette
to paint our landscape. Go grab your colors. I'm sure you will have this
color in your palette. If not a slight change in
color wouldn't matter, your landscape would end up
looking as beautiful as mine. All right, these are the colors. Go grab them and
let's get started.
4. Basic Techniques : Before we dive into the
main class project, let's learn few of the
techniques that we will be using to paint
our class project. We will learn how to paint this beautiful soft sky
using wet on wet technique. I'll teach you how to do that
in this technique class. We will also learn about
these dry brush strokes. And lastly, we will learn how to do the layering
technique that we will be using around the horizon time to
create the pushes. All right, these are the major three techniques which we will be learning
in this class. In case you want to
learn more techniques, you just have to watch
my earlier classes. Just watch the techniques part and you will be
more thorough with the basic watercolor
techniques I have taught a lot of in details in
my earlier classes. So make sure that you
watch them if you are a bigner and if you're using watercolors for
the very first time. All right, painting the sky
would be the first one. I will show you how you
can use the movement of the paper and the
movement of water and color to create the
beautiful soft sky. Then we will be using the
driver's technique and we'll be learning how to paint
the dry brush strokes. We will be using that
technique to paint the snow, to add a little bit of
texture to our snow area. Then lastly, we will learn
the layering technique. Layering is a very
important technique in water color and
we will be using that technique to add a lot of layers on the bushes
on the horizon line. All right, let's first start
with painting the sky. We will be using red on wet
technique to paint the sky. Red on wet technique
is basically applying wet color
on the wet paper. Here I am wetting my paper with even layer of clean water. I'm taking my round
brush size six and I've wetted my paper with
even layer of clean water. Right, So this is very
important. Take your time. When you're applying water, make sure that you cover
each and every part with even layer of water. Once that is done, I will take the blue color
which was there on my palette and I'll start
applying it on the top. Now what I'll do is you can
see I am tilting my paper upwards and that way the colors are
automatically flowing down. Right now, I'll apply
more color on the top and just keep my paper upright. Or maybe you can say at
almost 40 to 50 degree angle. And you will see that the
colors will flow downwards. Now what I'll do is I take my paper on the
opposite direction as I want to paint the
brown color at the bottom. And I want that brown color
to flow towards the blue. I am tilting my paper in the opposite direction and applying that paint
at the bottom. I also applied a little bit of lemon yellow in
between. That's it. I'm applying one more layer of that brown color at the bottom. Again, tilting the pot because
I want that brown color to move more towards the
middle of the paper. It's all about changing the direction of the paper in which you want your
colors to flow. You will get the
beautiful soft edge in case you find like your
colors aren't moving, you can add, or you can take the help of the
brush and soften the edges and let the colors flow in the direction you want. But make sure that whenever
you are applying the water, your paper should be wet enough for you to work
on this technique. It is very important to get the right amount of
water onto your paper. You can only do this technique while your paper is still wet. That's the only reason
I'm asking you to use at least 100 person
caught in 300 GSM paper, that your paper would stay wet for a longer period of time. And you will be able to use
this technique at ease. I didn't blend the color a lot
on the paper and still you can see that all the colors look blended and
they are super soft. And this technique
works like magic. But make sure that
you're practicing this on the sheet of
paper which you'll be using for your final
class project 23 times before you move on to
the final class project, because it looks easy. Once you will start painting, you will get an idea of how much water should
be there on the paper. How much not, yeah, do practice that before moving onto your
final, last project. The next technique
which I showed you right now was to
dry brush technique. Dry brush technique,
it very simple. Load your brush with paint, remove the excess on the tissue, and just very lightly
rub your brush on the paper and you
will see that it will create this
beautiful texture. Just one important
thing which you have to keep in
mind while to wake the dry brush trope is to remove the excess
paint on the tissue. Okay, now let's, let's learn about the
layering technique. What I'll do is I
will just apply few strokes of brown
color on my paper. It is a he light wash.
My paint almost has 60 to 70% of water and I'm applying a whe light wash
of that color on my paper. Whenever you are working
with water colors and when you are working
with the layering technique, you have to keep
in mind that you always have to
move from light to dark as we cannot layer light color on top
of the darker color. All right, so I just applied
one layer of light color. Now I'm taking the same color, but I am using a thicker
consistency of the paint. Applying one more layer while making sure
that I'm not covering the first layer with the second layer of color
which we have used. All right, once that is done, I will let this dry. Next, I will take the
same color and I'll add a little bit of black to make it a little darker
than the second layer. And we will apply the
third layer on top of it. This is how the layering
technique works. You are painting
the same subject, painting the same strokes, but you are just using
different colors to do that. While keeping in
mind that you are not covering the
complete underneath layer so that you can see all three layers by
which you have painted. All right, so this is one of the very important technique which we'll be using
to paint our bushes. We will paint our
bushes in three layers. First one, we will do it
while we paint the sky. Then we will add two
more colors once the sky is completely
dried. All right? Yeah. This gives you acquired a lot of dimension and
depth in your painting. And this is the only
way in which you can create the depth
in your painting. With watercolors
is something which is very important and you should know while you are working
with water colors. All right, so these are
the three techniques which we'll be majorly using
to paint our landscape. Just practice this on the
sheet of paper multiple times, especially the
painting of sky part. And do it 23 times and then move on to
the final class project. All right, that's it with the techniques and the
colors and materials. Now let's move on to painting
our final class project.
5. Sketching : All right, so let's move on
to our final class project, one by one, step by step. So let's get started. I'm super excited and I'm
so glad that you decided to join the class and to do
the final class project. All right, so let's get started. As you know, I'll be
using this Arch paper, which is 100% cordon, 300 GSM and cold press. I will pair one of the paper
from the block and I will stick that paper on my board with the help of the
masking tape. All right. We'll apply the masking tape on all four sides of the paper. If you don't know already, we are using an five sheet of paper to paint our
final class project. All right, so I'll apply the masking tape on
all four sides first. Once I have applied
the masking tape, I will thoroughly press it down on all sides to make
sure that I have applied the masking tape properly and it has been
completely stuck to the paper. Because you do need the clean
edges and clean borders. Once the painting is done, that's always an intention. And those clean edges looks super good if
you get that right. Okay. So to get that right, you need to make sure
that the tape has been stuck to the
paper completely? Yeah. Just once you
have applied the tape, run your fingers on
all four directions so that you are in no doubt that it has been
not applied properly. Making sure of that. Once we are done applying
the masking tape, we will start with
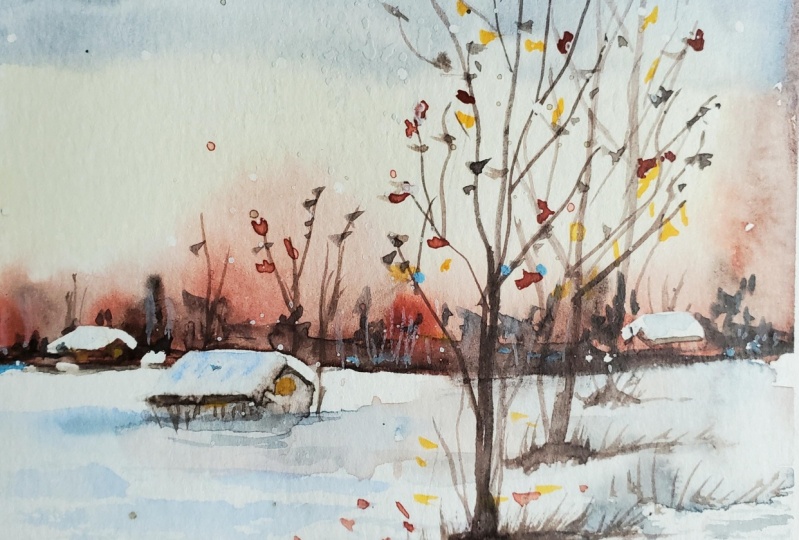
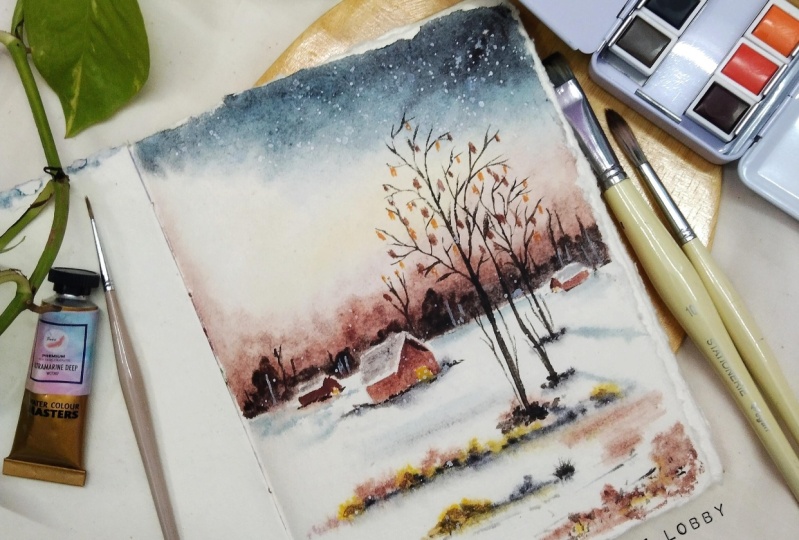
the sketching part. I'll grab my pencil. So let's get started. This is the painting
which I did, and everyone loved
it so much that I decided to do a class on it. But you see that
this is the painting which I did on an
six size paper, and this time we are
painting on an five sheet, which is double of that. What I'll do is like every time whenever
I start painting, I always make sure that
I do a thumbnail sketch. First, I'll grab my
rough sketch book and I'll draw a rectangle. This is the rough
size of the paper. I'll just draw the rough
idea of what I want. I just drew the horizon line
and I'll draw the house. In the last painting, we did one house because
it was a smaller paper. But this time we will do one more tiny little house
on the right hand side. This is the rough idea of how
I want my painting to look. This will give me the idea
of how it will look on the paper and how my final
project would look. All right. I just drew the houses. I drew the little bit of
pushes on the horizon line, few dry trees and that's all I'm pretty happy with,
my thumbnail sketch. Then once you are
happy with that, you can move on to painting your final project on the paper. I was pretty happy and I started doing the final
sketch on my paper. Like I said, I want the sky to be the larger part
in my painting. So I will draw the horizon
line slightly below the half of the paper I've
drawn, the horizon line. We will start
sketching the houses. The first one which
I will draw would be in the way foreground part. We will draw that a
little larger in size. I'll draw one more
tiny little house on the way right end of the paper. This one would be a
slightly smaller in size. Once that is done, I'll draw the
pushes which we are going to paint on
the horizon line. I'm roughly sketching it out. Make sure that you are drawing everything very
light because we are painting snow and we will
leave a lot of portion why we don't want the
pencil marks to show up, paint or sketch as
light as possible. I'm drawing it a little darker
so that you all can see, but you have to sketch
as light as possible. All right, so I also drew one more tiny little
house on the very left of the page because
I thought this is quite a large paper and I need to add one more
element in my painting. So that's why I did that. But if you feel like
you don't have to add one more house,
it's totally fine. Okay. Next I'm drawing the three straight lines
which would be our trees. That is the dry trees
which we will be. I'm just drawing the lines
for now and rest all. We will be doing it with
our paints. All right? I'm pretty happy with how
my sketch is looking, just going through it once. That's all with the sketch. In the next class, we
will start from applying the masking fluid first and then we will move on
to painting part. All right. Yeah, I'll see you guys in the next class where we'll be applying
the masking fluid.
6. Applying masking fuild : We are done sketching up
painting in the last class. Now, let's apply the masking
fluid wherever required. Here, I'll be using a
masking fluid from Brostrom. I've used Windsor
and Neuter one, but somehow it got way too
thick in short amount of time. Plus it was expensive. I just switched to this one. This one is much more
on a cheaper side. Okay, one more thing. If you don't have masking fluid, it's not necessary that you should have this for this
particular painting, you can always use white quash or even a
white watercolor paint. That is the Chinese
paint in case you don't have any
opaque white paint. You can also use
white acrylic paint. But make sure that you use that at the very end
of the painting. All right, we'll be applying this masking fluid on the
roof of the houses and in between the foreground part
as well as we will add some splatters of the masking
fluid to create the snow. This wasn't necessary,
but I really wanted to use this technique. I haven't used masking fluid
in any of my classes before. I thought I will add
this technique so that everyone would know
how to do it. All right. Now, to make sure that your brush doesn't
get ruined a lot, what I always do is I just take this bathing
soup, which I have. I have just cut it into pieces and put it
in a smaller tin. Once we have removed a little bit of masking
fluid on the pallet, what I'll do is I'll
take the brush, which I will be using, add a layer of snow soap on it. Once that is done,
then I will move on to applying the masking
fluid with that brush. What happens when you
apply the slope is the fluid doesn't get
stick to your hair a lot. That way you can easily clean off your
brush in the water. All right, so that is the
basic aim when you are using the masking
fluid that the brush or any tool which you are
using doesn't get ruined. All right, here I've applied masking fluid on the roofs
of all the three houses. I'll apply a few dots on the foreground part
around the houses. What masking bluing does is
wherever you apply the fluid, the paint doesn't get there. Once you are done
painting everything, you can always remove
the masking fluid and you will get the whiteness of the paper which is there. This technique is
really important, especially when you're
working with watercolors, because you cannot
leave the space, especially when you are
working on a smaller area, and it's very difficult to
leave those white space. This is the best option
in which you can just apply this robbery
texture on the paper. And once you are done painting, you can always remove that
off or peel that off. This is a way, way, way, handy tool when it comes to
painting with watercolors. It is an add step, which I was very lazy
to do it before. But once I have got
the hang off it, I really enjoy using that. Plus this masking fluid
dries off very quickly. It just takes ten to 15
minutes for it to dry. Once you are done applying it, you can just wait for ten
to 15 minutes and then you can start with your painting.
All right, servants. I've applied the fluid. I am just using the leftover of this masking fluid and adding these as a
platters on the sky. And this will act as
the snow in the end. Like I said, if you
don't have this, it is not necessary to
use this masking fluid. You can skip this step and you can directly move onto
the painting part. And I'll show you how to use the white wash by the
end of this class. All right? I've
applied the fluid now. We'll wait for ten, 15
minutes for it to dry.
7. Painting sky: We will start with Painting
the Sky in this class. But before we do that,
we'll have to wait for the masking fluid
to completely dry. Now different masking fluid
take different time to dry. The one which I was using
takes into 15 minutes. But the brand which
you are using, you can always check with that. Or you can always experiment
by applying a little bit on a rough paper and then
wait for it to dry. And just calculate how
much time that is taking. Very simple, right? All right, so while the masking
fluid is drying, let's prepare all
of our colors for the sky so that when we are
painting the sky wet on wet, we don't have to prepare our colors while
painting for the sky. I'll be using a mix
of three colors. One is indigo, the next
one is lunar plaque. And lastly, I will also add a little bit of
ultramarine blue. Now, lunar black and
ultramarine blue will create a lot of
texture in our sky, which is what I want. Again, if you don't
have lunar black, you can switch to pines gray
or oxide black, All right? So this is how the
color is swatching. I'm pretty happy with
how it is looking. The next color which
we'll be using for the sky is a little
bit of lemon yellow. We'll also use Aussie red
basically at the bottom. We'll also use a mix of Aussie red and lunar
black in the sky part. Lastly, we will be
using ultramarine blue. These are the five
colors that we will be using to paint our sky. All right, prepare all your
colors in your palette before you start painting
the sky. Keep this in mind. You have to make all of your colors ready to go
before you start that. You don't waste your time and you are much more quicker
while painting Sky here. I'm just checking
if my masking fluid has dried and it has. Let's move on to
the painting part. As we'll be doing wet on wet
technique to paint the sky, I will wet the sky area. But my larger flat brush, I'll apply even layer of
clean water on the sky area. Make sure that you are covering each and every
part of the paper, especially the sky part, with even layer of water and no area is uncovered with water. Take your time while applying
the water because this is a very important stem and this is the pace of
what you will be doing. Right. Move your brush up
and down, right and left, and cover the whole of the sky area with even
layer of clean water. Wait for five to 10 seconds for the paper to
absorb the water. And while that is happening, I am just removing the excess water which is there
on the side of the paper. Once that is done, what I'll do is you see the
shine on the paper. That is exactly what we need. There's not a lot of
water on my paper. Plus, there's not
a less of water. It is an even layer
of clean water. Okay. Now I will
tilt my board and I'll switch to my smaller
size round brush size eight. And we will start applying the blue color which we
have prepared on the top. So I'll apply just on the top. And as I have tilted my
board in slant direction, so this is almost 40 to
50 degree angle and you will see that the colors are
automatically flowing down. The consistency of the paint is not way too runny and it
is not way too thick. It is somewhere in between. All right, so keep that
in mind and I will apply more layer of the
same color on the top. Remember to make your colors
more than it is required so that you don't end up wasting your time while
you are painting. All right, once I'm happy
with the blue color, I will add a little bit of
lemon yellow in between. And then I will start adding
the aussie red color. As I want my aussie red color to flow in the upward direction, I will tilt my board in the
opposite way. All right. I will put or apply
something at the bottom, and that way my board would
be slant on the other end. While we're doing that, make sure that you always clean off excess
water which is coming around the edges
of masking tape so that the water doesn't flow
back to your painting. Always keep the tissue handy and clean the excess water
whenever required. Okay. Now, I'm starting by applying the aussie red
color just at the bottom. Like I said, I'm tilting my board in the
opposite direction, then just letting
the colors flow in the direction and blend with each other in case
that is not happening, You can always take the help
of a dam brush and pull the color a little bit
towards where you want. But while the paper
is still wet and the color is not way too thick, you will be able to move
your colors on the paper. That is very important that
you have to make sure that the paper is wet while you are applying or
painting the sky part. All right, Now I will take a
little bit of lunar black. And I will add that dark
color just at the top. And I'll clean my brush. And I'll also add
a little bit of ultramarine slo to
the sky just at top. If you would have noticed, I have kept this video
in a regal time. I have not edited anything. If you'll notice, I'm
painting the sky since 5 minutes and my
paper is still wet. And I'll painting for more two to 3 minutes and you will see my
paper would be bet. That's why I always ask all of my students to use the
right kind of paper, especially when you are
working wet on wet. This is why I highly recommend
you using the right paper. That is 300 GSM coal pressed and 100% cotton. Very important. Please do keep in mind when
you are painting this. All right. Now what
I'll do is I'll switch to my small
round brush size four. I will mix my aussie red
color with a little bit of lunar black and I'll start applying that darker brown
color just at the bottom. Okay, again, tilting my boat
in the opposite direction, because I want
that color to flow a little bit towards
the centium. Remember the color which
I'm applying right now is a little bit thicker
and it is not runny. If the colors are runny, you will end up messing
everything on the paper. So make sure that you are using a proper
consistency of pain. That is, it is not way too runny and it is
not way too thick. Okay. Once I'm happy with
all the colors in the sky, I will clean my brush, will then splatter clean water on the sky to create
tiny little blooms. Then we will wait for the sky to completely dry before we
paint the foreground part. All right, so this is how
you'll paint the sky. I'll show you the
close up of how beautiful the granulating
effect is looking, especially on the horizon
line as well as the sky part. I'll just zoom in a bit and I'll just show you how
cautious this is looking. I've not done anything. This is all the
magic of the color. All right? Yeah. I hope you
are able to achieve this now. We'll have to wait for
this to completely try, and then we will move
on to the next part. In the next class, I'll
see you all there.
8. Painting foreground : So it's time to paint
the foreground part. Let's get started here. I'm just checking if my sky has completely dried and it has. Let's move on to painting
the foreground part. Again, we will be using the same wet on wet
technique to paint the foreground as we want
a way soft looking snow. To achieve that, it is important that you
use this technique. Again, taking out my
larger size flat brush and wetting hole of the foreground part with
even layer of clean water, not touching the houses,
not wetting them. Just take for round part. Okay, so I am applying
even layer of clean water. Then I will switch to my
round brush size sex. And I'll also tilt my
board a little bit. And then I will load my
brush with ultramarine blue. I will take mid value
ultramarine blue in my brush. And I will apply
blue strokes around the houses as well as a little bit in the folk
around with this color. I don't want to cover the
complete area with blue color. I just want to add
a little bit of shadow on the snow
so that the snow has a little bit of more
dimension and color, right? I'm pretty happy with how it has looking as we are doing wet on the color will spread
out and it will look soft. Now let's add this
black texture, which you see over here. For that, I will
be majorly using lunar black and
lunar Earth color. To do that, I'll switch to my smaller size,
round brush size. For first, I will take a very light wash of
lunar blank color. And I'll just apply
that color around the tree to make sure that this is where I want
to apply this color. Applying a very light
wash, always, always, always start with
the lighter value of any color you are painting. Once you're sure a power the color placement
and everything, then you can always move on to the darker value
and darker colors. Okay? Also, this color
looks way too dark, but once it dispose it
gets way too light. If you are using pines gray, then be way light handed
because that color is too dark. Now I will take a little bit of Lunar Earth and I
will start dropping some colors near the
black which we have already applied using
the same color. I will also add some
plateaus. It's very simple. Load your brush with
paint and stap it off with the hand or
with another brush. And you will get this drops of or drops of
colors on the paper, making it a beautiful
blooms on the paper. Again, remember, we are doing everything while the
paper is still wet. Now this area, I feel, is a bit wet and everything
is spreading way too much. Let this dry a bit. That dry, let's
move on to painting the horizon line and adding
few layers of bushes here. I will mix my aussie
red with a little bit of lunar black to make my
brown a little darker. I will start painting
few bushes around the houses and on the horizon
line to paint the bush, all you need to do
is dabbing motion with your brush and that's all. Remember I'm not taking
thicker consistency of paint. This is a way light value of
the color which I'm using. I do not want my
paints to be opaque. I want the underneath
layer to show up. That is the beauty of
working with water colors. You want your paint to be
transparent and translucent so that you can see all the multiple layers
which you have worked with. Okay. Make sure that you are not using thick
consistency opaque paint. Right here I am painting
with that and I'll also drop few layer of lunar black
directly at the bottom. Repeating the same steps again, I'm hoping you all are
enjoying this landscape and you are very eager
and excited to paint. You can come along and paint
with me because this is a very slow normal video which
I have not edited a lot. It is a real time
video which you can easily follow along. If not, you can watch
the whole class. And then you can again paint with me however you
are comfortable. But I'm really looking
forward to see all of your beautiful little landscape and I'm sure you're going to
have so much fine painting. So make sure that you paint once you are
watching this video. All right, once we
have paint the f, I mean the horizon line, I'll take the lunar
black color again and I will start dropping that
color in the fue ground part. Now as the paper is a bit dry, the colors aren't
spreading that much. The same steps, I will repeat it with the
lunar Ores as well, and I will drop
some splats again. This is something which you will have to keep on repeating. Because as we are
working wet on, wet the colors or
the layers which we apply underneath spreads
and gets lighted up. You need to repeat the same steps to get the depth and dimension
you are looking for. Pretty happy with
the foreground part. Now let's just add few drops of lunar black color just near the horizon line in few areas
to make it a little darker. Then we will let
this completely dry before we paint the dry
trees and the houses. Rick? Yeah, dropping that color on the horizon line
and leaving it there. This is how the layering
technique works. We apply multiple layers
of the same color in different values to create the Tp and dimension
in the painting. With the layering technique
on the horizon line, we repeated the same steps in the foreground part around the trees that we see
in the background. This is a very
important technique and this technique requires
a bit of patience. Don't lose that and work
in a lot of layers. That's it for now. I'll
see you in the next class.
9. Adding Details : All right, so it's time
to bring the painting together by adding all
the details wet on dry. So let's get started. Let's add by one detail and complete this
painting. All right? So here I'm just checking
if the foreground has dried and it has
almost dried out. Let's move on to painting
the houses first, and then we will move on
to painting the trees. I'll be using the smallest
size brush size four, and even size two, but I would suggest you
to use any round brush, which is ideal for the size of house you
will be painting. Okay, So here I am
applying even wash of fozzy red color on the house with my
smaller round brush, what I'll do is I'll apply
that color on the top, clean it off, and pull that
color down with the brush. Using the damp brush to
pull that color because I want dark color around the roof. And as you go downwards, it gets a little bit lighter, applying the same color
for all three houses. Once that is done, I will apply a little bit of darker
color just around the roof. You can use pines, gray or lone are black, whichever color you are using. Okay? I'm using that
color just on the roof while the area or the aussie
red color is still wet. And you will see
that the color put, spread and merge and giving
you a softer looking edges. Okay. That is how we
will paint the house. Simple. Just have to
use the two colors and a smaller round
brush. That's all. All right. Now let's
paint the trees. And to paint the trees, we will be using the
dark brown color. To mix your dark brown color, all you need to do is mix your aussie red and black
color or pines gray color. I'll be, as you know, lunar black and we will create
our own dark brown color. Here I'm taking my
aussie red color on my palette and I will mix a little bit of
lunar black color. Whenever you are adding darker color with
the lighter color, add little by little
because if you'll add a lot of black or pines gray, you will end up getting
a flat pines gray color. And then you'll have to
add a lot of brown to it. Instead of repeating
the steps and doing the mixing part
over and over again. Try to add the brown or black, black color little by little. Okay, now it's time to
paint the dry trees. The tree which is in the way front would
be a little taller. As we move towards painting
the background trees, we will just reduce the size of, to create the dimension that the trees in
the front is larger. And as you move towards
the horizon line, the trees get smaller because
they are a little far away. Okay, here I'm using
smaller brush. I would suggest you to use maybe size zero size brush to create
the branches that you get, the thinner looking strokes. Okay? The trunk of the tree
would be a little thicker and the branches would
be thinner in size. Whenever you are
painting the branches, hold your brush at almost 90 degree
angle and all you need to do is create
thinner looking strokes. Use a brush which has
a really good tip. Even if I paint this with a larger size three
brush or four brush, I know that I would get thinner strokes because
my brush has a good tip. But if you don't have
a lot of control in your hand and you feel like your brush doesn't
have a good tip, then I would highly suggest you to using the smaller
brush to do that. Okay. It's very simple. Again, this doesn't
come out naturally. I have been painting
since long time and I have done a lot of my trees. And your trees would differ a, but that is totally fine. All, all you need to
keep in mind is to get the thinner and crooked
looking strokes to make it look like, as natural as possible. All right? Do the steps slowly. Don't hurry because
these are the details which or breaks the painting. I would suggest you to slowly plus this is
very therapeutic. You will enjoy painting each strokes branches and
it would be super fun, do it slowly, calmly and just enjoy the
process of painting. If you have any doubts regarding anything about this
painting, the technique, the colors or anything, you can always reach out to me in the discussion
section of the class. Or you can always DM me on my Instagram under the handle
at the rate artist Act. You know where to find me. So you can always reach
out to me whenever you need my help and I will try to get back to you as
soon as possible. Also, if you are
painting this one along with me or even if you have
painted this one later on, then please, please
please do post it in the project
section of the class. I, along with all
of your friends, would love to see your
work and this will appreciate a lot of your
friends to paint the landscape. To post out in the project
section of this class, we had done painting all
those three dry trees. It was pretty quick
and easy right now let's add few grasses
in the foreground part. What I'll do is this is one of the techniques which I just discovered
while painting this. What I did is I just dropped the column on the
paper and then I just turned my brush and used the end of my brush
to pull the color up, and it gave me a pure, full grassy looking strokes. Now, this is only possible
if the color is wet. If you have any
other tool which is more sharper or which has
a bit of a pointed tip, then you can even use that to get more thinner
looking strokes. All right. I did that in some of the places and
then I again switched to my brush and painted few
grasses with my brush itself, you can use both the techniques. And just take the decision for yourself which
one works for you. I'll be using both
in my painting. For base thinner
looking strokes, I will use my brush for some thicker and natural
looking strokes. I will use the end
of the brush to create the strokes
the same strokes and with the same color. That is the lunar black. I'm adding few strokes
on the back of the house as well and
around the house, plus I'm adding few dry trees on the horizon line as well. One thing I want to stress upon is if the painting
goes other way round or if the painting
doesn't look like you want to look like, then just don't lose hope. It is just a paper
and a painting. Grab a new sheet of paper. Just revise all the techniques which we have learned
and repeated. Believe me, you will be
doing so much better in the second painting and you will be a lot more confidence. It's a fine, we all fail
sometimes a success sometimes. So it's okay. All you need to do is keep on trying
and not give up. Don't lose hope.
Start over again. It's not the end of the world. It's just one paint thing. And I know you are going
to do it better in case you failed in
the first attempt. Repeat it one more
time and like I said, if you get stuck anywhere, just reach out to me
and I will help you out in any way
possible. All right. So, yeah, now let's paint
some dry leaves on the tree. Here I'm taking the aussie
red color and again, using my smaller round brush, I will paint some tiny, my little strokes making it look like leaves on the
trunk of the trees. I'm using a hi light
value of that color because I don't want to
create the opaque strokes, adding light wash of
aussie red color. And then I will use
the same color, but I will add a little bit of black to make it little darker. And I will repeat the
same steps again. Remember, don't cover the complete tree
with those leaves. You just want to add a
little to make it look like it was a transition
between autumn to winter. That is, the trees,
leaves have dried. The autumn has been completed, the winter has started. This is what I wanted to create in this
painting, All right? Just using the leftover paint, which was there on my brush, and adding tiny little
dots at the bottom that will make it look
like few leaves have dropped on the land. That's all this part. The next class we will
remove the masking cape and add more details on the roof of the house.
I'll see you there.
10. Removing Masking Fluid: All right, so now let's remove
the masking fluid which we had applied during
the time of sketching, and then add the final detain. I'll be using this
adhesive Eraso to remove my masking fluid. Again, this is not important, not necessary tool
for you to have. You can use any kind of Erso to remove your
masking fluid. Okay, so here I am removing the masking fluid from the sky. Drops of masking fluid
which we had splattered. I will also remove it around the house and foreground area. All you need to do is just wrap your Eraso masking fluid would
easily get off from paper. You will see wherever we had
applied the masking fluid, that area is as
wide as the paper. This is just interesting
and super helpful tool, especially for the
watercolor artist, because you don't
have to stress about the tiny area which you
have to leave white. All you need to do is just apply the masking fluid and
you are good to go. Then you can remove it at the end and you can
add color to it. Or you can leave it as
it is however you want. Yeah, this is how you
remove your masking fluid. Once your masking
fluid is removed, let's add some shadow
and color to the roof because I don't want it
to look completely white. We will add a little bit of ultramarine blue just
on the roof area. I'll take my round
brush size foe. I'll take my palette
and I will use a very light value
of ultramarine blue. This is like 80% of water
and 30% of pigment. I'm using that color to add few dry brush strokes
in the foreground part. All you need to do is
lower your brush with paint and remove the
excess on the tissue. Then just rub your brush
on the paper and you will see that it will create
a bit of dry strokes, which will give a lot of
texture to your painting. Next, I will use
the same color to add a little bit of shadow to the snow area and I'll apply that color on the roof in
case you have applied a lot. You can always clean
off your brush completely remove the excess
water from your brush. And use the damp brush to lift off the pink a
bit in case required. But always start with
a light light value, light handed, so that you
don't have to do this. Okay, Now I'm adding a few shadows of the trees
with the same color. Remember we are doing everything
right now wet on dry. Details are always
done wet on dry. Okay. Next I'm taking the
dark brown color, that is the mix of Aussie
red and Luna black color, and I'm using that color
to add some dry dots on the foreground part and
also along the horizon line. I'm pretty happy with
how it has turned out. I do not want to overdo it. In case you feel you
don't need to do it, then just take that call
for yourself. It's fine. You are the judge
of your painting, so you can do
whatever you want and you will make the best
decision for your work. Yeah. Take that
call for yourself. Once that is done, I will
take the Naples yellow color, which is a bright
yellow and I will take that color
directly from the tube. You see I'm not adding
any water to it, and I'm using that color to paint the toes and the
windows of the house. And I will use the
same color to add some tiny little dots in the
foreground part as well. If you don't have this color, all you need to
do is you can add a little bit of
white white e relic. In case you don't have
white or Chinese white, use that color and add a
little bit of warm yellow. That is the cadmium
yellow, Hansa yellow. Deep, any warm yellow
to your white. And you will get a
similar looking color. All right, I've added a few strokes at the bottom
of the trees as well, and I will also add some leaves of that color on the tree. Again, don't overdo it, just add 510 leaves
and that's all. Now in case you don't have
masking fluid and you want to create the snowy
effect on the sky, all you need to do is
load your brush with white quash or any
white thick paint, and then just use another
hand or brush to tap it off. And you will see the drops of white paint would
drop on the paper, making it look like snowfall. It is basically a
splattering technique, which you do when you want it to create that snowy
effect in your sky. Okay. And the same white, uh, any white paint, you can use it to
paint the roof area in case you have not used
masking fluid earlier. Okay. So here I am just using
the leftover paint to add some dry strokes and that's it you're in the
final class bear, we will reveal painting.
11. Removing masking tape: Now it's time to
reveal our work. Remove the masking tape and see the final look of our painting. Let's think first, I'm so proud of you that
you reach tell gear, you watched the class and I'm sure you're
going to paint this. I congratulate you for
completing this class. All right. Now let's remove the tape and
reveal our painting. Remember, remove the tape only when your painting
has completely. Try especially around the
edges where you the tape. Once your painting is dry, just pull off your tape
at an angle which is away from the paper so that you
don't end up tearing it. You don't really want to tear your paper when you have done
such a wonderful painting. Yeah, I almost got
the clean edge. Only the right hand corner was a bit unclean, but that's fine. You can always
apply a little bit of white caution in that area, but it doesn't
bother me that much. All right, this is
how we have done. We used on technique, we used wet dry. We use clearing technique,
flattering technique. And we also learned
how tilting of the board can give you the flow and the
softer looking sky. We learned a lot of techniques, and I hope you enjoyed
and you are going to paint this one at
your own space.
12. Thank You: Congratulations on
completing this class. I hope you enjoyed and loved
painting along with me. Now it's your turn to paint and post this in the project
section of this class. I'll be eagerly waiting to see all of your class projects. If you guys have any thought or any review about this class, then please do post it in the project section
of this class. I would be really excited
to read about it again. If you guys have any
doubt regarding anything, feel free to post it in
the discussion section of this class and I'll get back to you as soon as possible. Or you can always
DM me my Instagram. All right, that's it for now
and I'll see you guys truly. So hopefully in the next class. By
 Shreya Gada, Artist