Transcripts
1. Introduction for the Rose and Full Leaf: Hi there friends. My name is Sue elder Eddie. And welcome to my second
Skillshare class. One stroke, rows and boldly. Let me give you a little
background on myself. I am a one stroke
certified instructor and I've taught this
method for many years. I've taught at many locations. So provide classes have
been taught at Michaels and Hobby Lobby
stores in California. First, I will show you
the supplies I use to be successful in
one stroke painting. Then I'll show you the
steps on how to paint a one stroke, rows and Felipe. In this beginner class, learn in small bits at a time. So there's no need
to feel overwhelmed. It's not hard to do. It just takes a little
bit of practice. And today's class, you'll
learn the steps on how to blend acrylic
paint onto a brush. Create a shell stroke. Build a rose and full leaf. And how to base coat and
seal your finished pot. When you sign up for the class. I will provide handouts for
you to follow along with. You can also place wax
paper over the top of your handout so you can
trace paint your strokes. I'll see you in the next lesson.
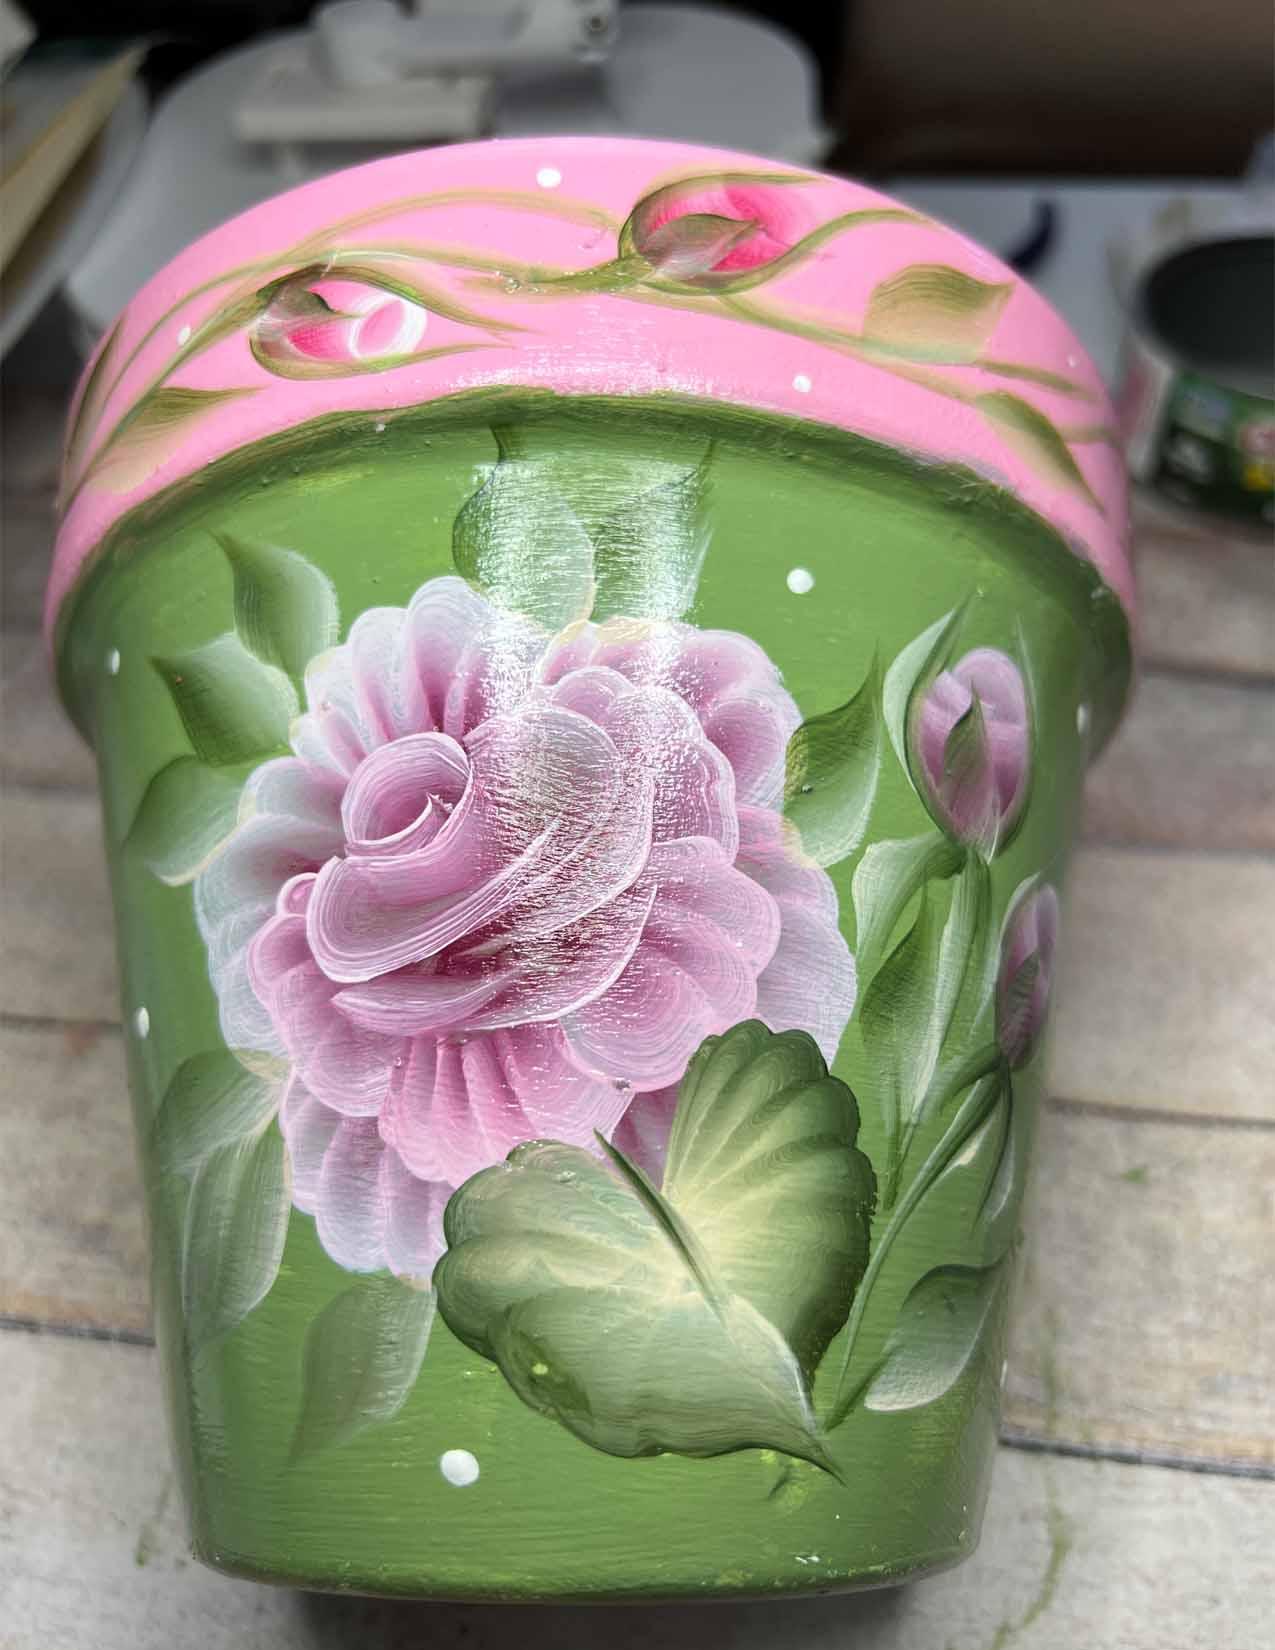
2. Project Introduction: The project for this
class will be how to paint a rose and
full leaf onto a pot. And a step-by-step method. You will learn how to base coat paint with
decorative colors. Paint a checkerboard, vines,
rosebuds, and leaves. And you'll learn
how to paint this beautiful rose as a full leaf. And after you're finished, you will seal your pot. So let's get started
on learning how to paint this beautiful
rose and leave. And don't forget to click on the Follow button up on the top of your screen so you can be notified when I
publish a new class. If you aren't a
Skillshare member, you can use the link I provided for a free trial
of Skillshare for 30 days. Or you can access this class. And so let's move on
to the next lesson.
3. Supplies: You can download the supply list in the class resources section. The acrylic folk arc acrylic
paints are thick and creamy. Floating medium is something you want to make sure
that you do get this. This really helps this
painting style. Brushes. You can get either
the three brush set or the value pack,
ten brush set. You can purchase these through Amazon or your
local craft store. Greeting card blank
so you can get these or you could use a piece of card stock that you fold-over. It's up to you. You can also buy sediment stamps that have saints
like Happy Birthday. Thinking of you get well that you can stamp
onto your card. I use a micron, 0.02 fine tip marker. Use any type of paper
glue that's not too thin. See you in the next lesson.
4. Trace Paint with Wax Paper: Okay, This is a little
short lesson on using wax paper to trace
paint your strokes. I'll be using wax paper that you can easily find
at your grocery store. So you can also date, date your piece of wax
paper and then save them so you could see your
progress as you go along. So I'm going to go ahead and load my brush
with the paint. And Brad go from one corner
to the other corner, press down back and forth. And you want to get this loaded
two-thirds of the way up. You also want to see a
beautiful gradient here. And you can't see it right now. But I had a box here that was an inch and a
quarter by an inch. It looks something like this. And I just want to
stay right here when I'm loading my
paint by go-to far, what I'm doing is I'm
taking the paint off. So just stay right here. Loading your, your brush, dip lightly into
your floating media. And let's just try this. So we're going, excuse me. We're going to place our wax paper over this
shell stroke here. And this is a handout
that I provide in the downloaded section
of the resource section. So I place the wax paper over the top of that with the
white side facing out. I'm going to start
at this corner, this corner here, and end here. And then I'm going
to think about that bottom point there. So what I'm gonna be
doing is I'm going to press down wiggle, wiggle. Always truly my brush as I go. So let me show you. So you press and you wiggle, like if you are scrubbing, crass wiggle, press wiggle, slow down, stop and stand up. And then there you
could see the stroke. So we'll try a second one. Reload your brush
with fresh paint. I really don't need
more floating medium because I can feel this is
pretty slick right now. So again, you're gonna see
this is the feral, this here. So watch the feral as I paint this stroke and see how I'm
twirling it in my fingers. Don't provide this
death grip on it because then you're not
gonna be able to twirl. So I'm gonna be right here, starting with the white on top. I push and I wiggle, push, push, wiggle, slow
down, stop, stand up. And that's how you use
these handouts here. Let me show you quickly how different it looks
using a size ten. So this was the 12th and you could see it
right here says size 12. This one is a size ten. You could see the
difference in size. So the reason I'm
showing you this, if you have a
different size brush, this isn't going to
be the same size. So I'm going to load
this brush up with paint two-thirds the way up. Look for that
beautiful gradient. A little bit more. Cheese, usually about three times at touch, the
floating medium. Now let me place this over here. We'll do the same exact thing. It is to see how it comes
out a little bit smaller. So just be aware of that. If you were to use the
three-quarter flat, which is oh, it's
roughly this size here. That stroke is going
to be much bigger. So there you go. Use your downloaded handouts with tracing paper to help
you learn how to do this.
5. Shell Stroke Pattern: Okay, let's get started. What we're working on right
now is the shell stroke. And you can find that in
your downloaded handouts. This is the stroke
that we're going to learn how to paint. We're going to start
here and we're going to press down wiggle, wiggle, wiggle, wiggle, wiggle,
and stop and stand up. So we'll start that one first. I've already loaded my
palette with paint here. And it's the usual paint
that I use, the berry wine, the white thicket, sunflower, and then some floating medium. I've already dampen my brush
and taken off the water. Now I'm going to load my
brush corner to corner. Press down. As you load. Add some
more corner to corner. And I'll do this three times. You're trying to push
paint up into your brush. And remember to stay in
this area right here. Don't go any further than
you can't see it right now, but I had a box that I drew on my plate here that's one
and a quarter inch by 1 ". And I'm just going to stay here to build the paint
up into the brush. I'm not going to go
longer and I'm not going to come over here
and start over again. So Let's do it one more time. And then add a touch, just a light touch of the floating medium
and blend it out. Anytime you add
anything to your brush, you're going to blend it out. You want it to look
nice here and here. So remember, we're going
for that shell pattern. We're going to put the
white up towards the top and the very wind
towards the bottom. I'm going to start here and
I'm going to press down. And I'm going to pivot. This is coming down. This is going to come
down to this area here. So I push in the center, I want it to build up
a little bit higher, slow down and stand up. And that's your shell pattern. I'll see you in the next lesson.
6. Outer Ring: So the next step that
we're going to do, we're going to create
this outer ring. And it's 1234567
petals around this. And it's gonna be a little larger than the
size of a quarter. Because in this section, you're going to add the rose bud and then another
layer of petals. So let me show you
how to do that. Three fresh air brush,
add fresh paint. There we go. Now, just
for this purpose, I'm going to draw around here. I remember about six to
seven petals around. So starting with the white
towards the outside, we're going to press
Stop our next one. And when we start
to lose our white, you can see how
pretty it was here. Here I'm starting to lose it. You want to go ahead and
refresh your brush again. Come back out here. And number three. Number four, fresh pink. Overlap a little bit. Five. It's starting to get to
see this right here. That means it's getting dry. I need to refresh with
paint and floating medium. Attach a floating medium. Let me do that one over again. Let's see what I just did there. Backwards. White is on the outside. And I still made fresh
white. Come this way. There it is. So now that's our
first outer ring.
7. Inner Ring, Rosebud and Comma Strokes: Okay, now we'll do, we'll do this part here. This rose bud is going
to come in right here. That's our next step. So fresh paint, fresh, fresh paint, little bit
of floating medium. Let's put this rose
bud right here. So browse bed up and
over, fresh paint. And over again,
there's restricted. And then here I'm going to go about halfway in a
little bit over half. Now I do the next stroke. And we cover that whole. You could see my berry
wine is looking dry. That's an indication. You need more paint, more paint and some
floating medium. Res stroke this better. Okay? So now we're not gonna do
the comma strokes yet. And when I call the
common strokes out, it's these here
that are gonna be flanking around the roads. But so what we're
gonna be doing is our next the inner ring. The inner ring is here. So we've done the outer ring, we've done the rows, but now we're gonna do
another layer of petals. And here I've got
1234, maybe five. So let's see what we do here. Fresh paint, blend it out. Let's start here. Wiggle, wiggle, wiggle. And you notice that
this right here, that one is not moving. So I'm pivoting each time. I bump it out. Other side. Start here. Wiggle, wiggle, wiggle. Stop. Fresh paint. Little bit of floating medium. Overlap it. 1234. Look at that, how
pretty that is. Let's try the next one. So I'll be creating
four of them here. There it is. And I see something
I don't like here. This became really transparent. I need a little bit more paint. So I'm just gonna go over that. There it is. Then I'm going
to clean up the rose bud. Clean up the rose bud. Look at that. Now, I'll create
the comma strokes. The comma strokes
are gonna be here, one on this side, another one, then another one, another one, and another
one for a total of five. So let's go for
that fresh paint, specially the white because
that's what you need to see. So you're gonna start on
the right side of the bud. You're going to press down
and jazz the widest touching. You're going to scoop over. Now we're on the left side, press down curve and just
the white is touching. And that one disappeared on us. Let's try it again. Little bit better. Fresh paint. Slowly, media. There it is. Look at that. One here. And one
more down here. There it is. That's how you create a rose.
8. Full Leaf: In our next lesson here, we're going to be
creating the full leaf. And I will usually place the full leaf right
underneath the rows here. So this is what we're
going to learn to create. So in the handouts, I have this full leaf
downloadable handout. You can place a piece
of wax paper over the top of it to help
you create the strokes. Now, I still have
the berry wine in my brush and I'm not going
to clean out my brush. What I'm gonna do is I'm
just going to pull it off because I want
to keep that in my brush so that when I
start to create the stroke, you'll see that
pink come through. On the pink side. I'm going to add my green
and then add the white. And move something. Here. It's not good
at dripped here. Let me get this out of here. Okay. So blend your paintbrush
back-and-forth. Grab some more paint, loaded, loading it up into
your paint, brush. Grab some yellow,
softens it out. Add a touch of floating medium. And there it is. So just like we have this
written out here, I'm going to place a y here. The y is going to, this is the center. And this is gonna be
one part of the leaf, and then the other
part is this way. So let's go for that. Okay, green is on the outside. So I'm going to
start at this angle. Press down and bump,
press down, bump. Notice that my brush
is pivoting here. And then I stand up fresh paint. I'm gonna come over
to the other side. And I'm going to press
Down, Bob, press down. And now what I want to make
sure is that I'm closing up that gap in the
center as I'm pivoting. And then I slowly stand up
and meet that other leaf, the other side of the leaf. Then just with the green side, I'm going to come in
and bring the stem. And that's how you
create your full leaf. Let's do it again.
Press that paint down. Press your brush down hard into your paint as you're blending. Okay, Little bit of floating medium, a
little bit of what? White and yellow on this side. Okay, so let's do this again. There's the why. Green
is on the outside. Press down, bump, press down. Just keep pressing down. Come into the center and
then stand up to a point. Come to the other side. Make sure that your white side is touching the center there. So we start to bump out, bump, bump, twirl, slow
down and stand up. I like the way this
came out and I can tell you it's because I
didn't blend my brush well. Let me try this one more time
with really blend my brush. Press down, press
down, press down. Let's see. The Y. Better, better,
better. Look at that. You know what? I still
see it on this side. This first one was blended a
lot better than these two. I try it one more time. Let's go for it. What? I'm going to take some of this
paint off and start again. Sometimes you have
to do that better. I could already feel
it on my brush. Feels nicer. Doesn't feel. It. Starts to glob up a little
bit on the sides here. And sometimes you got to be careful that
you don't pick up. Too much. Does get blended. Let's see. A little bit of
floating mediums. Betcha, this one's
going to be good. I can feel it already. Okay. Ready? Yes. I could feel it in the brush
when I was blending it. That's much prettier.
I like that. I think maybe I had a
little bit too much of the berry wind still in here. That's really pretty.
9. Basecoating the Pot: Use an inexpensive three-quarter
inch flat paintbrush. You can buy these
and value packs. And don't, don't use your good three-quarter
inch one stroke brush, use one of these
inexpensive ones. So what I'm going to
show you here is how to base coat your pot. So I'll add some paint and
I'll start to paint my pot. What we're doing here is we're just giving it a base coat. Because I'm still
going to go over this with a decorative color. But I want to provide a base
for my decorative color. This pottery has just vary. It just soaks up the paint. You might not have a nice finish with your decorative paint. If you don't do
this. Sometimes if it's if the weather's hot, it's very dry, pure in
an air conditioned room. Your paint might need just a little bit of
water on the brush. I'm just dipping
lightly into the water here and then I'm
adding it to blend it. There it is. Look at how
smooth that goes on. It's a lot easier than before. So I'm going to just
keep base coating this until I've got a
nice base coded pot. Like I said, I usually have
to do this and two coats. So let's come back
in the next lesson. I'll show you the decorative
color that I'm going to use.
10. Painting with Decorative Paint: In this lesson, I'm going
to show you how I'm base coating with
decorative colors. So I'm gonna be using this pink, which is crafts
smarts, pink, bliss. And I bought this
one at Michaels. And it's a multiservice premium
setting, acrylic paint. You don't have to get this. You can use whatever brand
or color that you want. And the green, I'm
going to be using Anita's all-purpose
acrylic craft paint. And this is called
artichoke heart green. And I bought this
one at Hobby Lobby. So what I'm thinking I'm
gonna do here is I'm going to add the pink on the rim here. And I'm just going to paint it. Probably have to do double coat. And what I notice here
with this craft paint as opposed to the
folk art paint, is that it's a lot thinner. It's not as thick
as the folk art, so it goes on a
little bit easier. So I'm just going
to paint the rim of this all the way around. Then I'll stand it up and
do the top back-and-forth. Okay, so I'm almost there. All right, so there's the first code and I'll
wait until that strife. I tried to go over it right now. I'll be pulling paint off. You know what, I might
just leave that rim light. Or one of my favorite things to do is to do a checkerboard. What I'll do is I'll
just get my flat brush and a checkerboard
all the way around. I just think it's so cute. You could do that or he
could just leave a plane. But this doesn't
take any effort and it gives it a little
bit more pizzazz. We go. I tried to leave like
a width of the brush apart. There we go. Paint. Just keep adding it. Go around the rim,
need more paint. One more. And we're done. So
wash out that brush. Then I'm going to wash out my
pink brush, the pink in it. And I'm going to
start the green. Yeah, this is going to
need two coats for sure. Lot thinner lot thinner paint. It's okay if it looks a
little splotchy like this, you're going to go
back over it the second time after it dries. You're going to just cover
the whole the whole pot. While the lower part of
the pot, not the rim. We've done that and pink. And you're going to just
continue all the way around. Wait until it dries, and then you'll go back for your second coat.
I'm almost there. But I'm out of paint. Grab a little bit more nice, even strokes. And you can see right
here it's still wet. And I went over it and it's
I'm pulling paint off. So you just got to let it dry. So we'll just let it dry. And then we'll apply our second coat to both the
pink band and the green pot. And then we'll be back.
11. Paint the Rim with Vines, Rosebuds and Leaves: So now that we've finished painting with our
decorative colors, we're going to add a line
along the pink rim of the pot. So I'm going to be
blending both the thicket, the white touch of yellow. Just keep adding it. Push down hard. Stay in this area and
don't go any further. Now we're building it up. Little bit of floating medium. So with the lighter
color leading, I'm gonna be just painting
with the chisel edge here. Up and down, back and forth. Kind of add a little
bit of pressure so you get that pretty look there. And then coming
around right there. Now, it gets more fresh paint. And I'm going to add another one and kind of
have them intertwine. Just makes it look a little bit more interesting than
just one of them. And what I'm going to
put in-between are some one stroke leaves
and some rose buds. Okay. We go now, we've met it back at the start. When they get more fresh paint. Little bit of yellow, little bit of floating medium. And I'm going to add
someone stroke leaves. I want to make sure that I leave enough room to add some
rows, but it's there. Okay, so let's see, let's add one right here. There. Let's see, I think
I can add a couple more little stem so they don't look like they're
just floating there. Maybe one, maybe two more. Okay. Maybe one. Alright, so now I'm going to
clean up my brush so that I can add the burgundy
wine and the white to start painting
these rosebuds. And did my previous
class on the beginner rose bud and one stroke leaf. I showed how to paint these. It's a short class. You can look it up and just take it quickly so
you know how to do this. But I'm going to add
the rose bud here. Free stroke because I
can see through it. I might have to
go over it again. After it dries. Put one right here. One right here. One right here. Here. Should be that should be enough. Clean up my brush. Again, take that paint out. I'm going to add
I'm going to add the green again so that I can finish up these
little rose buds. And let's see, green, white and some yellow, some sunflower touch
of floating medium. More green. Okay, so can it be here? A hug that bud. Then I'm going to
press down here. Here. Just adding these
calyx around the rose bed. And then little bud there. Add another one. Step, pretty fresh green. Like it was fading away. Okay. One on this side. Little one stroke
leaf. Press down. And we have one more to go. One more. So at an angle, one stroke leaf, press down. You could go out
another one strictly. It's kinda bear. There it is. There's our rim of our pot. And next we'll be painting
one full rows here, a full leaf and some rose buds, and we'll do it on each side.
12. Time to Paint the Roses and Full Leaf on the Pot: Okay, fresh burgundy
wine and white. Keep adding it and blending it. When that paint up
into your brush, touch a floating medium
and we're ready to go. So first shell, second shell, feeling kinda dry. Every membrane you want to leave that opening in the
center size of a core. It's dry. You can see my
ragged edges there. So let me make sure that I've blended this out with a little bit
of floating medium. We go. Now we're going
to add our rose bud. Very dry. Really has
different painting on, on pottery as opposed to paper. Are four petals. 1234. Clean up your O's bad. Fresh white. Comma stroke. Comma stroke on the other side. 34. And your last one. So there's our rows. Now we're gonna do,
we're gonna add those couple of rosebuds, one on this side. And I'll add two over here. And I'm going to
remove this paint, rinse it off because I don't
want to muddy migraine. I don't want my
green to turn olive. I want it to stay bright. So fresh green and white. Blend. Fresh green and white. Nice little bit of yellow. To soften that green. Touch a floating medium. And we'll start
with our full leaf. Stand up. Come to this side. Come back and meet
in the middle. Slowed down, stand up
and add your stem. Now we're going to add the
calyx around our rose bud. Rest, come down and come down. Right at the base
of your bag. Down. Stroke way. My paint is dry. Remember you always have
to just keep adjusting. Okay, now we're going
to add our one stroke leaves calleds to add here. On stroke, please. Press down and come down. But it occurred if I had paint. Can always raise stroke. So what we can do
is we can turn this over and add another one, right in this area. The first side. On those
blank areas there, you can even add some
one stroke leaves. Just add a little bind to the other side. There you go. Finish that up.
13. Add Polka Dots and Seal Your Pot: One thing I like to
add to my pods besides my signature and
checkerboard polka dots. So he's in the end of
a very small brush. I'm just going to add some
little white polka dots all over my pod here. Just randomly. Get that. Just looks cute. There it is. Right there. Not enough paint. There it is. Okay. Now that our pot
is completely dry, I'm going to seal this. And what I use to seal my pots
is an all-purpose sealer. And I get this one
from Hobby Lobby and it's Master's Touch
all-purpose sealer. And it says on here that
it's suitable for canvas, paper, cardboard, and
terracotta, tin and metal. So once I know that
everything is dry, I'll go ahead and seal this. So I'll just use this. Tuna can. Just add some to my can hear. And then I'll use my
inexpensive three-quarter flap, damping it with some water. Blot out that water. I just want a soft brush. I just want it to be soft. That's the only reason
I put water in it. Make sure the water is out. Then. All you're gonna
do is culture pot. Just brush it on that. And this one doesn't
say if it's Matt or or if it's a red satin. But just as long as
you protect your, your pot with this, you can always buy
the kind that are high gloss, satin or matte. So it'll be a surprise to me. What this one comes
out looking like. And you just just coat it and it's waterproof
after it's dry. So that's kind of important
when you're using this to plant a plant in it and you're going
to be watering it. You don't want it to
mess up your painting. So just coat the entire
surface of your pot. We go skip turning it. Sure to do your RAM. Even out any strokes that you
might see from the varnish. Just continue to face
culture entire pot. And when it's dry, you might want to
give it a second coat just to make sure that this gets protected. There we go. So now just make
sure I'll just put a tiny bit on my
brush to do the top. Go. All the way around. Protected. With that. You're done. Nice. Makes sure that you brush
the wash this brush out with cool water and soap. You want to get all that
varnish out of there. You don't want to
ruin this brush even though it's an
inexpensive brush, it's still a good brush. So clean out your brushes.
14. Cleaning your Brushes: I talked to you
here a little bit about cleaning your brush, wipe off your paint, then you have a little bit of dishwashing soap in
the palm of your hand, and then just start to
blend that soap up into it. Swish it around in your water. And can you see how that soap is just drawing that paint out? You can see that. Look at that. You don't want to
leave any paint in this brush, you'll ruin it. And these are nice brushes. I'm going to rinse again. Usually I do this at the sink, but this is easier for me to
show you how to clean it. Let's try this again still. It's pulling off some of the berry wine in
there. You see that? We thought that there are paint was cleaned out of
that brush and it's not sitting down,
back and forth. Rinse again into the water. See, does that look Queen? It looks clean. I don't know if it is. Let's see. No, we're still pulling
out some of the very wide. Keep doing this
until it's clean. What's important about
these brushes is you want to keep that nice chisel. If you have paid that drives up into the feral here,
the silver part, it's going to make your
brush fat like that. And you don't, you
can't get that nice. Chisel. Nachos are so important when
you go to do those leaves. I think I've got it. There you go. Nice clean brush. These will last you a long
time. You take care of them.
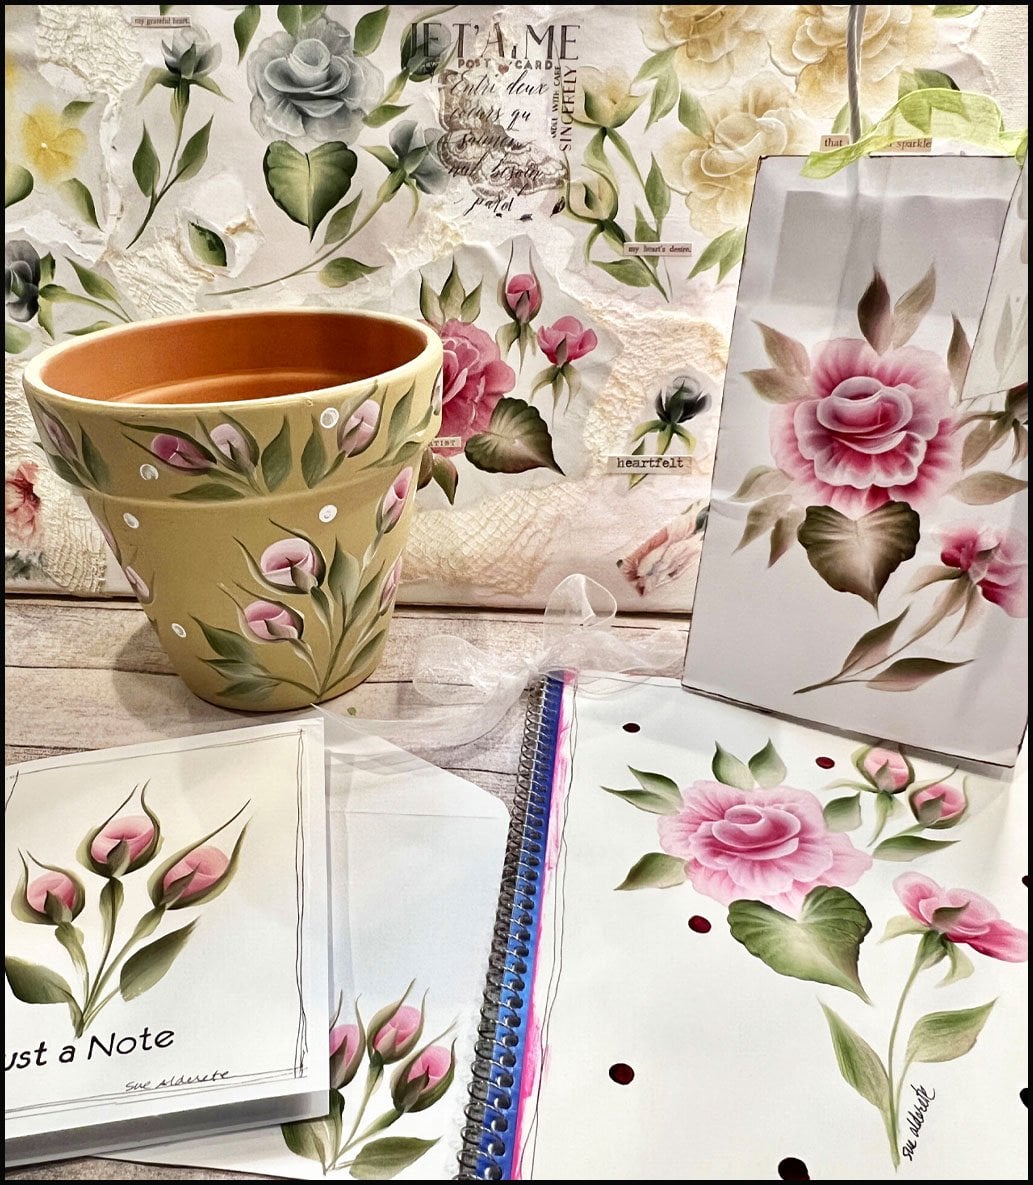
15. Conclusion and Final Thoughts: I'm glad you made it to the
conclusion of the class. This is such a fun flower
to learn to paint. You can paint it on any surface. You just change the size of
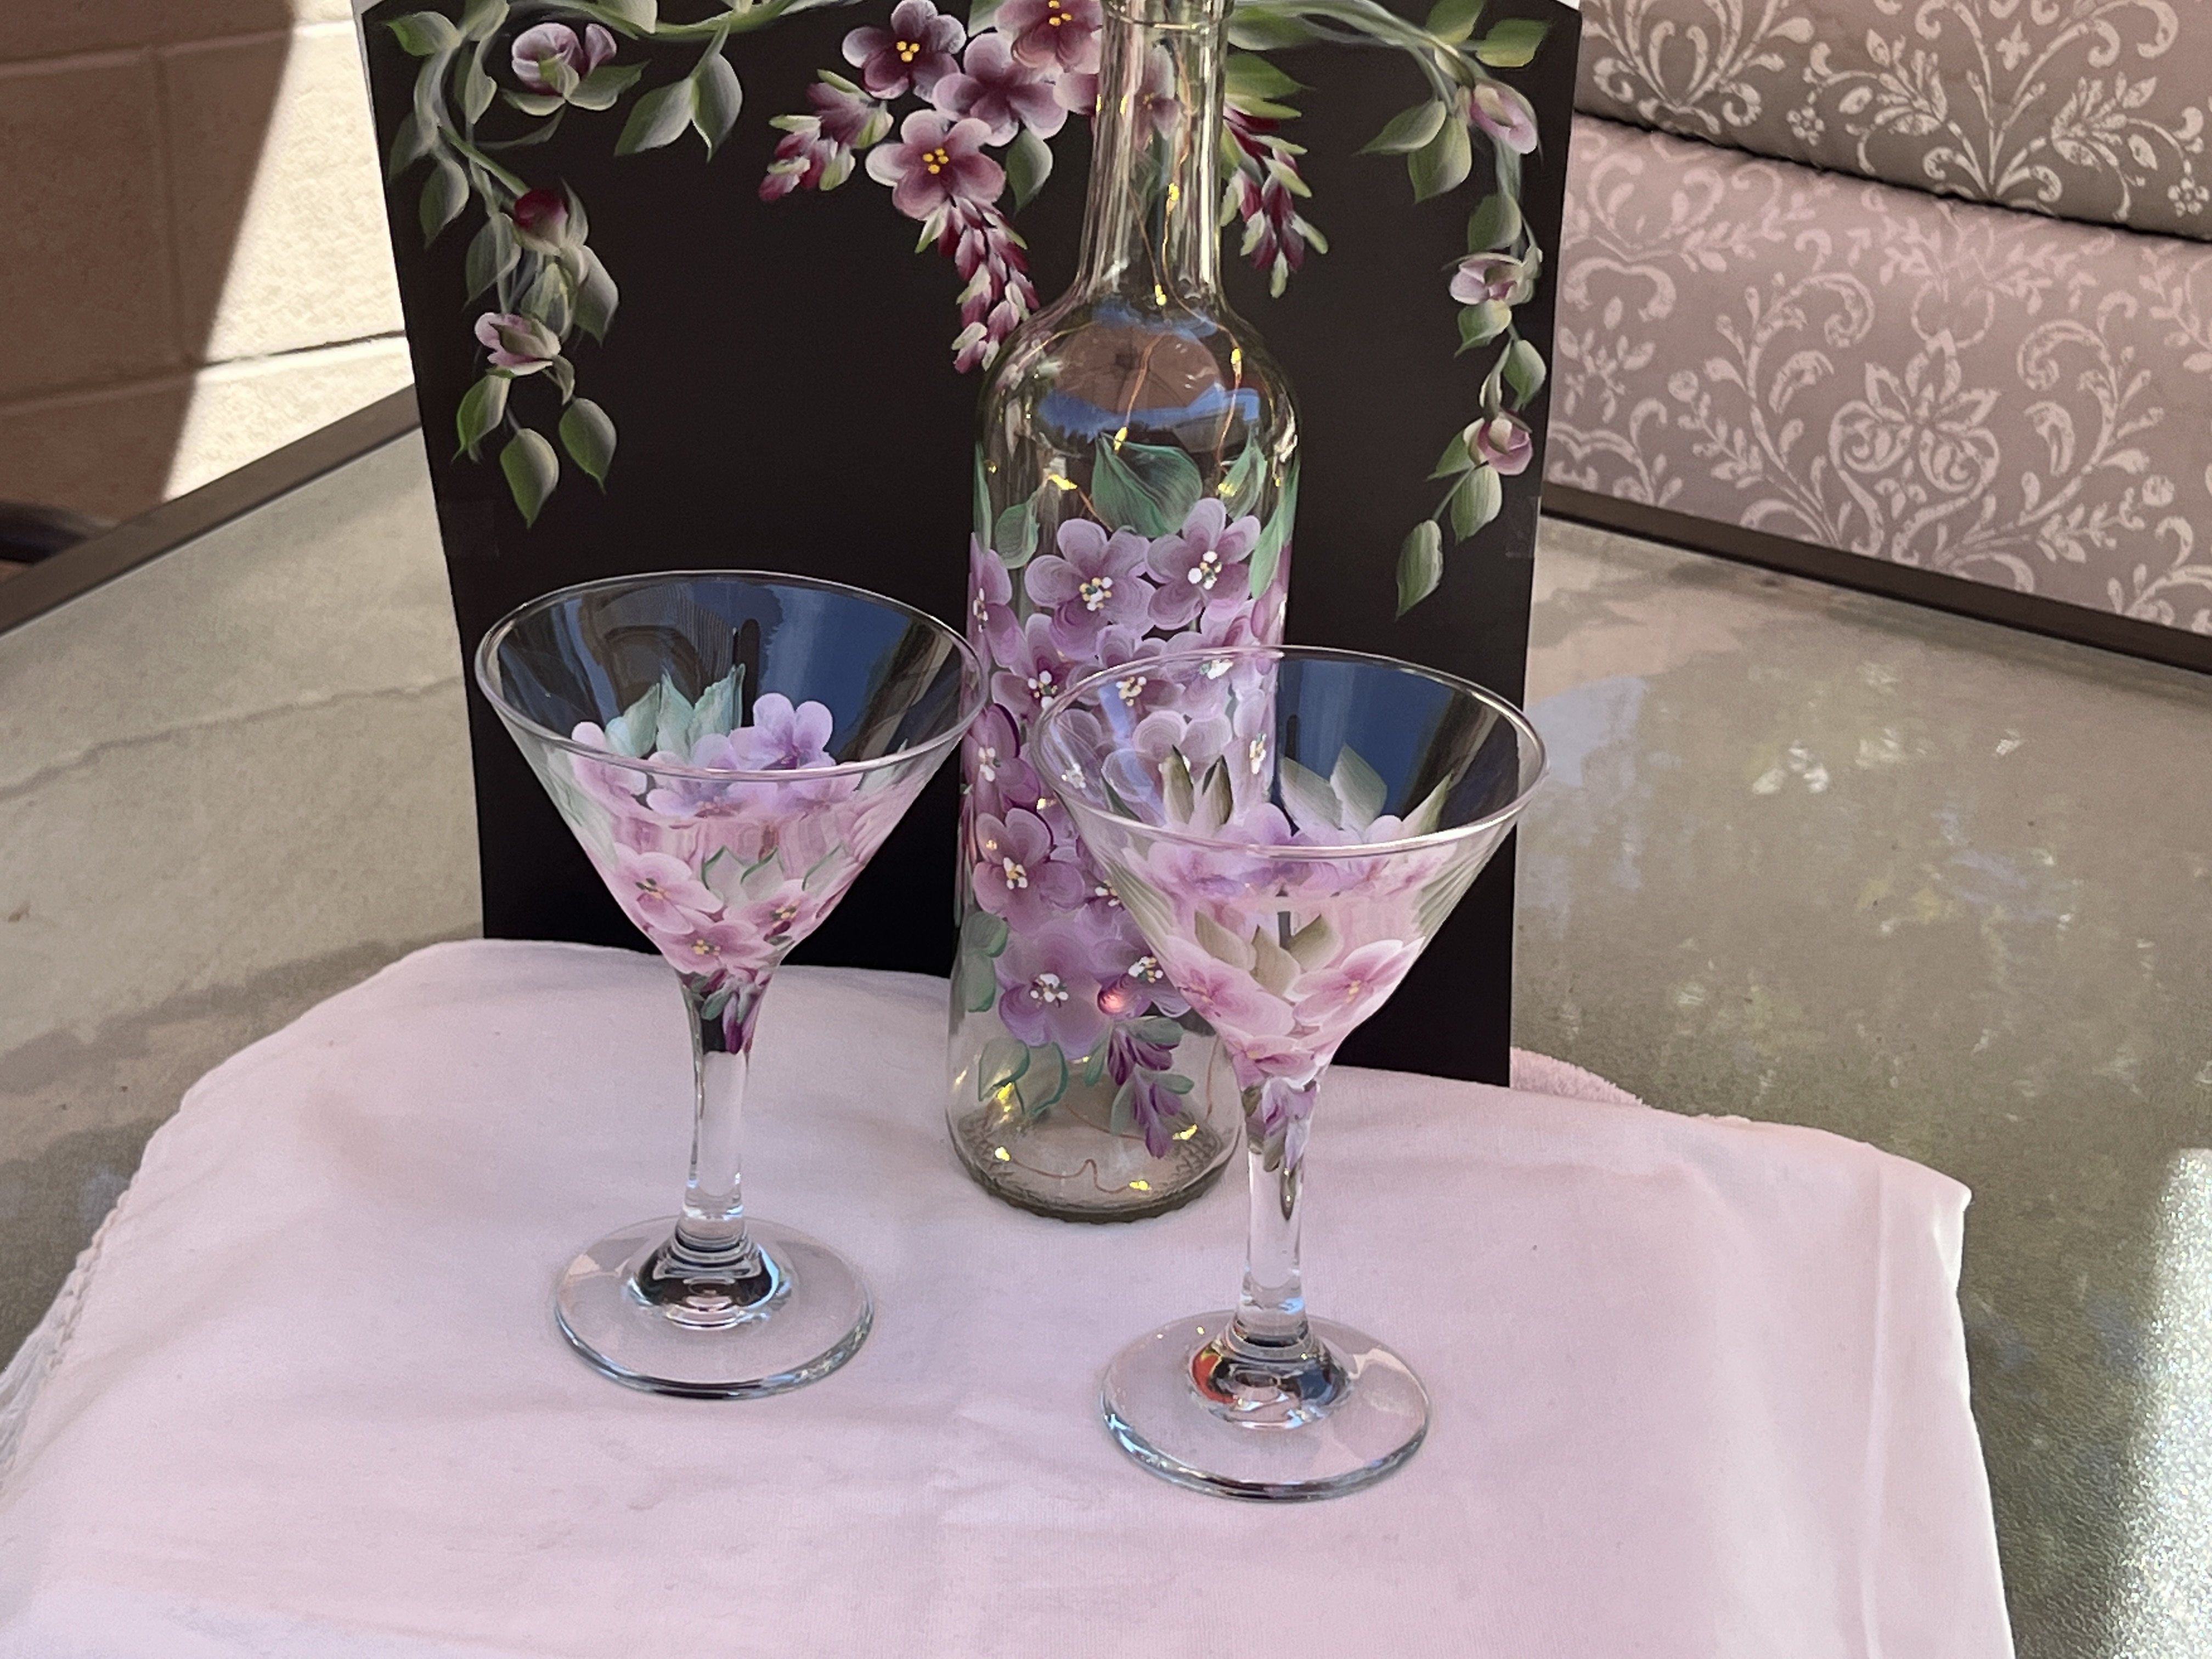
the brush or type of paint. For paper wood, walls, you can use acrylic paint. And if you want to
paint on glass, you will use the
folk art enamels. Please look forward
to one stroke. Last painting class
in the future. To be notified of
any new classes, please click on
the Follow button at the top of the screen. So thank you so much for
enrolling in my class. Please comment, leave a review or ask questions
in the discussion area. Also, please post
your projects in the project section
of the class. I would love to see
what you've created. You can also follow me
on Instagram at psu.83, 11 to see some of
my other creations. Thank you from the bottom of my heart and be
safe and take care.
 Sue Alderete, Always Believe in Yourself!