Transcripts
1. Introduction: If I could tell my
younger self one thing, it'd be not to
follow all the rules when it comes to
art and creativity. It's so easy to get caught
up in how things should be. That thinking, obsolete.
My name is Dave Reed. I'm a 3D artist and
content creator living in Brooklyn, New York, and I've been a 2D traditional
artist all of my life, and recently
discovered a love for 3D sculpting and 3D animation. You might have come
across some of my pretty incredible
children's books, including the Dream Machine or my social media collabs with the American Museum
of Natural History. You might recognize my
creative visual time lapses on both YouTube and Instagram. Three D sculpting inspires
me because it allows me to bring my art to life
in a whole new way. Today, we're learning
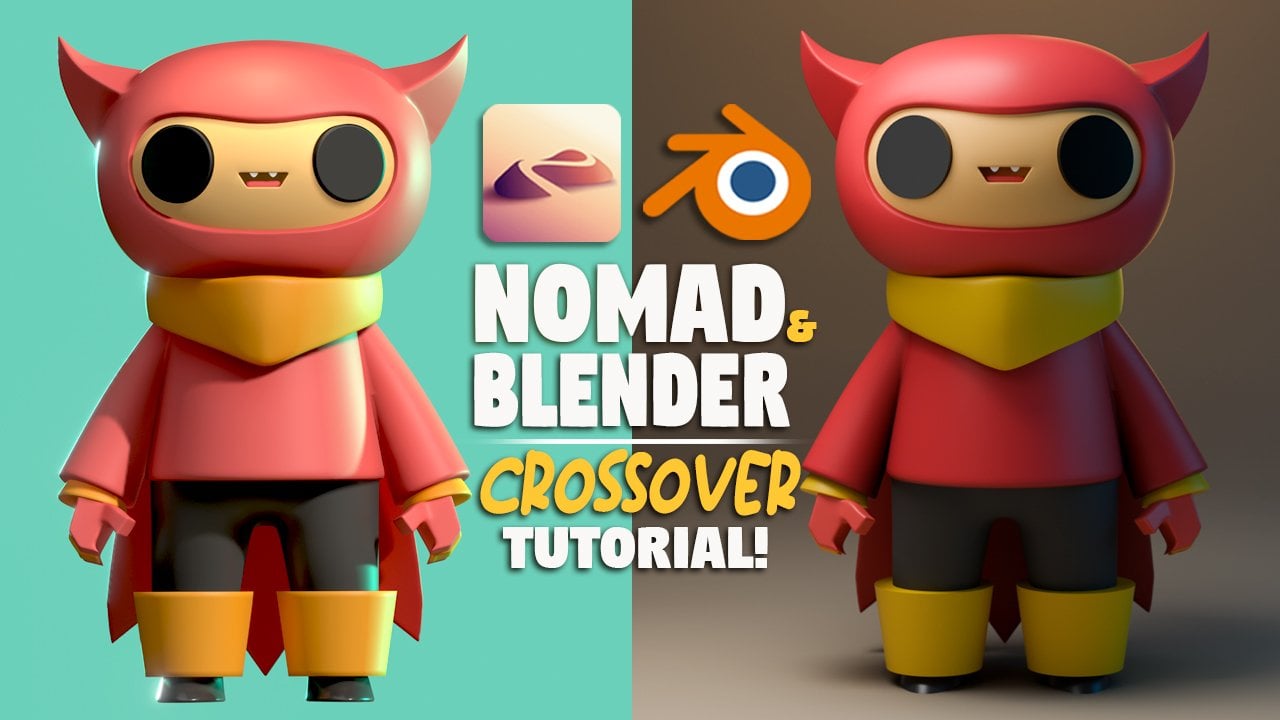
a complete workflow from Nomad Sculpt to Blender. We're going to bridge this
gap from the ground up. Today's project is
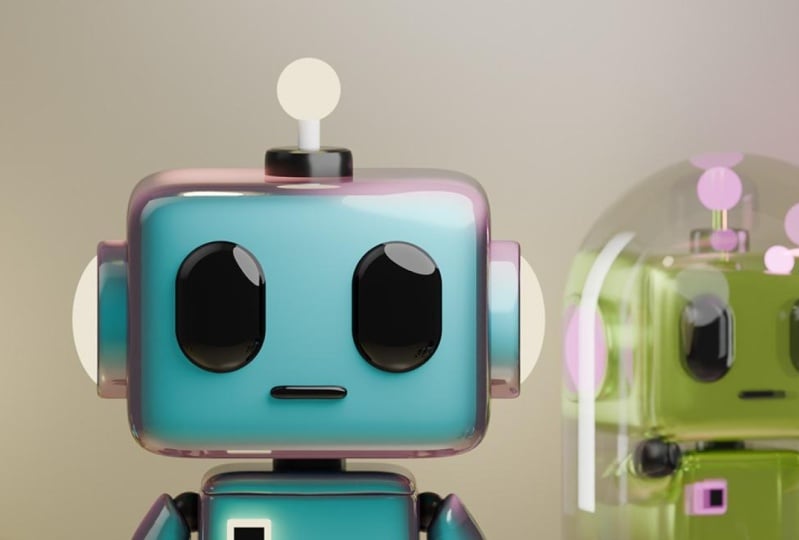
going to be a robot. Who doesn't love robots,
especially key ones? Just saying, we'll make
a quick model in Nomad, which we will then export
over into Blender. It'll be a complete
pipeline to Blender, which will give you
greater control over your Sculpt and your Render. You can easily follow
along at home with your iPad or Android
tablet for Nomad Sculpt. You'll need Blender with
a Mac or PC computer. We're on the front here of using Nomad Sculpt as a starting
point for Blender. Being fairly new to the scene, Nomad Sculpt does an
incredible job of using the latest touchscreen
technology for 3D. The 3D landscape has
changed so dramatically, and I love being on the forefront
of artistic technology. By the end of this class, I hope you walk away with
some new tools, new inspiration, and new
ideas. Let's get started.
2. NoMad Sculpt: Head, Body & Legs : [MUSIC] Let's start by making this
simple robot in Nomad Sculpt. Make sure you have the grid on and make sure that
you're in Orthographic. Let's go ahead and import
our reference image. We'll go here. Reference image. Can tap the image. Import Photos. We're going to use the
robot and just hit "Add". Hit "Transform" and then
you can move your robot, and once you're done,
tap the screen with one finger and it goes
back to sculpting mode. If you go to our scene, we
only have the default sphere. Let's delete it and we're
going to add a box. This is going to be our head. Let's just tap these three
dots and rename this head. Also, I like to use a MatCap; is just easier to see
rather than white. We will just tap
this little sun here and switch from
Lit PBR to MatCap. On the snap cube, I'm going to scroll out a little
bit, it front again. Let's just move this
up a little bit. We'll use our Gizmo. Let's
just move this cube up. Let's add a floor.
We're going to add it right where this red
line is right here. That way, we can get rid of the grid. We go to our scene. Let's just add another box. Let's rename this floor. I usually use FLR. We'll just use our Gizmo
and move that down. I'll put this back
up there for now. You just want to squash it and line the bottom up
with that red line. We can actually turn
smooth shading off. Let's go to this little sphere and just turn smooth shading off. We can get rid of the grid. Now we can get started on the sculpting or
building, I should say. Let's just move the
cube up a little bit, and we're going to make
it this general shape. We'll squeeze it down
with the sphere, and then we'll open
it up a little bit. I think that seems about right. Of course, you can make it
whatever depth you want. I think that looks pretty good. Maybe I'll make it a
little bit shorter. To get it round on the edges, we can do some things
before we validate. We'll tap here. The
Post subdivision, let's just put that to two. I'll move this over a
little bit so you can see. Then the division X, we're
going to bring this down. I'm going to put the
wireframe on just so you can see what's happening. We're going to bring this down and you see it's
getting more round. We can get to a spot
where we like it. I think that probably
looks about even, but it's getting a
little pixelated, so I'm going to turn this up. Hit that once, and I think
that's probably pretty good. I think that's all we
need. I'm going to go ahead and hit "Validate". I'm going to set a camera angle just so I have something to
go back to if I need it. I'm going to set it
right equal with this. I'll tap here, "Add camera", and then I'm going
to rename this one. Of course, this is
just so if I move it around and I want to go
back to that same spot, I can just press here and hit "1" and we go right
back to the front. I'm going to turn
the wireframe off. The body looks like a
similar shape, but smaller. Let's go ahead and
clone the head. We'll just clone that. Let's just name this body. We'll use our Gizmo. We'll move it down. I'm going to move this down at the bottom. I think it's easier.
We'll move that down. We'll shrink it and maybe we'll stretch it up
this way a little bit. I think that looks pretty
good. I think that works. It also looks like
we need a neck and we can just use
a cylinder for this. We'll go back here. We'll add a cylinder and we can go ahead and make
this a bit round too. I'm going to do the same thing.
I'll tap the three dots, put the subdivision to two, and bring the division X down. I'll bring it down to
12. I think that's fine. I'm just going to go to
the Gizmo and just shrink it because we know the
general size here, so we don't have to spend too
much time doctoring that. I think that's pretty
good right about there. You can use X-Ray if you want to see through these shapes
and if you want to make it a little smaller
if that's easier. I'm going to go back from X-Ray. Perfect. He has
little round parts on the left and right,
like his shoulders. We can use spheres for that.
This cylinder is the neck. Let's go ahead and name that. We can validate it, and
then we can add a sphere. We'll go ahead and
use our Gizmo. We'll shrink it, and
then we'll move it over to this left side. We'll make it pretty small. We'll enter it in
right about there. I think that is pretty good, maybe a little bit smaller. But I think that's
good, and we will, of course, mirror that
a little bit later. This is a small detail,
but if you notice, this seems to round out
a little more than here. Let's just do that
really quick. Let's tap on the body. Hit "Solo". I'm going to tilt it a little bit so you
can see it better. We'll go to Symmetry
and turn on Show line. That's just so we can
see the symmetry line. Let's hit "Local". X is already selected, so
we just need to hit "Z". You should see a red
line and a blue line. That's where you know where
your symmetry will work. Let's just use Move. I want around 150 or so, and I'm just going to move
in these edges a little bit. Maybe I'll make it a
little bit bigger, maybe like 225 or so. I'm just going to
move these edges in the slightest bit because I feel like that's what's
happening in the reference. I am pretty crazy
when it comes to details as you
might already know. I think that's fine. I'm going to go ahead
and hit "Solo". The only other thing
I'm going to do is move this in a little bit more right about there. We do have a line across here. Let's just take this body. We'll use Split, rectangle, and we'll
just cut this. We'll just go here and just make a white line and we'll
cut this into two pieces. Hopefully, they should
clean up nicely. I'm going to vox, so remesh these probably like 175 each. Let's do this one 175 or so. I think that looks pretty
good. We can smooth these now. We'll just smooth these
out really quickly. Looks like we still have
the symmetry going, which is fine,
that works for us. We'll hit "Solo" if
that's easier to see, and we can just smooth this
out until it looks nice. Hopefully, it looks
nice, eventually. I'm going to hit "Solo"
again and see what we have. The only difference
is now I'll bring the body up a little bit. Maybe I'll make
this smidge bigger, just so it matches up
a little bit better. We still have that break that line in between.
I think that works. We have a round little
bit at the bottom, like a little pelvis area, and that should be pretty easy. We're just going to use a
sphere. We'll add a sphere. Let's go ahead and
name that now. We'll just call it pelvis. We can go ahead and validate
it. Let's just shrink it. Let's move it down. Let's hide the floor for now. Just tap on the floor and
we'll just hide that, and we'll go back to the pelvis. We just want to shrink
it so that it's not hitting any of the edges. Let's make it a bit smaller. Maybe we'll just smush it
a little bit like this. I think that works. Now we can
add these two spheres that are going to be for the
legs. We have the pelvis. Let's add another sphere, and we'll use our Gizmo. We'll shrink. Of course, we're going to do the
left side of everything first and then we'll
just mirror it. Let's put this here. We can add it maybe up to
the pelvis a little bit. I think that looks pretty good. Now we need to shape like this. To me, this looks like a
cylinder with the top tapered. We'll add a cylinder. Let's use our Gizmo and
we'll shrink it with this orange ring that
you can't see that well. We'll shrink it and bring
it down and we want to make it just about the
size of the sphere, maybe a little bit bigger than
the sphere. It seems like. We'll go back to the
cylinder settings and I'll make the bottom a
little bit bigger like this. Let's make it round. Post subdivision 2 and then we'll bring this down
until it's nice and round. I think that looks pretty good. Then we have another
piece down here. I think what we should do
is take this cylinder, so this will be a leg mid. The sphere would be leg ball. Let's name pelvis ball. That's like this pelvis ball
and they're all connected. I think that works. We have leg mid and I think we can
just clone it probably. Let's clone leg mid
and make that foot. We'll just tap these three dots and we'll just call that foot. Let's do leg foot just so
everything is together. We'll use Gizmo and we'll
move that down a bit and maybe we can do
something like that. Hopefully, we can make
this into a better foot. Maybe we just stretch it. Let's go ahead and
validate the foot. We'll turn it sideways,
and I think that we can just make something a
little better than this. I think we can
probably use Move. We can tap on that foot. Let's tap on "Symmetry"
and go local. Now let's just bring this back. Let's move to a little bit smaller so we can
hopefully just move the top half and just make it
into a better-looking foot. I think that works. We finished
the head, body, and leg. Let's create the
arms and the eyes.
3. NoMad Sculpt: Arms & Eyes : We finished the
head, body, and leg. Let's create the
arms and the eyes. I like the leg. Now
let's just make the arm. Actually, this is
probably a nice shape. Let's use this. Leg
mid, we'll clone it. I'm going to move it
up under the body. We're just going
to call this arm. Let's call it arm B. Let's just use the gizmo
and move it up and over. We'll stretch it out. I think that could work. I
think that's a decent size. I think we'll validate
and we'll just use move. Now let's just use our move tool and we'll stretch this shape. We want to make sure
that we have the front and the back symmetrical. Make sure that you're
tapped on the arm. Go to our symmetry. Local. Right now
it's front to back. Let's go ahead and
switch that to Z. Now we have this
line, which would be the front and the back, and you can see
it by these dots. Now when we go back to front
and we use our move tool, we can literally just
make this shape. I'm going to put it
around 175 or so. We can just bend the
arm into this shape. I bend it like this.
I'm going to bring this edge down and this edge up. I'll bring this
out a little bit, maybe make this a
little flatter, maybe make this a
little more round. I think that looks pretty
much like what I'm seeing. I'm just going to use
smooth and just smooth it out a little bit, make
it a little more clean. Then maybe I'll just
stretch it as well. I'm going to use the gizmo and
just move that into place. I'm going to rotate
it out a little bit. Let's add these eyes in. They're a little pill shape, so we'll deal with that as well. Let's add a sphere, but make sure that
you're not on gizmo. Make sure you uncheck that
and then just add a sphere. We can use our gizmo. We'll move it, and
we'll move it out, and then we'll shrink it. Probably around there. I
think that looks good. Let's just bring it over here. Now we want to make it
more of a pill shape. In order to do
that, because this doesn't really do the
trick, let's validate. Now, let's switch the symmetry. Go here, switch from X to Y
and then let's hit Local. Now let's use the arrow, and then we can
pull these apart a little bit. We don't
need too much. It's maybe something like that. I'm going to go ahead and change this back to world and
change this back to X, making sure that I turn Y off. I'll put this back to auto. I'll turn leave symmetry on. Let's actually voxel re mesh it. Let's voxel re mesh around 150, and then let's just
smooth this out. If you need to, you
can stretch it, make it a little more as
perfect to those as you can. I'm going to flatten it and
then I'm going to bring it back into the face. I think that's pretty good. Of course, you can put yours
anywhere that you want. I'm going to try
to put it right in the middle, right around there. Let's do pivot center pivot. This is way too high. If you have an iPad and
you have quad remeasure, you can go ahead and bring
the resolution down. If not, just go up
here to miscellaneous, and then you can decimate three or four times
until it's very low. I'm going to use quad remeasure. I'm going to hit Quad Remeasure. I'm going to turn this off.
I'll probably put in 3,000. Essentially, we're just lowering
the resolution of that. Let's go ahead and name this I. We can go ahead and add a mirror and it'll show
up on the other side. Let's call this I, and then I'm just going to
validate. Join children. Yes. Now that we have our
robot all blocked out, let's jump into some details.
We'll start with the head.
4. NoMad Sculpt: Ears & Mouth: Let's add some robot ears and then we'll create the mouth. There's some little
things over here. Let's go ahead and
add, it looks like a cylinder and then a sphere. Let's go ahead and add a
cylinder. We'll use our Gizmo. We'll do up and over. Looks like I've added
it into a mirror. Let's take it out,
so we just have one. Let's do Snap. Should be on 90, so we'll rotate it
once. We'll shrink it. It looks like it's
something like this. I think that looks pretty good. Of course, I'm going
to soften it a bit, so I'll put post subdivision
up and bring this down to around there. I think that looks pretty good. Flatten it up a little bit more. Now I'm going to add a sphere, but I'm going to put On
Gizmo, add the sphere. That way it adds directly
where the cylinder was. I'm going to use the
Gizmo and shrink it and then I'm going
to shrink it this way, so we just have that little. That's perfect. Now let's make
this little mouth. We're going to do that similar
to how we did the eyes. Let's add uncheck On Gizmo so that when we add the cylinder, it goes
right in the middle. We'll use our Gizmo. We'll go up forward
and let's shrink. Snap, we're already on Snap,
so we'll rotate at once. We can turn Snap off. We can make it pretty small,
stretch it out a bit. Let's make those ends round. Post subdivision 2
and then we'll make this down to pretty low. We'll put subdivision to
three. We'll look crazy. It's pretty good. I'm going to go ahead and validate that. Let's go ahead and
box re-mesh it. I'm going to box re-mesh it in like 130 or so it
doesn't have to be much. The reason why I do that is if I don't and you try to move it, it can be a little wonky. I'm going to smooth it out. Then I'm just going to use move. If you want to give it a
little bit of a smile, make it a little happier,
and then just use Gizmo. Let's do pivot center, pivot just to get that
right in the middle. I like to flatten it a
little bit and then move it move it into the mouth space. That's pretty good. I'm going to make it smaller, maybe a little taller. I think I like it
there, but we'll see. Now that we've finished up
with the details on the head, let's create his hand so we can then mirror the arms and legs.
5. NoMad Sculpt: Sculpt & Mirror the Arms and Legs: Let's use a Taurus
to create his hand, and then we'll mirror
the arms and legs. Let's make these
little robot hands. We're going to add a Taurus. Add a Taurus, let's
just hit "Solo". Let's go to the Gizmo
Snap 90 degrees. Let's rotate it
forward. Like so. Let's go back to the gizmo
or to the Taurus options. Let's find these
pink little nodes, and we'll open it to probably about there. I
think that's good. Let's take this orange
node and just make it much smaller and then tilt it and find the green and you can
make it a little thicker even. I would say something
around there. Let's take the gizmo and
use the green arrow. Essentially, we just
want to stretch it lengthwise, like this. I think that's pretty good. Let's go ahead and make it
a bit softer and rounder, so we'll tap here,
put this to two, and we'll bring this down. I think I'll like that. We can up the
subdivision to get it a little cleaner, and
we can go back. If you need to, you can maybe make this a
little more round, or you can make it
a little chunkier. You can adjust it as needed. I think I might go ahead
and do that up one. I think I might like
that a bit better. Let's unsolo, and let's go ahead and put it in place and see what we can do with it. I'm going to rotate
it a bit, I'll turn snap off and rotate it. I think that's actually
pretty good. I like it. This is all looking very nice. We can take this Taurus and
we can just rename it hand. Let's take these parts
and just mirror them. We have leg ball.
We can mirror it. We can validate join
children and we can just rename it leg ball. We have leg mid,
so we can mirror, and then we can
validate that mirror. It is better to label them or else I'll forget and look like a dumdum when
I'm searching for it. Hand, can mirror, validate, and then call it hand again. The sphere, this
is the shoulder, so we'll mirror and validate it. Then validate the whole
thing, call it shoulder. Eyes we can validate. Mirror this, validate.
How children. This is the ear A, and this will just be the ear B. Even though they're not
really ears, but that's okay. This is the mouth. We do
have the floor again. This is the arm B. Let's go ahead and add a mirror. Now it has arm B,
we can go ahead and validate and then we can just call it arm mids. Let's ball. Good. We're
missing this little foot. Let's make sure all the parts
are mirrored, and if not, you can just add a mirror, and it should go easy peasy
over to the other side. We'll just call this foot. Now we can go through and
some of these are high. If you have quad remeasure,
you can lower them. If not, you can decimate them, but just be careful
that you don't adjust too much of the quality. Just go through,
and for example, I'm going to use quad remeasure. Right now, this is 59K. I'm going to turn symmetry off. I'm not sure how low
we can go with this. I'll do 5,000, see how it looks. Look at the wire frame.
It looks pretty good. I'll do half. Still
looks pretty good. I'm going to go
through and do that with most of these shapes just to get this robot as
low resolution as we can. Again, if you don't
have quad measure, if you're out on an
iPad and you don't want to buy it, just
use decimation. Just go through and decimate. Honestly, everything looks
pretty good except for the body is a bit high, and
I think that's about it. Everything else
looks pretty good. I'll come back once
this is optimized. Now that we've finished and
optimized our little robot, let's move on to some
final adjustments as we prepare to bring
him over into Blender.
6. NoMad Sculpt: Finishing Touches & Export : Now that our sculpt
is optimized, let's make some final
adjustments just to make sure he's perfect and
ready for export. You can, for example, I'm
going to lower the head a little bit because there's
a bit more space here, and I'm going to
lower him so that his feet are right
above the ground, which basically just
means selecting everything and moving him
down slightly like this. Perfect and then
I'm going to take the head and everything
connected to the head. I'll take the eyes, the head and both the
ear parts and the mouth. I think that's it. I'm
just going to lower that a bit on the head,
that looks perfect. I encourage you to take
some time to jazz him up. Maybe you want to put
some antennas on top, put some vents or box or cylinder, just
make some shapes. You can add some
things to him, make him a little more exciting. Then once we do that, so once your character
is all finished, then you want to go to
your scene menu and bake each one of these meshes. We'll start with the head, we'll go to the Gizmo and then Gizmo options,
and then bake. I'm just going to go down
and bake all of these. Now we'll switch from
MatCap back to Lit PBR. I'll go here and change from
MatCap back to Lit PBR. You obviously see there's
environment here. If you turn it off, then
it goes completely black. This is my eye
glare environment. You can download this
from Projects and Resources and to install it, you just tap here,
import photos, and then you find your
image and hit Add. Let's do some quick
coloring just so we can tell the difference
between white and black. All we're going to do is tap the different parts
that are black, for example, the eyes, and then we'll tap this
little color window. You can bring it to black,
and you can make it as rough or glossy,
whatever you like. I'm going to make mine a little
glossy, but not too much. I'll hit paint. I'm
going to go through and paint all of the different
parts that should be the same. Like, for example, the neck
and the little ball joints. I think those are all
going to be maybe the same as this black, so you can bundle them together. Let's say we have the neck, and then we have this one, we have the ones for the legs. Maybe we'll just these for now. We can go ahead and join those, and we want to add the
hands and the shoulders. We join all these
and we'll just put black parts and then those we can paint the
same color black. Of course, these we
can paint black and the only reason I'm
not adding these in because I might want to
change the color of these. Maybe this is black. The mouth is well and then we have some fun
details back here. Black and maybe this
part is also black. No, I think I like that white. I think that's
pretty good, yeah. I like this. I think this
is great. Let's save. Now everything is
set up correctly. We don't need the floor anymore, so we can go ahead and delete the floor and we don't
need the cameras, so we can go ahead and
delete the cameras. Now we have all of these parts that we're going to
send over to Blender. You don't have to
select everything. You can just go to the folder, GLTF export and I'm going to
export this to my computer. You want to export
this to your device where you have Blender, and then we will
open up in blender. Now that we've
exported our robot, we can now import
him in Blender.
7. Blender: Set Up Your Workspace: You transferred the gITF file from Nomad over
to your computer. Let's go ahead and
open up Blender. Now we're on the computer
where we have Blender. Make sure that you share your
Nomad to Blender.glb file, so you have access to
it on that computer. Now we can go ahead
and open up Blender. As you can see, I'm
using Blender 4.2.2. Even if this is a later version, it should be pretty
much the same. We can tap on the background to get rid
of the splash screen. Let's go up to ''Edit
Preferences''. Then go down to System. Depending on what
system you're using, I'm using a PC with
NVIDIA GeForce RTX 4090, so I have optics and
I have this selected. You'll have to see
what works best for your specific system. One last thing in
the preferences, just go to ''Input'' I
have ''Emulate Numpad'' selected because I don't have a separate Numpad
on my keyboard. I just have the numbers on top, where it says one and
exclamation point, two, add symbol, that thing. That's why I had Emulate Numpad. The next thing we'll
do is go over here to the right and go up to Render. Once you tap the little camera, you should see the
render engine, and I like to use cycles. Let's tap this and
go down to cycles. On device, it says CPU, and this is always
going to be slower than the GPU in my experience. Again, this is going to
depend on your system, but I like to do GPU compute. Any place in Blender
where you see CPU, I always change to GPU. Let's go down to the Render tab. Here we have Denoise. I'm going to tap
on the pull down, and then go to use GPU. Next let's go up to
the Render settings, and let's change the
max samples from 4,096, just tap on that, and
just change that to 300. This is one of the
things that controls the quality of your Render. I think 300 is fine,
but obviously, 4,000 is a lot more, but it'll also take a
lot longer to Render. Underneath this
little Camera tab is a little printer,
so let's tap that. This is the resolution that
your Render will export as. Let's head up to the
scene collection. Let's go up to the top right and click on this
little tab here, which will add a collection. Let's add three of them. For the top one, let's
name this Camera. For the second one,
let's name it Lights, and for the third one,
let's name it Background. Up here, you can see that we have our camera, which is here, our cube, and we have our light, which is a little
light right here. Let's bring the
light into Lights. Just drag the light down
into the Lights collection. The cube can go in
the Background, and the camera can go in Camera. Let's change
collection to sculpts. Let's drag this
down to the bottom, see if it stays down there. There we go. I just want
to mention there are some differences in
the keyboards from a Mac keyboard to a PC keyboard. Shift, Control, Alt, those buttons are a little
different on a Mac keyboard, so they may be a little
different than what I'm doing here. That's
the only thing. If you're using a Mac, then
you have to figure out the little shortcuts
specific for iOS keyboards. You can do all the actions. They just might be a
little different than exactly what I'm saying
here using my PC. Now let's go through some
basic mouse actions. When I move the
mouse in a circle, you can see the pointer just
going around on the screen. If you hold down
the scroll wheel, then it'll orbit
around your cube. If you hold down Shift
on your keyboard, then you also hold
the Scroll wheel, and instead of orbiting, it'll pan, so you can go up
and down, left and right. Then you can scroll
on the scroll wheel to go backwards, forwards. That's pretty much how
you control the Viewport. What we're seeing now on
screen is the Viewport. But it's also useful to
see the camera view. The camera view is what
we'll actually render out. That's where the money
is. This is the camera. When you want to view what
the camera is seeing, just hit "0" your keyboard. This is what your
camera is seeing, and this is what we'll render. You can move the mouse
around by just hold in your scroll wheel and it'll
go back to the Viewport view. Along with zero being
the camera view, you can also hit "1", and this will show the
very front of your sculpt. This is very similar to
the view that we see in Nomad when we hit "Front." Now that we're
looking in the front, I think it would
be useful to set the camera so we're looking
at it directly in the front. Here's our camera, what
we need to do is move it so that it's about here
and it's facing our cube. When you look at the camera,
you can go over here. There's a little arrow that comes out of the
screen so you can tap that, and then you can see item. This is the location,
the rotation, and the scale of the camera. Any object that you go on is
going to show the location, the rotation, and all
that information here. As we're looking at the camera, you can see these
numbers are random. What I like to do is, let's just go to each of
these numbers and hit "0", and then you can see where
it actually puts the camera. I put 0, and it lined it up directly in the
front of the camera. The rotation is off, but
it's still in the front. Why just hit "0", and now it's
actually at the top. In Z, we hit "0", then it goes right
towards center. If you want to move it
up and down manually, we can either use the move
or we can use the transform, which is essentially just like
our Gizmo in Nomad sculpt. Using the Gizmo, I'm
just going to use this green arrow
and push it back, and let's hit "1". Now we're seeing the
front, we can see that our camera is not
facing the right way. I'll just go to this rotation. Obviously, you can do
the rotation this way. It's a little less clean, but you can do it this way. It's interesting to look at
the numbers as you do this. They will change as you do this. This is close to 90, so let's put 90. You can see the camera goes. This is closer to zero, so let's just put 0, and this is close to
zero, so let's put 0. Now we are lined up
directly with the cube. You can press "1", and see that we're lined
up with the cube. Also, one thing that
I like to do in Nomad is work in orthographic. Let's do that here as well. You'll notice anytime you
have the camera option, if you look on this
bar right here, you'll see a camera option. If you click on the ''Light''
there's a light option. But when you're on the
camera, then it shows the options for the camera here. Let's change from
perspective to orthographic. You can see the camera got a
lot bigger, let's hit "1". Now you can see that we're perfectly lined
up with our cube. Now that we've got the lay
of the land in Blender, let's move on to setting up our scene and
importing our robot.
8. Blender: Set Up a Scene : [MUSIC] Let's jump right in. Let's go
ahead and delete this cube. Let's just tap on it and
then hit X and delete. Now, let's hit Shift A, go down to Mesh, and let's add a plane. So add a plane here. While the plane is selected, hit S. This will resize it, so now we can just size it up Let's say this is our floor. There's two really quick
ways that we can make a back wall or a
backdrop to our floor. The first way is really simple. The second one will
lean into more what Blender does really well, which will introduce some
new ways that you can use: vertices,
edges, and planes. You can hit Shift
D to duplicate, then you can move this
off here and then you can rotate like this, and that will give you
a pretty good backdrop. Let's X this, so tap X and delete. Here's one of the really
cool things about Blender that you
can't do in Nomad. We select our plane. Let's hit Tab to
go into Edit mode. See these three options up here? This controls the vertices, this controls the edges, and this controls the faces. The vertice is each
of these points, so there's four points
at the corners. We can tap the Move tool, and it will just
move these vertices. We'll hit Control Z
to go back The edge. Now you can select the edges, and you can move
those. The face. Obviously, there's
only one face here, so you can select the faces. But what's really cool is we
can go over here to Extrude. We're still on faces, so it's going to extrude
this face and make a cube or a
rectangle. Control Z. We can go to the edge,
let's select this edge, and now we can extrude. Let's grab onto this
yellow handle and hit Z. Hit Z twice if it doesn't
snap to just the z-axis. Then we can just move that up. You can see here that we
have a pretty good backdrop. Let's hit zero so we can
take a look at our camera. Which looks fine, but let's take the camera and you notice that you
can't select the camera, so let's hit Tab to go
back to Object mode. We'll tap the camera and
let's just move it up. Let's hit zero. Let's move it up this way. There we go. Now we can
move it up like this. Let's do right around there. Perfect. Now when we look through our camera that we're
seeing just our backdrop. Let's make it a little
more interesting. Let's rotate it a
little bit down. Let's hit zero. Let's rotate it a
little bit down, so we're seeing a bit of the
floor and the background. This is one of the
reasons why I like doing two separate views. We'll go up here
on the top right, and you'll see this little
crosshair that pops up. Let's left-click there
and drag this window out, so then we have two windows. I'm just going to use the
scroll wheel and scroll in. Now for this window, let's
hit Z, let's hit Rendered. This is the rendered version. Let's just keep this solid. If you hit Z, we have rendered, wireframe, material
preview, and solid. We'll just keep this
one solid as is. They look the same
because we haven't set any lights or
anything like that. Now we can move this one around and we can actually see what we're
seeing in the other window. I'm going to tilt it back a little bit.
Something like that. We're seeing a little bit
of the floor in the bottom, and we're seeing
the whole backdrop. Right now, we have
one light here. This is a default light.
This is a point light. You can move it around and you can see the difference that
the light makes. You can see if we're on a camera, there's
a camera setting. If we're on a light, there's a light setting, so
let's tap on this. This obviously gives
you the temperature of the light and the
power of the light and different things
like that so you can adjust how the light hits
everything in the scene. For now, let's just
leave this light here. We'll put it over on the right, but let's add a new light. Let's hit Shift A, and we'll go down to Light, and then we'll add
an area light. Now we have our area light. Let's move it over to the left. Let's move it up.
Let's make it bigger. You can make it
bigger in two ways. You can go on the orange ring of the light and make
it bigger this way, or you can go down to
these light settings. I'm going to switch
this to rectangle. We'll keep both of these on, and you can obviously
adjust the sizes here, but usually, I just go
and adjust them this way. We'll do two lights. We'll
do one in the middle. We'll move it up a little bit. Let's rename this top down. Let's hit Shift D. We'll
move this off a little bit. Let's change this to an ellipse and we'll rotate
it a little bit. We'll move it back. I
think that'll work. The only other thing I'm
going to do with this light, let's change the spread from
180 to let's just do 90. I'm going to make it a
little smaller, too. I think that works. We
have three lights now. Let's name this one key. I'm going to put key left
because it's on the left side. We have key left, we have the area light. We'll just call it glow right, and then we have top down. The floor plan is
now the backdrop. Perfect. Let's go
ahead and save. Let's save this as Robot_Render. "Okay". We'll save that. It's time to import our robot.
9. Blender: Import Your Robot: Now that we have our
scenes set up in Blender, let's pull in our robot. Let's go up to file. Let's go down to Import GLTF. Then you just find wherever
you have your sculpt. Mine is called Nomad to Blender, so I'll tap that and
then tap "Import", and it should come in
right at World Center, and also his feet should be
on the ground perfectly. Now the whole thing is selected. I'm going to hit S and
just make him a little bit bigger in the frame. I think that looks good. It's another reason
why I like having this and having my camera view here. I'm going to go ahead and get rid of this because we don't
need this on that window. Perfect. The next thing, we're going to play around
with some of the lights. We'll add some materials. You can really see the effect that the lights make
on your character. Don't forget that you
can adjust these. You can turn some
off, turn some on. You can add some other
shapes in there. You can hit "Shift" and A. Let's say you want
to add a cube, you can move some things around. Just get a little
more used to Blender and used to the Gizmo
and the controls. That's the only thing that
will make this process easier is just practice
and having fun with it and actually seeing
what everything does and how everything
affects your model. In the next video, we'll come
back to our little robot. We'll clean things up
and find some fun, interesting ways to make the scene pop as
much as possible. I encourage you to
download Blender kit. It's free software that
gives you free materials, models, scenes,
things like that. There's a link to Blender kit
in the class resources tab. Great job so far.
Don't forget to save.
10. Blender: Develop Your Scene: Let's make our scene a
little more interesting. Okay, so all of our
objects to our robot are over here on the top right
in our scene collection. I'm just going to add
it to the sculpt scene. I'm going to click on
Ant A. What is that? Arm. I think it's
supposed to be arm. [LAUGHTER] I'm going
to click on Arm A and then click on
the bottom object. Then I'm just going
to long press and drag this into sculpt. Now, sometimes some
things are connected, but they don't go in,
so just make sure they bring everything inside
that collection. Now we have that
sculpt. I'm actually going to rename it robot A. The reason why I want
to do it robot A is because I want to
clone this whole thing. Let's copy and paste. Here we have robot
A1. It's inside here. I'm just going to drag
it out. There we go. I'll just drag it out, and I want to drag
it below this one. There we go. I'm going to
name this one robot B. Now we have robot A and robot B, and I'm going to right click on this one and select objects. That is going to select everything within
that collection. This is robot B. Now over here, I just
want to drag this over, and I'm going to drag it up, and then I'm going to hit
S and just scale it down. Now there's like a little
mini robot. Why not? I think I want to take this box, and I'm just going
to drag it over so he's standing on this box. I'll keep this screen in zero, and I should be doing
all this in this screen. I'm just going to
flatten these, like so. Then let's go ahead
and stretch it. Here's a good place
where you would hit one. You can go in and really see what's lining up and what isn't. I'm going to stretch
this a little bit more. I think that looked pretty good. That looks pretty good.
Let's just take a look. Nice. I'm going to
go ahead and save. Now that we have our scenes
set up and interesting, let's make sure
everything is in focus.
11. Blender: Focus Your Camera : The next thing I want to do
is add our focus points. One of the things I always
love is adding depth of field, which is our robot
may be in focus, but the background will
be a little bit blurry. I always use that,
so I think it's important that I show
you how to do it. We can go ahead and expand these by just clicking
on these arrows, at least the top three. Let's go into Camera. You see the little
Camera option here. Here we have depth of field. So if you tick depth of field, then right now
it's just going to use this focus distance. There is also this
eyedropper for the object. Let's say we tap on the eye, but I don't find it to
be as exact as I want, and that's mostly
because these objects have depth to them. They're not exactly going
where I want them to go. Here's what I like to
do. Just go on one of your view ports and hit Shift A and then go down to Empty and then
go down to Circle. We'll click "Circle",
and now let's just move this circle right in front of our robot. Let's move it up. You can hit S if you want
to rescale it a little bit. I want to put it right up
to the front of his eyes. You can hit 3, and that will give you the
side view so you can make sure it's right to the
front of the eyes. Now we can go back
to our camera. You see it says focus on object. Let's X that, let's tap the eyedropper
again, Eyedropper. Let's go over to our empty, and you'll see it'll
say object empty. Let's tap on that. Now it's
focusing on these eyes. Where is our empty?
Oh, there we go. If I tap on it, you'll see this little thing
is lit up a bit. I'm going to open this, and here is our empty. I'm just going to drag
that up into our camera, and then I'm going to
rename it focus ring. If you go to Camera, this is
focused on the focus ring, and you can see that
the eyes are in focus. Right now, the reason why the rest of the
robot is blurry is because it's an extremely
shallow depth of field. Let's go over to
our depth of field. We're in our camera,
we're in depth of field. We have F stop and blades. I usually put the blades to 10. Then for this F stop, let's just put it to maybe five. We'll put it to 15. The F stop is at 15. Pretty much the eyes in
the robot is in focus, but then it still
gets a little blurry towards the back. But I
think that looks nice. Of course, you can
always just keep it off if you want everything
to be in focus. I'm going to keep mine on. Now that our focus is set,
let's light our seed.
12. Blender: Light Your Scene : Let's set up some lights. Of course, we have three
lights that we've added. But if we turn all of those off, so if you go over
here to the right and tap all of these
eyes for the lights, you can still see the robot. That's because of
the ambient light. To control the ambient light, you just go down to this
little world type symbol here. Background, color, and strength. If you tap on the color, right now it's this dark gray. If you were to put it
up, it gets brighter. If you put it down, it gets
lower. That's your world. That's what's pretty
much giving off all of the ambient light in the scene. Let's go ahead and turn
that all the way to black. Now when we go to our lights, you can see exactly what
each light is doing. These look really nice. I think this looks nice. For now, I'm going to keep the scene quite a bit brighter. I'm going to go to my world
and I'm going to put this. I'll bring this up, too, just so our scene is nice and light. Of course, you can adjust
all of these lights to get different looks
and different effects. This looks great. I love how big this is on the
little robots eyes. I'm going to bring it
out a little bit more. We have some of this
on these eyes as well. It's a little bright, so I'm
going to go to the light here and I'll put
it to maybe 600. I'll put it to maybe 500. You just don't want it to
be too bright on one size. That's 350. That way, it's bright, but
it's not too bright. You don't want any of the
white to be blown out. That's pretty much
the world here, and that's how you
control your lights, and you can add as many
lights as you want. You can have a good
time with lights. In the next video, we'll work on materials like
color and texture.
13. Blender: Materials, Colors & Textures : Now, let's focus on material
colors and textures. Along with lights, another thing that you can adjust which will control how your robot looks
is the robot's material. The material is just the surface of each of these objects. Let's start with the background. If you click on the background, and then you click over here, this little symbol here, so this is our materials. There's no materials
here in this window, so we'll hit "Add" or hit
the plus next to new. Then it says material 1. Let's click on here and
name it backdrop A Now, backdrop A is this color. You can tap on here to adjust
the color if you want, and you can make it a
little bit brighter or darker. I think I like that. You can also adjust
the roughness, the metalness, those
type of things. There's lots of these
options here that you can play around with in Blender. That's the background. Let's say, we want to give the box the same material
as the background. Just go to your Material tab, and instead of clicking new, you can click this, which shows our
preexisting materials. You can just hit "Backdrop," and now this will
match the background. If you change it, it
will just follow along. I'll hit "Undo" to go
back to the orange. Let's make sure that
we're on the box. I'm going to subtract this. The box will go back to white. We can add a new, and
let's change this to box. Let's say, we want to just
make it a different color, we can easily make it a
different color here. Each one of these materials
you can go into and adjust. You can change the color. You
can change the glossiness. For example, let's say the head, we'll go over to our materials. Right now, it says material 0. Let's just change
that to robot head. The reason why we
don't see a color here is because we
colored it in Nomad, and we brought it over. Just tap on where
it says base color. Tap on this, and then go to RGB, and then you will be able
to adjust the colors. Let's say, we did like, lime color, but we want
to make it really glossy. We can do that. I don't know if I want to
make it too glossy. You can also change
the metalness and make it a little
bit brighter. Now, we have this
lime color up here. Let's say you wanted
to change all of these to that same lime color. Just tap on one, hit Shift, and then you can select all of these pieces that you
want the same color. Make sure that you're
on the viewport, and hit Control J. This is going to join all
of those parts together. Let me open this up. Now, the head is going to be all of those parts joined together. If you go in your Material tab, you'll notice that the
head is still green, but all these other
materials are still white. You'll have to
just hit the minus to get rid of these materials. Now, everything is the
same material as the head. A few things I'm missing here. I'll just hit Shift, and I'll join them
with Control J, and then I'll go ahead and
get rid of these as well. Now, everything is
that same color. Let's say, we want the
eyes really glossy. We can set the eyes
really glossy. Feel free to get creative. You can change or adjust
any material in the scene. You can have matching robots or experiment with
different looks. Next up, let's see
what Blender kit has to offer and
why it's amazing.
14. Explore BlenderKit : [MUSIC] If you did want to
download BlenderKit, I just want to show you some
of the great things you can access with
this free software. On your sidebar here, you should have the sidebar for BlenderKit. If you tap "BlenderKit"
and you tap "Materials", we'll go down to Categories. Here you have all the categories of materials that you can use. Let's go to metal. You need to hit this little I. Now you can use the
scroll wheel to move or you can press these arrows. I usually use the scroll wheel, and you can go through these
nice lovely materials. Let's say we're on
the little robot. You can add any of these
materials to your robot. Let's go back to all. I'm going to go up to Search
and just type in Edge. I like to use these
worn objects. That's my favorite. I'm going to hit "Shift," select
all of these parts, hit Control J, and I'm going to subtract all of these and hit the yellow. Let's go here and just
make sure that we have both the eye
and the camera on. You don't want to have
anything like this because when the eye's on, that means you can see
it in the viewport. When the cameras on, that
means that it will render. If you have the eye off, you won't see it in the
viewport, but it will render. If it's like this,
then you'll see it in the viewport, but
it won't render. You just want to make
sure that you have everything on that should be on. Test out your free material
library with BlenderKit. Let's add something
with an emission. An emission is when you
can make something glow. Let's try these
little side parts. Maybe this will be
a fun emission. We'll go to our materials. Let's name this Ear Lights A. Next, we can go to the surface. Right now it's a principal BSDF. That just means a
normal material. We can tap here
and find emission. Now you can already see that
it's pretty much glowing. I want to change the color. I'm going to make it very saturated because when you raise the strength
of that light, it's going to get more white. That's just the
nature of lights. That's the nature of color. But once you start raising this, then you'll see that it
gets progressively whiter. I think I'll just put
it to maybe four. If you want, you can do the same thing with the little guy. We'll change this
to Ear Lights B. We'll change it to an emission. Let's make these maybe blue. We'll put this to four. Another small trick that
you can do is you can add lights so that they mimic what
this light would be doing. For example, if I hit Shift
A and add a point light, and then I move the
point light up and over. Now the point light
is right here. I can change the power
of this point light to 100 and then I can change the
color to a matching color. I'll up the radius a
little bit, maybe 2.2. You can see this orange ring. Now we have more of an orange. In order to see it, let's say
we put this color to black, you can see it a
little bit better. Let's Control Z. If you have a
darker environment, it's going to be easier
to see these lights. Now you can see how much the
light is actually emitting. I'm just going to this light for now and turn these back on. Next, we're just going to
export our little characters. Make sure you go through. You can play with the materials, and then we're going to
export our little robots. In the next lesson,
we'll export our seed.
15. Blender: Render Your Scene : Let's go ahead and render
our little robots. Again, our render settings are these little printer here, and right now it's 1920 by 1080, and you want to make sure
that in your camera, your max samples are 300. Whatever's in this
box, when you hit 0; if your camera's like
this and you hit 0, it doesn't matter which window
you're in, you can hit 0. This is what is going to render. Let's go up to the
render settings and hit "Render Image". You can see slowly it's just going to render
out your image, depending on your max samples. Here's our rendered image. Now, as I'm going in, I can tell that this looks
like it's in focus, and this looks like it's
still a little out of focus, so I'm going to close it
and see if I can fix that. I take the focus ring
and I move it over. See that little
bit of difference. Anyway, I'm going to take
Robot V, select all. I'm going to Shift, and I'll hit this box
below and just move this up the tiniest bit
to around there. Now let's render our image
bigger, but that's okay. Another thing that I did
not do is I didn't tap on these eyes and make them glossy. If I do that and then I render, that might help get
them nice and clear. They're much more clear once
I made these eyes glossy. This is our first
render, but for me, it still looks a little bit
blurry when we zoom in, and that's because of
the size of the render. We can go back to the printer, and I'm going to change this to a bigger size. I'm
going to go here. I usually do 4K, UHD TV 2160, so I'm going to tap that. Nothing is really going to
change much here because the same aspect ratio
is just a larger size. Now you can see that
the size is larger, so I'm going to go
ahead and hit "Render". It's going to take a little
bit long to render out. But you'll notice the
samples makes a difference, and the size makes a difference. If it's going really slow, you're going to have
to set them lower or just wait a little bit longer for your
render. There we go. If I really wanted to make
a copy of this to keep, I would even go
larger than that. Underneath the
resolution, there's 100%. I might go 200%. If I was making a reel or a
short or something like that, and I wanted to really
have the ability to zoom in on either of
these robots to make a cropped thumbnail or
something like that, I would do 200, and then
I would render that out. Party till I die. God, I hate that I have
that song in my head. Such a terrible song. I'm so sorry. These look really great. I like to zoom in and really
check out our surfaces. Now, sometimes in Nomad, you can do things with
smooth shading off. For example, this
sphere is not as crisp. It's probably because
of the surface layer that we did in Nomad. That's where things
like quad remeasure and remeshing and the surface
resolution comes into play. Maybe if this was a
higher resolution, this would be more clear. That's one of the
things that you just have to learn
and get used to when you're going back and
forth through the programs. If I tap on this I and
I right click on it, so they're shade smooth. Nothing really changed,
but you can do shade flat. Now you can see this is with smooth shading off, which
doesn't look great. I'm going to right click,
there's autoshade smooth, and then there's just
regular shade smooth. It looks like it was best
with regular shade smooth, so I'm just going to
leave it like that. I don't see anything
else that needs to be smooth shaded
that isn't already. I find that if it has smooth
shading on or off in Nomad, it usually mirrors that here in blender is
what it seems like. But everything looks good. I'm going to render this. Now this is the point
where you experiment, move the cameras around,
move the lights around. You can take the camera and
change to perspective view. There's so many amazing shots that you can get with
different perspectives; going in close or pulling out and getting wide
shots and things like that. Be creative, have fun with it. Once you get used to
Nomad for a while, it's nice to just
bump things up to this really professional
level render.
16. Final Thoughts: Thank you so much for
joining me in class. I really appreciate
your time and I hope you had fun working in 3D. We started out in nomad sculpts. We just used some
cylinders, spheres, boxes, simple shapes to
create our character. It doesn't always have to
be something super complex. Now you know the
steps to prepare it, exporting it from nomad, importing it into blender. You know how to bring
it into the scene, set up the lights, the cameras, when you can take advantage
of both applications, it really brings everything
to the next level. Really excited to see what you create in nomad and blender, and I'm really excited
to see your robots. Be sure to post them in
the project's gallery. Also, be sure to
rate and review. I really want to know what
you loved about the class, what you'd like to see more of, and even what you'd
like to see less of. I'm not only growing
as an artist, but I'm also growing
as an art teacher, so I hope you feel at home and
comfortable in my classes. Let me know in the title
of your class project, if you want to be
critiqued or if you want any tips or
anything like that. I'm happy to help. Once
again, I'm Dave Breed. You can find me on social
media TikTok, Instagram, YouTube @drugfreedave, and, of course, right
here on Skill Share. Keep drawing, keep sculpting. I'll see you all
in the next video.
 Dave Reed, 2D & 3D Illustrator - Brooklyn, NY