Transcripts
1. Introduction: Getting a little
bored with simple character building
and nomad sculpt, then let's step it up a
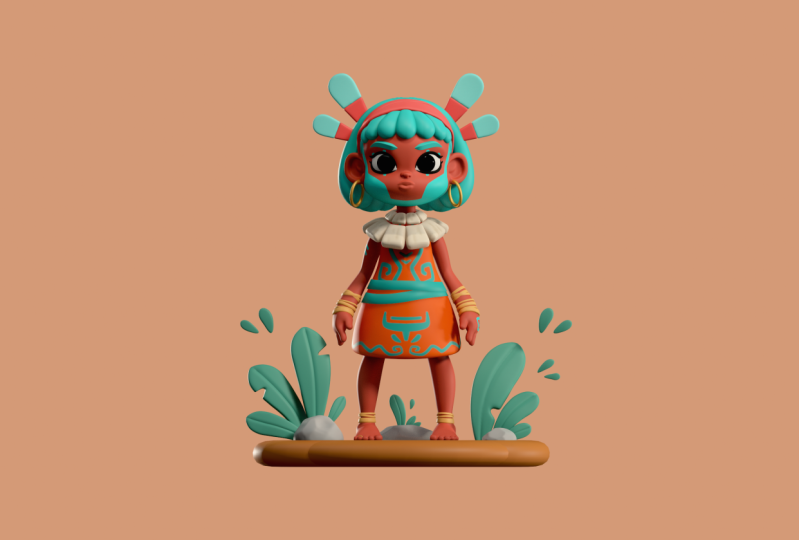
notch with this cute gal, who's a little more complex. I'm Dave Red, a Toti artist, a TD artist, and a content
creator with a wife and a cat. I love drawing, I love
three D sculpting, and I love giving away
all my knowledge. Whoo. Knowledge,
all my knowledge and insight to anyone
that'll listen. So here's what you'll
learn in class. How to create that simple, classic three D head shape, choosing primitives to block
out the body and hair, keeping your sculpt
smooth and efficient, tips and tricks for stylization and keeping the art fresh, Blender prep in the full
pipeline from tablet to computer and creating a clean, beautiful character turntable. You should be pretty
familiar with nomas sculpt already to
take this class. So let's pull
everything together and create some next level art. And, yeah, it's time for you to start
getting into blender. Blender. You ready? You ready? I'm ready keep drawing, keep sculpting, and I look forward to seeing you in class. Well, there it is.
2. Class Project: Alright, so welcome
to the class project. Glad to see you here. So today's class project is
going to be three projects. So the first part of the
class project is going to be your Nomad sculpt
through the render. So we're going to go through everything in Nomad scope first. We're going to create a
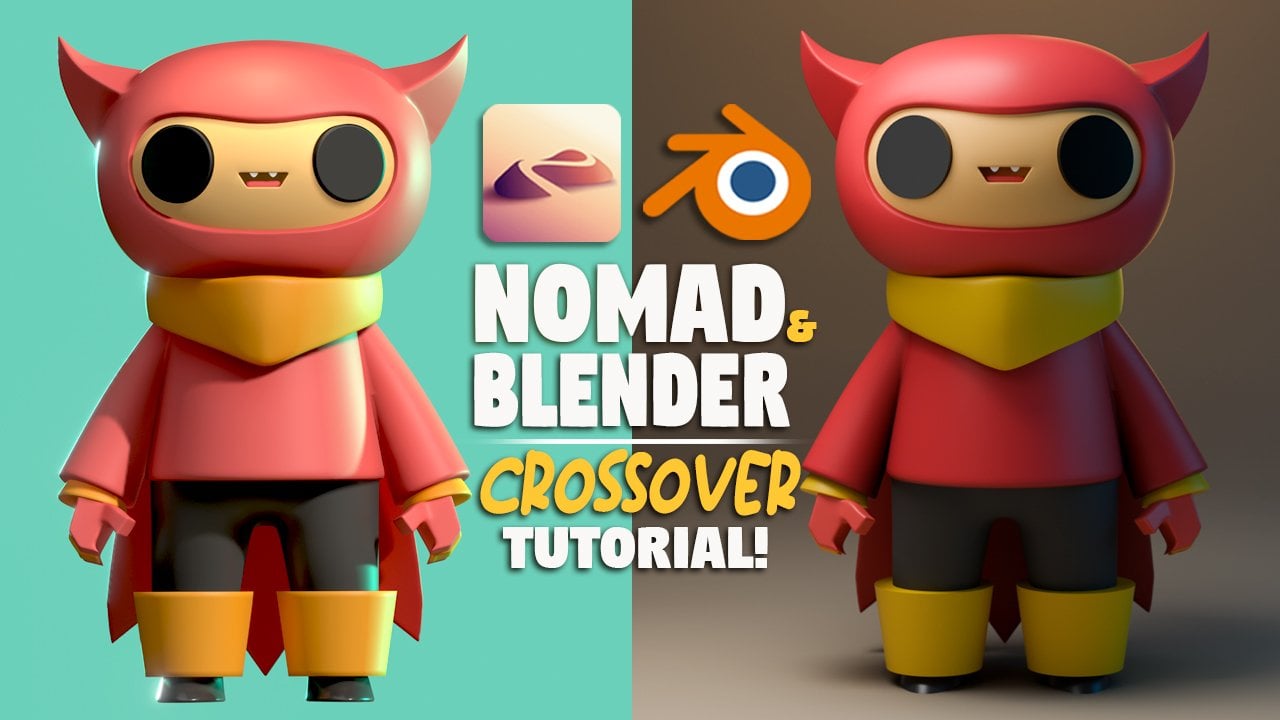
completed, finalized render. Secondly, it's bringing
it over into blender. Blender renders are
kind of like next level, beautiful cycles render. Cycles is a render
engine in Blender. Blender just has a lot of
equipment under the hood. I think that it's
worth checking out, and I think it's worth going
the extra mile to figuring out how to at least
sculpt things in nomad, get them over to blender and
create a blender render. Now the next level is
creating a nice turn table. So there's a few ways
that Blender can make an actual turntable.
It can make the video. But the problem is if the video fails anywhere along the line, the whole video fails, and you've just wasted
a lot of time. So the way we're going
to do it is we're going to export each individual frame. So we'll have a folder
of maybe 240 frames. So then we just need
to bring it over into any video editing software,
put it all together, make it one clip, and then
speed it up like 5,000%, and then you have your
nice working turntable. So that's why really
nice turn tables look nice because
it's a bunch of really nice images and it's exported at a really
high quality. Time. You know, if you're gonna spend
all this time and effort, creating a really cool sculpt, then you want it to look as cool as it can look,
and I think it's time. Alright, let's move on
to getting started.
3. Getting Started : Ho Okay, so first, let's bring in our
reference image. So we'll tap here,
reference image, tap on the image,
Import, photos. And let's do her. Okay, you can close
this little box. If you need to move
the image around, just hit transform, and then
you can move it around. So find a good place for it. I like right around here, and then tap with one finger to
go back to sculpting mode. You might have a grid,
so the grid is here. You can turn it on and off. The background color, you can go back to this little
picture icon. You can change that here to
any color that you want. If you notice that your
sphere looks a bit pixelated, you can go into this
little sphere here, go down to smooth shading, you might have to turn that on. My auto is automatically on, so you might have to
switch from off to on. When you get a pop up, you can just name it
whatever you want. Let's to Azzi. As we're going
through the tutorial, we're gonna want to
save incrementally. I like to save a
lot just in case, so just press the folder
and then hit save here. So I always sculpt
in orthographic. So just tap this little camera and make sure you're
orthographic. That way we avoid any perspective distortion
while we're sculpting. Another thing I like to do, and this is just more of a
stylistic visual thing. I like to change from white. Let's go to this
little Sun icon and switch from it PBR to Mt cap. So Mat cap is just like
a colored sort of clay, but you can change it to any
one of these that you want. Maybe we'll do this one. So it's just a little bit easier on the eyes for me personally. And just another note later on when we want to
color this character, we're gonna have to switch
from MATCAp back to it PBR because you won't be able to get your colors when
you're using a McCAp. We'll have to switch
back to lip PBR. Okay, I'm going to get
rid of the grid for now. So this sphere, I'm
going to delete because it's a very
high resolution, and we don't really
need it right now. So let's just go to the scene.
This is the sphere here. We're just going to
delete that, and let's add a new sphere. And we can rename
this by tapping on these three white dots, name, and let's
just call it head. So let's move the head
up and let's make a surface just so we have
some sort of a ground plane. That'll be easier when
we start setting up and blocking out the
different shapes of her body. So first, I'm just gonna pinch. And I'm gonna hit front.
So this is the Snapcube. This is so I can
easily just go back to the front of our mesh
or our three D object, also called the mesh,
also called Clay, whatever you want to call
it. I like to call it Clay. Is mama ame, Clay, Amahol Clay. So we'll go ahead
and bring the grid. And now we can move this up. So we're going to use
the Gizmo over here. Your tools are over here, and you can see that a lot
of them are grayed out, and that's because we
haven't validated yet. And validating
just kind of makes the mesh an official
part of the project. It's not already. Like, it's here and we can sort
of move it around, but we can't use all the tools. The only reason you can't
do that is because there's some special things that you can do before it's validated. So you don't have to worry
too much about that now. We'll go into it a
little bit later. But for now, we want
to go to the Gizmo. The Gizmo is right here, and you can see this
is our controller. If we were playing a video game, this would be the controller. Whoops. I don't know
what I just did. Okay, so this orange ring
that controls the scale. And then you have
these little spheres, and don't forget it's
three D, so if I turn it, you see there's one
facing us as well. So these spheres,
they just stretch. So they stretch the object. I want to hit Undo. So you
can undo with two fingers, or you can do the undo and redo that are over here on
the left bottom corner. Okay, then we have the arrows, so they'll just move it in
its respective direction. And then we have these
rings. The rings rotate it. So I went back to
the scene, add. And then primitives are
just really simple shapes. So I just added this box here. Okay? So now we have a box. Let's go ahead and rename it. Floor. I'll just put FLR. Now we can use this
box as the floor. And the surface of the floor is going
to be this red line. Again, if you don't see it, just make sure
that you hit front here and make sure you
have your grid on. So make sure you have
the box selected, and let's shrink it with
this little green node. So we'll shrink it like
that. Let's make it bigger. Then let's shrink
it again. So now we have this flat plane. You might notice it looks
a little bit weird, and that's because
of smooth shading. Smooth shading tries to
make your mesh look smooth, but this is a very simple box, so the edges just
sort of look weird. So let's go back to the
sphere, smooth shading off. We're only turning it off
for this specific mesh. You can turn it on and off for each mesh or each
shape that you use. So next let's use the green
arrow and just move so the top edge is right
underneath this red line, or I should say right
at the red line. So now that we have
that floor plane there, we can go ahead and
turn off the grid. Okay. So now let's tap on the sphere, and now the Gizmo is
active for the sphere. Anything you tap on,
that's what's active. We'll just go ahead
and move this up. Probably around there
for now I think is good. Okay, let's dive into
making the head. We have our head sphere.
Let's go ahead and clone it. Now we have head one. Let's just rename
this lower haw. So now we'll move it down
with the green arrow. And let's use this green
sphere to not shrink it. Smush it, collapse it, and now we'll use this orange
ring to make it smaller. Maybe right around there or so. Okay, we'll turn to the side, and let's move it forward, which is now towards the right. It would have been Ford,
but I turned it this way, so confused myself sometimes. Okay, so this is the
main part of the head. So let's make this a
little bit bigger. This part is this
round part here. So let's make it
a little bigger, maybe something like this. There we go. And we kind
of wanted to sort of flow into this other sphere. Let's use the move tool. Let's put the radius
around 230 or so. And also, I think the radius
I think this might be contingent on how far
or close your mesh is. So just notice when I scale
it in, and it's pretty big. So I just want to make sure that the that you're not making the brush or the
tool too big or too small. So try to zoom in and try to match the size that
I have on my screen. So with the move tool, we're
at about 2:15, 220 or so. And we want to match
this side of the head. So I'm going to take
with the move tool and I'm going to try to
drag this part down. Here we go. See how we
drag that part down? And then I want to
take this part, and I'm just gonna stretch
it out a little bit. So that looks like a
decent a decent match to the way that this
side of her face looks. So I think that
looks pretty good. But what we want to
do is voxel remesh these two shapes together. So all that is is a fancy way of saying we're
going to take these two shapes and make
them one continuous shape. So they're just
gonna be one shape. And that's called
voxel remeshing. So let's just go to
these little bricks and also just so you know the icon changes depending
on what you're on. So it's right next to the
scene menu. Let's go to voxel. And when we remsh, we want to have both of these selected. So let's go to our
scene and just make sure we have the head
and the lower jaw selected. And I'm going to use my
little shortcut down here. If I just go like that,
it's the same menu as if I was to go here and
go to Vauxhall remesh. But I wanted to point
that out because I always use the shortcut. So if I pull up the shortcut,
it's the same thing. The numbers are
changing the same. So let's do about 1:15 or so. And let's re mesh. Okay? Multi resolution
will be lost, okay? So now you can see that
these are it's one piece. And now we can take smooth,
and we can smooth it out. Make sure symmetry's
on that way, it's smoothing both
sides instead of one. Okay. Looks pretty good. Okay, and also don't forget
you can use the gizmo, and if you think that it's
a little bit odd, like, for example, I think
that my head is a little the length of it is a bit too long.
It doesn't match. So I'm just gonna take this
green sphere and you can just shrink the whole thing
to make it shorter. So you can make it wider,
whatever you need to do. But don't forget that you
can use the tools that we've learned to kind of fix
it up if you need to.
4. Face Details: Okay, so let's first add a nose. So let's go to our scene, add, and let's add a sphere. So you won't be able
to see it because the primitives always
show up in the middle. So let's just move it
up. I scroll back in. We'll move it forward and then
we'll take the orange ring to shrink it Okay. And now let's move it down
and nose this position. Right now, she
looks like a clown. Let's go to our scene, and
let's just rename this nose. So we'll tap this name, nose. Okay, so let's shrink
it to about there, and then let's flatten it. Something like that. Looks cute. So let's go ahead and
validate this sphere, and let's take the flatten tool, and I like the angle. Like to make a little
angle with the nose. I'm just going to flatten, bring my radius up a little bit, and I just want to flatten
the sides out like this. We'll take a look
at the side view. So let's use drag. Drag is a
little different than move because drag doesn't try to take all of the
area around it, so it's easier to do small, more detailed
movements with drag, whereas with MV, that's for bigger, more smooth movements. So let's use drag.
And for this nose, I want to take this
bit and put it up, and then I want to
drag this bit down. Okay. I think that
looks pretty good. Let's take a look
from the front. Yeah, I think that looks
cute. It looks cute. We'll do more with the
nose a little bit later. I guess the only thing
that I might want to do now is let's push this down and then pull this up. Notice I can pull it up
even though if we hit Xray, you can see that it's
behind the head. As long as this
nose is selected, you can still adjust even though it's behind another mesh. Okay, so maybe something like that I think is pretty cute. Okay, so let's add the lips. I think that's a pretty
good start for the nose. So let's add a cone. Okay, so we'll move the cone up. I can zoom back in.
That looks a bit weird. So let's move it to the
front and shrink it. And let's use this red
ring to rotate it. Now, you notice it's
hard to move it straight down because of the way that we've angled it
since we moved it. So if you ever need to just move things straight up and
down or left and right, you can always hit a line. So if you hit a
line, then it makes the gizmo a line to the
project and not the object. So just remember if you're ever struggling to move something straight down or straight right, then just hit a line and you can always move
something straight down. So I'll move it
down to there and we'll shrink it even more, and then you'll sort of see that it'll kind of make
that upper lip. Something like that, little
tiny lip looks cute. I like it. Makes
the nose look big. We'll probably shrink
it a little bit later. For now, I want to
make the lip bigger. Let's soften up the
edge of this lip, we'll tap these three dots. Post subdivision, we'll
put that up to two, so we'll just drag
it to two and then division X, we'll
just drag that down. I'll leave it at around 18. I think that's a
good start for now. Maybe I'll make it
a little bit wider. Think that looks good. I just want to point out.
I want to do really close so you can see the shapes that I have going on where the chin is. The nose is here,
the nose comes down, and then the lip comes
out here and you can see it almost meets up right
at the bottom of the nose. You have this nice line here, and we can plug the bottom
lip in a little bit later. The only thing, I'm going to go ahead and validate the lip. I might use move. I'll bring
the radius down and push that bring this lip up a bit and you can even
bring underneath, you can bring this
lip down like this. You can use drag or move
and you want to drag. You want to try to
drag the bottom, we're seeing that bottom
frame of the lip. So I think something like
this looks pretty good. But take your time with it,
get it to how you want it. I'm going to move
mine up a little bit, so it's just meeting that nose. I like the way that looks. Okay, so I want to
give this character a bit more of a better
looking forehead. So I'm going to use move. And I just want to move this
forehead up a bit. See how it pulls up
and it looks weird. If that happens,
that's why I'll make the move tool bigger because I want a real smooth smooth
move, smooth moves. Smooth move, excellent. I'm even gonna push
this in a little bit. So we have that nice curve here, and the forehead is not
coming out too much, it's not back too much. We just have this
nice little curve. I'm going to adjust my nose. I feel like it's not
sufficiently triangular enough, so I'm going to squeeze
the bottom with drag. I'm just going to
squeeze the bottom I'll use flatten and I'm just going to
flatten this again. So we have something like that. Of course, we can smooth it. We'll do all this later,
but don't be worried if the mesh starts
looking a little beat up because we can always
smooth all this stuff. Gonna stretch mine
out a little bit. Nice. And you'll see
me go back and forth. I'm trying to keep all
of my natural edits in. It's just part of my process. So if you have to go back and
change something ten times, 20 times, then feel free
to go back and do it. It's just part of
creating the art. So hopefully you can sort of get the gist
of what I'm doing. And it's okay if
yours is different. And it's okay if you want
yours to be different. This is your art, so follow
along as much as you can. But then don't forget to be as creative as you
want to, as well. I'm just gonna
adjust the shape of my lip a little bit
with the drag tool. Just a little
something something. It's always some. Okay,
so let's add some ears. For this, we're going to
go to SN, add cylinder. Okay, so we'll bring
our cylinder up. Actually, we can probably just I always accidentally hit Undo. It's like constantly doing it. So let's move it up and over and then shrink it
with the orange ring. And now let's take Snap. And once you hit Snap,
this should be on 90. And if a line is
still highlighted, you can go ahead and click
on a line so it goes away. So we want Snap 90, and we want the snap
that's the angle, not the arrow, so
we want the angle. And now we're going
to use this red ring, and we're just going to bring it towards us so it flattens
it out towards us. So all that is is it just keeps the rotation and
increments of 90 degrees, and you could change this
to whatever you wanted. But 90 degrees just
makes it towards us. So now, obviously, the ears
are going to be slimmer, so let's shrink it this way. Okay, so you can see the
shape of the ears here. What we need to do is instead of using the symmetry as we've been using it for
the left and the right, we need to make it so it's
mostly the front and the back. Let's tap these three dots. Let's run the post
subdivision up to two, and let's bring the division
X down to maybe 30, and then let's validate. Okay, so now let's go into
the symmetry options. And the symmetry can
get really confusing. So just follow along.
I'm going to try to not get too much in the
weeds with this. So I'll go to the
symmetry option. Go down to show line. So this will just show us what our symmetry
line is going to be. So we're going to turn the X off and see what
happens if we tap Y. Then we have this green line, and that's exactly what we want. So now this symmetry is
the front and the back. So we'll hit front.
Let's use move. And I'm going to bring my
radius down to maybe 150 or so. So what we need to do now
is make this ear shape. So let's pull up here. Let's make the out. It's kind of they're kind of
boxy, which I like. Okay, so for this little bit, I'm just gonna
play the time laps because I did a couple
shapes that I didn't like. Ultimately, it winded up being kind of squarish, which I liked. I'm going to move this down and just make it kind of squarish. I don't know, kind of cute
and kind of cartoony. So I kind of like that.
So I think that works. So let's go to symmetry. Let's just go back to X, and we'll turn Y off,
so we'll tap on Y. And we're gonna turn
symmetry off in general. So we'll just turn symmetry off. So now what we want to do is we want to make
this indentation. So there's a few
ways we can do it. We can use the layer tool,
which is really cool. You can hit sub, and then
you could go like this. That would be an
easy way to do it. But you have to do a
continuous movement. The moment you take the stylus
off and then you go back, it makes it deeper. That's one way to do it. But there's another
way to do it. Let's use the mask tool. Okay? The radius is about 60, so this is going to be
painting like that. So we just need to
paint the area that we want to kind of work with. So we'll just paint the
inside of this ear. So I'm going to do
something like this. You can always do unmask. Like so. Okay, that looks good. Make sure that nothing
came on the opposite side. So now we can take
when you're in mask, there's going to be
an option like this. It might be at the
top. You can use this arrow to move it to
the top or the bottom. Let's do invert. Invert and then we'll
take the Gizmo. And now only what's shown
now is what's going to move. Now we can move this in L so. Maybe shrink it to Tad and then we can go back
to mask, clear all. I think that looks great.
So let's take move. And now let's move
this into the head, and we can actually kind of go like this if we want to
make it a little bit nicer. You can rotate it to make
it as perfect as you want. Maybe make it a
little bit smaller. But I think that
looks pretty good. The only thing that
we want to do now is rotate it backwards, so it's a little more natural. We can move it into the head,
rotate it a little bit. I think that looks pretty
good. I think that's great. You can fiddle around
with your ear, make it look exactly
how you want. You can match the
reference or you can switch it up,
whatever you want to do. But I think that looks good.
5. Eyes: Alright, so let's
make the little his, and we just want
to remove some of this clay to make
the eye sockets. So one way that I've made it
easier for myself is to use crease and then I'll kind
of make the eye sockets. I'll kind of draw them in. So it's gonna be
something like that. But I think I've
made mine a little too high, so I'm going to erase. See this nice shadow there, so you can tell that the eye
is sort of resting there. Sort of like that. That gives me a good indication. I'll just zoom in so you can
see the shape that I made. It gives me a good
approximation of where I need to make
the eye socket. You can use clay with sub,
bring the radius down. So that's another way to do
it to make those eye sockets. So let's use smooth
and let's smooth this out and see how it looks
it looks pretty good. So now we have this
area for the eyes. So the only thing that I'm
going to do is take drag, move or probably work too. But if you notice you really
want to get that attitude, so I want to bring
this down a bit. Kind of pull this out
a little bit here. So that kind of gives
us that attitude. And then I'll take flatten. And I just want to flatten
this plane out right here. I'll make a nice
flat plane here. Like so. Then you can take smooth
and just smooth it out, make everything look
nice and natural. So now let's go ahead
and add in our eyes, which will just be spheres. Let's make sure we
go here and save. Then next to it, on our
scene, let's add sphere. We'll move it up with our Gizmo. We'll shrink it with
the orange ring, and the eyes are fairly big. Let's move it over and then
let's move it into the head. Right tie into that eye area. Now we're just
going to have to do some stretching of the eye to make it fit where
it needs to go. We can stretch this
way a little bit. But what we really
need to do is validate it and then use move or drag and we need to make
it fit into the shape. We need to make it the shape
that it's supposed to be. I'm going to pull this part up, push this part
down a little bit, it's actually not too bad. It looks a little big,
so I'm going to shrink. I'll kind of stretch
it out a little bit. I'll use move. So essentially, it's kind of like I don't know. It's a really soft
triangle almost. It's kind of what
we're going after. The bottom part we
kind of want straight. Make move tool small. You can see it kind of comes
to a point towards the nose. That's something
that you can try to shape that you
can try to get. I think that looks pretty
good. I think that looks nice. It's bulging out a lot
when you look to the side, just go to your gizmo and it can be a little
tricky because we can't quite shrink it like this. But what we can do is go to pivot and then take this
green ring and rotate it. Now it's pointing
towards the way that we might be able to collapse it. If you hit pivot
again, we've moved our pivot so let's see now what happens
if we There we go. That's a little bit
better. It's flattening the eye out so
it's not so bulgy. And now we just have to put
it back in the right spot. Let's move it out this
way. How does that look? That actually looks decent.
It looks pretty good. So just take your time
and just try to work out this shape so you can get it looking
somewhat like this. And so when you look
at it from the side, it's not that bulgy. Let's take a look from the side. Even if it's sticking out
too far from the side, I'll just push that in a
bit, it still looks nice. Now, this is a
step that we could probably do later, but
it's just so much fun. So let's use the layer
tool and come over here and make sure that
your radius is fairly small and make sure
you're using sub. So tap on the nose, and let's mix two
little nostrils. So probably around here. And let's just make two little
nostrils like this and you let go and then go back into it and make those
nostrils nice and deep. And then you have your nostrils. I don't know why that's
so much fun for me. So next, I think I
want to use tube, and let's make the eye lashes. So with the tube tool,
we're going to use path, and I have these
two highlighted. They're always highlighted.
So I guess that's fine. I have Snap highlighted. You can match that if you want. Okay, what we're going
to do is tack down here and then drag it to the end of where
you want it to go, which for us is
probably around here. We can stretch this node out so we have
something like that. Now don't move your
scene because if you do, this won't move and you'll
have to do it again. Now just within this line, you can tap on the line
and it'll add nodes. So you just want to match
the line of the eye. So I'll probably do
maybe another one here. I think that looks pretty good. So now we're just go ahead
and hit this green dot, and that gives us
our general eyelash. Okay. So now let's hit radius. We have the two nodes. Here's the three
nodes. Here's one. One just does size. Two does size on both
ends or either end. Then if you hit three, then you can adjust
each individual node. I think this looks
pretty good for now. The only thing I
really want to do is a little wing tip on the end. They're really fun. I'm
going to extend that out, add another one here and I'm going to extend
that up a little bit. And you know what, Let's
hit all the nodes. Let's make this one sharper
by bringing it together. Oops. Oops. So then we
have that nice wing tip. This we can bring
together a little bit. I think that looks
good. But overall, she has nice thick eyelashes. So I think this looks great. Let's go ahead and
turn snap off. So we're turning snap off. Snap makes it snap
to the surface, but we've turned
it off so that we can drive this into the skin. I have to zoom in a
bit and then I'll just drive this into the
skin so it kind disappears just like that. This side looks pretty good. I can actually bring
this out a little bit. I love the way that looks. The next thing I want
to do is use profile, which is going to
flatten this out. This is more just like
a stylistic thing. I probably don't
really need to do it, but I like to. Now
it's flattened out. Let's tap the pink twist and let's just twist
it a little bit. Just like that. I think
that looks great. We can go ahead and mirror down here and we'll just leave that there from when
we do the other side. Let's tap here and
let's go to the mirror and rename this ashes. And save. Okay, so we're doing
fantastic so far. Let's add there's another
little eyelash part underneath. I think it looks really
cool. Let's add it in. Let's go back to path, and we're just going
to do the same thing. I'm not sure. I think
I want it from here. I think I want to
start here and bring it all the way over here. Now we'll just do
the same thing. We'll just add some nodes and
follow the line of the eye. Like so. Then we'll tap that. Maybe this is a little
bit smaller overall, but I'm going to hit
radius twice so then I can just adjust all of
the individual nodes. I think I just want to outline
this outside of the eye. I'm going to add
another node here. Shrink this one, shrink the end. Drag that in. I want to
bring it up a little higher. Something like that. I want
to shrink this part as well. Turn snap off so I can bring it I'll add a node so I can bring
this into the skin. Oops. So we'll just shrink it and
kind of put it in the skin. You got to get it in
there. Sometimes you got to move it oh, I thought I had snap off. I don't know how sometimes just goes against whatever
I'm trying to do. I was wondering why I wasn't
going inside the mesh. There we go.
Something like that. And we can adjust these just
make them a little smaller. You can work on this on
your own time. I'm moving. It's a bit difficult
to go slowly, but as long as you see the
shape that I'm making, feel free to pause. Just
do it at your own time. I know it's tricky
and working with the tools can be a
little bit tricky. But once you get used to them, then you'll be able to do
this really, really quickly. So I'm going to
hit profile again, and then I feel great. I like the way it looks.
And just another note, you can do twist, and
you can tap twist three times and you can
twist each little node. Like, for example, if I want this to kind of show like that, I can twist just that part. If I want this to twist
out more, whoops wrong. I can twist this
out a little bit. So this is another little
useful trick with the profile. There's another little piece here that I think is really fun. Right now, the lashes,
we have the two, I'm going to go ahead and add another path and this is just going to be a really
small node right here. I'll tap on it. And you can
see it added all these, which I'm going to
turn the twist off. And these I'm just going to drag into one another to kind
of get rid of them. Sometimes it does that it tried to match all of the nodes
that are in the other tube, which is not really
useful to us. You can see even the
profile kind of. But anyway, so all I
want to do with this, I'm going to turn snap off. This is just kind of like
a little extra piece here, but I like it. I like it. I'm
going to add it in. I'm essentially just
going to vary it into the other make it a
little bit smaller. So let's just bring it in. Let's make this small. So it's just like a
little tiny detail, but I love little tiny details. You can rotate it if you want. Ooh, maybe like that. Yeah. I think that
looks pretty good. You can take the gizmo
and sort of move it. I might want to make it, right
on the eyelash. Perfect. Whoops. Nice. While we're
here, let's go in. Let's name this I I white. We can go ahead and hit AD
and we can add a mirror. Let's rename the mirror
I white as well. If you have any if it
feels like the eyes are too close together or something doesn't
quite make sense, I would go in and
edit all this stuff now and just make it look the way that
you want it to look. All right, while we're here and we're getting real
good at the tube tool, let's use the tube tool
again. Let's hit Path. Let's make sure we don't add
this into another mirror. We're in the scene, and
let's just tap head. That way, when it adds the path, it's going to add it
underneath the head and not into one of
our other mirrors. So we're on path, and let's just make these
cool looking eyebrows. I'm going to start here and
then move to about here. We'll tap that. I'm going to add a node here, and then maybe add a cheeky node there. I think I like that. Tap radius twice. I just had a brain freeze. I think I want to add
another little one here so I can move this up. I want to make this
nice and sharp here. Like so. I might want to make this one
a little bit bigger. I might even want it
like a right angle. That will be cool. We'll
just leave it like this. If I want it to
be a right angle, I'll just add another node. At least that'll give it a
little more of a shape to it. I'll add another node here so I can make this one
a little more sharp. So maybe something like that. I like it. So let's use profile. Okay. And let's use twists. Let's twist it. Yeah, I
think that looks great. I love that. Okay,
good. Let's save.
6. Stylized Hair: Okay, so let's add
this little headband. Let's go to our scene and
let's add a cylinder. We don't want it to be
inside any of these, just make sure that
it's not inside of a mirror. We can rename. Head band, mind my spelling. This tube, this is
actually eyebrow. Let's just get it
out of the We don't really need it
nestled in the head. We can just leave it as is. For the head band, let's just
go ahead and bring this up. Let's click on the Gizmo
and we can move it up. Alright. Let's do Let's do Snap. Should be on 90. We're gonna use this red ring to just
snap it like this. Now let's use this
little green node to bring it closer
like this, like so. It's looking good. We can kind of
generally place it. You can kind of see where
I'm going with this. So we'll generally place
it maybe around here, and we can probably
before we tilt it, let's go ahead and
press this little cylinder right
next to the gizmo. It's almost kind of hidden. So the cool thing about the cylinders is we can
kind of adjust this. So the only thing that I want to do is bring
the front one. So the side that's
closer to her face, I just want to make it a
little bigger like that. Maybe we can make this
a tad bit smaller. I think that works.
All right, cool. Right now, this is just to give it a little
more resolution. Let's just tap these three dots and let's just do
post subdivision. We want to do it twice
or that too much? Let's just do it one, and it's just going to give it
a little more resolution. We'll just hit X,
and let's hit hole. I hit a hole once,
and as you can see, it's much, much thinner. We can take this blue ring and we can adjust the
size of the hole. Okay. Okay, we'll put it right about there. I
think that's pretty good. Okay, so let's go
ahead and validate this and let's sort of move it down and kind of where
it's going to go. Now we're going to make
these little round things. So we just need to kind of pretend that they're
there for now. Let's turn off snap so we
can just move this freely. Let's kind of get it
in the right place. So this is the eye, we have the eyebrow, and then we have so that's
actually pretty good. That's a pretty good start. So now we can just
go ahead and add these little round pieces that's going to be the
front of the hair. We'll just add a sphere. We'll tamp the Gizmo.
Let's bring this up. We'll shrink it. All of these spheres,
we're just going to make around the size
that they would be. So that looks pretty good,
something like that. Let's go to our tool.
Well, let's validate it first so that we can
use all of our tools. We'll hit move, and it
doesn't need to be too big. Let's hit Xray. At least so you can see exactly
what I'm doing. These are round in the front, so we just want to
drag out the back. Maybe push up a little bit.
So something like that. Now, I kind of want to
pinch it a little bit, so it looks like that this part is more
round than the back. But I think that
looks pretty good. I'm just going to kind
of push and pull. The reason I do that
is because you can see the shape of the head and you want this to look
like it's falling, like the weight is on the head. So that's why I'm kind of
pushing up so that it's a little it feels more natural the way that it would hit the head. So that's why I'm doing that. But that looks pretty
good, I think. So let's undo Xray, and
then we can take a look. And I think that
looks fantastic. So in order to make this
part, well, first off, before we start cloning this because that's
going to make it really, really easy, we want to make sure we have it
in the right spot. So let's go ahead and go back to here and
just mirror this. So now that we have
that mirrored, we can kind of gauge
where these should be. So this we'll just take the gizmo and let's move
it to where it should be. So I'm just going to move it up, maybe tilt it a
little bit more down. So it's so that's kind
of a better line. They just kind of go
across like this. So this is a better
place for it. I might have to use move and just kind of adjust
it a little bit more. But for the most part, you know, it looks pretty good. I'm happy. It looks great. So now let's take this sphere and let's clone it, and let's move it over. Now, it doesn't have to be these don't have
to be symmetrical. So I'm not too worried about him being symmetrical
because it's it's hair, you know, it doesn't
have to be perfect. So just take all of your little spheres and then move them in. Okay? We don't really
want too much space. So something like that, you can move it over a
little bit further. You can take move,
and you can kind of drag the back if you want. You can be a little bit creative in how you lay out the hair. So just continue to do
that and just bring them all across. I'm
going to work on mine. You can feel free to watch
and then work on yours or pause and create your hair. Okay, so let's clone and
make sure you're safe. Okay, so it'll be cloned again, make this one smaller. And I'm just rotating
it so it follows the so it's falling on
the head the correct way. Good. We'll clone it again. We'll stretch this one. Okay. Looks pretty good. Alright, so this looks good. So now we want to do
the back of the head. We can't see it, but we know
it's going to be round. I'm going to tap on head so
that when I add the sphere, it just goes right below
and I know where it is. We can go ahead and
validate this sphere. And sorry, I'm laughing at the way my voice
gets sometimes. I don't do it on purpose. I really, really don't
do it on purpose. Okay, so this is going to be the round like back of the head. Okay, so I'm thinking probably around there
feels good to me. And let's hit X ray so that
we can just see this sphere. Activate ray vision. I'm going to take
trim and rectangle. So this will just allow
you to cut this sphere. You just make a
square, whatever is in white, boom is gone. So now we just cut
the sphere so we only have the backside. We actually don't need
the front either. Euks the lasso, and let's just lasso the front
right around here. We don't need any
of this. So we'll just lasso that part, too. Okay, it looks great. All right. Let's turn Xray off. We have the back
part of the head. That looks good. Now the hair is going
to slightly come over and go over the ears. Oh, where's the other ear? I guess I didn't. Let's go to the cylinder, this ear here. You can just tap on the
three dots and rename it. Ear, and then we're going
to have to rename it again. Now that we have this
ear, let's add a mirror. We had a mirror and now it's
mirrored to the other side. So now we just have this mirror. Let's just go into
these three dots and we'll name this ear. Okay, so now at least we
have the two ears there, and we have that bit of hair. Okay, so let's work on the
hair coming off of here. So there's a few ways
that we can do it. We can do it similarly to what we did with
the spheres here. We can just make a big
sphere and stretch it. But let's try with
the tube tool. So we'll use tube we use path. Let's see. Let's
just start about here and do something like that. We can go ahead and hit
the little green sphere, and then we pretty much have
our little hair tube there. Let's make it look more like
this round stylized hair. Let's tap this three dots, post subdivision,
let's put it to three. Let's bring the division
X down to maybe four. Okay, so now let's hit radius twice just so you have
all three of these lit up. And now let's just kind of angle the hair so that it's smooth off of the
curve of the head. So I'm going to drag
this up here and just add another node and then kind of pull it
out a little bit. We're actually going
to have to stretch out this part of the
head a little bit. I'm not actually putting it
in a straight line this way. I spreading it out a little
bit because we might have to adjust the
head band a bit. Sorry, sometimes I just
go into just such detail that isn't too important at this point in time.
I can't help it. Let's make this
side much bigger. We can add another
little node here. Maybe we'll add a node
here so we can make this bit smaller and then
this one a bit bigger. I think that looks
pretty good, actually. Something like that,
and you can add another node if it's not
curvy enough for you. But I think that's pretty good. I'm going to actually
move it back a bit. Kind of by the ear, it looks great. I
really like it. I'm trying to look at the ratio of space between the bottom of this and the
bottom of the ear. I might make that a
little bit longer, make this a little bit bigger
maybe, something like that. We'll fix, it's going
through the ear now, but those are little
details we can fix up. I think that looks pretty good. It's connected to the top
of the head. That's good. Okay, let's go ahead
and clone this. This is going to be hair Lock? Well, how do you spell Locke? I feel like it's
different if it's like a hair like a lock of hair. I think it's like maybe
like CHE. I don't know. I could be going
crazy. We'll just name it hair. You guys
can make fun of me. Okay, so we have hair. Let's clone that. And let's just take the Gizmo 'cause
we can just move it back. Move it back, we can move it in. Now remember the trick Because we want to just move
it straight over. Let's just use a line and then we can move
it straight over. Maybe something
like that. It looks like it's a little longer. So we'll do something like that. The great part is we can go
to this little squigly line next to the Gizmo and
we can edit this. You can make it exactly
how we want it. Maybe we'll make this
a little bit bigger. Maybe we'll kind of angle it
to the front maybe, like so. All right, so that
looks pretty good. Pretty happy. Let's go
ahead and mirror just so we can get the full aspect. So we'll go back to the
hair and just hit mirror. It looks nice. This one I'm going to make
bigger and I'm going to curve it a bit more. Actually, this one I might want to curb a bit more as well. I like that curve. I think that looks beautiful. Now we can clone this. Let's clone, we'll
just clone this hair, and then we can go to our gizmo and we can move it
where we want it. Let's take a look
from the front, get a nice little look see. We'll do it about
there. Maybe we'll make it a little bit lower. Let's clone another one. Let's bring it out
of this mirror. I didn't even actually didn't intend for this to go in the
mirror, but that's fine. But this one, we
just need one more. So let's just do this one. We'll go to the little
tube tool options, and then we can adjust
this as needed. We want to probably put it
back or not put it back, but give it a nice
little swirl back. Whoops. Let's undo,
let's undo Snap because it's trying
to make it not go into the other hair. It's going to try to avoid
that so we can take it off of Snap now we can just adjust this accidental undo. Then we can just take all of these and you can
just bring them. The only thing else I'm
going to say for the hair, I'm probably going to add
some other ones in here. And then I'm just going to kind of adjust these top parts. I'm going to add some lone ones just to kind of
fill in this space. I think it'll look nicer.
Honestly, you can probably use spheres too just to kind
of fill in that space. The only other technical
thing I want to do is maybe twirl this
out a little bit. Oops, take it off snap
and just twirl this part out as well. Okay. And I'm going to go I'll clone this and I'm
going to drag it out. And then I'm just gonna
make some other ones, but I'll just time lapse it. You can fix this up
however you want, but I'm just gonna add a bunch of strands and just make it looks like it's not
so symmetrical. No
7. Hair Pins & Earrings: So now let's tap
on the headband. Let's use the move tool. Make sure it's fairly big. I want to take the
bottom part and just pull it back so it's
behind the ears. Okay? Something like
that is pretty good. Obviously, mine's a little wide, so I'm going to make
this a little smaller, and I'm just gonna pull
this together a bit. So we have something like that. Now, I think I
want to take move. I'll make it even
a little smaller. And I kind of want this part
to kind of come out a bit. And I think I want this to squeeze in just a
little bit more. And the only other thing is just make sure that
this is nice and snug. I might actually shrink
this a little bit. And by snug, I just want
it snug on the hair. You might have to adjust
the hair as well. If you have part of
the hair sticking out from the head,
not the headband, but the head, I think I
just want to take smooth and just kind of smooth that
back, kind of get rid of it. But I do like the idea of kind
of hair coming down here. I think the best thing
to do is, let's see. Let's take this piece. Let's see. Is it mirrored? Let's go to Gizmo.
Let's clone this piece. Let's move it down. Kind of tilt it a bit,
let's just move it over here so it's that it's
kind of sideways. So then you can take
move and we can kind of just mold it so it looks like hair coming down and we'll be able to make that a
little bit more blue hair. It looks nice, and it kind
of covers up that spot. So I'm going to take this and it looks like we have to
mirror it on the other side. Let's bring it up to
where the hair is. And let's name it
like hair sides. And let's do add
and then mirror. So now we have a mirror to the other side. I
think that's great. Let's make sure we're
saving as well. Whoops. Accidental undo. I do that all the time now. So you want to make
sure that this headband is nice and snug, but use move and see
these parts of it. So we want to make it look like, maybe I'll make
move really small. We want to make it
look like, you know, the hair is kind of
affecting it a bit. And actually, now that
I'm looking at it, the hair isn't symmetrical. So this hair isn't symmetrical, let's go back to the head band, and let's turn off symmetry and let's just do this
without symmetry. I'm going to lift this part up because you can see
the hairs high there. So we'll lift that
up, lift it up here. In any of these spots where
it's snug against the hair, it's not really snug
in this section, so I'm going to pull that down. Things like that. So
it doesn't have to be completely symmetrical at all. These gaps, they kind
of bother me a bit, so I'm just going to take move, and I'm just going to
adjust these a little bit, just so they kind
of fill those gaps. Maybe I'll scoot
that down a bit too. So let's take these head
pins. Let's make those. Let's add cylinder.
We'll use our gizmo. Let's move. Let's move it up. And now we want to go snap. We can take it off of
a line. It's fine. So we want to go snap, and then we want to
snap it towards us. Like so. We can shrink it. Make it a little
smaller. That's fine. Okay, so now this actually
looks pretty good. Let's how do we
want to play this? Let's go ahead and validate. Let's take Move tool. Now we want to move it
down, but we want to move. We want to move the
front and the back. So we need to go
back to symmetry. And let's do we'll turn X off. Actually, let's
leave X on and let's choose Y. Let's just do local. So XY, local. And you can do show line just
so you can see these lines. So again, that means that we're the symmetrical regions
are now the left and the right on both
sides of the red, and then front and the back,
both sides of the green. And just a little extra C Z would be the top and the bottom. Okay. So now let's take the move tool and we just want to
make these shapes. We'll just do it pretty simple. We'll just pull the bottom down. You can make it as perfect
or as different as you want. Maybe you wear hairpins and you want them
a different way. That's the beauty of it.
It's the beauty of it all. We'll go back to
move. We'll just stretch this down a little bit. I love it. I think
I wanted a little more a little more squarish. Okay? I think that's perfect. That's exactly what
I'm looking for. I don't know why I
said it's so weird. It's two different colors. We could split it in two. Let's do split. And
let's do rectangle. And let's split this in two. Let's see how it looks.
Okay, so let's take the top. And we need to voxel
remsh these now. So we'll go here, voxel. Let's do it like 150. Remesh. Let's do the bottom. Same thing, Vox remesh 150. This is a shortcut. It's
the same thing as here. See? Same numbers. We'll vox will remesh it
at like 150. Looks great. We can go back to the symmetry, and let's just put it back
to world and turn this off. So essentially, we're
just going back to how it is by default. Let's take smooth and let's smooth this out
keep symmetry on. Let's smooth this out as well. Okay, these both
look pretty good. So they're here and here. We have two of these cylinders, and you can also stretch
them out with the gizmo. Seems like they need
a little stretch. I'm going to take this
little bottom one, and I'm going to move it up. Like that. So that's one way to do it or
you can just color it two different colors. I
think I'll stick with that. Real quick, if you have quad remeasure, you can
re mesh these. So right now, this
is pretty dense. It's 43 K. That's
very, very big. I'm going to set this
to 10,000 and just hit remesh or just
hit the 10,000. What this is doing
is it's taking the wire frame and
it's minimizing it, but it's just doing it cleanly
than regular decimating. I'm going to hit half, half, half because these don't need to be very
extremely detailed. If you don't have
quadri measure, you can do decimate, so go here, Miscellaneous.
Here's decimate. Let's say we hit decimate, decimate the size
is getting smaller. But you see this is considered not clean
whereas this is very clean. If I do this one, I can
do with quad measure, I can do SAM. It
makes it very clean. Then I can do half, half, just make it smaller, as
small as I needed to be. I'll turn the wireframe off
and I'll get out of that. Looks pretty much the same, much smaller size, and
that's what we want. Okay, so now we have these. I'm going to take the
lower one and just nestle it that way
they're together. Let's just go ahead and shrink and possh we'll
just bring it down. Well, let's take it off a
snap so we can rotate it. Okay, so the rest
is pretty easy. We're just going to
try to match these up. As best we can, I'm
going to clone. Do a little rotate. This one is smaller, maybe
a little thinner. So now we have both of these. We can actually move
them all if you want to adjust them like that. Okay. We can actually take
this whole thing and we can add a mirror. Now
it's on the other side. And let's just name
this mirror hair pins. Perfect. Let's save. I really like the ears,
but I think I want to think I want to squeeze
them in a little bit. I'm going to hit a
line and just kind of squeeze them in a smidge. And since I'm doing that,
I think I'm going to take this hair and maybe just
move it back a smidge. So it kind of goes
behind the ear. I really like the
ears. It looks good. So let's make some earrings. This is really simple.
We have the ears here. Let's add a torus. Let's make sure we
take it out of this ear mirror in our scene. Okay, so let's find it. Gizmo. Let's see. Let's do Snap and let's
turn it this way. And now we need to
we can shrink it. Let's just shrink it
to around the size, and then we can worry
about how thick it is. So that looks
decent. We'll shrink it up to about the size we want. And now we'll hit this little
doughnut next to the well, let's rotate it
actually, as well. Let's go back to the
Gizmo and just rotate it. Let's take it off of Snap let's take it off
of a line as well. So let's just rotate. Let's just kind of get
it in the right spot. Let's rotated a little bit more. And we want to make it so that you're looking
straight at it, you get that nice ring feel. So this looks good. So let's go back to
that little doughnut. And now we can
adjust, let's see. Wes, is this the thickness? Yeah, that's the one. So now we can adjust how thick it is. So we'll do something like that. I think, maybe a little thicker. You know, everything is
stylized and so, you know, we have to make sure
that we give her some real cool looking
thick gold loops. Okay, let's go with that.
I'm gonna hit mirror. I might need to adjust adjust
that one a little bit, but I think that's fine
for now. Validate this. So now we can just kind of move move it to exactly
where we want it. It looks like it's
going through her face, unfortunately, so
let's move it up. There we go. That's
better. I think I want to rotate it
out a little bit. Yeah. Let's rotate it
out. Yeah, right there. Perfect. I'm going to save. I save a lot now. I don't trust I don't
trust these apps at all. So now for the neck, we're
just going to do a cylinder. Let's add cylinder. Let's take the cylinder
and move it up. Let's try to find the head. Is the head on the
top? Yeah, I'm gonna bring it right
underneath the head. I'm gonna rename it. Neck and we can go ahead and
just move it up in the neckish position. Okay, we want to have probably going to make it as wide
maybe as the lip or so. Move it up. We can kind
of stretch it a bit. Let's do Xray. So now we can see where
exactly the neck is. So the neck would be probably
going in right about here. Let's do X ray again. That feels right. So now let's tap the little cylinder whoops. We'll make the bottom
a little bit wider. Like that. Okay, I think
that should be pretty good. I'm going to make this longer so that we can figure out how
it attaches to the body. I think that's fine.
Let's validate. Oops, accidental undo.
8. Tube Tool Body: Okay, so let's use a
tube for the body. So let's turn on the grid. Let's go to Tube. Let's make sure that
we hit front on here. Let's do path. And we want to work with
this little magnet. So let's hope it works. So let's start here and
then go straight down. We can ignore the floor for now, and let's tap the green dot. So let's take this floor
and just hide it for now. So we'll just hit the little I. So let's step back on the tube. Let's take the gizmo and we'll just move
it back a little bit. Okay, so now what we want to do is hit radius three times. Let's go to the tube options,
the little squiggly. Okay, so I'm going
to add one here, maybe one here for now. Let's make these a
little bit bigger. So we just need to figure
out to get the right size. Okay, so that looks pretty
good for the top actually. Well, it looks like it's
not snapping anymore. Yeah, I find it a
little frustrating. Sometimes it just won't
snap, but that's okay. So we're going to put it here. Let's turn off Snap.
That's better. It looks like this snap and the magnetics are different snap just means
snaps to surface. But now it looks like it
is using the magnetics. For the grid. That's what I that's what was
most important. Okay, so I just wanted to
kind of clear that up. That was a bit confusing.
So when using the grid, when you're in orthographic
view like we were, then there should be magnetics. So when I'm moving
the tube tool, it should sort of magnetically
snap to the grid. The reason it wasn't
happening is because I had snap on in the
tube settings. The tube is not going to go
through, like, another mesh. So I think the tube was
just avoiding the neck. It wasn't going
where the neck was, so it kept jumping and moving and doing things
that it wanted to do. So yeah, I was
frustrated because I didn't think the
magnetics were working, but I think it was
just because I had the Snap function on
Hopefully, that makes sense. Let's move the whole
thing back a bit. I don't know if X
ray will help us. Let's go back to the
little squiggly. This is our body like here. The back usually
curves like this. The waist usually is like that. This part, let's
make this wide, too. Her dress is kind of like that. So that looks pretty good. Maybe we'll add
another one here. Oh, no, maybe not. I think
that looks pretty close. I think it all
looks pretty close. Obviously, mine is very tall, so I'm just going to
use the gizmo and just cheat it and just
kind of shrink it. I think that looks pretty good. It's still quite big, so I'm going to shrink
it, actually. I want to make this
a little wider. And that a little wider. That's really low resolution. So let's tap these three dots. Let's do post
subdivision up to three, and let's bring this down some. We'll bring it down to 12. We'll turn Xray off. I think that looks good. I'm going to go
ahead and validate. Whoops, and then we'll
turn off the grid. Okay, so I think she
looks pretty good. The only thing is, obviously, the dress is still a
bit too long for me. So firstly, let's
deal with the shape. I want to make it a
little more round here. So I'm just using the
move tool with symmetry, and I'm just going to bring
this out a little bit more so that it matches
that a little bit better. Okay, and it still
feels a bit big. So the bottom of
the hair is here, and this part just
seems too long. So first, I'm going to bring
this up a bit maybe there, I might shrink it a little
bit. I want to take the neck. I'm going to use X rays so
we can just see through. The neck, I want to
have a bit of a curve. I want it to curve into this. The neck should be
curving like that. I want to make the curve first. I'm going to use move on the
neck and push it forward. Now we have that curve. The second thing I want to
do is pull this down a bit. This can go up, this
should go down. Now I'll just move
it into place. Remember, I have a line as well, which whoops, looks like
I have both pieces. I want to make sure I'm
just using the neck. Let's take this tube out while we're here,
let's just rename it. Clothes. So let's take the neck and just
move this back up, and maybe even a little tilt. Like so. Uh oh. Okay, so first the only
problem I see is this isn't exactly I must have
done the dress, and I must have not had symmetry on when I adjusted the dress. It's the only thing
I can think of. So this happens sometimes. Sometimes things that
should be symmetrical for some reason aren't I'm
going to take this dress. I'm going to go to the Gizmo and I'm going to hit move origin. So that's gonna move it directly to the middle of the scene. Now, if I move this up, let's use Xray, and I'm gonna try to move it back
exactly where I had it. So somewhere around there. So I'll turn Xray off, and
now we'll take a look. And it looks like it's
actually lined back up. So I think it's so
I think it'll work. And the only reason I'm
concerned is when we do paint, we really want this
to be symmetrical and we want everything
to be symmetrical. But she has some nice necklaces, so I'm not too concerned about it. But that's
just another trick. If that ever happens,
just do Gizmo and then move origin and
then try to move it back up, and hopefully it'll
be symmetrical. So if this is the dress, I just want to drag out
the little sides of it. It just feels a little bit more like something that
she'd be wearing. That makes sense? Okay. That's also
a little extra. You don't really
have to do that, but okay, I think I like it. I'm going to just kind
of take smooth and just kind of smooth
all this out here. Okay, nice. So next, let's do these little necklaces. So these are pretty cool looking
9. Necklaces: Okay, let's work out
these little necklaces. So we're gonna start
with maybe one, two, three, four, five, six, so six little sections, and then we can
duplicate it for the smaller one or we can
change it a little bit. So this to me, looks like, we'll add a cylinder. Actually, no, let's
add Let's add a box. Oh, yeah, the dress really
is a little bit off center. I'm gonna take symmetry off and try to fix it a little bit. Okay. I'm always a little extra. All right, so let's
take this box. Let's just use the gizmo. Let's make it much smaller.
You can do it down here. Okay, I'm gonna elongate
it a little bit like that. Okay, so I think that
looks pretty good. So let's just mirror it. Let's move it over. Let's
tilt it a little bit. We might turn snap off
so we can tilt it a bit. Something like that. We can
probably shrink it a bit. Okay, I think that
looks pretty good. So let's go ahead and validate. Then let's take smooth and let's make smooth pretty big and we'll just
kind of smooth these. Let's see how they look. Okay. I think they look pretty good. I want to smooth the back more. I actually want to make the back a little bit smaller
than the front, so I'm kind of smoothing
a bit aggressively. I want everything to
be sort of rounded, but I want the back
to be a little bit. A little bit more maybe. So let's move them
closer together. They look like they're
actually pretty close. Maybe thicken them
up a little bit. Oops, I meant to
rotate it a bit. Okay, so maybe
something like that. And you can adjust the
thickness and stuff as well. Let's try to get it to the size that we want to
actually make it. So we'll move it in. We're gonna have
to adjust it more. Let's rotate it down. We'll make them really small. Now, let's bring
them really close. I'm gonna hit a line
just so I can move them kind of into the
dress since they're gonna be sitting on
the dress. Okay. Maybe a little bit lower. Let's bring them
down since she has two levels of neck
necklace necklaces. Okay, so the only other
thing that I want is, I think I want a bit of a bend in them. So I'm gonna use move. Okay, I want to make sure that I want to
bring the symmetry to local so that both sides
are moving kind of evenly. Yeah, that's better. So now we can just go back
to regular world. Okay, so let's take
this necklace. Let's name this necklace. Let's name it Necklace B. So let's take this
box, and let's clone. And now let's make
the other ones. So we'll just kind of This will be sort of similar to how I always do teeth. So
we're just gonna move. You can just pretend that
there's only one here, and we just want to make this let's take a line off
that'll probably be easier. Actually, no, let's leave a line so we can move it
back to the body. Okay. Maybe we'll just
leave it on a line. Let's make this one a
little bit smaller, but maybe the same thickness, so we have to take it off of a line so we can make
it kind of thick. Then we can kind of figure
out exactly how we want to position it next
to the other one. Let's take a look at the size. These might still
be a little big. I think that looks pretty good. Okay, so I'm gonna use move. And like I was saying,
I kind of want the backs to be a
little bit thinner. So I think I'm just
gonna do it manually, and just kind of push
the backs in a bit. Yeah. Oh, no, did it not do
it symmetrically? Oh, it did. It did. Okay. This
just looks funny. I want to make sure it
still looks even though, so I'm just kind of
doing a little extra. Okay, that looks good. I want to try to make
sure that it's like a nice line, a
little curve here. Then I'm just going to clone and we'll make some smaller
ones back here. It might be easy to do
Xray so you can see, or that might be very confusing. If so, then you just have
to try to do it by feel. Turn Xray off. Okay, so we want them to look
like they're kind of going around or body. Make them a little smaller. Tap a line. And just
take your time. This kind of thing is difficult if you're not
that used to the Gizmo, the Gizmo can just be a
little bit. It can be a lot. So, you know, take
your time with it. Don't think that
you have to rush. I mean, for me, I'm hoping that you're kind of just
seeing what I'm doing. And that will, you know, and then you can just
try to match that. But, you know, go
at your own pace. There we go. Okay, I think it looks I think that looks
really, really good. That's exactly what
I'm going for. So if I have another
one, I think that'll be the perfect, like, size. So I do want to
figure out what I want to do with the
back part, though. We could just
continue the clone. We could take all of this, take all of these from the
necklace and hit solo. Or we want the body, too, though, right?
We want the dress. We want the clothes. Now if we tap on that, we can clone, and then we can actually just keep
this going if we want. But this is extra. You don't really have
to do this since we're probably not really
going to see it anyway. So I'll just move a
little faster for this. Okay, so we have all
the necklace pieces. So now is a good time. If you do have quad remeasure, you can just go through and you can go to each one of these. I probably should have done
it before I made the clones. But we can go to each one of
these and then just do quad remeasure and adjust them, maybe go half and we can just continue to do this
because we don't need these to be such high res. So even that I think
is pretty good, although it looks like it
melded it in the front, which I actually
didn't want to do. Oh, symmetry.
That's what got me. So I had symmetry on quadri
measure. You know what? If I go back, I wonder
if I take the symmetry off and I have if it's going to meld them together and I don't
think it will. Yeah, that's more what we need. So I'm going to do 527
for each of these. Just make sure to
turn off symmetry. Now our necklace
is looking good. We can go here and clone and
this one can be necklace A. We can just use the Gizmo
pivot center pivot, didn't help us, but that's okay. Let's select all of the
things in the mirror, then the pivots in
the right spot. I think when we do the
mirror, it actually moves it. We'll do all the
stuff in the mirror, we'll bring it up
and we'll shrink it Oh, right there. That's perfect. That is perfect. Love it.
10. Arms & Hands: Alright, so now let's make
some hands or some arms. So, we use the tube tool path. And let's see. Okay,
probably around here or so. Okay, the position
is pretty good. You might have to adjust
the necklace a little bit, which is normal. Sometimes you just have
to adjust some things. So I'm gonna take these who push them up a little bit. Then I'll go back to the
arm and back to this little squiggly and we'll
just make the arm. Let's turn snap off so
that we don't have to deal with this trying to jump out. I'm going to turn the radius. So all of those so
that way I can make the shoulder kind of small. Let's just try to
match this Okay, so I'm looking at
the left side now. And usually with the
arm, I kind of make an arch kind of the opposite way that
this is sort of like this. That looks pretty good. And also another thing
that I always do. Let's hit Xray is I usually like the shoulder
to be towards the back. Okay, so pretty much like this. Let's have this be the elbow, which is around the
mid waist or so. Okay. You think that looks good. Let's hit Xray and go
back to the front. Looks good. Okay, so now we
just need to figure out how we really want
this arm to look. I'm going to make this
one smaller for sure. I'm going to bring this
up a little higher. Maybe even make it a
little bit bigger. So there's a little
bit of a contrast. I want the arms to
be nice and thin. But Okay, that looks good. I'll make the wrist
a little smaller. Actually, I kind of like
bigger pudgy hands. So I might not make
it that much smaller. I think that looks
good. We don't have to do too much extra here with the shoulder
because it's really underneath the
underneath the necklace. So I think that looks good. I'm just going to show
you what mine look kind of looks like
without anything, and I think that
looks pretty good. I'll make the shoulder a
little bit wider, perhaps. And this is the part where
it goes in the body, so that's why I
have that tilted. But yeah, something
like this, very simple. I think that looks good. I also now that
I'm looking at it, she's very wide, so
this is an easy fix. I'm just gonna use
the gizmo and a line. And I'm just gonna squeeze
And these details, I might fix those a
little bit later, kind of get the necklace
out of the arm and stuff. But again, those are really, really tiny details
that if you want to go in deep and really work those details
out, you can do that. Okay, so let's work
out some hands. So the first thing I want
to do is add, like, a box. I keep wanting to say cube. So we'll add a box. We'll
just use the gizmo, and let's just
place it over here. Now we'll just block it
in and see where we go. Usually, this is the
easiest way for me to figure out the hand
because our hands are, you know, we can figure out the palm and then you just
figure out the fingers. Okay, so I think that
looks pretty good. We'll kind of, we'll kind
of angle it like that. I think that looks right. So I'm going to take the arm, and I might as well go ahead
and mirror it for now. And let's validate it. I'm going to take move,
and I want to try to I'm just gonna adjust the arm so that it sort of
fits this, um box. And by fix, I just mean, kind of goes cleanly into it. Let's smooth it a little bit. Now I want to take the box
and I want to soften it. Let's tap these three dots. Post subdivision,
let's put it up to two division X. Let's
just bring it down. This just softens the topology, makes it a little
more round, like so. I think that looks
good and we can adjust the size of
it if we want now. Maybe we'll tilt it a
little bit more like that, so it looks like she's
doing that with her hand. Okay. And I'm just
going to validate it. So let's just use some really
simple shapes for this. Let's try some shapes out first. So let's try, so
we have this box. Let's actually clone the box. And let's try to make this some fingers. So we can move it down. We can kind of shrink it. Wo We can't really
see her fingers, but we can sort of rotate it. Like so. So we can do some
fingers like that. Let's just clone and
just make a couple of fingers and then we'll
see how we feel about it. I'm gonna take it off of a
line so I can kind of stretch them relatively, so
we'll clone again. Okay? And her hand is not wide enough, but also these fingers
are a bit chunky. So let's make them a
little bit smaller. I'm just gonna continue
to move them towards the back of the hand. So let's do the same thing. Let's make them a
little smaller. Maybe we can fit them
on the hand after all. But I tend to do that. For some reason, I tend
to make fingers chunky, which is fine, but
then you can't fit five of them on
there, you know? Let's make this one
a little thinner. It's the pinky, the
pinky is always thin. Let's cow again. Maybe we can fit
another one on there. Give them a little rotate.
Something like that. Now this is obviously a
little bit too thick. I'm going to shrink that. I actually looks all right. I'm just going to
use inflate and make the ball of the palm. Kind of like how we have.
And now I'm just going to clone this and that'll
just be that extra finger. We'll just clone it, and then
we'll kind of move it into this general area where
a thumb would go. Maybe we'll make it
a little fatter. Okay. So I'm gonna use smooth and just kind
of smooth out this palm. So that should help us a bit. Hey, there we go. It's not bad. So I'll just zoom in. So it's really just,
you know, it's just shapes. It's not terrible. It's not terrible. Okay, so I don't know if we want to keep her
fingers like this. I'm just gonna use move, and
I'm going to bring all of these kind of into the
hand a little bit more. I don't know if you can
hear that clicking. That's my heater, I guess. So I'll bring the thumb.
Maybe I'll widen the thumb a little bit. That's fine. Push in this palm a little bit. I might even take the arm and push that in
a little bit too. I think that looks good. I like it. It's very simple. Doesn't need to be
crazy. But, yeah, I think that actually
looks pretty good. So the only thing that
I'm thinking about is when I vox will
remsh this together, sometimes they get
kind of, like, melted together and it
can look a bit weird. So I'm just trying
to decide if I want to separate them a little bit, Vox will remesh the
hand and the arm, and then, like, take move and, like, kind of smooh
them together. It's very difficult, but
I'm a perfectionist, and, like, that's always
how I want to do it. Sometimes I hate being a
perfectionist, you know? Well, there's a few
other things I want to experiment with,
well, I got you here. So, what if we push in a
bit and kind of, like, pull out the This is just, like, a general, like, the
kind of flow of the finger. Kind of pushing in
and then having the finger come
out a little bit. Also, another thing that's
cool is if you tilt each one, let's say this one
is out like this, and then this one is
tilted a little bit. And then this one is tilted a little bit more kind of thing. Sometimes that
looks pretty cool. But definitely the one
little cheat is pushing in a bit on the fingers in the
middle and having them curl Even if you push man
on the bottom, too, it gives them a nice
little round piece here. You can see it clearly with
how different these look. Whoops. I think that looks great. And since we did it
to the other fingers, let's do it to the
thumb, as well. You want to drag out this piece, this part of the thumb.
Push this part in. Whoops. It's a little bit
difficult to navigate. Let me solo this thumb. I think that looks pretty good. So I would say that well, you can move on and we can vox
remesh this hand together, and you can leave it how it is. But I might do something a
little bit extra where I vox remesh the fingers a
bit separately and then use move to kind of painstakingly push
them together, because that gives it the space
and the depth in between. Otherwise, they kind of
get melted together, and they kind of look like
more like a toy's hand. Okay, so let's try it. I'm just gonna take
these fingers. For sake of talking about
it, I'm just gonna try it. I'm gonna tilt them so that they're a little bit
away from each other. I want to give them all some
space away from each other. Now when we ox
remsh hopefully we can easily just ox
remsh them together. So the only other thing
that I want to do before I do that
is make sure that these meshes are
nice and cohesive. Like so the arm is
going into there. This looks pretty fine. That'll smooth together
nicely. Everything looks good. And Okay, so these
are the fingers. So let's get all the
pieces of the hand. I think this is all the
pieces of the hand. Yep. And maybe we'll do a whole hand first
and then we'll Yeah, I think that's the
smarter way to play it. So let's do a whole hand. And you know what? We might need to Well, let's try to box remastu
together and see what happens.
11. Remeshing Arms & Hands: So let's go into our scene
and select all the boxes, the hand, the thumb. Well, this thumb actually looks really big
from this angle. Why did it look so big from
that angle? Not having it. I think I just need to
bring it in maybe here. Oh, that made a
world of difference. I made a world of difference. Let's select all of the fingers and the palm and the thumb. I'm going to do a
quick save so we can always come back if
anything messes up. So let's voxel remesh
this together. We have some spaces. So let's do voxel. Again, that's the
same as going up here and then vaxl and
changing the number there. Oops I'm going to do it at 2:50. Okay. And then we'll just remsh. Okay, that's actually not bad. So now I'm going to take smooth. The reason why this
happened is because a lot of a lot of the
things weren't very, um, they weren't very
high resolution. So let's see what happens
when I smooth them. I smooth them, it looks good.
Everything looks great. Okay. So now let's try adding the arm. So let's take this mirror
and let's validate it. So we'll validate it, and
this will be the arm or arms. And this is the hand. Let's take arms
and let's go here, multi res and subdivide, we're just going to give
it more resolution. So now we have the hand. Let's add mirror. Then let's go ahead to
the mirror and we'll validate that we'll
just hit yes. Now we have both pairs
of arms and hands. Now we can take the
arms and the mirror and let's voxel remesh
them together around 200. E. Okay, let's see. Good. There's still
some space here. We got the size
down a little bit. So now we can do smooth, make sure symmetry is on. We can smooth this
arm into one piece. I'm going to be
fairly gentle here. Okay, so I think that
looks pretty good. I might not even have
to move very much, but I want to show you
what I was saying. So if we take select mask, let's use the lasso. And let's say we lasso off this Oh, I did it the wrong way. Let's say we lasso
the middle finger and the rest of this as well. So we just want to
leave this pinky Okay. Just a pinky. We'll
leave the pinky exposed. We want to make sure
that we let's hit solo, just so we can make
sure that we have the rest of the arm protected. Okay, so now we can take move. I'm going to make it pretty big, and I just want to
kind of slide it over. You can take Gizmo, too. Actually, I don't know
if Gizmo will work. I don't think Gizmo will
work. Let's stick to move. And we just want
to move it over. See how I'm just sliding it
over so that it's touching the other finger.
That's what we want. So now we'll take it off
of solo, we'll go to mask, and we'll go to cleara
then we'll take smooth and then just
smooth that out. So now you have them touching, even though they're voxomsh. I just want to make this finger
look a bit more squarish. So that the fingers
kind of match? Yeah, that looks good. I don't even know if I
need the other fingers to be touching. I
think they look fine. As I say that, I want to try this bigger finger because this has a lot in between there. So I'm going to use select mask, lasso, and I'm going to
lasso this just this finger. I'm going to use unmask and
get rid of whatever that is. So I'm going to
mask that finger. Let's take it off a unmask. Let's just see if we can get
a little more in the middle. Oops. And see, that's what happens sometimes it goes off
and it affects other areas. That's what you have to be
a little bit careful of. So make sure it's
just that finger. And now we can do invert. And we can take move, and we can just adjust this
finger over a little bit. Like so. Let's go to the mask
and then clear all. Then we can just smooth
this up a little bit, and we have those fingers touching and it
doesn't look weird. All right. So this thumb is a little bit. There's
a lot going on there. It actually looks okay, but I'm going to smooth
it a little bit more just to get it a little more
softer, a little more cute. Smooth that thumb a little bit. But again, this
is very stylized, so I'm not really going
for super realistic hands. I think she looks
great. All right. So next for the feet and legs. Yeah, so we'll do the
feet and the legs next.
12. Legs & Feet: Alright, so don't
forget to save. So let's take tube. And now we're gonna
just make some legs. I love her little stance.
So we'll do path. We'll start here
under the dress, and maybe around there. Boom, I'm gonna turn snap off. I don't know why I really do enjoy seeing boom.
I don't know why. It's kind of embarrassing, but not really,
but a little bit. Okay, so let's dive
in and take a look. This straight little bit
of a calf muscle there, nice little curve
into the ankle, maybe we want to put some
boots on her or something. Maybe barefoot.
Maybe we'll do it the same way we did the fingers. I should have saved one of
those little plump fingers. Okay, so let's go back
to the tube settings, and let's do a node here and
Let's do one here as well. So let's make everything
a little bit thinner. We'll tap this twice and we can make the
calf muscle here. We want to tilt it so that
that's kind of straight. You might need to add some
other little nodes here. I think that looks pretty good. Okay, I'm going to open
these up a little bit. Make them a little shorter. She's not that tall. I want to make the calves a
little bit bigger. My wife has big calves. They're kind of cute.
Bigger than mine. I wish I had bigger calves. Okay, so that looks
really good. I like it. Um. Usually, the leg would be kind of bent like this. If you bring the notes together, they disappear, so just
try not to do that. Um, still looks good
from the front. She looks a little wide legged, but it still looks pretty
good. Let's see from the side. I think it looks perfect
from the side, actually. Yeah, I think that looks good. You can obviously test out
to see we'll hit a line, see if it looks
better, if it's a little more forward,
a little more back. But I think aligned
with the hands feels the most natural to me.
I think right around there. So we'll move it
over a little bit. Um, the arms look a little bit. Should I make the arms shorter? Or should I make
the dress longer? These are tricky
questions, you know? Well, I think I like the
dress a little bit longer. It's always hard to tell. Sometimes, that's the leg. Sometimes I struggle
with that kind of thing. But I think that works for now. I like the positioning
of the leg. I think that looks good. Now for the feet, let's
take the whole character, everything except the floor. Let's make the floor visible and let's move everything up. The foot would probably be
around there to the ground. Okay, perfect. So let's add in let's
add in a sphere. Let's go to the leg and
let's add a sphere. And let's name this foot. Let's name this tube leg. Okay, the foot, we can
just move it over, shrink Okay, let's
stretch it out. So it's probably going to
be something like this. I just want to
actually shape it into a foot. So let's validate it. Let's use drag. And let's
drag this back part up. So we'll drag it up like that. I think that looks
good. Let's use move. Move is a little more
kind of smooth with it. So kind of smooth we'll kind of bring it down a little
bit in the front. So it's a little
bit more sloped. Let's take trim and
let's trim the bottom. So let's use
rectangle with trim, and we'll just trim
the bottom of it. EasyPs. Okay. So let's use drag. And now we just want to think
about the shape of a foot. So usually, maybe move
is a better tool. Let's use move and
push this side in. And let's flatten
out this front here. So we want to do
something like this. I'm gonna go ahead and spread
this out a little bit, so it still kind of goes
into the ankle piece. But I think this
looks pretty good. Try to put it here so you can sort of see the shape
that I've made. I want to use move. I
want to just shift it down so that it's
always on the floor. I'm going to shift this
up a little bit too. If you want to make
a little heel, you can make a little heel, but. I think that's good. So now we just need to
figure out the toes. And I think for the toes, let me try smoothing the
foot down a little bit, just making it a little smaller. Let's add another box. I'm still not sure if
I want to just put boots on her because
that would make it a lot easier than giving
her little toes. I mean, that's just the reality
of it. Oh, you know what? Let's try something that
I've never tried before. Let's make a longer box. Here, let's do it this way. Let's make a big
toe and then clonee it and make a longer
box like this. Let's tilt this We'll make sure that that's on
the ground and actually, we can tilt it sew, tilt it a little bit more even. Let's take the big toe and let's just put
that right here. Can be with the others. I
guess it's not to be that big. Jeez. So that pretty much
looks like toes to me. I don't know
what you think. So I'm going to
validate these boxes. And I think that this might
actually work for our toes. Okay, we'll do that. I'm
going to take the foot, and I'm just going to maybe
I'll use move really small, and I'm just going to drag this into these toes a
little bit more. Maybe, again, I'll just do
this little shape where it's like, Like that. I mean, it looks like it
looks like toes, right? Tilted a little bit more so the pinky toe
isn't too too small. Okay, so let's say
that that's our toes. He's a good look at our toes. We validated the boxes. Oh, mate, maybe we should
have made them smaller, made them softer. Should
I have done that? Oh, we're too late
at this point in time. We've done too much. So let's take smooth. And let's take the big toe, and let's just smooth this. We're gonna smooth
out this big toe. And we're gonna do the same thing we did
with the fingers, make it see bit wider. Well, let's go back
to this toe, please. And so this part of it, I'm
going to stretch it into the foot while still making
it a little bit thinner. Remember we did that
with the fingers, we kind of made the
part where it comes into contact a little bit thinner. I think
that makes sense. Push this down a little bit. Curl this part up a little bit, maybe pull it out some. Boom. That can be a big toe. Could make it a
little bit more round if you want, pull
out in the middle. Okay, so now these toes, it looks I know
it seems strange. But let's do it this
way. Let's take split. Now let's just do
let's do Lasso. I don't know if that's
going to work actually. We're going to make it work. Maybe we can use rectangle. So I'm going to put it sort of perpendicular to the screen, and then we can
just use rectangle, and let's just make some toes. So here's one toe. We want to make sure
we get the whole box. So maybe that's one toe
there. Then we go here. How many toes do we need? How many toes do we need? That might be too big of a toe. You can make another toe here. We'll make it a little smaller. And then this Make sure. Oh, did I go far far
enough? Oh, I did. And then this one we can
make two toes, I think. So now we have two toes, and I think that
might work for us. So I'm going to go
and smooth each one. Especially the back. And then I'm going
to go in with move, and I'm going to
do the same thing. I'm going to fast forward,
but I'm just going to try to move all
of these toes, try to make them the
same shape of this, press down the base, and just make the front
round more round. Again, they don't have to
be super, super perfect. Maybe I'll make them a little
bit rounder in some spots. Maybe we'll just do inflate. Can smooth it a little
bit to shrink it. Okay, so the next thing you
want to do is just make sure that the angle of the
foot and everything is, like, how you want it. I like it a little
bit of wider stance with the toes kind
of pointed inwards. Okay, so once you have your
toes where you want them, you can add in
some like inflate. I just added these to be, like, the ankle bones. I just use inflate to kind
of add them in there. It's nice to just
do inflate and just make some areas for
that on the foot. I'm also noticing the back
of my foot looks weird. So let me just get this
looking a little more normal. I think I'm going to vax remish the toes and the foot together. So let's take the
foot and the toes, and let's see what happens if
we axle remish around 250. Let's try around 300. Well, that's not
too bad. So let's take the leg and
let's validate it. Let me close this box. So we'll validate the leg. And let's go to Multi res. So we'll go here where voxel is, but we'll go to Multi res, let's subdivide it twice. And then let's take these two, and let's voxel remesh
them together at 2:50. Let's try 250. So we're vox remshing the
leg and the foot. They are meshing together, but I'm not too worried
about that for the foot. So let's smooth out this foot. I'm gonna try to go a little bit gentle
with the smoothing. I'll try to keep it towards
the base of the toes. I'll go over it a
little bit soft. Go over the toes a tiny bit, but I want to try to keep
all the detail that we can in the foot. I
think that looks good. And now we can take
this, which is the leg. So let's just rename it leg. And then let's add a mirror, and we just clone it
to the other side. Okay. Her stance looks a little wide, so
I'm gonna take move. And it looks like I just need to push pull that in a little bit. I'm gonna pull from
the calves out. Okay, I think that
looks pretty good. Adjust the feet and stuff with move. I like the way that looks. I like it. The
13. Arm & Waist Bands: Okay, so let's make
these little bands. So I'll show you how to
make one or two of them, and then you can add as much
as you want or not add them. So I think it'll be easiest
to let's go to the arm, and let's go to scene and
let's add a cylinder. You could also use Tauruses, but I'm not sure about Tauruses. You think I like a
cylinder better for, like, kind of straps. So we're just going to line this cylinder up with the arm. Let's make sure let's
turn off a line, then we can just shrink it and we'll do
something like this. We just need to bring it
around the whole arm. I think that looks good. We can actually make this softer. Let's tap the three dots, post subdivision to two, and then we bring this down. Let's try making this
really, really small. So we'll try leaving it at 18. Post subdivision is two
let's leave this at 18. So now I'm just
going to adjust it a little bit more so that it's going around her Okay. I like that. So I might make
one that's a bit loose. So we're going to
have this one which I might decide to make loose. I can use whole. The
other ones, I don't know. I think I might just keep them. I don't think I'm
going to do them spaced the same way either. So let's clone this
and move it up. Let's make sure that
we keep everything. Let's name this one band wrist let's take this one and maybe we'll make it
a little smaller. Honestly, now I'm going to validate this and then
I'm just going to use move and I'm going
to move this up the arm and just
adjust it as needed. I'll clone. Maybe
I'll move it up, maybe one is a bit thinner, and then maybe one maybe
it's tilted a bit. Can make it a little
bit bigger maybe. Actually, no, let's not make
it a little bit bigger. Let's make this smaller too. So let's say this
one is like this. Then I'll just use move and
I'll just make sure that it's around the arm
for the most part. Okay, I'll clone this one. Maybe I'll have another one
here that's really thin. I probably should have
did. Let's delete this. Let's use this one.
Let's clone it. Let's move it up and let's make it bigger
and let's do whole. We'll make a few that actually have the hole in the middle. Okay. Let's let's make it a little bit thicker and maybe we want
to turn smooth shading off. Let's try that. And let's see if we bring the
division X down. Let's bring linear subdivision. I want to get it more squared. Yeah, I like that a little
bit better, I think. All I did was I did the
linear subdivision. That really helped me. I really helped to
get it looking a lot more squarish, which I like. I'll bring the
division X up to 29. I have post subdivision at two, linear subdivision at one, and division X at 29. I can probably bring that
down a bit to 25 or so. I'm going to do I
want to validate it? Let's keep this one and
then let's clone it. Let's move the clone
up and now we can kind of validate this one and then we can just sort
of make it however we want. Maybe we'll make it a little
thinner and we'll use move to give it a little
bit of weight. I kind of like that.
Maybe we'll take this one and maybe we'll move it up. C, maybe we'll add
another one up here. Kind of like that.
I think I like it. So let's validate. Let's take this
one and validate. And then we'll just
use MOV to make them a little more snug. Choose one of them to
be on the outside. I guess it's gonna be that one. Okay. This looks pretty good. I want to make sure it's not
going in the arm too much, but I think that
looks pretty good. All these repaint all these
wristbands look great. This one I want to do
whole I'll validate. I want to kind of make
it hanging a little bit, which means that we have to
adjust this one as well. But I'm okay with it. Hey, the rest of it
looks pretty good. I don't think there's
any space there. Okay, so all the
wrist bands are on. So how do we want to do this? Let's take one, and let's
just nestle them all. And now is, again, a
good time to go in. If you have quad
measure and you want to make these nice and
small, you can do that. I'm just going to turn
symmetry off for these. These are all pretty small. We'll have these. Okay. So now I'll take all
of these and add a mirror. Okay, so you can choose to
do it this way or you can do kind of differences. Okay, so that's one way to
do it. I'm going to undo. And now, let's say we
want to take this clone. So then let's go to each one. We'll go to the
symmetry and we'll go to flip Object, boom. Ooh, let's make sure we did. Oh, yeah, we did. So
we cloned all of them, so now we can just go
down the line and flip each of these Okay, good. So now we have one,
two, three, four, five, six, one, two, three, four, five, six. The beautiful thing about
this is they're separate now. Let's turn. Let's go to move.
So they're separate now. So now if you want to
adjust some of these, just so they're not
matching completely, you can do that pretty easily. Maybe we want to take
this one and clone it. Let's go to the Gizmo and
clone and maybe move it up. Something like that. You can take move and kind of move these
around a little bit. Okay, so at least they look
a little bit different. Can maybe clone another one. Use move and just kind of, like, put a little further
up on the arm so it looks like it just
has a different vibe. So now they don't look. She doesn't look
exactly symmetrical. Okay, so let's do
the little strap. We're gonna do the same way
we did the little bracelets. So let's add cylinder, also, make sure you're saving. So we added a
cylinder. We'll use the gizmo. We'll bring it up. Shrink to around there. And I actually I don't know
if I want to make this thicker and more like,
where the waist is. You can always do
whatever you want. Don't forget that. So
I'm gonna shrink it. I don't know if X ray
will help a little bit. Shrink it like
that. So obviously, the bottom part
needs to be wider, so we'll tap the little
cylinder. We'll make this wide. Top part looks pretty good. We can do whole, but I don't think that we
need to for this. I want to give it. Maybe I want to
leave it how it is. I might just leave it how it is. Let's hit Validate. Let's turn Xray off. There's this or
we can move it up to more where the
waste would be. I was thinking maybe we
might even add two of them. Maybe something like that. Might be cool. Okay, so I like the
way this looks. Now I'm just going to
use move to adjust it. I don't want symmetry, so I'm going to keep that off. But I just want to adjust
it so that it's nothing is going through where it
shouldn't be all that jazz. Okay, this one
looks pretty good. It just Oh, both of these
need to go in at the back. Look, symmetry is on, and this one turn that off. We'll move that in there and then just make this
small and make sure that the back the bottom part
is above the dress. Okay. That looks good. And I just want
to make sure that it's nice and thin going across. You don't want it
to be really thick. Like that looks kind
of weird, you know? So any spot where it's
looks unrealistic, then got to get rid of it. See, right here, even that all looks really weird.
That looks better. It looks good. It all
looks pretty close. So we have these
little plants as well. I think we'll add those
next. Let's save.
14. Leaf & Rock Props: Here's another little neat
trick with the layer tool. Let's go to layer, and
let's go to the leg. Now I have my radius
around 68 or so. The intensity is down to 15. So again, we're using
layer on the leg, and let's just go in
a circular motion and that will just
give some knees. I'll take smooth and
smooth them out. And now you have some
semblance of knees. I love it. I can't get enough. Okay,
so these little rocks, those let's just add spheres. Well, let's rename this
while I'm here, legs. We'll rename the legs. And let's go down to
where the floor is. What is this mirror? Oh, that's the earrings. Got to keep everything.
This is the upper lip. Try to keep things together. We want it to be
above the floor. We'll just leave
it here for now. Let's add a sphere and
let's rename this rock. Let's move it down till
it's above the floor. Now we can just shrink it
Okay, maybe around there. Let's make this a
little bit bigger. Might have to turn the grid
on and just flatten it. When I write at that
a little red line. Perfect. So let's take this. I'm gonna turn the grid off. And let's just validate
it and let's trim it. So we'll take trim, and
we'll go like that. So for rocks, usually, I like to use flatten. I've never really used
this planar thing, but that might actually
work well for this. I'm not too sure how
to really use it, but it makes good, like sections like that, so that might actually come
in handy for the rock. Otherwise, you can just
use the flatten tool. Which also works quite well. I'm just going to
flatten out all these really sharp parts. But notice how it just kind of starts to look like a rock. I think the plan R tool
looks pretty good. I'm going to turn the intensity down and make some divots in it, and then maybe just use flatten
flatten them out. Smooth. I think that's a
pretty good rock, to be honest with you.
It's a pretty good rock. Can clone it, can move it over here,
maybe make it smaller, maybe flatten it, rotate it a little bit to give a little
bit of a different vibe. Let's do a line
and move it over. So now we got two rocks. You can clone it again, maybe, put one back here, stretch it out, rotate it a little bit. Stretch it out a little bit. So just like that, you have another some
more rock formations. And you can just always add
more little pieces to it. I still don't know the
proper way to use this tool, but sometimes you just
got to do what you can. Those are good for
rocks, I think. Now we have these cool plants, which I'm definitely
going to use again in other
videos and things. In order to make
something like that, let's do it the same
way we made these. Let's add a cylinder. We use the Gizmo. We'll do Snap. You can do 45. You just
have to do it twice. Okay, we'll go like this. And I think that's pretty good. If I'm honest. We'll validate. We'll use move, and we
want to do Y, I think. Let's go to symmetry and
let's go local so we can see exactly
what we're getting. Now we just need to
make that shape, which seems to be like this. But the top is a little sharper. It's kind of like that, right? Make it a little thinner.
Top is still a little sharp. Yeah, that's a
little bit better. Okay, that looks decent. Okay, so I think that
looks pretty good. And we'll make two, one
kind of like this regular, and then we'll put
the little chop in. So I like the way this looks. Let's Let's smooth it. Let's voxel remsh it first. Let's voxel re mesh
it at like 150, just to kind of solidify it a bit and then let's smooth it. That looks nice. I'm
going to clone this. Let's name it leaf
this will be leaf B. This will be leaf A. Okay, so we probably could
have so let's take Life Leif. And let's turn off Y. And we can go back to world. Let's take move. And of course, we want to give
them a nice bend, so I'm just gonna
bend this forward. I'll make move really big and then just kind of
give it a nice bend. Beautiful. I want to do the same thing with leaf B. I'm going to go back in here, world, turn Y off, move, and then just
give it a nice bend. Oh, and again, I hear
something in the backyard. Well, there it is. Okay, so now this one
has a little bend in it, and we can take a
chunk out of it. So let's do trim with lasso. And let's try to take a chunk out of this. It might not work. Okay, so it did that. So first, let's turn symmetry off. Let's take fill and
just do legacy. Now let's try it. Okay.
Beautiful. Let's see if we can get it
a little sharper. That's nice. Now
that I've done that, I'm just going to put
this back to fill. That's what I had
it on. I'm going to voxel remesh
this at 1:50 again, and then I'm going
to smooth this. Looks great. Now I want to take crease. Okay? Symmetry's off. I'm actually going to
turn the line off. So I'm gonna go to symmetry
and just turn that off. And I want to make a
line down the middle. Okay, so leaf B
has the cut in it. So let's move that up.
Let's take the other leaf. Let's clone this. Let's
make this one leaf C. So this is just gonna be plain. I'll make this
small. And Leaf A, let's also put a crease in. Crease can solo it. I can turn symmetry off, and we'll just put
a nice crease. I think that's it. Okay, so I'm going to undo solo. So now we have three
different kinds of leafies. Alright, so let's move this. Let's start getting these
background together. We'll shrink this. Bring it
down to maybe around here. Let's take it off snap. Let's make it a little thinner.
Okay, that looks good. We need another regular. We can use a regular one. Let's do one of these.
Let's clonee this. Let's put this back there. I want these to be right behind her leg or right by her leg. Let's move the rock back. Okay, this is nice and small. We'll rotate it. Get
these out of the way. Okay, great. Let's take this. Oh, I don't think I have
one the opposite way. We'll just use one of these. Move all these into position
a little bit better. I might even take
move and just kind of continue to adjust this to make it a little
more exciting. Like so. And then I'll clone
and make another one down here. Okay, that's good. I'm gonna take trim, and I might even I like the little
bites taken out, so I'm gonna put
this back to legacy, and I'll try to take the
bite out and then smooth it. Because why not? And that's pretty
much how I'm gonna do these other pieces. So you can do this
at your own pace, but I'll fast forward through
that because, you know, we're just gonna do a
little matchy matchy. A
15. Funky Floor & More Bands: Okay, so one other
quick thing I want to do with the floor. I'm just going to bring
the grid back real quick. I just want to add we have a lot of leaves
here, a lot of leaves. I want to add a cylinder. I want to use gizmo, and I
want to make the floor out of maybe cylinders
instead of this square. So I add this cylinder. Let's hide this
floor and go back to the cylinder three dots
post subdivision to two, and I'm going to
bring this down to maybe 18, I think is decent. I think that's not bad. I'm going to validate that. I'm going to use quadri measure. You can use decimate
if you want, but I just want to kind make
it a little bit smaller. Then I'm going to clone it I just want to make it a
little more interesting. That's literally
all I'm doing is I just want to make it more
interesting, a shape. Let's call on this one. Maybe I'll put it back here. These are easy.
I'm just going to adjust these and make sure that they're on the on the rock here. I'm just going to nestle these. Should nestle this too. I'm just nestling them, you just put them along press them and bring them underneath.
That'll just make it easier. So when I move it forward,
they're all together. That's more It's a little nicer. I can do it again and maybe just fill this
little space here. Okay. I'll take all these
cylinders and just join them, and that'll be the new floor. All right. Let's save. So I'm going to go ahead
and add some of these the same little cylinder rings. I'm going to add some
around her foot. So kind of like she has
some little foot bracelets. Okay. Everything looks nice. Okay, so let's do a
little bit of cleanup before we colour the character. The first thing we
need to do is take the headband and
let's put on Xray. We need to trim the bits
that we don't need anymore. So we'll take trim
with rectangle, and I think we can probably trim where it comes into the
ears. So let's trim that. Make sure you take a look
at it and just make sure that it looks good.
Everything looks good to me. So I think that's
a successful trim. There is a piece here, which is kind of interesting. I think we could take split, and we could use lasso, so we can do
something like this, where we actually split that, and then we'd have Tavoxl
remesh both sides. So that they don't look weird. Otherwise, they look real weird. We've axle re meshed both sides and we can
smooth both sides. Let's try Quad remeasure
for both of these. Put on the wire frame so you
can see a little bitter. Let's try for this one as well. Now they're the same size. We just need to manually move them back so they're
making contact. Okay, so now they look
like there's still one piece. I like that. We can probably take
both these headbands and just put them together. For the ears, I
might want to put a little something in there.
They look a little empty. I might use the layer tool. Bring the intensity
up a little bit. Maybe I'll just add a little, I wanted to use a
layer, not inflate. We'll use layer and add a little something
there for the ears. Let's just do a test
smooth. Looks okay. Let's take the ears
and voxel remesh them. This is going to solidify
the shapes a little bit. Let's do 160. That should solidify
the ears a bit. As for the face, we
want to join the face, the ears, the neck, and maybe the nose and the lip. I get a little tricky. Let's take the nose and we need to make everything a little
bit higher resolution. Let's go here, multi res
and let's subdivide it. Let's take the lip and
let's subdivide it. Honestly, let's just see
how this looks first. We'll take the head, the neck. Now we have to find the nose
and the lip and the ears. Okay. Let's do this. Let's take the
ear and just bring it up. Let's get the nose.
Let's tap on it. The nose will bring it up. I like to call this
housekeeping. Let's get the lip. I probably should bring
all the face stuff up, but this is good for now. So let's take the
ears and validate. So now both ears are one piece. So we have all of these, which we need to validate
together or Fox will remesh. So let's do a quick save
before you do any big action. We'll go here, and then
we'll put the resolution to let's do 300 and
see what happens. I'm gonna do it down here. And let's just go for it. Wow, that looks nice. Symmetry is on. Let's do smooth. Let's start over here.
Hopefully, we can get this ear nice and smoothed out. It looks nice and natural.
Loving it so far. The nose, we want to
make sure we keep as much of this detail as we can. So very gingerly, I'm
smoothing the edges. The lip, I'm going
to smooth the edge there and maybe we want
to do a bottom lip too. So we might want to do inflate And we can use inflate
for a nice bottom lip. I think that looks great. In smooth out these
cheeks a little bit. Make sure everything looks good. You can smooth out
this bottom lip. Everything looks really nice. If you wind up smoothing out, I do like everything
to look really smooth. So if you wind up smoothing
out the upper lip, you can use something like
pinch, where is it pinch? Then you can do
pinch to really get a nice crisp upper lip. It looks even better
than before. I love it. I don't know about
you, but I love it. You can also use pinch
on other parts like the nose to get that
really clean look there. I feel like I need
to smooth right underneath the nose
a little bit more. You can also use
drag if you need to, you know, adjust any
of these things. Drag is a great tool for that,
but everything looks good. You can also take
crease, for example, the ear here if you want
to make some more detail, maybe make it a little
bit thicker like that. Maybe you want to
make the ear come off like that so you can
do some more detail. Okay, beautiful. The
earrings look good. Move them down and make
them a little smaller, I think. Are these separate? Oh, they're together. Move them down a little bit.
I think that works. I think that works. Let's
take the earrings and let's validate the earrings. Then we have all this hair
too, which looks good. For now, I'm just going
to nestle it all. This is the hair sides. Let's validate the hair sides. Okay. This is more
hair. Okay? More hair. That looks good. I'm just
gonna leave it for now. This is hair. More more hair. More hair. What is this? Oh, this is the
hair on the head. We'll call it hair bowl. So that's the bowl that's
kind of sitting on top. Here's the hair pins. These are the brows.
Let's go ahead and validate the brows. Headband. This is
more hair here. I'm going to go ahead and nestle all of these little
hair thingies, by long impress on
them for a second, and they kind of
nestle hair fronts. I know this part
is a bit boring, but it's really nice to have everything as
organized as possible. Nestle the rocks, earrings, spring the earrings
up to the head. So the upper lip
is now the head. Earrings closed. What
is the cylinder? These are the waistbands. These are the arms. I like to save periodically
because I know I'd be set. I know I'd be upset I do all
this and then it crashes. Okay, I'm going to
try to nestle these, but it's hard to
know which is which. These can be together. I think they should go to
this leaf? Yeah. That's nice. Let's find these
little things over here. Let's just put them together. Now all of those are together. Okay. Okay. So now I think we
can just color this, light it, and then color it.
16. Lighting & Coloring: Okay, so let's light it. I want to find a nice
spot in the middle. I think that looks
pretty middlish. I'm gonna tap here and add view. So this little camera and add
view just adds this view, and I'll just name this one
by tapping the little pencil. I'd like to save
another one. I'm going to turn the reference image off, so you just tap this
little picture icon. I'm going to turn that off. And then I'm going
to add another one. This is going to be two. Okay, so this way, if you move it around and
you want to go back, you can just go back
to where you want it. So I'm going to turn process
on this little shutter. I'm going to put
the quality up, I'm going to turn post process on. I like reflection and I
like global illumination. I like ambient occlusion. I'm going to put the curve
bias up to around there. You can adjust these
to wherever you like. I think that's pretty much it. Litch Let's go to the little sun and switch
from MATCAp to it PBR. Okay. I should be bright. So now let's take
all of these things. We can get rid of that
floor, the old floor. Let's take all of these things. It's a lot. So we'll take all these and
I want to change it to something neutral. So I'm gonna tap here, and I would just change
it to some sort of neutral color like this. Maybe right around
there. Okay? So we have it kind of a neutral color. Now let's go to the little sun again and turn off
the environment. So I'm going to turn that off, and then we'll turn on our
first light and you really get a sense of what it looks
like. Why is this white? How did I miss? I must
have missed one of them. Okay, let's go back to our view. Okay, so back to the lights. So we have our first light here. I'm going to rename it
key. Here's some options. I'm going to put
this on I'm going to put this up to maybe a little bit above 22.3 or so. And let's clone this and
let's name this one. Edge. Okay, so we
still have a line, so I'm just going to move this one and actually should have moved the other
one, but that's okay. Let's go back to the key. Let's just move
it here and here. As wherever this white arrow is pointing is where
the light goes. So as long as you
don't rotate it, that's the only thing that
will change the light. So I'm going to
undo because I like the way it's hitting
hitting her right now. So let's go back to edge. So this one we need
to rotate until we get a nice clean line on the left side
right on the edge. Just like that. Let's
bring this up to five. So that's the edge
lighting or rim lighting. It's beautiful. And I don't
even know if I want to. Let's add another light. Let's just name it
Let's name it R two. I'm just gonna stick
to what I always do. So R two, we're going
to move this over here. We'll rotate it.
This is going to be another light coming
in on this side. So maybe right there. And now let's add a last light. Let's rename it D two. Okay. And I think I want to
do this one on the top. Let's change it from a
directional to a spotlight. Yeah, this already looks
more fun. We'll move it up. Kind of getting that nice,
like, overhead view. I think that looks
great. Turn it up some. Okay, let's go back to our
view now. That looks cool. So let's go back to this little sun icon and
turn on the environment, and let's just
dial it down some. So we still get some
nice shadows there. Beautiful. Now we can go
back into post process and really see if there's
anything that you want to change with the ambient
occlusion and things like that. Sometimes it just
doesn't want to work for me. I'm not sure why. I don't know what that's about. I'm going to bring the size up, so it's a little
darker. I like it. So there's tone mapping, which you can play around with. Sometimes I like to up
the saturation a bit. Up the contrast a little bit. I think it thinks it
looks more pretty. And that's pretty much it. Everything else is
just by default. I think it's fine. Okay. So now we have the lighting. I
think it looks great. I'm gonna give it a quick save. Another little detail.
Let's go into this and turn post process off. Some other little details
that I just wanted to try out on the face with crease
with symmetry on. If you wanted to add
a little something to the lips, it could go like this. Let's do a little lower. Maybe a little bit
of a smooth there. But just to give the
lips a little something extra if you so choose. Look at those cheeks. I might have went overboard with the cheeks, not gonna lie. But that's how it is. That's
how it's going to be. I'm going to turn
post process back on. You can leave yours off if you like. So this is looking good. I think we just need to
give her some color now. Okay, so make sure you save. I just saved as and
I added a new one. So now I have Azi and As CLR. So this is just the
one moving forward. I'm just going to color it. I'm actually going
to save this image. You can go here,
go to the folder, go down to screen, and I'm just going to
save this for now. The only other thing
that I want to do is go through and just make sure everything is optimized
as much as possible, meaning, save Quad
remeasure or decimate. Also changing a lot of these. These are really
high. These leaves are 18.9 K that's way too high. I'm going to go through
and do Quadremsure and really bring
this size down some. Now we have post processes on. So now let's do some
quick coloring. She's going to be red
kind a reddish color. If you want it to be that color, she can always be whatever
color. So we'll go here. It's like a I think that's good for
now. I'll paint it. And her arms are kind
of, like, more brown. They're almost like she has
face paint on or something. And I think that's kind
of like that seems kind of cool if that's the case. She's a bit reddish roughness up a little bit, so
we'll paint that. We can always change it. The legs, the legs separate. Oh. Let's take the legs and let's
paint them the same color. The dress, let's do like an
orangy yeah, that's perfect. A nice bright orange. Beautiful. These thingies, I think we can take the necklace and I'm just going to
validate it. What the heck? Take both these
necklaces and validate them and we'll color
them the same color, which is white but
maybe a little warmish. Maybe right there. Maybe we'll lower the roughness a bit so they're a
little more shiny. We'll paint that. Earrings are a nice gold. Oh, I love that. You know, I get weird.
I get, so excited. Let's take the eye whites, and we'll just validate them. All these lashes, we
can validate as well. So eye whites.
These can be white. I'll just put the
roughness up for now. I'm not sure what I want
to do with them, actually. So now the eyelashes, those are gonna be black
with the roughness up. We don't want too much light
bouncing around with them. These are this beautiful the brows are this
beautiful blue. I like, it's a little darker. Maybe a little more into
the green spectrum. Like so. I like that. The hair is probably similar. Oh, we need to get all
this hair together. Let's just get all this hair. I think we want a similar color, but maybe a little more, something like that, I
think, we'll paint that. Cylinder split.
So we want these. These are even lighter color. Beautiful, bright. Paint those. These bits, let's
just join these. Let's take these
two and join them. We'll take these and
let's make those. They're a similar red
to the face. Okay. The headband is the same. All right. Let's paint that. Let's get all these
nice bands, wristbands. I think these are
more. These are the foot bands, more wristbands. These we can make
kind of beiges, like, a dark brownish
or beiges color. Okay, kind of like that. So that's going to be the color. The waistbands, I kind of
like the blue. Of the hair. All these leaves. These are going to be
similar to the hair, but they're going
to be more green. A roughness down a
little bit. I like it. The rocks, these can
all be the same color. The reason I keep touching
is so that panel goes away. I mean, these are gonna be gray. That's a beautiful gray. I did get that
excited over a gray. We have the whole floor. So maybe we want that just to be a little bit more orange. I like it. And, um, Oh, so we do want
to paint, as well. So let's do some painting. So let's take Let's
hide the floor. And I think I just want to
show some last minute details, and then we can just
export our final image.
17. Detailing: Okay, so the last detail
that I wanted to do, let's take the clothes, the top, and let's see how
paint looks on top of it. So I'm going to take a
similar color to the hair, maybe a little bit brighter. I'm going to go to the
layer and add a new layer. So this is going to
be blue details. So the layer panel is here. If you hit the add layer and then the pencil,
you can just rename it. So this is the base layer
that's orange, and whoops. And this is the details. So with paint, you
can paint here, you can see that it's
not very detailed. So there's a few
things we could do. We could go to here and do dynamic
topology, turn that on. So once that's on, we should be able to get a little
bit more detail. It's going close. And that
might be our best bet. Wow, I shot up to 60 something
already. That was crazy. Okay. Okay, I'm gonna turn
dynamic topology off because usually you can get away with some clean lines as long as it's
around the same area. Even eras, sometimes
you can go in and kind of clean it up with eras. Oh, no. Looks like I have to go and
fix this up completely. I need to turn symmetry off. Okay. I'm gonna turn it
off, and erase. I must turn symmetry back on. Alright, beautiful. I'm going to turn
post process back on. I know we need to paint
the face as well. So I'm going to get maybe
the same color as the hair, maybe a little bit brighter. And let's see what it looks like without dynamic topology. Let's add a new layer. Let's go to the face. Add a new layer. This
will be face paint. Oh, I'm going to race. Okay, that looks pretty good. Okay, so let's kind of work out. Let's turn post process off. Firstly, Okay, I think that looks right. I don't think it needs to
go all the way to the neck. So let's see how this
looks. I'll fill this in. That looks pretty cute. Let's take a look
from the front view. The only thing is, it
looks a little round here. I really want it to be nice
and sharp of an angle. I love the way that looks. I kind of like it. Maybe on her arm, her
arms together, they are. Let's turn symmetry off. Maybe I just want to give
her a nice swirl on the arm. I'm the Oh, I need to do
dynamic topology again, I'll turn that on. Okay, I like it. Maybe I want to give her
something on the other arm. Let's take the
color of the skin. Let's make it darker, maybe with some
green undertones, like a tattoo. It's solo. Let's give her let's give
her some lines here. This was a tattoo that
I almost got, actually. The one I did get was similar, but Oh, what happened
to the floor ground. We'll bring that
back in. Looks like the toes are kind of
popping up a little bit. So let's just fix
that with move. I feel like she needs
a little toe ring. Gonna go to the legs and
validate them. Is that a torus. We'll do a torus. Shrink Okay. I think that works. I don't really think we need
too much more, to be honest. I'm taken off of a line and maybe it'll just
stretch it out, make it a little more visible. I'm going to lower the
division X, make it small, validate it, and then
I'll take move and maybe just adjust it a smidge. Then as far as paint,
I'm just going to grab the earrings and we'll
paint it the same color. All right let's save. Let's
turn post process back on. That looks wonderful. Let's
go to the view number two. It looks amazing.
The other thing I want to do is I
like the lighting. Each one of these
directional lights. I'm just going to press
the little options and change from fixed to camera. And there isn't one
for the spotlight, so we'll just leave
that as it is. Now I'm going to save again. Now you can export,
just go here. You can export settings are down here, you
can just do screen. You can do transparent
background if you want, and then just put Export PNG. If you want to do a turn table, you can press the
little nomad icon here. I'm on an iPad, so I'm going to start my screen recording, and then you can just hit Turn table I'll make it a little bit bigger,
and there we go. I think this was
such a fun sculpt, such a fun character. And if you just think
of things as shapes, and if you just stick
to it and spend the long hours working out
whatever you need to work out, you can make some
really amazing stuff.
18. Blender Prep: Alright, so the next
thing you want to do is bring her over into blender, and we can just do
some simple renders. They're gonna look really cool. She's gonna look
really, really great. So you might have noticed that
she looks a bit different. So the first thing, I
added eyes. Really simple. I just added spheres, and I
just moved them to the eye. So you might want
to flatten them up. And just remember to place them sort of on towards each other, so it'll look like
she's looking straight. You never want eyes
to be right in the middle of the white
parts in the eyes. You want them to be sort of
inward towards each other. The next thing is,
I took the face and the body, and I
just joined them. So those are all one piece. And then, obviously, I
changed the background. I made it this orange.
So that's just obviously changing the
background here. That's easy. Okay, so another thing I did
was I went in with paint, and I kind of did some
manual ambient occlusion. So what that means Whoops. What that means is I went in
and I added, like, shadows. Kind of around all
these different parts. And I added a little bit of red to the tips of the
fingers to the elbows, if you can see, I added some red there and
then smoothed it out. So I just added a little
bit of extra color, a little bit of extra details. I went in with here with crease and then I grab
so I grab this color, and I make it a
little bit darker. And I'm using crease, I make
sure stroke painting is on. So that way when I'm using
crease, it does that. So I kind of did that over these just to give them a
little bit of grit. And you can see here, I added a little bit
of darker blue. In the hair, I added some dark smooth out some
dark color there. So I always do that
to my sculpts. In the grid, I made sure that she's pretty much lined up with this red line
because that's going to be the floor when I
bring it over into blender, that's going to be
the ground level. Okay, so I'm just making
sure that there's no layers. If there is a layer, then you'll see a little green or a little purple. So
let's get rid of those. So make sure there's no layers. I'm going to go ahead
and delete the cameras and delete the lights because
we don't really need them. You don't need post process to be on. Make sure that's off. And next, go through
with the Gizmo. So just go through and make
sure that they're all baked. So I've already done
this, but just go through each one and make
sure that it's baked. If it's not baked, bake it. If you don't do that, then sometimes when you bring
it over into blender and you'll get nomad unskew I
don't know really what it is, but it's really annoying, and I don't know how to
fix it in blender. So just go through and make
sure everything is baked. Next, you can export
GLTF right here. A, so just export that. You can save it and transfer
it over to your computer. What I'm going to do is I
always airdrop it to my Mac, and then I have my PC connected to my
MAC, so I'll do that. But you want to get that file over to Blender, the GLTFFle. All right, so let's hop
over to the computer and import this sculpt into blender. So by now, you should
have transferred your GLTFFle to your
PC that has blender. So let's go ahead
and open Blender. We're going to open
up Light Bright, So Light Bright is a preset
background that you can use, and it'll be easier than setting up everything
from scratch. So we're going to go
file open for you. I'm just going to open
recent and Light Bright. Okay, so the way I have
it set up in Blender, here I have my animation tab, and I like to have
these two windows open. So I'm not sure exactly how it's going to
open up for you. It might open up
something like this. If it just opens up with
one window in layout, then what you want to
do is go over here to the little cross hairs
and just drag this over. So then you can
have two windows. On the left side, just
hit Z and hit Render. And on this side, if you hit
Z, it should be in solid. The reason I do this
is so on one side, I can see the rendered
version of what I'm doing, and on the other
side, I can just see a solid version that's
easier to work in. And I think we can turn some of these options off up here. Because we don't
really need to see all that stuff on this side. So this is just for the
render. This is your camera. So this is a light. This
is the backdrop floor. This is the backdrop back. This is an empty. This
is what we're going to use to do a turntable. This is the focus ring. So this is where the
camera is going to focus, and here's another light here. Okay, so let's import our file. So we're going to go
I'm going to go back to animation because I pretty
much have it the same. So let's go to
File Import, GLTF. Okay. And I have mine in
the downloads with a Z. So we're just going to import. All right. There we go. So
now I'm gonna zoom in here. And sometimes it'll start
zooming really slow, so I'm going to hit, that'll
kind of speed it up. Okay, so right now,
everything is selected. So if you look over
here on the right, this is all your
this is everything that's in this project, and this is everything
that we just brought in. So what we want to do is
shrink this to a smaller size. So let's just hit S, and then
we're just going to shrink. To a smaller size. And the reason I do that
is because I believe the default size and blender
is almost a full human size, so it doesn't have
to be that big. So now I'm just using the
arrows and moving it up. So here's some tools here. I'm just using this one, and you can just move it anywhere
you want it to go. So I'm going to hit
zero on the keyboard. That brings me to
the camera view. And you can see she's
way too far away. So let's go up here to camera. And let's pull out
on the solid view. You can see our camera here. And down here there's
camera settings. So just look for this little
camera and let's scale in. I do really love a nice
orthographic view. So over here, I'm going
to hit Z and rendered, so we're seeing
the rendered view. Okay, so make sure that in this little camera
that you're in cycles. Back it up a little bit. And she's pretty much in focus because we don't have
any depth of field. So let's do that really quick. So now we're back in
the camera options. Let's scroll down to depth
of field, focus on object, tap this little Tingy Mbab and then we're going
to go to the focus ring dropper, eye dropper. And now focus on
object is focus ring. So that's exactly what we want. So now we're going to
go to the focus ring. And literally, you can just put this wherever you want it, and that's what's
going to be in focus. I'm going to hit S
to size it down. I'm going to hit three so I
can look at the side view. Oh, I'm I'm in perspective. Okay, so I'm looking
at the side view now, and I just want to
put it where the eyes are you want the
eyes to be in focus. So that's the main focus. So now I'm going to go back to the camera and go back
down to the depth of field options for the aperture for FSTop, we're going
to move this up. And as you move it up,
you're gonna see that she's gonna become more
and more into focus. Smooth this over. Okay, I
think that looks pretty good. So I'm gonna put it on 23. She's in focus,
and the background starts to get a little
bit out of focus, but it still looks good. So the next thing I notice
is these are black, and that's probably
something about the normals, which is the surface of a mesh, sometimes they get, like,
flipped. So let's fix it. So I'm going to hit tab. So tab enters you
into Edit mode. So there's object mode. Edit mode and
object mode are the two that we're only
going to use for this. Okay, so we're
back in edit mode. Okay, so we're gonna go to mesh. So I'm gonna hit
all mesh normals, set from faces. Now
they're looking right. I'm not sure what's
up with this one, though, but that's okay. And I can also see that her arms are a little too out of focus, so I'm gonna go
back to the camera, and I just want the arms to be a little bit more in focus. It's kind of
egregious. Like, it's kind of a very high
number for an FSTop, but that's just
because we're using the orthographic mode. Alright, so this looks good. So the next really
important thing the eyes, I want to make the eyes
as glossy as possible. So I'm going over
here on the right, and I'm going to tap this,
which is the materials. The materials is
like the surface of all of these pieces have their
own individual materials. For example, this
is material five, but I'm going to change
that to I P one, which always is my code for
pupils. P one is pupils. So now I'm going
to go to roughness and bring that all the way down, and that way, they're
going to be really glossy. And you can do that for
some of these others, like the eye whites
are also glossy. And the skin, for example, we want that to be more
rough, more realistic. So we're going to bring
the roughness up. The hair as well,
we're going to bring the roughness up so
it's not so glossy. Same thing with the leaves. And another little
trick since I kind of bundled my leaves in
three different sections, so one, two, and three. But I'm going to
take all of those, and I'm going to hit Control
J and join them together. So now in the material tab, there's actually
three materials, so I'm just going to
erase two of them, so now there's one material, and I'm just going
to name it leaves. So now it's going to affect
all of them and not just one. So I'm going to bring
the roughness up. And also, if you checked out
my last skill share video, a lot of this stuff should
be familiar from that video. But if you have Blender kit, then you can do really cool
things like, for example, these rocks, we're going to
go to Blender Kit materials. And then right up here, let's
hit this little eyeball. Let's just look up rock. So now we have some rocks. So let's try this one. Zoom in. It looks pretty
good. So you have all these different options that you can try out for rocks. I like that. And also
the floor, the ground, you can leave like that,
or you can look for something like mud or earth. So then you have something
a little more earthy. So there's lots of
options with Blender kit. Blender kit's really fun.
I think I want to do, like, a clay floor. I really like that color, but let's try clay,
that's kind of beautiful. So one of the more tedious
things I'm not going to do all of, but you
can go into this. If you have blender kit, you can look for a gold that'll
work for example, the earrings, or you can, of course, just go
to your materials. And for the base color is here. If you wanted to change
the color of it, you would just have to go to, like, RGB, and then you
could change the base color. And you can also just
up the metallic. So that'll just bring the
metallic stylization up, which is pretty close to gold. But if you have blender
kit, then you can find a better gold, lighter color gold.
Something like that. Okay, so for the eye lashes, what I like to do is turn the roughness up
a bit and then go down to the specular and
then turn that down. So I don't really want any light shining off of these, so
that's why I do that. The eyebrows, we're just
going to go up and rough. And once again,
I'm just still in the materials the little
material thing here. And anything that
you click on is just going to go to that. Okay, I think everything else
looks pretty good for now. Okay, so there's a back wall. You might want to turn that off, that gives, like, a little
bit of a better view. I kind of like my
scenes a little bit darker, so that
makes sense for me. You'll notice there are some other lights
and stuff over here, so you can sort of play
around with those. And see if any of
those work for you. But you can click on them
and move them around, and they kind of should add a
little something something. So with lights, you just
go down here and where the camera was and where the materials was
is now a light. So then you can
change the settings, maybe, like, 50, 50 is
a little bit better. It looks like. Maybe
you want to make it a little warmer. You can
do that kind of thing. And let's maybe use
this key light. So I'm using this tool
again, the transform tool. I want to rotate it. And I want to try to get this
shining on her eyes. Okay, so you want to make sure that in
the light settings, multiple importance is on, and I'm going to go to the
spread and put that to 180. When the spread is at 180, that's when you get that
really nice round reflection in the eyes. So I'm
gonna move it up. So I'm trying to there we go. So I'm trying to
find it in her eyes. I'm gonna make it smaller. I'm gonna change the
color. I'm gonna turn the saturation down
just so it's white. There we go. That's
what I'm looking for. So I think that
looks good. And I always like to test out to see what it looks like the
before and after. I like that. So you can play
around with delight and change the shape of it, how big it is, things like
that, to whatever you like. Okay, so I really like the gray, but let's say we want to
change it to an orange. Let's go to the floor. Now, if you'll notice
the materials, you can't change anything here. So we have to open up a new window if you don't have this. You can go to animation and
see if you have this window. If you still don't have it. So let's say, for example, you're in layout and it
looks something like this, go to one of the corners
of the panels till you see the cross hair and just
open up another view, and then we can just
make it a little bit bigger and then go to whatever's
here in this section, change that to Shader Editor. I can close that. Okay, so
this is the shader editor. So this is similar to
the materials tab. It just gives you more options. It's a little more advanced, so we're not gonna
go too deep into it. Okay, so for example, the base color, maybe we want
to change that to orange. Let me, I might as well go
to my camera view here. Okay, so I'm going to
go back to animation. You can just change the base
color to orange or yellow. I think I like that color. So I want the background
to be that color as well. So I'm going to click on this
color. Click on the hex. I'll hit Control C, and then I'll tap
on the background, click here, click here, Control V, and enter that. Now they're both matched up. And let's see. If we
put it back wall, you see it's a lot brighter. Let's change this color. Let's see if we put it to just, like, a little bit of
a different color. That's kind of
interesting. And I'm going to change this to 500, okay? Let's change it to 200. Okay? You can
always change it to a different color if
you want, as well. Ooh. Look at that. Let's just do a
quick turn table. So we're gonna use this box that's already
there, this empty. So this is the
center of the box, and I want it to be
right between her feet. Actually, let's make it smaller. I'm gonna hit S, and
I'm gonna shrink it. I think that should help. And then I'm going to stretch
it with this blue one. She looks like she's right in the center, so I think
that should work. Let's just take
everything down here. So everything having
to do with her. And then, lastly, I'm going to control click on the empty box, and you'll see that everything
else is dark orange, and this is light orange,
and that's what we want. So that just means
that that's the last thing that we've selected. So now let's hit Control P, and we can set parent to Object. So now we have
everything is in this. Let's just select all
of these and then drag them into turn
table animation. Everything is in
there, but now it's all underneath this empty. So now all we have to do
is control the empty. So down here, if you
have your shader window, so what we need is a timeline. We need what looks
something like this. So now we are in the timeline
and we can set keyframes. So keyframes are
what we're going to use to animate this turntable. So, of course, this is going
to be our first keyframe. So make sure you're
in transform. If you don't see it, hopefully you see this little item here, and we want to do
the rotation and Z. That's like the
turntable rotation is Z. So just go to Z and hit I. So I enters a keyframe. So we've entered that keyframe and let's bring it all the way up to let's do like 240. So 240. And we're going
to go to the last frame. You can click here to
go to the last frame. So now we want to essentially
rotate this 360 degrees. So let's just put 360 here,
and then let's hit I. Okay, so I think this is good
enough. Let's export it.
19. Render & Turntable: Okay, so make sure that in this little camera
that you're in cycles, Okay, we're going to go down. These are my settings for
here. Max samples is 300. I do have Denis on. I have use GPU here
and here, GPU compute. My computer is much faster. The GPUs much more solid and
much more fast than the CPU. Okay, so we'll scroll down. Think I'm going to
leave motion blur off. So now if you go down
to color management, usually I change the look
to medium high contrast. Gives it a lot more
punch, and I love it. Okay, so now let's go
to this little printer. Okay, everything looks good. Let's set a place that we want
to render the turn table. So let's go here, the folder. And you can put your turntable. So it's going to essentially, it's going to export 240 frames, and that's where those
frames are going to go. So I'm going to put mine
blender box, animation link. I'm going to add a new
folder. Turn table. So we'll accept that. Okay, so now the place where the images are
going to go is set. Of course, here, you
can set the resolution. If you don't have a
really fast computer, I would maybe set this
something smaller. You can just click
here and click one of these other options just
so it's not so huge. That's going to
help if you don't have a really, really
fast computer. Another thing that's
going to help if you go back to the camera, you can set the MAX samples down to maybe like
50 or something. So you can experiment with that because that will make it
go a little bit faster. It sacrifices a little quality, but it'll make it go
a little bit faster. So yeah, and I think
that's about it. So let's export a sample image just so we can see what
we're working with. So we're going to go back
up to so we're going to go back up to render
and render Image. Alright, beautiful.
So this is our image. Well, firstly, you can save it. You can go to Image and then save. That will save your image. I'm gonna close this,
and then I'm going to go over to the rendering tab, and I'm going to open
up a new window. So I'm gonna go over here to the corner and I'm just
gonna open up a new window, and then I'm going to
change this to compositor. Okay, so you should have
these nodes in there, so you want to
turn on use nodes. And then usually you unplug
it and plug it back in, and it reads your render. So this is what we just
rendered. Hit this little arrow. There's a little hidden
arrow over there, and if you go to options, make sure your device is GPU. I'll have to rearrange that
so I add that in first. Okay, so right now
it's in fog glow, which I usually use. It's a little more subtle. If you turn the threshold down, that means so what
it's doing is it's taking the brightest
parts of the image, and it's making a
fall glow with them. So there's lots of different various levels of brightness. So the threshold will say, Okay, it's not going to do
anything unless it's over this amount of brightness. So if you put that really low, then everything becomes
bright. You know what I mean? So if you put it up higher, then it becomes less. Let's change this to bloom. It's usually a lot more easy
to explain using bloom. So let's turn the
threshold up Okay, let's see how the mix is doing. Okay, so yeah, Bloom
looks pretty good. You can see it's nice and shiny. You can see you
have these, like, nice shiny spots.
Looks beautiful. It looks great. I might want it to be a
little bit brighter, a little bit lighter. So I'm gonna go back here. I want it to be a
little bit brighter, you can go to the world. It almost looks like
the materials tab, and you can change this color. So right now it's gray, but you can make everything a
little bit lighter here. Okay, so let's render it again, so we're gonna render image.
So this should render. But this is gonna
include what we did in the composite because
we hit use nodes. So now it's gonna
render normally, and then the last step is
gonna be rendering those last minute those nodes Nice. It still looks feels
a little dark to me. Oh, I mean, back to
render, excuse me. And maybe the mix, maybe
it's just too dark. I don't want it
that dark. Okay, I like it there. Yeah, I
think it looks good. Okay. Okay, so I'm
going to save as, and you can name it
whatever you want. For some reason, I named
her Asi Skill Share. Okay? So we're going to save as. So once you have your image and you're happy with your image, then you can start
rendering your turn table. So we go to Render,
Render Animation. So then it will start
and it will render each frame in your
turn table animation. So you'll have to take
the images and bring them into whatever editing software like Final Cut Pro or premiere or some sort
of editing software. Bring the images in,
combine them all together. So it'll be like one
really long video clip of all of these images. And then you can just
change the speed of the image to I don't
know, 5,000 or 6,000%. So you increase that,
so then it's just going to play as a
continuous turntable. That's what I do
in Final Cut Pro, and I will show you that I would be doing you a
disservice if I show you how to create a
turntable without fully showing you how
to create a turntable. So let's let these render
out and we'll be back. Okay, so wherever you
specified your files to go, that's where each of your frames that we rendered in Blender
is going to wind up. So mine, I put in this folder.
This is a different one. I kind of went crazy.
So now you see one through 240 images. So I'm going to take
all of these images. I'm going to copy them,
and I'm on a Mac now, so I'm going to
use Final Cut Pro, paste these all in this project. As you can see I added
some backgrounds and, you know, a lot of fun stuff, but it's essentially
the same thing. So obviously, if you hit play, it's going to be
really, really slow. So that's not really gonna work. So here's all of our images. I'm just going to select them
all and then combine them. Okay? So now I'm just
going to speed this up. I'll do 6,000%. And you can see now
it's quite small. So now I can hit play,
and she just spins. Let's try if we tried 3,000, the animation is gonna be longer so I can
stretch this out, but it probably won't
look as smooth. Oh, it's actually not bad. It feels a little more choppy, but that still feels a lot
better than the fast one. Okay, so now we have that. I'm just gonna export it. And then I just hit next,
and it's going to export, but I don't have to 'cause I
already have the file here, except it's too fast.
It's way too fast. So now you have a
proper turn table. You have proper images, and also don't forget
that these images, each one each one of
these is an image. So if you wanted to
get a side view, you can just go to
your side view image, wherever that may be, and
you can grab that image, which is another
really cool thing. But just remember that these
are all kind of big, too. So once you get your
specific images, once you export the turntable, you might want to go
through and just delete these folders because they
can add up really quickly. So I'll just show you
another one that I did here. I did this one, too, but
this one is also too fast. So enough to slow that one down. Alright, so let's finish
on a couple of turntables. Great job. Can't wait
to see what you do. Here's what I did. You
know, I had to do my thing. That's the best part
about this. It's art. And once you're kind
of understanding it, and once you're
getting a little bit, then you can keep pushing
it and pushing it and pushing it
until you get more. And that's when it
becomes really exciting.
20. Outro!: The time to make your art
look as good as it can look. That's what brings
your brand image, all of your art to
the next level. It's always baby steps like first nomad render, then
it's a blender render. Then it's a blender turn table. And then it can keep
going on from there. I'm still learning Blender, but, of course, as I
learn, you learn, I'm going to bring a
lot of that information to my classes so that we can just keep making
cooler and cooler things. Of course, please upload your class projects to
Projects and Resources. Also rate and review. Let
me know what you thought. But also if you
would like to see more of something or if
there's something that you think would be helpful or more helpful or
just different, interested to hear those
kind of things as well. Of course, you can catch me on all social media
as drug free Dave. YouTube, post I'm a
prolific YouTube poster, so there's a lot of information, a lot of cool videos there. And, of course, I have
a ton more classes and courses here on Skill Share, including my newly released
Skill Share, original video. So that's one where
I work with them, and I made this really
cool robot video, and I'm super excited about it. And I think it's probably
the easiest way to start sculpting
something in Nomad and then step by step by step, bring it into
blender. That's it. Be sure to tag me on
social media if you post any of the work
there. I love to see it. I love to share
my students' work on my What is it called? On my Instagram stories
and things like that. Alright, I think
that's it. Great job. I really appreciate you
spending the time with me, taking time out of your busy
schedules to listen to me, yap on. I really appreciate you. Keep drawing. Keep sculpting, and I'll see you all.
Oh, and one more thing. So I actually recorded
a lot more material right after I finished
recording for this class. So I'm gonna upload
that to YouTube. So be sure to head
over to YouTube. It's almost like a
study hall session. It's gonna be me
working in blender. And just some of
the things that I didn't really have time
to put into the class, I'm going to put on YouTube.
 Dave Reed, 2D & 3D Illustrator - Brooklyn, NY