Transcripts
1. Nomad Sculpt Basics: Quick Start Guide: If you've ever thought
three D is confusing or a little intimidating, you're
definitely not alone. With so many tools,
features, and menus, it can feel like
you need to know everything to get started, but that's really not the case. Once you know a
few key features, the rest will just slowly
start to make sense. I'm Dave Reed, a three D
artist and content creator, and I teach people
how to get into three D in a way that
actually feels approachable. What I love about Nomad
Sculpt is it lets you jump in and start
creating right away. It actually feels like
drawing or sketching and Procreate, and I love Procreate, but now you can take
your two D characters and make through D renders, through D prints, even
through the animations. This isn't about creating
a finished sculpt. This is about understanding
how everything works. I will be teaching
your class today. We'll go through the basics like moving around your scene, working with simple shapes, and then I'm going to
show you the tools I use most often for sculpting, painting,
lighting, rendering. So you'll know where they
are. How to use them. Think of this as a
quick start resource you can come back
to at any time. Once the tools start
to make sense, three D stops becoming intimidating and starts
becoming creative. Alright. That's all I got. Keep drawing, keep sculpting. I look forward to seeing you in class. You're on Skillshare. Buckle up.
2. Class Project: For this class project,
your goal is to explore and experiment with the tools and workflow inside Nomad Sculpt. Rather than focusing
on a specific piece, use what you've learned in class to create anything you'd like, simple shapes, abstract forms, or even early character designs. This is all about getting
comfortable with the tools, building confidence,
and starting your own creative process. Regardless of how
simple or complex, I can't wait to see
what you'll create. Remember after class to post
it in the project's gallery. And just for full transparency, I was actually gonna
make this a short class that wasn't
gonna have an intro. So that's why it starts
with what is no mascot. Alright, let's jump
to the next video.
3. Getting Started: What is Nomad Sculpt? Nomad Sculpt is a three
D sculpting application. I discovered it in about 2020, 2021. I use it on the iPad Pro. It also works on Android. And now there's
actually a desktop app which I've never used. I've only used the one for iPad. So what is smooth shading? Smooth shading will
make your models look smooth. Okay, so
I'm gonna zoom in. If you can see these little if it looks
like a disco ball, that means smooth
shading is most likely not on. So you can go here. Go down to smooth shading
and just hit Auto, my auto is on, or
you can hit on. Once you turn it on, you can see that there's no disco ball. Everything is nice and smooth. What is orthographic? So I always sculpt an
orthographic view. So there's perspective, kind
of how we see with our eyes. But then there's
also orthographic. There's just no perspective. And then later on when I'm done, I can add as much or
as little perspective as I want, kind of
like a camera lens. So, for example, so if I
switch to perspective, it looks like it's lined
up, but it really depends. If I go in closer, you can
see that it's not lined up. So I don't like
issues like that, so that's why I always
sculpting in orthographic. I can literally just line it up, and it will always be lined up. So again, that's in
this little camera. There's perspective, and
there's orthographic. I use orthographic.
What is a snap cube? So Snapcube is this
little object right here. You'll see me a lot
of times if I'm looking at something and I
want to look at it front on, I just can tap front, and I know I'm looking
at the exact front. If you don't see this, just
go to this little cog here and then just scroll down
to you see a snap cube. So that's your snap cube. How do I change the background? So you'll notice sometimes I
have different backgrounds. So to change the
background, you just go to this little picture window
here. You can tab here. You can make the background
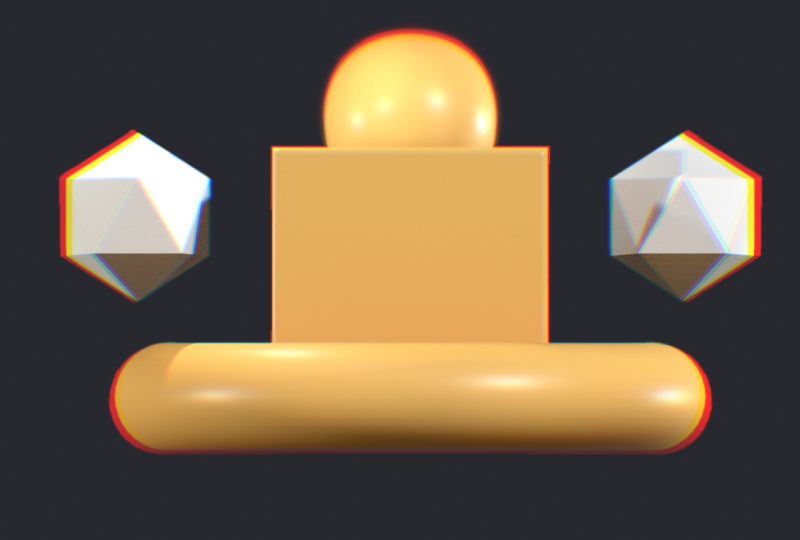
any color that you want. So I'll just tick with black. Okay, so what is a three D mesh? What is a three D object?
What is a primitive? So they're all kind of the
same things or similar things. These are both three D meshes. That just means objects that
are three D. The D object, they're both three D objects.
They're just same thing. Primitives, primitives
are simple shapes. A sphere primitive, we
have a box primitive. If you go here, this
little scene menu. You can add and you'll
see primitives. So these are all just
different shapes that you can use for,
like, base shapes. So let's say you
want a cylinder, now we have a cylinder primitive
that we can work with. So they're all three D objects. They're all three D
meshes, and these are all primitives because they're
just simple shapes. And, of course,
really quick, you can undo with two fingers, and then you can redo
with three fingers, okay? Autosaable pop up. Let's just call this basics. Okay, so how do I move
your three D objects? So to move things around,
you want to use your Gizmo. So this is your Gizmo.
Here on your tools, you'll see that you
can use the Gizmo. And that's kind of
like your controller. So first, obviously,
you have these arrows. Remember, it's three D. So
if you change it this way, there's one that goes towards
you and away from you, obviously, up and
down, left and right. And then we have the
bigger orange ring. And I'm going to
change the color. You don't have to do this,
but I always use McCAps. They're kind of like
fake color and lighting. Um, see. I'm just gonna use
this color because you can easily, more
easily see this. So the larger orange ring is just scale. That's all that is. I don't really use
these two that much. They kind of do their own thing. I don't I don't
usually use them. But I do use these
little spheres, and they kind of stretch. And then you have the ring. So we have blue, red and
green, and this just rotates. So you may have noticed
when I was talking about the Gizmo and
I opened the tools. A lot of these are great
out. That's because we haven't validated this box. So you'll notice this down here. So once you hit validate, then you can use
all of the tools. So anytime you add a primitive, anytime you add them, you can
adjust them a little bit, but you can't use all the
tools until you validate. How do you import
a reference image? So I use this a lot
with my tutorials. So what you want to do is first, you want to have your image on whatever device
that you're using, and then just go to this
little picture here, and then just go to
this little picture here and then tap
a reference image, and then tap on the image itself or this little box here
if there's nothing there. Import and then I have mine saved in photos,
so I'll tap photos, and then I can find the photo
and I'll just tap on it, and then I'll tap the
little checkmark. So I'm going to close this and you'll see that
it shows up here. Now, if you want to move it, you can just go back into
that same place, hit Transform, and
then take two fingers, and you can move it around
as much as you want. You can place it, and then tap with one finger
to go back to scope. But also, so let's say you
wanted to use a background, you would just go
into the same place, tap a different image, and then go to transform and then just make
this really big, tap once, and then you
have your background. So if we want to
save our progress, you want to save often in no Matkal because if it crashes, you will lose what
you're working on since the last
time you saved. So we're gonna go to this little folder and then go to save. And then, yes. And
then it'll be saved. Okay, so let's just
change the color. Let's just change our
MATCAp for the next lesson. So we're just gonna go
back to this little sun, tap on MATCAP, and
let's go to this one. There it is. PXG clay. So let's use PHD clay. On the next lesson,
we're going to go over some of the
tools over here, not all of them,
'cause there's a lot, and there's a lot that I don't use and don't
know how to use. So we're gonna go over the
ones that I use most often. Great job so far.
Don't forget to save.
4. Sculpting Tools: So here are your tools. Tab here. You can actually
move this around, kind of make it how you
like, just using this edge. Okay, so let's add a new sphere, and this sphere we'll
do all of our work on. So let's go to our
s menu up here. Let's add a quad sphere. And then you see
all these eyeballs. Let's close all of them,
except for the sphere. Which is right here, let's tap on these three little dots, and let's change this to demo. You can name it
whatever you want. So let's just go
ahead and validate. Let's use the orange
ring to make it bigger. And you know
what else I want to do? Let's turn it a little bit, and then let's use this little I would say sphere.
Let's it sphere. This little node to
just flatten it, so that might make it a little easier. And then
we'll hit front. So let's just start with clay. So we tap clay, and you'll see over here this
is the radius. So this is how big I tap there. This is how big the tool is. The intensity is how
strong the tool is. You'll notice that
there's two red dots, and that's because
I have symmetry on. So if I turn on the
grid, the symmetry, by default is going to be
the left and right side. So when I tap on this,
you're going to see a red dot on the
left and right side. If I turn this off,
and then I tap here, it's only going to do one side. Make sure I'm on the clay tool, change the radius so
it's a bit smaller. And I'll use the clay tool. And you see how it's
it's not that clear. Like, it's sort of jagged
and not very nice. That's because of the
resolution of this sphere. So the resolution, if I turn
on the wire frame here, so the resolution is just
how dense your object is. See this number
here, 6,001 to 46. Let me turn the grid off. 6,146, that's how
big this sphere is. A very high density object
will retain more detail. And the lower you
go in this number, the lower in density, the more kind of jagged and
not as crisp and clear. The details won't be that nice. So just remember, low
number, low density, less detail, high number, high density, more detail. I probably should go into this a little
later, shouldn't I? It's got to explain. So if you want to
raise the density, you can go to these
little cubes. You can go to multi res
and you can subdivide. So if I turn the wire frame on, what this is going to do is going to take each of
these little squares, and it's going to subdivide
that into four more squares, making everything more dense. There's a square here, and then there's four little squares. So each of these four
squares is going to become four more squares. So we go there, multi res, we subdivide, now we see
it's probably hard to see. But now we can see there's
more squares there. This is now 24.5. If we
were to do it again, then it goes up to 98.3. So you just have to be
careful that this number doesn't get too high. So that's an easy way to raise the resolution of your sphere and raise the density
of your sphere. Of course, the other
way, you can go to Voxel and you can axel remish. So down here is remish. So this would essentially
do the same thing. You can make it up to,
like, maybe 200 or so. Remesh And it's kind of
doing the same thing, but you notice that it made
sort of a different pattern. But essentially, it
did the same thing. Now it's 112 K. So those are the two different ways that you can raise the density
of an object. Let me turn off the wire frame. So I'm not going to
get too deep into when I would use one
versus the other. Eventually, you'll probably lean one way or another in
different situations. Essentially, they both
raised the resolution, and I think that's the
most important part. So if you want to get more detail and you
need to raise it, at least you know both
ways that you can do it. Okay, so we raised it to 98.3. Let's go back to clay. Okay, radius is about 60. So now you see
that's a lot better. It looks so much more clear. Okay? So that's clay. So
we're essentially just adding clay to our object.
Now, there's also sub. So each of these tools
has either sub or some sort of opposite of
what the tool normally does. So if I hit sub, you can see that it's digging
in instead of adding. Brush is very similar. Okay, so that's your
brush tool, drag, okay? It drags it out like that. Move. See how it tries to move more
of the surrounding area. Okay, so an easy way to
explain drag versus move, let's pretend we have that this sphere is a water balloon. And with drag is like taking one finger and trying to
move that water balloon. Your fingers the balloon
is going to move, but your fingers
mostly going to go into the balloon versus
using the move tool. Move tool covers more
of a surface area, so that's like using your hand and moving that water balloon. So if I was doing
something where I wanted real smooth curves, I'd probably just make the
move tool quite a bit bigger, and then I would just sort
of bend it like this. But if I wanted to do like
little jagged pieces of, like, armor or something, kind of
like sonic or something. So then I would use drag. Okay, so then we have mask. Sometimes I use when I
make mouths, I use mask. So I'll just take it.
Let's turn on symmetry. And let's just make a
mouse shape like this. So now this part is protected. So a mask is just
a protected area. So right now this is the
only area that's protected. Of course, you can always
use unmask as well, and you can try to make
it a little cleaner, if you want,
something like that. But now this area is protected. So let's say I wanted to
make a mouth where there's, like, a cavity where it goes in. So all I would have
to do is go down here to the mask settings
and the invert. So once you do
invert, everything is protected except for the
part that you put the mask. You can just hit Gizmo. So
once you use your Gizmo, it's only going to
affect that part. So let's say I wanted
to do an actual shape, I'll use select mask, and then let's say
we use ellipse, and then you can
make an ellipse like that. And it's pretty
much the same. So obviously, just notice
that I have symmetry back on. So if I make it, it's
gonna make two, invert. You can also, you know,
bring it out, push it in. Uh oh. So it looks like it
went to the back as well. So it looks like
it made the mask on the back side as well. Just go to this option here, go to filter, and then go to
front facing vertice only. So you can tap this. And now, since this is front facing, it's only going to
be on this side. Shouldn't be on the back. I'm glad that
happened because it's something that happens
often with the tools, it'll go through
to the backside. So just know you can go here, go to the filter front
facing vertex only. That means whatever
side is front facing, it won't go through
to the other side. Okay, so let's go back
to the clay brush. Let's add some clay here. Let's say we want to
smooth this down. So the smooth tool really easy I'm gonna bring the
radius to about 1:50. This just smooths whatever
you made. See those ripples. It's gonna smooth
them out. Nice, easy. Flatten. So I'll
make it about there, flattened tool, very simple. Let's say we want this edge
to be a little bit more flat. So we just go like this,
and we flatten it. Like so. And just
so you can see, I don't think that I've changed my flattened brush at all, but just in case I
just want to show you just so you can
see some of my menus, in case yours is a little
bit different than mine, or acts a little bit different than mine, this might help. But that's the flattened tool. What are my favorite tools. So then we have
crease, so we tap crease and let's say we wanted to make a
crease down here. It's just gonna
make a nice crease. Of course, you can hit Invert, and then the crease will
be the opposite way. So then we have trim and split. These are really simple trim. I usually use the rectangle, but you can use some
of these other shapes. So essentially, you
just draw a rectangle. Anything in the white
will get trimmed. So then that just
gets trimmed away. Now, if yours acts
differently than that, you might have to adjust one
of these settings, whoops. I have mine on boolean. That might help if you're
having issues with trim. So that's trim. Of course,
you can use any of these. This lasso is just,
like, kind of loose, and it trims however you want. So then there's split, go to split rectangle. And then it just splits,
and there's two. And here's another
little tip that I do. If I split something, see how the edges are jagged
if I just hit solo. What I usually do is
I'll vaxel remish. I'm using a shortcut
for voxel remshing, I just pull it up. It's the same thing if I
go here and vax remiss. So essentially, it's
just recalculating those little squares
that we talked about. It's recalculating everything. So right now this
is the wire frame. So if we go here
and I pull this up, notice it's the same number. If I remash, you see that
it's a little bit cleaner. Everything is just recalculating
for the new shape. So I'm gonna go to
this side, too, and then I would just voxel
remash and then maybe, maybe smooth them so they
look a little bit better. So, something like that is
when split is your tool. Okay, inflate inflate is
when I want to do, like, sort of a character has, like, skin rolls or something
like that, I might use inflate like this. Again, another one of
my favorite tools. I don't know why
it's doing that. Make it a little bit bigger. And then I might smooth it out, something like that.
Wrinkles and clothing. I like to use smooth.
Sometimes I'll use it with crease and add a crease Whoops. And then add a crease
in the middle to sort of accentuate it. So that's crease. Or,
that's inflate. Excuse me. Layer, another one that I use, I usually use it with sub. So if I want to do a mouth or
an eye socket or something, just some instances, I might
want to use layer instead. So I'll use sub here. And what that's going to do
is just take out a layer, depending on how intense. So if I turn the intensity down, if I turn this up, obviously
it's more a deeper layer. Pretend all the way up,
and that's the deepest. And then, of course, if
you just do it normally, it's just going to add a layer. And last but not least stamp, if we go to this little pencil, it the stroke options. Alpha is probably
your most important. So if we tap on this square, let's say we do this thing, and it kind of shows
you what it looks like. You can change the
scale if you want. Okay. So then you just drag, see how I tap and just drag,
you can kind of rotate. Here's some other
images that I just downloaded from the Internet, but like scales or something. And if you don't want
that box around it, then that's gonna be let's
see if I change the scale, so see this red circle. If I can see the square here, you're gonna
see it on here. But if I don't see
it on the scaling, then you're not going
to see it here. You know, so it's
gonna be kind of so if you're making a creature, you could kind of
do it like that. Okay, so I'm going to
put this back to 98.3. So let's set this up
for the next class. So remember we
switch to a MAT cap. We don't want to
be in a MT cap or else the colors
will look terrible. So just go to this
little sun switch back to it PBR so
that it's just white. And while we're at it, if you
don't have my environment, so that's this environment here, just make sure you
download that. I have it included
in this class. So you can just tap
here, import photos, and then import it from wherever you have it.
So I think that's it. As long as you are on it PBR, it's white and you have this
environment around four. Then we'll be good to
go for the next class. For painting, we
have paint tool, roughness, metalness, colors, painta and eyeopper, we'll
jump to that right after this.
5. Painting: Okay, so first, let's
go to our paint tool. So here's our paint tool here. This is the size
of the paint tool, and this is the intensity. And of course, you can
tap this to erase. Okay, so once you've
selected your paint tool, just go down here to this little colored
cube. You can tap that. And here's your color window
so you can change the color. So let's say we wanted
to make it a yellow. We could go here, and then
we could hit paint A. So if you hit Paint A, so now
the whole thing is yellow. So, of course, you
could go back here. And let's say we wanted
to change the color to something like that. Of course, you
could also just use the paint brush, and you
could paint like this. Okay, so just for funzies, let's add let's
add a pink color, and let's just do some shapes. Now, let's say we wanted
to make this more glossy. You can tap here. You can turn
the roughness up or down. So you can see it kind of shows you a preview
on the whole thing. So let's say we turn the roughness all the
way down to zero, and then we color it over these. They're going to be glossy. Little hard to see,
now you can see. So now only those pink parts are glossy because we just
use the paint tool. So let's say you wanted to
paint the whole thing glossy, tap on the pink, and you
want the same yellow color. So you have to hit the
eyedropper and then just drag over and you see that it's collecting
that yellow. So that's going to turn this
back to the color that you had used before or whatever
color you slide over. So now we can just tap
here you can go down, bring this all the
way down to zero, and then hit pain all, and now
the whole thing is glossy. Obviously, if you do
the roughness up, less light is going
to bounce off of it. So that's the difference between the roughness and
making it glossy. So, of course, you
have metalness, so you can adjust this, and that's going to make it
react more like metal. Obviously you can still change the roughness to make it
different types of metal, kind of like a brushed
metal, things like that. Okay, and a little bonus. If you have problems with
making really clean lines, here's a little trick
that you can do. Just have here. Why don't
I see it? Is it stroke? There we go. So let's
go back into stroke. You can adjust the
asyrope stabilizer. Let's do it to 60. And now you see that
there's more of a drag, and this is going to
change the color. So it's going to help you make clean lines using the
lazy rope stabilizer. If you want to put
it back to default, you can just tap
the reset button. And last but not least,
there's also something called, let's see, stroke painting. We're making let's say we want
to make a crease in here. So the crease would be
like a darker yellow. So I'm going to go to my paint. I'm going to go
to the eyedropper and grab this color again, and then I'll go
back to the paint and make it a darker color. So now I can use the crease. I can tap on stroke painting, and then I can make a crease. And in the center of that
crease is the darker color. I think it's really useful. And I think once you
do stroke painting, you can use even for
these other tools, so you can see the
stroke painting. So it's gonna use the tool, but then it's also
going to paint on that tool. So that's
stroke painting. Another thing that I
also might do is change the color so that
it's not so glossy. I might make it a
little more rough. So it looks like
not as much light is getting into that crease. Alright, so next up, let's
jump into the tube tool.
6. Tube Tool: Alright, so now let's
jump into the tube tool. So we'll tap the tube tool here. I normally use path. So we'll tap that. I usually
keep this the way it is. So what you want to do
is tap on the screen, drag, continuing to
stay on the screen, and then lift off the screen. Tap this little green, and
now you make your tube. Now, you can see that
it's stuck to the side. Snap My snap is on by default. What you can do is add nodes. So if I tap on this, that's going to make it easier to
snap to the surface of this. By adding these little nodes. Snapping is when it'll snap
to whatever mesh is near it. So if you're trying to make
something go inside the mesh, unchecked Snap, then
you can make it go through the other
mesh really easily. Okay, so these nodes, if you
want to get rid of them, you can just drag
them into each other. Let's go ahead and go to our scene and
just hide the demo. So we just see the tube. Let's go to front. Okay, so obviously you can manipulate
these as much as you want, bring them together
to delete them. You can also tap
on the nodes for sharp angles instead of curves. Use this little orange node to make the whole thing
bigger or smaller. You can tap radius,
and then you can do this small and this
big or vice versa. Or you can tap it again, and then you can adjust
each of these nodes. Okay, so if you want
these ends to be round, uncheck constant density, and
then check the three dots. And if you bring the topology,
if you bring this down, you bring them both down, let's put the post
subdivision up to two. Okay. Let me bring these down. So I put the post
subdivision to two. I put the division X to
four and division Y to 17, and you can see it
looks more round. You can also see that
it's a little blocky. So what you need to do is just bring the post
subdivision up again, maybe even to four to make
it a little bit more dense. And now you see
that that's round. So the other really cool
thing you can do is hit profile. And you see the shape. Well, this is your
profile, so you can kind of play around
with that if you want. You can also tap these
to make it more round. And I'll just make
them square again. So if you wanted to
do something like Ninja Turtle headband
or something like that, you can go into the profile, and then you would
just have to figure out how to make this thinner. So I might make it thinner, and then I would
just kind of make it flow however I
wanted it to flow. And also, this is
how I make kind of belts going across characters
and things like that. You can actually hit closed, and that will close
it up, so that will cause it to be one closed piece. It's a lot of fun.
Play around with it. So next we're gonna
go into lighting, and we'll bring back
the other shapes. Let's go ahead and do that now. Let's take this tube
and just delete it. And let's bring back
our little shapes. Yeah, so we'll just work
with these top shapes. I'm gonna make my
tours a little bit bigger. And then we'll
go to the front.
7. Lighting & Post Processing: Alright, let's jump
into lighting. So the first thing that I like
to do is I want to change the shapes to a neutral color.
So we'll go to our scene. And you can even change
these other ones, too, if you want. Even though it's a bit
hidden, just tap on it. And then let's go
over to the grayish. Maybe I'll go a little orange. Kind of like that will work. I'm going to bring
the roughness down a little bit so we can see a little bit
of that light on it. So it'll bring the
roughness down to 0.42. So something like that,
I'll hit Pain A and then just tap on one of
these, and they're good. So now we have a neutral color that'll be easier to light with. So the reason why
we can see light right now is because we
have an environment on. So when you tap this
little sun icon, you see the lights
here, which we don't have any, but you
see the environment. So let's turn the environment
off and then add a light. And now you see the light
is coming from here. So this is a directional light. Let's tap a line, and let's tap this
little gizmo here. So the only reason I'm tapping a line is because if
you don't have that, it's a little bit harder to just maneuver it left and
right up and down. So if you hit a line, then
you can easily maneuver it. So with directional lights, it's all about how
the light is rotated. So that's the only
thing that will change. So if we move it up here, the reason I'm
moving it up here, see this little white arrow, that's where the
light is coming from. So if I was to rotate it, then you'll see
the light change. Here, you can increase
the intensity. So I usually do about 2.5
or so for this light. We'll go to our little sun.
We have our first light. Let's rename this key. So this is the main light for
the scene, the key light. We can go here and clone it. So now we have key one. Let's rename it with
the pencil to edge. So I always do this
for all of my sculpts. I make an edge light, but we need to move it
to a different spot. So while the edge
light is selected, we're going to move this down,
and let's hide the tools, and then move it
over to the left. And then let's rotate it
using the green ring. So we're just going
to rotate it until we see just the edge on
the opposite side. Can rotate it up. And then
rotate it a bit more. There we go. So we can see
a little bit of the edge, and you can increase the
intensity, too on this one. Since I like to make turntables, if you want the
directional lights to stay stationary when the
thing is turning, meaning that the lights aren't turning when you
do the turntable, you just have to
press these little dots and then hit camera. It's probably easier
to do the first one. And then when you clonee it, it'll it'll already
it'll already be done. Okay, so let's just for funzies, let's add another light.
So let's clone this one. I'm gonna name it R two. And I'm going to move this
over to the right. And I'm going to do
sort of like an edge, but maybe a little more
a little more light. So maybe something like that, and then I'll lower the
intensity down a little bit. Let's add a light.
Let's call it D two. And this will be a point light. So what we want to
do is change it. So here we go to we'll tap
once it's environment, once it's spot, and
here's point light. I guess we could have did
spot light, as well, okay? So we'll just move it up here. Maybe we'll move it to the left. You can lower the intensities. So that's a point light.
The only other one I use is maybe the directional. So the directional, I might, you know, do
something like this. You have a little more control.
On the beam of the light. So you can make the beam bigger, smaller, that kind of thing. Okay, so once you
have that done, it's always good to turn
back on the environment. That's why this isn't
completely black. You want some sort
of fill. Fill light. So we just go back here, the environment.
We can turn it on. We can see it's very
bright so you can lower the exposure and make
it so that it's dark, but you're still
seeing a little bit of that a little bit of that shape. So that looks a little bit
more natural. Okay, great. So that's essentially lighting. That's pretty much how I
light all my characters. So next we're going to
hop into post-processing. If you have a strong
enough device, you can actually turn
post-processing on first. So just going to this sittle
shutter post-processing. But essentially,
you can just match everything if you
want. I keep this on. I keep this all the way up
to one. You can adjust this. I like to take this color,
whatever color that I'm using, so if this was blue, I would
probably change this to, like, a dark blue. But since it's orange, we'll just keep it as an orange. And obviously, you can adjust
the strength and the size. So ambient clusion is, like, if these shapes are
close to each other, it's gonna add those
little natural shadows. So that's what ambient occlusion is. And that's pretty much it. You can turn bloom will give you if you set the
threshold lower, then the glare will be brighter. So if I put it way down, it's more kind of glary and bloomy. But if I raise that threshold, then it kind of limits that. If you turn it off, then you'll see that glow will go away. And the rest of these you can kind of play with on your own. Chromatic aberration
is kind of fun. Kind of gives it
this little effect. And then there's grain, things like that
to make it look a little bit more natural, have a natural,
like, film grain. So of course, the other
thing depth of field. I'll show you depth of field. Okay, so you have far blur and near blur if I was
to move this back some. Okay, you can see. So
now that's further away, so now you can see
that it's blurry. The things that are closer
are a little more in focus. So I can change this, so then the front of this is
kind of getting blurry. So that's depth of field, so that's kind of fun
to play around with. It's not true depth of field, so it's just kind of mimicking what depth of field
would really look like. So if you export it,
sometimes there can be some artifacts because
it's almost like a phone. When it fakes the
depth of field, sometimes you can
see artifacts around the edges. So just
keep that in mind. There's also really cool things if you look on the scene menu, let's say you add a let's say we add some strange
shape like this. Now, if you want to make arms or something like that,
you can always hit mirror. So then if you move
it left and right, then there's two of them, and they're just
mirrored on each side. So that's kind of cool. If
you already have a shape, so if you already
designed something, so to say we have this one shape here and we want to
make it a mirror, we can just do add
and add a mirror, so then it will go
to the other side and you can move them, but you want to make
sure that you're on the shape and not
the mirror itself. So then you can move
them. And anything that happens to this will
happen to the other side.
8. Rendering: Okay, and last but
not least rendering. So if you want to
render this, just go back to this little folder. So here's the files.
Obviously, we've been saving, but here's render. So you just tap the render. And you can do it with a
transparent background, which is what I usually do. But again, I remember I
told you about the bloom. So if I do a transparent
background and I just do screen, so this is just the shape
that it's going to save. So I normally just use screen, and I export and
I'll show you what this number corresponds to in a second when
it's done. Okay. So you can see that
any of that blur doesn't really show when you export as a
transparent background. And also, that number, the number that it's counting
is the same number that's here in post process and
Max frame sampling 350. I find that 350 is
perfectly fine. So we'll go back to
here, back to render. If we turn off transparent
background and export, then you should see all of this nice glare the way
that it's supposed to look. Okay, so now it's the shape, but it's also the
black background, so now you can see
that nice glare. So that's how you
export just an image. So if you want to
do a turn table, you just tap this
little nomad icon here. I'm on an iPad, so I would
start recording now if you want to record
your turntable. Okay? Here's my speed. Here's
my constant speed. And I just tap here, and then you have
your turntable. I forgot that I moved that. And of course, it is
processing all of those frames over
and over again. So that's why you're getting
some of this noise because, you know, maybe if you
have a stronger iPad or, you know, more RAM or
something like that, you might not get this. But I'm using an M two, so I do get some noise when
I'm doing a turntable. Hang, that's it. So
yeah, that's it. Welcome to Nomad Sculpt. It's a really fun journey. And even after this, you
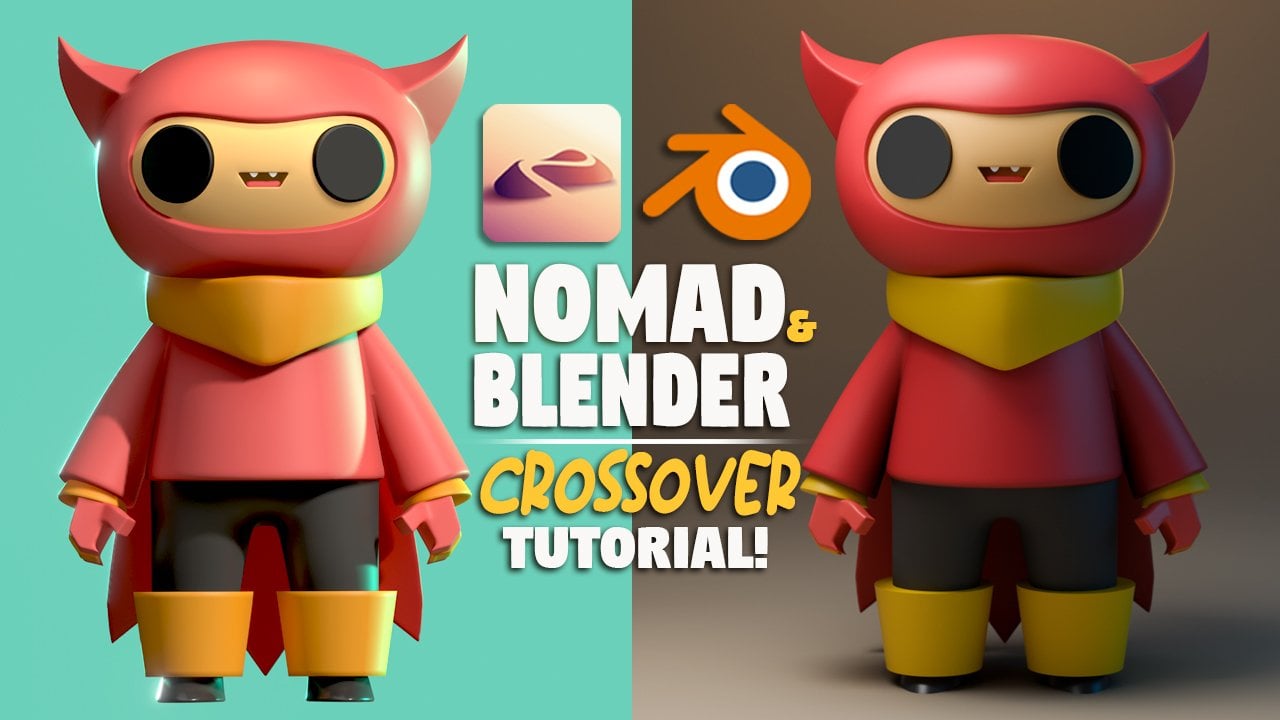
can send things to blender. I have through the printed sculpts that I've
done from Nomad. It's a lot of fun,
and there's a lot of places you can go from here. I also have a ton more classes, so be sure to check those out. I have a ton of classes
on YouTube, as well. Youtube.com slash DRG fre Dave. I'm on Instagram, instagram.com
slash DRG Freave. So I have a lot of content
in a lot of places, but my best classes are
definitely here on Skillshare. So thank you for watching. Keep drawing. Keep sculpting. I'll see you A in
the next video. And don't forget to
rate and review. And please if you
whatever you make, anything that you make, post
it to the class gallery. I can't wait to
see it. Great job finishing up with basics. I hope that you learned a lot. I appreciate you
hanging out with me. Hopefully things make a
little bit more sense now. Be sure to post your work
in the project's gallery. Let me know what
was most difficult and what came more
easily for you. If you share your
work on Instagram, be sure to tag me
a drug free Dave. I really love seeing what
students are working on and I love sharing student
projects to my stories. If you're looking for more nomad sculpt and just
digital art content, be sure to follow
me on my YouTube at youtube.com slash DRUG VDV. If you found this class helpful, be sure to rate and review. It helps a lot, and
it lets me know what kind of classes I
should make more of. Alright, that's all
I got. Keep drawing, keep sculpting, and I look forward to seeing you
in the next video. Wil program. Welcome to enjoy. And Dunbar, that's
the Meadow Lake man. Sing the arms now. You buying tomorrow
Mr. Tucker Nappy Holiday This program originates
in our Dalla studios. Dave Norgal speaking,
this is CPN, the Texas Quality Network. When we ya. When we went yeah. When we win.