Transcripts
1. A Character’s Journey: From Procreate to Nomad Sculpt: Have you ever sketched an
illustration and thought, Hmm, I wonder what this would look
like in three D. But you don't really know if
your design would work or where to start? I'm Dave id, three D artist
and content creator, and we're gonna take
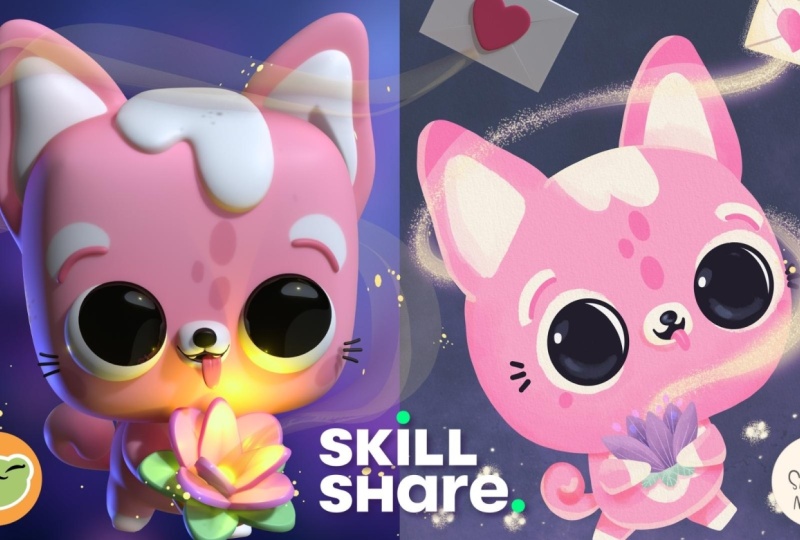
the cute pink chihuahua with the magical flower that
Sandra designed in part one. And we're gonna turn
that into three D. Wait. So who's Sandra and what's
the pink chihuahua? It's a super charming character design with a great backstory. So, part one is creating the
two D design in Procreate. This is a Skillshare top teacher dynamic duo situation here. So let's ask the super
talented Sandra Maia. She's an amazing illustrator some questions
about how to design a two D character that works for three D. What makes
a great sketch? What makes a dynamic
character design, and what makes an efficient
three D reference? Bringing my characters into
three D has always been a dream of mine because I feel that it makes them
feel more real. A great sketch for three D comes from clear decisions,
simple shapes, strong silhouettes,
a clear back story, and a turnaround that shows a character from
different angles. I couldn't have said
it better myself. And when I'm turning an
illustration into three D, that's exactly what
I'm looking for. Clear simple shapes,
a strong design, and a turnaround that
helps me understand the character from lots
of different angles. So these two classes
are a great way to elevate your design
and your brand. Alright. So in this class, we're going to keep things
simple and approachable, blocking out shapes, maintaining the personality
of the character, and just letting the
artwork guide the sculpt. We're just going to take
a cute two D character and bring it to life
in three D. So if you're an artist that
wants a complete workflow from two D to three D,
you're in the right place. Alright, that's all I got.
Shout out again to Sandra. Thank you for trusting us
with your character design. We're gonna have a really large, extended Chihuahua family here
soon, and I'm here for it. Keep drawing, keep sculpting, and I look forward
to seeing you in class here on Skillshare.
2. Class Project & Prep: Alright, welcome to
the class project. So we're going to take this
really cute pink chihuahua, and we're going to
bring it to life in three D. This is
a two part class. I think it'll be really
useful to actually draw something because
it'll just get you in that mindframe of drawing, but then understanding
and thinking, Okay, I'm making this in two D, but I have to think about
how the back looks, how it looks from the side,
different things like that, which are really useful to bringing your characters
to life in three D. It helps when a lot
of those decisions you come up with beforehand, so you're fully prepared
when it's time to make it in three D. Alright, so
I'm going to get you prepped. We're going to go
through the setup, so our nomad sculpts
kind of match up as much as possible or as much
as I think is important. So that way, when
we're starting, we're starting off on
a pretty clean slate, and we can match, and you don't get
confused because I know three D can feel daunting and it can
feel confusing, and I don't want you
to feel that way. Alright, so let's get you prepped so that in
the next video, we can actually get started
with the sculpting. So first and foremost,
make sure you download all the resources
that are included. So you would just go here
to Projects and Resources. Download resources. So we'll have the eye glare environment, and then we're going to
have the reference images, and I'll also
include MSculp so if you want to open that up and
look at it and reference it, you have access
to that, as well. So once you download, it's
going to go into your photos. So then it'll be here. This is the one that we're
going to use for class. So just keep note of where it is because once we're
inside the program, we're going to import
a reference image so that we can use
this and Nomad. So let's import my
custom environment. So this is optional, but
I just want you to have the same screen and
settings that I have. So first, let's go to this
little sun icon. Tap that. So here's your environment.
What an environment is is like the ambient light. So if it wasn't for this environment, it
would be pitch black. So use an environment because this is the
ambient light in the room. You can see the reflections. You can rotate it,
things like that. So if you're in a
room and you have a window and there's light
coming in that window, that's your ambient light. That's how you can
see in the daytime. I know I tend to ramble on. Anyway, so let's import. So let's tap on the
reference image. Import. Photos. And then wherever you downloaded
your eye glare environment, which was in the resources. Tap the image. Okay?
You can close this. So now you just
have your general ambient lighting set up
in your environment. Let's get things synced
up so that you're seeing the same things
that I'm seeing. So in nomat sculpt, you can
change the background color. All you'd have to do is go
to the sittlePicture icon, tap the color, and then you can change it to
whatever you like. So when AutoSave pops up, you can go ahead and
name your project. For now, let's name it cutie. So next, let's just
tap this little camera here and just make sure that
you're in orthographic. And all that is is just making
sure that we're not going to sculpt with any
perspective distortion. So next, let's go to
this little sphere right here, the materials. Let's go all the way
down here to smooth shading and make sure
that you have it on. I keep mine on auto, so mine is just on all the
time unless I turn it off. So you just want to
make sure that you have smooth shading on. So this is one of my visual
preferences when sculpting. I'm going to go to
this little Sun icon and then go to MTCAp. All a MATCAp is is fake
coloring and lighting. I just think it makes
it easier to see. And of course, you can tap here to see all the different
styles of MT caps. So these are all they're
kind of interesting. They're kind of fun
to play around with. So I think for today, I'm
going to go with PXG clay. Okay, so let's go ahead and
import our reference image. So let's tap on the
little picture icon, and then we'll go down
to reference image. And then you'll see
this little box comes up so you can tap here. Import photos. Okay? And then you just
go to wherever you have the photo saved. So
I'll tap this one. I'll tap the check, and
now the photos brought in. So I'm going to press this little X just to
close the import window. You can see the image here, but I kind of want to resize it. So we would just go back into our little photo,
go to transform. And now you can take two
fingers and you can drag it. So I'm gonna make it small
and put it right about here. And then I'll just
tap with one finger and we'll go back
to sculpting mode. You'll want to save often
just in case nomad crashes. So just go to this
little folder, save. And yes. And remember, you can always hit Save as if you like something, but you think you want to go
in a different direction, but you might want to
come back to that spot. Something that I do
very often in nomad.
3. Getting Started: Okay, let's get started. So when I look at
this character, I see sort of a squarish, kind of like a rounded
box for the head, probably the same for the body, maybe a little bit more
round than the head. The legs, I see cylinders, the arms, I see the
tube tool, the ears, maybe spheres that
we cut in half, and then spheres for the eyes, and we'll figure out the
nose and things like that. So if you just concentrate
on creating the base shapes, what we call blocking, you want to block the character out, make the base shapes, and then everything will
be so much easier. Okay, so this is
our default sphere. I'm gonna go to my scene menu, and I'm just gonna
hide it for now. I might delete it
later, but we'll see. So the scene menu is basically all of our shapes that
we're gonna bring in. So let's go right here to add, and then we're going
to bring in a box. So we're going to use
the gizmo right here. The Gizmo is essentially
your controller. So there's a bigger
orange ring around it. So all that is a scale, okay? I'm going to use two
fingers and tap to undo to go back
to the beginning. So the larger orange
ring is scale. These arrows just
move it around, so we have the red arrow. Moves it that way, green
moves it that way. And then we have these rings. So there's the blue
ring that rotates. And then you have these spheres that kind of stretch and pull. And there's a few
other things on there, but I don't use them
that much, so I'm not even going to go into them. So I'm going to go back
to heartbreakar box. So anytime you bring
in a new shape, these shapes are
called primitives, but they're really
just simple shapes. So anytime you bring in
a new say, primitive, anytime you bring
in any new shape, it's going to give you
this dialogue box, and you won't be able
to use all your tools. So your tools are here. Most of them are great out right now because we haven't validated. All that is is there's some
special fancy things that you can do before the object is like officially
part of the project. We can go ahead and
hit validate and now you see all of your
tools are available. Okay, so let's
round out this box. So we're going to go to
this little beaker up here, right? And then we see smooth. So we're just gonna tap on smooth and then drag
it to the right, and you'll see that
it smooths right out. So I'm going to go
maybe around there. When I turn it this
way, if I recall, if you look at the sideways, so his head is not that wide, so let's go ahead
and flatten it. Okay, so we've turned it
and you can see the left. This is a snap cube. This
is just an easy way to see which part of your
model is facing you. You can tap it, and then
it will perfectly line up. So now we want to use
this little blue sphere, and let's just shrink it down. I think maybe around
there feels right. So then we have
something like this. So let's clone this shape, and we can use it for the body. So over here on the left,
we're just gonna hit clone. And we're gonna use this green arrow to just drag it down, and then the orange ring
to make it smaller. Okay, so I'm thinking
something like that. Now, this one is a
little more rounded, and it looks like it might
be a little more stretched. So I'm gonna use this
little green sphere and just stretch it this way. And if I want it to be a bit rounder, I can do
the same thing. I can go back to this
little beaker here. I can tap that, and
then I can just tap smooth and get it a
little more round. Okay, maybe I'll just stretch it a little bit more
and then move it up. Like so. Okay, I think I'm
pretty happy with that. So let's clone this again and let's use it for
his little snout. So we'll go back over here
to clone and let's turn it. And then we can take this blue arrow and we can just drag it over and then shrink. Okay, we can go
back to the front. So I'm going to stretch
it a little bit this way. And it looks like it's a little round almost like the body was. So I'm gonna do the same thing. I'll just tap the
little beaker and then smooth and just make it
a little more round. Okay? And I might inflate it, as well. So down here, you can go to inflate and you can
just inflate it. Okay? I think that's perfect. And the character
has really big eyes, so you want to make
sure you leave enough room for the eyes. So I'm gonna drag this
down a little bit. You can see it's a
little bit further down, it's closer to the bottom
of the head than the top. And let's go ahead and
bring in some eyes. So we'll go back over to
our scene, add quad sphere. Okay, so let's go to
this little gizmo here. It's a little hidden,
but it's there. So tap that little gizmo. And then we're
going to move with the blue arrow, we're
going to move it out. We can head front
again, can shrink it. And let's hit mirror.
We haven't validated. So this is one of
the special one of the fancy things we can
do before we validate. So we'll hit mirror.
We go back to the gizmo and then take the red arrow and just
move it to the left. And you'll see the
mirrored version, as well. So I think the size
of the eyes is big. We want to bring them down so they're closer to the
bottom of the face. And I think that
looks pretty good. So we'll have to take the snout. So once you tap on a different mesh, that's what's selected. So I'm gonna move this
down a little bit, and then I'm going to
shrink it a tad bit more. So maybe something like that. And I might want to make
the head a little more. I might want to use inflate on the head. You
can tap the head. Let's go back to our beaker and let's inflate
it a little bit. Yeah, I think that's
good. Okay, you can take this and just move it into
the body around there. Let's tap on the eyes, and let's use this blue sphere to kind of smush them back. We don't want them to bug out so much. So that's
why I'm doing that. I'm gonna pull them
out a little bit and notice how they're not
really flush with the face. So this is where I would rotate them so they feel a little
more natural on the face. So maybe something like that. I think that looks pretty good. So let's go ahead
and validate these. Now, if we go back to our scene, you'll see that
there's a mirror here, and this is our quad sphere. So there's really
just one quad sphere, but since it's nestled
underneath the mirror, that's why we're
seeing this one. So for this mirror, let's
tap these three dots, name and we'll do I A. So this is going to be the
white part of the eyes. So let's tap on
the actual sphere. We'll do the same thing
the three dots, name, I A. So what we want to do
is make the pupils. So we're going to
use these spheres and we're going to
duplicate them. So let's select both of these, it Clone let's just
change the names to B. So this one will be I
B, and same with this. Okay, so make sure
that you're on IB, and you don't want
to be on the mirror. You want to be on
the actual sphere. And we'll go back to Gizmo, and we'll use the blue to
bring it forward a bit, and then let's
shrink it a bit with the larger orange So the
character has really big eyes. For now, we'll just
put him in the middle, a little more inwards. So anytime you do
characters looking forward, you always want to
make sure the pupils are closer to the
inside of the face. If you bring them a
little bit inwards, then they look correct. So just a little tip
that I do with three D, two D, I always bring the eyes
a little bit more inwards. We're going to change
this a little bit later. You can see this character is looking off to one direction. So we'll deal with that
detail a little bit later. Let's save.
4. Arms & Legs: So next, we'll use
one of my favorite tools, the Tube tool. So if you tap here and then
go over to the left and you want to hit a path, so
it should look like this. So to use the tube tool, we're gonna tap on the screen, drag without lifting and then lift once you've
dragged your line. So this is going to be our tube. So we tap this
little green line, and then you see the tubes. And here's a quick thing that will happen.
It always happens. Sometimes you accidentally put a new shape into one
of your mirrors. So if you check the scene,
you can see that I put this tube and it got
famied with the eye. So all you have to
do is long press and drag it out. Well,
drag it up here. Actually, let's drag
it down. So now our tube is out of the mirror, and you can see
there's only one tube. Okay, so let's turn
snap off for now, and let's turn it to the left. And now we can position it. So it looks like, again, we can always reference
the side view. So let's go ahead and tap on this node and just drag it over. Okay, I think that
looks pretty good. So I'm going to move it a
little bit further back. That's just something I do
in most of my characters. I always kind of favor a little bit towards the
back for the arms. And this character's
arms are very short, so we're going to shorten it up. And that's basically it. If you want to make
a curve in it, you can just add a node here, and then you can
make rounded curves. If you want it to
be a sharp curve, you can just tap it, and
then it's more of an angle. And you can add as many
nodes as you want. If you need to get
rid of them, you can just drag them
into each other. And this is your scale. So, if you wanted to make
the arm bigger, which I think this character's
arm is maybe around there. Let's take a look at the front. But you can see that the
bottom part of the arm, the end of the arm is smaller and the base of
the arm is wider. So we're going to do
that with radius. So see how there's
only one selected, and now there's two, now
there's three, now there's one. So this affects the scale. So if I tap it twice, then I can move
this, and it doesn't affect the front
one. You can see. If I tap all of them, then you can just
do all of them. You can make all different
shapes and sizes. Okay. I think that
looks pretty good. Maybe we'll make this
a little smaller, and I want to drag
it a little bit more into the body. Okay? So I kind of like
that, but I want to make the whole thing
a little bit smaller, so I'm just gonna use
the gizmo instead, and I can just shrink
the whole thing. And if I want to get
back to the nodes, I need to press this
little squiggly line, and then I can get
back to my nodes. Okay, beautiful. So now let's
go ahead and hit Mirror. And then let's hit Validate. So what we can do now is round out these arms using the smooth. So we'll tap here, our little
beaker and we can smooth. Okay, not too much. I think that looks pretty good. And I'm also going to hit
inflate a little bit. Okay, I think that
looks pretty good. And don't be afraid to go back if you want to
change something. If you feel you've
lost too much size in the base of the arm,
you can always just undo. And then you can
make the base of the arm a little bit bigger. So maybe something like that,
and then you can validate, go back to your beaker, and
then you can smooth that out. Well inflate a little bit. Okay, I think that
looks pretty good. Okay, so let's go ahead
and hit Validate. Now, let's say you want to move these a little bit
more in and up. It's a little bit tricky
because of the Gizmo, because of the orientation of it. So here's a little trick. Let's just hit a line. And now we can easily
just move it left, right, up, down back and forth.
So I think that's perfect. So for the legs, we're just
going to use cylinders. So we'll go up to our scene, add, and we're going
to find cylinder. We can go ahead and hit mirror. And you notice that
the whole mirror went into the other mirror. So just make sure
that you select both long press and
just drag that out. And then you want to make
sure that you're going in and labeling these. So this mirror is the arms. Okay, this tube is
just the arms again. And the reason I
label the mirror, the red part is because
eventually we're going to take these and combine
them just to be one shape, and it's gonna take the
name of the mirror. So this is gonna be legs. And this cylinder is legs. So we're going to use our gizmo. We're gonna take the green
arrow and move it down. We'll shrink it with
the orange ring, a large orange ring. We'll move it up. With the red arrow,
move it left. So now we can go into
these cylinder options. And it looks like this
is a little bit bigger. Maybe we'll make these
a tad bit longer. We'll go back to the
gizmo right next to it, and let's rotate
just a little bit. Remember, we're still on a line, so you can always turn that off, and then it will orient to
the shape that we're using. Okay, I think that's
actually pretty good. Yeah, I think
that's pretty good. And I might make it a little bit longer and then move it
up just so we're not having just so we're not having this issue where
you're seeing the end. The only thing
that I'm seeing is this has a little more
space in between. So I'm going to do a
line and move over. I like that, you know, you want the right
amount of space. Seems like it's,
like, pretty wide. So if that's the case, I might make the body a
little more wide. And you can also
use the move tool. And if you're on the body, you see these two little red dots. That's because we
have symmetry on. And so we know what happens on one side will happen
on the other side. So with the move,
and my radius is about 200 and my
intensity is about 50, just so you know, just so
you can match if you want. But you can also just pull this so that it kind of goes
cleanly over the legs. And if we were using
the tube tool, we could kind of
curve this down, which I think might be perfect. But there's other ways to do it. So let's validate it. Let's smooth it
out a little bit, so we'll go to our
beaker and we'll smooth, make them a lot cuter. And then let's go
back to our move tool and see how we're on the edge so we can just pull
from this side. Let's make the radius bigger, and it'll pull more cleanly. Maybe we can pull that
down a little bit. And now that I'm thinking
about it, I want the legs to be a little
thicker this way. Maybe the arm as well. Just make it a little thicker. Okay? I'm going to
go back to the body, and I want to make the
front a little more round. So I'm gonna use the move tool, and I'm just going to stretch
out this little belly. Move tool is one of
my favorite tools. Really makes you feel like
you're actually sculpting. I'm gonna push in a
little bit on the back. I'm gonna make the
radius bigger. The reason I make the radius bigger or smaller is
because when it's bigger, then it's gonna be more of a
sweeping, smooth movement. I think it looks very cute. So I'm going to take
the legs. I'm gonna make the I'm gonna use the move tool and just drag
the legs up a little bit, just to make it a
little more flush. But I think that's beautiful.
So let's save our progress.
5. Buns & Ears: So this next part is
completely optional, but it's one of my
favorite aspects. So we're gonna go
to our scene menu. We'll add a quad sphere. We're going to go ahead and
hit a mirror right away. You know what's coming.
We'll go to our Gizmo. We'll move it down.
We'll use the blue to move it back a little bit,
and then we'll shrink. Okay, now we'll move it down, and then we will drag
it out like this, maybe a little bit bigger, maybe a little wider, too. And I'm gonna use
this little blue sphere to kind of shrink it in this way to kind
of tame it a little bit, at least, just a tad. Okay, I think that looks great. I'm gonna go ahead and validate. So this is still a mirror. So even though I'm validating, we go to scene, we
have our mirror here. Whoops. It's in the legs, so we'll just long
press and drag it out. And this is your buns. Okay, so we'll just go
to the quad sphere, and you can just have some fun
with it and make it look a little bit more natural. We're gonna make a
tail anyway, but, you know, don't forget. Sometimes you go to
the body and you can sort of stretch the body to, uh, to make it work as well. And that's really all. This is more just like a
little fun thing to add a little detail that
everyone loves. Look at that. That's perfect. Okay, so what we're gonna do
we're gonna take these buns, so we're gonna select
both of them and hit validate and then hit yes. So it should be
on Join Children. Just hit yes. Okay?
So we have our buns. Let's see. This box is the head, so let's go ahead
and name these. Forgot to name them earlier. This box is the body, is it? Or is it not? Well, that
might be the snout. Bones box? Oh, this is the body. Okay. The bones and the body, and we're just gonna
hit join up here. Okay, so let's make these ears now. The ears are a bit tricky. Sometimes you have
to take shapes, and then you have to edit
them and adjust them a bit to get the exact
shape that you need. So let's go to our scene menu, and I'm just going to tap this top quad sphere and delete it. So this is the one
that we hid before. And I'm going to delete that
and add another quad sphere. I'll move that to the top. I'm going to rename this ears. Tap for a little hidden gizmo. Green arrow will
move it up over. And I'll just go ahead
and validate it now. We can always add a mirror
later since there's two ears. So I'm going to use this larger
orange ring to shrink it. And then I'm going
to stretch it with this green sphere or
something like that. I'm going to rotate. And I'm going to make
sure that I turn a line off because I want to move
it directly this way, not exactly left and right, but more on an angle for the orientation of
the actual ear. So let's just turn a line off, and then we can move it down and we can sort of figure
out where it's placed. That seems pretty good,
actually, right around there. So you see these shapes. So we have to sort of
mold those shapes. So let's just take move. I'll make it a
little bit smaller, maybe around 200 or so. So this part looks like it
goes up and then it curves. So I'm gonna pull this, and then I'm going to
go to the top and I'm gonna pull this that way. So I'm really just trying to
match that curve right here. I'll make it a
little bit bigger, and then I'm going
to drag this part out and this part down. And I'll push in here to
see if that helps us. I'll make it a
little bit smaller. So sometimes I just make
it bigger and smaller, depending on the
amount of detail, depending on how
much I want to move. So I'll try to push
this little shape out. I'll push here, and then pull. I'll make it a little smaller so we can try to get a
little more detail. But I think that's
pretty good. I'm just gonna try to even it
out a little bit. But I think that's
pretty good. Now, I usually move the ears a
little bit further back. I think what I
want to do is turn the ear to the side like this. Let's take split. So
we'll take split, and then we'll choose rectangle. And we want to try
to cut it in half. So let's start at the top. You want to tap and then
make a white square. And anything inside that is just gonna get trimmed or split. So it's just gonna
get spit. So now let's take this smaller part. So just make sure that you
tapped on the front part. We'll use the gizmo
and we'll shrink it. And now we'll push it back. So now let's take
both of these pieces. So we'll take the
outside of the ear. Let's call this ear big. And then let's call
this here, middle. Okay, so anytime I usually
trim or use trim or use split, I like to voxel remesh
after I do that. So all this does is recalculate these edges so it doesn't
look really funny like that. So make sure we're
on the ear big. We're going to tap
here right next to our scene. You see voxel? And let's drag this up
to I think 150 is good. And then we'll remsh
and then it's remshed. So now we can go to our beaker and let's just smooth that out. Okay, I think
that's pretty good. So we'll go to this one. I'm
going to do the same thing. Only I'm going to
use a shortcut. Instead of going here and here, I like to use a shortcut down here where you just swipe up and then it
has the same thing. You can see the numbers
are exactly the same. And if you don't
have this shortcut, you can always come up to
these three little dots. Go to shortcuts, and then
you can just add it. See? So anyway, let's vaxll
remesh it around 150. And then we'll take our beaker and we'll
just smooth it out. We don't really need
to smooth it that much we're not seeing the edge, but I can still smooth it out. And then I'm just
gonna flatten it up and push it into the
year again. Perfect. So let's say you
wanted to rotate or adjust both of these
shapes at the same time. All you would have
to do is go to your scene, select them both. And let's do pivot, auto pivot. So that just moves the Gizmo to the center of since we
have both selected, it's gonna move it to
the center of both. But then at least you can rotate and move it around and
adjust as you need. So let's go to our scene menu. We'll take E Big. We'll add a mirror. And let's name the
mirror. Here Big. We'll do the same thing for
ear mid, so we'll tap it, add mirror, and
then we'll rename it ear mid. Let's
go ahead and save.
6. Extra Details: So now let's do this
little cute part here. This, of course, could be color. You know, we are translating three D to two D. But for this, I think I want to make it
sort of raised a little bit. So we'll just use a
couple spheres for that. So we'll go to War scene. We'll add a quad sphere. We want to make sure we go
ahead and bring it out. Actually, let's leave it
right above the body for now. Okay, so this is
just gonna be chest. Okay, so now we want to
use our little gizmo. We can go ahead and validate it. So let's move it down forward a little bit, and
then we'll shrink. Okay, I'm gonna push it back, and I might flatten
it up a little bit. And there's a really cool
tool that we can use Xray. I'm gonna use this red
ring to rotate it. And then I'm going
to stretch it a little bit with
this green sphere. So now we're going to go
ahead and let's go to our scene. So we have chest. We're going to tap the
three dots and clone it, and then we're going
to add a mirror. Okay, so then we can go
to this chess sphere. We can turn Xray off, and then we can separate these, rotate them with the blue ring, and then we can just adjust
them to where we need them and the size
that we need them. Okay, so let's turn back
on Xray and just make sure that this looks how we want
it to look even underneath. So I want to bring
these two side ones. I want to bring
them down further. And then I'm going to
go ahead and use move and just drag this part up. Even on this one, I want to maybe make it a little smaller and just drag this part up. Like so. Turn the X ray off. Okay, so I'm gonna
take this chest and this chest and the gizmo. Let's do pivot auto pivot, and let's just move it down so we can see it a little bit, a little better. I think
that looks perfect. So you can do any adjusting
that you might need to do. Maybe you want to
bring it a little bit closer into the body, but I think that
looks pretty good. Okay, so let's take
this mirror, validate. Yes. Then we'll
select them both. We'll go to my little voxel
remesh shortcut down here. We'll put it at 1:50
and then remesh. And that's okay. Okay, so
now I'm gonna take smooth and just smooth out
more towards the top. I like the detail on the bottom, so I don't really want
to smooth that too much, but I think this
looks pretty good. Okay, let's save. So now let's go ahead and add this little detail on the head. So it comes around
like this in the back, but it also has these
two things in the head. And what I think
I want to do for this is actually use a mask. So this is a little involved, but I think you can handle it. So we're gonna take
the mask tool. Okay, so when we're
working with mask, it's very pixelated, and that's because the head is
fairly low resolution. If things are high resolution, then they're better for more crisp details, sharper lines. If they're 6,000, you know, if they're fairly
low, it's gonna be pixelated like this. So
that's all that's happening. Good. And let's go to our
little option here, multi res, and
let's subdivide it. And now let's try the mask. So that's a little bit better. So the back of the head
kind of has a design like this and it comes
up to the front, and it's sort of
similar to that, and it kind of breaks off
and does its own thing. So I'm going to
turn symmetry off, and I'll just work on one side to make it a little bit bigger. Now, if I'm looking
on the front, you can see that I don't quite
have it down far enough. So just make sure that when
you're adding these details, you're looking at them through very through lots
of different Oh, eras is just unmask. So unmask unmasks. You want to make sure you're looking at it through lots of different angles and just making sure that the
details line up. Okay, so that's more like that. And then this comes down
a little bit further. So something a little
more like that. So a really neat
thing we can do, we can go to this
little shield here, and it gives us some options. So firstly, you see this height. So we can make this bigger. Okay, so I'm going to make
it a little bit bigger. And you can also adjust
how you want the, like how smooth you want it. Okay, so I'll make it smooth like that. I think
that's perfect. I think that's what
we need. So now let's just hit extract. Okay? So we'll tap back on the head. Make sure you're in the
mask and you want to clear. So now we can take
this little piece, and let's name it head top, make it a little smaller,
move it down some. And maybe you would just
stretch it or squeeze it that way so it's a little more right
on the head. I love that. I think it's so fun. But I think that looks pretty
good. And you can use drag. A lot of times people wonder what the difference
between move and drag is. So if you had a water balloon, move is like moving it
with your palm, like, gently moving the whole thing or grabbing it and
moving it this way. So it sort of is more of
a larger surface area, so the moves are more smooth. Pinch is better for details. So pinch is like taking a water balloon and pushing
it with one finger. So it'll push, but you can see that your finger is pretty
much going to go into it, or pinching it and pulling
it and moving it that way. So it'll move, but there's
gonna be more kind of going off on your finger than if you were to just take your whole
hand and move it. So that's essentially a
difference between drag and move. My rule of thumb
is if I'm doing, like, really fine details, I might just take drag and
let's turn symmetry back on, and I might just adjust
things with drag. But again, this is
very minor details. Let's save.
7. Nose, Snoot, & Tongue: Okay, so let's make a
little tiny little nose. So let's add. I think I
want to use a cylinder. So we'll use our gizmo, and let's tap snap here, and this is just so we can move it exactly 90 degrees this way. We can go ahead
and turn that off. So now we'll pull it
forward and shrink. Move it down and
in and of course, we can shrink it
back to normal size. Okay, I think that
looks pretty good. So let's go ahead
and validate it. And let's just use
move to shape it. You can make it a little
bit smaller if you need. But I think something like
that is perfectly fine. I'll just stretch
it a little bit, push it into the nose area. Of course, the nose
is very small. Okay, so I think that works. And I want to round
it out a bit, so I'm going to use
the little beaker and just smooth it as well. I like to keep most things nice and smooth. That's perfect. Alright, so now
we're going to add two more spheres to the front. That'll help us get that
little crease for the mouth. So we'll go to our scene.
We'll add another quad sphere. We can go ahead and mirror and we'll just use our gizmo and
we'll move it into position. Okay, as long as
you have mirror, you should be able
to move it out. And also just make
sure that you're not in any other mirrors. You just want to be in the
mirror that you just made. So now we'll move this into position and move
it closer together. So I'm going to validate, and I want to take these spheres, and I'm just going to move
them so they're a little more flush with the nose. I think they look pretty good. I think they look pretty cute. I'm gonna turn symmetry off because we're working
in a mirror anyway, so that's I'm just doing that so I can bring
these closer to each other. So we can just join these
together and smooth it, and I think that'll
be perfectly fine. And now we're going
to take the mask, tap on the original snoot and we're going to
make this round piece. So you see where the mouth kind of opens, where it's black. So I'm just going to draw a mask here maybe make it a little bit higher, like that. So that's going to
be our open mouth. We can just invert, take the
gizmo and push it back in. Okay, so now we can
go back to mask. We can clear it,
and it looks great. And you can adjust these
a little bit if you want. You can kind of push
them up a little bit. So now we're gonna
voxel remshT mirror. So we're gonna
validate this mirror. So this is the little new snout. This is the original snout, so we'll select
them both. Voxel. Let's bring it to 150 and
let's save before we do. So box will re mesh at 1:50. Let's re mesh that we'll take smooth and we'll
just smooth it out. So now let's use drag. Make sure you have symmetry on. And let's just extend these. So let's just pull. So we're just
extending that smile. You can always smooth
it out a little bit. Okay, I'm gonna use
move and just kind of drag the mouth
down a little bit. So this is a trickier
part because we're using lots of different
things to get to this shape, but sometimes you got to
do what you got to do. You know, that's
just part of it. But I think this
looks good. And you can also add a crease, if you want to add a
crease down the middle. That smooth it out a little bit. I want to take the nose, and I think I might want
to tilt it a little bit. So maybe I'll give the nose
a little bit of character. If you want to go crazy, you can add some spheres
for little teeth. You know, I love to add teeth. You would just make
the spheres really small and then kind
of shrink them. I'm going a little
bit faster by now, I'm pretty sure
you probably have a much better understanding of the Gizmo and what I'm doing. Of course, if I want
it on both sides, you just hit mirror,
then you can validate. So you can see how things
they just get much faster more the
more you do things, and the more you
kind of get going. Should probably just
stick to the reference, but sometimes I can't not add things that
I just want to add. You know, that's just,
like, how how I work. I just want to push the
inside up a little bit. So now there's a little
tongue coming out. So for the tongue, I think maybe we'll
just use a cylinder. So these are the teeth. So let's use a cylinder
for the tongue. So we'll go here,
we'll add a cylinder. We'll use our gizmo.
We'll move it out. I like to do snap
in 90. I'll shrink. I'll shrink it this
way, make it smaller. Okay. And let's stretch it. Okay, so it feels like
feels like a tongue. So what we're gonna do is let's put it right up to the lip. Look at the size a
little more correct. So that feels about right,
something like that. So I'm gonna go ahead
and validate it. But what we can do is use mask. And let's just use select
mask and let's use the lasso and we can just kind of go
along the curve of the mouth. You can invert that,
and then we can take the gizmo and
we can rotate it. Whoops. Let's take it off of Snap 90 so that we
can rotate it freely. So we rotate, and
I'm going to move it so it's not bending so crazy. So all I'm doing is just
bending the mirror. We'll rotate a little bit
more, rotate this way. Okay, I'll shrink it down a bit. All we did was use the mask
to just bend the tongue. So now we just go back to mask. We can clear it, and we can
do a wovoxl re mesh it? Let's try. Let's try
our beaker first. We might be able
to just smooth it, which I think is, you
know, looks pretty good. And then we can take move. And then we can just
move this part. Make it a little
bit bigger. We can just move this into the mouth. We use Xray, and we'll just go ahead and just stretch
this out so it looks a little bit
more realistic. Okay, we'll turn it off.
I think that looks good. Now, if you stretch it and move it a lot, it can start to break. Let's see if I can
show you what I mean. See how it starts to break. If that happens, then you
need to voxel remesh it. You need to recalculate
the resolution. I mean, it looks bad, but
hopefully, that makes sense. So even this let's get
back to how I had it. Yeah. So even this, I like to just vax
remesh just to be safe. So we'll do 150. And then that way, we can
just smooth it out. And if you want to
get fancy, of course, you can always do little details like maybe you want to
add a crease in it. Smooth it just a Smich. Maybe you want to take
something like flatten. Sometimes flatten is fun
to kind of just give it a little shape. But I think that looks pretty good. We'll go ahead and save.
8. Eyebrows & Tail: Okay, so let's make
his little eyebrows. And for this, we can
just use tubes. Path. And we're going to
do the same thing, tap on screen, drag,
and then let go. So you can readjust these nodes, but then you want to hit
this little green dot. So Snap just means that this is snapping to the
surface of the head. So if I add some
more nodes here, you can see that
it's snapping to the surface. So
that's what Snap is. And Snap is good in this
instance because we can shape this and it'll stay
on the surface of the head. So we're gonna use this. We only need the one
radius because it looks like it's a uniform size, so we'll just make
it a little bit smaller or thinner,
I should say. Let's turn off constant density, and let's go to
our little options over here, post sub to two. And let's let's bring these down until we get it nice and
round wherever we want it. I think five and three
looks pretty good. Yeah, so division X is five,
and division Y is three. I think that looks pretty.
It looks pretty round. So I'll go with four and five. So now we'll go
ahead and hit mirror cause it's the same
on the other side. And as I'm looking,
they look a little big. Sometimes the scale just
kind of is beyond me. I have to kind of rework things. Just be careful when you use the Gizmo 'cause sometimes
you can kind of bring it away or adjust it off
of the off of the body. And for these, I'm gonna
go ahead and validate. I should have validated
and then saved, but sometimes you just you're working too
long and too hard. Okay, so now sometimes
they're small details. You want to always be looking at your model and making sure that it's exactly
how you want it to look. So this is pink,
so that's paint. We can make these. We'll
make this as an extra. I think I want the head
to be a little wider. So we'll use our move tool. We'll make sure symmetry is on. And now is a good
time to just do any sort of little details
that you might want. Like, for example, I
feel like the head should be a little bit
bigger on the top. I think my whole
snout might be a little big, so I'll
take the snout. I fail to name a lot
of these things, so you need to
make sure that you name them because otherwise, it just makes everything a
little bit more difficult. Eyebrows. This is the nose. Okay, I like the teeth. So I'm gonna go
ahead and validate the teeth, the eyebrows. I'm gonna go ahead
and validate those. Okay, so let's try to take the snoot. So we have the snoot. Let's do pivot, auto pivot. The teeth, the nose,
pivot, auto pivot. And let's just
make this smaller. Oop, I forgot the tongue. Always forget something. So
we'll just make this smaller. Maybe push it in a
little bit more. I like that size. And
the only other issue that I had was, I think the legs I
wanted to make smaller. But then I wanted
to make the base of the legs a little bit wider, so I'll just use move tool to
kind of help out with that. Love it. Save. Okay, and lastly, design wise, let's just do these little
whiskery type things. So we'll use the tube
tool. We'll do path. Then we'll just make a
little line like that. You can turn snap off. And let's just drag these
back into a good position. You can see they're quite
large. That's okay. We'll fix that. So we'll use this little orange
thing to shrink it down. Okay? So we'll shrink it down. And we can make the whole
thing pretty small. But I think we need
to use the gizmo and just go even smaller. And then we'll go back
to this little squiggle, we'll just stretch it. I'm going to turn
constant density off. And you know, I can actually probably
just do it this way. I never really thought to Oh, you know what I
need to do, though? I need to make post
subdivision two. So that's usually what I do. I think that's good? I think I might want
a little bit of a Let's go ahead and clone, and let's use our gizmo
to just move it down. And you can even adjust it. Maybe this one goes a
little bit straighter. Clone again, and
then use the gizmo. Maybe this one is more
like the first one. But, yeah, I think that works. Okay, so I'm gonna take
all of these tubes that we just made and drag them out. I'm gonna give them their
own mirror, so add mirror. Okay, so now we have our mirror, so these are the whiskers. We'll take these tubes,
we'll join them. Let's uncheck a line. Let's do pivot, auto pivot. So it should just
go to one group of them. And I
want to bake this. So let's go to the gizmo here. We'll go here and
we'll just do bake. And then we'll do
pivot auto pivot. So essentially, what we dished
was set the orientation. So now our gizmo is perfectly in the middle and it's oriented
the right way. Whoops. So the reason why I
wanted to do that is because this is way too big. So now I can shrink it. I can make them a little
shorter if I want. You can move them
in or out and just figure out the best
place for these. And you can even you can even
smooth these if you want. Make them even,
like, smaller and a little more round. I
love it. Let's save. Okay, so whiskies, I'm gonna
grab those and validate. So only do that once you're
happy with them, which I am. The legs, I'm gonna go
ahead and validate. The arms, you guessed it. I'm gonna go ahead and validate. Now, the eyes A, I'm
gonna validate those. This is the eye whites. So I'm gonna leave the pupils 'cause we might move
them around later. The ear mid, let's
validate ear big. Let's validate. Oh,
I forgot the tail, didn't I? I did forget the tail. Which we will use
the tube tool path. And if we take a
look at the tail, it's a nice cute
little curly tail. We use the tube
tool. Path. Okay, so let's do the tail the right way. So make sure you tap on left. Let's turn the grid on, and let's make sure that we
turn this magnetic thing on. So we're going to
use tube tool path, and we will just drag like this, and you can see it should snap straight and then tap
this little green. So now we can turn snap off. Let's move that
directly into the body. And let's curve this tail. So I'm going to add a
few little curves here. And you just want to kind
of bend it over on itself. Like, so it doesn't
have to be straight. You can take, like,
maybe the top one and sort of move it
over a little bit. So now we're gonna
use the radius. So I'm gonna do all of these. So now we have all these
little orange nodes. I'm going to turn
constant density off. I'm gonna press the
three dots and go post subdivision to two
and bring division X down and bring
division Y down until we just get some
nice round ends. So maybe maybe maybe
division X three, division Y seven. So
we'll see how that works. Oh, and to make it easier,
let's just do two at first and make the end of the tail
bigger and see what we get. Okay, let's do all of them. And make sure none
of them are black. Like, I just had one that was
black, so that didn't work. I'm gonna turn this grid off. We don't need it
anymore. And anytime you start to see
these little ridges, let's just go here and
put this to three to give it a little
more resolution. Well, we'll make it four.
We'll live dangerously. Okay, so this one I'm
gonna make smaller. So this is the end one
I'm gonna make smaller. This I'll make bigger,
this I'll make bigger, and I'll kind of spread
these out a little bit. So sometimes it just takes
kind of moving it around and adjusting it until you
get exactly what you need. I'm switching it to division
Y nine and division X to three only because I just
think it looks a little nicer. Okay, so let's look at
how it's situationd. Pivot auto pivot, so
it's a little more, like, kind of like that. So I'm just gonna angle it up and kind of make it a little more true to the hardwork. I think that's perfect.
Alright, so I'm gonna validate.
9. The Magical Flower: Okay, so now that we have
all the basic shapes done, I'm going to switch
this reference image. So let's tap here. We'll tap on the
photo import photos, and we'll bring in
this final one. What we have to
do next is figure out how we want to
pose this character, and we also have to make
this little flower. Alright, so let's
hide everything. So just go to your
scene and make sure you hide everything, we're just going to start fresh. Let's turn on the grid. So we're going to use
the lathe to make the little bowl that
this plan is in. So that's just find
the lathe tool. We're going to use curve. So you should have a line going down
the center of the screen. It may not line
up with the grid. Actually, I'll just turn it
off so it's not confusing. So what we're gonna do is tap on the line and then we're
just going to draw a bowl. So we're going to go out up, maybe put a little lip on it, and then come down and
we're going to draw the inside line of
the bowl, as well. So it's something like this. So what the the tool is
the lathe tool does is just makes it go all the
way around that line. So now we have all
these little nodes, and these are the
outside surface, and you don't really
need all of these nodes. So some of these you
can just bring together and just kind of keep
the bottom flat. And now you can adjust the shape and just make it exactly
how you want it. I'm going to get
rid of those Okay, so you have something like that. And all of these up
here, you can adjust. And maybe you want to be fancy, you can tap and make, like, a little bit of a sharper edge. And this, these are
just the inside. So this is the
inside of your bowl, which we probably
won't even see. So there's the inside,
there's the bottom. So now what we're gonna
do is just validate it. So now we have our bowl. So let's bring back our grid. So the reason I want to bring
back the grid is because I want to keep everything
right in the center. So if we hit front, we can
see the center is right here. See the green line
and the red line. So what we can do
is go to our gizmo, which is at the
bottom of our bowl. So let's reset that.
We're gonna go pivot, auto, pivot, and then go up to this box.
So we're in the gizmo. So on the left side of the
Gizmo is this little icon, and let's hit reset. So now let's tap pivot, and then let's tap reset again, and that's going to
bring it to the center. I'm not sure why
it's that confusing, but we got it there in the end. So I'm going to
turn the grid Okay, so let's make sure that we
are labeling everything. So this lathe, I want to
take it out of the eye, and I'll actually bring
it up top, maybe. So this lathe, we'll tap the
three dots and name it bowl. Let's go to our scene
and add a sphere. So this is going to
be the middle flower, so this might be like
the glowing flour. So we'll tap this little
gizmo, we'll validate it. We'll move it up a little bit. Shrink it, and then
we'll just stretch it. Okay, so maybe
something like that. That'll be in the
middle of our plant. So next we'll go to the scene. We'll add a cylinder, and we're gonna use our
gizmo and we're gonna shrink it like this. We'll move it up. Now, let's rotate and let's
tap top. Trying to buy ale. Okay, so let's use the big orange ring and shrink it down to
maybe around here. Let's go ahead and
stretch it like this. And now let's go pivot, and we're gonna
use this red arrow to move this over to right
at the end of the leaf. We can hit pivot again
and we can validate. Okay, so this is
what we have here. Can make it a little
thicker if we want. So now we're gonna
slide this over. Right, until it lines up until our gizmo lines up
with that green line. So essentially, we're
just sliding it over so the end
is in the middle. Okay? Perfect. So the
next thing we're gonna do is take this leaf and
we're gonna use a radio. So we'll go to our
scene. We'll add radial. We can name this Leaf. Okay, so now we want
to go to the cylinder. So let's say we wanted to make
this five instead of four. We need to go to
the radial option here and just change
this to five. So now we want to make
sure that we work on this particular
leaf or cylinder. So now we can use the Gizmo
and we can move them out. Can rotate. You can
move them down. So maybe I'll make
it a little smaller. Let's make sure that we're
on our cylinder 100%. Let me turn this grid off. So now we're gonna go up
to the symmetry options, and we're gonna switch to local. So now the symmetry is
local to this leaf. And right now it's
top and bottom, what we really want
left and right. So let's find left and right. I think it's going to be Z. So I turned X off, and now I'm using Z and local. So what this means is I can use MV and I can give these a bend. I'm pushing up on one side, but we've mirrored it
to the other side. So now we can just
adjust these as we need. Maybe we want to make the top a little sharper or
something like that, or a little bit wider here. You can have some
fun with that and really just shape your plants. I think it looks pretty nice. So I'm going to take this bowl. And you can also
experiment with the bowl. Maybe you want it a
little bit taller. You can shrink it,
make it taller. Things like that. So next, we're going to take this leaf
and let's just clone it. So we have leaf one now, so we can take this
cylinder we can move it up, but maybe this has
four leaves instead. So we can go back to the radio and just change
this back to four, and then we have four leaves. So now, if you want to adjust the leaves like we did before, we can go ahead and
adjust them and just make them exactly how we
want them to look. Maybe I want them
a little shorter. So this is another place where you can really have fun with it, experiment, and make some
really cool flowers and leaves. You can play with the rotation like stow. That
looks really pretty. So I'm gonna go
ahead and take the whole mirror, leaf one. I'm gonna use the gizmo, and it should be in the middle now, and I'm gonna rotate it. And now I think I
want another leaf. So we can do the same thing.
We'll take this leaf. We'll clone it. So
now we have leaf two. We'll go to the cylinder. And by now, you
pretty much got it. Let me turn a line off. I probably should have
turned it off earlier. It didn't really affect
how things look. They look great, so it's
not too big of a deal. So I'm gonna go like this. I'm gonna maybe do that. And I think maybe I'll try
three leaves this time. So I'll go to my scene, go to the leaf two, and
bring this to three. Okay, I think I like that. I'm just gonna go to move and just edit maybe the
bottom of these leaves. Maybe make these leaves
a little rounder and pull up the edges and push
down the middle, perhaps. I like it. You can always take crease, as well if you want to
add some more details. Let's say we go to this one, and I'm going to
turn symmetry off. That way, I can just
make a straight line. I'll make it down
all of the leaves. I'm going to turn
symmetry off here. Go here, turn symmetry off. Oh, no, did it go on
the back as well? So here's another common issue, so I made those creases,
and they went on the back. Okay, so let's fix it. So let's go back to our let's
go to our crease options. Let's go to this
little pencil here, and let's go to filter, and let's do front
facing vertex only. So this should eliminate that. I should be able to
make it on the front, and it shouldn't go through on the back. So that's
what we need to do. Perfect. If you want to experiment
more with your leaves, you can do instance. So if you do instance
and you say yes, essentially, all these
leaves are separate now. So you can adjust
them all separately. But that's just something
a little extra. You don't have to do that. But if you did want
that flexibility, now you know how to do it. Okay, so, we're back to normal. Let's just validate
Join children. Validate join children,
validate Join children. Perfect. So now we
have our leaves, which we can go
ahead and long press and just connect them
to make it easier. We have our quad sphere, which is the let's just
say plant low mid. So that's the middle
that can glow. We have the plant bowl. Plant bowl. And
then we have leaf. So let's do Leaf C,
Leaf B and leaf A. And we can put these
all with the bowl. So we'll just long press and
connect those to the bowl. So now you can move
the bowl anywhere and the leaves will go with it. Perfect. I think that's
a really cute plant, and it gives you a little
look into radial symmetry.
10. Letter & Heart: So let's hide all of these. And now let's make
our little envelope. Okay, so we'll go
here and add a box. So we'll use our gizmo.
We'll flatten it. And I think for this, I want
to turn smooth shading off. So we'll go here to
the materials tab. Smooth shading, and we're
just going to turn it off. So now let's go to
our little three dots here and let's lower
the division X. Okay, I'm just going to lower it to seven. I think that's fine. We'll use the little red
sphere to stretch it. So now let's add a cylinder. Let's use the gizmo right here. Okay? We can take
it off of a line. We can do Snap 90, and we'll snap it 90
degrees this way. Okay? I'm just gonna pull it out towards us and then shrink it. We go back here and we
turn smooth shading off. So now let's turn off
constant density. And let's bring the division
X all the way down to three. Okay, and I think we can
leave this as it is. We can leave that at two and
we'll shrink it this way. It's a bit hard to see, so we're going to
stretch it like this. Okay, now, there we
go. So just inside. And now we have it upside down. So let's just rotate it. One, two, and we'll move
it into this and up. And I want to rotate
it a little bit. So let's turn snap off
and just rotate it, like, just a slight bit, and let's use a line and
just move it straight in to our envelope, like that. So let's tap pivot
and let's move this look at the front
right up to that top. So right up to the top
and then hit pivot again. So what this allows us to
do is we'll shrink it, but this edge won't move. So only this part will move. Perfect. So now we
can validate it. So now we're going to go
back into our scene menu, and we're going to
go to this cylinder, tap the three dots, and clone it, and then
we're going to go to the symmetry options
and flip object. And we're going to
flip it on the y axis, and you see that it just
flipped it to the bottom. So that's perfect. Let's save. Okay, so now let's
make the little heart. So over this, I want
to add a cylinder. Okay, we'll take a
look at the front. So, of course, we want
to rotate it towards us. So we want to go to
our little Gizmo. I'll do Snap 90, and I'll just use the
red ring to rotate it towards us and we
can reposition it. So we're gonna tap mirror. We're gonna go back to Gizmo and then we're going
to separate these. It's looking hardy already. And I think I want to go
ahead and validate these. So then we'll take MV. I want to make sure that
we're on the cylinder. I'm gonna rename
this mirror heart just so we don't forget. So this cylinder, and actually, I should just go ahead
and label all of these. Letter main Liter fold. A, or let's do top. And liter fold bottom. Okay. And this will be Letter
hearts probably better. And let's save. Okay, so now it's a matter of going back to our
cylinder using MV. So let's go to the symmetry
tab and let's set to local. And let's change to let's see. We want y. So this way, the front and the back
are gonna be even. We won't notice from
the front view, but it'll make it look
I'll make it look better. So now we can just
drag this into the other one like this, and
I think that's perfect. So I'm gonna take this letter, validate, join children. Yes. And I'm gonna vaxel
remesh it just so it's one piece and not
two pieces together. So vaxoRmsh I'll do 125 or so. So we'll re measure it at 1:25. I'm going to use my
smooth that we've been using and just smooth
that out. That looks great. And again, if you
have quad remeasure, it's a good time to go
into quad remeasure, turn off symmetry
and just do half. I can turn on the wire frame so you can
see what's happening. So it's just making
these squares bigger, which is lowering the
resolution of this heart. I think that's pretty good. Okay, so we'll go to our Gizmo. So we're on the heart. So I
need to do pivot, auto pivot. I'm gonna go ahead and
just change this back to X and make sure that it's local. And I want to move this, maybe
make it a little thinner. And now we can just put this
where it's supposed to. Perfect. Okay, so now we
have letter main. I'm gonna go ahead
and validate that. We'll take the letter fold, top, letter fold bottom,
and letter heart. We can just put those
all with our letter. Maybe we want to squeeze, like, the whole thing and
make it thinner. You can do that, if you want. But, yeah, I think that
looks great. So let's save. Okay, so let's bring
everything back so we can see what we have. So this was my old plant
bowl. I did it one way. It turned out to
be too confusing. This plant and bull
is getting deleted. Which I will move up.
We have our letter, which I will also move up
shrink to the appropriate size. It's kind of small.
Maybe a tad bit smaller, but I think that
looks pretty good. Maybe we'll put this
over here as well. Alright. That looks it's
looking so good. Let's save. O.
11. Remesh & Hierarchy: So next, we want to voxel remash the head with the ear so they're one piece so
we can smooth it out. The body will voxel remash
so we can smooth that out. So first, let's
grab the outer ear, the ear big, and the head. And I'm just gonna use
my little shortcut down here to voxel remesh. I think around 165 is fine.
So we'll remash that. Okay. So now the ears and
the head is one piece. We can take our smooth tool and then we can just
smooth this out. Maybe a little bit on the front. Okay? So let's do the
same thing with the body. We already joined these two. So we can just voxel remish
Round 150 is probably fine. So we'll smooth
around the edges. I don't want to lose too much
of the detail down here, so I'll just smooth a
little bit on the top. And another good thing about
boxel remising the head, if we can get rid of these with smooth those little pointy
edges that are annoying. Beautiful. So now
I'm going to place a letter and the plant just
in the basic position. So it's kind of here. Maybe a little turned. Like so. And it looks like it's
in front of the head, and maybe I'll just
rotate it a little bit. So I'm gonna take the bowl and then move it in front of
our little character. We'll move it close. We'll move it down some. Maybe we'll make
it a bit smaller. And I'm gonna rotate
it out towards us. Now, I know the leaves
are going into the head, but we'll adjust that. So I'm going to do a quick save. So what I like to do if I'm gonna move the head
or rotate the head, that can be tricky because we have so many things that are connected to it that
we also need to move. So obviously, you don't
just want to move the head because then
you're all messed up. Stuff. So we'll go to scene, and let's bring the
head up to the top. So we have the ear mid. So I'm gonna bring those up and nestle them with the head. We have the tube, which I
think it might be the tail. Yep. So we'll just
rename this tail. Okay. And the tail, we can actually drag that down and
nestle it with the body. So the chest, we can nestle
with the body, as well. And the legs, let's just leave the legs here for now,
the legs and the arms. So the whiskers,
we can connect to the head, the eyebrows, tongue. So all these pieces, I'm
just going to nestle. In some, for example,
like the nose is connected to the snout. Like, you can even
take the nose and then just you can nestle
nestle that to the snout, which has nestled to the head. All right, A. Alright, B. One's head time up. Okay. So I think everything
is nestled correctly. So I'm gonna go to the
head and just hit solo. Pivot, auto pivot. And then I'm going
to do pivot again, and I'm going to drag
the pivot all the way to the very bottom and
then pivot again. Solo. The reason I brought the pivot down when
it pivots here, then it's way easier to pose. Since we validated the arms,
and it's not going to work. So what I like to do
is just split the two. So we'll use the split tool, and we can probably use Lasso. Sometimes it's good to
turn on Xray so you don't accidentally miss a
part of the mesh. So I'm going to
use Lasso and just completely select one side. So then we have arm A. An arm B. And let's do the
same thing with the legs. We'll just use split, and
we'll just split the legs. Okay, so we can
turn an Xray off. So now this is gonna
make it much easier for us to pose our character. So I'm gonna save and
if you're like me, sometimes if you get a
little nervous about doing certain changes and
you might want to go back to a previous rendition
of your character, you can just hit Save As, and you can name it
something else, backup. Okay. So now you
have two versions. So when you go to open, we have D and then we have CD backup. So you can just open this and we're right back where we were.
12. Pose & Tail: So let's just add
a box to give him something to stand on just
as a frame of reference. So we'll just add a box. And we can go here and
turn smooth shading off. Just make it small.
We'll switch to the gizmo and just
make a quick floor. So now at least we have
some frame of reference. Okay, so now let's set our
pivot to make our arms and legs much easier
to work with. So we'll tap on arm
A. I'm just gonna hit solo, pivot auto pivot. So this is the middle,
but this won't make it easier easy for us to pose. So we hit pivot. I'm gonna go over and up and take a look, and that's in the middle,
so that's perfectly fine. And I'll hit pivot. It's Arm B, pivot, and I'll
just do the same thing. And now we'll go to the
legs, pivot, auto pivot, and we'll just do the same
thing. Whoops, pivot. Okay, so now we can own solo. So these are gonna be
much easier to move now. So I'll move this one
forward and rotate it. And I want to push it
back into the body some. There's a little
sphere here where you can kind of move it
kind of freestyle. So I do use that sometimes. I noticed I just used it, and I forgot to mention it. So it's very useful. So now I'm just gonna take move. And I'm just gonna adjust the arm a little bit and kind of push it in the body
so it makes sense. And, you know, it's
okay that it's not, uh, you know, perfectly
aligned with the other arm. So now, this arm, we want
to do the same thing, and we're just gonna move
it forward and rotate. So we'll just position the arm, so it appears that
the character is holding the bowl or the plan. Perfect. So now I'm gonna take the head, and I'm gonna move it back some, maybe rotate it
back a little bit. And then I'm gonna tilt it. Now, I want to take the body. I'm going to bring the
body above the head, and I want to take the head
and nestle it to the body. And we're also going
to nestle these arms. Thus we have to do one by one. We can nestle those to the body. Okay, and I think we'll leave
the legs alone for now. And the plant bowl,
I think we can nestle that to maybe
one of the arms. So we'll nestle that
to one of the arms. But it's important that we
change the pivot point. So let's solo it, pivot and move this towards
right at the bottom, it should be at the
bottom, middle. I think that's good. So we'll set the pivot and
then we'll unsolo it. So now it's gonna
move a little bit more natural where the legs are. Sometimes I like if you put
like one leg up and maybe, like, another leg back and
then maybe lean the body back. Maybe we can even bow this
leg out a little bit. Who, I want to take
it off of a line. It's much easier
to have it off of a line to be able to rotate and move this leg around
the way that you want. Okay, I think
that's pretty cute. Now, we can also, if we want to experiment with maybe
turning the body, we can go to body and then
change the group to object. So let's grab the
arms, the chest. The plant. So everything having to do with the plant
as well and the tail. So all of these
should just rotate. Let's take a look
at the front again. I think that works. So if I'm looking at this angle, which is kind of like
what the reference is, I kind of want to bring
the tail over now. This is what they call a
cheat because obviously the tail is in the back,
but we want to cheat it. So first things first, let's
move the pivot, pivot. I'm gonna rotate it, and
then I'll move it here. I'll move it down a little bit, and then tap pivot again. So now when we rotate, it's a little better. So we'll have to
cheat it kind of a lot, maybe even move it out. So sometimes, you know, you
have to kind of cheat it. So we're not seeing that much of I want to do a little
trick with the foot. I think I would like
to maybe use inflate, and I just want to inflate
a little bit here. So we'll see how this looks. I could add a little bit here, as well, just so it matches. Just to give it a little
bit of something. But I think I really
like that. I think I want to make a new tail. So I'm gonna use
the tube tool path, and we're just gonna
make a new tail. But this tail, I'm
just gonna make to the exact dimensions
that I need. Okay, so it'll be perfectly
going into the middle there. Okay, and now it just needs
to come out and curve. Okay? So, something like that, post subdivision to two, turn constant density off, and then bring these down
and make it nice and round. So I think the X being
four and the Y being 16 seems pretty good for now. So I'm gonna make it thicker. And then I'm going to
switch the radius. So there's two
orange nodes here. I'll make this one smaller. And then I'll tap both of them. And I'm going to add
one here so the bottom, so the bottommost
one is smaller. Then all of these, which
are kind of tricky to find, sometimes you got to follow the but these are
gonna be bigger. So this one is gonna
be much bigger. Okay, so pretty much
something like that. This actually looks better
than the other tail. So let's add a little
more geometry to this. So let's just tap
these three dots and bring this to let's
bring it to four. So looking at this leg,
I'm just gonna hit Xray. See how it goes below the floor. I just want to take
trim, rectangle, and we're just going to trim
that a little bit below. We don't want to go
right to the edge. We want to go a
little bit below. Okay, so we'll turn Xray off. So let's go up here. Let's go to Multi res, and
let's subdivide. We'll go to the
other leg. We'll go up here to Multi
res and subdivide. The arms, we can do the same. Maybe we even do those twice. So the other arm Multi
red subdivide twice. It's pretty good, so I'm
going to validate the tail. So now I'm going to take
the body the new tail, which is the tube,
both arms, both legs. Okay, I think that's everything. So now I'm gonna voxel
re mash all of this. Maybe we'll do like 225. Okay, so now our
pieces are connected, there is something
else I wanted to try, which I've actually
never done before. So I'm gonna take
select mask and lasso, and I'm going to grab the tail. And I want to try to be
careful not to grab too much of the body. Okay? I'm just gonna
go to mask and unmask. So this is different
than select mask, 'cause this is
more like a brush. I'm just gonna get rid of this
on the body, a little bit. Well, let me turn symmetry off. So now I'm gonna hit Invert. So the tail, I want to
be a little bit bushier. So I'm gonna go up
here and use inflate. See how it's only
inflating the tail, which is exactly what I wanted. Now I'm gonna use Gizmo. So I'm actually going to move
the gizmo right to the end. It's right there. So I'll
move the gizmo there, and that way, I should be able to move it down a little bit. And let's see. So now
we have a little space, at least, which I think
looks pretty good. So now we'll go to
mask and clear. Let's take smooth, and
we'll just smooth this out, and hopefully it will,
I think it looks great. We can smooth the
rest of the body out. Okay, I think that looks
great. Let's save.
13. Lighting & Post Process: Alright, so I'm gonna position this kind of like
our final position. I want to save this.
So I'm gonna go to this little camera, ade. And I'm just gonna name it one. So now I'm gonna
grab this letter. I'm going to move it a
little closer to the head, and then I want to go
back to that view. So we'll tap the little camera, and then we'll just
go back to the one. You might need to make it a
little smaller, actually. I'll go back to the view
and just update it. And also, these
leaves, which you can see are kind of going
through the face. I like the way that
the leaves are. So I think what I
want to do is take the gizmo. I'll move it forward. Just so it works right
at the edge of the face. And I think I want
to take the bowl. We'll go to our
scene, and let's grab the plant bowl and let's go over here to
where it says Group. Let's change to object. So now I think I want to tilt just the bowl and move it over. Maybe even make it a
little bit bigger. So that way, we're not
moving the plant much, but we're moving
the bowl so that it still appears that
he's holding the bowl, and we can even take this arm and kind of cozy it up to
the bowl a little bit more. You want to have
some contact there, so it really looks
like it's being held. So I think that's pretty
good problem solving. I think that looks, I think that'll So let's get this
colored, lit and rendered. Those are the last
things we need to do. We're almost there. So first, let's
change from Mat cap. That's this orange fake color
and light back to white. So we'll tap our little sun. We're going to switch from
Mat cap back to it PBR. So next, we're gonna
grab everything in the scene and just change
it to a more neutral color. So we're gonna go to
our scene menu here, and let's just
select everything. So I'm going to
select all of this. I don't even know what this
is on top. What is that? Oh, the tail. So I'm going
to select everything. Except for the camera I
can take the box too. So we're going to
select everything. We're going to go to the
little cube down here. I'm just going to
drag this over here. So this is our color window. Down here, you can choose
whatever color you want. Let's do a neutral color. I like to do a little
bit of orange, and then a little
bit close to gray, and I like to bring the
roughness up to about halfway, 0.5 0.54, somewhere
around there. And I like the
orange. I like it to kind of look like
terra cotta almost. So I'll go with
something like that. Let's paint all. It's just
gonna paint everything. So a neutral color is
good to set our lights. So then we're going to
go back to the sun. This is the environment, so we're just going
to turn that off. It's gonna go pitch black. So now there's no ambient
light on our scene. So we're going to add our
first light right here. So this is the default light. It's a directional light. So you can see this
little light bar here. These are your four
types of lights. I normally just use
directional lights unless I need something special. So we're in the Gizmo, and
we have the light selected. So I'm just going
to tap a line and then drag the light over here. So with directional lights, it doesn't matter where
the light is placed. All that matters is where
this little white arrow is. So if you rotate
it, the light will change. I'm going to hit Undo. But you can move it
anywhere you want. So what I do is usually move the light to where it looks like the light
is coming from. So here's the arrow. So
the light's coming here, so I'm just going to
move it kind of in that position. So
it makes sense. Let's tap these
little three dots, and let's make sure we change
the attachment to camera. And, oh, also, one more thing.
We'll tap on the light. And if you don't see
your little light icons, you can just go here
and just go like that. You can make sure
that that's on. If it's off, then you
just won't see them. So just make sure
that's on. So if we go back into this light, let's change the
intensity to 2.3. I'm going to go back to my
camera view that we made. So now we have our
first light set. Let's tap this little pencil
and just name this key. So that's your key light. That's the main light
source in your scene. So now we're gonna hit
this little clone button. We're gonna change
this one to edge. So this is going
to be a rim light. So let's go ahead
and move this light over down a little bit. And now we're just
going to rotate it with this green ring so we see a nice bright edge
on the side of the body. Let's go ahead and change
the intensity to like five. So now let's rotate and let's
rotate this way, as well. Let's rotate a little more. Okay, so now you see that
nice beautiful edge. Looks great. You can experiment if you want to make it a
little bit brighter, but I think five, a little
bit over five works well. So that's our second light. We'll go back to our lights. We'll clone that, and let's
change this one to two. We'll drag it over. So we're
going to do a similar thing, but on this side, but it's
not gonna be as harsh. So let's go ahead and rotate. I rotate it down a
little bit like that. So just rotate it until
you see, there we go. So that would be like, more
of like an edge light. So I might put a little
bit more on it like that. And I want to change I want
to put the intensity down. I don't want it as bright
as the other side. Okay? And my
background's purple. It's really cool to incorporate the colors of your background, the colors of your project
into your lighting, so it feels more natural. So you can just tap here, and then you can change
the color of the light. So we'll do a similar
kind of purplish. And it might be fun
on the other side. Let's go back to our lights. It might be fun on
the other side on the edge to maybe do a
nice, like, a warm color. So we increase
that a little bit. So we have a little
bit, you know, a little bit of warm color here, purple there, just looks nice. Okay, so let's add
another light. So let's just add light here. And let's change
this one. So it's a directional right now. If we tap that, it's environment,
spotlight, point light. So point light is
like feels like a light source where it's just glowing and radiating
out from the center. So let's use a point light. Let's bring the intensity down. And let's move it.
I'll just hit front. Let's move it so it's like coming from inside
this little flower. Okay, I want to lower
the intensity a little bit more so it's not so crazy. Okay, and we'll just move it
right in the middle there. See that? Beautiful. So now
that we have our lighting, and of course, you can change
the color or anything you want of this, you know,
so we'll change that. So now that we have
our basic lighting, let's bring back our
environment and adjust that so that it complements the lighting
that we've already made. So we'll bring back
the environment. See how it's very bright and it just kind of it kind of
flattens out everything, so we want to bring
the exposure down. So I'll put mine like 0.8
something around there. I think looks decent. Okay, so that looks
great. I'm gonna go ahead and turn on post process. So post process is
just the computing and making it look more like what the final image
will look like. So let's just hit post process. Okay? Now, you can actually save your post process
profiles. So minus DFD. But here you can see
everything you can see all of my
settings right here, although these are
a little bright, so you can always play
around with them. But usually, I just
leave. I just leave. I'm gonna bring the
strength down a little bit, I think. Yeah. So sometimes you might have to play around
with a little bit. It just seemed a little bit too dark if that's up all the way. I just didn't want it that dark. Okay, so that looks great. So next, all we need
to do is add colors, whatever colors we
want to the character.
14. Color I: Okay, so that looks great. So next all we need
to do is add colors, whatever colors we
want to the character. So that's really, really simple. All you want to do is tap on whatever mesh that
you're working with. We have the head. Let's tap this little color
cube down here. We have our color window, and let's go with a pink, so I'm gonna bring it
all the way up to red. I'm gonna go all the way up
top and then just bring it to the left until we get
a similar pink color. Want to make it a little bit
warmer. I think I like that. So I'll paint. And of course, you can adjust and try out different colors if you
need. That looks great. So now I'm going
to take the body, and I'm going to
color it the same. So I'm just gonna tap
here and paint all. Let's go back to our view. The floor maybe we'll just make, sometimes I'll just do the
same color as the background, since it's not really
important to show the floor, so I'll just kind of match it. So it's like a little game to, like, try and match
as close as I can. So anyway, so that's the floor. So now let's do the eyebrows seem like they're a darker pink, so let's work on
that darker pink. We can always take
the eyedropper here, and we can eye drop this, and then we can go
back into our color, and we can always just
make that darker. I think maybe something like
that. We'll paint that. And I think that's the only
thing that we might paint. Maybe the heart the heart
might be the same color. Okay? So now let's do the
white part of the eyes. And then it's just
rinch and repeat. Then we just go to white. I'm going to bring
the roughness down. So now I'm gonna go to
black and do the pupils. And we might want to
you can go all the way, bring the glossy all
the way down all the way up by bringing
roughness all the way down. We can do pain all. So now
we have our roughness. It looks good.
This can be white. So we'll go back up to white. But we don't want
it really glossy. We want it a little bit rough. Okay, so we'll bring
the roughness up. This is white. So we'll
just do pain all. And I think, okay, so a
little snoot is white. The little nose is black, but I don't think I want
it as glossy as the eyes. If we go in really close, we have my little additions, these the little Tefis. So I'm going to make those
white glossy the tongue, of course, is going to be pink. But since he's pink, we're going to make it a
little more of a darker pink and maybe not as glossy.
So maybe around there. And this is a little bit extra, but I'm going to go
behind the mouth. So what I'm going to do is,
so now we're on the face, I'm going to add a layer. So if you tap the
little layer icon here, we have the base. So the base is pink. I'm
going to add a layer, and this is going
to be in mouth. So I added a layer, and
all I'm going to do is maybe take a really dark red. I'm going to bring
roughness all the way up so there's no light
bouncing off of it. I'm going to find my paint tool, and then I'm going
to paint in here. Whoops. And it looks
like I have symmetry on, so I'm gonna turn symmetry off. Actually, I don't
know why it would be. Oh, you know what? Because I tilted the
head. That's why. If I still wanted
to use symmetry, I could, I could just go
to symmetry and do Local. And what that would do is change the symmetry from the whole
project to the head shape. So that's why now it's straight. So if I turn this on, it
should be perfectly fine now. The more you know.
Okay, that looks great. Let's go back to
our second view. Okay, so the envelope is white. Oops, let's go here. And let's just select this same white just
to make it easier. So we'll just do paint all, take these little pieces.
So here's the heart. All these are the same,
so I'm just gonna join these pieces and just
paint them white. Ooh, these are black. Black. I don't think I want them too shiny, so that's good. Looks great. So then the flour, the flower looks like so the light seems like it's
gonna be a purple color. So let's find that. Maybe
something like that. For now, I'll bring
the roughness down, a pinch, paint that. We're just gonna paint all of these. These I'm
gonna make green. The bottom ones, I'm
gonna make green. Okay. And maybe the light, maybe we want to change it
to a more purply color. So maybe something like that.
And then we have the bowl. I feel like it should be
brown or, like, terra cotta. And I'm going a little fast because this is more
of the fun things. Like, you don't have to
match my colors, you know? I'm just kind of going
off the cuff here. So we'll make that the
nice pot terracotta color. I think I like that.
Let's go to our view. Okay, so for the paint,
let's go back to the head. Looks like we have a little
bit of white on the feet, the hands, and the head. So
that's what we're gonna do. Let's just go ahead and grab. I'm gonna go with the eyedropper,
and I'll grab the pink. And then I'm just gonna
bring it to white. So the only reason I'm
grabbing the pink is so that the texture is
matched to the pink. I'm going to add a new layer, and this is going to be white. We're gonna go back
to our paint brush. So there's white
above the eyebrows. So let's see how it looks. It looks okay. It
doesn't look too bad. But if you want it really
clean, here's a little tip. You can tap here. You can go to dynamic topology.
You can enable it. So then you'll see this
little diamond here. So now, it's gonna be
super, super clean. Okay, you don't need to do the inside because you always
you can turn that off. So what's happening a quick note of what's happening is if
I turn the wireframe on, you can see the
wireframe of the head, and then you see it's
really dense here. So what it's doing is
it's using the tool, but it's making where the
tool goes very dense. Remember, dense is better
for detail and less dense, it would be blurry
and pixelated. So that's why this
is more dense here. So, again, you don't have
to use it for the inside. You can turn that off
because when you do that, it's going to increase the
resolution of your mesh. So you don't want
to go too crazy or else you're going to, like, be up in the millions
and not even realize. If you turn it off here, then you can just do
regular paint inside. It's more just the edges that you want to be
clean, not the inside. Now we're just coloring
it in. So that's perfect. But just remember, if
you turn it off there, it's not fully like,
it's not disabled. So once you're done, you want to go back here and disable it. Otherwise, you'll be using,
like, some other tool, and it'll be on and
it won't be good. Also another tip, what you should do is turn postpcess off. So if you go here and
turn postpcess off, it'll be a lot
easier to maneuver. I'm gonna leave mine on
just so it looks pretty. But I don't recommend it.
15. Color II: Okay, so I'm gonna turn
dynamic topology back on. I'm going to select this again. So now we're just
grabbing the color. I'm just gonna make it darker
where I want those notches. So that was the
white. I'm gonna make a new layer for the magenta. Okay, so let's turn dynamic topology on
and make our spheres. We want to keep it
nice and small. Okay, that looks pretty good, so I'm just gonna turn
it off and color inside. I'm gonna try to erase around
the edges a little bit. Just to make it a
little cleaner. Okay. So you can see I
made it a little dark. So that's the beauty of layers. You can just go into the layer and just lower the
opacity of it. Beautiful. I'm going to turn symmetry on. It looks like there's
two little notches here. Let's take a look at
the reference again. So it looks like there's
some spots on the back. Oh. Oh, there's two dots. They're not connected to
the eye. Good to know. And there's some dots in
the back, so let's do that. Okay, we'll turn dynamic
topology back on, take it off over erase. So these are more like
little spheres here. And let's do the
ones on the back. So there's some
little spots here. I'll turn symmetry off. Okay, I think it was
something like that. Now I'll turn dynamic topology off and just color these in. Alright, I think it looks great. So the only thing
that I want to sort of experiment with is doing
the light coming from here. And actually, if it's
coming from there, then maybe it is like a golden
yellowish color, perhaps. Maybe it is that color.
So, you can't really do, like, a particle system, which is kind of what
this looks like. It'd be very difficult
to do that in nomad. I'm just going to simplify that. We're gonna use the tube tool. We'll use path. So
let's start with just drawing a path from the
heart down to the flower. So let's tap the green dot. So now we have our tube, and this tube is going
to go through the ears. So I'm just gonna make
this go through the ears. Let's turn snap off. We don't need. I'm going
to add another node here. And this is up and through
the ears. Like so. Okay, so then it goes
around the body. So we just need to bring this back so that
it goes around the body. Let's add another node. So it's kind of going
around the body. I'm going to add another node. Kind of kind of comes
around the face like this. If we look at the front, it's kind of coming
around the top here. So I'm going to
bring this up some. And then it comes
around the face, a little bit in
front of the face. So let's add another node and just crudely bring
it in the front. And then it goes into
this light beam, so I'm going to add
another node here so I can really make a
curve in that flower. So you have to take
your time with this, but you get it. It's just a light path
coming from the little glow. Nothing too fancy. It
doesn't go over the eye, so I want to try to
make it match that. I don't think it needs to go. Well, let's see. Let's
take a look at the view. So the things you
want to pay attention to is you can see it a
little bit around here. Actually, it goes it
doesn't go behind the ear. It goes in front of the ear.
Okay, I just noticed that. But that's fine. So
we'll just bring it in front. No big deal. Okay, so it kind
of slinks around, goes in front of the ears. And then it has a little
curve here and goes up to our letter. Okay, I don't want to
touch in the body. That looks great. It's Gaelic. So now we can figure out how
to make this glow and how to make it feel kind
of cool looking. So we'll go to the
materials tab here, and instead of opaque,
let's go to blending. So blending is kind of cool cause you can
adjust the opacity. So maybe we'll put
it somewhere to, like, 40 or so. And we can do always unlit, so that'll give it kind
of a nice little glow. Cast shadows, I'm
going to turn off because we don't want this to give off any shadows, really. I'm going to change the color. To a warm color like this. So maybe something like that. I like it. Now, of course, it's kind of uniform now. So what I would do is
just hit radius twice. And for this, I would
just kind of, like, add some nodes and
then just adjust the I would just adjust
the size of this. So it kind of looks
like smoke almost, and you can be really creative. With how it's
looking, you can do, like, loops or
something like that. So you can be really
creative with your with your light here. So let's maybe make this
a little bit fatter here. And then we can make
this a little more skinny, something like that. And you can also you can go to your gizmo,
you can clone it, and then you can move one down, and then you can just
adjust that one to be, like, very different, you know? Like, they can kind of come
together, break apart. So you can really just adjust them to make some
interesting things going on with this
with this glow. You can adjust the
colors, maybe. Maybe you want to make one
like a little bit darker or lighter, something like that. And you can adjust you can
adjust the opacity of one. So maybe that one looks
like really light. And you can do that
a couple of times. So those are just
some interesting ways to adjust I'm gonna go
ahead and validate these. Just interesting ways to adjust your kind of magical
glow coming off. So, yeah, I think
those are cute. I'm gonna take these
two tubes and just join them together.
I'll move them up. You can also go back in here and maybe you
want to make them additives or Oh,
maybe dithering. Diering is kind
of cool, as well. You can turn two sided off, and you get that
kind of cool effect. It just pays to really go
in here and play around with some of the effects if there's something
that you can't get. Like, this exact
thing we're just not gonna be able to get in nomad. So you just come
in and play around with some of this stuff
and see what you can get. I mean, that's
exactly what I do. So let's go back to our view so we can enjoy it.
It's a beautiful view. So let's just look at it
without the reference. So we'll just go back to the
little image, check that. I'm going to go back
to the Sittle camera and just update this one. So now we have both one with the reference and then
without the reference. So if you want to
export the image, we just go to wire
little folder, and then right next to
it, there's render. So now you can export
the image, the screen. If you don't want
the background, like the purple background, you can tap that, and
it'll just be this image. It might be a little
tricky, though, because some of the elements are translucent, so they
might look a bit. So that might look a bit weird. I'm just going to
leave that for now. So I'm going to
export the screen. Okay, so here's our image. So here is where you can
download it or save it, so we'll save that image. We'll hit X. Play around with if you go to your
little camera here, now you can go to
Perspective and you can adjust that if you'd like, so you can get some
really cool angles and really cool shots. So maybe the shot like
that looks really great. I'm gonna save that one as
well because I love it. Let's try Let's try transparent background and
just see how it looks. Okay, so we'll save. I want to save this,
so I'm going to go back to my camera ad, and
we'll just make this three. And let's say you want
to do a turntable. You just want to go to this
little nomad icon here. If you have an iPad, this is when I start
screen recording. So I'll tap screen recording, and then just hit
your turn table. So here's my options.
You just hit Turn table. You can resize it if
you want. It's perfect.
16. Final Details & Outro!: Remember I told you
about the eyes. Now you can go to the eyes, and let's say you want
to move them around. So the only thing I
would say is you might want to validate and
uninstance them. So just hit yes. So this way, you'll have both of your eyes. You can select them and
move them together. I would do pivot, auto pivot
to bring that in the center. And let's do Oh, let's take it off of a line. Pivot, auto, pivot. Okay? Looks like that's
the best that we'll do 'cause they're tilted. So let's tilt this pivot. We're gonna move this
like that, pivot again. So now we can move them
both over a little bit. If we wanted them to be
looking in one direction, or maybe they're looking over here and up towards the letter. I'm gonna move my pivot just
so it's out of the way. So we'll have it looking
up towards the letter. Oh, another really
cool thing that you can do is you can set any of the body parts to if you go to materials and
set them to subsurface, that's also going to make things look really, really cool. So you can adjust the depth. I usually bring mine down
to like 0.08 something. I'll do the same with the body. I'll just go to subsurface,
bring this down some. Okay, I'm gonna go
to my view here. That looks great. I'm gonna go to these
little eyebrows. I'm gonna do the same thing. We'll go subsurface.
The little snoot. I'm gonna go subsurface. I'll bring it down a little
bit. These, as well. So what this does, it's going to eliminate a very
dark black shadow. See this black shadow here. But if I make this subsurface, it kind of eliminates that
really black unnatural shadow. So that's my whole reasoning
for doing this bit. Even the flowers,
I'll go subsurface. This one I can change the color, so it matches a little
bit more of that green. And then the flowers, which I'm gonna join together, actually, these leaves, I'm gonna
join them together, and then go subsurface. And this one maybe we'll
increase the depth, that'll make it
more see through. Let's change the color
to a more purply color. Even though red might
look pretty, dude. Maybe the heart will
make subsurface, too, just for funsies.
But, yeah, I love it. And of course, there's
these little glowy things. I'll show you how to
make those really quick. We'll add Let's add a plane. We'll make it a disc.
We'll go to our Gizmo. Let's move it here, down, we'll flip it towards us. We'll make it really small. We'll change the color
to a yellow color, and we'll change the
material up here to an additive, always unlit. We can bring the opacity up. So it's bright, but you
can still see the color. You can shrink. We don't need that much size
on our planes, so we'll just tap this. We'll bring the division
X all the way down. Can't move this out of the way. So I'm gonna bring it
down to one, validate it. Clone so we'll do another
one up here, shrink, Clone. Maybe ten bit bigger, Clone maybe smaller,
clone again. And that's how you'd
make a bunch of little glowy bits the easy way. So just a few more additions. Obviously, you can take
your little light bulls and you can just copy and
paste them all around. You can see I pated
some little extra ones here or discs, I should say. And then also on the body,
you want to add a layer. Then you can do
your white paint. So again, I'm using dynamic
topology, which is here. Just have it enabled, and you'll see this little diamond here. Then you can paint your hands. Again, you don't have
to paint the inside. You can turn that off
to paint the inside, or you can just paint. You can paint this
first, and then turn dynamic topology on and
then just line up the end. I also added some tubes
here for the lips. I think those were the
only changes I made. And with that, ladies
and gentlemen, we have created a three
D character design. Wonderful job. I
really appreciate you spending the time
to learn with me. I hope my ramblings
haven't been too much, but I find three D sculpting to be so relaxing and so fun. And I hope that I've brought you on that journey
and that you felt some of that magic that you
can draw whatever you want. You can create whatever
you want and make it in three D. Shout
it again to Sandra. I love this character design. If you haven't done
her class, why not? Drawing is the most fundamental
thing that you can learn. The skills, having the skills, having the ability to draw what's in your mind
and come up with characters is just so
important for three D. 100%, definitely go do her class. Again, upload your
three D sculpts. I can't wait to see them. I'm pretty sure
you can upload as many images as you want
in the project gallery. Maybe you want to
put them together. I want to see you be creative. I think that's the most
effective way to learn and to be inspired is to play and not feel like you
have all these rules. Definitely don't in my class. So, as always, you can
find me on Instagram. If you post on
Instagram and tag me, I love to share my students
artwork on my stories. Also on YouTube, I have
tons of content of Nomatscp content and some old Procreate stuff
on there, as well. So definitely check
me out there, youtube.com slash Troy freave. And, of course,
be sure to follow and check out more of
Sandra's work here. And also rating review
because I would love to do more collabs with more talented people so
that we can just share our knowledge and our information
and just lift you up, make you better artist,
keep you creative, and keep you inspired. Keep drawing, keep sculpting, and I look forward
to seeing you next time here on Skillshare.
 Dave Reed, 2D & 3D Illustrator - Brooklyn, NY