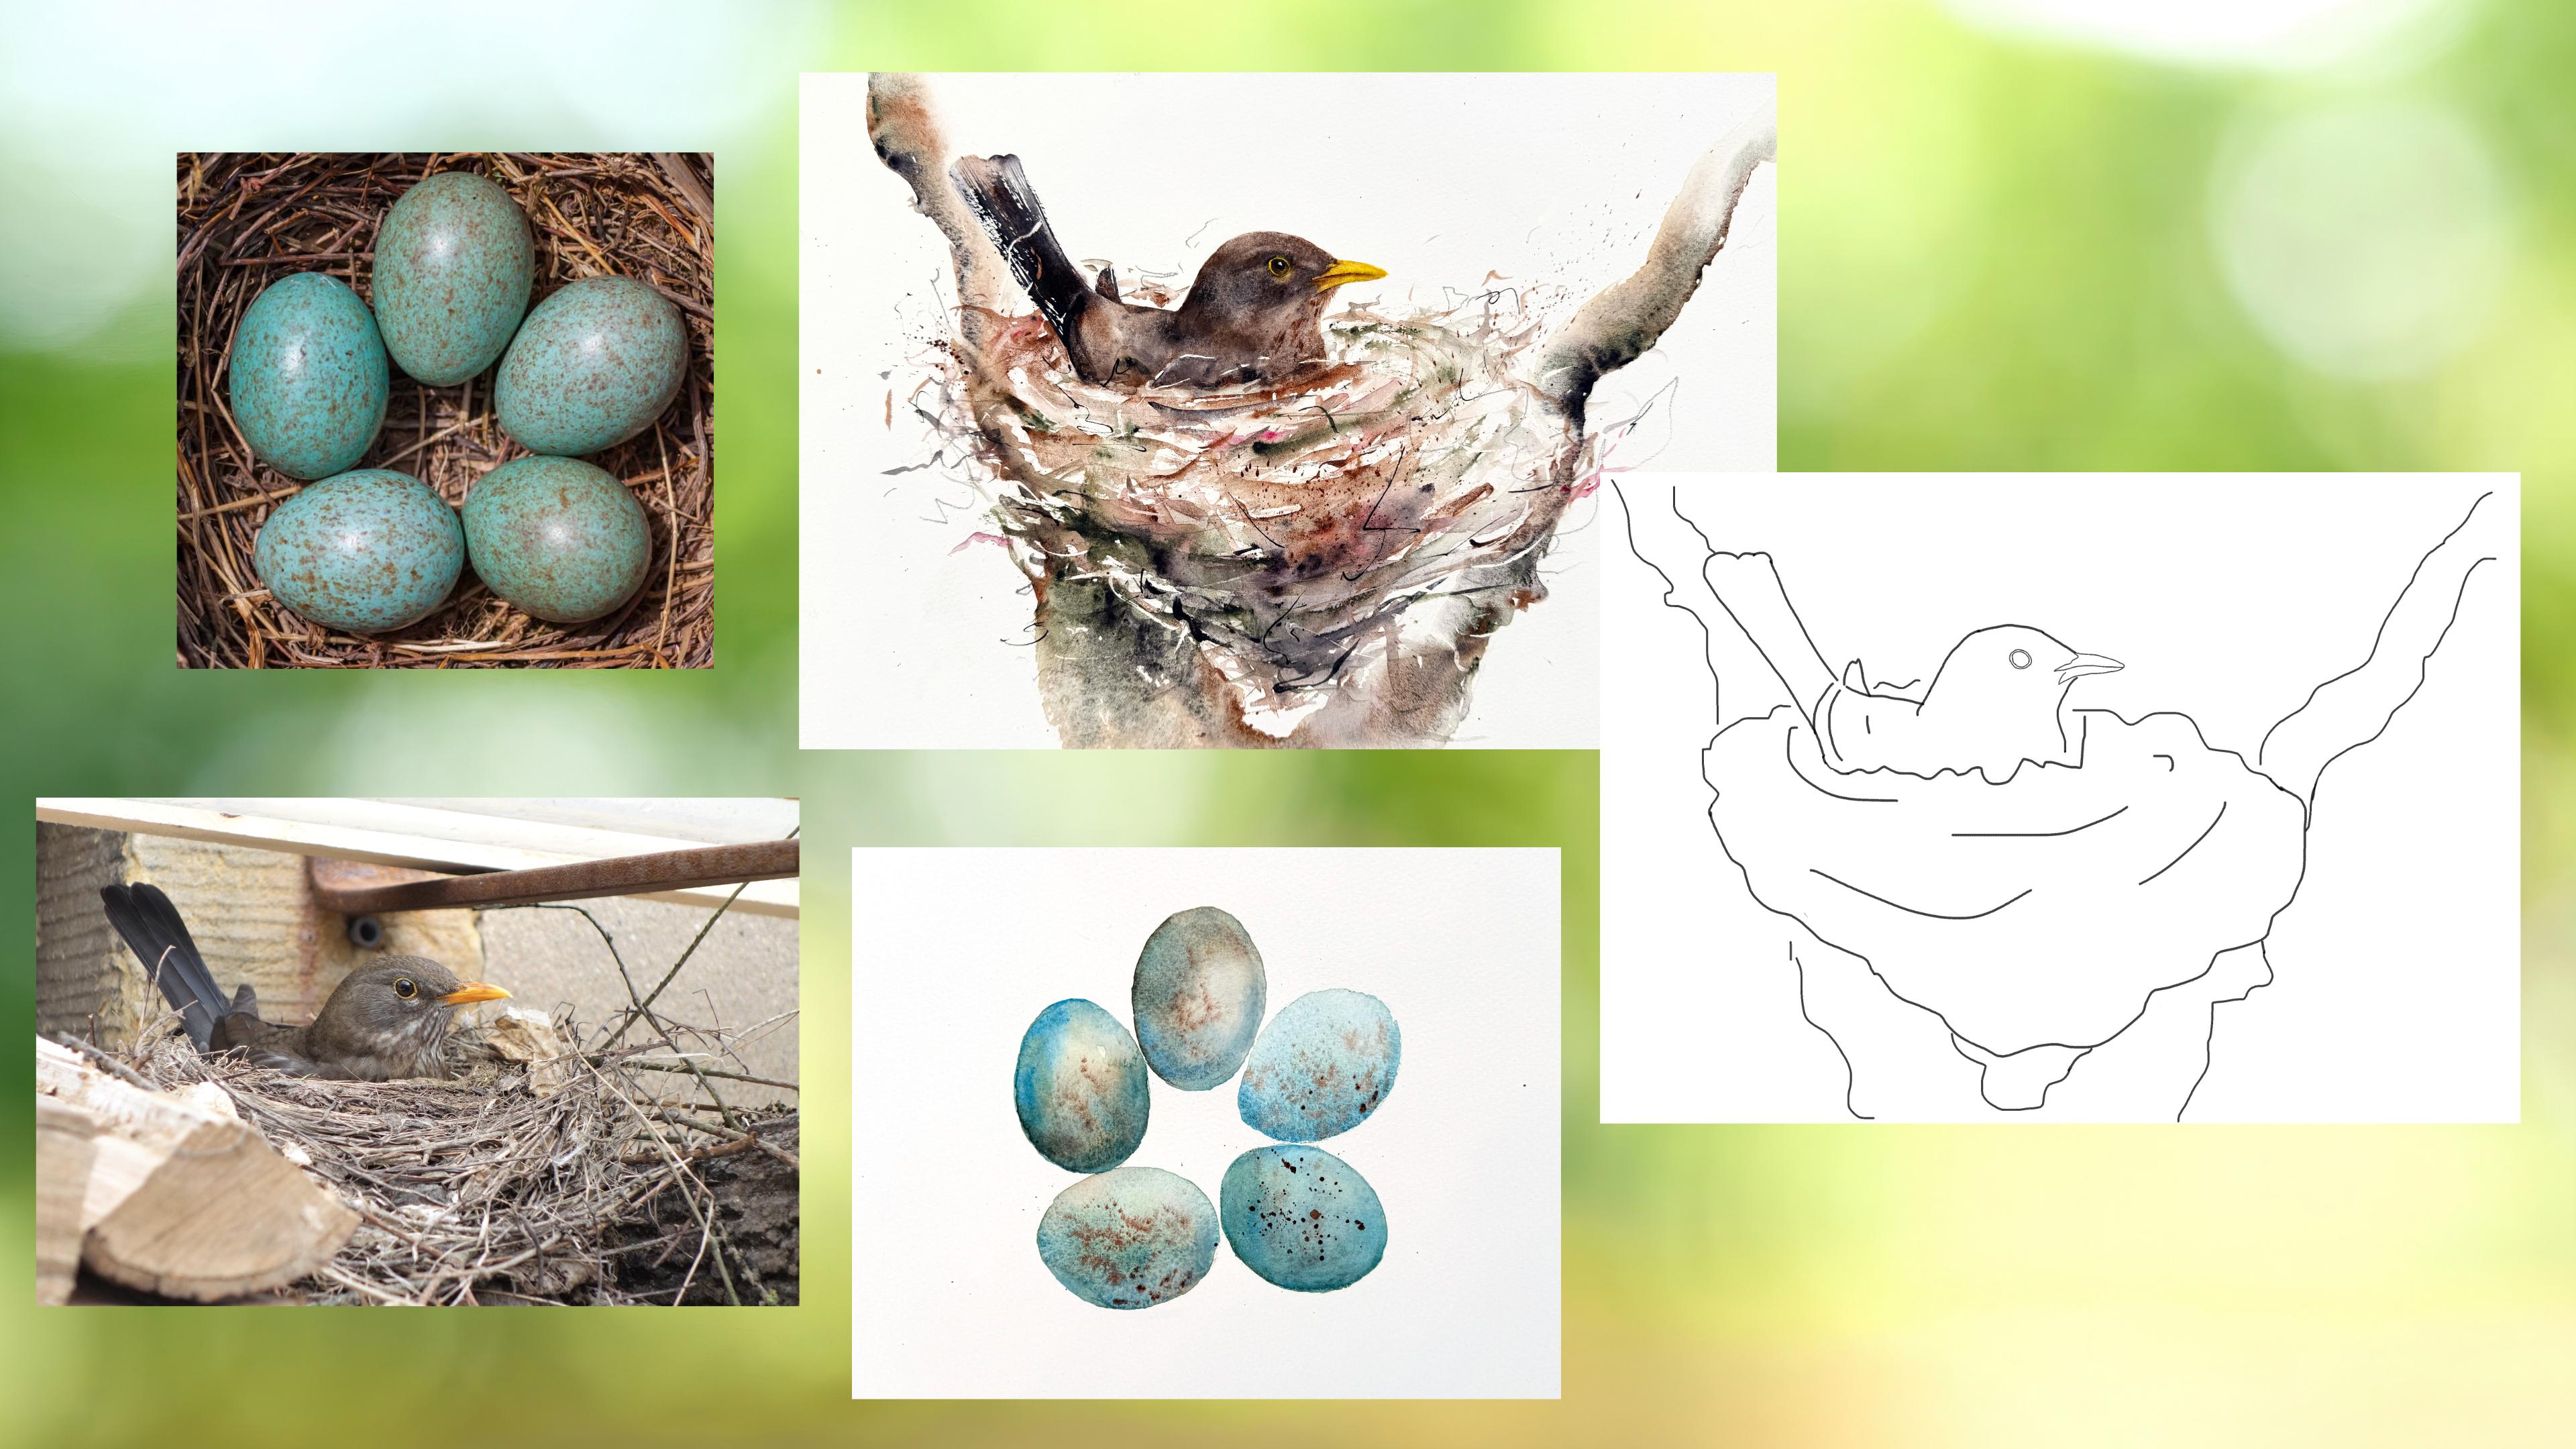
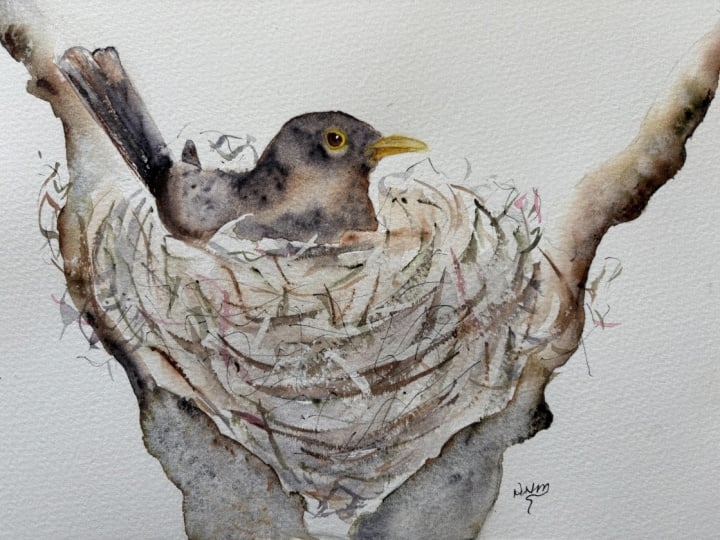
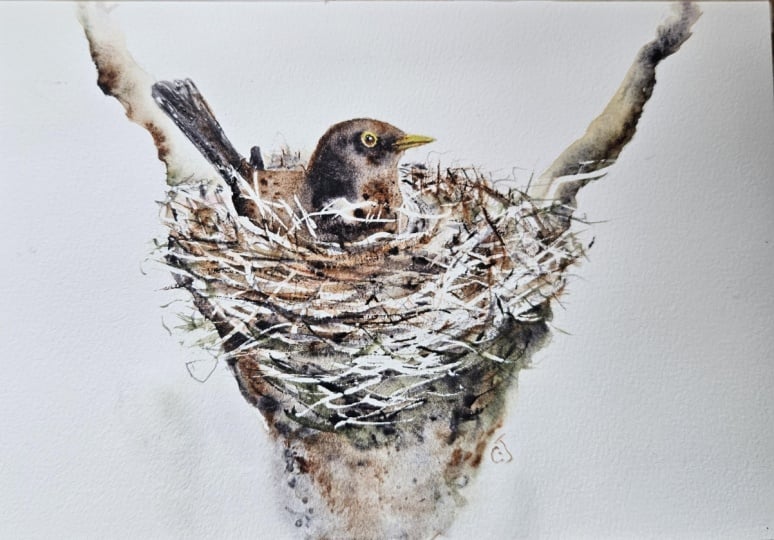
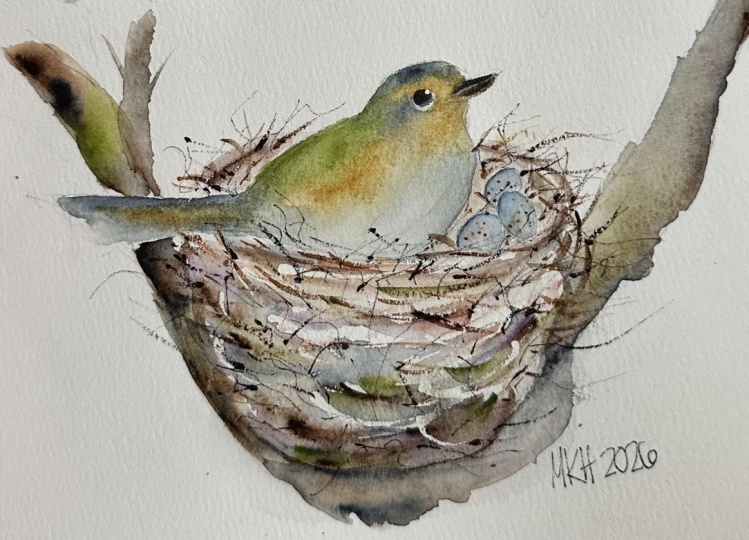
Transcripts
1. Introduction: Hello, and welcome to this
intermediate waterclod class. Today, we're going
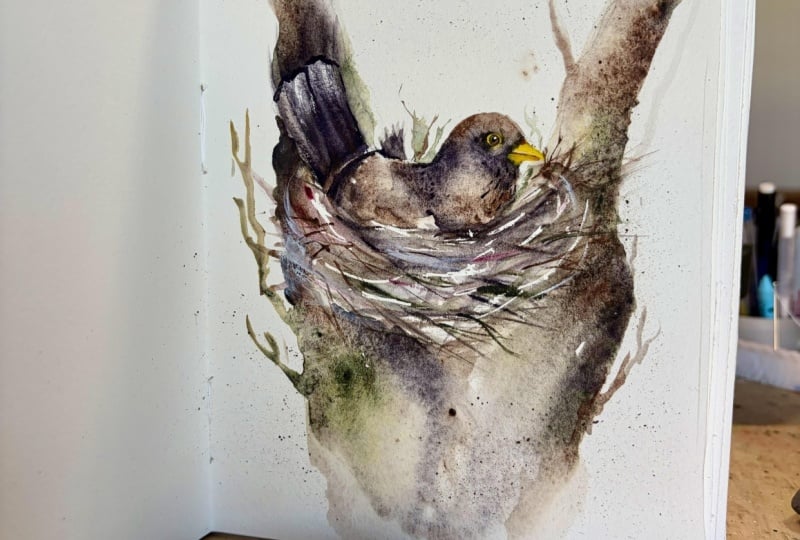
to be painting this sweet little bird
sitting on a nest. If you're after a fun, simple class that combines these lovely free
flow techniques, you're gonna love this one. There's a great mix of ideas and techniques and an extra bonus egg
painting lesson for you. I'm Jane Davis. I live, paint, teach, and walk my lovely spaniels in the beautiful South Downs
National Park in England. Over the last 20 years, I've taught myself the free flow technique that
you see today. Not having been to art school, finding my own way has been
fun and sometimes daunting, but has allowed me to
develop my own style. This has led me to teach others either on a
one to one basis or as part of a group in a wonderful studio in the
heart of the South Downs. I also run a successful
art business where two days are never the same from the thrill
of exhibiting to painting pet and
wildlife commissions in my own home studio. In all my classes, you will follow
along in real time, where I can guide you
to keeping your work loose and fresh
without overfussing. If you're just starting out, my three beginner
classes will guide you. With your first masterpiece
painted in only 15 minutes. Then you'll find dozens of
my master classes available, covering a wide range
of beautiful subjects. In each one, I share the techniques I use in
my own professional work. We'll have a lot
of fun together, and you'll gain the
understanding and confidence to
incorporate everything you learn into your own work. You'll be amazed at how
easy watercolor can be. I provided you with some great reference photos and a downloadable template
of the whole piece. The template will give you a stress free drawing so you
can just enjoy the painting. We will be putting that
lovely free flow technique of mine to good use to create those lovely
branches and nest. We'll be getting a little more detailed when we
create the Blackbird, building up soft layers to
give form and depth of color. And, of course, I'll be showing you how to finish
off this painting, including adding those
lovely scribbly detail. I've also included an
extra relaxed lesson on painting bird eggs with some slightly different
techniques from me. If you'd like to learn
more about me or my work, then please pop
over to my website at Jane Davis watercolors.co.uk. This can be found
on my profile page, along with links to my
Instagram and Facebook pages. I love to share my
art and adventures, especially on stories
with many ideas, works in progress, and
tales of studio life. I really hope you will share all your paintings on the
projects and resources pages. I love seeing your masterpieces. And don't forget
I'm here to help if you get stuck or
have any questions. I want you to experience
that buzz of painting in this liberating wet on wet loose style. So
come and join me.
2. Materials: So let me run through all
the materials you're going to need to paint this little
bird sitting in a nest. Now, before before
I go any further, the colors are really up to you. You can choose the
colors I've chosen. This is obviously this
piece of work here. I did many, many
different shades. This one's got a little
bit of violet in it, and I think I probably used
sort of like genuine excuses. They're all quite rough copies, but that one I couldn't I can't even remember if I'm honest, what
I used in that. And I've got here quite
a bluey, greeny one. I say, they're all quite rough, but I think hopefully it
explains that you can use whatever color you fancy and probably go into
a little more detail. You can choose your bird so that may guide you or what colours to select
for this little class. So from the very
beginning, I have, personally, I've got unsea
green, lunar violet. I have transparent brown. I have handsy yellow
medium, just for the beak. Rose madder, I don't use that very much if I'm
honest through there, but you can see the
little pink tones and just a tiny little
bit of white grass, which is just for the
catch light, nothing else. Uh, paper. This is arches, and it's 140 pound knot, and it's been stretched on
a perfect paper stretcher. All these links all these can be found on the projects
and resources pages, and I will put a link for
the perfect paper stretcher. Obviously got my pot of water. I have some masking
fluid, not essential, but it's quite nice to section some of the
areas off for it. But if you haven't got
it, it doesn't matter. Salt, again, I have used some
salt, and it would work. It depends on which
paints you pick. They don't work particularly
well on granulating paint. But if you choose something
that's not granulating, the salt might be quite
fun to add some texture. A little rubber obviously
just to rub the pencil marks out with kitchen
roll or paper towel. I've got an old brush. Now, make sure it's an old
brush to do the masking fluid. So that's believe it or
not, it was a brush once. I have a pencil. Doesn't
matter, a pencil. And I've got my trusty
dagger brush, which I love. And yes, I could have painted the
whole whole lot in that. But I have got a tiny,
tiny number naught. No, sorry, excuse it.
It's a number two. I did do some of the
eye detail with that. So if you haven't got a
dagger, please don't worry. You could easily
use a round brush, anything 6-10,
probably, but again, don't get too hung up on that. A hair dryer, I do use that just to finish off
drawing little sections, but again, not necessary. There's a nice
reference photo of the blackbird sitting in a nest. It's not the complete thing. This is a little bit, um out of my imagination
for better or worse. So, yes, you can
obviously choose your how you design your piece. But there is a picture of
the Blackbird sitting there, so I've used her to
take a reference from. Um, is there anything
else I need to tell you? I feel like I've
missed something out, but I don't think there is. No, right. Let's
go and sketch her. Let's go sketch her out, and
I'll explain a little more about the composition
and all that.
3. Sketching Out: Now, before you can
do any painting, we need to do a little
bit of sketching out. Now, as you can see, I'm painting a female
blackbird on her nest. Now, if you're in a
different country and you don't have blackbirds in your country and you want to
paint something different, then by all means, these stages will apply to any
bird on any nest. So let this class
just be a guide for you and let your sort
of imagination be free, and this would apply to
the bow shapes as well. I've decided to go with these
sort of shapes into a V, but you could have swung
it round into a portrait. Let me just show you
some other examples, although they actually
all landscape. These bowels are quite
an integral part of the overall painting. We'll give you some nice shape. So bear that in mind how
you want these to look. And also the nest needs to be able to sit on the
bowels you've chosen. So if you've got a weird shape, just try and bear in mind
that the nest would have to sit without falling off.
I hope that makes sense. So make sure it's all tucked in to the shapes you've chosen. I've gone with these shapes. I don't know why in the
end, if I'm honest, they probably just suited the shape of this piece of paper, and I'll show you that it's
a very rough little sketch, but that was probably the last one I did and the one
I probably liked the most. So with that in mind, I'm just going to give you just
a few tips on how I've sketched this out and little bits of points that
might be useful for you. But what I will
say is always keep your pencil marks
as light as you can cause especially on
any top portions where ideally the
light's falling, so we won't have a
lot of paint here. And it's always nice to not
have those lines restricted. Any watercolor terms,
they call this a lost and fan where it just
disappears into nothing. So that's a lovely part
of watercolor painting. Whatever bird you've chosen, whether it's the Blackbird or you've chosen your own bird, I'm quite excited to
see what everyone does, actually. Just make
sure it's right. They do tend to I've looked at quite a few
photos of different birds. They tend to sort of
snuggle themselves down into the nest.
It's quite sweet. And if you're looking for other reference photos,
just be mindful. If you look for AI
generated ones, they're a little cartoony. They obviously haven't quite
got the proportions right, and the bird tends
to be very small, and the nests very large. It doesn't really matter if
that's what you're going for. But if you want, it's
a bit more realistic. Just keep that in
mind, it might be a little out of its proportions. As I say, try to make sure
the nest actually sort of sits in that those lines of
the bowels you've chosen. So I've just sort of
roughly put it here. Don't try to do
all little twigs, we're going to be quite liberal with how we do our
brush strokes, but just get a nice
sort of coney shape. And I think that's it, actually. Just make sure you've
got the eye in there and you've done that beak because this has
probably been going to be quite a loose piece of work. So we need some little
areas that are going to be really lovely and tight
and neat and detailed. So I would suggest that's the beak and the
eye in this class. So yeah, take your time, sketch that out, step away
when you've done your sketch. And when you come back 10
minutes, probably all you need, just come back and
just reassess, make sure you've
got everything down 'cause it makes a
big difference. If the sketch isn't right,
your painting I find is I don't I will never produce a nice painting if my sketch isn't right
from the word go. I tend to lose
confidence as well, halfway through if
it's not right. So it's an important part, although it's not always
my favorite part, it's the most important part.
4. Masking Fluid: So before we even
get any paint down, we're gonna put a little bit of masking fluid. This is optional. If you haven't got
masking fluid, it doesn't matter too much. It's just a fun way to add a little bit of
texture and interest. Now, this is quite a fault. It's all jar. Have
I done that right? Yes. Should put that
all way over there. Now, a word with masking fluid. Don't whatever you do,
use your best brush. I've got a very old brush, which you can see has even
got dog hairs attached to it. 'Cause you won't
get the gum out, so I tend to use
this, if I'm honest. Now, once you've got your net shape you got
your nest shaped down, we're just going to be quite random with this masking fluid. It's just to get say, just a few light twigs. Once we can do one layer, we'll rub the mask, we'll
rub the masking fluid out, and then we'll be left
with these white marks. Now, I quite like it if I go
into the bird a little bit, there's a nice twiggy bit that goes back over
the herd's tail. All these things
just helps ground and make her look like she's
actually sitting in there. So you can sort of
go back and forth. You could in theory,
try just putting these in at the front so
it would appear that the light's hitting
that nest a little bit more. We'll see you may do this a few times because I think it's
going to be quite a fun one. I say, go into the bow as well. It's a Black birds are a little bit more random with
their nest making. Some birds are quite neat,
and some birds aren't, so I'm going to go
out a little bit just to give it a
nice bit of texture. Right. And then just
for good measure, I'm just going to do
a few splats as well. Now, it takes a
little while to dry. And once it has dried, we put down out the weight, and we put the lid on that
before I knock it over. It takes a little while
to dry, and once it has, if there's lines and bits of gum that you don't like, they
can always be taken out. So don't panic at this stage. If you've flicked something where you don't want
it to be flicked, allow it to dry and
we can rub that out. Oh
5. Boughs: Right. Before I do
start the bowels, I'm just going to sort
of assess where this gum has fallen just
while I remember, not sure about
this a little bit. I might get that
a little bit out. As I say, just go
over your own piece. You may have done it perfectly, and you may not want
to take any out. I think that honestly
might be it. I quite liked. Hopefully, it's been strong enough
to go into the bow. Yeah, I think that'd be fine. Right, we are going
to do the bow. Well, what you want to do? Pick up your bigger brush,
and we're going to wet this bow down. I'm gonna go. I'm gonna go sort of here just so I can pour some of
that down in a minute. So I don't want to
wet the whole lot. I'll show you how it gives you
a nice effect in a second. And just back fill it. And
it almost doesn't matter. If you have some it dry patches, I wouldn't thought that matters. It all adds to the
sort of texture. Now, I've got unsiGreen
I got my lunar violet, and it's pick up the
transparent brown. I'm just get rid of the
rubber. I don't need that. You're gonna put your paint on the brush at the same time. I'm going to try and
work just underneath this bow and just allow
that paint to go up. In theory, this is just
going to be one layer, so be nice and bold. But that said, if you really needed
another layer, you could, but let's try and get enough
down on the first layer, and then we're done. We don't have to sort of
muddy it and work over it. So you can put colour
on top of one another. Don't be afraid.
It's just a bow. Has to look kind of somehow I imagine it's
to be a bit of a gnarly. She's found herself a
really gnarly old bit of hedge or something
to tuck herself into. So what we're going to do, probably a little
bit more paint on my brush, but some down here. So I'm not particularly worried what paint I
put down, what color. I'm just a nice mixture. And then we're gonna
touch that wet line, and we're just
gonna pull it down. I'll just give another
sort of very loose, um sort of I would say random, but it's just allowing. It's just allowing everything
to be wonderfully soft. Let's put a little
bit more green, probably a little bit
too heavy handed with the violet there and put a
bit of transparent brown. I suppose, in theory, this would be a little cooler underneath after having just dropped a
load of warm brown there. Let's put a bit of
violet over the top. And then you can
just sort of flick that right out of your board. You could give it a
tilt. If it's not moving much or giving you
anything very interesting, you could give the board a tilt. I don't want it at the moment. That's forming something
quite pretty at the moment. If I tilt this, I
will lose this. I don't if you probably
can't quite work that out. There's a lot of
water sitting here, and I think that's gonna push in and leave quite an
interesting watermark. That's all I'm after,
especially with the bow 'cause they need to be nice
and random, don't they? And yeah, lots of sort of marks. Again, I have got my little,
a little bit of salt. If you're not working with
very heavily granulated paint, then a little bit of salt can add a nice touch of texture. I don't want to put it in here. Today, I can say, I can see
it's forming something nice, so I don't want to touch
it and worry that anymore. And it is literally just
the same on the next bowel. I've just done a nice
old splgeh haven't I got it out later. I'm going to pick up a brush. I'm gonna wet. I'm going to I'm gonna do
exactly as I did. Um, on that left hand
one. No, right hand one. My left and right is horrendous. I always swear if they
were the other way around, I'd probably have a better
chance of getting it right. So go carefully round that tail. Sort of work your
way round the nest. We will hopefully
work on the nest in a minute while these bowels
are a little bit tacky still, so we'll hopefully get a
little bit of softness, but for the time being,
work round the nest. And again, I'm going to
come just down to there. Put a little bit
there, just there. It just where you can see
how I've put the line. And again, I'm just going
to do it exactly the same. Let's work on Let's
work on this edge. Throw it a little
bit more green. Now, I'm standing, and I
always stand the paint, but this would be a
nice if you're not so comfortable standing
for any length of time. Try just doing it for this portion because I
think you can get above it, you can see where things
are going a little easier. And I think it just keeps
everything a little looser in your call
a general posture. So it's worth having
a little play with, even if it's only
for a short time. I have just noticed
I got my pink there. I don't really want to add
pink into this at the moment. I like the colors,
so I'm not going to. I did on some other pieces. But, you just have to
go with the flow and see what sort of shakes out whether you want
to add that colour. If you do want to
add a little bit of pink or a different
shade you've got, then by all means do, as I say, I really want this class to be a little bit more
free-flow for you as well. So hopefully you can
sort of follow along, but also do your own
piece if you want to. I put a little bit
more painting there, just so we can then
when we pull that down, it's got, there's some paint that's going to come
into that area. I visualize this as a slightly
chunkier bowel, I suppose. So let's pull that down. Again, I don't
really want to tilt it because this has
worked out quite nicely. This is looking
quite nice, as well. So even if this one ideally
could do with a tilt, I don't want to tilt because of this side.
That makes sense. Let's have a look. I think a little bit more
strength, I think. Let's put it
underneath the nest. So same theory, that
should be a little cooler. More green. I might sprinkle a little bit of
salt down there. Why not? Do a couple of twist
from yours coming out. Maybe even just a little
knot of something. It like that to it so
you can actually see there's a fork there in
that branch she's chosen. There's no reference
photo, really, we're just just having a bit of fun. But yes, just make sure
these are lined up, which I probably should have mentioned in
the sketching out, as a bowel goes
through the nest, make sure it actually
makes sense that they would be a continuous thing. Right, I think, honestly, I
like what I've done there. I think that's enough.
We can fiddle too much. As always, I'm going to sprinkle a little bit of salt on
this causes why not? Now, I've put my salt through the other side
next to the paint because I normally sit
it by the my water. And I think what I've been
doing, I've had it there. I've gone to clean my brush, and I've been dripping
water into my salt, which then doesn't help with the absorption because
the salt's wet. So I'm just putting
it onto a wet thing, and it's already absorbed enough moisture so it's not
working particularly well. And also granulating paints
don't work so well with salt, so I probably won't get much
of a result out of this, but it's why not? You might I might get something. And also, you may not be working with such granulated paints. Right, as much as I want to
fiddle and do a bit more, I'm going to just allow
this to dry a little bit. I've got quite a
lot of water here. This is almost dry.
Although I want this nest to sort of bleed
a little bit into the bout, I don't want it bleeding
probably too much. So I'm just gonna give it like a minute probably and
see where I am then.
6. Nest First Layer: Okay, so this is settled and
just drying a little bit, so I reckon I'm probably
good to go for the nest. So loosen up your wrists,
little wiry round. It's 'cause we're going to do
some lovely sort of sweeps. And again, this would be a
really nice time to stand. Again, same thing.
If you're sitting, you get a little
bit sort of clampy. Um, right. I'm gonna pick up the same
colours, actually, I might. Let's have a little
bit of that pink. So I've got the four colors
in my hand at the same time. And I got to clean my brush just to make sure I haven't
got anything on there. And then let's go for it. Again, I'm not going
to particularly worry what colors
I'm putting there, but probably in theory, I should be doing
the cooler colors slightly at the bottom
and warming up. And so anything that's
the heavier marks at the bottom as it
lightens to the top. So let's let me start
rather than just talking. I've got my green
and the violet. Nice and drip that everywhere. Nice, loose wrist, and we're just going
to do some sweeps. We've got two layers
to do over here, so don't worry too much. It's probably better
to look sparser than it is to look really thick. But it'll be a brown.
You can run that in. Some of this, I say,
my bowels are a little bit still a
little bit damp, but I think that just helps
to integrate the nest in into the sort of
bow on the painting. Bear in mind, she's obviously started building
or they've started building. I think they both
do it together. So they would have
fallen a little bit into this V shape just
so it's not sort of teetering on the top and trying to make it look
like it's kind of grounded into that
little V shape. And I want to go around her. Sort of sweeps
around, doesn't it? Again, it's just a
little flicky wrist, it slightly warmer
colours up here, tiny bit of pink's
quite violent, so I'm not going to use
it too too heavy handed. Can I put my brush on the side. Any you can sweep that round So, I'd always say less is more 'cause you can always
on the second layer, we can always do more, but you can't take
it off very easily. Once you've done
it, you've done it. They pick up all sorts
of funny things. I say, I'm going to refer
back to the Blackbird really I know we've had
nesting in our garden. I remember watching one of them pick up a lump of plastic. It's only a little bit of sort of heavy duty
bagging, I think. Yeah. So I should imagine that
was proudly carried back to nest as
nesting material. Now, I wouldn't do
any twiggy bits into the bird into
her at the moment. We'll do that on the
sort of later layers. Now, step back. Whether you're stitting or standing,
just have a look. Let's actually put some so it can be very easy to
have it all very uniform. So we're doing all these
sort of sweeps and it looks a little bit uniform. Have a look at that reference
photo. You can see this. I'm actually almost
vertical lines going down where they've
probably where they started, started adding the
material into that gap. Some of those down,
as well. I'm getting to the point where I've
probably done enough here. A bit of something luna
vt, a bit more down there. But brush is quite wet, so it's hopefully keeping
everything nice and soft. And I'm not worrying
if this is a bit damp, and it's all sort of
bleeding into the bowel. Trying to keep it a little
bit warm as I go up. Almost feel like I
need some more colors. Such a color junkie. That's a little bit more
green on the top. Right. I think I need to stop, 'cause we can do all
these funny twiddly bits on the next layer. Yes, I'm gonna down those paints 'cause
it's quite enjoyable, as well, isn't it? And it's easy to
get carried away. And actually, what would be
fun if you'll find you're sort of a fiddler
and want to carry on covered my hand in paint. You'd almost do
two side by side, even if it's just a
really rough copy. Um you know, for instance, you could have done a tiny
version like this next to it. Sometimes it's just enough for you to stop your main piece, go on to another bit
and stop you fiddling, what you consider going to be
your more important piece. Anyway, we just ideally need to allow that
to dry, really. And actually, while I'm
allowing this to dry, I've just sort of
soaked up those spots, and if you haven't come across a magic sponge,
they are brilliant. So they come in a little square. I've just ripped off a corner. They're actually
cleaning product. But they are fantastic
for getting rid of any spldges like this I
don't like seeing it. If I'm working, and I can see there's sort of
it's got a bit mucky. I I don't know, makes the whole look thing
look a bit untidy. So I don't like to see that
in my only view somehow. I'm getting to get rid of those, but actually you can see. I would say, the
Daniel Smith paints are very unforgiving, so forgiving, should I say, and will lift out
quite easily, too. So, yeah, that's just while
I was thinking of it, they're a useful thing. And I'll put a link
on the projects and resources page to that.
7. Birds Body First Layer: Right, let's start
the little bird. Let's get to see her. So I'm just going to wet
down the front portion. So it's coming down to here. You can see on that
reference photo, there's sort of a line
where she's snuggled in. Now, go really carefully
because she's got black birds have got a nice yellow
surround around that eye. So go nice and
carefully around that. I've just noticed that's
a little bit damp there. Se me putting my fist on something that's
not completely dry. I can avoid that. Okay,
so we're coming round. So, take your time wetting this a little bit down
'cause we want to keep that nice yellow
beak nice and clean. Yeah, I tend to work on the outside and
then back fill it, so I know I've got
the shape right. And don't worry if it blends, I would touch the nest material, and if it blends,
that's perfect. Then I duck my head
up and down just to see I've got everything
nicely covered. And then we're going
to add some colour. Now, a female blackbird is a little is browner,
and just paler. The male blackbird is quite
predominantly dark and black. So some of my practice pieces, it got a little mole like, and I don't think the males
ever sit on the nest. I may be hopefully I'm
not wrong on that one. So try if you're
doing the Blackbird, try to keep her nice and brown. I've only got the
transparent brown today I'm using and the Luna Violet. But, of course, if
you've got something, you think, Oh, you know what? That color would be perfect, then by all means, use those. I didn't want to add
too many to my desk, which I'm always
a bit guilty of. Right, I'm going to start.
Let's start on the back here. Again, that's just going to allow that colour
to blend and bleed. A little bit more lunar violets. Try and keep her a little
bit dark, not that warm. Just keep an eye on
that reference photo, look for the darker areas, and the light will
take care of itself. Let's have a little bit
of pink in there as well. Tiny bit of warmth on that. Already probably
quite a warm color. It's a transparent brown. I've been really mindful to go carefully up around that big. We're gonna do two
layers over here, so this layer is
just the first one, so it doesn't matter if
it's a little washed out and pale and you
haven't got some of those darker sort
of markings there. Then don't worry
too much to say, it's just the first
layer, this one. I don't know if
we have a squint. Squinting sounds such
a corny thing to say. The artist's squinting
at her work, but it does make a big
difference, actually. Just see that where
those darker areas are. She's got some lovely
sort of frecky marks, but I'm not going
to worry too much because they can
actually be taken out, so I'd rather get a nice
sense of float than trying to sort of reserve those flecks. But there's something a little
bit heavier here it'll get a little bit cooler
in there while it's where she's sitting
a bit more strin. Right. I'm now going to wet
the back feathers first. So I'm working towards the back. Gonna leave this one separate. We're gonna do a quick
flick, hopefully, and then we're joining it up, just allowing your
colours to flow. So there's a bit of strength
of dark down there, isn't it? The back feather? Did you ask keep? Just keep out my eye on that
reference photo. I quite like that light I've got there at the moment,
so I might keep that. Say we will do another layer. So obviously, there'll
be another layer of paint going over
the top of it, but it's always nice to
leave light if you can. Let's have a little look.
I think that's quite nice. I love, and this is where it's gone very grainy,
partly the paint, and partly because
we've wet this, and then it's been allowed
to then run into here, so it's sort of hauled
into that back area. So I'm just going to
allow all that to dry. I will definitely need a bit a little bit
more Luna violet, because she's quite
brown at the moment, but it's probably better
than being black. I don't quite want to do those
tail feathers quite yet. If I do these lovely
sweeps up there, I'm gonna lose
this it's going to obviously join up with
the tail feathers. And I'm just gonna hold
fire and allow that to dry. If by any reason, you know, yours is nice and dry, you could skip ahead, but I'm just gonna
allow that to dry.
8. Birds Tail: Right. This is nice and dry now, so I'm going to do that lovely
sweeping tail up there. Bigger brush. And I'm gonna I think I'm just gonna stick with the
lunar violet, actually, causes as you can see on
that reference photo, the tail's quite dark, as well. So I'm gonna brush nice and
plenty of paint on there. Sorry. I actually
what I'm gonna do. I'm just going to paint
a little bit on there. So it's a really nice,
sticky consistency. I've gone carefully
around those feathers. And then I'm just going to just use the brush. I'm
gonna sweep up. Careful here. And actually, if you
leave little white bits, this is lovely, it's a nice sense of light
flicking on that tail. It's just come down here. What I do want to do because they haven't got a
fluffy tail at the end, I just want to round that off. L's clean the butt
pot that down. I don't think I need
any more paint. Of course, I can always
add another layer when we do the other
layer of the body, so there's something
not quite right. As you can see
that kind of looks a bit better that it's rounded off 'cause she hasn't got she
hasn't got a fluffy tail. And that's just still
allowing that nice light. Just making sure that it all looks outside,
shape looks all right. Yeah, I think that's
come together well. It's chicken that's chicken.
That's the white shape. And then there's also
the other little, doing the bite again,
so I just poking my brush in there like I
do when I'm on my own. So again, same thing, a little bit of
paint to the bottom. I've cleaned my brush off, taken excess moisture off
because I don't want this wet. And then because we've only
got a tiny area to work with. So let's try and
just brush that up, so I'm brushing it
into dry paper. Yeah, I think that's alright. Actually, what I
might do, 'cause that little portion there looks a little bit
brownier to me. I'm just gonna drop a little
bit of brown paint in there. And that that's sort
of the main body done. Um, I said, there will be
another layer over that. So we're gonna do the eye
and the beak necks, I think.
9. Outside of Eye and Beak: Right. First in thirst, we are going to do the little
yellow rim around the eye. So I'm actually going
to use mytanibush. And if you have been standing, then I would definitely sit at this point. Sounds quite nice. But I'm gonna
continue standing as I I haven't really
got the setup to sit. Right, so very carefully, go round that yellow. Now, it doesn't matter so
much if you go inside, but try to keep the outsides. What you don't want
to what you want to avoid is making
this ring too big. So it wouldn't matter if
you go inside because we're obviously going to
darken that inside area. So if you can't
get it, you know, really nice and slim, work, concentrate on
getting the outside nice and neat and small. Don't worry, on the
reference photo, you can see some bits are a
little bit wider than others, but say, we're just trying to
concentrate on that shape, the outside shape,
shall I say, sorry. So yes, once you have
something like that, then we're just going to we will need to allow that to dry. And I will hang on to my little brush because
we're going to do the beak neck, be
nice and small. Let's start. Let's start
at the bottom one. So keep in mind those
sort of creases and where the beaks beak
generally go inside a bird. Quite often, people
will just sort of stick them right
on the outside. But obviously, if you've yeah, taking time to sketch it out, you'll get that right anyway, but just in case it's worth remembering it
needs to go inside, inside the body, not
stuck on the outside. So we're just going
to draw that out just a little bit of
light so light genuine. I haven't actually got so light genuine on my table, even today, so a little bit of brown to them transparent
brown, at the end. As you can see, the beaks
a little bit browner, and it will be a
little bit cooler and darker at the bottom. And even if it isn't
can add a little bit just to give that
definition of the join. Poking away at a
bit of Luna Violet again to darken that
a little bit more. So so one of the reasons
I love painting out the tube is that it can be
right next to the subject, so you're just sort of
tapping in and out. Make sure we keep that
nice and yellow, though. That's a little bit dark now. Let's just put that luma down stop my temptation of
sticking my brush in it. And it's quite pale
at the end, isn't it? So we really want the strength at the base and not
so much at the tip. So just take your time. Always worth getting these
little bits lovely and tight. And if you love fiddling, this is the time to fiddle. It's the little bits, they say, the beak and the eye. I've got a little bit of
pink there. The upper. Lit to me, a little greeny. F may have put the
pink on the table, not actually going
to use it very much. I think that
looks alright. Now, I can continue
with the top portion, but I will try to leave the tiniest of lines because what I don't really
want it doing, ideally you would
let this drive. It all gets a little bit
a bit much, isn't it? Little tiny areas dry. But so I'm going to leave
a tiny, little white line. I can join that up in a second. So this will be a
little bit lighter. In theory, she's you know, I can see the light
coming from the top here, so let's keep that
a little lighter. And you can touch
the body color, and that will just
gently blend as well. So it to a new bit
of just brown brown. We're really confident
I can just very gently join them up or just leave a tiny
little white line. Again, that's just a nice definition of
where the join is. Again, you can do another layer over that. So don't overfddle. Just do the one and get
what you like down, and then you can always
add to it once it's dried, so it's always better to allow
layers to dry and then add another one if you want to continue with some more
strength or some more detail. Right, this should,
with any luck. But just to be on the safe side, I'm just gonna get
a quick hair dry.
10. Inside of Eye: Right, let's fill in
the inside of the eye. Now, if you've got that
reference photo opened up, I would really scroll in so you can see that eye
nice and clearly. And I'm going to start
off with the brown. Always start in the middle. It's always gonna
look really weird, but then we can edge
our way out and start sort of getting that shape right, say, take your time. It's no hurry. It was
no paint drying or lots of paper drying if we're painting straight
onto dry paper. We just want to make sure we get that shape. Nice and neat. Keep flicking your eyes back and forth to that
reference photo. If you do it enough
and quick enough, they almost superimpose
themselves, so Yeah, keep keep flicking back and taking your
brush away as well. That's always a useful tip. It gonna start adding a little bit of darker
color to the top, 'cause although it doesn't necessarily show it on the
reference photo, actually, it shows a lighter area, I'm still gonna work a little
bit darker on the top. Probably defaulting back to how I paint animals a
little bit more. There's an eyelid, but I'm
gonna roll up my old excuse, as well, because I can't
get that close to this. I think I'm gonna
leave it there, and once the camera it's off. I will just reshape
that a little bit. And you can see, actually,
I haven't been that careful of going round when we
did that first layer, so I'm gonna have to make
sure I go right up against that yellow when we wet
this bird down again. But yes, just that needs
to be allowed to dry. That's gonna worry me now.
Let me just take that off. Um, That's better. All these little things
you see mistakes? I often it does to me anyway. I'm like, Oh, no,
don't like that. That's gonna have to go dadda. Um, yes. So I'm gonna just gently off camera, just
shake that a little bit. But, yeah, just take
your time. And then we need to put a
little pupil in, but ideally, that
needs to dry first.
11. Birds Body Second Layer: Right. Actually, before
I put the pupil in, I think I might do
that right at the end. I want to get a second layer
over this little bird, and I'm going to try and
get right up against that yellow because to me it looks a bit
odd at the moment. So pick up your bigger brush, and we're going to
do the second layer. Same things apply, same
way we're going to do it. So we're going to wet
down head portion go a little bit over there, but all those things corrected either with a dry brush
right at the very end. Or we can use that magic sponge. Now, I'm going to make sure I go right up against that yellow. Well, what are we around? Now, mine has gone. She looks somewhat
anemic at the moment, so I'm gonna have to
be qui at stronger with that, una violet. Now, obviously, you may be doing a completely
different bird, so just check on your
reference photo, check where you are, and just see where you
think you need that depth. What we're looking for is just adding the darker
areas at this point. So you may have a lot of
dark areas like I have, or you may just have
a few that might be just a little bit
sort of here and there. You need to add a bit
more strength, too. So, as always, as we work our
way through these classes, we all start to have different
we're all working on different areas we need
to concentrate on, especially if we're
doing different species of birds just to
complicate matters a bit. Let me just uncroe my painting. Sawing a reference
photo from what iPad. I Right. I am going to keep hold
of transparent brown, but I am going to
be predominantly using the lunar violet. I might get to use that pink. Right. So I need
to squint my eyes, and I definitely
need more dark here. So I've been quite bold. 'cause we're gonna with some of that back down into
the back, as well. So let's, if I squint my eyes, I can see there's probably going to keep this little
bit portion clear. It work too much.
You see actually where there must be
some dry paper here. You can see where
it hasn't moved. But I just want
to concentrate on getting her a little bit darker. And getting around
that eye, as well. So there's a nice bit a little
bit of transparent brown. There's a nice bit
round her eye. You can squint, you can see it's almost like a little
mask, isn't it? I say, really
careful that yellow. Once you lose that yellow, you're really hard to
get it back again, 'cause it's obviously
a very light colour. And we're working quite dark. Try to make sure I
get right up against those edges where I'm standing. Is there a white patch
there, as well, is it? Really wants to sew
light genuine now. I haven't added it to my table. I love sewed light genuine. If you've followed
some of my classes, you know how often
I use it as well. Just such a useful color. But let's stick with
this for the time being 'cause I Yes, I like the I love the
I like lunar violet. It's not one I've Sometimes you put these paints and you have them in your
drawer, don't you? And they sort of sort of fall out of favor
for some reason, or even get stuck behind the back of the drawer, and
you just don't use them much. And you think, Oh,
I. I love that. Shadow violet is another one. It's not probably one that
I would use often cause it's not a particular animal
shape, but animal color. But if you haven't coming across that,
that's a lovely color. Right, take my brush away,
let me have a little look. I still need a little
bit of depth here. It bit tiny bit it Transparent brown
on the top there. It's come over a little
bit more. Luna violet. Really keeping mind to
keep that beak shape nice. Not to go into there. How is she looking? Yes,
definitely better. And if you find a lot of
people seem to say, Oh, my paper, you know, my paper is drying
really quickly on me. If you look and you find there, Oh, this is still damp,
then you can just add. I don't really want to do
it because it's already probably quite
saturated, but you can, you know, get more
water on your bi and just drop it onto the
area you're working on. So as long as it's all dry, but if you've got bits
that are starting to dry, that's when it's
not ideal timing, but if it is, if it's um If it's still
a little bit damp, yeah, you can sort of reignite the paper and get
that little bit damp again. Keep 'cause ideally, I don't
want to do another layer, so I want to make sure I've got enough strength down there
and got her dark enough. I think she's quite like
this light area here. It's looking quite nice. Um, the bit here. I know I said I wasn't going
to go into this area, but, yeah, see if I could just
tap a little bit of dots. See if I can start
to create that? She just keep looking back
at that reference photo, so I caught it on my desk and my eyes are
flicking back and forth. I'm trying to think eye has
gone a little off shape, I think, but I can, uh there's a bit of light here. You can
always take light out. So be careful
because these paints almost lifted out too easily. So be careful. It's a little patch under here, as well, isn't it
underneath her eye here. I get that out. The nice thing about taking colour
out at this stage, rather than it's completely dry, is it leaves a sort
of softer mark. You see, when you do
this when it's dry, it will be quite an obvious
slo can be an obvious slot. Um, rub out, but a little bit depends on your paints and your
paper you're using. Eyes definitely gone
a little strange. Um, but oh I can't get
any closer at the moment. Right. Before this does dry, I'm going to do what
we did last time. I'm gonna touch that area,
and I'm gonna wet the back. Now, again, I'm going
to make sure I touched that tail color just so if
it just blend, that's great. Again, just assess your piece. I think I want a little
something a bit darker here. It's a tail feather going
in there, isn't it? A little bit longer back there. She's also got those
nice speckles, so tap some of those
in if I tap this in when it's really
wet and it'll be ever so soft when it dry. There gonna be a
car up there just to get that wing
definition back. I think she's looking right.
Just a little bit more. I think lovely unaviles beautiful for that
granulating effect, isn't it? It's really lovely.
Little bit colour there. So I can always go
back because we've obviously let some of
that color into the back, you may find you need to go
back in here and strengthen. I think she's almost there. I do need to correct this eye, but that's me being a little
way away from this painting. And yes, I think I've
gone into the yellow, haven't I me saying, Be careful. Don't go into the
yellow. I'll give her a little go in
a minute when I can get a touch closer. I get that band back again. That's disappeared,
isn't it? It's like a If you look at that
reference photo, there's almost a a
little band here. So Right, I'm starting to get
to that tricky stage. I can feel it's starting to dry because my paint isn't
moving very much. And I can although it's not as easy for me to see with this light that I film
under, I can feel it. So have a little check. If you're still fiddling
like your I am, just check you've still got
that. It's still wet enough. If it's not, then we're
probably all sort of starting to fall into
that rather tricky, um stage where it's
beginning to dry and adding more water at this stage because
we've already fiddled, it can get a little bit mucky. And if worst comes to
worst, you're like, Oh, no, I really need to do more. It would still be better now. At this stage, you just leave
it, let it dry completely, then re wet it and just work on the areas you wanted to
sort of fiddle with now. So I'm going to down my
brush and allow that to dry, and I'll probably have
a little fiddle with that eye while we're
allowing our birds to dry.
12. Nest Second Layer: Right, ho. Um, neaten
up my eye a little bit. Looks a bit better, doesn't it? What we're going to do now is to rub out this masking fluid, but make sure all the elements are nice and dry before
you start rubbing. So nice clean hand. And you're just gonna you
rub masking flew it out. Remember if you've
got some over the bird, rubbing out too. Rubbing. I'm also gonna rub out any of the
petal marks, as well. And that salt. Salts finally give me it a bit of something,
hasn't it down there? Always quite satisfying rubbing masking fluid it out, isn't it? That it to. What's something
like? I think it's all good. What can you hear
that away. Fab. Right. And what we're gonna
do now is just to add more strength to that
nest cause obviously it's a little washed out and it
needs a little bit more body. So, exactly the same as we did with the
first layer, really, but we're gonna do
a few more sort of twirly bits and just give it
a little bit more texture. So I would go look at
your nest, actually, and what colors you think
you'd like to add a bit more, you know, more colour too. So I think I'm going to constra little bit darker down here. We'll use that
pink. And actually, the pink's quite nice here,
I've used a bit there. So yeah, be a judge of what color you'd like
to pick up and use, but it will be the
same technique. So let's start with the loon. Actually let's have
them all in was eye. In my hand at one time, I was eye neglected that
pink down there. So, again, you have
the same movement. And don't worry about
rustling up any of that bottom layer
with existing layer. That doesn't matter.
It's all gonna add to that sort of scent of
texture and lightness. And you can say, lay your
brush at different times, different sort of angles. I know I've got
this wedge paper, but even if you've
got, you know, just a normal round brush, just lay your brush
in different angles. It can be wet down in areas, not wet down in other areas. So you're really
just after making a bit of a sploge really, but a mindful splodge. Because it is easy it's too easy to get a little bit muddy, but I would suggest always just stepping back and having
a look where you're at. So it's quite easy to
sort of get carried away and head down in
you're working away, and before you know it,
you've overdone it. So I'm just starting to add a few twirly bits in here as
that begins to dry as well. So I want in theory, keep it a little warmer up here, a little lighter,
not quite so heavy. I suppose your
theory it would be a tiny bit darker
underneath her tail. She what up against her. Again, I can twiddle around. I can twiddle into her, as well, so don't
forget about that. Dry marks. You can
use your fingernail. That's often quite
fun, actually. So that's just just laying
my fingernail on the edge. Just pulling any bits out, 'cause that'll be quite
um, quite squiggly. You can see it's very fine. Again, it's just after
adding different textures. Try to keep away from it just to make sure I'm
not overdoing it. A little bit dwiddy up here. The good thing about
this brush is, it's got a lovely point to it, so it's although it's quite a big brush in some
ways, it's also quite fine. So I can pretty much do
most paintings with this. It's useful to do a little
bit at the back here 'cause she's obviously
sitting in a nest. Just do a few little
bits into the body. But for any reason,
you think you might be doing another
layer of the body. I won't be, but if
in case you do, then just hold fire with
putting anything into the body. I think that's looking right. Don't want to get Don't want to lose all those white
marks that we've carefully, painstakingly,
masking fluid off. It's just a a bit of texture with a real
spludge of paint. Twiddle a few bits
out here as well. So I kind of want
to get a sense that it's sitting sitting
in that crook of the bow rather than sitting sort of Yes, sort of floating into it. Concentrate on that and talk. Right. I'm going to leave
it here at the moment, because it's just so tempting just to keep adding
these sort of flicks because they're so they're so enjoyable to do, aren't they? But it's easy easy to
overdo it. Put those down. You can add pencil marks, ink marks as well when we do the finishing off
bits, which I can show you. But if in doubt, don't overdo it cause
you can always add more, and it doesn't matter if you add more when it's
completely dry as well, because that will just again add to the different
complexities of it. So hold fire and see what you've got and we'll
analyze it once it's dried.
13. Finishing Off: So we're really on to
the finishing off bits. There's obviously a little eye we need to finish and the beak. But what I find really useful at this stage in the process, because we've been
painting for an hour, maybe an hour and
a little bit, is to take a picture
of your own work. So I'm going to do just that. And I will analyze my
picture from my photo. Off I won't show you the photo
because you're looking at the screen, but the picture. But I am quite pleased
with it, actually. I obviously need to rub
out these pencil marks. I like the overall
bird and the shape. The tail feather looks
a little disconnected. It's 'cause there's
no brown in here. So what I might
do in a minute is just to wet that
down and just pull a little bit of brown just so
it looks they look united. To me, they look a
little stuck on, which in theory,
they actually were. They were painted
separately, weren't they? I will do a few pencil marks into this nest just to
give a little bit more. Yeah, just different textures. I don't think I want to
do any more painting on here or even any
paint brush marks. But again, I say, as we sort of work our
way through these, we all have slightly
different issues and things we want to work with. So first thing first, I think, is to get the eye done and
rub these pencil marks out because we can kind of
see what we're going into. I think getting rid
of pencil mark is a really lovely thing you I
just releases a lot of stuff, especially if you've got
these edges like the bow. You can see it just
disappears, then, doesn't it? It's not being constrained
by any pencil marks. I won't do much rubbing it
always rubs the desk around, and it gets a bit warbly, so but you get the gist, so I'd rub it any pencil
marks that you see out, and let's get the eye done
and little white catch light. So the best thing to do if
it's we need to really put that blab pop still got
it blob of water there. We still need to
put the pupil in. It's actually quite obvious
on that reference photo, but birds generally don't
see them particularly well, but we will put one on, and we're going to wet
down the entire eye area. Try not to misshape it
at this stage again. And I'm just going to use a tiny little bit of lunar violet. She I don't want it too wet, so if it's sitting in a
little bobble of water, either suck it up with a little
bit of kitchen roll just by the edge there
or with your brush, but we'll also make sure
that's sort of drying. A little simply, we'll
put that in the middle. And just allow it
to gently spread. It's not that obvious. But it will be
enough, hopefully, just to sort of give a
little bit of depth, and you'll be able
to just to see it. And also is to take out light. So little tiny brush,
it's got no paint on it. I've taken the excess.
I've just done that. Excess moisture with my finger, and I'm just wiping
away some of the color. And that will also show that
pupil off a little bit more. If you've watched it away like I probably have at this stage, so it's always a little awkward for me to see these
type of details. You can always pop
it back in again. So they're not like a dog's
eye or particular cat's eye. The pupils generally
quite blended in. Okay just as gently.
Just work away. You can always spend
a little bit of time fiddling. There's
no harm in it. And quite often, you're
like, you're working away, and all of a sudden,
you take your brush away and go. That's
it. I'm done. And it suddenly appears
in front of you. So take your time. Don't panic. I think I'm
just about there, actually. And with that little
white catch light, it'll make all the difference. So we're going to do another
little layer on this. Big. Gonna work underneath. I just want to make that a little bit more a little bit warmer,
a little bit more orangy. So although I haven't got
the orange, obviously, if you have an orange,
then grab your orange, if it's a little
yellow like mine, but I'm trying to be good and stick with some limited colors. So I've got the transparent brown and a little bit of pink, just to warm it up
a little bit more. And if you've lost like
I have a little bit, you've lost some of that beak, that nice marking not markings, but it'll tick into the body. Then you can always just
wipe that color away and just refine it again. Again, if this line, maybe left that little white line, if
that looks too obvious, you can then squeege
that up so you lose it. Be careful you don't lose
the line of the beak, we'll make that look odd. Again, it's just gently
working away, really. Looking at your reference photo, seeing what you need to adjust. I lost some of this, haven't I hear?claim some of that.
Take your brush away. It's always such a
useful thing just to lift it away, see
where you're at. Yeah, it more shrimp there. My papers just damp, at this point, so it's
sticking quite well. Yeah, that makes
difference, doesn't it? Again, I can go
back onto the top. I don't think at this stage, because it's a second layer now. Even if we touch it underneath, it's still gonna won't it
shouldn't bleed too much. There's not a lot
of color there. And second layers don't
move as much as first. Again, I can just
assess where I want the color a little
bit maybe at the top. And there is a
little nostral mark, which again, of all these
pieces, all these classes, actually to paint them a lot larger would be easier
in some respects, because when you're doing little fine details on
something small, it's harder. It seems like it should
be easier somehow 'cause you got It's
not so daunting, is it, but it can make it
more challenging, I find. I think that looks alright. It's always good
just to sort of, take your brush away,
have a little look. And even if we rest
it for a little bit and re analyze it
again in a minute. So let's do that tail feather. It's a shame 'cause I've got that nice little sweep of that. Yeah, I love how that
light has formed on there, and we've got that
little bit of bowel there as well that's
gone across the tail. But let's do let's
do the top portion. I'm just gonna wet that
top portion down again. I actually might just bring it into the body a little bit, just to soften it a touch. And then I'm going to add
that transparent brown. It's very gently. You may not need to do this, so please just to say,
look at your own piece. If you like your tail and you've achieved that nice unity, then I wouldn't
worry personally, but Unfortunately, I can't
see if I want to work. Otherwise, that
would be amazing, but I can't be a judge. Soften this into
the body just so it all joined up a
little bit more. And there are quite
some intricate feathered markings in here, aren't there, which you
could sort of tinkle with if you like the
detail, then you could. But I'm going to leave
it a little bit simple. So the idea of this
class was quite easy, quick, play, really, with
some nice a nice subject. Use that in a little bit more. Fab. Yes, that
looks better to me. It feels a little more united. Just that little bit of transparent brown sort
of marrying the two up. Right. The little catch light is probably one of the last
little bits we need to do. We might take a little bit of color out to try and get that freckling on the chest area, but So I picked up a little bit of white
gouache I've had off the table. Nice and sticky. And
we're gonna put. I always I still default
back to probably the dog positioning so it's
top and to the front. Just like that. It makes
all the difference, isn't it? It's amazing. Right. Let's see if
we can dry brush, a little bit of
transparent brown. I give it a bit of a squeeze
if I can get the paint to the top without
squirting it somewhere. So I'm just running my
brush along the top. Like, have a nice angle, and I'm gonna see if I can
just tap some of that. Those little freckle marks. Make sure you get in
the right direction. They're obviously sort of
coming down, aren't they? And then run across. I don't want to do too many. I can also take a little
bit of color out, so I might do that
as well in a minute. Actually, what we
didn't do, which is a shame I should have
done that a lot sooner. That settle it was
some little flicks, but it's probably gonna
look a little stuck on 'cause this is the trouble we're putting flicks
on at the end. Let's soften that down and
do a few little flicks. Yeah, so apologies. That was my me forgetting
to do those little flicks. Yeah, that's caught some of those little
freckles, isn't it? And again, you can just take a little bit of colour out so it's scrubbing away just in
random little places. It's a nice one that comes
get the angle right. It's a nice one that
comes off here, isn't it? Go careful because if you're working with
the same paints, they lift ever so easy, so you can just take quite often just squidg
it with my finger. I think that's enough.
Oh, it's find. You know, we've been
painting for a little while, and it's so easy to over fiddle, like I'm doing now, without sort of analyzing it with a
fresh pair of eyes, I know. Bang on about that, but it does make a
difference cause you can walk into the room and
go, Oh, that's so obvious. I know exactly
what I need to do. But if you carry on fiddling, at this point, you're
almost blind to it, I feel. But, you know, that's just
my perspective on things. But very last thing
we need to do I said, I would do is some pencil marks, some squiggly pencil
marks just to give another texture to this nest. And a good thing
about using a pencil, especially if you've
got, you know, quite a soft pencil, which obviously gives
you a harder mark. Then you can rub them out
if you don't like them, so it makes you be
a little bit freer, I think, because you know
you can get rid of them. So just have a little have a little
play. Just scratching. You could do this with a pen if you're feeling a little
bit more confident, you get a little pen, Little fountain pen again. I can do the same.
Can't get rid of these, so that's once you put that
mark on, you're done it. But, yeah, it's quite nice to get a bit of
contrast, isn't it? But easily, easily overdone. So if in doubt, leave it, and say, leave it for an hour. Come back. See what you think, see if you need any more
sort of squiggly lines. Or any splat, you could
do that or splatters. I haven't done that on any of my practice pieces to show you. Uh let me let me do it on
this, see what you think. So this is and I
have done, actually. So this just excuse the bird she's a bit a little bit weird, but, you can hopefully
get the idea. So if you did want some splats, I'll just picked up the brown, popped up in my brush,
and then you just flick your finger underneath the brush,
and you just flick back. And that adds
another, another kind of if you want to if you feel like you've
lost some movement. You can always add that, so
let's just put a few in here. Yeah, it's quite fun,
actually, isn't it? Ovely. So let me down my brush 'cause I
think we are done. So I hope you enjoyed this. I hope it's a lovely
freeing piece, you say, it was only intended as a
quick little exercise, really, and it's sometimes hard to
keep that in mind, isn't it? To keep this nice
and easy and free. And as ever, please pop these up on the projects
and resources pages, especially if you've
done a different species of bird and a different nest. And I can see hummingbirds
and all sorts of things. So actually, hummingbirds
may not be so good. I think they do a
little round nest, don't they? A little hangy one. Anyway, if you've done a different species,
I'd love to see it. If you've done the
Black Bird fab, I'd love to see that, too. And again, any questions. You might be stuck on something. I haven't made
something clear enough. Then in the discussion section on each class, ask me there. That's the best
place to reach out. I'll pop your painting on the projects and
resources pages. And if there's something particular you want
me to look at, and then pop it on there
and just under the comment, say, What do you
think about this? Could I have done
something different? I'm always there to help. Yes. So thank you as
ever for joining me, and I do really look forward
to seeing your projects.
14. Bonus Eggs Part One: So I hadn't really planned on this little extra
bonus lesson for you. But when I was looking for some reference photos for the little blackbird
sitting on the nest, obviously, I came
across some eggs, and how beautiful are they? So I thought we could have
a go at them. Why not? So I've kept the
transparent brown and the undersea green, and I've got a
magnesium blue hue. Now, obviously, if you're painting if you've painted a
different bird completely, you might want to find their eggs and the colour
colors of their eggs. I should imagine they're
all going to be of a similar way to paint them, but obviously, I'm going to be painting the blackbird eggs. So They're ever so easy. Lots of water. And actually, I found blowing the paint around is really lovely
for creating some texture, not something I normally do I do like to drop the paint
in and leave it. It's gonna be slightly different because it's actually quite nice to mix it
around. On the paper. So I suppose, in theory, you could be doing some mixing in palates, if you like
that sort of thing. But I'm actually going to just
mix straight on the paper. So I've wet down the egg completely, same
amount of water, so the paper's nice and
saturated with a good gleam, but it's not sitting in puddles. I've got the blue, Itual
pick up the blue and the green's a bit harder
with a smaller tube. Now, we're just gonna
pop that color down. Look at that. Isn't
that a lovely blue? I was rummaging around trying
to find the right blue, and I haven't used this
paint much. I must admit. Or at least not for
a very long while. But it's rather the yummy. So the thing is to get these
eggs a really lovely shape. So I hadn't actually done
a sketching out section, have I, but, um, there'll be a
reference photo there, and I will pop a
template in there. So Yes, just sketch them out, get the right shape
because if the eggs don't look egg shape, they look like something
else in theory. So yeah, make sure
they get a nice shape. And I've just put
the green on top. I'm giving it a really good
old rustle round, which is, I say, really goes against
what I normally do. But I found it creates
quite a nice egg. I'm still trying to leave this. I'm going to always
I'm trying to keep an eye sort of idea there's light coming
from one direction. Actually, we're looking
at the reference photo, I think it's coming straight
from above, isn't it? But let's just try
and keep one portion. A little more light filled
at the top than the bottom. Now, what am I going
to do with this straw, if you're wondering
why I've got a straw? You don't need a straw. You
can just blow, but obviously, you don't want to see
my head appearing underneath the camera blowing. So Just give it a little blow and you can see if you've got a nice
textured piece of paper, that's sort of pushed that
paint across the grain, and it's leaving it
quite granulated. I'm gonna leave that
one. That color. Obviously, it can all
be slightly different, so let's crack on
with the next one. Oh, look at that for a pun. Crack on. It's It's amazing how you say
these silly things when you're painting or doing a thinking of a
particular subject. Amuse myself. Okay, let's I'm gonna pick a
little bit of I might know. I'm going to keep that try and stick to those
sort of colors. This one's low one's still a
bit quite bluey, isn't it? So just rustle those in. So yeah, no dropping.
You're putting the color down and you're
giving a good old rustle round. The only rule I would
say still applies if once it starts
to dry, leave it. But as long as you've
got a lovely sit puddle of water or so your
papers nice and wet, then you just carry
on. It's interesting. It's always worth playing with different ideas and
thoughts, isn't it? So Let's just move out. I'm gonna try and keep them separated so they're not
running into one another. Just give a bit
more at the bottom. It's a little bit darker
down here, isn't it? It might be a bit too dark. Let's see how that goes. Give me a bit more of a rustle. Put a bit more blue on top
so we can get a bit bluer. Okay. Lost the point here a little bit. Not the point of doing it. It's the point of the egg. Yeah, let's give that one
a little little puff. Fab. Let's move on
to the next one. I'm gonna put a little
bit more brown in this one cause this one looks a bit more
browny, doesn't it? All fleckled. So, same again. We'll write it all down. So try and keep them separate
'cause obviously, if I touch this egg here, it's going to run
the colour gonna run into this egg down here, Sona keep them
separated if I can. I'm going to pick up
the transparent brown. I'm gonna put the brown and
the green one to start with. Actually, the tricky is actually to keep that real egg shape, 'cause it's quite easy to go
outside the line somehow. Let's put the blue on top. But they are quite
an exquisite thing, aren't they? Bird eggs? I suppose you don't We don't often we rarely get to see them, do in real life, as it were, so we only see them on photos, but they are just little
things of beauty. I have noticed while
I've been washing up and looking out
the garden that I think we have a wren busy
making a nest in our hedge. And that will be I think they
do a little domed nests, at least the wren
here in the UK. So always take your
it's still same rules sort of apply in taking
your brush away, having a little ponder,
see what you think, see what colors you
think you need to add. And it's quite nice they're
all a bit different. I wouldn't you know, they are all different when you look at
them individually, but it's nice not to
repeat the same thing. And you may even
decide not to give one a little blow, you know, you may want to
keep one a little more. You know, not so grainy. Yeah, I can quite like
the color of that one. Give it in another uf. Lovely. And then on
to the next one. This one's a little
more brownie again, isn't it the top one? Trick is now not to
touch this one here. I'm working at a weed and,
I can't turn the paper. And then we're gonna add. I'm gonna put a bit more say
a bit more brown at the top. Huh, that's going a bit greenie. That's a bit more brown. Worth
a quite brown, isn't it? It's bit interesting to see
if we put the blue on there, how big we can get
that to change. Let's skew that blue Oh top. And, of course, you can
always do more layers. So if one egg just hasn't got quite enough depth
to it, you can go over. I probably won't just 'cause I feel like it's a bit
of a bonus anyway, and how much time you
want to spend on these. But, um, yes, you can always do another layers
and add more depth. But we will let them dry and
do some sort of splatters, as well or some pots dry. It's a bit there's a real bit
of blue there, isn't there, isn't that one? Great. I'm gonna leave that one there. I know it's not quite the same, but, you know, again, I like what's happened there. I'm not trying to do
an ornithologist guide to egg identification. So if they're not exactly
like a black bird's egg, then it doesn't matter
so much, I don't think. I just I always
want a nice color. Alright, let's put blue here. Let's try and maybe marry that one I put a
little bit more. This one, so we've got
the colors coming over. I try, but hardly
to touch those. Green on top. Let's give
up a big old rustle. And if you're not in the UK and you're not familiar
with Blackbird, it's worth maybe I'll pop a little YouTube
video of their song. It's quite beautiful. If somebody asked me what
was my favorite bird song, it would have to
be the Blackbird without a shadow of a doubt. It's just I think it takes me back to
my childhood as well. My dad was quite a
keen bird as it were, not that I probably
realized at the time, but he was very
quite knowledgeable on his birds and all
the bird songs as well. So I kind of picked up that
trait, I think, from him. Um Yes, and a Blackbird will always
remind me of him, as well. So I've got probably fond
memories because of that. But it is such a beautiful tune. And obviously, they don't
sing all year round, so it does become synonymous with summer and
lovely warm evenings. So they're very beautiful song. And I'll say, I'll do my best to pop up if you're not familiar. So if you're probably in the UK, you know what a
Blackbird sounds like. But if you're outside the UK, you may not necessarily say, I think if you're in the States, do you have a black bird a
slightly different colouring? I should have looked
that up, so apologies. Alright, how are we looking? I think that one
looks quite fun. Let's probably put a little
bit more blue in this. Right. I get it edge. Yeah, they're fun, aren't they? Right. I might leave
that one, actually. I don't think I'm gonna
give that one a huff. But I'm going to put those chewed blue and
the green down for you. I'm gonna hang on to my brown. The egg I'm started on with
is still a little bit damp, so I'm gonna see if I can add a few of those sort of speckles. If yours is dry, don't worry. You can either wet it down
and then add the speckles. But very gently,
let it wet it down. Again, you don't really
want to be mucking up that lovely layer
you've probably put down, so I'm concentrating
on doing me dots. It is if you're working like
me, it's a little bit damp, be careful you don't
add too much water onto this onto your page, 'cause you might end
up with water marks. So make sure ideally
your brush needs to be the same sort of
wetness as your eggs. It sputter around. So you don't have to match
the match up each egg? So just have a little
random old sputter around, and you could always see what
this what that produces? That's a bet spot for. So
we'll get rid of that. I just gonna work
my way round now, do some little
splatters. And you can. It's always a little risky 'cause you can
splatter the eggs, outside the eggs, but see
if I can be very gentle. If you get a little bit more random this rather than
trying to do dots, 'cause it's very easy
when you're doing dots to to not be random. I've got a nice
consistency on my brush. I don't know how
I've managed not to splatter outside.
Hell, no, never go. I think it will be a case
of allowing them to dry, and then we have a little look once they've completely dried. Yeah, they look they look
quite fun, don't they? Yes, so at this stage, I
would allow it to dry, 'cause you'll most
definitely be at an awkward stage
where bits will be drying. You've done
the splatters. If you try and add any
color at this point, you'll probably find
it sort of blooms mixes badly with the
brown brown splatters. So I would down your
brush and admire them.
15. Bonus Eggs Part Two: So how have yours dried? Have you got enough
oomph in them? I quite like mine,
and I must admit, I'm going to do
another layer over a couple of these. I won't lie. These I'm kind of experimenting
with you on this one. I haven't really painted these. Much beforehand. As you can see with a non stretched piece of
paper, as well. But let's give this a go. It's a little bit of fun. I'm going to do this one
mainly I well I was saying, be careful about putting too much water on when
you're doing the spatters. You can see that I've got a little bit of a
white area there. It's just I've added
too much water. When I was doing those spatters,
it pushed the blue out. So very gently.
And really gently, probably more so than normal, when you're doing
another second layer, 'cause I've got some
nice splatters there. So I don't want to move
them around too much, but we'll at just a
little bit more depth and see what that produces us. It's quite fun doing this with you and not having
it all planned out. I feel I'm I've
done the main done the main subject. Just
have a bit of fun. Right. Let's. I'm gonna put a little bit more
brown, a bit more blue. Gonna go blue first. Pop a bit more blue.
Again, sort of tapping. I won't do too much
rustling, I don't think. So I'll go back to my sort of more common
method, I suppose, of just tapping the colouring 'cause what I don't
want to do really is wibble a lot of that brown
a think we'd out a bit of, there's some lovely
shadows in here, isn't there, as well, especially as they're
sitting in the nest, but I'm not I'm not going
to be doing all that. But But I'm sure I'm sure many of you will
incorporate maybe this in with the Blackbird
on the nest, maybe a little eggs
running beside it. There's a little field
guide kind of thing. I feel maybe I missed out on the trick. I should
have done that. I just gonna you can
also at this point, if your egg has got a little
misshapen gone a little Oh, gone over my line
there a little bit. I seem to have lost
a bit of point here. Sometimes it can be
dangerous if you're going outside your
lines that you've carefully put down and you
end up with a weird shape. Yeah, I quite like that. Let's do this one, I think. That's the opposite one to it. Um yes, let's do that one. Oh, actually, do what I will
do. Just put that nice. Just take a beer
color out. It's a lovely bit light's sitting
on top of that egg. Very gently. I should have have
gone over that little bit there hadn't had e that I've taken the light out of before, but Yeah, that's given me
a little gleam, hasn't it? While that's still wet, A
let's go over this one. Okay, see if we can even
make this even bluer. So stick mainly with
the blue, I think. I can actually join one of these up to its
partner just so that maybe you aren't having all got little
careful space between them. That'll be quite nice. Belly's bit of brown
in there as well. Touch green, a little
tiny bit of green. In stick to my plan, trying
to make this a bit bluer. That's put the green back down. It's always same thing. The minute you think you have
something nice, leave it. And actually, I probably won't take color out
because I've got that nice naturally a nice
lump of light there. And this is always the trouble with doing multiple layers. You quite often lose
some existing light ca you've gone over
with another layer. This, I thinking
a little od now. Now it's beginning to dry. I'll tell you what I might do. Let's let's give it a rustle. Let's just try. You see
I've got unstretched paper, which is also buckling on
me, which isn't helpful. But in the spirit of just
playing and experimenting, as I always go on about, let's let's give that
a rustle. Why not? Let's see how that sort
of changes things. 'Cause it is something I say. I always tend to drop my paint straight on
the paper and leave it. I'll try to rustle
things around. But maybe it's quite
fun with these eggs. Or I end up with a muddy thing, one or the other.
But you know what? We've had a bit of fun.
You've had an experiment, and you know what works
and what doesn't. So these are always always little things that
are just worth doing. Sometimes you come up with
something and you're like, Oh, that was a really good
idea. That was useful. I remember that I, you know, in other circumstances that rustling things around actually gave me a nice bit of texture, and it may not
obviously be eggs. It might be something
completely different. Or vice versa, you might go,
I'm never doing that again, 'cause that really
didn't work and just left me something really
horribly and muddy. I think I'm gonna
leave that there, 'cause that's quite blended now. We'll give it a little
huff with a little puff. But not going to be overly helpful that I've
got this is raised. You probably see that and
it's buckled either side. So my paints going
to be sitting in these dips suck some of
those up a little bit. I like how this
one's coming out. I love this egg. I think
I like all the others. This one's a little
odd, I think, but we'll see how it dries and I can I might put some spatters on it when it's completely
dry, see what that looks like. I'm going to down my
brush, allow that to dry and then put
some spatters over
16. Bonus Eggs Splatters: Well, now it's completely dry. It's a little flatted
and a bit boring. And that's the case of Yeah, I've really sort of worked that. But like I said, I'm gonna put a few
splatters on it, see if we can make
it look a little bit a little more tictured. A little something there.
I actually gonna do splats rather than dots
because I know what I do. It's gonna be all too uniformed, so I could do water in there. They things coming
out, are they? A bit of water? Well, too much. Let's go back to spluttering. Okey doke. I think I'm going
to leave those eggs there. The only thing I
probably would do, once that's completely dry is to rub any pencil marks out there. So I hope you enjoyed this
little extra bonus play. I just thought it
might be fun when I saw how beautiful
those eggs were. And as I say, it's
quite nice to just do something unstructured that I haven't sort of practiced a lot beforehand and just go
with the flow with it. So, again, if you've
done these little eggs, I would love to see them, because I think
they're quite cool, and I like to see if you've done a different bird
or even if you've done the Blackbird and decided you found some other really
pretty looking eggs. I just love to see
whatever you produce. So yes, please do share. And thank you for joining me for this little little bonus lesson.
17. Final Thoughts: I hope you enjoy painting
the nesting bird. And I wonder, did you
paint another bird? How did the free
flow elements go? Remember to be bold with your paint and water
and just allow. Did you enjoy painting that little black wood with
those lovely soft layers? Remember to pay extra detail
to that eye and beak. Did you have a go at painting those eggs? Fun, aren't they? And I'd love to see
what you've created. So don't forget to add your
work to the projects page. As I always say, it's
worth stepping away, coming back and looking at your painting with a
fresh pair of eyes. This simple act still amazes me. So we look forward to seeing
you in the next class.
 Jane Davies, Professional Artist and Teacher