Transcripts
1. Let's Go on an Adventure!: Right now we're
gonna go on a nature journaling adventure
in the Desert. We're going to cover
how to get started, how to capture the
magical landscapes, and how to draw some of
the fascinating plants. This class is perfect for people who've never
nature journal before or people
with a little bit of nature journaling already
under their belt. It's also really good for people who are by
themselves at home, who want to go on a little
nature journal adventure, or for groups of people, friends, or even
families at home. It's really good for
artists who want to add a little bit more nature and inspiration to their
studio practice. I'm going to be leading this
class today in the desert. My name is Marley
Piper and I've been teaching nature journaling and going on nature journaling, adventures and crazy places
for the last seven years. For today's trip, nature
journaling in the desert. Make sure you have a
sketchbook with you. Something to draw with. Preferably an ink pen. Watercolor is optional. Other important things to
have in the desert, r hat, sun protection, plenty
of water to drink, and close toed shoes for
all the spiny plants. Alright, let's keep going
because the morning time is magical in the desert and
it's also very short-lived.
2. Capture the Context: Metadata: But before we walk too far, read a width those
sketchbooks out, it is really easy to go on
a nature journaling trip. Never pull out your
nature journal. But we're not going to make
that beginner mistake today. We are going to get it out as
soon as possible and start nature journaling
because we have to capture this amazing
context here. Look at this place. Now would be a great
time for me to briefly mentioned the project
for today's class. Project is going
to be completing a nature journal
page of your own based on the landscapes and plants of this
majestic desert. The first thing we're gonna
do is called metadata. And I know that sounds really technical or boring,
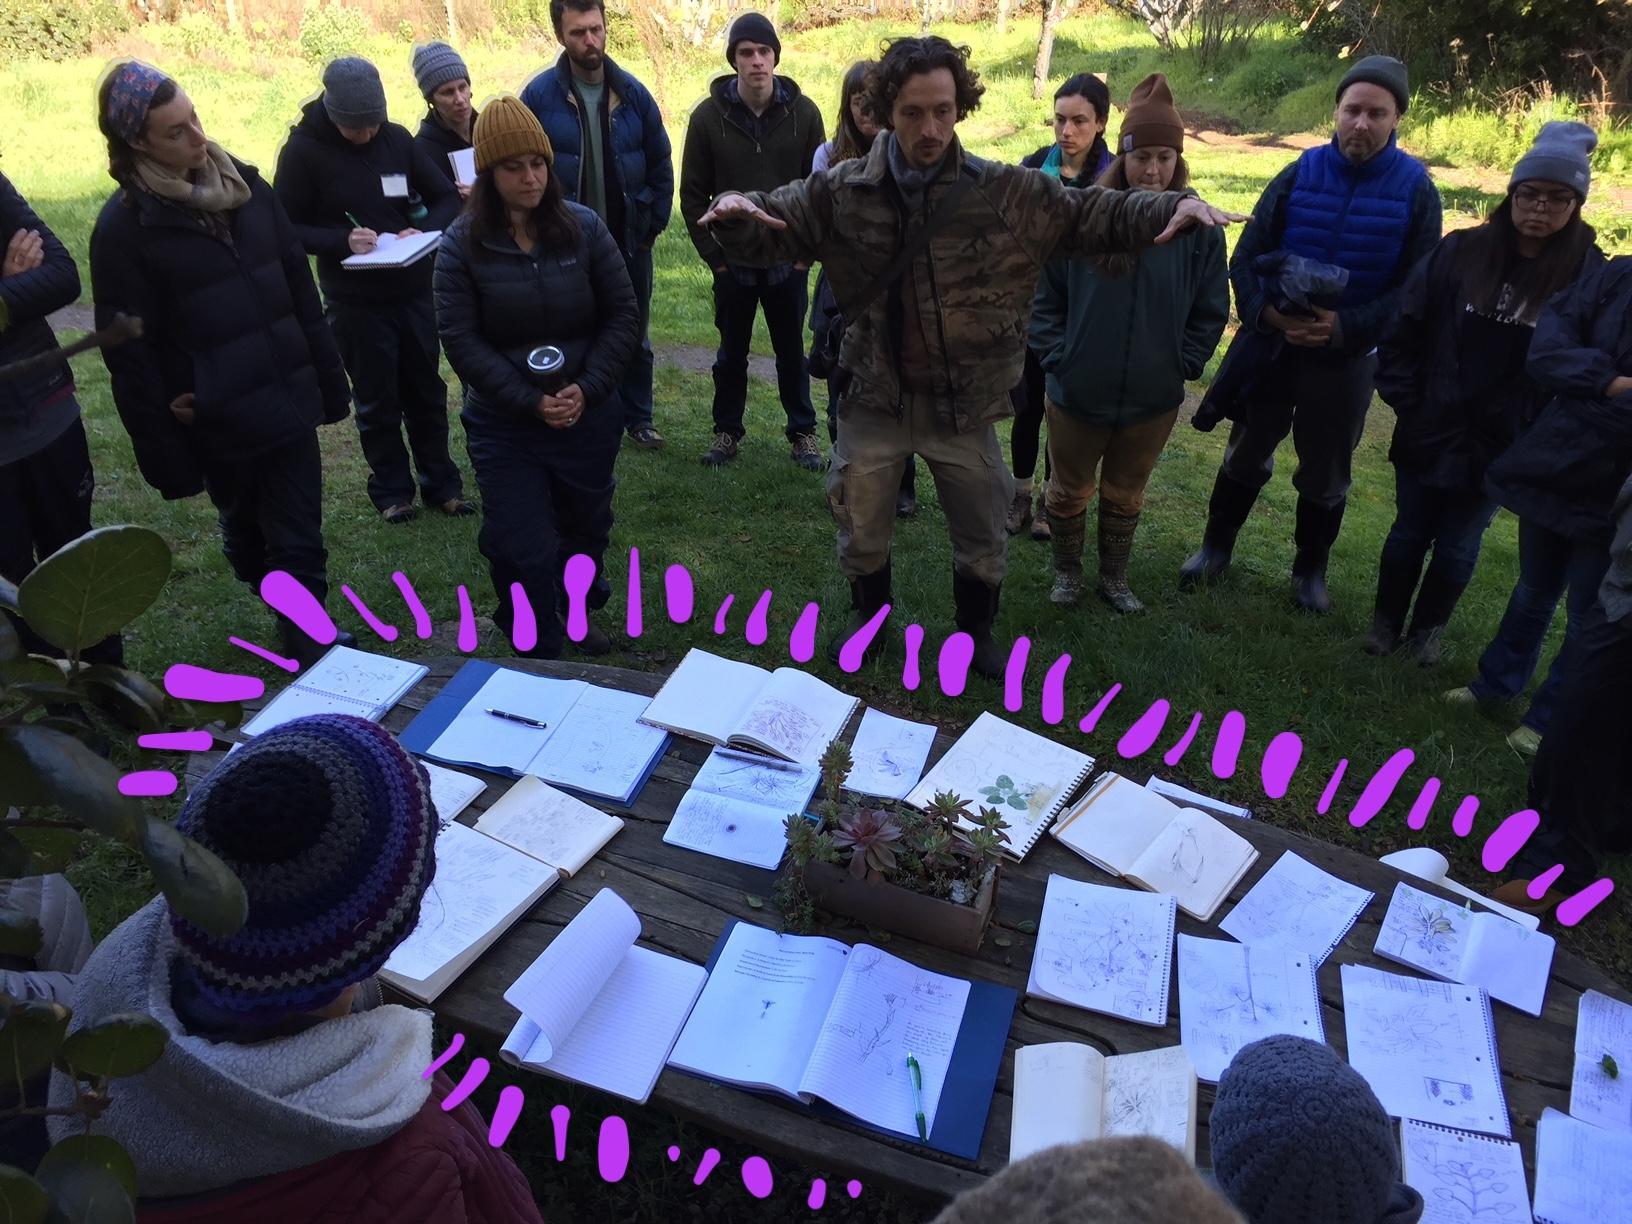
but it's not. Here is a bit of metadata
that I did when I was up in the canopy in the rain forest hanging
from the rope right here. Nature journaling at
about how many meters? 20.5 m off the ground. So you can multiply
that by 3.34 ft. But metadata is
basically just a entry. It's sort of like the heading
that you would have done in middle-school with the date, the name of your teacher. But in this case, you
don't have to do that. The location, the
temperature, the weather. I do a little drawing
here showing that I was on a boat on some crazy ocean. This was also in Panama. So the metadata is important information
about the context that you want to capture. One thing you can do
is you can look at the location feature on your smartphone and that can
give you some coordinates. But I'm not going to worry about anything more precise
than that right now. I'm worried or Springs,
california is good enough. And then I'm going to
put the temperature, but I'm also going to
do a little bit of a just to show kind
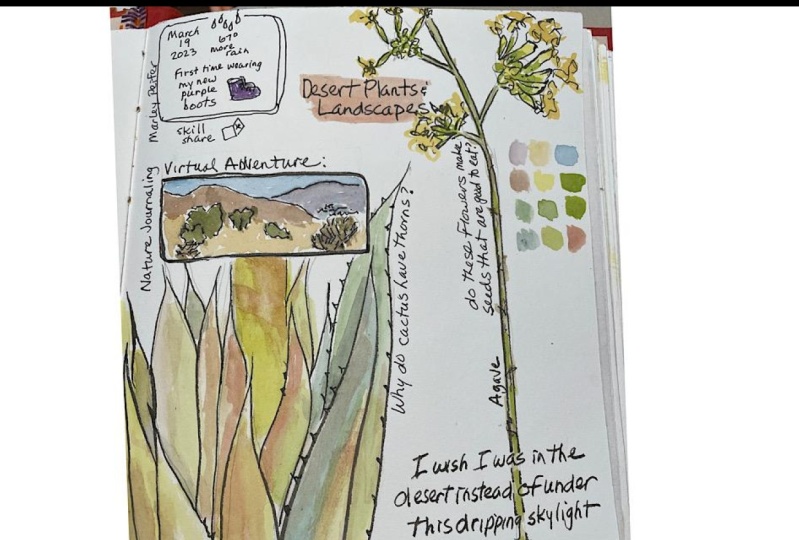
of the scenery here. There you have it metadata. Go ahead and do your
own version of that. What I like to do is if I'm watching something online, e.g. I'll make a drawing
of a computer. In this case, a laptop
can be a quick sort of icon or make a note saying, like some people do a sign that says like
the YouTube symbol. These things can indicate in your metadata that you're
doing something virtually. Very important if you're doing
something virtually or in real life to make a distinction on your metadata
for that kind of stuff, because metadata is
interesting for reference, but it also gives a visual
continuity to your pages. And if you always use
the same metadata, your nature journal
pages are going to look a lot cooler and more organized.
Like I wish this page. Oh, there we go. You can
see the metadata here. And just that sort of
regularity gives it an important look and aesthetic look to your page as well as important information. But let's keep going
because we've got a lot more nature's you're
going to need to do. Another great benefit of
metadata is it breaks in the page and empty page
can be very intimidating, whether you're a
beginner or an advanced. And using this simple way
of getting information and some marks on the page breaks in the white page and can make it easier to proceed from there.
3. Draw the Landscape: So how are you
supposed to capture the landscape in a
setting like this? Right now, I'm
going to show you. So the first thing
that we need to do is we probably need to
make it smaller than this. If you bite off too much, especially in an expansive
landscape like this, you're going to get
very overwhelmed. So let's crop this
down and I'm going to work from this exact
same one is u, and we're going to try
to simplify it here. So let's zoom out a little bit more and we're
gonna work from this first draw rectangle. We're going to keep it
simple because we're doing a complete nature journal
page and we're trying to be aware of how much
time that we have. So I'm going to
simplify it first. I'm going to work from
the back to the front. I'm going to capture this
furthest mountain ridge here. Sometimes I'll do
that in a pale, a more pale color actually thinking and bring this line in. And I'm not going
to worry too much about composition and layout, even though I did
think about it some, those are things that I'm going
to talk about way more in depth in another video
because that's a big topic. It's going to capture this
dramatic peak right here. And this shadow. I'm not gonna go too
in-depth in the shadows, even though that
is very fun to do. A little bit more of one there. And I'm not going to even do, I don't think any of these
goalies in the background. Even though that can
be really fun to you, I see a big okay TO plant. So I want something, I want some big plants and
my foreground that overlap. So I'm going to just get the
general shape of it here in case I want to make it a different color than
the background. And some bushes that
pop up above it. The line there as well. There's almost like a path here, but I don't know if I'm
gonna be to capture that. I'm not going to
worry. I'm trying to have just three
basic shapes here. So you can see there's this, there's that, there's that
and then there's the sky. And that's it. And I'm not going to
do color on this one. I'm not going to do a full
on watercolor painting. Some of you don't have your
watercolors with you today. So I'm just gonna do whatever
is the most simple, simple. And these are all, all of
the things that apply to this one will apply
to your watercolor. So luckily, we have this kind of strong light still in
the morning and we have these cool shadows so we can show the direction of
the light very easily. These shadows are
fun and dramatic, but creating a skinny frame
actually automatically adds drama to your painting and
makes it more interesting. And all you had to do was you didn't actually
have to draw anything. So this is good enough for me. I think this captures
the feeling here. Maybe I'll put in a little bit more details of the plants. And I could watercolor, feel free if you do have, some of you do have
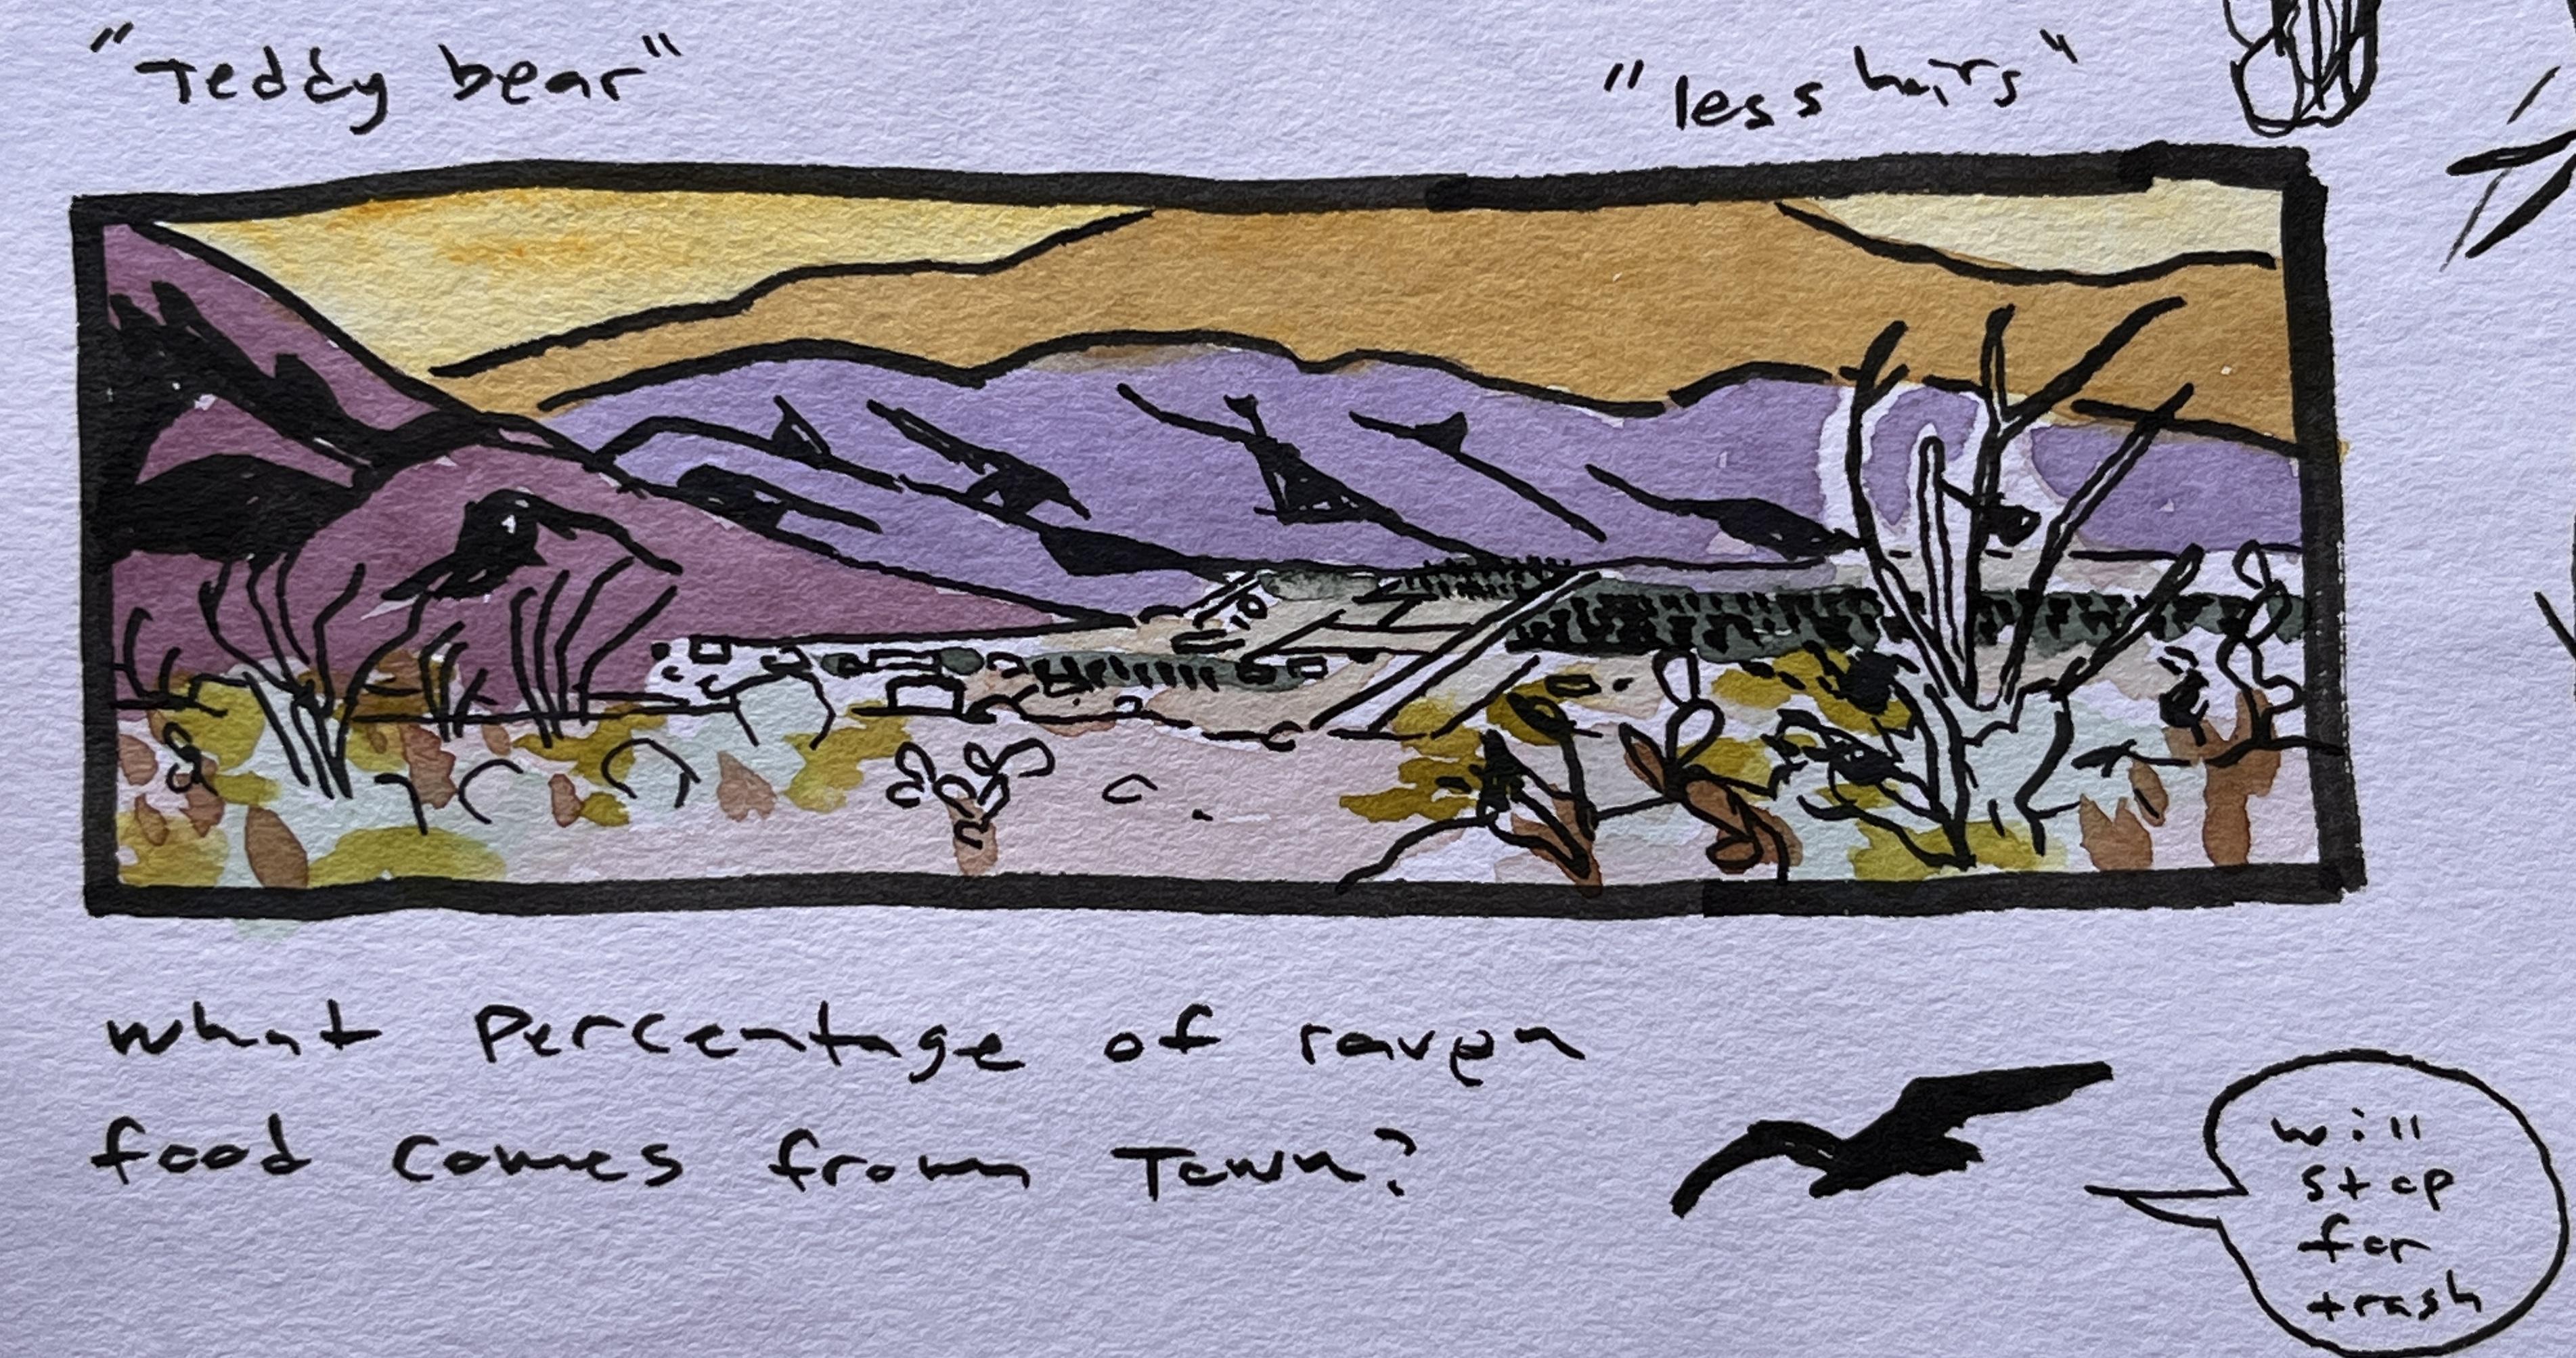
colors with you. That's fine. Go ahead and oh, I need to put the town
in a little bit here. That's it. Showing some of the human made elements I think
is really important. We have a tendency sometimes
to not show them in our photos or in our drawings. But if there's actually
human elements there and you're excluding them, you are falsifying reality. And so I think it's
actually really important to draw in the
human-made elements. And this is the town of Burgos
springs, pretty cool town. And maybe I will go
ahead and try to add some of these goalies
in the background, which can be distracting. And this is a place where he could actually maybe
we're in the drawing even. So I'll keep that simple. And that's basically
it for my thumbnail.
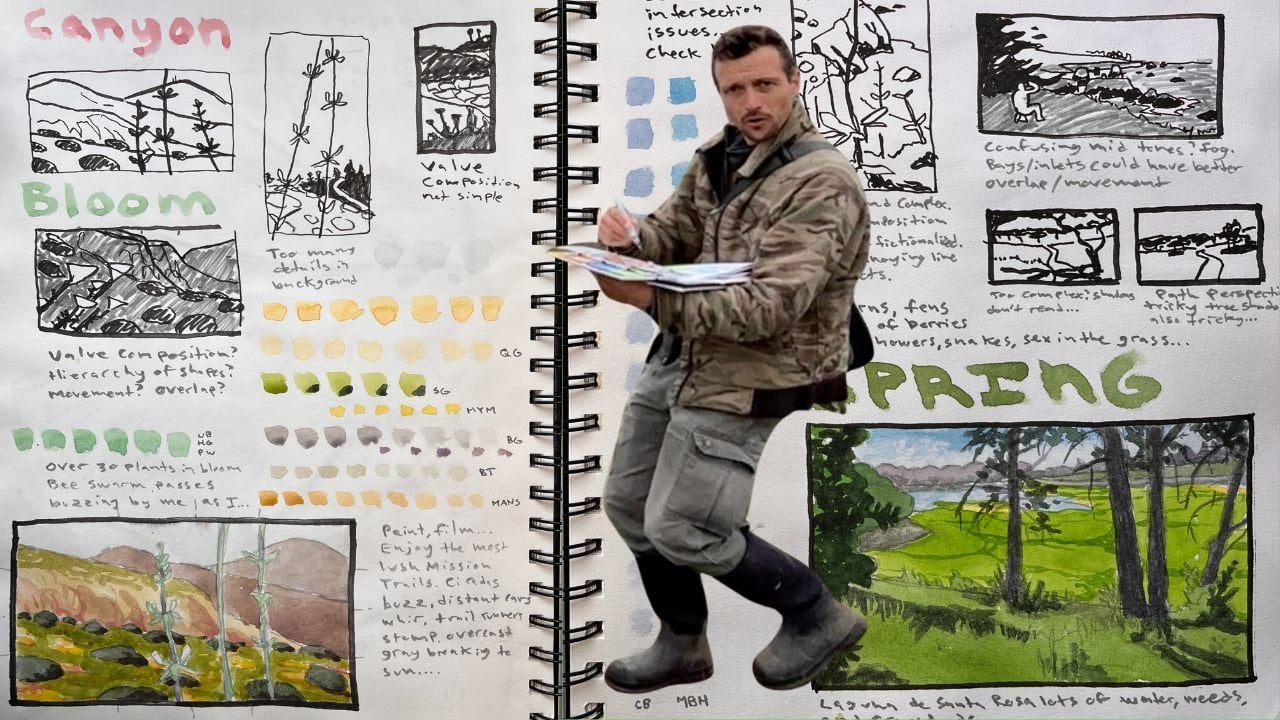
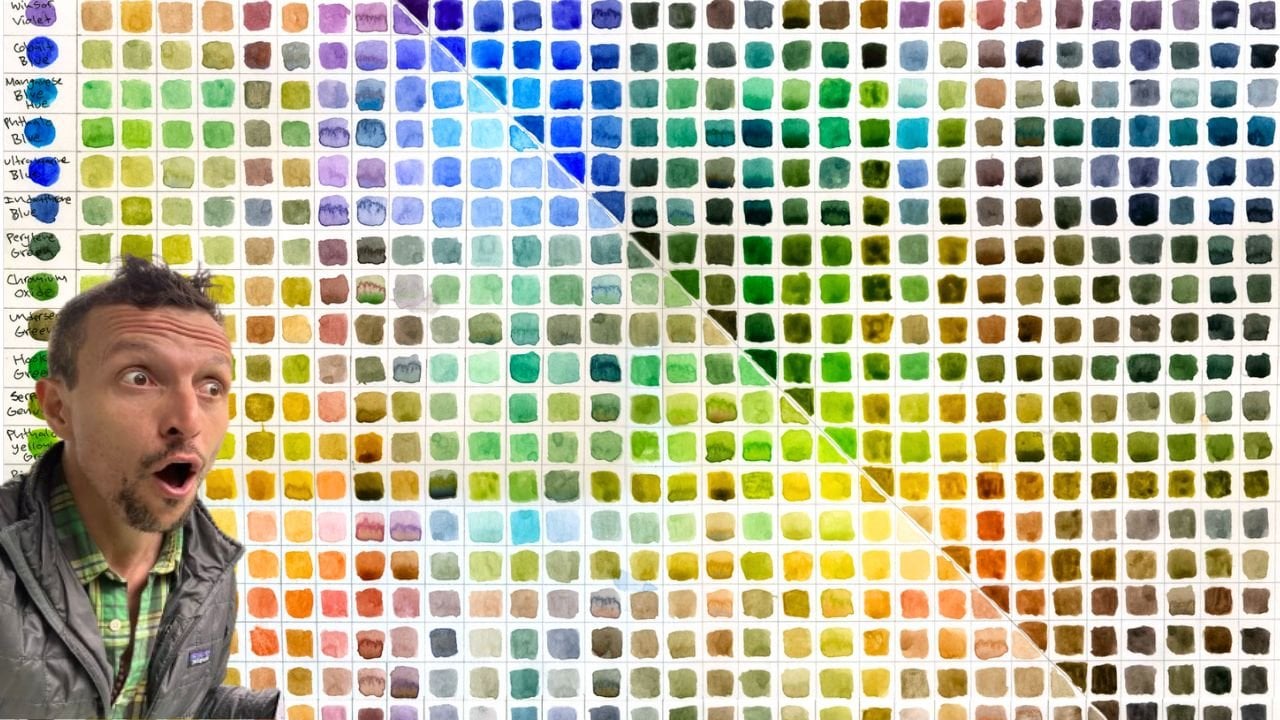
4. Capture the Colors: Alright, I know that a
lot of you are really excited about capturing
the desert colors. And what we're gonna do is we're actually going to do that separately from this little landscape thumbnail
that we just drew. Keeping your colors
and your drawing separate can help you learn
each one individually, and then you can later
combine them on your own. Obviously at home, you can play around with
this however you want. But for right now, this
is what we're gonna do. We're gonna do these
color swatches because color captures a lot
more of the feeling of a place and can really
help you if you're using your nature journal as a
way to remember things, when you go back, you
have an amazing souvenir. Those colors will bring back the feeling of the place,
but we need to hurry. The morning light is
changing and we're losing those really
interesting colors. So let's see what we can do. Color matching,
do your best with whatever color
supplies you have, or just skip this part or follow along and
watch how I do it. The first thing I'm gonna
do is I'm going to go for this sort of really pale color. And luckily, I might even
have a color in my palette already that matches up pretty closely and that would
be buff titanium. So I'm just gonna go here and I'm just going
to make these, these are pretty pale so they might not show up that well, but some of the colors here
in the desert are quite pale. And I'm just going to
do these swatches here. Ideally, these are sort of going from darkest to lightest. You can use your towel to clean off some of the paint as you go if you need it to
get paler faster. So that's pretty good.
That's like my first color. I can put little initials
next to it to remind me of what colors from
my palette I use. That's a really good
way to learn colors. And I guarantee you,
if you practice this, you're watercolors
will get better, faster and step
being able to study these aspects of landscape
paintings separate weights. And now I'm gonna
go for this green like this creosote
bush right here, actually going to go
for this gray green. There's sort of like
a silver color, a lot of people would call it. It's sort of like a
blue-green actually. So I'll put a little
bit of blue in here, even though that looks
so weird at first. I'm going to use a
little bit of gray. Actually, should
he used that gray? A little bit of gray. Gray gets dark really fast. You have to be careful
of it because a lot of grays in nature are
very pale grays. Grays in your pigments are often very dark or
hard to keep light. So I'm gonna go with
that color right there. I think that's a pretty
good match for this sort of smoky blue gray is rather pale, but lots of my bushes
and plants here in the desert are going to have some variation of that color. Next is, I'm going to do that color of that
creosote bush there, which almost looks like
this serpentine Genuine. Already have maybe with a little bit of this
rich green gold. To make it even more
sort of yellow. You have to be really
careful with dreams, especially in the desert
because most of them are not very saturated at all. And a lot of times
people just start putting green on
anything that's a plant. Even not green, I would
say is a little bit dangerous even for the desert. I probably want to tone it down. So toning something is when you add a muddy color to it and
make it less saturated. So technically, that's
what toning is. That right? I think I'm right. The terms for color get
used in different ways. But technically an art, That's what toning is in
value is light to dark. Okay, so now I got this. I could do another, I think I'm gonna do something with this quinacridone, gold. I see this sort of yellow
color a fair amount, especially early in the
morning and later in the day. There are some other
pinks and purples, especially in the evenings
and the mornings. And then all I need is like
a dark color, I would think. So I have this sort of
nafta mine, maroon here. And if I turn that
down with an orange, I get a pretty
good shadow color. Warm shadow color. Maybe some of the rocks have this color on them right now. The one last thing I'm gonna do, wireless watercolors drawing. I'm going to do
one other thing to capture the context
of this place.
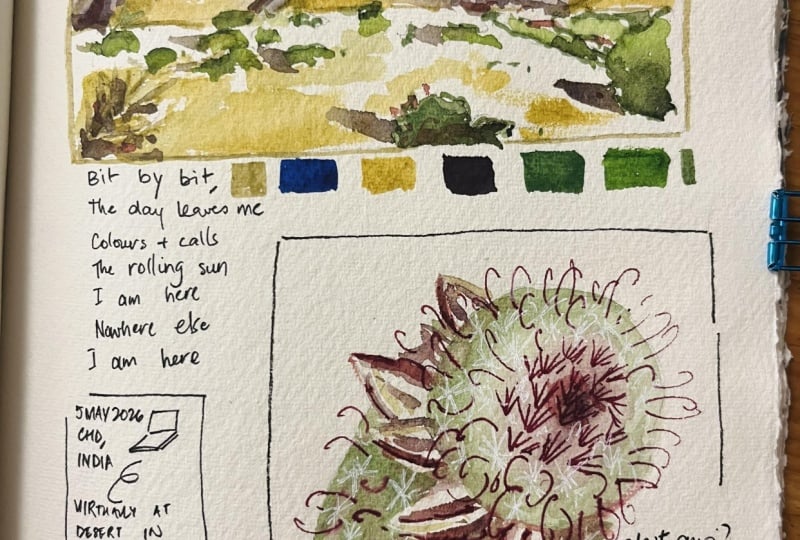
5. Poems are Easy!: Alright, so go ahead and choose a nice rock to sit down here. And we're gonna do
a little bit of a mindfulness poem
really quickly to capture the feeling and some of the sensors that are a little bit harder
to capture on paper, if you like rules, you could do an actual haiku. But a lot of times what
I do is I just tried to describe some of my other senses besides site on my
nature journal page using words and then I just try to use short sentences and
keep it, keep it short. So I'm gonna go ahead and
see what I can come up with. I'm noticing that the
coolness of the air, the coolness of the rock. I'm noticing a
Mourning dove calling. I noticed the coyotes
have stopped. I noticed a light breeze, and I'll notice something
that I smell as well and turn that into
some short sentences. Alright, while I'm
writing my poem, go ahead and take a minute
to write a few lines creatively describing
this desert sunrise as if you were actually there. Poems are easy, checkout,
mine, cool granite, all my bum felt through
my pants. Mourning dove. Q one fly, Buzz, Coyote is done. Warm sun on back, cold air and nose. Does it smell like desert? So even though I couldn't really smell
anything in that moment, I just made up a
question instead. So now you can see
how easy it is to do a little bit of creative writing in your nature journal, capture some of that feeling. If you're using your nature
journal as a memory, as a place to come back
to you as a souvenir than having a little description like that combined with these colors, combined with that, look
how fast we did that. And we're capturing
the landscape. But we still need
to capture some of the fascinating
plants around here. So let's get going because it's already
starting to get hot.
6. Capture a Plant!: We've gone to this nice area with lots of different plants. Now it's your turn to choose
one to nature journal. Behind door number one, we have the beaver tail
cactus, always a classic. Behind door number two,
we have mammillary, a diode, aka the fishhook
cactus or nipple cactus. Why they call it that. Finally behind
door number three, we have this amazing flowering, a Garvey genus plant. I'm not sure which
species it is. Wait, hold on. It looks like a golf is gonna do watercolor with us Actually. Now that you did the hard part, which is picking a plant, I'm going to help you
with the easy part, which is drawing it,
especially because we're gonna be using drawing as
a learning tool. So I'm not just trying to make a pretty picture
or a decoration. Otherwise, I would not
have chosen this plant, but I'm actually very
curious about this plant. So drawing in my
nature journal is the perfect place
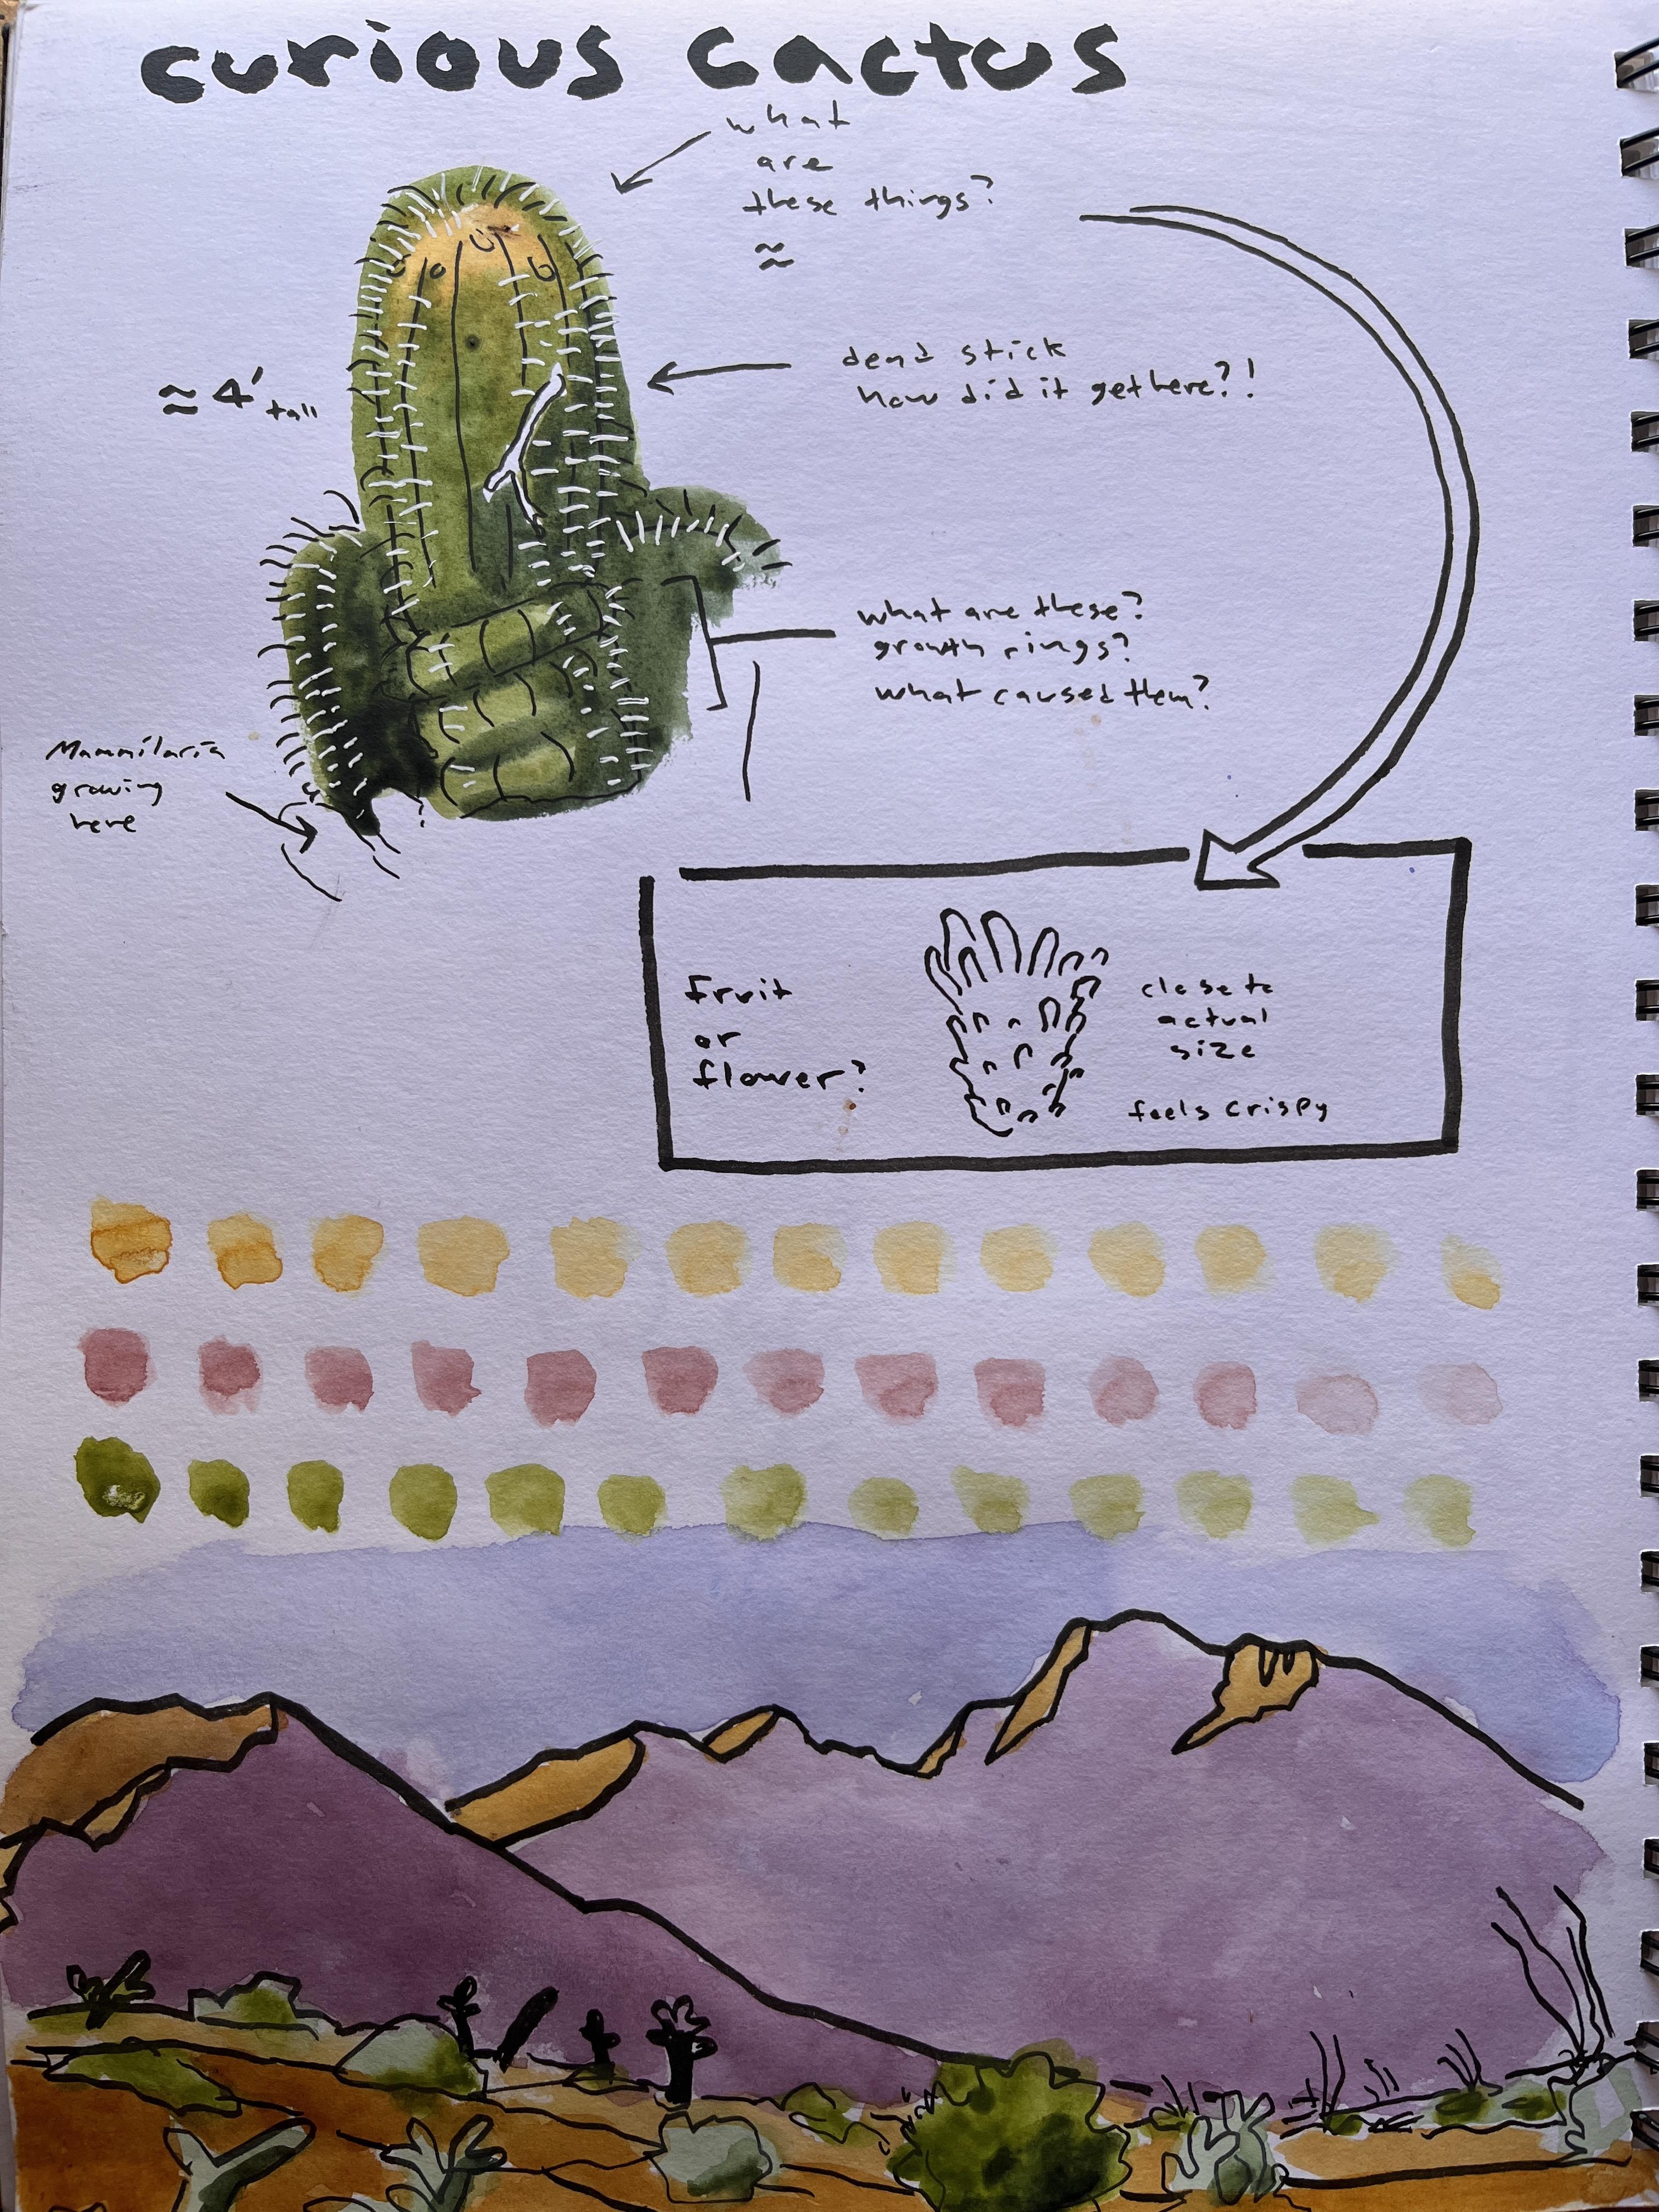
to learn about it. I am really curious
about this plan. How did this get here? And why is this other cactus with flowers growing
right underneath it? How many spines does it have, those ru, or flowers? Does anything this cactus. What makes it a cactus? How long has it
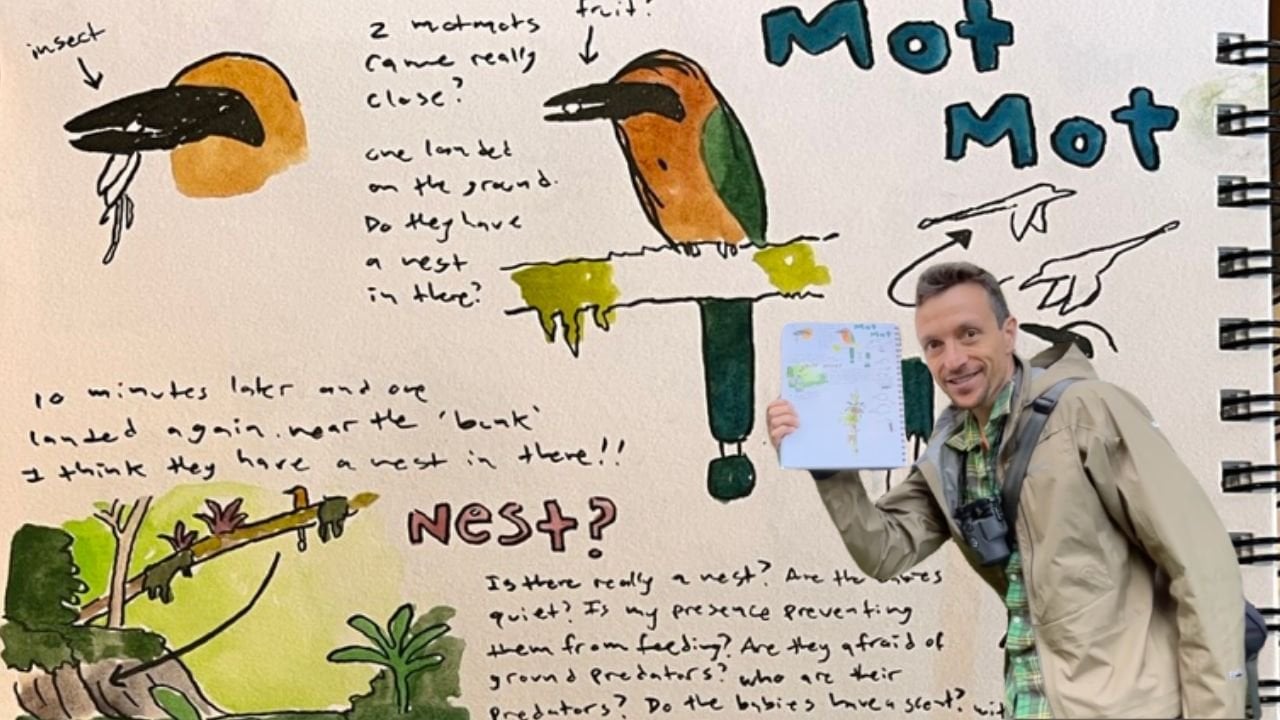
been growing here? Checkout, how I nature journal this barrel cactus right away. I'm focusing on
making it a diagram. I'm using arrows, I'm using
words, I'm writing questions. I'm putting in little measurements
and things like that. Because by doing this and not focusing on the
pretty picture, I'm going to have more fun. I'm gonna learn more, observed more and
paradoxically in the end, my pictures will get prettier. But if I focus on trying to make a pretty portrait of this plant, I'm probably going
to get frustrated. I'm gonna give up sooner. I'm not going to learn as much, not have as much
fun and my pictures won't be as pretty
in the long run. To simplify adding
color to this page, I'm just going to do color
swatches like we did earlier, and try to make some
colors that mass at cactus and put them here
separate from my drawing. This is a great trick and
I use it all the time. If you really want
to paint the colors right onto the
plant, that is fine. I just want you to have this
technique in your toolkit because a lot of
times it comes in handy to separate the
drawing and the color. Oh shoot. The sun is going down already. It's magical being out here
in the desert as the coyotes, how watching the sun go down while we're
doing our drawing. So just remember, go back to
the plant that you chose. Follow some of those techniques for nature journaling it because this plant is going to be an important part of
your final project.
7. Lost in the Desert?: This is so fun nature journaling out here in
the desert with you. I wonder what else we might see. Road Runners, coyotes, rattlesnakes, maybe. That's weird. It's not the trill was the trail back to the
car, was here somewhere. You know what? You're going
to have to hang on here for a second and nature journal
on your own while I go check to make sure that
this is the right trail back, I think we've got a few
more hours of light. The sun's just set, but we have a few
more hours of light. So just hang out
here and use some of the nature journaling techniques
I showed you already. There's lots of cool
stuff to look at here. And I'm gonna go double-check to make sure that this is the right
trail that well, as I walk away into the desert, you pull out your sketch book and you now have a toolkit
of nature journaling techniques to help
you connect with and capture the magical essence of the desert that
surrounds you. Take as much time as you need and pause the video if you want. All right. Well, I'm glad you didn't seem to notice that was getting completely
dark all around you. You're obviously having
a great time nature journaling even
while I was gone. Luckily, that was
the right trail because it's starting
to get cold out here. So let's head back to camp now. I can't wait to see
your journal pages while we sit around
the campfire, enjoy some chocolate brownies, maybe a glass of red wine, because now you
need a reward for all that energy that you
put into nature journaling, this is a really great habit, so rewarding it is going
to help you keep going. And I read an article, science article that said it's
good for your memory too. So thanks for joining
in on this trip. That was super fun.
8. Bonus Lesson! Add Color: So many of you wanted to add
color to your landscapes. So here's a bonus lesson. Start with the blue of the sky. Keep that blue really pale. I also added it to the
furthest mountain there. That makes that mountains
seem more distance, having a little
bit of that blue, the foreground is a pale color, sand, but ideally
the mid ground and the foreground are going to be darker than the
background and the sky. Everything should get darker
and darker, more warm, and more saturated as it gets
closer to the foreground. Remembering these
elements and having these color swatches is going to make painting this landscape in afterwards so much easier. So you can see I'm adding
in more of a purple color, even if you don't
see it as purple. Distant objects painted
purple will look very good. I'm adding some details
in the foreground, but no details in
the background. That was easy.
9. Bonus Lesson! Let's Draw Spines: Remember how we
kept our watercolor separate from our plant
drawing in the desert. That's because using watercolor to paint cactus is
a pain in the butt. But right now for
this bonus lesson, I'm going to show you
a little trick of how you can simulate spines. Part of the problem is
that with watercolor, you can't do pail
on top of dark, but we're going to use a
trick that's not watercolor. First, start off by making a real dark wash and you're going to want
to make this wash go even beyond the lines
of your cactus if the color isn't
dark enough and if it doesn't go around the cactus, this technique will not work. You could waste $50 shopping for all the different types
of gel pens or you could just use these to
the I recommend, I'm going to use
the thin one here, which is the signal uni-ball. I think it's the broad. And you can see how I'm going
to create these spines. There's a certain
way you have to hold the pin to get the lines right and it will be pointier at
the end of your stroke. So keep that in mind
as you make your plan. The other thing to keep in
mind is that this is very, very fun and most of the
time you will overdo it. At this point, I'm not
really observing the cactus. So this is sort of
pure decoration, even though I said
nature journaling is about observation. If you remember, the spines
weren't really white. Anyways, this is
a good technique for you to at least know about and definitely stop
before you think you're done. This white gel pen and
that presto pin can both work for water features as
well as spines on cactus. Ta-dah. Look at that. Good job.
 Marley Peifer, Journal for Life