Transcripts
1. Introduction: Sketching and painting the small perching birds that are the kind that you likely see at your bird feeders are out in the park when you're out and about is easier than you think. There are specific steps you can take to capture those birds that you love in your nature journal. Stay tuned and I'll show you how step-by-step.
2. Drawing With Shapes: All right, most people, when they start out drawing something, when they're beginners, they look at their subject and they tried to take a pencil or pen and just do the whole outline with all the details right from the beginning, right? We've all done it. I've done it. It's true. And what happens when we do it that way unless we are super experienced or the thing we're drawing, what we tend to do is we get it all out of proportion because we start with the thing that's nearest to us and then our brain kicks in. And our brain is this magical, enormous computer system basically that stores things in images and impressions. We don't need to for survival of the species or anything. We don't need to store details. So we store images. We see flowers in one-dimension from the top only. So when we encounter a flower out in nature, it's hard for us to draw it in perspective if it's not just facing straight flat at us. So what we need to do to become better at drawing is to learn to see the simple shapes that everything you see is made up of. And we're talking super simple shapes, circles, squares, triangles, rectangles. Those are the basic shapes that make up literally everything that you see. If you can find those shapes and get those shapes in the correct proportions, then you can tweak and fiddle with them until you get the proportions correct. And then you go in and add details and sharpen edges and change proportions and angles just a little bit to get exactly what you want. That goes for the small perching birds that we're going to take a look out today. All right, let's move over to the drawing board and we'll start to look at how you find the shapes in these birds and then how you take them from those simple shapes that we might have drawn when we were children and turn them into and more realistic looking small perching bird for your nature journal.
3. Finding the Shapes: Okay, Let's begin to take a look at how we can recognize the basic simple shapes in our small perching birds. Lots of different birds, but they all have very similar characteristics as far as their shapes go. So what I've got here is a copy off of my computer and this is a clear plastic report sheet. This is good for teaching yourself to find the shapes in the beginning, because that is key to learning how to draw this way as being able to see the shapes. So the first thing we're going to notice about this small chickadee is the shape of its body. So we can take our marker here. This is an erasable dry erase marker. So we can use this folder over and over. And this is the basic shape of his body. And where does this body in? We're going to call it about right there. Alright, so you see that is basically an egg shape. And that's where we'll start when we draw, when we begin to draw here. So let's switch to a different color here. And now let's look at the bird's head. We're going to outline this here. And once you can't see is the bird's head. It's not just perched on top of their, their heads are almost a circle. It sits, they cross over here. Because we have to remember that the birds, there are skeletal structures, There's tendons, there's muscle, and there's feathers in there. They have a neck, just like we do. But when they're at rest, which is what you see most of the time when they're perching, they tuck their heads in because that's their relaxed position. You only see their necks all stretched out when they're reaching for something. So this is the more natural resting position. And again, these are not perfect shapes, but these are your starting point and this is how you're going to put together a realistic looking perching bird in the end. All right, so we've got their bodies kind of oval or egg shaped. Their head is a circle. And then back here we have CVs feather sticking out here. This is a big strong tail muscle. Because if you think about it when they're in flight, their tails become writers. Helping them to change position and do what they need to in their flying when they're sitting. They balanced them up and down. So this is a really strong muscle back here and you can see again, it traverses the line of their body because it's part of their body it sits in. And then generally when they're at rest, their tail is an elongated rectangle like that. All right, now let's go back up here to the top. In their beak is another little triangle that again sits inside the head slightly to because not perched on top. If that's a mistake, a lot of beginners make. You don't remember that the beak sits in the face, that the head sit down into the body, that the tail sits up into the body. You end up with kind of a bird snowman kind of feeling you're never going to be happy with the shapes. You're going to end up with a bird that is a lot longer and slimmer than it actually should be. Okay, so let's erase this and we'll do one more example so you can see that this works no matter what position your bird happens to be. So let's switch to see another picture here. This one, this one is a little, is a little different position. All right, but we're going to see the same kinds of things is take our red marker and we're going to find its body. We get that actually up in the frame here. All right, so we're going to outline his body. And here it is again, basically an oval. And then let's switch over to the green marker and add in his head, which even though he's facing US and Canada to the side, his head is more or less a circle is kind of a squished circle in this particular instance, but a circle nonetheless. All right, and then down here at the bottom, if you look really closely, you can see that strong muscle attached to the long rectangle for the tail. And there again the beak in the face, and it sits like that and it's another triangle. So you can see these are the basic shapes that you need to draw these small perching birds, they may have slightly different features. Maybe a tuft at the top of their head or something like that. If you're talking about a cardinal or a tip mouse or something. But the basic shapes are going to be the same and all of those other little features will be details that we add later. All right, so let's move on to the drawing board and we're actually going to begin to draw our bird shape by shape, by shape.
4. Begin with the Body: All right, I've got my reference photo here and I've chosen the one where the bird is sitting sideways, bounce the easier way to begin to get a feel for the shapes of the birds, even though other than in field guides, you're probably really going to see them this way out in the field. The principles still apply. So what I see first is we traced it. We've got his slightly oval body. But I'm also going to look at angles. If I lay this down, you can see that's a pretty sharp angle, not quite 45 degrees, but close. And I want to start this with as close to the right angle as I can because that will mean much less tweaking later on and okay. And I'm going to draw a little bit darker than I normally would so that you can see what I'm doing. I'm not drawing this all in one straight line. I'm kind of adjusting as I go. I think that angle is a little off, so I'm going to make it a little less steep here. All right, so that's basically his body. And then we're gonna go back up here. All right, we have the basic body shape. We can see, we've got an angle here and that's pretty close. And the size is approximately right? So now we've got our body to work off of. Now we'll move on to the next step which is adding the head.
5. Adding the Head and Beak: All right, so we've got his body and we're pretty happy with the angle of his back and the overall size and shape. So now we're going to look again at his head and saying, let's see, his head kind of sits up towards the top of his body. I'm going to draw a really rough shape here just to get started. And make sure that I remember that his head is not just stuck on top of his body. It's actually sitting down inside there. All right. While we're here looking at the head, we're also going to look at this line from the beak, the beak and the eye, it's blooming. Pull this up here so you can see a little bit better and you have all these reference photos, by the way, in the resources section, I've given you several photos to work from. You can see that as I kind of lines up towards the top end of his beak. And we're going to again look at this angle and his beak is not exactly horizontal, It's arched slightly up. So we're going to start it right here and arches slightly up. And you can see that his beak is not completely pointed, it's slightly rounded at the very end. They're not a very wide beak. And the beaks are important that you get them right in these birds because the beat gives you a clue to what kind of food the particular bird is, is munching on. Alright, so let's see. We've got slightly raised angle and the eye sits towards the top, not quite in the middle of his head. Some pretty content with that. All right, and now we're going to go on to adding on the tail shapes.
6. Tacking on the Tail: All right, so we've got our body, we've got our head, and now we need to look at the tail and we're gonna do the same thing with the pencil. It's kind of, that's almost a 45 degree angle from the top of the beak down to the end of the tail. So we're going to see if we can match that by laying the pencil down. And the tail is going to come off like this. And it's kind of rounded at the end. Goes up into his body like, like that. And remember, these are just basic shapes. This is just a rounded rectangle like we talked about. And now we're going to look at this, this angle right here. So actually the body comes up and we're going to start a little bit of tweaking. Now the body comes up like this. And there is this strong muscle that comes down like this where the tail is attached and it comes up like that. Alright, so we've got our angle. Now we're going to look at in proportion to his body, the length of the tail. Do we have the length of the tail, right? And I think that's close enough that we're going to call that part done. And just remember that we're going to come back and we're going to tweak all these shapes in just a minute. And again, I've drawn this much darker than I would want. I'm doing it on my own. And this is what you'll do to either use a photo blue pencil that kind of just disappears after you sketch around it, or use much, much lighter lines so that you can erase the lines that you don't need as we tweak, which is the next step, we're going to begin to refine the shapes and get our positioning adjusted any place that we need to.
7. Refining Shapes and Positioning: All right. As you can see, I've gone back in and erase some of the extra lines that we don't need so that we can see a little bit better. So what I generally do is start with this angle along the back. You can see that his head comes down a little straighter than we've got it. And there's not this angle is not nearly as pronounced as it is in what we've got. So we're going to straighten that out just a little bit. That's much better. And then I generally go back up to the beak area. And I can see that his face kind of draws back pretty sharply from his beak. And then it comes up in a straighter angle. His head is not nearly as deep as that original circle that we, that we drew. And then we're going to look down here underneath the beak has what we would call a chin area on a person. And it kind of dips in, goes more straight down into his chest like this. And then it also is a little more streamlined than the original oval that we drew. So we're going to straighten that out a little bit and come up into that tail. All right, then we're gonna go back. And again, if you make wider lines, you don't need to do as much erasing. I'm just drawing it dark enough for you all to be able to see what I'm doing. Alright, so I'm much happier with the shape we've got going on now. And this is, this is what you do. I mean, if you're out in the field or you're sitting at the bird feeder and you're trying to capture bird on the spur of the moment. Of course you're not going to do this much erasing. You're going to draw faster and go back and tweak later on. But you're still going to capture much more of what you're looking for. Among the way. Soften that angle just a little bit as well. It's not such a harsh line. All right, so we've got the angles are a little better. I still think we need to pull his head down just a little bit. Here we go. That's much better. So now we've kind of got the outline of our verb. We've got as I settled. And now I think that I'm looking at it after a mess with his head a little bit, his eye is a little bit just a wee little bit too high. So we're going to bring that down just a little. Alright? And so the next thing we're gonna do is we're going to locate this wing here. So I'm looking, it's not quite at the mid-line of its body. It's just above the midline and it pretty much comes straight up. And then it swings down and joins in with the tail here. And then it comes up over his back. So now we're getting rid of that awkward angle that was there by the tail. All right, we've got this wing here. Okay, so now we have the basic tweaking done. He looks like a chicken. He now he just needs a little more detail and markings and we'll get to that in the next step.
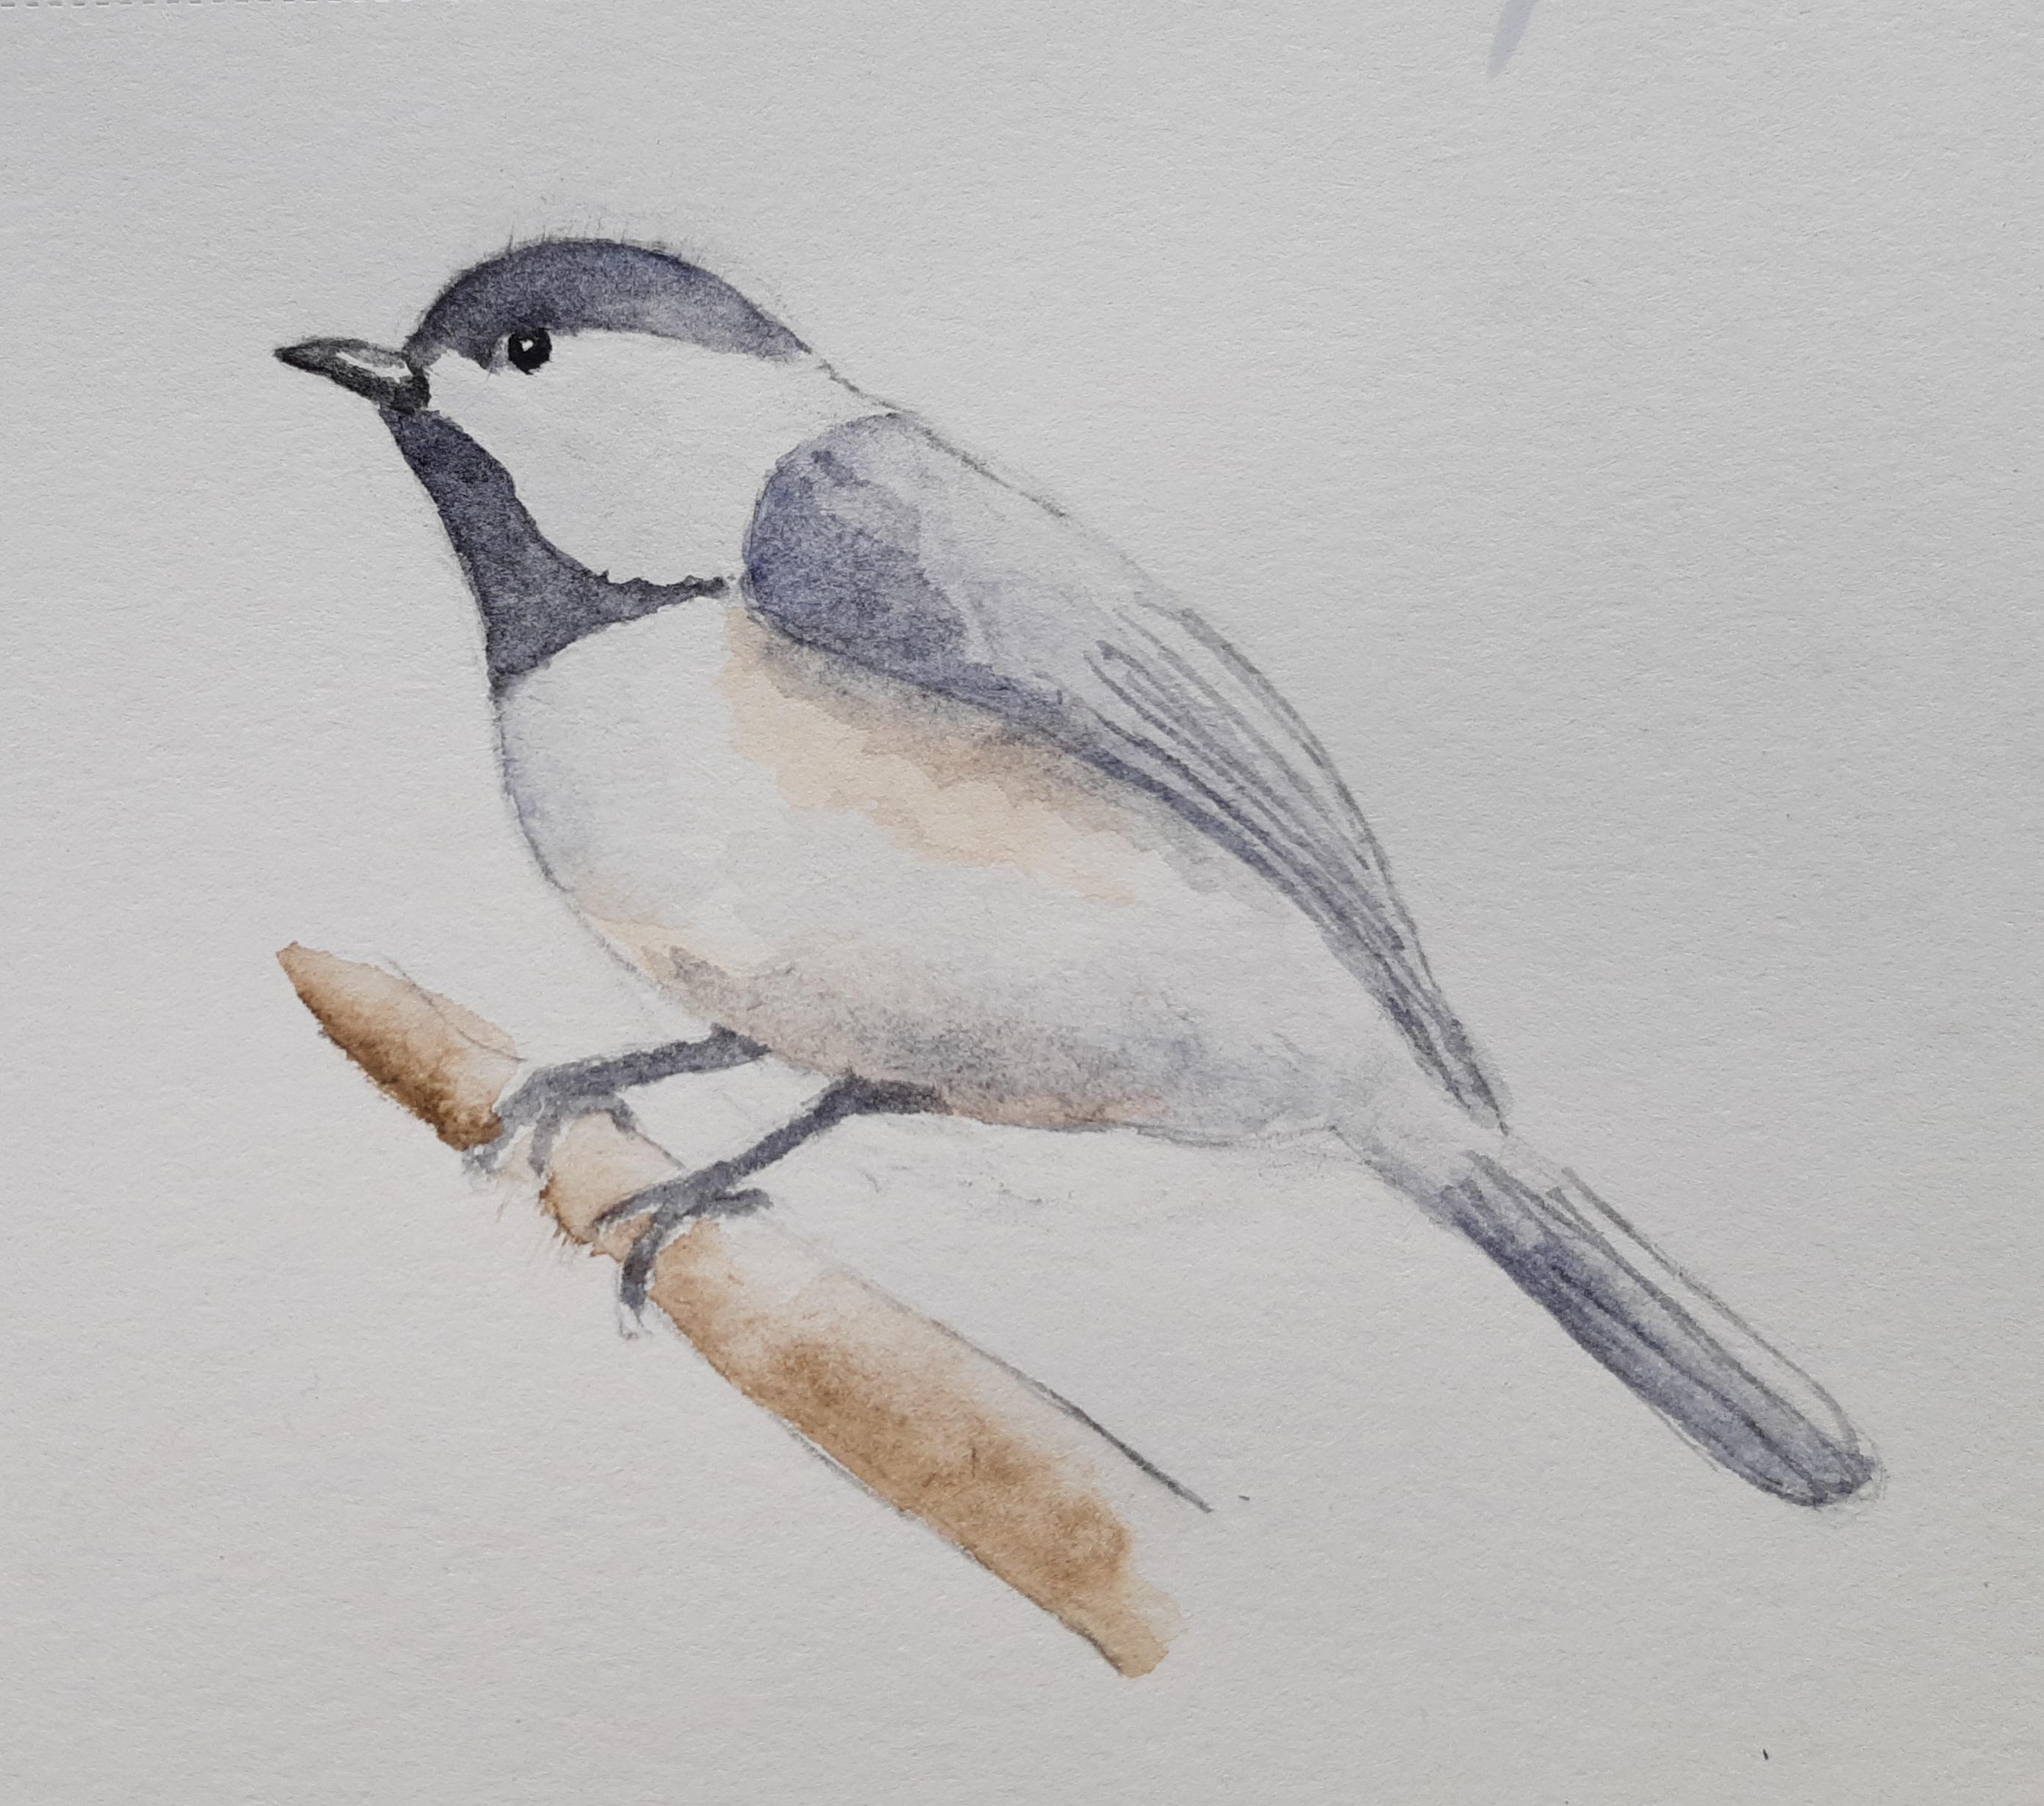
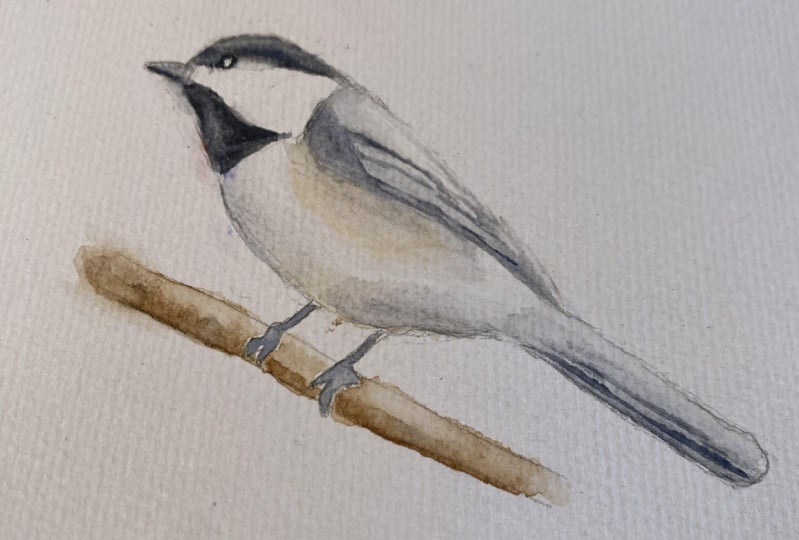
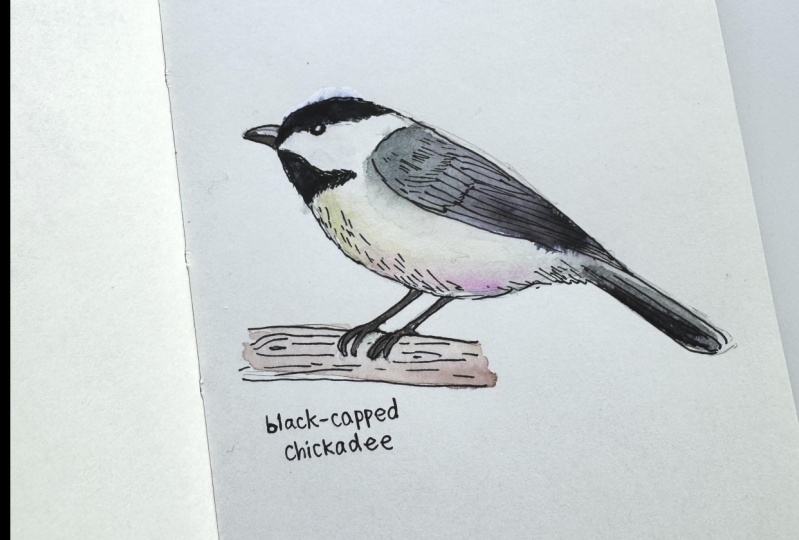
8. Adding Color: All right, so we've got our sketch here. And you can see I've taken a kneaded eraser and lightened up the lives just a little bit so they won't show through so badly. On one we have a watercolor. So the first thing I'm going to do is get the black going. And if you look at your color photo, and again, those are available in the resources section. And I've given you multiple pictures to choose from. You now play around with them. Do all three or all four of them. Really get to know chickadees. And I'm just using just a slightly wet watercolor. I'm not going crazy with the water. I find it much easier to control. And especially if I'm out and about. And I'm doing this out in the field while I'm sketching. I don't want to make a really wet, juicy painting that I have to wait forever to dry. So for now, I'm just kinda sketching loosely in the watercolor, has the black markings, his mask up on his face. And if you look closely at your reference photos. And indeed this is true of most things in nature. There's very little actual black block. It looks much darker and the shadows, of course, in our eyes read it as black. But if you'll look in the more highlight areas like up around the top of his head where the sun is hitting him. It's actually almost more of a gray blue color. So I have taken my black paint and add just a little bit of blue to it to give it more of a blue tint up on the top of his head where the light is hitting. And I don't want to make that part too, too dark because there is a highlight up there. So we're going to add a little more black, black down here towards this big, dark and handsome and then let it go lighter up on the top of his head. And if you look at the beak, the beak itself is almost a soft gray swan, really going to wander the paint down there and spread it out and leave room for that highlight, which is in this reference picture at the top and kind of in the middle. Hi lights and darks are really important when you're trying to get a realistic work. That's what's going to make your, your drawings come to life and look real. And then Phase II is pretty dark, so that's going to be the darkest black that I use. And even though we can't really see much of a highlight in his eye in this particular picture. I am going to use a little bit of artistic license and leave a little white dot in the middle of his eye here. Makes them look a little more alive. And you can see sometimes, depending on the light that a chickadees photo was taken, then they can almost look like their eyes is kinda disappear. And so making the eye the darkest part won't make sure that your your ticket used. It does not disappear into the rest of this face. All right. So that's probably all going to do there with the black. But while I've got this black color, I'm going to use a little lighter version of it. And I'm gonna go here and just add a quick wash to most of his wing. But if you'll notice again, up across the top, there's quite a bit of light hitting him. So I'm just going to continue to add water and fade that out toward the top of the wing. And then I'm going to let that dry a little bit so we can go in and add in a few details. Same thing with his tail. There's a quite a bit of blue showing on his tail feathers. And it's much darker towards the bottom. So by adding just a little water towards the top, we can add a hint of color without we're not totally losing or highlight. All right, so now I'm going to go back in and I've already gotten mixed up on my palette here. Kind of a, a Tanishq tone out a little more umber to that. Actually, it's a little weird. And I don't want to add too much of this at a time because they don't want to overpower him. But right here under his wing is a little bit of that color. And again, I'm just going to kind of lighten it out so it just disappears. And then there's some more of that color here at his underbelly. Again, just kind of letting that fade off into nothingness. And then we have to think about his legs are a bluish gray, but they're going to be a little bit darker because they're hearing shadow. And again, I'm not going to play with too much detail in his feet and legs because I want more the attention to be on the bird itself. All right, that's good enough. And then I'm going to I am on our picture, the stick that he's on, his gray, but I think I'm going to do more of an amber color here just to make it stand out a little bit more. And following the shade and shadow patterns, I'm going to make it a little bit darker on the underneath part of this twig that he's standing on. Lighten it as it goes up. To give that a little more three-dimensional. All right? Now we're going to let that dry for just a second and then we'll come back in and add a few little details in his feathers. And we'll be done with our project.
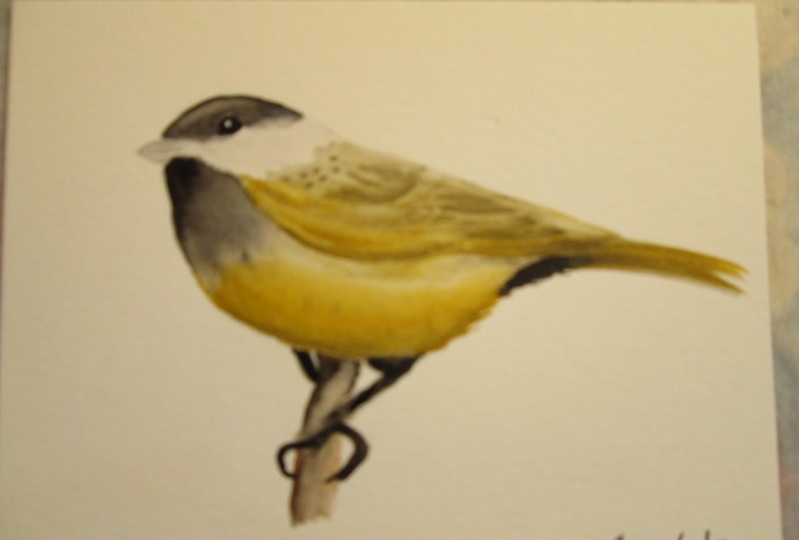
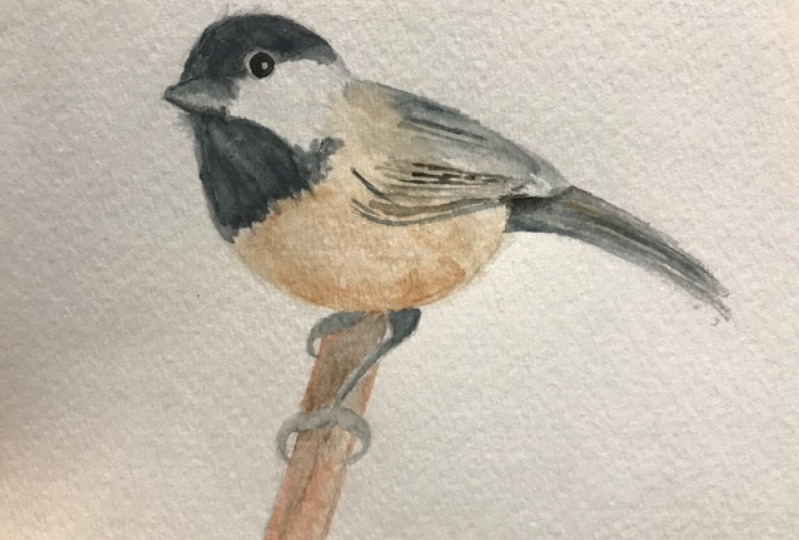
9. Final Details & Project: Alright, use dry enough now that we can go in and add details. And what are we going to add? I'm not gonna go overboard with details because again, sometimes less is more. I am going to pick up a few shadows. Here is wing area where the top of his wing meets the the flight feathers down here at the bottom. And then I'm just going to put just an indication of the direction his feathers are falling here and his wing. And the same thing with the tail. You can see a little more individual feathers in his tail. So we're going to round those off just a little bit. We're not going to go crazy. All right. Now, I'm going to add a little more blue to my gray black that I've got going here. To put in a few shadows here and there, show that he looks a little more three-dimensional. And you can always get a more three-dimensional look in any painting or drawing by adding in a little bit of blue or purple to your shadow areas. That makes them look a little more rounded. Because colors fade as we go into the distance, coach dropout. And blue is the last color to drop out of the spectrum as you move away from a subject. So you get that illusion of depth. If you put a little bit of blue in the shadow areas. I'm just going to let that kinda fade out. There's a little shadow here under his wing and around his legs. And it's a little more blue coming up his neck here. And again, we're going to just add a little water and just let that fade out into nothingness. We have just, just the tiniest bit of shadow here on the bottom of this face. It's not exactly color, It's just a little bit of a shadowy area that has a blue tint to it. It's dark in this part of his wing just a little bit more and a little darker and the tail. And we're going to call that finished. And, and that's your project actually, for this particular skill share class, you can do this version of the chickadee, or you can do any of the other three that I have there. Good luck in the resources section for all the different reference photos that you can play with or do a small perching bird of your choice. It doesn't really matter, but make sure that you share them with us in the project area, I would love to see what you create from these and share with each other and learn from each other as we go through this process.
10. Final Thoughts: I hope you learn something. You really can't break down almost anything that you want to learn to draw into very simple shapes. And then tweak as you go. If you're out in the field nature journaling, sometimes you're trying to do a bird or a squirrel or a rabbit or a deer or something that's moving quickly. If you can simply capture those basic shapes, you can tweak it and fix it and detail it later after you have time to sit down. But that's a great way to be able to capture the shapes in the positions and the different motions and movements that you see in the birds and the mammals around you. So I really, really hope that you give this a shot. Remember that you've got for reference photos to work from in the resources section. I can't wait to see your projects and shared in the project section. And I hope you get out there and have a wonderful day out in nature. Make sure you go to my teacher page and follow me if you haven't already, so that you're notified of any the next classes coming up. You can also find me on my teacher description. You can find my webpage and my YouTube channel to follow along on lots of different nature journaling and sketching adventures. Have a great day and thanks for watching.
 Lisa Duncan, Nature Journaler/artist