Transcripts
1. Welcome to the Class: Hello and welcome to the
world of quash painting, a beautiful painting medium that I have exploded recently. And this class we
are going to paint and beautiful
monochromatic paintings, which anybody can paint. The most amazing part for this entire classes
that we're going to use a single wash color, which is going to be ultimately, in order to create
beautiful depth and detail, we are going to use
to wash colors, which is going to
be black and white. Glass is absolutely sold
it for beginners and also intermediate and advanced
level artists can try it. We are going to
start by studying all the art supplies that you will need for this entire class. I'll be giving you a
beautiful class overview in which we are going to learn
about all the paintings. That is going to be a beautiful color palette study
in which we are going to learn about the
tense of the gradient effect. I'll be teaching you
how you can cut it out A6 sized paper into
a perfect square. We are also going to
learn how you can cite tibial watercolor paper. I'm painting now back down using a specific brush painting. All the minimal
elements and each, and every painting
we are going to study everything in detail. No need to worry at all using minimal elements and basic
painting techniques. We are going to be these
beautiful mini paintings. At the end, we are going
to jam for the corners and complete and printing
the entire painting. I'm very excited to share
this class with all of you, and I hope that you
get to learn something new and creative from
this particular class. And gaze you are new
to wash painting. This class is absolutely
suited for you. So without any delay, grab your supplies and let's
get started with the class.
2. Art Supplies: So before we start, it is very important for all of you to know the correct art
supplies that you will need for this
particular class. So here I have all
my art supplies being placed on the desk. So let us talk about
the force not supply, which is the single wash
color not we're going to use for the entire glass,
which is ultramarine. That is basically a blue color. So it is not at all necessary that you will find
the exact same. You can go for any
other alternative as when the next odd supply
as a pair of scissors. This is the art supply that
we are going to use to cut the A6 size before it
into a perfect square. Next up we have our simple
ruler and a pencil. So this is basically a
simple plastic ruler having dimensions in centimeters
and assemble benzyl, which I hope everybody
must be having. So we're going to
use this tool to cut the E6 nice paper into
a perfect square. Now comes the most
important part, which is the watercolor paper
that we're going to use. So this is watercolor
paper of A6 size. And the one thing that you have to keep in mind is the GSM. So it takes 300 DSM
that we have to use. So let me tell you that. Yes. And basically
means the thickness of the paper so that they can apply heavy watches
on the paper. So that is something you
have to keep in mind. Let us talk about the
most important part, which is going to be the brushes
that we're going to use. So I'm having
basically five dashes which we are going to use
in this particular class. Let me give you the details
about all the brushes. Bod from the flat
brush lettering, meaning for white brushes that you are seeing right
now are round brush. Basically, these brushes are going to be used to add details. So the first one is around
rush of size eight. The second one, because I
don't rush upsides six. Then we have another
down gush of size four. Then last but not the least. The last round brush
is off size two. So these are the four round
brushes that you will need to add the details
and to the painting. Then the last brush is
outlandish of size 1. ". Flat brush is basically going to be used to paint the background. So these are all
the brushes that you will need for this
particular class. Now next up we have
to wash colors, which is basically
black and white. So these are the two colors
that we're going to use to create some beautiful contrast effect with the ultramarine. The next time I
have a masking day. So this is basically a paper
masking tape of size 1 " that we're going to use to site team the
watercolor paper. The next step I have a
simple glass of water. You can already see
my dirty water in it. So this is basically
a glass of water which you have to keep to
clean up your brushes. Then I have assembled tissue
paper on which you can dab your brush to remove
excess amount of water. It is always good
to keep it handy. Then the next step, Here's
a simple color palette. So this is basically a simple
plastic color palette, which is not having any
sections since we are going to use combination
of colors together. So it's a simple color palette. You don't need to worry
at all. You can go for any of that good
alternative as well. So these are all
the art supplies that you will need for
this particular class. Don't need to worry at
all in case you do not have the same odds apply, you can go for any other
goods alternative as well. Now let us move
towards the next part.
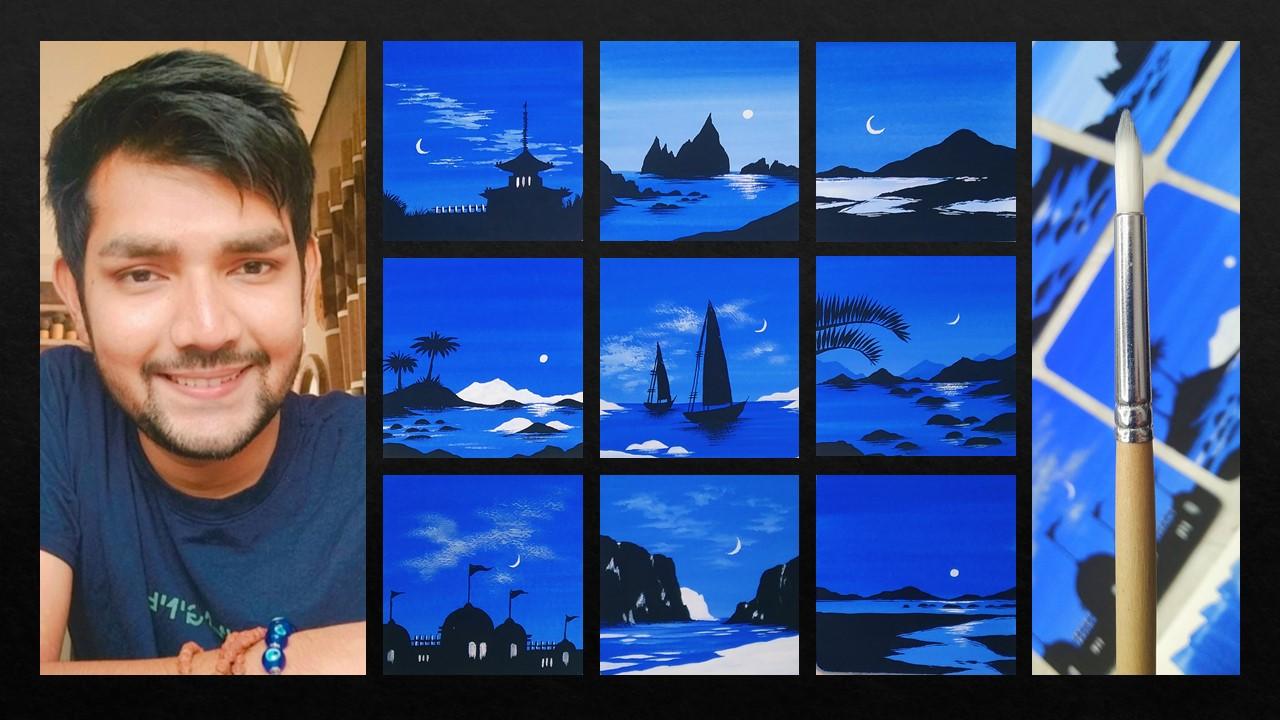
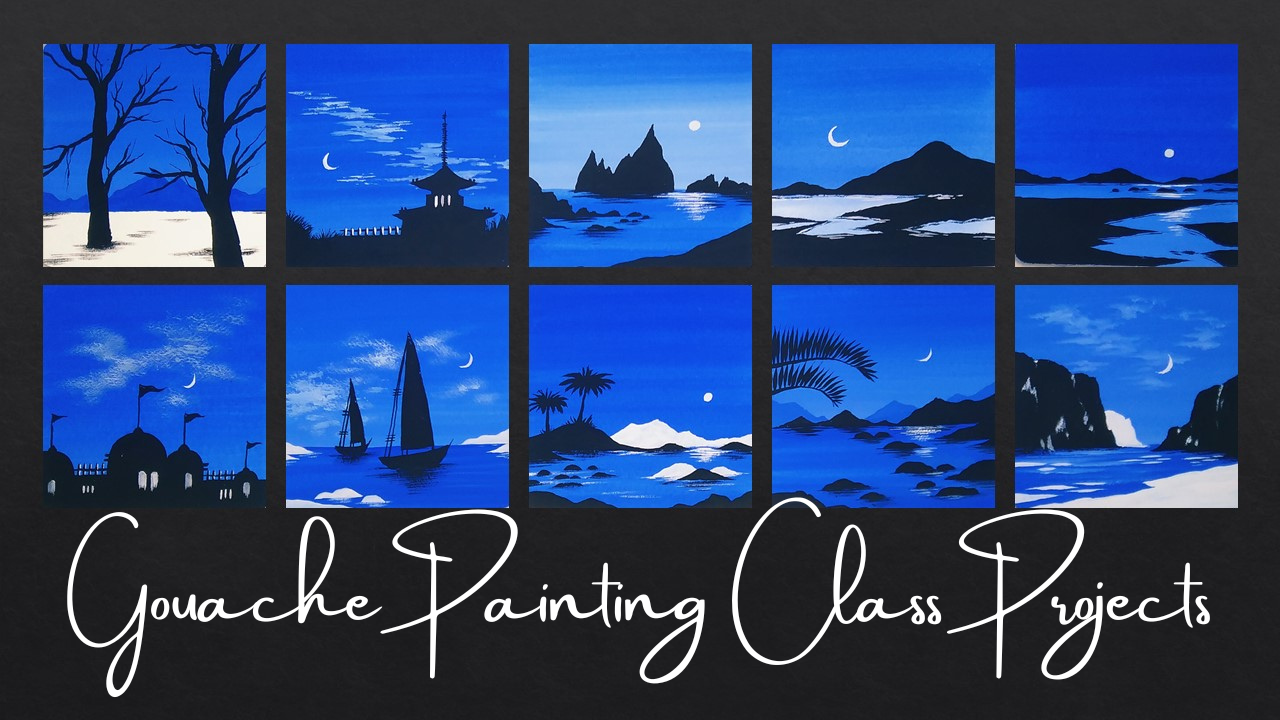
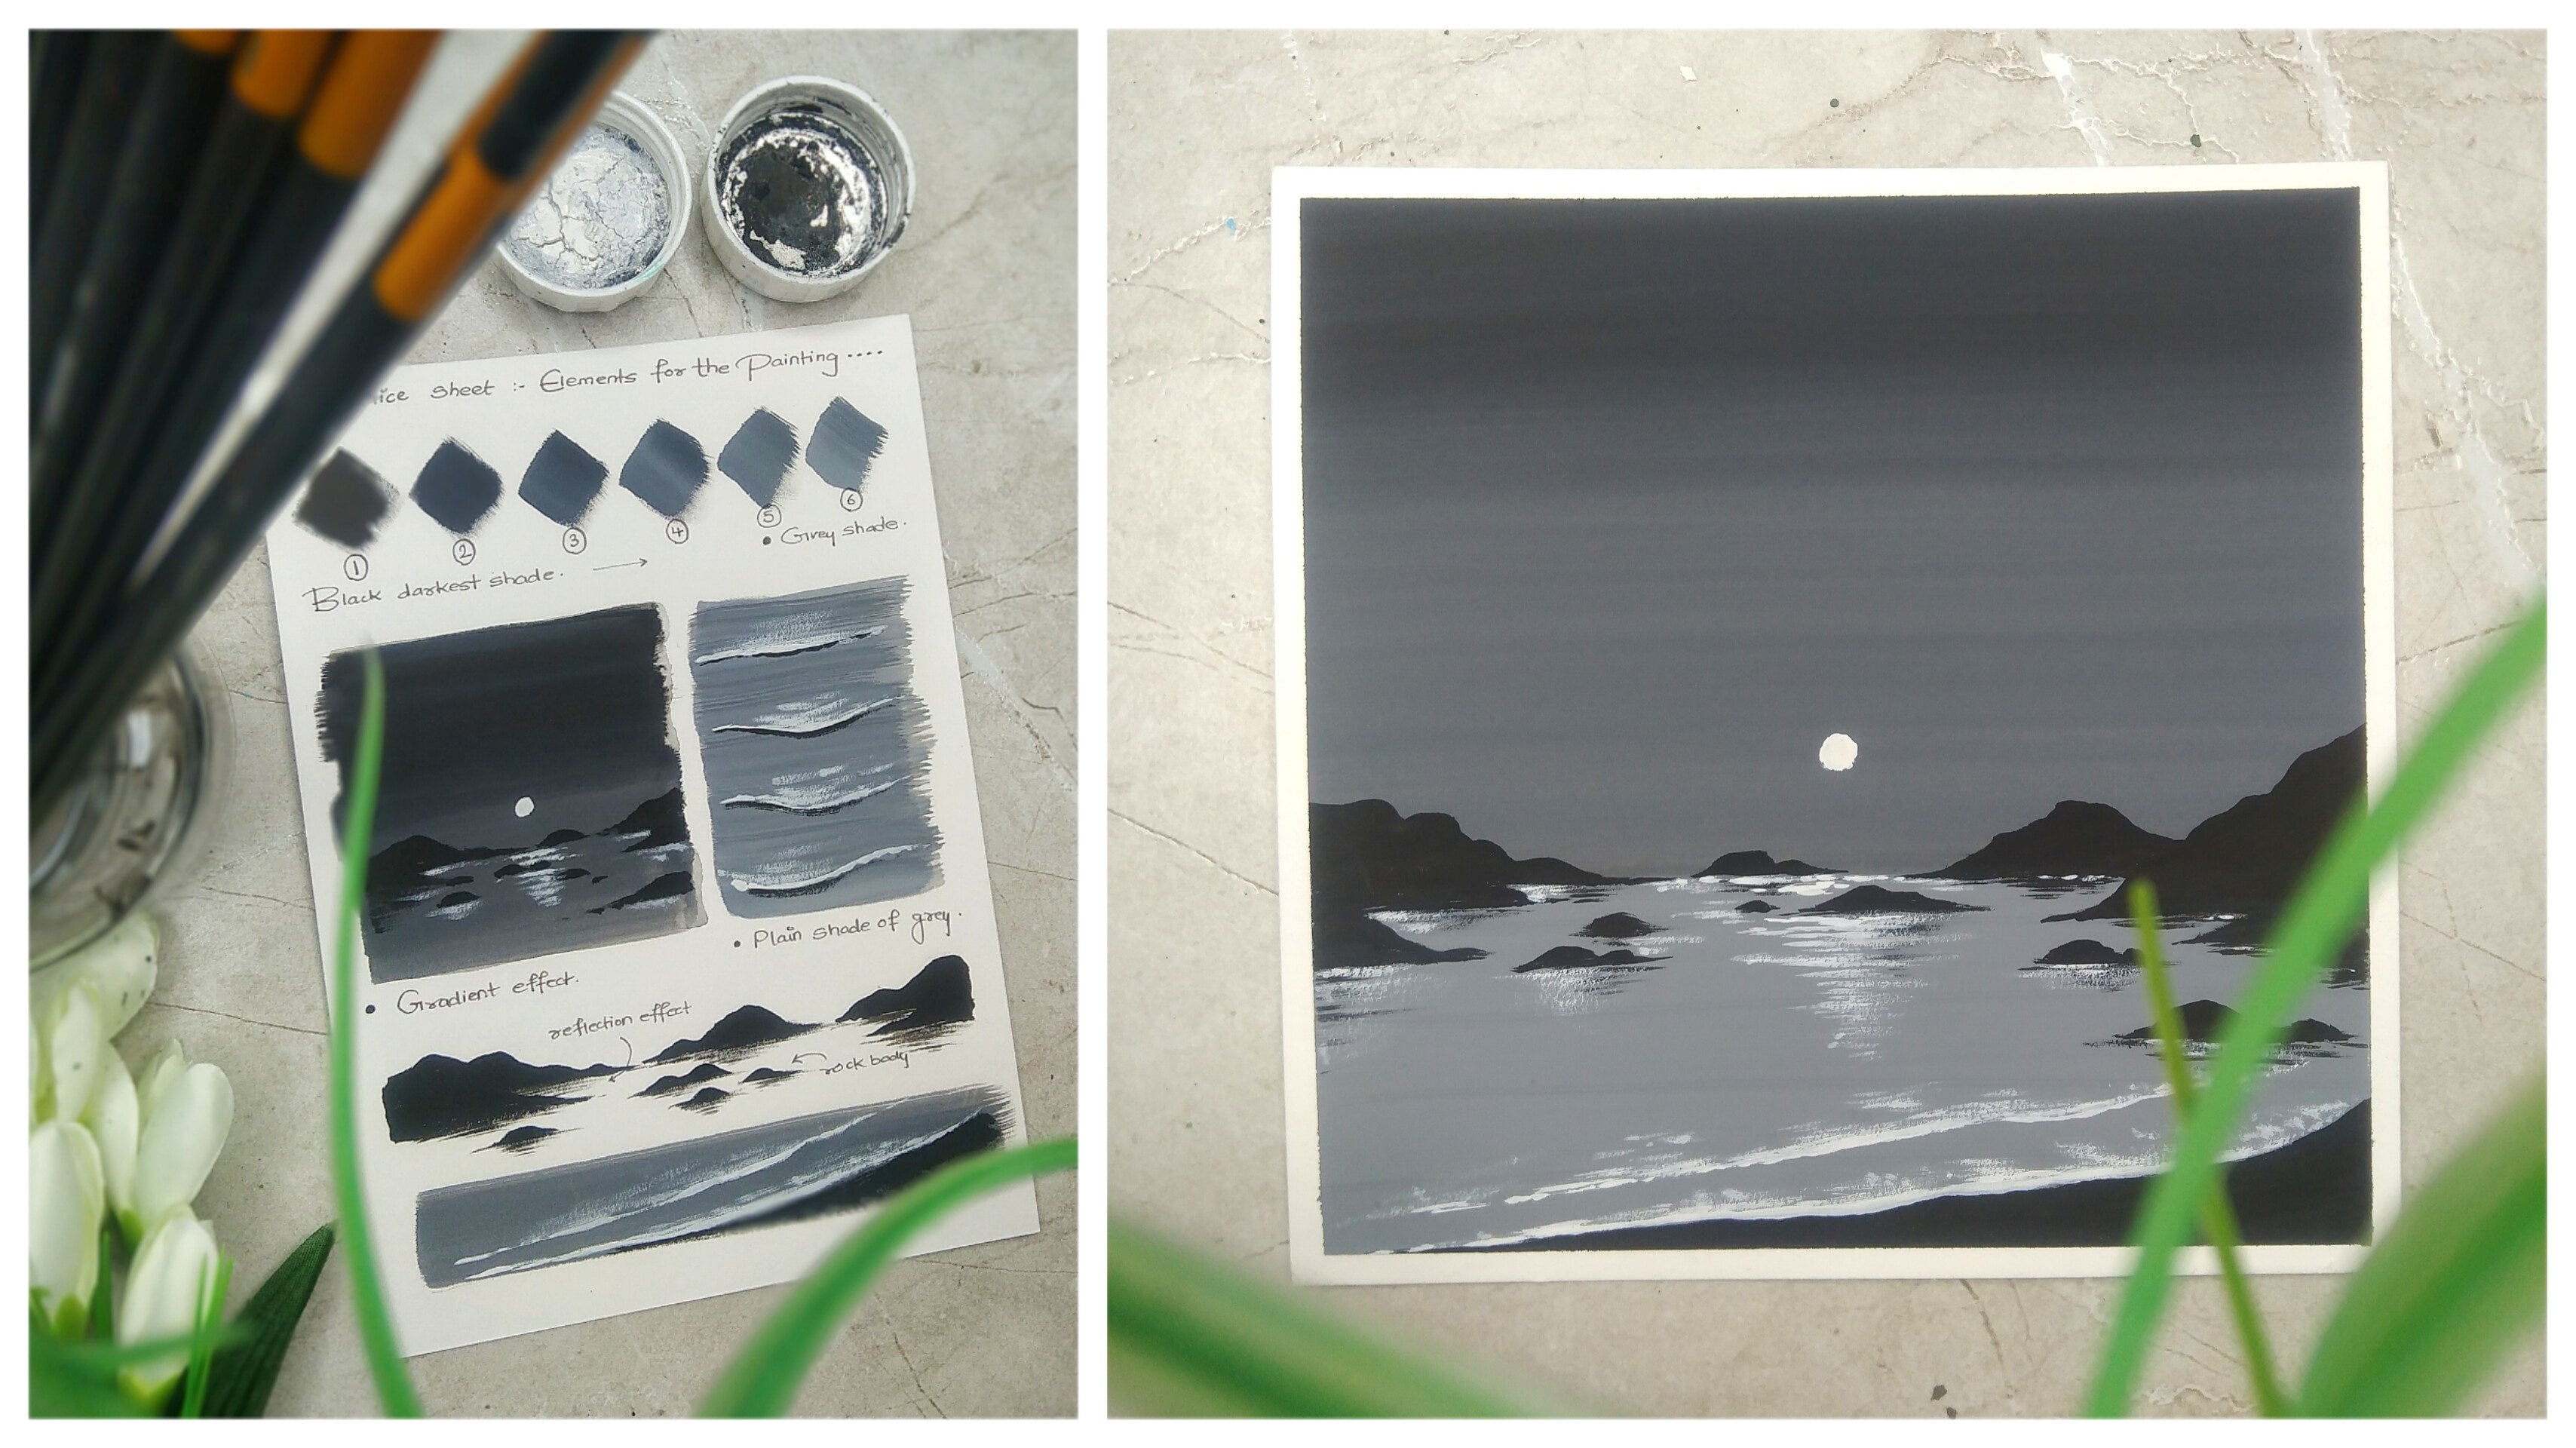
3. Color Palette : Hey everybody, let us talk about the color palette
that we're going to use in this particular class. So you can already
observe my messy desk, or I'm having these set of ten paintings that
we are going to create. And you can already see the color combination
that we are having. The major color here
is ultramarine, which is basically a
blue, which you can call. But in case you do
not have ultramarine, you can go for any other
good alternative as well. Apart from that, we
are going to use black and white gouache colors to create contrasting elements. So you can already observe my messy color palette in which I have taken
some ultramarine. We have added some white and created some tens
of ultramarine. We are also using black
on the other side to create some beautiful
contrasting elements in the painting. I'll be teaching
you two techniques. Basically. The first one will be the one in which
we are going to make dense of ultramarine by adding some amount
of white slowly. Another one would be a
gradient effect that we are going to create
using ultramarine only. So now you can observe that
I have taken some amount of water to loosen the
cholera in my color palette. I was already having some
dark tone of ultramarine, which we have taken
directly from the tube. You can observe the
saturation of the color, which is the exact color which
you can see on the tube. Now will be making the shades. Or we can say that teams on this particular color
lighter in visual. So as you can see, I have
taken some amount of light. Again, you can add some
water to loosen the cholera. Now you can see I'm mixing it a little bit more with white, so it will become a little
bit more lighter in shale. Now as you go on
adding some amount of water and the existing white
color in the color palette, the saturation of
the color will start creating and you can already observe the
change in the color. So it gets lighter in the
tint as you can observe. So these are the specific
tint of ultramarine that we are going to use in
the entire class projects. Now let me tell you how you can create a beautiful
gradient effect, which is absolutely
a very easy process. Just take your 1 " flat brush and take the darkest
tone of ultramarine. Mix it well in the
color palette, use some amount of water
to loosen the cholera. Now I'm applying
the darkest tone on the upper portion,
as you can observe. Now, simply clean
your flat brush now will be taking
the ultramarine, which is having some
white color in it. So that entails a little
bit lighter in shade. I'll be applying it just
below the darker tone. As you can observe. Blend it a little bit with
the darker tone. Just dry your flat
brush by dabbing it on the tissue paper and apply it on the intersection of
both the colors. Now you can see the
beautiful gradient effect. So this is a simple technique to create a gradient effect. So this is how we are
going to use the tints and the gradient effect and
all the specific projects. Now, let us move
towards the next part.
4. Lets Cut the Paper: Hey everybody. Now let us
cut the watercolor paper that we're going to use to
create all the class project. So here I have my simple
watercolor paper. So let me give you the details about the watercolor paper. These watercolor
paper, or 300 GSM, and the size of these particular
watercolor paper is A6. So you just have to
take care of the GSM, which is 300 GSM. Now this basically means the thickness of
the paper so that we can apply heavy washes
on the watercolor paper. Just to show you,
the class project is basically a square paper. And the watercolor
paper that we are having is a rectangular people. We are just simply going to make it into a perfect square. So here I have my
symbol plastic ruler, which is having dimensions
in centimeters. So by using the ruler will
be taking the measurement of the shortest size of
the particular paper, which is 10.5 cm. Now, I'll be taking
this shorter land on the longitudinal side of
this particular paper. So just simply mark 10.5 cm. I'll be taking one point, and I'll be also taking
one more point so that we can draw
our co-linear line. I'll be just making the dots
a little bit darker by using my pencil so that it
can be easily visible. Now, I'll be placing my ruler on both the points and will
be simply drawing a line. No need to hurry it
onto it very carefully. You can see we have
got a perfect square. Now by using a pair of scissors, will be removing the
additional part and we'll be getting the exact
squared that we want. No need to hurry atoll. Use your pair of scissors carefully and remove
the additional part. Just follow the line
that we have drawn. Here is the watercolor paper
ready in a perfect square? No need to throw
the remaining part that we have cut that out. That can be used to
practice some elements or the tense of the
particular color or making certain brushstrokes. So that is how we can
save some paper as well. So this is how we have prepared our watercolor paper before
starting the class project. And I'll be using this
particular remaining part from the watercolor paper to create the tense of the ultramarine and
radiant effect. You can also do the
same so that you can get an exact
idea of the colors. Now let us move
towards the next part.
5. Lets Tape the Paper: Hey everybody. Now let us take the
watercolor paper that we have prepared. So as you can see, I'm
ready with the desk and my watercolor paper being
placed on the desk. So before you start painting, it is very important
that you place your watercolor paper
in the right position. And you can cite, tip it so that the paper doesn't
move from the desk. So here I have my
1 " masking tape. So this is basically a simple
paper tape which we use to sidestep the
watercolor paper. No need to worry at all. It is easily terrible
and you can just create certain pieces to place it on the edges of your
watercolor paper. So the reason behind doing this particular step is so that when we remove
the masking tape, we get a nice white border. But for this particular class, I'm going to remove
that white border and create some beautiful
GM Ford corners, but you can keep
the white border as well according to
your requirement. I have placed the masking tape. Just try to make sure that your masking
tape is parallel to the paper edge so that you can get a perfect parallel border. Tap your finger on the
masking tape so that it gets stuck to the watercolor paper and your desk in
a correct manner. Try to keep some portion
of the masking tape on the watercolor paper and
some portion on the desk. I'm placing the last
step and we are done. So this is how you have to cite tape your watercolor paper, and it is a very easy step to do it carefully and
we are good to go. So this is how you have to cite, tape all the watercolor
papers before starting every
particular project. So now let us move
towards the next part.
6. Day 1 - Dense Seascape: Hey everybody. Now let us
start with the first painting, which is a dense seascape. So you can already
observe my desk. I'm ready with my watercolor
paper with the tip. I'll be taking the ultra
marine and my color palette. So do not take a lot
of color at once. Just try to take color
as much as needed. We always have to
save resources. So I'll be using my one-inch
flat brush and we'll be applying a thin coat of water
on the watercolor paper. The reason behind applying a
thin coat of water initially is that once we apply the color and the brush
can move smoothly. So this is basically known
as a wet on wet technique. So as you can observe,
I have applied water on threefold area
of the watercolor paper. Only. Know I'll be taking
some water in my flat brush. And you can observe
in the color palette, I'm mixing it with
the ultramarine. So we'll be starting applying the color from the top portion. Just observe the
movement of the brush. These are simple
horizontal strokes and I'll be moving towards
the bottom part slowly. No need to hurry at all. Just make sure that you
move your flat brush and a very slow and steady manner so that you do not
make any mistakes. Now I'll be taking some
solid quash color. I'll be taking my round brush and just take some color
in the color palette. So since we are going to create a beautiful gradient effect, I have taken my flat brush again and I'm mixing
some ultramarine with white so that we can get a
lighter tint of ultramarine. Now this color I'm applying from the bottom portion and then slowly we have moved
towards the upper side. The strokes are absolutely seen. So you have to move
your brush and this particular horizontal
direction only. Now what I'm going to do
is I'm again going to take some darker tone of ultramarine
as you can observe. So just take your
old flat brush, add some amount of
water in case you find your brush a little bit rough
to move on the surface. You can see I have
applied as solid batch of ultra marine on the surface just below the gradient effect. Use the tip of
your flat brush to apply the color on
difficult areas. Again, I'll be repeating
the same steps. No need to hurry. Just make sure that you move your brush in a very
slow and steady manner. So you can already
observe that we are almost ready applying
the entire background. So now, since we have painted the water body on
the bottom portion, let us try to make some waves. I have taken my round
brush, size four, and I'll be applying these little white
horizontal strokes which are very thin as you can observe on the red surface of ultramarine that we
have applied right now. No need to worry, the vibrance of the white color
will fade away once we apply another coat
of ultramarine on it. Now I'll be taking
the same brush and just try to blend it with
the background color. So you'll be able to
see that we'll get some nice light
horizontal patches which will replicate
some water waves. So this is basically
just done to create some nice depth
and the entire painting. So now we're going to paint
some little mountains. So I'm just trying to
create another tenth of ultramarine by adding some
amount of white color in it. Add some amount of
water and try to create a good consistency
so that you can move your brush in a very
smooth and good week. No need to hurry at all. Take your time and mix the
color when tried to create a beautiful shapes
so that it can get a nice contrast with
the background color. This round brush is
basically of size six. So you can see we have
created a nice tint of ultramarine and we'll be painting some
beautiful mountains. No need to worry at
all. Mountains are having a very natural shapes. So you can create these
beautiful random natural shape. What do you have to do
is just try to make the outline first
so that you can get a nice shape of the mountain and then you can fill in the
solid color inside it. So initially I'm painting the mountains on
the horizon line. I'll be taking some small
and big mountains together. So as you can see, I
have painted the outline initially and then I'll be filling in the
solid color inside. No need to hurry while
doing this particular stem. We very much patient
and come by doing this. Just try to observe
that I'm filling in the color and make sure that
there isn't any space left. Just try to make the mountains a little bit more and
a contrast way. So now I'll be taking
some solid black color, which is a gouache color only. And now we are going to create mountains using black
color so that it can create a beautiful
contrast effect with the mountains which are
in ultramarine shade. So now I'll be using my
round brush of size four. I have taken some solid
black color in it. I have added some amount of
water so that the brush can move very smoothly on the
watercolor paper surface. Now, in order to create
a beautiful composition, you have to create
these outline and a variation with the mountains which are painted
in the background. I'm trying to keep these
Black Hills and between the ultra marine tint mountains so that both can be visible. So no need to worry at all. You can also create your
own composition as well. So initially you have to
draw the outline first, as I'm doing right now. And then we are going to
fill the solid color inside. So you can observe that after painting the black mountains, the mountains which are painted using the ultramarine
color, are also visible. So this is how we can create
a beautiful composition. Now using the same black color, solid black wash color, I'll be painting some more
health and the front portion. Add some amount of water
in your color palette in case you find your color and
rush a little bit rough. By doing this, you'll be able to move your brush a little
bit more smoother. I'm adding one mode
just below the hill that we have painted
on the right side. So this particular
thing will give some more depth to
the entire mountain. Now using the same black color, we are going to create
some smaller round bodies in the entire water body. The method is
absolutely the same. You just have to create a beautiful outline and then you have to fill it
with solid black color. You can create
these round bodies in a very random way as well. But I'm trying to create the
cluster of the wrong bodies nearby right portion where
we have the bigger hills. As you can observe, I'm
just trying to make the rock bodies in a
random fashion only. By using this
particular technique. You can also create
the combination of rocks and smaller and
big size as well. It is absolutely fine. You can just observe the
technique that I'm using. I'm using the tip
of my round brush of size four to
create the outline. And then I'm using
the entire surface of the brush to fill in
the solid black color. You can see I have painted
some smaller rocks as well. So now we'll be repeating
the same steps. I'm adding some more rock
bodies near the horizon line. Now in case you find to paint these particular
rock bodies, which are a little
bit smaller in size, you find it difficult to paint. What you can do is that you can go to a rough scrap of paper, or you can use your practicing
journal in which you practice your art
on a regular basis. You can practice
their forest and then you can come towards
your final painting. And this will help you to paint a little bit all in confidence. And the chances of making mistakes will be
definitely very minimal. They're not get disheartened. If you make any mistakes, it is absolutely fine. It's just a painting, so no need to take
it that seriously. You are definitely going
to learn something. So once you try to paint it, again, the chances of making mistakes will
definitely decrease. You can see I have painted a nice big rock body on the
left bottom corner as well. And I'm trying to add some more rock bodies there as well. So these are enough. Now let us add some
nice reflection effect of the wrong bodies. So to give the
reflection effect of the mountains and Iraq
bodies that we have painted. It has a very simple
and easy technique. I'm going to use my round
brush of size four. And it is basically a
detailing brush only. So you can observe
that you have to make these little horizontal
strokes just below the mountains and the log
bodies that we have painted. Now, these particular
strokes will give a nice reflection effect
on the entire water body. So by adding these little
horizontal strokes, it makes the mountains and the rock bodies look a
little bit more realistic. So now I'll be using my same
round rush of size four. And we're going to paint two beautiful coconut leaves coming from the left-hand side. So just make sure
that your color is very much good
enough and consistency. You don't need to have
access amount of water. Try to maintain the
consistency carefully. I have taken a simple stroke, the main stroke of
the coconut live. Now once you have painted the main stroke in this
particular curve manner, you are going to paint these little strokes getting
attached to the main branch. No need to try to make these
drugs in a very careful way. Use the tip of your
round brush to have these little pointy edges. And then you have to simply attach it with the main branch. Now once we are moving towards the tip of the main branch, you have to meet the size of the little leaves, a
little bit smaller. You can observe the movement of my detailing brush carefully. And we are done painting
the first leaf. This is how you have to paint the coconut leaf on
the left hand portion. We are also going to take
one more coconut leave just below the first one. But this one is going to be a
little bit smaller in size. Again, painting the main branch, but this time a
little bit smaller. Then I'll be making the little
branches attaching to it. These little leaves
basically are going to be a little bit more
smaller than the first one. Now as we move towards the end, are I would say that
tip of the main branch, you have domain the size
on the leaves, smaller. I hope that you got an exact
idea how you have to paint the coconut leaves and you can see how beautiful they look. No need to worry at all in case you find it
difficult to paint, you can go to a rough scrape off paper or you're
practicing journals. You can practice their
first and then you can come towards
your final painting. Now, I'll be taking
my round brush, size four and you have to
simply paint a small moon. So just have to use the tip
of this detailing brush, which is basically around rash and try to
paint a small moon. You just have to make this
little curved stroke. Now I'll be painting
the reflection of it on the water body. No need to worry at all. It's a very simple
and easy step. You just have to make these
little horizontal strokes and are very rough
and random way. Make sure that these are not
too much and not too less. Also, just trying to apply the detailing brush and
this horizontal movement. And once you move towards
the bottom portion, tried to make the size of these talks a
little bit smaller. So this is how the reflection of the moon will be falling
on the entire water body. You can also enhance
the rocks a little bit by adding these little
white strokes there. And we are done with
the entire painting. Now let us remove the tape. There's a trickier tried to
remove your masking tape and an angle so that
you do not end up tearing your precious
wash painting. So you can see how beautiful
divide model looks. Now, if you want to
keep the white borders, you can definitely
keep it if you find it more aesthetic that way. But I'm going to remove the side edges and
we are going to chamfer the corners because that would look more
attractive to me. But you can keep
the white borders as well if you want to keep it. So just use the pair of
Caesar. Be very much careful. Tried to cut the entire
byte portion carefully. The line is already visible, so it is absolutely fine. As you can see, I have
removed the white portion. Now using the same scissor, I'll be simply
making a small cut, which is going to
chamfer the corners. Let me do more, some
more white portion in case you find it that it is not
completely gutted. So now we'll just use
the same scissor and add this little curve
on the corners, which is championing
the corners basically. And it will make your entire
painting look a little bit more cool and sophisticated. And it is absolutely
your choice in case you want to keep
the white models. That is also absolutely fine. So we are done with
the first painting. I hope that you enjoyed it and got to learn
something new from it. Now let us move towards
the next painting.
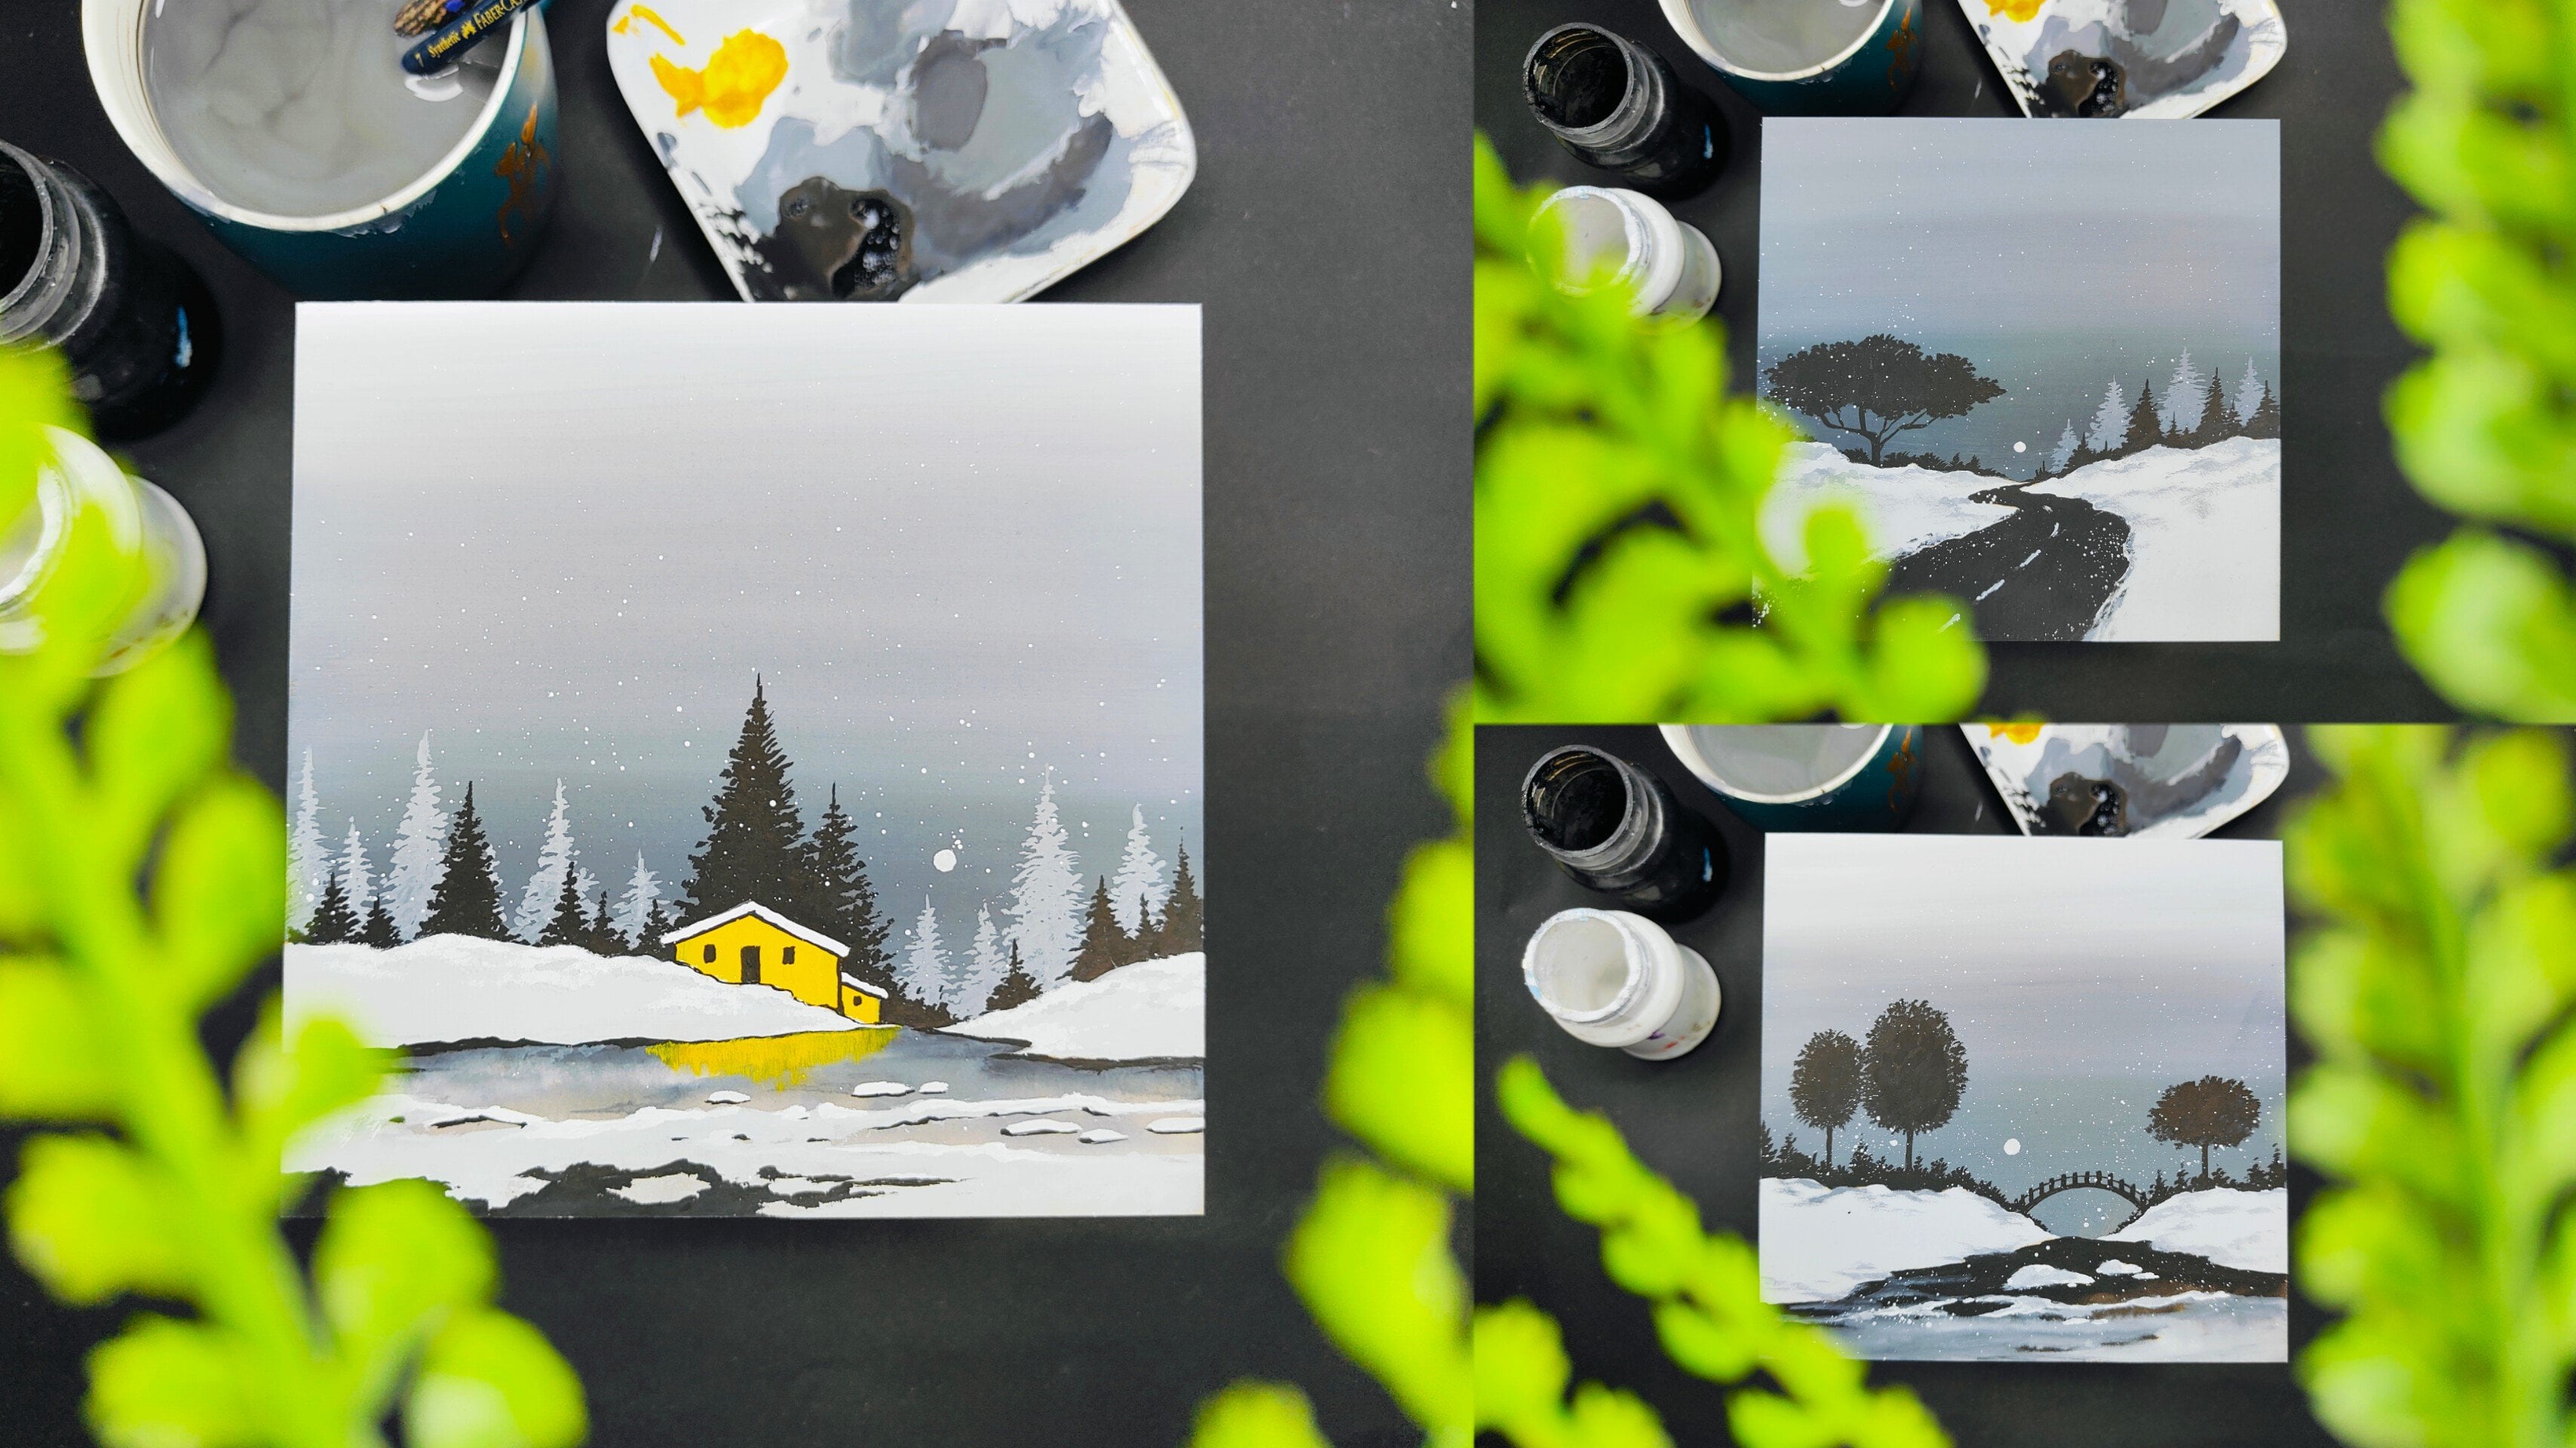
7. Day 2 - Tree Trunk: Hey everybody, you are most welcome to the second painting, which is tree trunk. As you can see, I'm ready
with my watercolor paper and my color palette
is, as usual, Mazda will be simply
applying a thin coat of water initially using
my one-inch flat brush. The reason behind applying
a thin coat of water initially is that once
you apply the color, the brush can move smoothly
on your watercolor paper. Initially, I'll be taking
my solid ultramarine color, which is the exact shade that
we take out of the tube. So we'll be applying
the solid color from the top portion and slowly will be coming towards
the bottom portion. No need to hurry at all. Just tried to make these
little horizontal strokes carefully and in a very
slow and steady manner. Now you can dab your flat brush on the tissue paper in case you find that there
is excess amount of water on the
watercolor paper. Now this time on
the bottom portion, we are going to keep it plain white since we are going
to replicate some snow. Now, I'll be using
my round brush of size eight and we are going to paint some hills in the background on
the horizon line. Using the tip of
your round brush, you can just create a beautiful outline of the mountains that
you want to paint. No need to worry at all. You can paint your own mountains as well by creating your
own composition and style, you can just follow
the technique. Just paint the outline
initially and then fill in with the solid color that we have taken from
the color palette. So it's basically the
exact ultramarine color, which is darker and
tone as you can see. No need to periodontal
just make sure that no portion is
left for painting. Use the tip of your detailing brush to
create these little edges. You can see I'm trying
to add some tips in the entire mountain area. So this is how we have created the mountains in the background before painting the
entire branches. So now I'll be using
my same round brush of size eight and we are going
to paint the branches. You can observe
my color palette. I'm having some solid
black wash color in it and I'm just trying
to loosen it up using some amount of water
so that we can move the brush in a very
careful and smooth way. So since we are going to paint the tree branches which are always in a very natural shape. Just have to create
the entire trunk initially by using
the round brush, you just have to apply
some pressure so that you can create a thick
and good branch. Basically the trunk
of the entire tree. And then we'll be painting these smaller branches
coming out of it. I've taken the base of these forced tree trunk
on the entire snow area. Now, I'll be attaching some
medium-sized branches to it. So no need to worry at all.
You can use the tip of your round brush to create
this particular branches. Now that is a trachea, the applied pressure
on the entire trash. Well, decide the thickness of
the branch that to create. Now once you move towards
the outer portion, you can apply the
least pressure to get a nice pointed tip. So no need to worry at all. It's very simple. Where you
want your brand to be very much thicker and a little
bit broad and size, you have to apply
some more pressure. I'm going to paint another
trunk by applying two layers. So I have initially applied one vertical stroke
and other just decided so that we can get the entire tree trunk
a little bit broader. Now it'll be applying
some more strokes to attach some medium-sized
branches to it. Now it is not at
all necessary or compulsory that
you have to paint the composition of the branches
in the exact same manner I have painted sends branches have a very natural
and organic shapes. You can definitely
create your own as well. So as you can see,
we have painted some medium-sized tree trunk. Now we'll be adding
some little branches by using the detailing
brush basically. Now in order to get some little thin strokes on the branches, I'm using a little bit
smaller detailing brush, which is of size two,
basically around rationally. And you have to create
these little strokes attaching to the
medium-sized branches. Now again, I'll be repeating
the same thing only, no need to worry at all. This is a tree basically. So it is always going to have a natural and
organic shape. So you can create
your own composition of the branches as well. It just have to look
aesthetic value of painting. And one thing that I always
tell my students is that in case you are not that much confident enough while painting, in the final painting directly, you have to just simply take
your practicing Journal or any odd book in which you
practice on a regular basis. Try to paint their
first practice it. And then you can come
towards your final painting. You can observe how beautiful these little branches
are looking, attaching to the entire tree
trunk. No need to hurry. I tried to paint it in a
very slow and steady way. In case you find me painting
a little bit faster, you can definitely slow the
frame of the entire video. There's an option below. So you can observe the movement
of my detailing brush. I'm trying to use the tip
of my brush to create these little thin
strokes and make the entire tree trunk look a
little bit more aesthetic. You can apply some pressure on the brush to make it
a little bit thicker. Now let us add some texture just below the first tree trunk, which is on the left side. Try to have minimum water in
your brush and more color. It will create a nice textured
effect on the white snow. It will also give a
sense of reflection. I'm trying to add this
particular texture on the white snow so that we can get a nice depth the
entire painting. You can also create this little horizontal strokes on these second
tree trunk as well. So we are done with
the entire painting. Now let us remove the
site team tried to remove the masking tape in an
angle so that you do not end up tearing your
precious painting. You can see how beautiful
the white edge looks. Now in case you
find a white edge, or I can say the white
border more aesthetic, you can definitely keep them, but I'm going to cut it. I'm using my pair of
scissors and I'm removing the side border,
which is in white. No need to worry at all while
doing this particular step. Just try to follow the line
which is already visible. And we're done. You
can see there's a little bit whitespace left
below the second tree trunk. I'm trying to remove it as well. We are ready with
the entire painting. Now to make the entire painting a little bit more aesthetic, I'll be championing the corners. You just have to make a
curved cut on the corners. And it is absolutely
fine if you wanted to keep the entire painting with
the white border, as well. As you can see, the
entire painting is ready. I hope that you enjoyed the painting and got to
learn something new. Now let us move towards
the next painting.
8. Day 3 - River Landscape: Hey everybody, you are most welcome to the third painting, which is a devil
landscape basically. So this is a very minimal and easy simple painting to create. I'm using my one-inch
flat brush to apply a tan coat of water initially
on the watercolor paper. Try to apply an even coat of water and make sure
that there are no water lumps and between
no need to hurry at all, do it in a very slow
and steady way. Now, I have taken the exact shade of ultramarine
from my color palette. Make sure that there isn't excess amount of
water in your brush. Try to have a good
consistency of color. I have started to apply the
color from the top portion and I have moved towards
the bottom area slowly. So since we want to create a
beautiful gradient effect, you have to just simply
clean the flat brush. Now, I'll be taking some
white in the color palette. Use another brush to take some white color in
the color palette so that you do not make
the other brush dirty. Now, I'll be using my same
plaid brush of size 1 " and applying the
tent of ultramarine, which is a little bit lighter
in saturation of the color. Now slowly will be moving
towards the upper portion. So you can already observe a
beautiful gradient effect. The color on the
bottom portion is lighter and saturation
and the color is darker. Now I'll be taking
my round brush and we're going to paint some beautiful hills
on the horizon line. I'm using my detailing brush basically it's a round brush. Only. Use the tip of the brush to paint
this beautiful hills. You can keep the tip
a little bit pointed, add some amount of water, and you're black
color in case you find the color a
little bit rough. And by doing this, you will be able to move your brush a little
bit more smoother. Use the tip to draw
the outline of the mountain first and then you can fill in the
solid color inside. There isn't a specific
way of creating the composition of the hose
Nadia seeing right now, or I can say the mountains. You can create your own
style of mountains as well. You can create the
variation in sizes. No need to hurry
at all. You can do this in a very slow
and steady way. I'm creating some
beautiful rock bodies on the water as well by painting these little round
bodies just below the hills that we have
painted initially. Also one more thing
I would like to tell you is that in case you find painting the
gradient effect in the background a
little bit difficult. What you can do is you can
practice it on a rough scrape off people initially tried
to get a nice blend. And then you can come
towards your final painting. Now, I'll be painting
some landscape on the bottom potion, I have simply drawn
a horizontal line leaving some water
body space in-between. And you just have to make these little strokes creating
some landscape area. This is basically the
outline which will tell us where we are going to
paint solid black color. And we'll be leaving some
water bodies space as well. So make sure that
there isn't any space left between the
masking tape and the watercolor paper that will not look nice when we
remove the masking tape. Now once we are done
with the outline area, you can fill in the
solid black color. No need to hurry at all. Do it in a very careful
way so that you do not make the color come
inside the water body. I'm just trying
to fill the color inside the landscape area. Use the tip of your detailing brush to paint
in the difficult areas. So you can already observe
that we have painted the landscape area and it
looks really beautiful. Now let us add some more landscape area on
the right hand side. So the method is
absolutely same. I'll be drawing the outline
first and I'll be creating this pointed edge on the outer portion and I'll be filling in the
solid color inside. Now, I'll be using the tip
of my detailing brush to create some sort of reflection
effect on the water body. You just have to use
the tip and try to make this lines just below
the landscape area. You can also create some random small
horizontal strokes on the water body so that it can look a little
bit more realistic. So by doing this,
we are creating some sort of depth in
the entire painting. Now, I'll be using
my detailing brush, which is basically a round
brush only of size three. And we are taking some
solid white gouache color in the color palette
as you can observe. So I'm going to
paint a small son. And you can also consider
it as a moon as well. It is absolutely fine to have to just draw
a small circle. Just about the mountains that we have painted
on the horizon line. And using the same brush, we'll be creating some
nice reflection effect on the water body by creating these little horizontal strokes. These strokes do not
have to be perfect. You have to make it in a
very rough and randomly. But as you move
towards the bottom, potion tried to
make the sizes of the strokes a
little bit smaller. So this is how we are going to paint the entire
deflection effect. So now you can observe the entire combination of the landscape and
the river together. And you can create
your own combination of landscape and
seascape as well. So we are ready with
the entire painting. Now let us remove
the masking tape. Tried to remove the masking
tape and an angle so that you do not end up tearing your
pressure of gouache painting. And you can see how beautiful
the white border looks. In case you want to
keep the white border, that is absolutely fine. I'm going to remove
it because I have that particular theme for
the entire class projects. So I'll be simply
using my pair of scissors and I'll be
just following the line that is visible and simply remove the white portion
from the entire painting. No need to hurry at all. Do it in a very slow and steady way. We are done removing
the borders now, just chamfer the corners, try to cut a small curvature from all the corners of
the entire painting. And we are done. So you can see how beautiful
the entire painting is looking at a very minimal
and easy project to create. I hope that you're
going to learn something new from this
particular painting. Now let us move towards
the next painting.
9. Day 4 - Elegant Castle: Hey everybody, you are most welcome to the fourth painting, which is an elegant castle. I'll be using my one-inch
flat brush to apply a thin coat of water on the
watercolor paper initially, no need to hurry at all, tried to apply a thin coat of water on the watercolor
paper and then even don't just have to apply the
little horizontal strokes. Now I'll be taking the, I'm going to use the exact tint of ultramarine from
the color palette. Make sure that there isn't access amount of
water in your brush. Try to have some
good consistency. Takes some amount of water and loosen up the colors so that you can move your brush in a very smooth way on
the watercolor paper. So while applying the color
to the watercolor paper, make sure that you do not hurry. Just simply observe the
movement of my flat brush. I'm just trying to get a nice even tone of wash color
on the watercolor paper. Now, I'll be taking a
lighter tint of ultramarine. So I already have some
white in my color palette. I'm trying to add some amount of water
to loosen the cholera. Take some additional
white in case you find the color is
not that much enough. Just feel the resources. That'll be adding the color
from the bottom potion and I'll be slowly moving
towards the above ocean. Again, I'll be repeating
the same step. You can observe the
movement of my flat brush. I'm just trying to make these
little horizontal strokes. So we are done applying
the entire background. So now I'll be using
my round brush to paint some beautiful
clouds in the sky. So just take some amount of white gouache color
in the color palette. Try to have minimum
amount of water just to get a nice shade of
the entire color. **** your round brush
on the tissue paper in case you find that there is excess amount of
water in your brush. Now you can just observe
how randomly I'm just trying to make these
little horizontal strokes. And by creating this
particular horizontal strokes, you can create a beautiful cloudy effect in the entire sky. You can already observe a
beautiful contrast between the white clouds and the ultramarine blue background
that we have created. So no need to hurry at all. You can paint the clouds in a very slow and
steady manner. Also, one more thing that
I would like to tell you is that the amount of color saturation that you are seeing right now will be one shade lighter when it dries up so you can apply the
color accordingly. So now I'll be using my
round brush oxides for, and we are going to apply a beautiful sellout
of elegant castle. So you have to use the
tip of the round brush to create a nice grass effect
on the bottom portion. So as you all have observed, that grass is also something in a very natural and organic farm. So you just have to create
these little strokes. We are basically creating a nice composition of the
grass on the bottom portion. So initially you have to
apply these little strokes creating the outline
for the entire foliage. And then we'll be painting the entire color of
black inside it. There isn't any specific way of decomposition or of the
outline that you create. You can create your own
composition and shape as well. Also, no need to hurry at all, painted in a very
slow and steady way, tried to practice the grass
on a rough shape of paper initially or a practicing art
journal that you maintain. And then you can come towards your final painting in
case you're not that much confident enough to come towards the final
painting directly. Now once I'm done with the outline of the
entire class portion, I'll be filling a
solid black color inside so that we can
create a nice loud. So now we're done painting
the entire grass. Now let us create a
beautiful, elegant castle. So we're going to have the
castle a little bit shifted towards the right
hand portion that I've simply drawn
a vertical line, which is the Tower of
the entire castle. Now once you draw a
beautiful vertical line, just use the tip of your
detailing brush and add these little horizontal lines to create some beautiful details
for the entire castle. Now what I'm going to do is that I'm going to create two loops on both the sides using
the detailing brush. Just apply these little
curves on either side. Then we're going to fill
it with solid black color. So this is basically the
roof of the entire castle. Now let us create the walls. You just have to apply
vertical strokes now. So as you can see, I'm
trying to paint the walls of the entire castle as I move
towards the bottom portion, you can also have
some variations. You can create some
details as well. Now again, I'll be taking the
roof of the entire castle. I have taken two curvatures on either sides and I'll be filling it with solid black color. Now once we are done
painting the roof, again, I'll be
painting the walls. So now I'll be applying
one more layer to create some beautiful
details on the roof. And again, we're going
to paint the walls. So simply draw two
vertical lines on either side and fill in the
solid black color inside. You can see how beautiful the entire cell out of
the castle is looking. So I'll be using my
same detailing brush to add some details. You can create these
little punctures and add some details to
the castle so that it looks a little
bit more attractive. I'm adding some small details on the tip of the roof as well. You can use the tip of
your round brush so that you can paint
on the minute area. Let us create a small fence
just beside the castle, I guess, with the grass that
is not that much visible. So let us just fill it
with solid black color only and let us paint the
fence on the upper portion. I'll be using my detailing brush to create some vertical lines. We have created the fence. Now let us attach it with one horizontal line using
the tip of the brush. Now, I'll be using my
round brush of size six. And I have taken some solid white color in
my color palette. As you can observe, simply, you have to draw these
vertical lines to create some beautiful windows and a contrast with the
solid black color. You can also enhance
the fence that we have painted on
the right side. Now using the same brush, use the tip and carefully
paint a beautiful moon. So this is not at all difficult. You just have to draw
this small alcohol, which is having pointed tips. In case you find the moon to paint a little bit difficult. You can practice it
on a rough scrape off paper initially, and then you can come
towards your final painting. We are ready with
the entire painting now let us remove
the masking tape. Tried to remove the masking
tape in an angle so that you do not end up during your
precious gouache painting. No need to hurry at all. Let me remove the last
masking tape as well. You can see how beautiful the white border looks
for the entire painting. You can keep the white
borders if you want to. I'm removing it using
a pair of scissors. So this is not at all difficult. You just have to follow
the line and remove the white border if you want to keep it all
so you can keep it. You can see I have removed the white border now I'll be
simply jumping the corners. So we just have to
remove the corners and an angle by making
these little curves. We are ready with
the entire painting. I hope that you got to learn something new from this
particular painting. Now let us move towards
the next painting.
10. Day 5 - Iceberg Seascape: Hey everybody, welcome
to the fifth painting, which is iceberg seascape. As usual, I'm ready with my watercolor paper
with this idea. So I'll be using my
one-inch flat brush and I'll be applying
a thin coat of water. Initially. We are applying a thin coat of water on three fourths of the
watercolor paper. Only. Now I'll be taking the exact saturated color of ultramarine from
my color palette, add some amount of water
to loosen the cholera. We will start applying
the color from the top portion and slowly will move towards
the bottom area. You can observe the
movement of my flat brush, that is simple
horizontal movement. I'll be taking some more
color in my flat brush. Make sure that you have
the exact consistency. Tried to have less
amount of water and more color. No need
to hurry at all. Try to make the strokes in a
very slow and steady manner. Now will be taking some white
color in the color palette, and we'll be taking a lighter
tint of the ultramarine. Now I'll add some white
color in case you find that the color is
not that much enough. So we're going to
use the same brush, add some amount of ultramarine from the color palette only. So you can make a nice tint of the ultramarine color and we'll just apply it
on the horizon line. Now this time we are moving from the bottom portion towards the above ocean and slowly will come towards the
topmost portion. So it will create
a nice background. So the process is
absolutely the same. You just have to make
these horizontal strokes. Now, I'll be taking my
round brush of size four. And this is basically a
detailing brush only. We're going to take some
solid white color in it. So to make the clouds a
little bit more aesthetic, I'll be adding some amount of
ultramarine in it as well, so that we can create
a lighter tint of that particular color. But you can already see there's a nice contrast between the
clouds and the background. To just have to use your round brush and a
very rough and random way. You have to create these
little patches of clouds. One thing that you
have to keep in mind is that there has to be very less amount of water in
your brush and more color. In case you find that there is excess amount of
water in your brush, what you can do is just dab your brush on
the tissue paper. It will absorb all
the excess amount of water and there will be
more color in your brush. And you can just
dab the brush on the background color and you can create these beautiful
cloudy effect. So there isn't any specific or particular composition
that I'm creating. I'm just moving it
in a random way. You can also create your
own composition of clouds. So you can observe that
the color is finished. So I have taken some more ultramarine
in my color palette. Now to paint the water body
on the bottom portion, I have taken some darker tone of ultramarine to take
the same plaid brush, which is our 1 " flat brush, add some amount of water so that the color
can lose enough. Now we'll be applying a
nice horizontal stroke on the bottom portion. Make sure that there
isn't any space left between the masking tape
and the watercolor paper. It will not look nice when
we remove the masking tape. I'm applying it in a
very slow and steady way and just be careful
while doing this. You can observe the
movement of my brush. So we're done painting
the water body. I'll be using my same
land rush of size four. We'll take some white
color in it and they are going to add some patches
on the water body. So no need to worry at all. Just take some white color
and round brush and you have to apply these little horizontal strokes
on the water body. The color is already wet, so we're going to blend it
with the background color. So now I'll be taking my
round brush or size six, and we're going to take
some solid black color. I already have some solid black color in my color palette. As you can observe,
you just have to use some water to
loosen the cholera. So by using the solid
black gouache color, we're going to create
two rock bodies, which are going to
be huge in size. So by using the
tip of the brush, you can create the outline
of the wrong body. So this can be considered
as two huge mountains also, or you can call it
as wrong bodies. So as you all know
that mountains generally have a very
natural and organic shapes. So it is not compulsory that you paint it in the same
way I have painted. You can create your own
natural shapes as well. But the technique is to create the outline first
so that you can get the exact shape
first and then you have to fill it with
solid black color inside. Now the most amazing part of detailing brush is
that you can paint in the difficult areas
using the tip of the brush and be very much careful and slow
while doing this. Now using the same
detailing brush, I'll be painting
another mountain body, which is going to
be a little bit smaller than the
first one, end size. And this time we are having some variation in the shape as when I have drawn the
outline as you can see. So this will give
me an exact idea of the shape on the entire body. And now I'll be filling in
with solid black color. No need to hurry at all. Do it in a very slow
and steady way. So now we just have
some ******** and left to paint on
the bottom potion. Use the tip of your round
brush and just simply painted. Now, I'll be using my same detailing brush
and we are going to create some beautiful reflection effect on the water body. So this is not at all difficult. You just have to use
the detailing brush, having some solid
black color in it. And just make these
little horizontal strokes just below the mountain body. Now while doing this, you
just have to make sure that there is less
amount of water and more color and your
brush on the water body, we are going to create this
beautiful reflection effect by doing this particular step. So now I'll be using my
detailing brush of size three. And we're going to create
some beautiful snow bodies. So just take your detailing
brush and use the tip of your detailing brush to
create a beautiful line. Simply moving from the
bottom-left corner towards the upper portion of the right area will create some depth and then
Dyer is nobody portion. So you can do it in a very natural and
random way as well. Now, once we are done
with the outline, we will make a solid patch
of white color inside. So just fill in the
solid white color, makes sure that there
isn't any space left between the masking tape
and the watercolor paper. That will not look nice when
you remove the masking tape. Now you can observe this is how we have painted this no body. Now it is not at all
necessary that you create the same outline for
the entire nobody. You can also play with the shape and create your own
composition as well. So now we're going to create a small mountain body which is going to
be absolutely made out of snow that we are going to paint just beside
the big black Hill, which is on the left side. Now using the same
detailing brush, I'm going to add some snow body on the water body as well. So you just have to make these
little horizontal strokes replicating some snow bugs. Or we can call it as
icebergs on the water body. This is not at all difficult. You just have to make
these little strokes, horizontal strokes basically,
which are pieces of ice. And gives you a
non-black much confident enough to paint
these little pieces. You can practice them on a raft, scrape off paper while you're
practicing art journal, and then you can come
towards your final painting. I'm adding some more ice bugs just below the bigger
Black Hill as well. So now let us paint a big snow mountain just
beside the Black Mountain, which is bigger in size
on the left portion. So it is absolutely going to have a similar kind of shape. You can create your own
organic shape as well. And you just have to fill in
solid white color inside. And we are almost
done painting it. So this is how we have created some beautiful snow bodies. And the black and
white color is giving a nice contrast effect with the ultramarine and
the background. Now, let us add some
depth in the Black Hills, which is not at all difficult. You just have to use your detailing brush
or a round brush. Basically. You just have to have less amount of water
and more color in it. And we will apply this
textured effect on the hood so that it looks
a little bit more realistic and we can
create some depth in it. In case you find that you are having more amount of
water in your brush, just simply dab it
on the tissue paper. It will remove excess amount
of water from your brush. You'll have more color in it. So I'm using the tip of the
detailing brush to create these little vertical strokes on the Black Hills to create some beautiful
depth and details. No need to hurry at all, do it in a very slow
and steady manner. And you can create your
own natural texture by applying it randomly
on the black as well. So now let us paint
a beautiful moon, which is the last part
of the entire painting. Just place the moon
nearby to the hills. Or you can place it
wherever you want to and just create a little CoV-2. Tried to have the
pointed edges and then diamond and a little bit thicker on these
anti-abortion. Use the tip of your
detailing brush to do this so that you can
paint a beautiful moon. And we are done with
the entire painting. Now let us remove
the masking tape. Tried to remove the masking
tape and an angle so that you do not end up tearing your pressure
wash painting. You can already see once we
remove the masking tape, we got a nice white border. If you want to keep the border, it is absolutely fine. But for this particular project, I'm removing the powders. You can see there is
some portion left on the left hill where the color
is not applied properly. You can use your detailing
brush and give the details. By painting in the
remaining portion, be very much careful
while doing this. Now I'll be removing
the white borders. I'm using my paid off season. Just simply follow the
color line and remove the white portion in case you want to keep
the white borders, that is also absolutely fine. But since I'm going to
jam for the corners, that's why I'm removing
the white border. No need to periodontal do it
in a very slow and calm way. Now by using the same pair of scissors will be
championing the corners. So it is not at all difficult. You just have to simply make a curved cut on all the corners
of the entire painting. This is Dan basically to create the aesthetics of
the entire painting. You can see this is
the final painting. Look, I hope that
you got to enjoy and got to learn something
new from this painting. Now, let us move towards
the next painting.
11. Day 6 - The Boats: Hey everybody, welcome
to the sixth painting, which is the boats as, as one of my favorite paintings. So I'll be taking my
one-inch flat brush and I'll be applying a thin coat of
water on the watercolor paper. Initially. We'll be applying the water on the threefold portion of
the watercolor paper only. Make sure that you apply
an even coat of water. There shouldn't be any
water lumps in-between. No need to hurry at all, do it in a very slow
and steady manner. The reason behind applying
water code initially is so that you can move
your colored brush very smoothly on the
watercolor paper. And this is also basically known as a wet on wet technique. Now I'll be taking the most
saturated ultramarine tint, which is basically
the color that we take out from
the tube exactly, will be just applying it on the topmost
portion and slowly, I'll be moving
towards the bottom. But again, no need
to hurry at all. Just observe the movement
of the flat brush. These are simple horizontal
strokes and you have to just simply move your brush in this
particular direction. So to create a beautiful
gradient effect, what I'm going to do is I'm
going to have a lighter tint, ultra marine and we'll be applying it on the
bottom portion. And now we'll be moving upwards slowly and we will blend
it with the darker tone. This is how you have to create a beautiful gradient
effect in case you want a little bit more
lighter tint of the color, you can add some more
white wash color in it. Although it is not at
all compulsory to have this same color saturation
that I'm having. There can be some minor changes. It is absolutely fine. So we can create some more
darker tone of ultra marine and lighter tone of ultramarine on the bottom and above portion, they've taken some white
in my color palette. I'm adding some water to loosen the cholera and I'll be applying
it on the bottom potion. And slowly I'll move
towards the above portion. On the topmost portion, we want darker tones
of ultramarine. So what we're going to
do is we're going to use the same glad trash. And you can see on
the left corner I'm having darker dawn
of ultramarine. I'll just add some amount
of water and losing the cholera applied on the topmost portion and slowly move towards
the bottom part, tied to blend the colors together in a very
careful and slow way. In case you find painting the background a
little bit difficult. What you can do is you can
practice it on a rough scrap of paper while you're practicing
art journal initially, and then you can come
towards your final painting. I've taken some ultramarine
because it was finished. So take it in an optimum amount only so that you do
not waste color. So we are going to
paint the water body and it is going to be the exact shade which
we take out from the wash to take some amount of water
to lose the cholera. I'm mixing it well
in my color palette. I'll be making
horizontal strokes. To paint the water body. Makes sure that there isn't
any space left between the masking tape and
the watercolor paper. That will not look nice when
we remove the masking tape. So we're done painting the
entire water body as well. Now let us start
painting the boat. But before that, let us make the water body a little
bit more realistic. So I've taken some
white gouache color in my detailing brush, which is basically
a round brush. I'll be making these
little horizontal strokes randomly on the water body. Now color is a little
bit wet only right now. So no need to worry at all. You just have to apply these
little horizontal strokes and randomly only. Now I'll be using my
flat brush and we'll just apply the code again, which is having
ultramarine in it already. So while we do this, there is going to be a little shade of white which will give
us a nice water effect. So now I'll be taking
some white color and my detailing
brush off size two, which is basically a
round brush only to paint some beautiful clouds and
this vibrant blue background, which is in the sky. So what do you have
to do is you just have to take your
detailing brush, take some whitewash color
in your color palette, and make sure that there
is no water in your brush, just color because we do not want the background
to get spoiled. You can take a little bit of
water to loosen the color. That is fine, but do not
have access amount of water, that will definitely spoil
your background as well. So in case you
find that there is some amount of excess water in your brush
and what you can do is and just dab your
detailing brush on the tissue paper that will remove all the excess
amount of water. And this is how
you have to just, justly move your brush on the entire background to create this beautiful
cloudy effect. There isn't any specific way of painting this or any
particular composition. You can create your own
combination of clouds as well. That is absolutely fine. You can already observe how
beautifully the clouds are looking in contrast with
the ultramarine background, I'm trying to have some clouds on the bottom portion as well. So just when you feel that the color is
not getting applied, you can add some amount of
water to loosen the cholera, but it shouldn't be
that much enough. So you can see I'm getting
some darker tone of clouds on the left quotient just because there is some
more water in it. In case you find that there
is excess amount of water, you can simply dab your
brush on the tissue paper. So this is how we
know how to create these beautiful clouds
in the background. And we are almost done
painting the clouds. So we are done with the
sky and the water body. Now we're going to
have two boats, which is the main element
in the entire painting. These boats are going to be
an absolute black color. I'll be taking my detailing
brush of size six. And you can see
I'm already having some black color and
my color palette. You some amount of water
to loosen the color up so that your brush
can move smoothly on the watercolor paper. To paint the board,
we are starting by creating a simple vertical line. The first boat is
going to be a little bit bigger in size
than the second vote. I have simply drawn
a vertical line and I'm going to create an
isosceles triangle. Basically. This is basically the
cloth which every boat is having on which the wind
comes and the boat moves. So you just have
to simply create this particular
triangular shape. So what I can suggest
here is that you can draw the outline first and then you can fill in the solid
black color inside. That would be much better. And in case you do not find
it confident enough to directly paint on
these anti-abortion of your final painting, what you can do is
you can practice this on a rough scrap of
paper initially, and then you can come
towards your final painting. Now, I'm painting the
base of the entire board. So you just have
to use the tip of your detailing brush to create a beautiful horizontal line, which is a little bit curved. And then we're filling in
the solid color inside. So since I'm trying to paint the boat and a pause
back to manner. So that's why there is a little bit bigger size on
the right portion and it is a little bit smaller
on the left portion so that it can look a
little bit more in 3D. I'm trying to connect
the triangular shape with the base of the boat. Simply, I'll be
adding some lines, some vertical lines
which are going to be connected with the base. And it will give some more nice details to
the entire board. Be very much careful
while doing this. No need to hurry at all. Let
me add a few more details. I'm just adding these
little horizontal lines. So here we have, anyhow
painted a little bit simple, but we can also go
for complex boats, but it is absolutely fine. You can paint according
to your comfort zone. So now let us add some
reflection effect of the boat on the water body. Just use the same
brush and apply this little horizontal
strokes just below the boat. No need to hurry at all. Try to apply these
little strokes in a very slow and
steady manner. Now repeating the same method, we are going to
paint another boat, which is going to
be a little bit smaller than the first one, and it is going to be on the
backside on the force board. So according to the
perspective also, it is going to be
visually smaller in size. The process is absolutely same, but this time you have
to paint a little bit more careful because
it is smaller in size. Use the tip of your
detailing brush carefully to fill in the solid black color and add these little details. If you want to go
with a combination of three boats or if
you want to keep only one bone,
that is also fine. You can create your own
composition as well. Now, I'll be adding
the reflection effect for the second boat as when we're done painting both the boats and it
looks really beautiful. Now let me paint a
small moon in the sky. I'm using the detailing brush, having some white
gouache color in it. I'm using the tip of it
to create a small curve. And now we are going to
paint some nice icebergs on the water body to just
have to apply the outline. So these are basically
rocks, are mountains, whatever you want to consider.
The entire painting. I have just simply
applied the outline first and then we're going to fill in the solid white color inside. I personally find this
solid white color very nice and a contrast with
the ultramarine background. So I'll be adding one mode, eyes body on the
left-hand side as well. So since Rocky Mountains, these all elements are
natural and they have a nice organic shapes
so you can create your own organic shape as well. Just make sure that
you draw the outline first and then you fill in
the solid white color inside. Now we're going to
have some icebergs on the front part as well. I'm using my same
detailing brush. I'll be adding the outline initially and then I'll tell
the solid color inside. That is a very random
and natural shape that I'm trying to create. So since I'm painting
near the masking tape, so make sure in case
you are painting any particular rogue body
near the masking tape, there shouldn't
be any space left in-between the masking tape
and the watercolor paper. That will not look nice when
we remove the masking tape. Now let us add some
reflection effect of the icebox as well. Similarly, the one which
we did on the boats, you just have to apply these
little horizontal strokes. And we are done with
the entire painting. Now, let us remove
the masking tape. So there's a trachea. You have to remove the masking
tape and an angle so that you do not end up tearing your
precious gouache painting. So just make sure that you do it in a very slow
and steady way. You can see how beautiful the white borders are looking
for the entire painting. So it is up to you. If you want to keep the white borders, that is absolutely fine. I'm going to remove it by
using a pair of scissors. You just have to simply
follow the color line and remove the white portion
from the entire painting. Now the reason behind removing
the white border is that I'm going to jump for the four corners of
the entire painting. Don't make it look a
little bit more aesthetic. Using the same pair of scissors, you just have to cut a small curve from
all the four corners. And if you are okay with
the pointed corners, that is also absolutely fine. So I hope that you enjoyed this particular painting and
got to learn something new. This is the final painting. Look. Now let us move
towards the next painting.
12. Day 7 - Coconut Tree Island: Hey everybody. Welcome to the seventh painting which
is coconut tree Island. I'll be using my
one-inch flat brush to apply a thin coat
of water initially. No need to worry
at all. Just use 1 " flat brush and apply a thin coat of water on the
entire watercolor paper. Tried to apply even
coat of water so that your color can spread in
a very even and smooth way. So this is basically known
as the wet on wet technique. I'll be taking the darkest tint of ultramarine that
we take out from the wash tube will be
applying the color from the top most portion and will be slowly moving towards
the bottom area. So you can observe the
movement of my flat brush. It is a simple
horizontal movement. Apply as many as strokes
as you want to unless you find that the code
is very evenly spreaded. Now I'll be taking the
lighter tint of ultramarine. I have added some white color on the right side as you can
observe, and my color palette. In case you find that
the white color is less, you can add some more color. Mix it well using
your flat brush and make sure that the color
is having a lighter tone. Now slowly from
the bottom portion will be moving towards
the elbow area. So again, I'm making the
same horizontal strokes. This will create a lighter
tone of gradient effect. Now we are going to paint some
beautiful eyes, mountains. I'm using my detailing brush, which is basically
a round brush only. So you just have
to make an outline first and then you can fill in the solid white color inside. Mountains generally have a very natural and
organic shapes, so you can create your
own shapes as well. We haven't drawn a big mountain
in the center abortion. Now let us create one more
mountain which is going to be on the right side of
the entire painting. Just have to use the tip of your detailing brush to create
these beautiful mountains. In case you are not that
much confident enough to paint the mountains directly
into your final painting. What you can do is you
can practice it on an art journal or rough
scrape off paper initially, and then you can come
towards your final painting. Now I have painted to
more snow round bodies, or we can call it smaller
hills on the water body. So the process is
absolutely same. You have to just draw
the outline first and then you have to fill
in the solid white color. Now to add some nice
reflection effect onto the water body, I'll be using the
same detailing brush. And you just have to apply these little horizontal
strokes just below the hills. No need to hurry
at all in case you find me painting a
little bit faster, you can definitely slow the frame rate and
there's an option below. We are going to repeat
the same method. We are going to apply
the reflection effect on these small rocky bodies as well that are painted
on the bottom portion. So you just have to apply these little horizontal
strokes below. Let us add these little
horizontal strokes on the left bottom corner as well
to enhance the water body. And it will make our painting look a little bit more
attractive as well. So now comes the main element
for the entire painting, which is the coconut trees
with a beautiful island. So this time I'm taking my detailing brush and
we're going to take solid black color so you can
observe my color palette. We already have some
solid black color in it and we're going to loosen the cholera by adding some amount
of water in it. Now in order to paint
the coconut tree, it is a very simple
and easy process. You just have to use the
tip of your detailing brush to create a beautiful
outline for the entire tree. So I'm just trying to
create the leaves of the coconut tree using the
tip of my detail brush. And you just have to apply minimum pressure on
your detailing brush. Try to fill in solid black
color inside so that you can get a nice foliage for
the entire coconut tree. So we are going to
have to coconut trees. One is bigger and another
one is smaller in size. So you can paint
another one as well. And it is absolutely fine
if you want to create combination of three
to four trees as well. That is also absolutely fine. I'm trying to have
two coconut trees. I've painted both of them. Now let us paint the island. So I'm trying to
create the outline and the baseline of
this particular island will be at the horizon line with the White House
tried to overlap it. Once you draw the outline, you have to fill in solid
black color inside. It is absolutely fine
if you want to create your own natural shape
on the island as well. So I'm trying to create
some more mountains just above the writers
that we have painted, using the same detailing
brush and applying the outline first and then filling in the
solid black color. Now to make the
bigger island look a little bit more
dense and in detail, I'm trying to add some reflection
lines just below it by creating a little bit of more
mountains in front of it. So we have two smaller Whitehead's as well in
front of that also, you can create a
nice black hill. Now to create the
reflection effect, the process is absolutely same. You have to apply these
little horizontal strokes just below the mountains
that we have painted. So while applying these
little horizontal strokes, just make sure that
you do not have access amount of
water in your brush. Dab your detailing brush on
the tissue paper in case you find that there is
an excess amount of water in your brush. So we are almost done giving the reflection
effect as well. Now let us paint the stem
of the entire coconut tree. You just have to apply
these vertical lines. Now where we have joined the coconut trees
with the island, we can create these
little grassy effect as well using the tip of
the detailing brush. So you can observe
how beautifully using these little
minimal elements, you can create a nice
minimal painting. I find that the bottom portion
looks a little bit empty. So I'm trying to add
some rock bodies using solid black wash color. So I'm painting the
outline first and then I'm filling in the
solid black color inside. Make sure that there
isn't any space left between the masking tape
and the watercolor paper. You can also paint some
smaller rock bodies just below the main island. I'm using the tip of
my detail brush to create these little
small round bodies. No need to hurry atoll in case you find me painting
a little bit faster, you can definitely slow down, take your time and paint. Now let us paint a
beautiful sun or a moon, whatever you want to consider, you can consider that. Just paint a small round. Then we can add its
reflection effect onto the water body using
the same detailing brush, having solid white
gouache color in it. You just have to make these
little horizontal strokes. And we are done with
the entire painting. Now, let us remove
the masking tape. Tried to remove the
masking tape and an angle so that
you do not end up tearing your wash painting in case you want to
keep the white borders. It is absolutely fine. But I'm going to remove them because I'm going to
jump for the corners. Just simply follow
the paint line and remove the white borders. Use a pair of
scissors to do this. So once we have removed
the white borders, we are going to make
a small curved cut on the corners so that the painting looks a
little bit more aesthetic. And if you want to
keep the corners, that is also absolutely fine. So we are ready
with the painting. I hope that you enjoyed
this particular painting. Now, let us move towards
the next painting.
13. Day 8 - The Castle: Hey everybody, you are most welcome to the eighth painting, which is the castle. I'll be using my
one-inch flat brush to apply them coat of water initially on the
watercolor paper. No need to hurry at all. Just observe the movement of my flat brush and try to
apply an even coat of water, make sure that there are
no water lumps in-between. The reason behind applying
a thin coat of water is so that our brush
can move smoothly. With colored in it. I'll be taking the exact
ultramarine color, which is the darkest
saturated color taken out from the wash to just add some amount of
water to loosen the cholera. And apply these
horizontal strokes from the top portion and slowly
will move towards the bottom, but again, taking some
darker tones of ultramarine. And I'm going to apply
it on the top portion. Again. You can observe the
movement of my flat brush. Try to get an even tone of code. Now slowly will be completing
the entire surface. Now since we want to create
a beautiful gradient effect, I'll be taking some
white gouache color. You can observe it
in my color palette. Now after taking some
white gouache color will be mixing it
with some ultramarine to create a different
tint of the color. So just mix it well and apply on the bottom portion and
slowly move towards the above. But in case you find there is excess amount
of water in your brush, just simply dab your brush
on the tissue paper. It will remove the
excess amount of water. So now I'll be using
my detailing brush, which is basically
a round brush, to paint the castles silhouette. I've taken some black color in my color palette and just loosen it up by
adding some amount of water and create a
nice consistency so that you can apply the color directly
onto the background. The background is
absolutely dry. I'm trying to create
one dome shape which is semicircular. You just have to apply outline initially and then you have to fill it with solid black color. Now, just beside that, on the right side, I have
painted another dome. Now we are going to
have one smaller dome on the left-hand side. So this particular
dome is attached with the masking tape
to make sure that there isn't any space left between the marketing team
and the painted area. Now one small dome on
the right-hand portion. So you can carefully observe
that I'm using the tip of my round brush to paint
in the difficult areas. Now let us attach all
the bones together. So I'm just making
these horizontal lines, which is replicating
the walls as well. Now once we are done with
the outline portion, we are going to fill in and dire solid black color inside. No need to hurry atoll, make a nice consistency
of the black color. Tried to have some amount
of water so that you can move your brush in
an easy and smooth way. Also make sure that there
isn't any space left between the masking tape
and the watercolor paper. You can observe carefully
that we have created the entire silhouette
of the castle. Now let us add some
beautiful details. Now I'll be adding some
nice details to the castle. So we are going to another
round brush of size two, which is basically a
little bit smaller so that we can paint
minute details. So I'll be taking some
black color and simply make a small loan and add some amount of water
in the black color in case you find the
color a little bit rough, then we'll be drawing a
simple vertical line. Now similarly, we
are going to create these vertical lines on
each and every dawn. So just be very much careful and do it in a very slow
and steady way. Use the tip of your
round brush to paint a nice thin vertical line. Now since it's a castle, we are also going to add some beautiful flags on the
top of the vertical line. You just have to make these triangular shapes
on the top portion. Make a nice wavy line outline. And then you have to fill in
solid black color inside. Similarly, we'll be adding one last flag on the
smallest dome as well. So this is how you can create some beautiful details and
the intercostal silhouette. Now let us add some fence
on the top portion so that the painting looks a little
bit more detail and elegant. This is an absolutely
easy and simple process. You just have to use your
detailing brush of size two. And you have to simply
draw these vertical lines, attach it with one single
horizontal line so that it gives a nice detail
to the entire castle. Now, I'll be using my, another round brush
of size four. And we'll be adding
these little windows in contrast with the black
background in the castle. No need to hurry at all. Just take some solid white gouache color in
your color palette. You can just simply
move your round brush in this vertical direction
towards the bottom part. And you can create these
beautiful little windows. You can also paint these windows in combination
of three to four. For the bigger dome, I'll
be painting one window. Let us keep it in combination of two windows for
this particular dome. Now, let us add one more
window on the edges and dome. In case you find it difficult to paint on the final
painting directly, what you can do is you can practice this on a landscape of paper or on an art journal
that you maintain to practice. Then you can come towards
your final painting. We are left with the last dome, so I'll be adding one
little window there. And we can also paint combination of three
windows nearby. This is how you have to add some minute details to the
entire castle silhouette. You can also create your
own details as well. You can play with the
shape of the windows. Now to enhance the fence
on the top portion, I'm just adding
one vertical line, just beside the black line, vertical line
basically, so that it can get a nice contrast
with the background. Now let us paint some
beautiful clouds. Now I'll be using my
round brush of size two, and here's a trick
to paint the clouds. You have to be very much careful while painting the clouds. Tried to have minimum amount of water in the entire brush. Take some solid white
gouache color inside it. Make sure that there is less amount of
water in the brush. And you just have to make
these rough strokes on the entire background
in case you find that there is excess
amount of water in your brush, just simply dab it on
to the tissue paper. Once you dab your brush
onto the tissue paper, the water will be removed
and you can create this beautiful texture
and the entire sky area. It is not at all compulsory
or it is not at all mandatory that you have to paint the clouds in the similar
way I have been Did. You can create your own
composition as well. You can play with
the shapes as well. I'll be painting a small moon. Just take the detailing brush and take some solid
white color in it. Make us smile. Kavita,
try to keep the tip is pointed and some thickness
on the between area. This is how you can
paint a beautiful moon. Now let us remove
the masking tape. By removing the masking tape, you can see how beautiful
the white edges looks. Tried to remove the masking
tape and an angle so that you do not end up tearing your precious
watercolor painting. If you want to keep
the white border, that is absolutely fine. I'm going to remove that because I'm going to
chamfer the corners. Just follow the
painted line and use a pair of scissors
to remove the sides. No need to hurry
at all. You can do the step and a very steady and slowly time removing
the last side as well. Now if you want to
keep the corner shop, that is also absolutely fine. But you can use the same pair of scissors and make
us more curved, cut on the corners. This will make your painting look a little bit
more aesthetic, but it is absolutely fine if you want to keep the
corners as well. I'll be removing
the last corner as when the painting is
absolutely ready. I hope that you enjoyed this particular painting and
got to learn something new. Now let us move towards
the next painting.
14. Day 9 - Hills With Seascape: Hey everybody, welcome
to the ninth painting, which is Hills with seascape. So I'll be using my one-inch
flat brush to apply a thin coat of water initially
to the watercolor paper. Make sure that you apply a thin coat of water
in an even tone. No need to have water
pools in between. So try to make a nice even coat. So this time we
are going to have a nice effective
gradient effect. So I'm going to take less saturated color
of ultramarine first. I'm going to apply it on
the horizon line first. And slowly I'll be moving
towards the upper portion. So you can see it's
a very light color. And now we'll be taking
the darker tint of the entire color
and slowly we'll be applying it on the top portion. And slowly you have to move
towards the bottom part. So now you can see
the difference between the bottom
and the top portion. Now we are going to
blend them together. Just dab your flat brush on
the tissue paper so that access amount of water is removed and blend
the colors together. You can see the variation from the top and bottom portion. So this is how we have created a beautiful gradient
effect using ultramarine. Now to create the sky a
little bit more dense, just simply clean
your flat brush. Try to add some amount of
white gouache color in the color palette
and mix it well with ultramarine together. No
need to hurry at all. Try to create a nice
tint of ultramarine, which is lighter in chain. And from the horizon line, just move towards the
above ocean so that we can get a nice blend
with the top color. Also, one thing you have
to remember is that the saturation of the color
which is visible right now, which is the color you
are seeing on the screen, which is red right now, be one shade lighter
when it dries up. So according to that, you have to make your color selection. And it is not at
all necessary or compulsory that you painted the same way I have
painted or you'll get the exact shade that
I'm getting right now. It is absolutely fine if there are certain
variation in colors. Now I'll be painting
the water body on the bottom portion. So I have taken some
ultramarine and simply I have applied my flat
brush using some watery. I have losing the cholera. So it is basically darker
tint of ultramarine to create a nice difference between the
skyline and the water body. Now, I'll be using
my round brush, which is basically a
detailing brush to paint the hill. To paint the hills. I'm going to use solid
black wash color, which is already there
in my color palette. Just simply use some water
to loosen the cholera. Now we'll be starting by
painting the outline first. By using the outline, you can create the
natural organic shape of the hills that is not at all necessary or
compulsory that you painted in the same
way I have painted. You can create your own
composition and shapes as well. Once we are done
with the outline, we can fill in the solid
black color inside. So you just have to complete
the entire shape first. No need to hurry at
all. Tried to paint it in a very slow
and steady way. Use the tip of the round
brush basically to create the outline and
painting the difficult areas. You can see how beautiful
than died **** is looking. Now I'm filling
the bottom portion with the tip of my
detailing gun shoot. You can observe the movement. Let us have some more hairs
on the right-hand portion. So the method is
absolutely the same. You have to create an
outline basically, and then you have to fill
in the solid black color. I'll be taking some
nice rock bodies on the left-hand
side portion also. So this time we are
keeping it a little bit lower than the
first two hills. So simply you can observe the movement of my
detailing brush. I'll be creating these
little rock bodies. Then hands that has a
little bit more and to create some more depth
into the entire painting, I'll be adding these
little horizontal lines to create some nice reflection
on the water body. It is absolutely a very
simple and easy process just to use the tip of your detailing brush and create these little horizontal
lines just below the hoods. Now we're going to take
some more solid black color in the detailing brush. And you're going to create
some landscape area on the bottom right side portion
that have simply drawn the outline and I have filled in the solid black color
inside, as you can observe. Let us also create
some more rock bodies which are very small and tiny. You can use the tip of your detailing brush
to create them. And you can also add these little horizontal lines to create a nice reflection effect. Now I'll be using
my round brush or the Healing Brush or
statistics basically. And I have taken some solid white gouache colors
in my color palette. So now we'll be painting
the moon or sun, whatever you want to consider, you can consider that and just simply paint a small round. So by creating this
particular circular shape, we are painting the entire moon. Now we'll be painting it's reflection onto the
water body as well. Using the same detailing brush, I'm going to create some nice horizontal strokes
under the water body. So just below the entire moon we are going to
create the entire deflection effect
onto the water body. But before that, you can increase the size of
the moon as when. Just use the same
detailing brush, add these little horizontal
lines onto the water body. Just make sure that you create
some nice set of lines. Try to have minimum amount of water into your detailing brush. In case you have access
amount of water, just simply dab your brush
onto the tissue paper. Take some solid
white gouache color and create these beautiful
horizontal lines. And as you move towards
the bottom potion, try to decrease the size
of the horizontal lines. Now let us remove
the masking tape. Tried to remove the masking
tape and an angle so that you do not end up tearing your
precious wash painting. You can observe how beautiful the white borders look
with the entire painting. If you want to keep
the white border, that is absolutely fine. But I'm going to remove that because we are going to
chamfer the corners. Just simply follow
the painting line and remove the white borders. And in case you want
to keep the borders, that is also absolutely fine. I'm just using my pair of scissors to remove
the side edges. Be very much careful while doing this and no need to hurry. Just do it in a very
slow and steady manner. Now we are going to
remove the corner. So just make a small curved
cut on all the corners. And if you want to
keep the corners, that is also absolutely fine. By jumping the corners, I'm trying to make
the painting look a little bit more aesthetic
and attractive. So I hope that you enjoyed painting this
particular painting. Now, let us move towards
the next painting.
15. Day 10 - Mountains With River: Hey everybody, you
are most welcome to the last painting which is
mountains with dribble. So here I have my
watercolor paper ready with the masking
tape on the sides. I'm using my one-inch
flat brush to apply a thin coat of water on the
watercolor paper initially, make sure that you apply, or even coat of water. Make sure that there
isn't any space left between the masking tape
and the watercolor paper. Now the reason behind
applying a thin coat of water initially is so that
when we apply the color, the brush can move easily and in a smooth way on
the watercolor paper. I'll be taking my
exact saturated color of ultramarine and
we are going to apply the color from
the top portion and slowly will be moving
towards the bottom area. No need to hurry at all. Just observe the movement
of the flat brush. Now we'll be taking
a lighter tint of the ultramarine color, add some white in the color
palette, as you can observe. Now I'll be using my flat
brush to mix the color well and create a lighter
tint of ultramarine. Mix the color in
the color palette. No need to hurry. Now we're going to apply the same horizontal strokes and move towards the
above ocean slowly. This will basically help us to create a nice gradient
effect in the sky. You can observe the
movement of my flat brush. I'm just trying to create a beautiful background
color for this time. So we are done with
the entire background. We are going to keep the
water body the same way it is in on lighter
tone of ultramarine. Now, I'll be using
my round brush, which is basically
a detailing brush to paint the mountains. I have just simply drawn the outline on the entire
mountain initially. And then I'm filling in the solid black color inside
till the horizon line. Mountains generally have a very natural and
organic shapes. So you can create your
own shapes as well. You can create your own
composition of mountains as well. Now just below the
mountain area, we are going to have
some landscape, which is going to divide the landscape and
level separately. You just have to make these
random lines post initially to supply the river area
from the landscape area. So you can use the tip of your round brush to
create the lines and make a nice composition
of the landscape area. And then you can fill in
those solid black color. I'm just using the tip of my brush to create
landscape area. Then I'll be filling the entire area with
solid black color. You can already observe that the river area is going to
be in a very random way. It is not necessary
that you create the river area in the exact
same fashion I have created. You can create your own
composition as well. Just make sure that
there isn't any space left between the masking tape
and the watercolor paper. That won't look nice when
you remove the masking tape. Now using the tip on the
same detailing brush, I'll be adding some
depth just below the mountain area and river. So we just have
to use the tip of the detailing brush and create these little horizontal lines. So by creating
these little lines on the outskirts of the river, it will give us some nice depth and details to the
entire painting. Now I'll be using
another round brush and I'm having some solid
gouache white color. And we are adding some
little horizontal strokes on the dark black Mountain body
and the river area as well. To create some details
for the painting. This will basically create
a nice rough texture. By using the same
detailing brush. We are going to paint a small
moon in the sky as well. So you can add some
amount of water to loosen the cholera and it will help your brush move smoothly
on the watercolor paper. I'm just going to create a small curve which is
going to be pointed on the tips and a little
bit thicker on these anti-abortion to create
a beautiful moon. You can see how beautiful
the white moon is looking with beautiful blue
ultramarine background. It is creating a nice contrast. Now let us remove
the masking tape. Tried to remove the masking
tape and an angle so that you do not end up tearing
your gouache painting. You can already
observe how beautiful the white border looks once
we remove the masking tape. And this is the most
satisfying part as well. So if you want to keep the
white borders, you can, I'm just going to remove them since we are
going to jam for the corners. No need
to hide it all. Just simply follow the
color painted line and remove the white border. Now using the same
pair of scissors, just make a little curve God, on all the corners to make the painting look a little
bit more aesthetic. But if you want to keep
the sharp corners, that is also fine. I hope that you enjoyed the painting and got to
learn something new. I'm very, very happy to share
this class with all of you.
16. Class Conclusion: Hey everybody, you are most welcome to the class conclusion. I hope that this
class helps you to explore gouache colors
as an art medium. Painting on a regular basis, improvisers, you are painting
skills on another level. And one thing that I
always tell my students is to keep practicing
and maintain an agenda, to keep a record
of your artwork. I'm really very happy to share this class
with all of you. You can take one painting at a time and create all
eaten class project. In case you have any doubts or questions related to
the entire class, feel free to ask them in
the discussion section. I'll be really excited to see
all of your class projects. Don't get afraid of
making any mistakes. Let me know your reviews
for the entire class. Keep practicing happy painting
and thanks for joining.
 Rutvik Patel, Artist and Instructor