Transcripts
1. Introduction: Hi, this Skillshare class is for you if you're looking for new ideas of what to put in your junk journal or
art journal pages, or if you're interested in mixed media art or paper crafts, or you like origami, but are wondering what to do
with origami that you make. Or if you're creative
explorer like me and like to get your hands
in all things artsy. I'm Kathleen Arla Johnson,
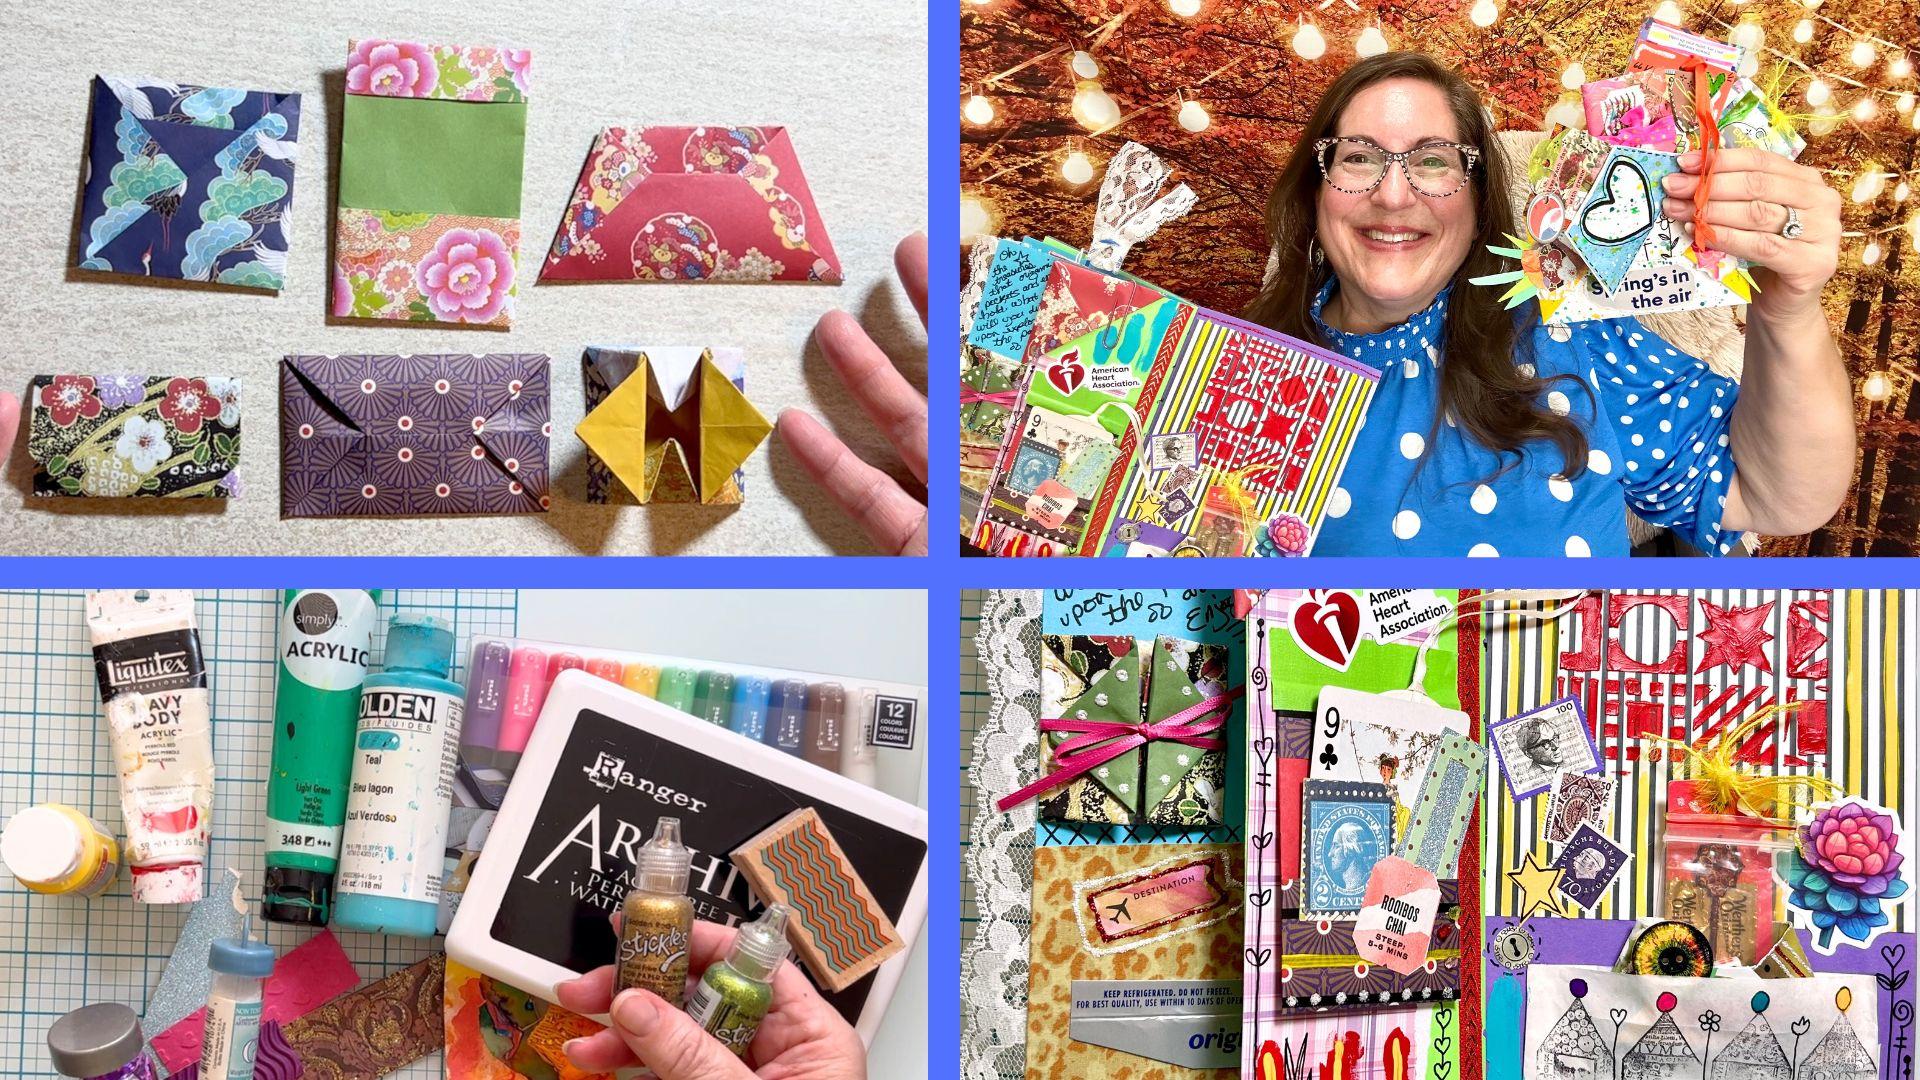
and in this class, we'll be learning to make seven different origami pockets and envelopes that you can put in your junk journal or
other creative projects. We'll talk about
embellishing your origami with paint or other mixed
media art supplies. Then I'll share a whole stash
of ideas of what to put inside of your origami pockets and envelopes and at the end, I'll share a time
lapsed video of the creation of a
junk journal page using these origami
pockets and envelopes. Your class project is to make origami pockets
and envelopes, following my easy step
by step directions, and then come up with your own idea of what
to do with them. No junk journal, no problem. I've got one of the lessons showing you how
to do a quick and easy stitched binding to a junk journal using
just card stock. You can find me on YouTube and social media at Creative
Solace Studios. Check out the Junk
Journal playlist on my YouTube channel, and you'll find my two minute
junk Journal definition, as well as other free tutorials and journal flip throughs. All you need for this
Skillshare class is paper. The other supplies are optional. You can get started today. Right now, thank you for spending creative time
with me in this fun, eclectic and
versatile art class. Let's jump right to it.
2. Supplies: The supplies you'll need for this class are square papers. Origami paper works great
for folding because it's so thin and it doesn't get bulky when you fold
it into layers. I'll be demonstrating
with standard six inch. That's 15 centimeter. Square double sided
origami paper. Feel free to experiment with photocopy paper cut into
squares, pages from magazines. Notebook paper, scrapbook paper, which you conveniently can
also buy in squares already, pages that you
tear out of books. Or any other interesting paper that's thin like sheet music. I also recommend trying an origami lesson for the first time on a
paper that isn't your favorite just in
case it doesn't go exactly as planned
and you need to redo it on another paper. Oigami is pretty exact
with its preciseness, and the folds aren't
too forgiving. So if you need to
refold something, it's best to start on
a new piece of paper. So short and simple, all you need is paper. In the next lesson,
you'll learn about some optional supplies
that you might also want.
3. Optional Supplies: Optional supplies are
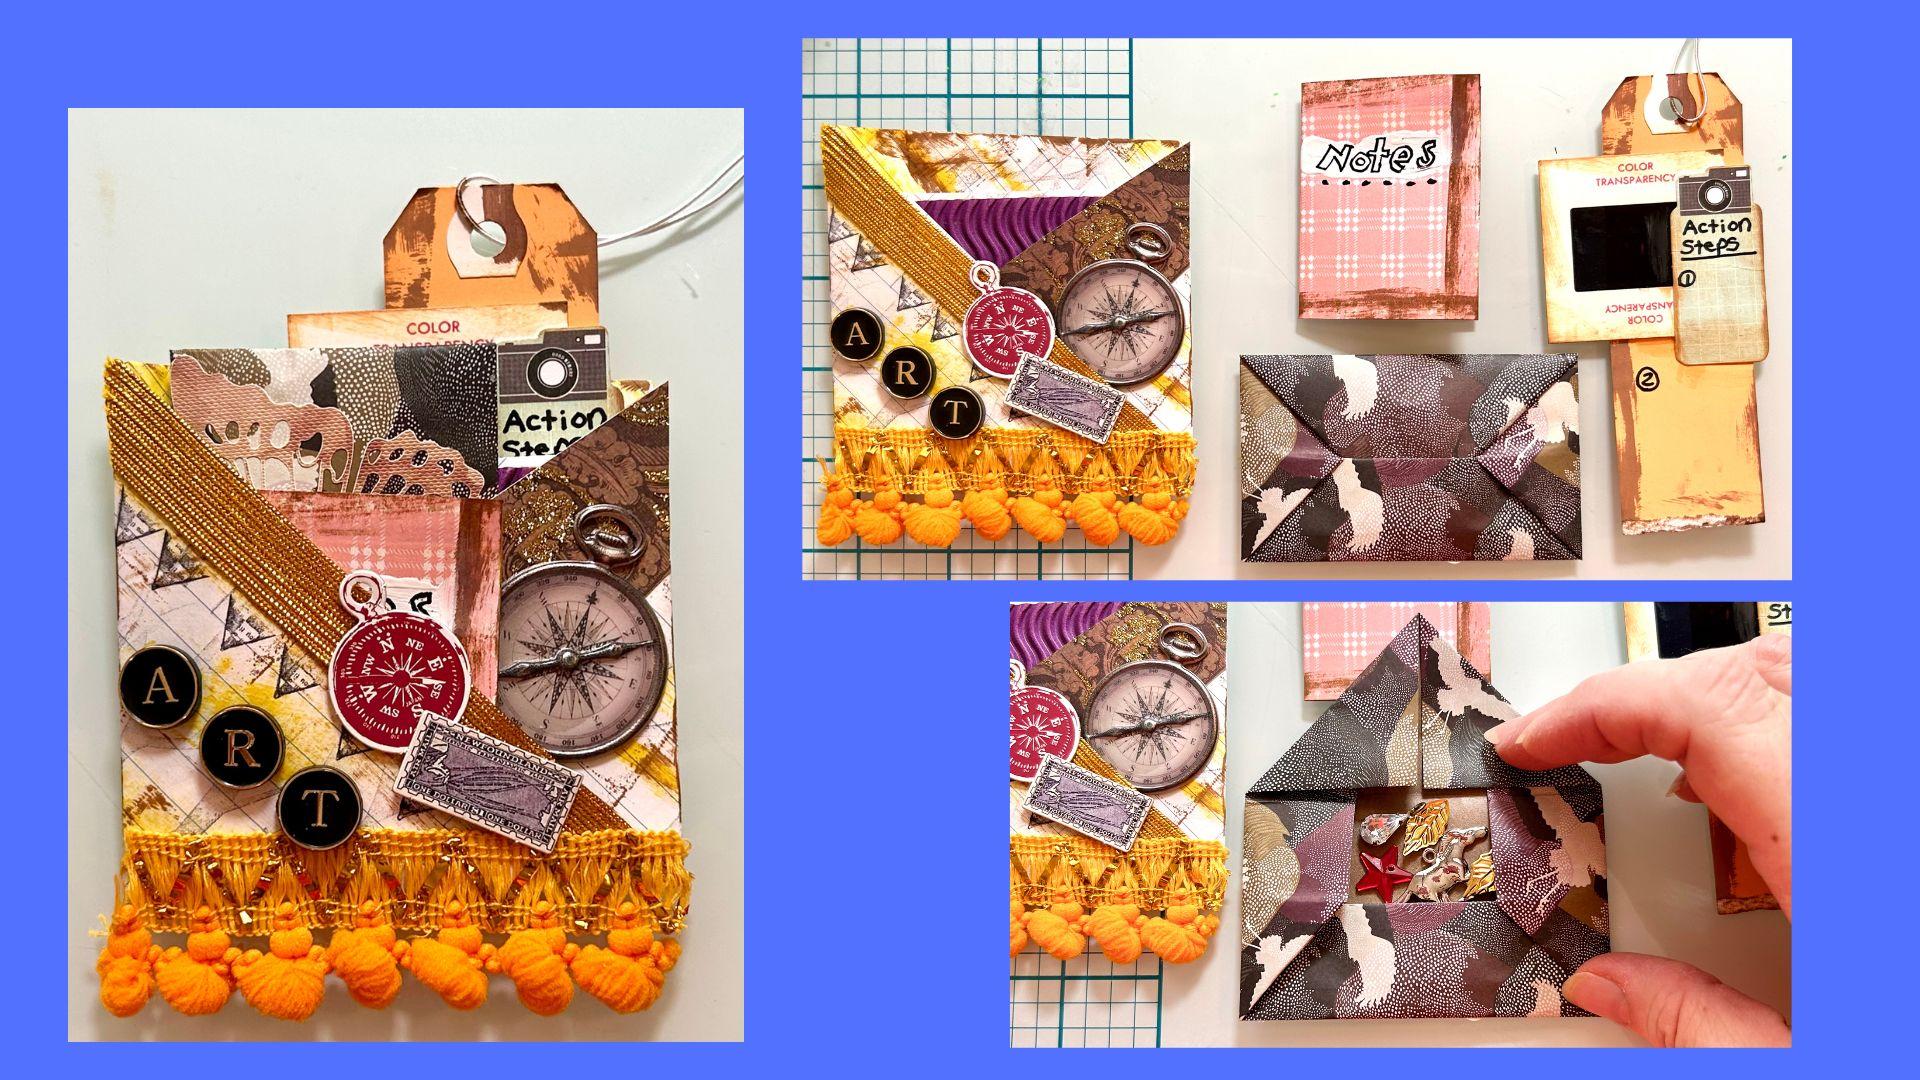
anything mixed media to decorate your origami pockets and envelopes, such as paint, markers, scrap papers, painted paper scraps
from other projects, fiber trim, rubber
stamps and glitter. Whatever mixed media art
supplies you have on hand, don't get overwhelmed by all
the ideas, what you have. Another optional supply
are papers to put inside of your origami
pockets and envelopes. This could be just
a piece of paper, a tag, journaling cards, photos, fortune cookie fortunes,
or whatever else you dream up to put into your origami
pockets and envelopes. Let's not forget that this is
origami for junk journals. Hopefully, you have
a junk journal or a notebook or a sketchbook
or something that you'd like to glue these
fabulous origami pockets and envelopes into. O.
4. Overview of Origami Lessons: Let's see an overview of what the six origami pockets
and envelopes look like. This is origami
pocket number one. You could put a tag or something inside of there. Fun to fill. O agamiPocket number two has
its pocket spot right there. OgamiPocket number three is interesting because
here is the pocket, but it could also
be an envelope. If you decide to turn
it around this way, it opens up like so. For an envelope. This one can either be a pocket
or an envelope. Now we have the first envelope
which opens like that. So exciting to put things. IoT one, sorry. This one opens all
the way inside there. That one's got a
really hidden pocket, a deep pocket in a small space. That's the first envelope. The second envelope
is a little larger. And then the final one, the grand finale is
a box envelope which pops open three
dimensionally like that and then closes up to be
flat on your page. You can imagine so
many fun things going inside of these such as one into another or like that. Let's see if it was
this direction. I think we could
fit it in there. I bet if we open that one up, we could squeeze two together, but it won't fit in that one. You can imagine many
possibilities with these six origami
pockets and envelopes. In addition to the
pockets and envelopes, we'll also learn a
bookmark technique and this origami bookmark can go over the page of
a junk journal page. Let's get started making them.
5. Origami Pocket #1: For this junk journal,
origami pocket, start with the side
of the paper that you want to see at
the end facing down, place your paper
like a diamond and fold the bottom corner
up to the top corner. After that, take
the top layer of the triangle's top point and fold it down until it
touches the bottom fold. Put your left finger about 1 centimeter in
from the right side of the paper and fold the right side of the triangle
across towards the left, lining it up with the
bottom of the paper. Repeat on the other side, folding the left corner of the paper across
towards the right, so that the top of that fold matches the top that
you just did across from it. Line up the bottom
edge once again. Carefully make any
minor adjustments before creasing the fold. Y, we're almost finished with this easy junk journal
origami pocket. Open up the little
hidden pocket on the right and gently tuck
the left point into it, so it locks in place and
secures your design. Now you have options. You could be finished
and leave it as it is. Or you could take the top corner and tuck
it down like an envelope. There are even two places to
tuck it either in the very back or in the very front when you look down
inside of that pocket. Once finished,
look carefully and explore all the possibilities
of the places where you can slip a tag or journaling
card or other piece of fun ephemera into this versatile little
junk journal pocket. There are so many
options once you start exploring the folds
that you have created.
6. Origami Pocket #2: This junk journal origami pocket will end up in a rectangular
shape when finished. With the decorative
side of the paper down, bring the bottom of the rectangle
up to the top and fold. Then open the paper. Take the bottom and now fold it up to the middle
horizontal crease. After that, fold the
top of the paper down approximately one third of the way towards that
same middle crease. This is a quick origami
design. There's not much left. Flip the paper over
like a pancake. Now, you'll see the
patterned side of the paper. Then take the left
side of the paper and fold it about two thirds
of the way to the right, making sure it's lined up at the top and bottom paper edges. Moving onward, once
that's finished, fold the right side of the
paper back towards the left, using the previous
fold underneath it as a guide for where
to make this fold. How easy is this? All we have left to do is
to tuck it closed. We'll accomplish this by opening
the little tuck spots at the bottom and also at the top of the right
side of the paper. Slip that left
side inside of it, and this move holds
everything together. Now flip the paper
over to discover your very own junk
journal origami pocket.
7. Origami Pocket and Envelope: This origami project can either be an open pocket
or a closed envelope. With the pattern side down, fold the bottom of
the diamond up to the top of your origami
paper to start this design. You now have a triangle. Take the top layer of
paper from the top of the triangle and fold it down
to the bottom of the paper. See where I'm pointing next. Use that as a point to fold the left corner of
the triangle to the right, matching up with
the horizontal edge of the paper that's there. Note that you don't fold
it all the way across. Same thing on the other side. Take the right hand side of your paper and fold it
across to the left, again, not going all the way. Now, the very top point
of your paper gets folded down to the middle of the bottom edge
of your paper. It's really coming
along and you can see that the final shape is
going to be a trapezoid. While you folded it down, it matches up with
another triangular point, see it right there underneath. Grasp both of those triangles
and tuck them under, folding them
underneath the paper. This is what will help keep that part of the project closed. Now for choices, if you keep your creation oriented
in this direction, it's a trapezoid shaped pocket with the pocket
opening on the top. But if you rotate your
project 180 degrees around, so the bottom is now the top, you have an envelope that
you can open and close by unfolding the little points that we tucked under previously. How fabulous to have options.
8. Origami Envelope #1: O Let's make a mini origami envelope
for your junk journal. This can be tucked
into another pocket, a tuck spot, belly band, or a larger envelope. But I'm getting ahead of myself. With the pattern side
of your paper down, fold the bottom of your
diamond up to the top corner. Then the right side is
folded towards the left, estimating about two thirds
of the way across the paper. Taking a look at the
top of that fold, aim to fold the
left side across to the right at the same
height of the fold. Both edges match up with
the bottom of the paper. I will give you a heads up. If you use regular
sized origami paper, this ends up being a really
teeny and cute envelope, just big enough for a small
slip of paper inside of it. Now, open up that
hidden pocket on the right and tuck the left
corner of the paper into it. So they slide together and
lock into place securely. There's also a pocket
opening at the top. If you want it to be really
secretive and mysterious, you could stash
something in there. From the top point of the paper, fold that all the way down
past the bottom of the paper. And that will create the
size of the mini envelope. Wrap that extra point around inside to fold the
envelope closed. Oh
9. Origami Envelope #2: Time for another
origami envelope design for your junk journals. Begin with the pattern
side of your origami paper down and bend the bottom edge
of the paper up to the top, creasing only the right and
left edges of the paper, not making a fold
all the way across. Open the paper and
bend the bottom of the paper up to those little
creases that you just made, and now make similar creases again on the right and
left sides for this step, not folding all the way across. After opening up the
paper once more, fold the bottom edge up to
the last crease markers, those guidelines that you made. Yes, this time we'll get to fold the paper all the way
across. Make that fold. After completing that
step in the directions, take the bottom of
the paper and fold it all the way to the
first crease markers. And yes, fold it all the way across again like
a regular fold. The top edge of the paper
now gets folded down. Fold it down to that crease
marker that you already made almost to the
bottom of the paper, but not quite there. Leave a little space
at the bottom. Open the fold that
you just made, and we'll now fold the bottom
right corner of the paper up to make a little triangle that lines up with the
paper underneath it. Repeat the same thing on the
bottom left corner as well. At this time, we fold the right
side of the paper over to the left using that little
triangle underneath it as a guide that tells
us where to make the fold. You can feel it under there. Repeat on the left side. Moving to the top of the paper, fall down the two top corners, folding them inwards
to meet together, like you're making the tip
point of a paper airplane. That makes the tip
of your envelope and it gets folded down. There's the opening
of your envelope. I know it's small, but I
also know that you'll find just the right junk journal
treasures to stash in there. To close the envelope, tuck the point under
so it becomes closed.
10. Origami Envelope #3: To make this origami
box envelope, start with the pattern side
of your paper down and fold the bottom right corner of your square paper up to
the top left corner. Once that fold has been made, take the top right corner and fold it down to the
bottom left corner. Then open the whole
thing up and fold each of the four corners of
your square into the center, matching them up to the center point as
precisely as you can. This super cool
origami box envelope has the most steps of the
origami designs in this class. So this video is a
little bit longer. You can do it. It's
not more difficult. It just has more steps to
get to the end result, which is a hidden box or present that pops open
when you open it. It's a really fun
origami design. I'll play a little bit
of music in between the parts of this video where
I'm finishing up each step. Now take the bottom edge of your square and fold it
up to the middle point and do the same for
the top so that they meet in a horizontal
line across the middle. Open them up again.
Pivot your paper a quarter turn and repeat
on the other two sides. Open everything up, except for the left and
right triangles. See all those folds. We'll make good use of them. Fold the bottom part of your paper up to the
first horizontal fold, and then again to
the second one. Repeat on the top. Now, we're really ready to create the main parts
of this design. Open the right and
left triangles, fold the right one all the
way across as indicated. Fold the bottom of the paper up and put your finger inside as a helper to help guide it into this little triangle shape. You already have the folds made. You're just pushing the triangle into the folds that
are ready for it. Guess what? Same thing on the top right
side of the paper. This Pentagon shaped
piece in the middle now gets folded over to
the right and the whole left side of
the paper folds on the middle vertical fold so that it matches up with the
part we just completed. One step at a time, baby steps, and we're really bringing
this origami design together. Fold the bottom edge
on the first fold, the horizontal fold, and
hold it straight up. You can poke your
finger inside there and push it into
yet another one of those little triangles
that makes use of the folds that we've
already made in the paper. We end up with a little
diamond shape on the bottom, repeating it on the top. It helps to make note of the bottom edge where I'm
pointing with my right finger. Hold your finger there again and then open it up into a triangle. Breathe a sigh of relief
that that part's done. Remind yourself of
how awesome you are and fold the top layer, starting with that
point on the right, so it folds over the middle
part of the project. Let's test it out
and open the box up gently by pulling the
two flaps to the sides. Whoo. So excited to
see the box pop open. Now crease the bottom edges of this box so that it will help the box stand
open when it's open. And next we'll be carefully pushing in the top and the
middle parts of the box, so it will collapse inwards. Match everything up
first on the top, and then on the bottom. We're almost there,
just a little bit left. Make sure the left
and right sides meet at that middle opening. Fold the left side
over to the right. Then fold the point backwards to the left like a triangle. Now you're making the point
like a paper airplane. Fold the bottom
and top inwards to the center like a
point of an airplane. Fold the whole
triangle backwards to the left and repeat this
sequence on the other side. Once you practice this
origami box envelope, it becomes easier, especially because most things
that you do on one side, you repeat on the
other side too. What a cute secret place to hide junk journal ephemera treasure inside of this
little box envelope. You also have the option
to secure it closed with a paper clip or a ribbon
around the whole thing. More on that later.
11. Bonus: Origami Bookmark: This bonus origami bookmark
is really simple to create. The pattern side of
the paper is down, and the bottom tip of the diamond gets folded
up to the top tip. Now take the right corner and fold it up to the top tip of your paper and do the
same thing for the left so they meet
smoothly in the middle. Next, we'll open up those
last two folds that we made. Once open, separate the
top layer of paper at the top tip and fold that all the way down to the
bottom edge of the paper. Take the right corner of your paper and fold it again
up where it was before, then carefully bend it back
and tuck it into the pocket, gently working it down until
it slides all the way in. Repeat on the left side, and you've completed your
handy Oregoni bookmark. It could fit onto the edge
of a junk journal as it is. Let's take a look at
what that would actually look like on a
junk journal page. It's fun to see this
in actions so you can get a visual of where we're
going with this idea. You can put it on the
corner of one page or a group of pages
could fit in there also. Or you could modify
this bookmark with another step to make
it look a little different. You could choose to
fold the part of the paper that's in a
single layer backwards to make a crease and then forwards to also tuck that part into
the triangular pocket too, your choice or make
one of each style. If your junk journal
pages are thin and the bookmark feels like it's going to slide
off or fall off, the bookmark could also be
secured with a paper clip.
12. Embellishing Your Origami: Let's start off our mixed
media embellishments of our junk journal pockets and envelopes with two papers before they've been folded into
the origami shapes. One of my favorite ways to
splatter paint and don't you just love splatter painting
brings out the kid in me, is to use fluid acrylic
paints because they're already more waterer
than regular acrylic. Still dip your brush into
some water and then tap. I just like tapping on
the scissors because it's nice and hard to
tap onto your paper. I purposely did the
photocopy paper on the left before cutting it into the shape of a square so that I can choose
the best parts of it later. I tried not to get
too carried away because both of these papers are thin and I don't
want them to rip. Also, if you're splatter
painting on a paper that's already in your
cut square shape, make sure you get all the way to the edges and the
corners of that paper. You can also paint, use markers or other
mixed media supplies, such as this before
folding your origami. I just want to show
this as examples, but the way that I
prefer to embellish the origami pockets
and envelopes is to decorate them after they've
been folded because then your mixed media supplies don't get in the
way of the folds, the bulkiness of the folds, and you can also tell exactly where they're going to end
up on the finished design. Here's one more example of
decorating the whole paper. This is lined notebook paper stamped with distress
ink pads by Tim Holtz, and then stamped in a repeating pattern with
a tree rubber stamp. Seriously easy to do, and look at how beautiful
that is as an origami paper. What else can you come up with? So let me update you
on a few of these. I want to show you this one because somehow
when I folded it, the top did not get even. We'll see what I can
do to cover that up with scrapbook paper or something else and
see how to fix it. I wanted to show
you one more oops here because these
things happen. Somehow, when I
did this envelope, this flap ended up in here
where it shouldn't have been. I'm just going to
glue those down. For this style of
envelope, in this journal, I glued an embellishment onto one side of the tabs that open
it and used a paper clip. Another idea is to grab yourself some ribbon and tie it around, so this stays closed. I'm not going to
tie it right now, but I will show you
that on the back of it, I'm going to just tape it. You could also glue
a piece of paper on there to hold it closed. Then I'll use my
favorite glitter glue. Stickles Glitter Glue by Ranger is the boss
of Glitter glues. I love how it turns out, and I'll just put some
decorative dots on here. At this point, I'd
really like you to start thinking of your own
mixed media creations. What supplies you
would like to use, what supplies you'd
like to use up. This is good for using
excess supplies or scrap supplies and how you can bring them together
into this project. Also really looking
forward to seeing some uploaded photos
of your class work. Drop some in process photos in there as well so that we can see different supplies that
you're using and how you use them as well as
some finished photos. The purpose of this lesson
is for you to come up with your own mixed media ways to embellish your
origami pieces. Here is one of our
splatter painting papers. Here is the other one with some scrapbook
paper, marker doodles, junk mail, washy
tape, a map page. These two are magazine pages, which really can be
bright and colorful. The text of magazine
pages is also fun to use. Recognize our rubber
stamped paper, and I put a scrapbook
paper on top of here, trimmed it to the corner, and it now matches. As well as some other
scrapbook embellishments and some fiber trims. So have fun play, search around your house for whatever mixed
media art supplies, paper ephemera, and other
embellishments that you want to use to decorate your origami pockets
and envelopes. This is such a dynamic
lesson that's open ended and can go in so
many different directions. Find your groove and your style getting the flow of
mixed media exploration. Then I'll see you
in the next lesson when we continue the fun with decorating tags to go in
your pockets and envelopes.
13. Tags for Your Origami: In this lesson, we'll be
taking a look at five types of tags plus a bonus idea and
then creating a tag together. Keep count, make sure
I get to all of them. The first super easy
way to create a tag is just by cutting a rectangle or whatever shape you
want out of paper. You can use a paper cutter or a scissors and that could be it. Or you can punch a
hole at the top of your tag and leave it or string some yarn
or ribbon through it. To take it up a
notch, you can also snip off with a straight cut, see, I didn't get
it quite evenly, the edges to make a
more interesting tag, or you can round off
the edges either with a scissors or a corner punch. The second tag making
idea is to use a ready made one out of
scrapbook paper that you just need to cut
out or punch out or to use any other tag making
machines or die cut machines. The third type of tag
is a clothing tag. There are so many interesting
types of clothing tags. Collect some from yourself, your friends, your family, stash them in a
little envelope or a tub and use them for
your junk journals. Ready made tags. The fourth tag making idea is food packaging or other
product packaging. Look how easy it is to cut off the little end tag and flap of this spaghetti cardboard box and it can fit perfectly for
a junk journal or gami tag. This small toothpaste box, the end tab, could be for a
small pocket or envelope. This whole side right here
could be for a larger one. Fifth, instead of a tag, stuff your origami pockets
and envelopes with other paper ephemera that
would fit into them. This could include
scrapbook ephemera, transparencies,
words and phrases, photographs, coupons,
product packaging, postage stamps, game cards. And playing cards and
other game pieces. Don't forget that one
smaller origami can fit inside of a larger
one and consider folding any type of paper into a little booklet that could also go into your origami
pockets and envelopes. In addition to a
one page booklet, a card, that's really a card, you could fold multiple papers together into a full booklet. This could be stapled or sewn. I think you've got the hang of this fun paper ephemera
tag, brainstorming. Let's talk next about
something that's not paper. The bonus idea is
to skip the paper Ephemeral together
and go for fun, three dimensional treasures that you can put in your origami
pockets and envelopes. Examples are charms,
beads, buttons, sequins, game or puzzle pieces, and other small trinkets. I think you've got
the hang of this by now. Have you been counting? Those are the five
types of tags plus a bonus idea of making use of three D items
that aren't even tags. After you've found your tags, be sure to personalize them with mixed media art supplies
or written journal. I'll close out this lesson with some music while I'm
working on a tag, and I'll look at some more
inspiring eclectic examples. Then I'll catch up with you in the next lesson where we'll finally put our creations
into a junk journal. Yay.
14. Sewing a Junk Journal: Who? We have made origami
pockets and envelopes. We have embellished them with
mixed media art supplies. And we've talked
about so many ways to fill those pockets
and envelopes, including tags and
other treasures. It is now time to talk
about junk journals. If you don't have a junk
journal, grab a notebook, composition notebook,
lined notebook, sketchbook, whatever you want. You can even do this on a card, fold a piece of paper in
half, and there you go. I'm demonstrating how to make a super quick sewn booklet if you punch an even
number of holes and then thread whatever
sewing fiber you want. I'm using bookbinding thread. I am just doing
something a little extra by threading a bead on the outside of the spine
and I have three pieces of card stock paper in pretty colors that are going
to be my junk journal. Once I'm done with the stitches, I'm tying a double knot and I'm ready to
go with the pages. This is one example
of how to make a junk journal super easy. Now let's put our
origami on the pages.
15. Origami in a Junk Journal: Let's explore ways to put our origami into
our junk journal. Aren't you thrilled when
a project comes together? This is on the
right, a belly band. It could be either
vertical or horizontal. It is open on both sides
and glued on the ends. Here is our origami envelope. It was a really thick one, and it fits in there very snugly to
be slipped in and out. On the left side, I'll glue two sides
of this paper to make a tuck spot for
this piece of origami. On the blue paper, I will make a pocket
triangular one by folding the page itself up
and gluing it on the left. Another option is to glue an envelope onto your
junk journal page. Of course, let's not
forget about gluing your pockets or
envelopes directly onto the page and no need to do one of these on every page
of your junk journal. I'm just throwing a whole
bunch of examples out here to inspire you to decide how you
want to put yours together. Let's paper clip this origami
on its place in the book. On the next page, we can fold it over. But this time instead of
glue, we'll use staples. Are you having fun imagining all the possibilities
for your junk journal? Let's not forget the
origami bookmark. And on this spread, I'll do some mixed media touches so you can get a feel
for a finished page. This pocket will be out of a
paper bag. How fun is that? After gluing some decorative
scrapbook paper into place, I would like to show
you how you can easily use a piece
of masking tape to attach just the top
of a pocket into place so that you
could also have room underneath it to put something else on your
junk journal page. Let's bring this project home by finishing up this
mixed media spread. The possibilities for a
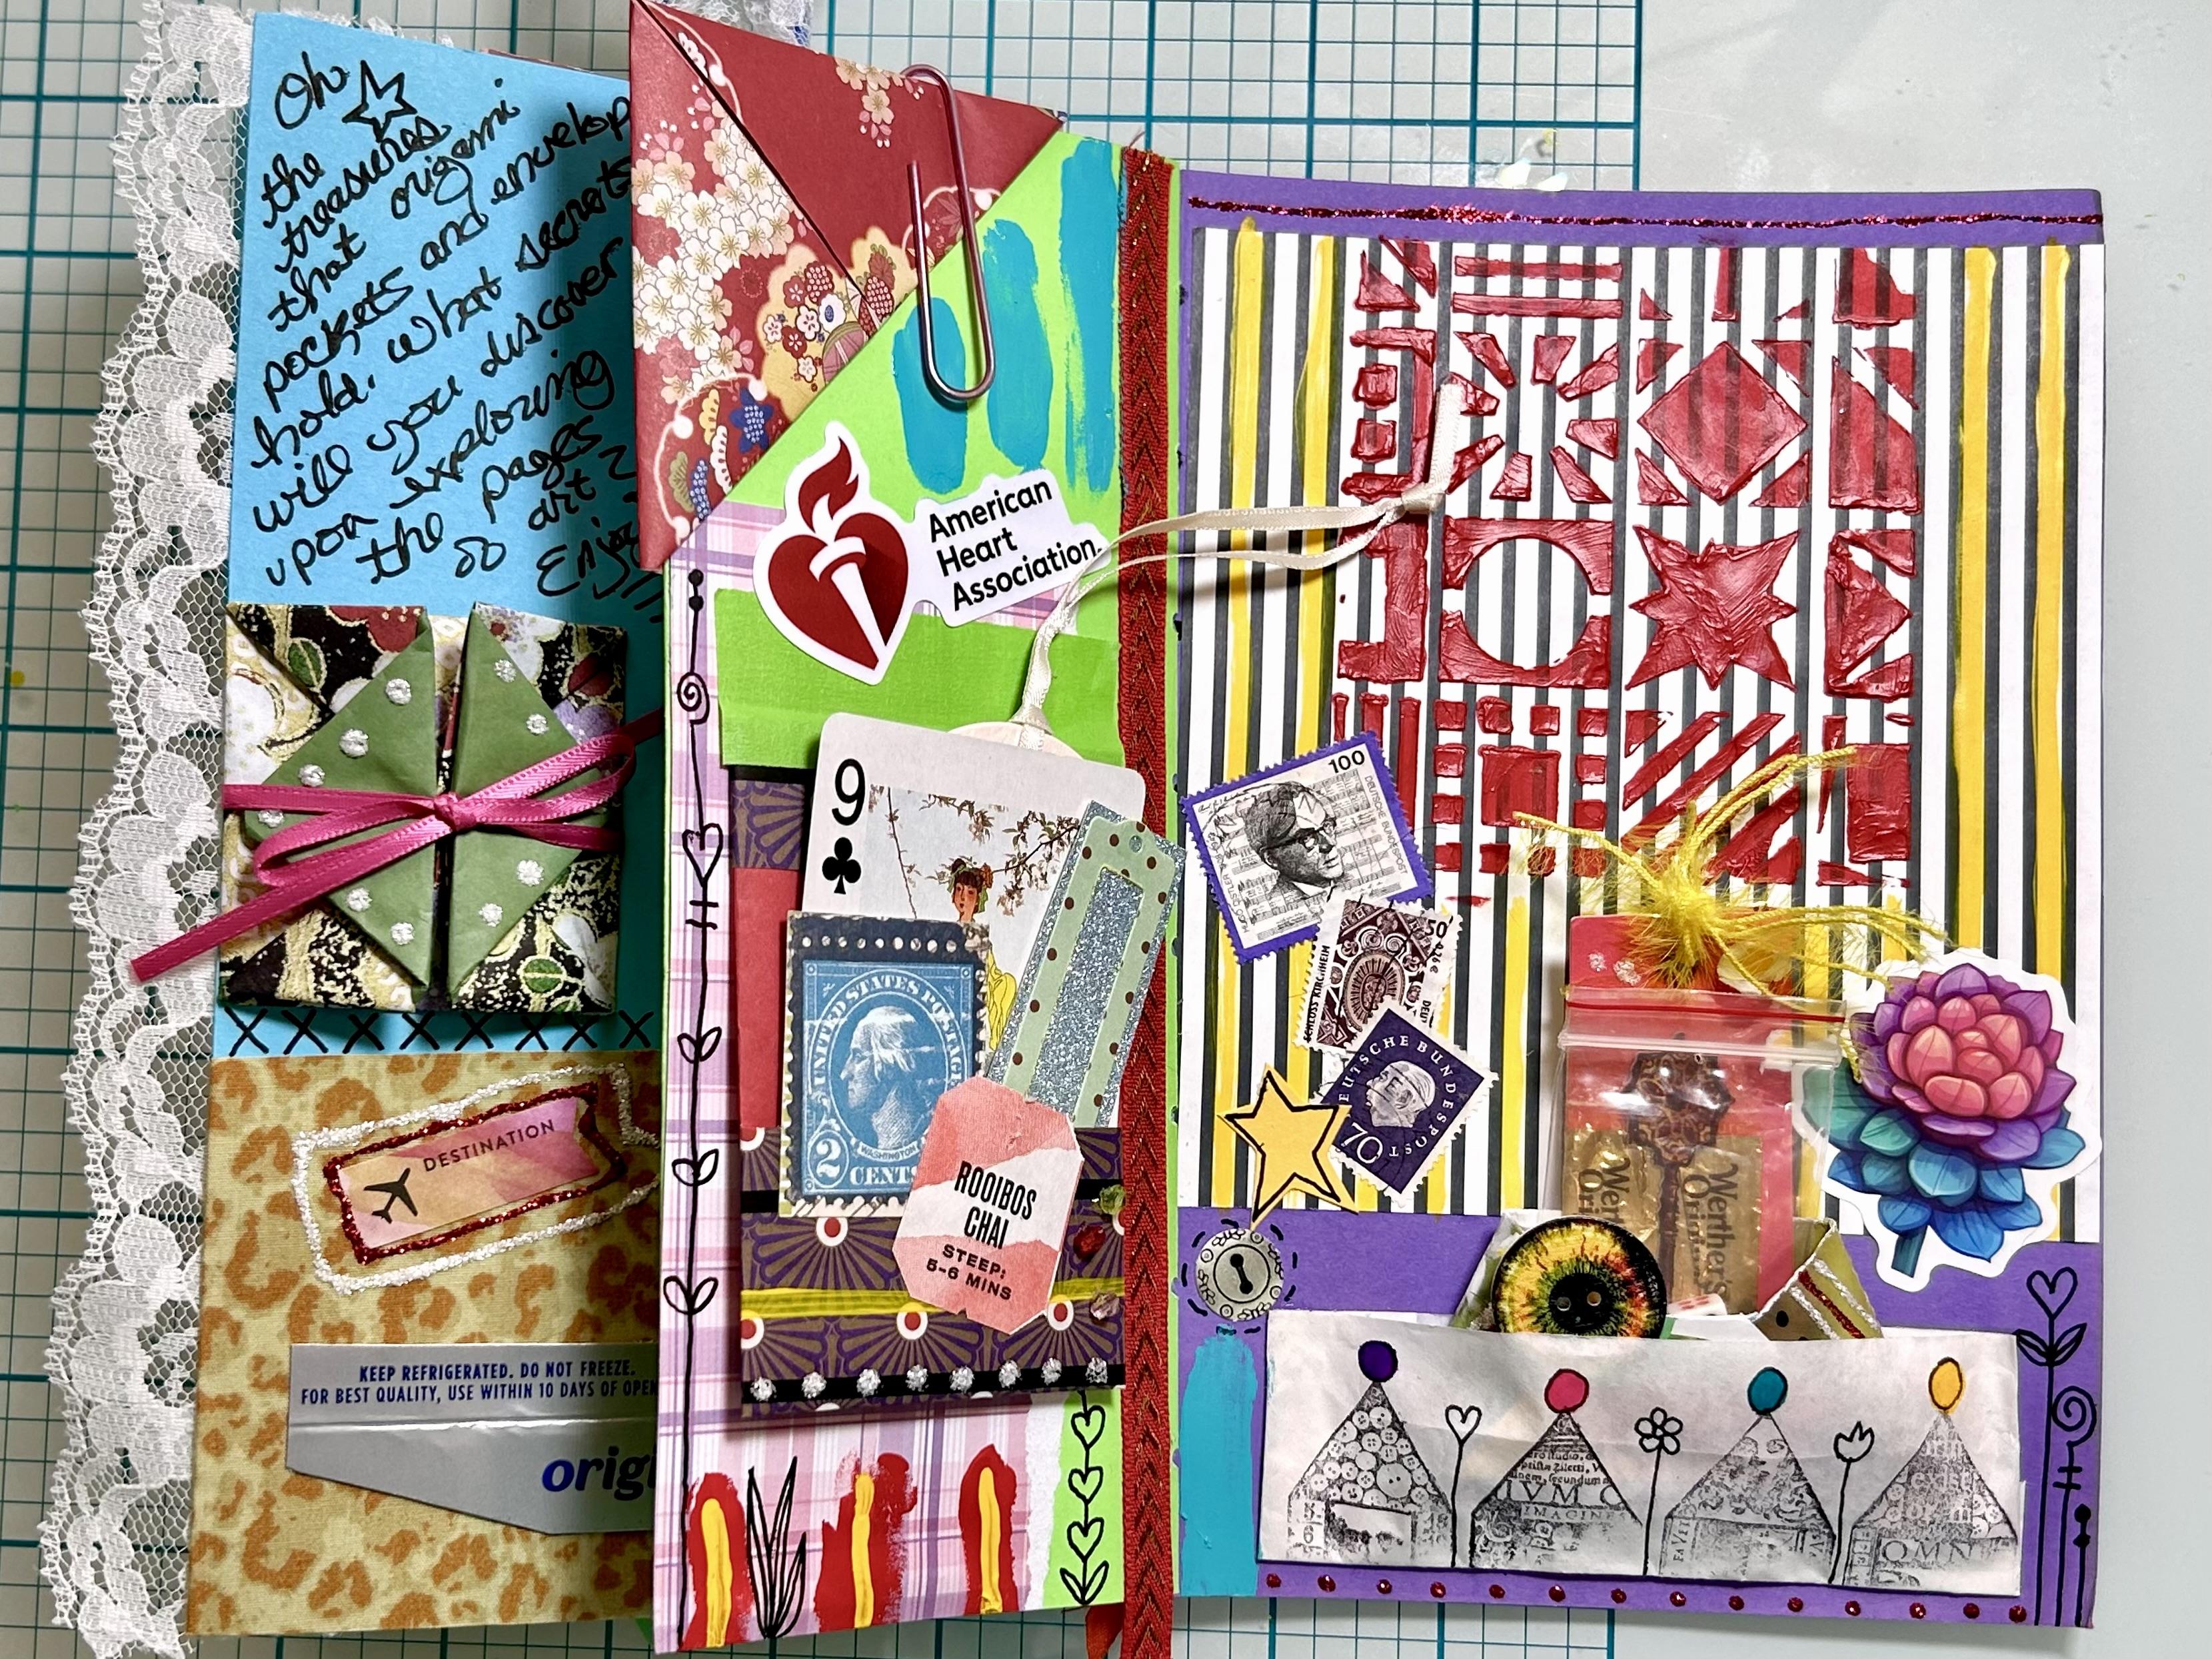
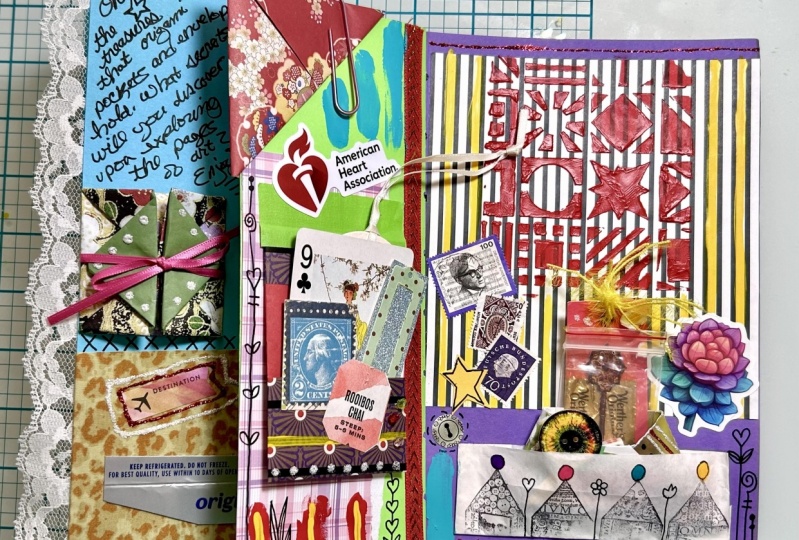
junk journal are endless. There's an example of a Finnish junk journal
spread including origami pockets and envelopes with mixed media art supplies. Congratulations on making
it this far in the class. I hope this inspires lots
of creative ideas for you. Let's wrap things up
in the next lesson. A
16. Conclusion: Wow, what an amazing
creative journey we've been on going from paper to
pockets and envelopes, including the tags and other things that we
can put inside them. I hope you've had fun and
gotten your own ideas to use some mixed media art supplies to embellish your
pockets and tags also. Please look me up at
Creative solace Studios. On YouTube, I've got a whole bunch of free
videos waiting for you, including a junk
journal playlist. You can look me up elsewhere at Creative Solace Studios
online as well. Please share some photos
of your class projects. Upload them to the
class gallery. I'd love to see them. I know
other people would too. Share some of your in
process photos so we can see the supplies you've used as well as your
finished projects. Thank you again for spending
creative time with me. I'm Kathleen Arla Johnson, and I'll see you in our
next creative adventure. Look me up.
 Kathleen Arola-Johnson, Creative Solace Studios