Transcripts
1. Introduction: Hello. In this class, we'll be making a colorful
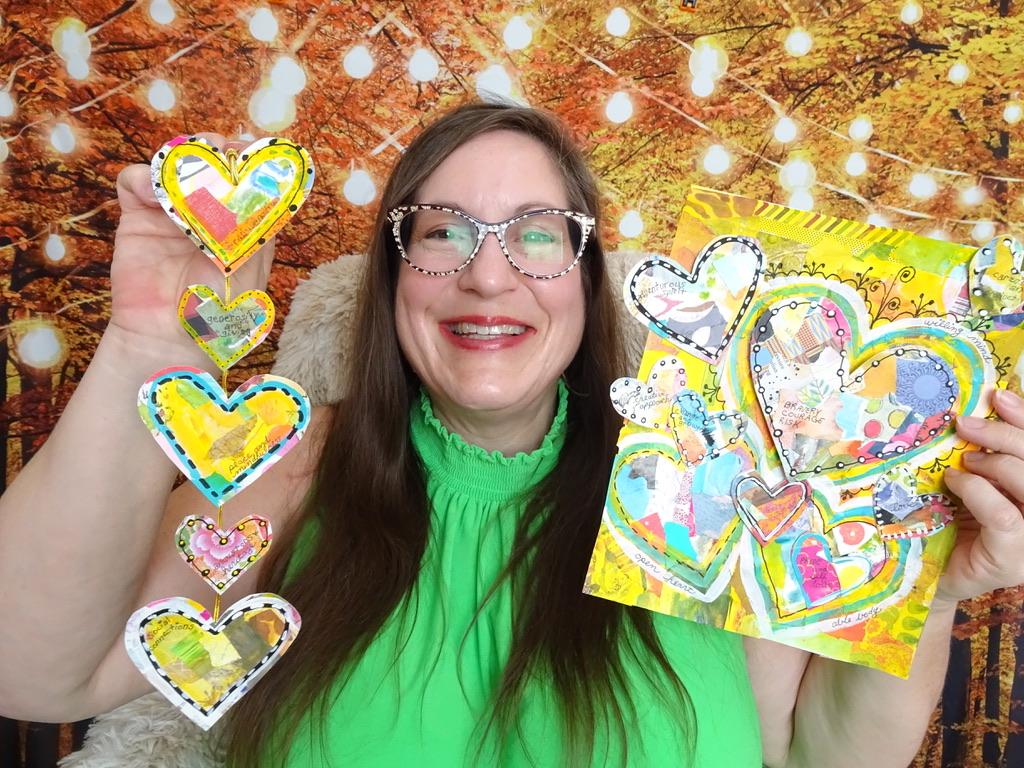
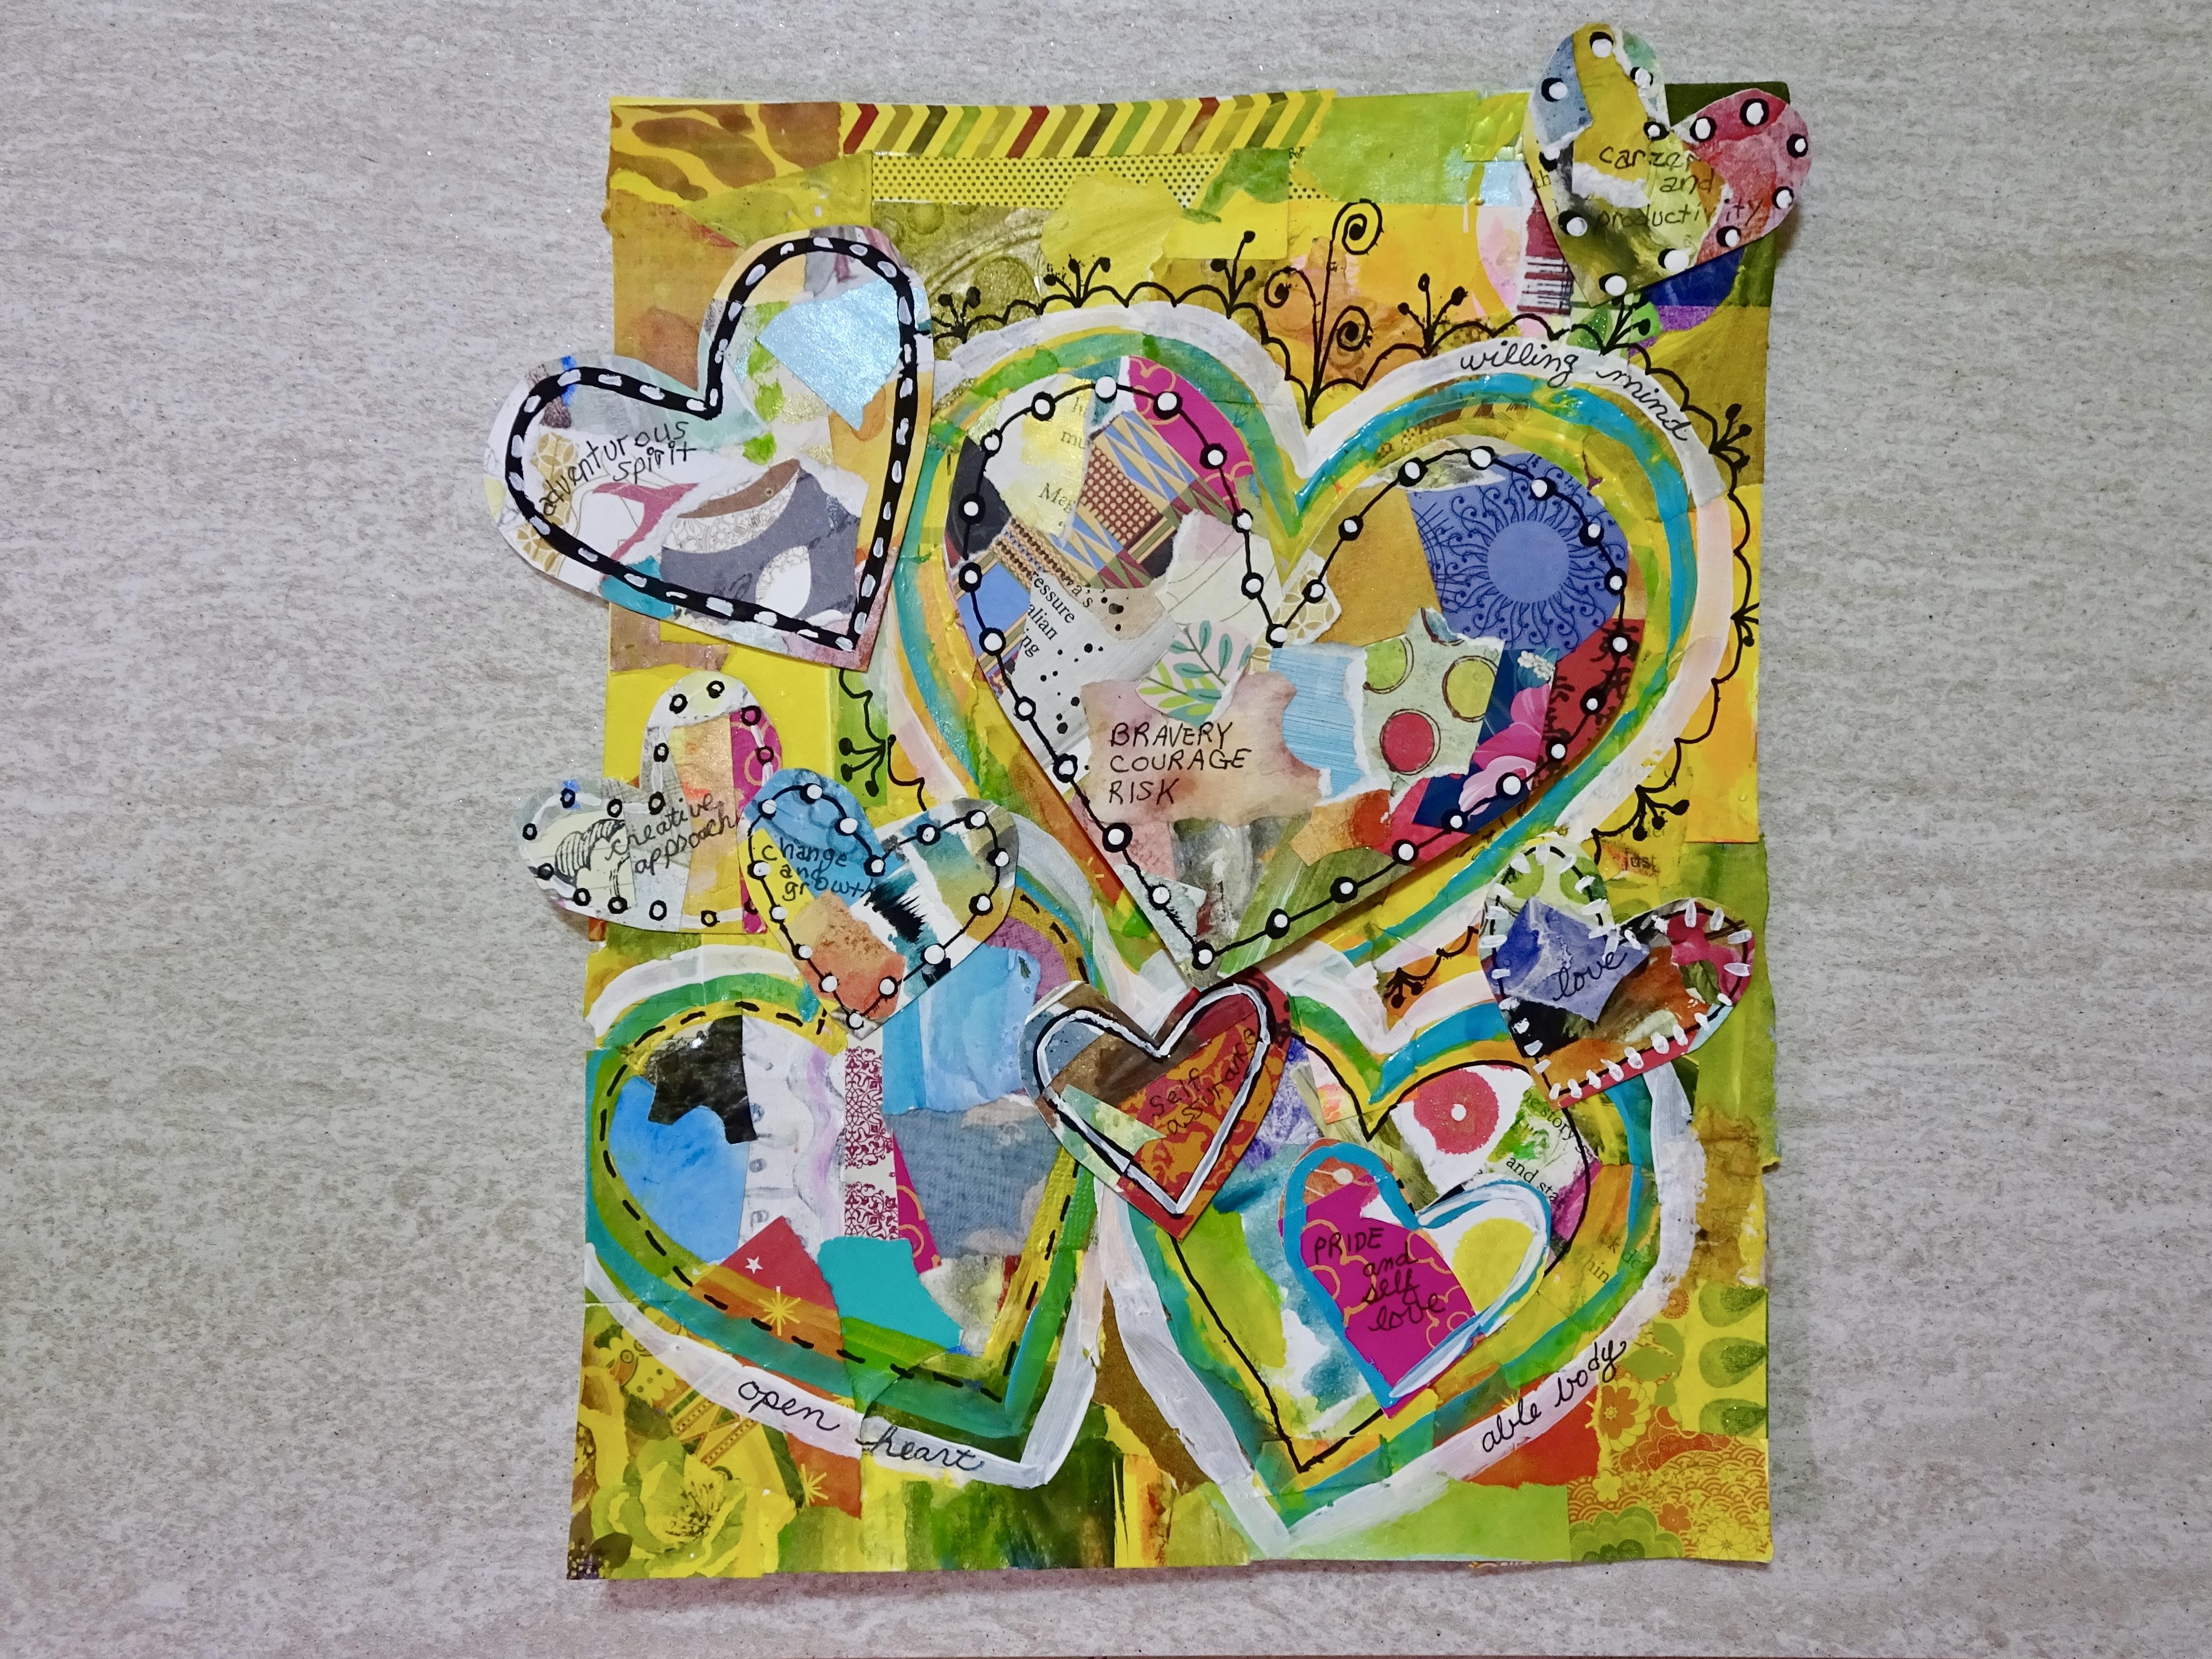
mixed media art project with hearts that have intentions and goals written on them
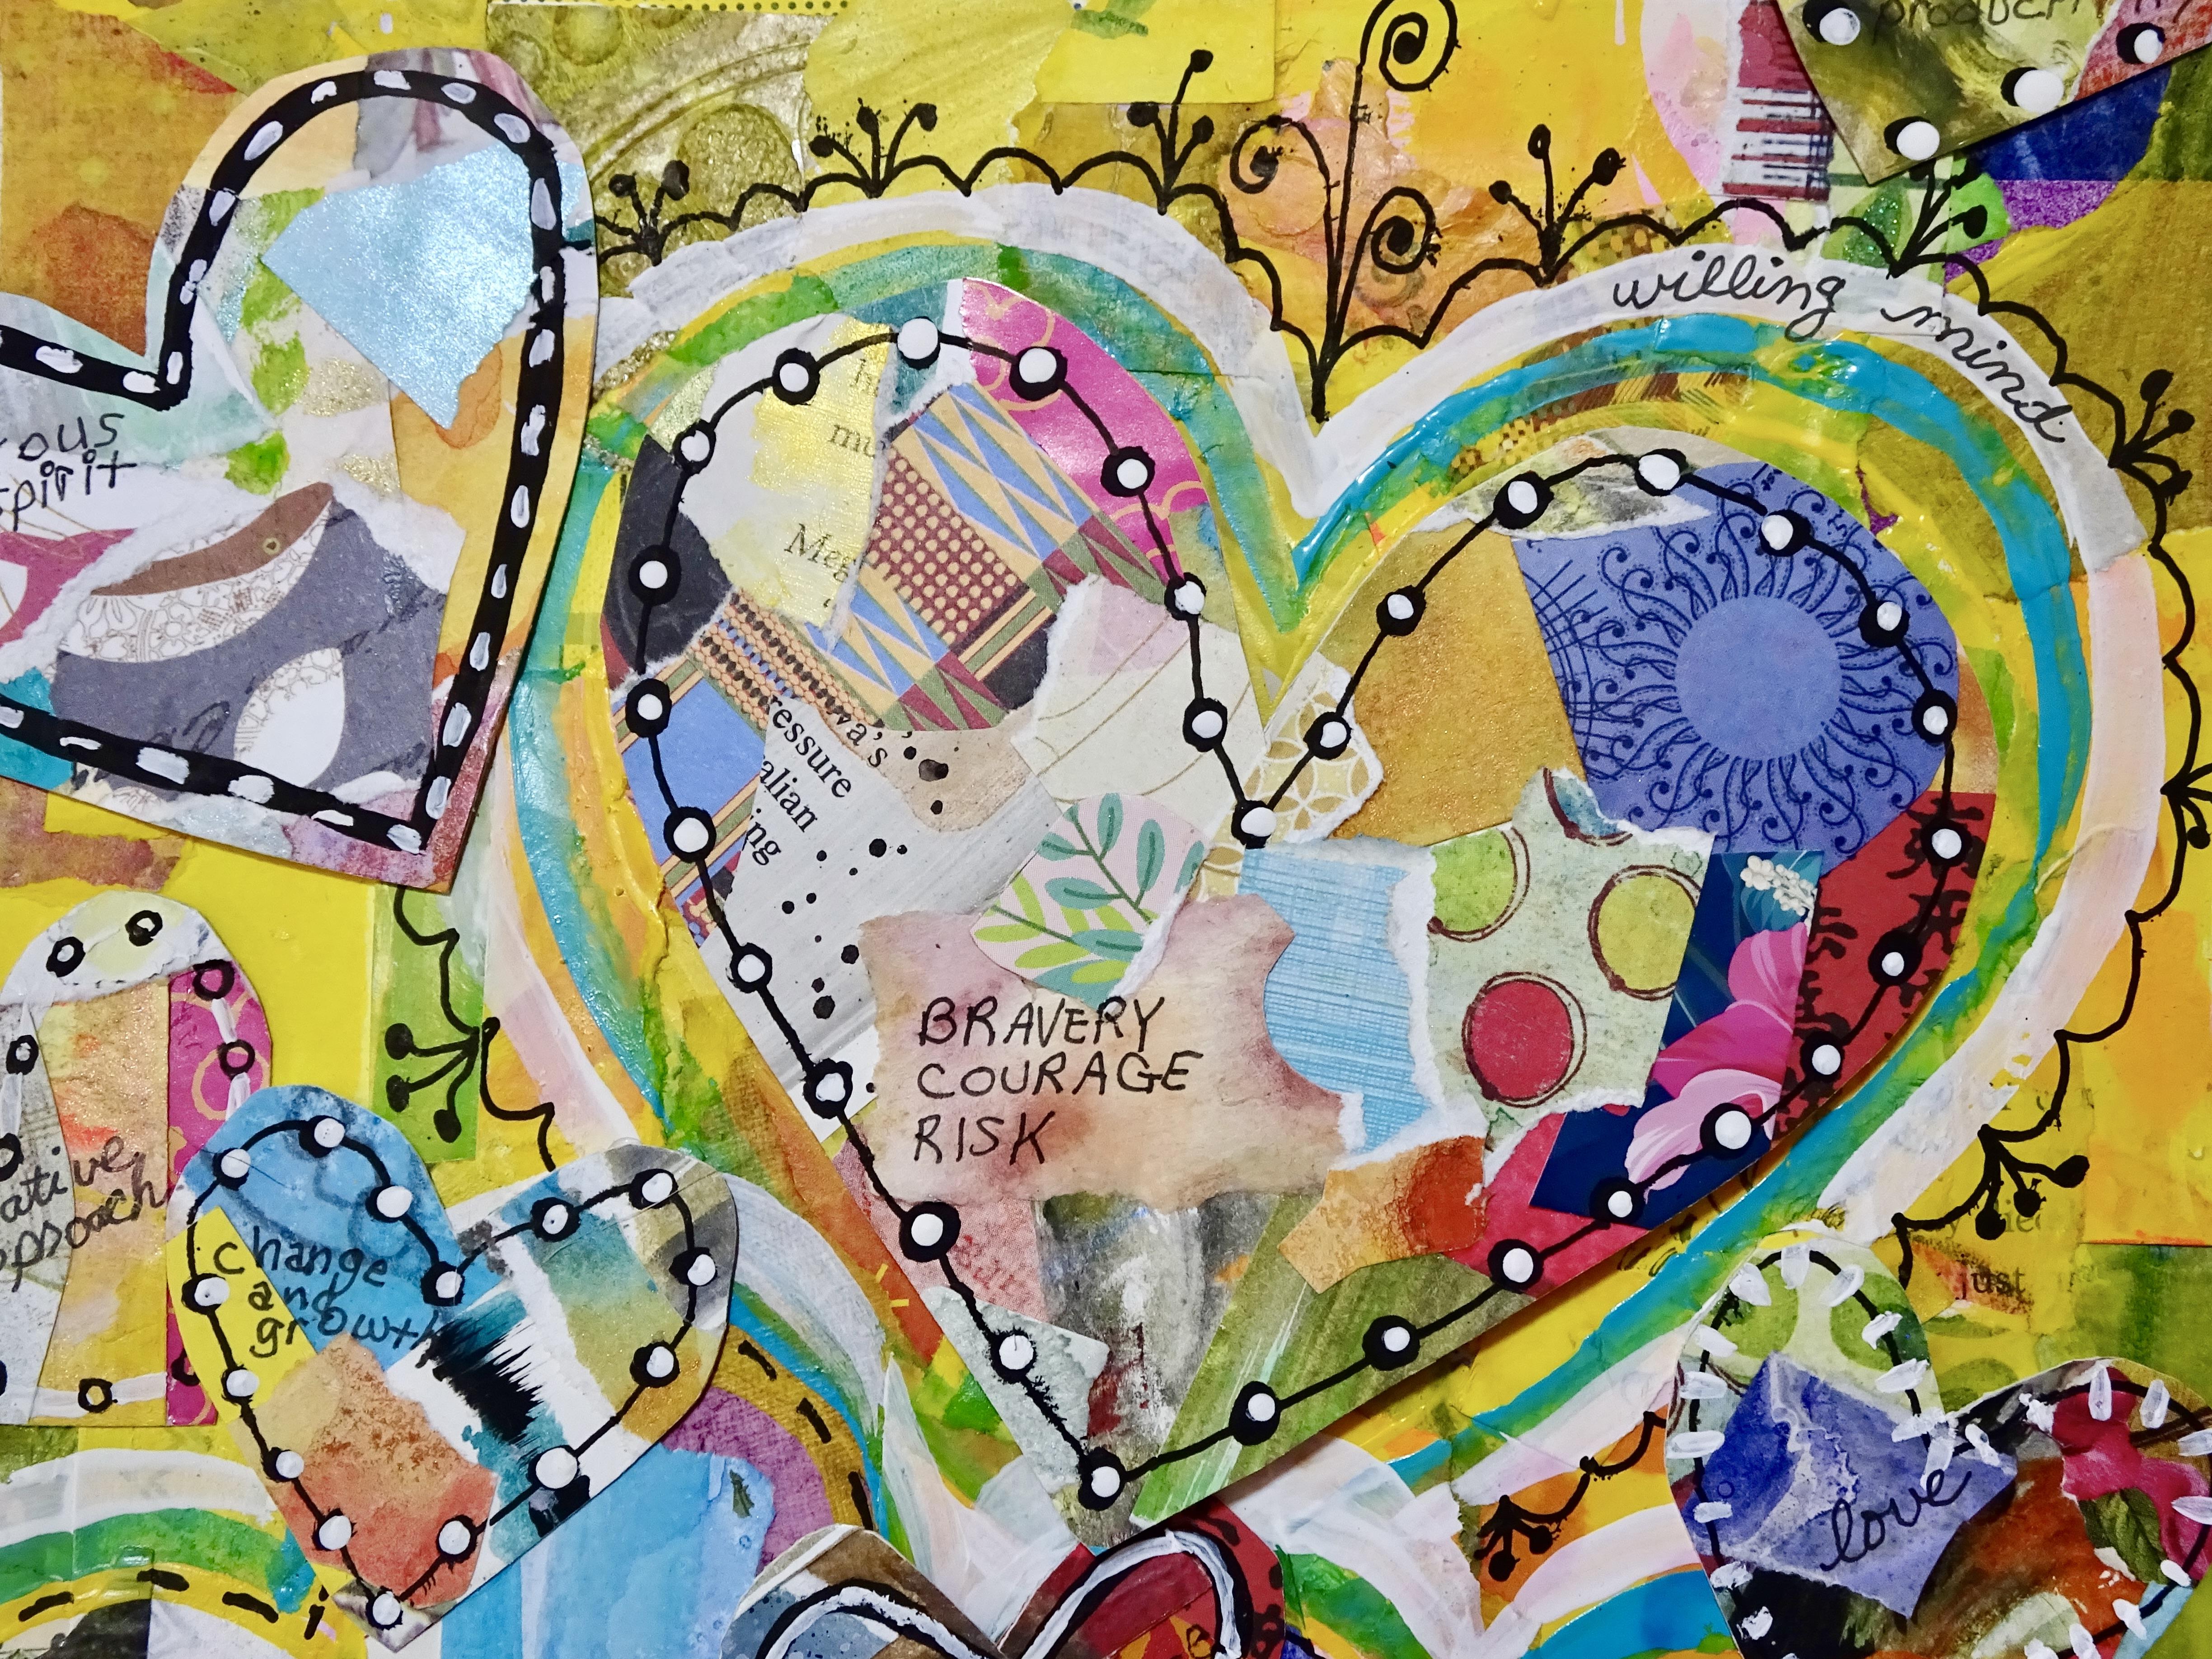
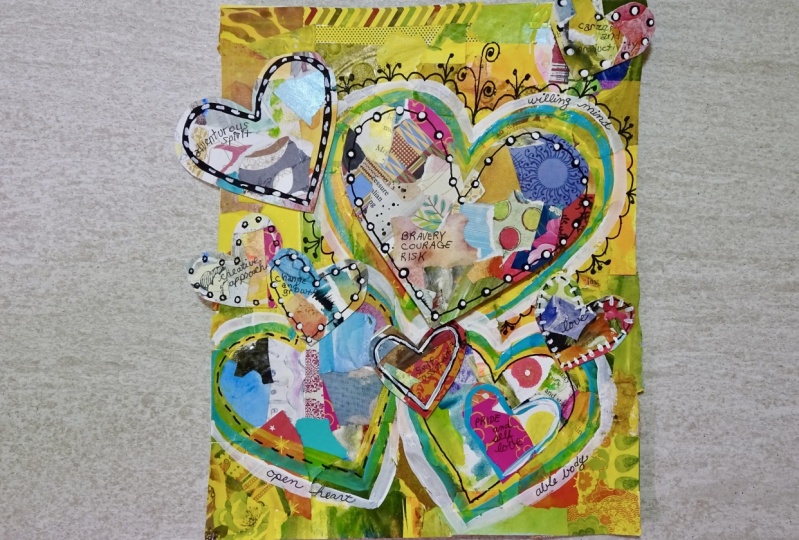
and are personalized to you. Such as on this large
heart, I wrote bravery, courage, and risk
because those are three things that I'd like to
bring more of into my life. What are some qualities that you would like to bring
more into your life? This class is for anyone
who wants to be creative, practice some art techniques, and dive into learning a bit about yourself
in the process. We'll be using paper and paint, whatever you have on hand, and I'll describe some options for materials in
the supplies video. My name is Kathleen
Erila Johnson, and I'm a mixed media
art teacher with a background in teaching
elementary school art. My passions are art
journaling, nature journaling, and finding ways to
experience self growth to discover things about yourself and positive mental health. My YouTube channel is called
Creative Solace Studios. You can find more mixed
media art tutorials and inspiration there. I think of myself
as an art explorer, and I encourage you to think of yourself as an art
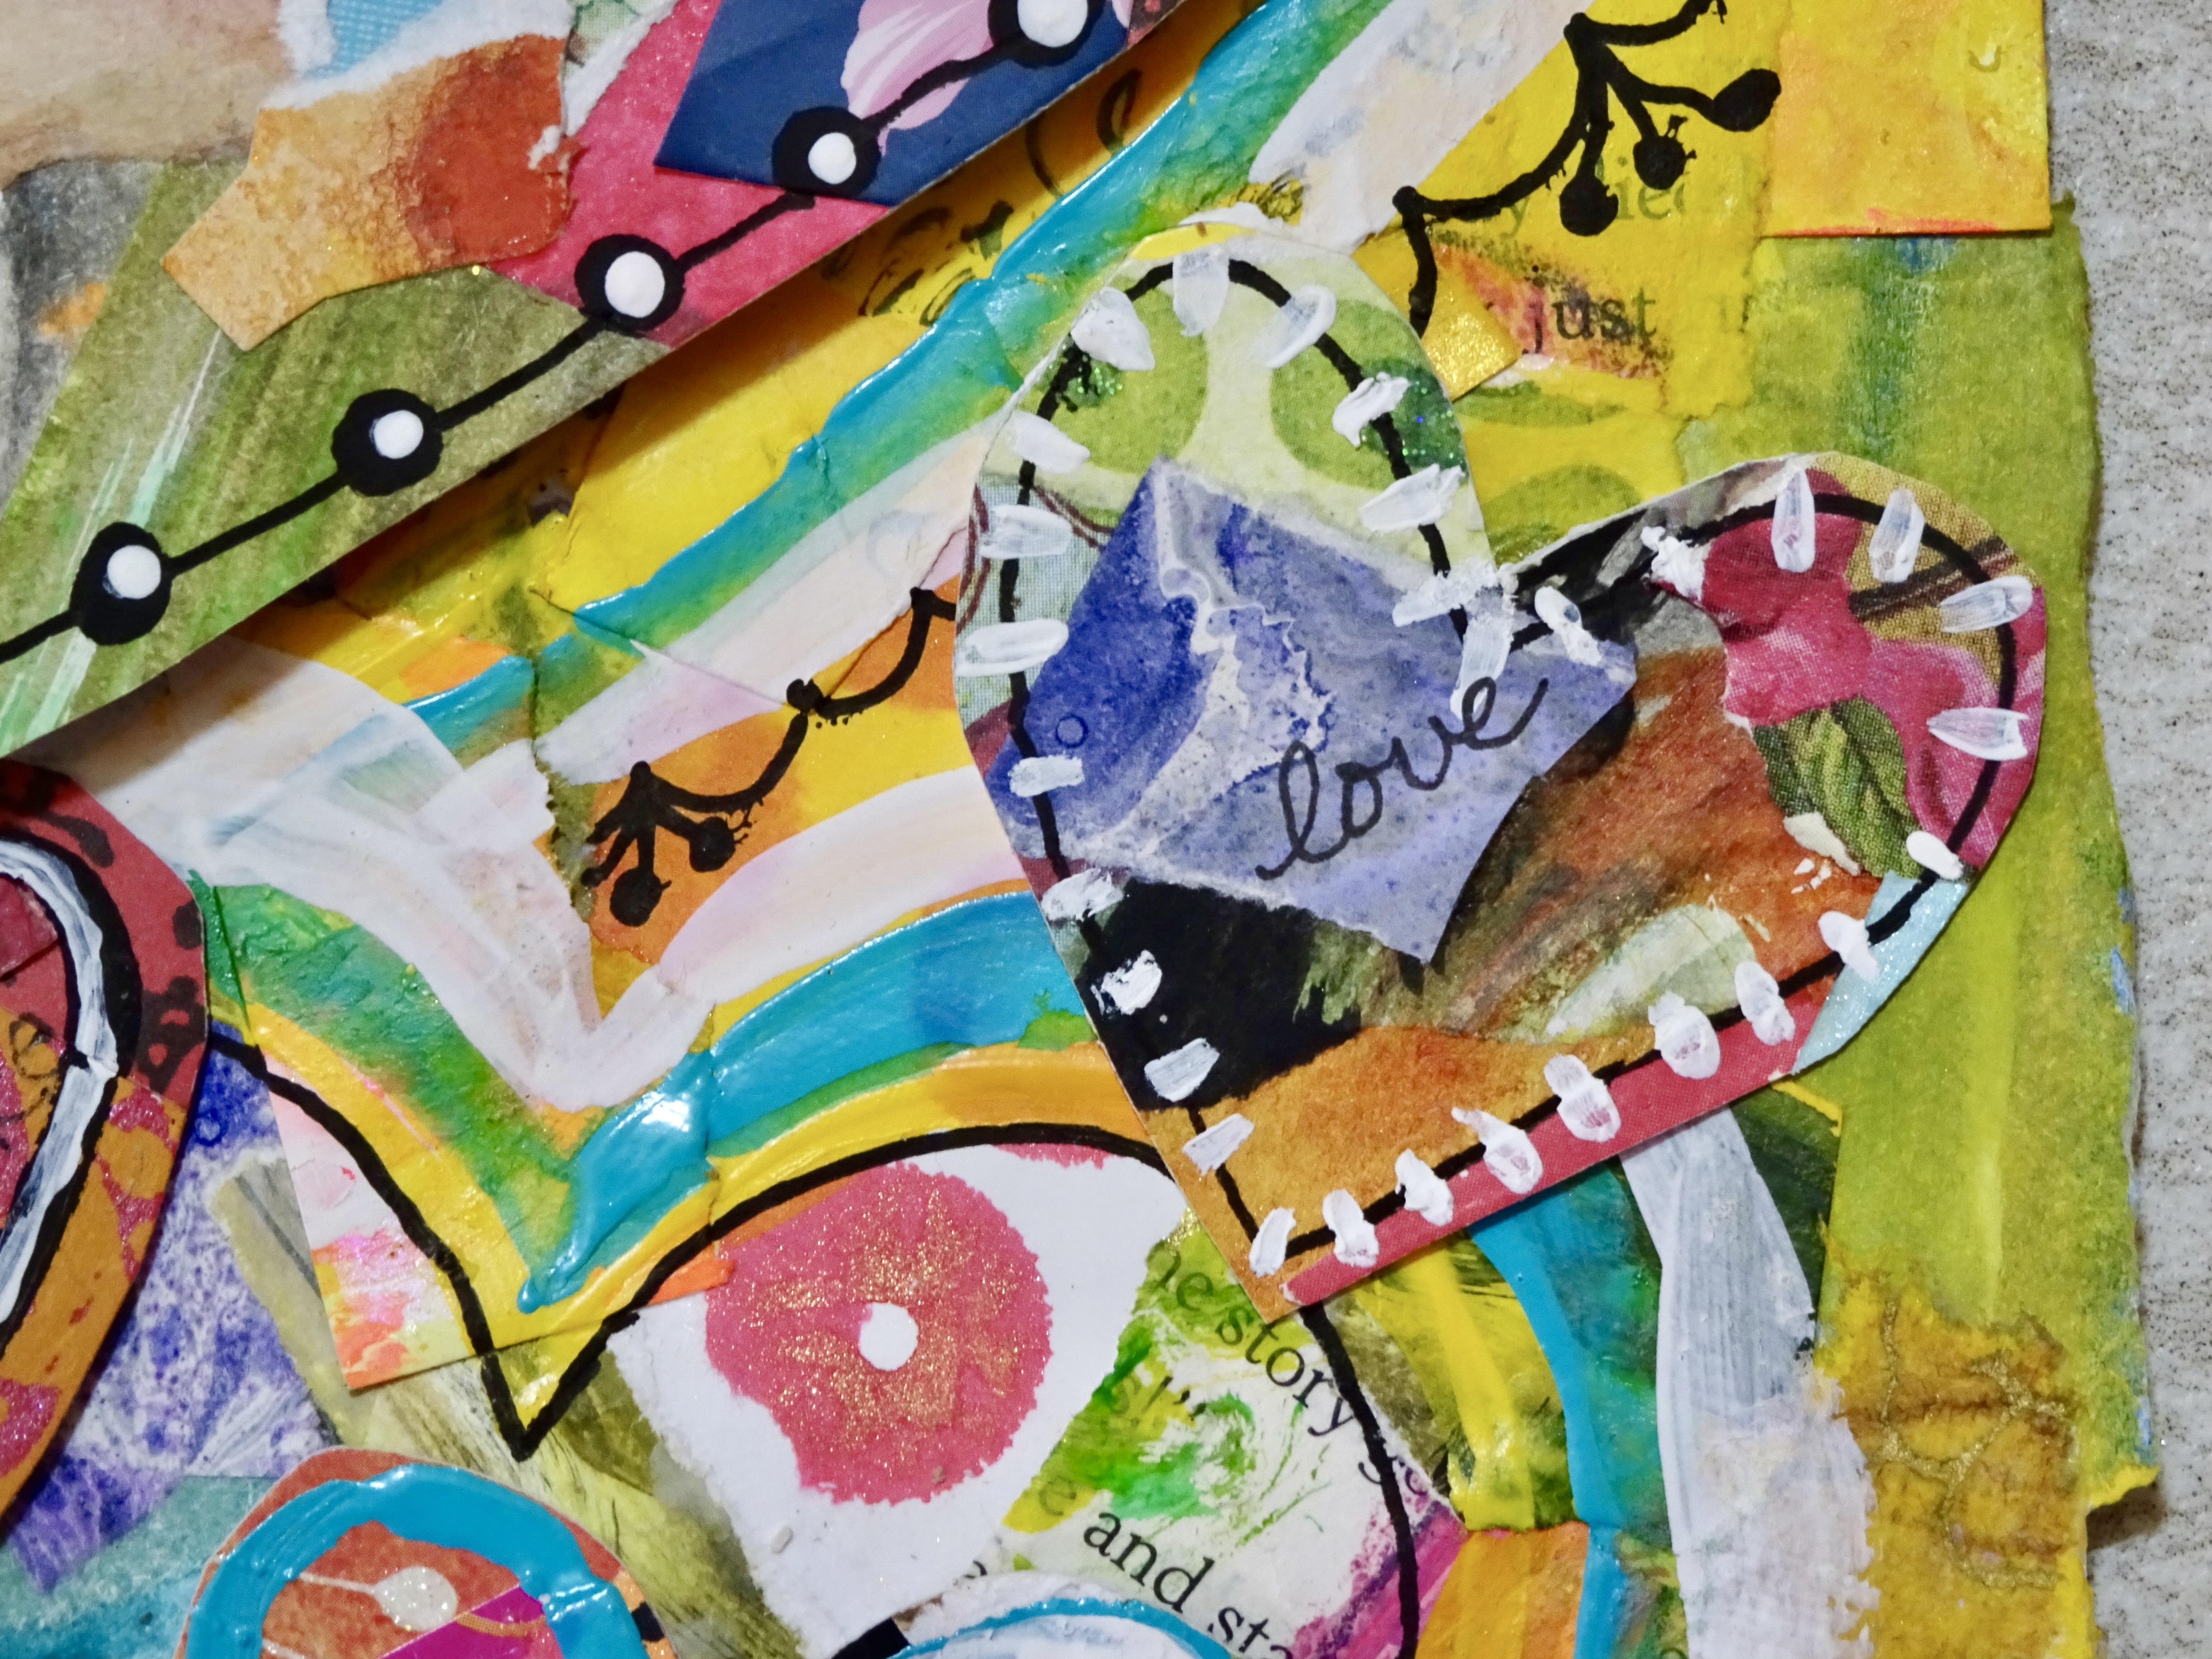
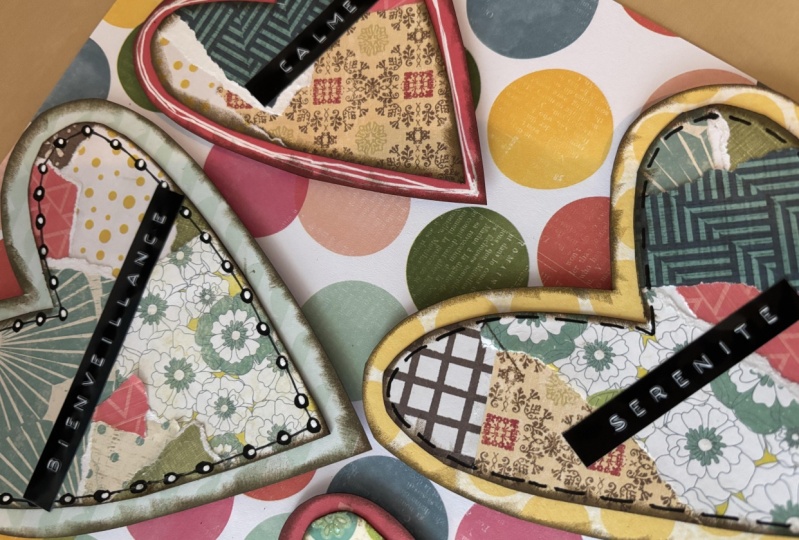
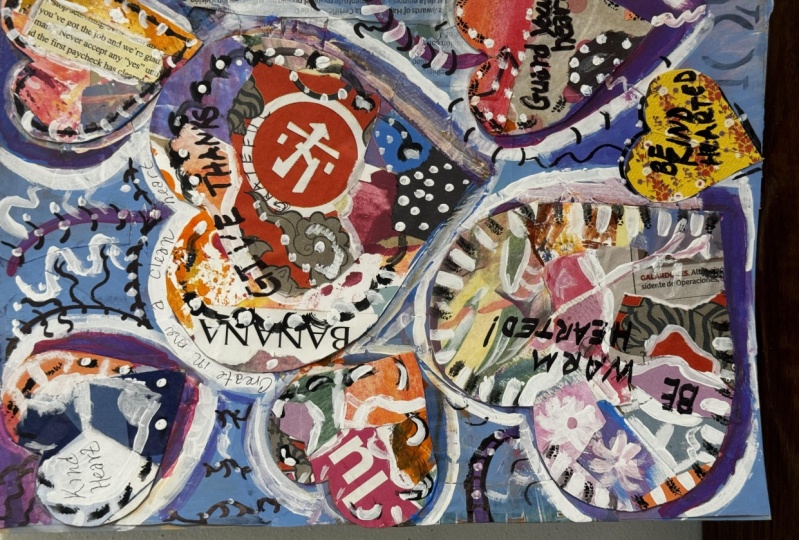
explorer, too. Here's a close up look
at our class project, which I'll be demonstrating
step by step from the background collage to
the main focal points of the hearts with plenty
of choices for you to customize your art project in ways that are
pleasing to you. An added bonus is
a bonus lesson, showing how to use
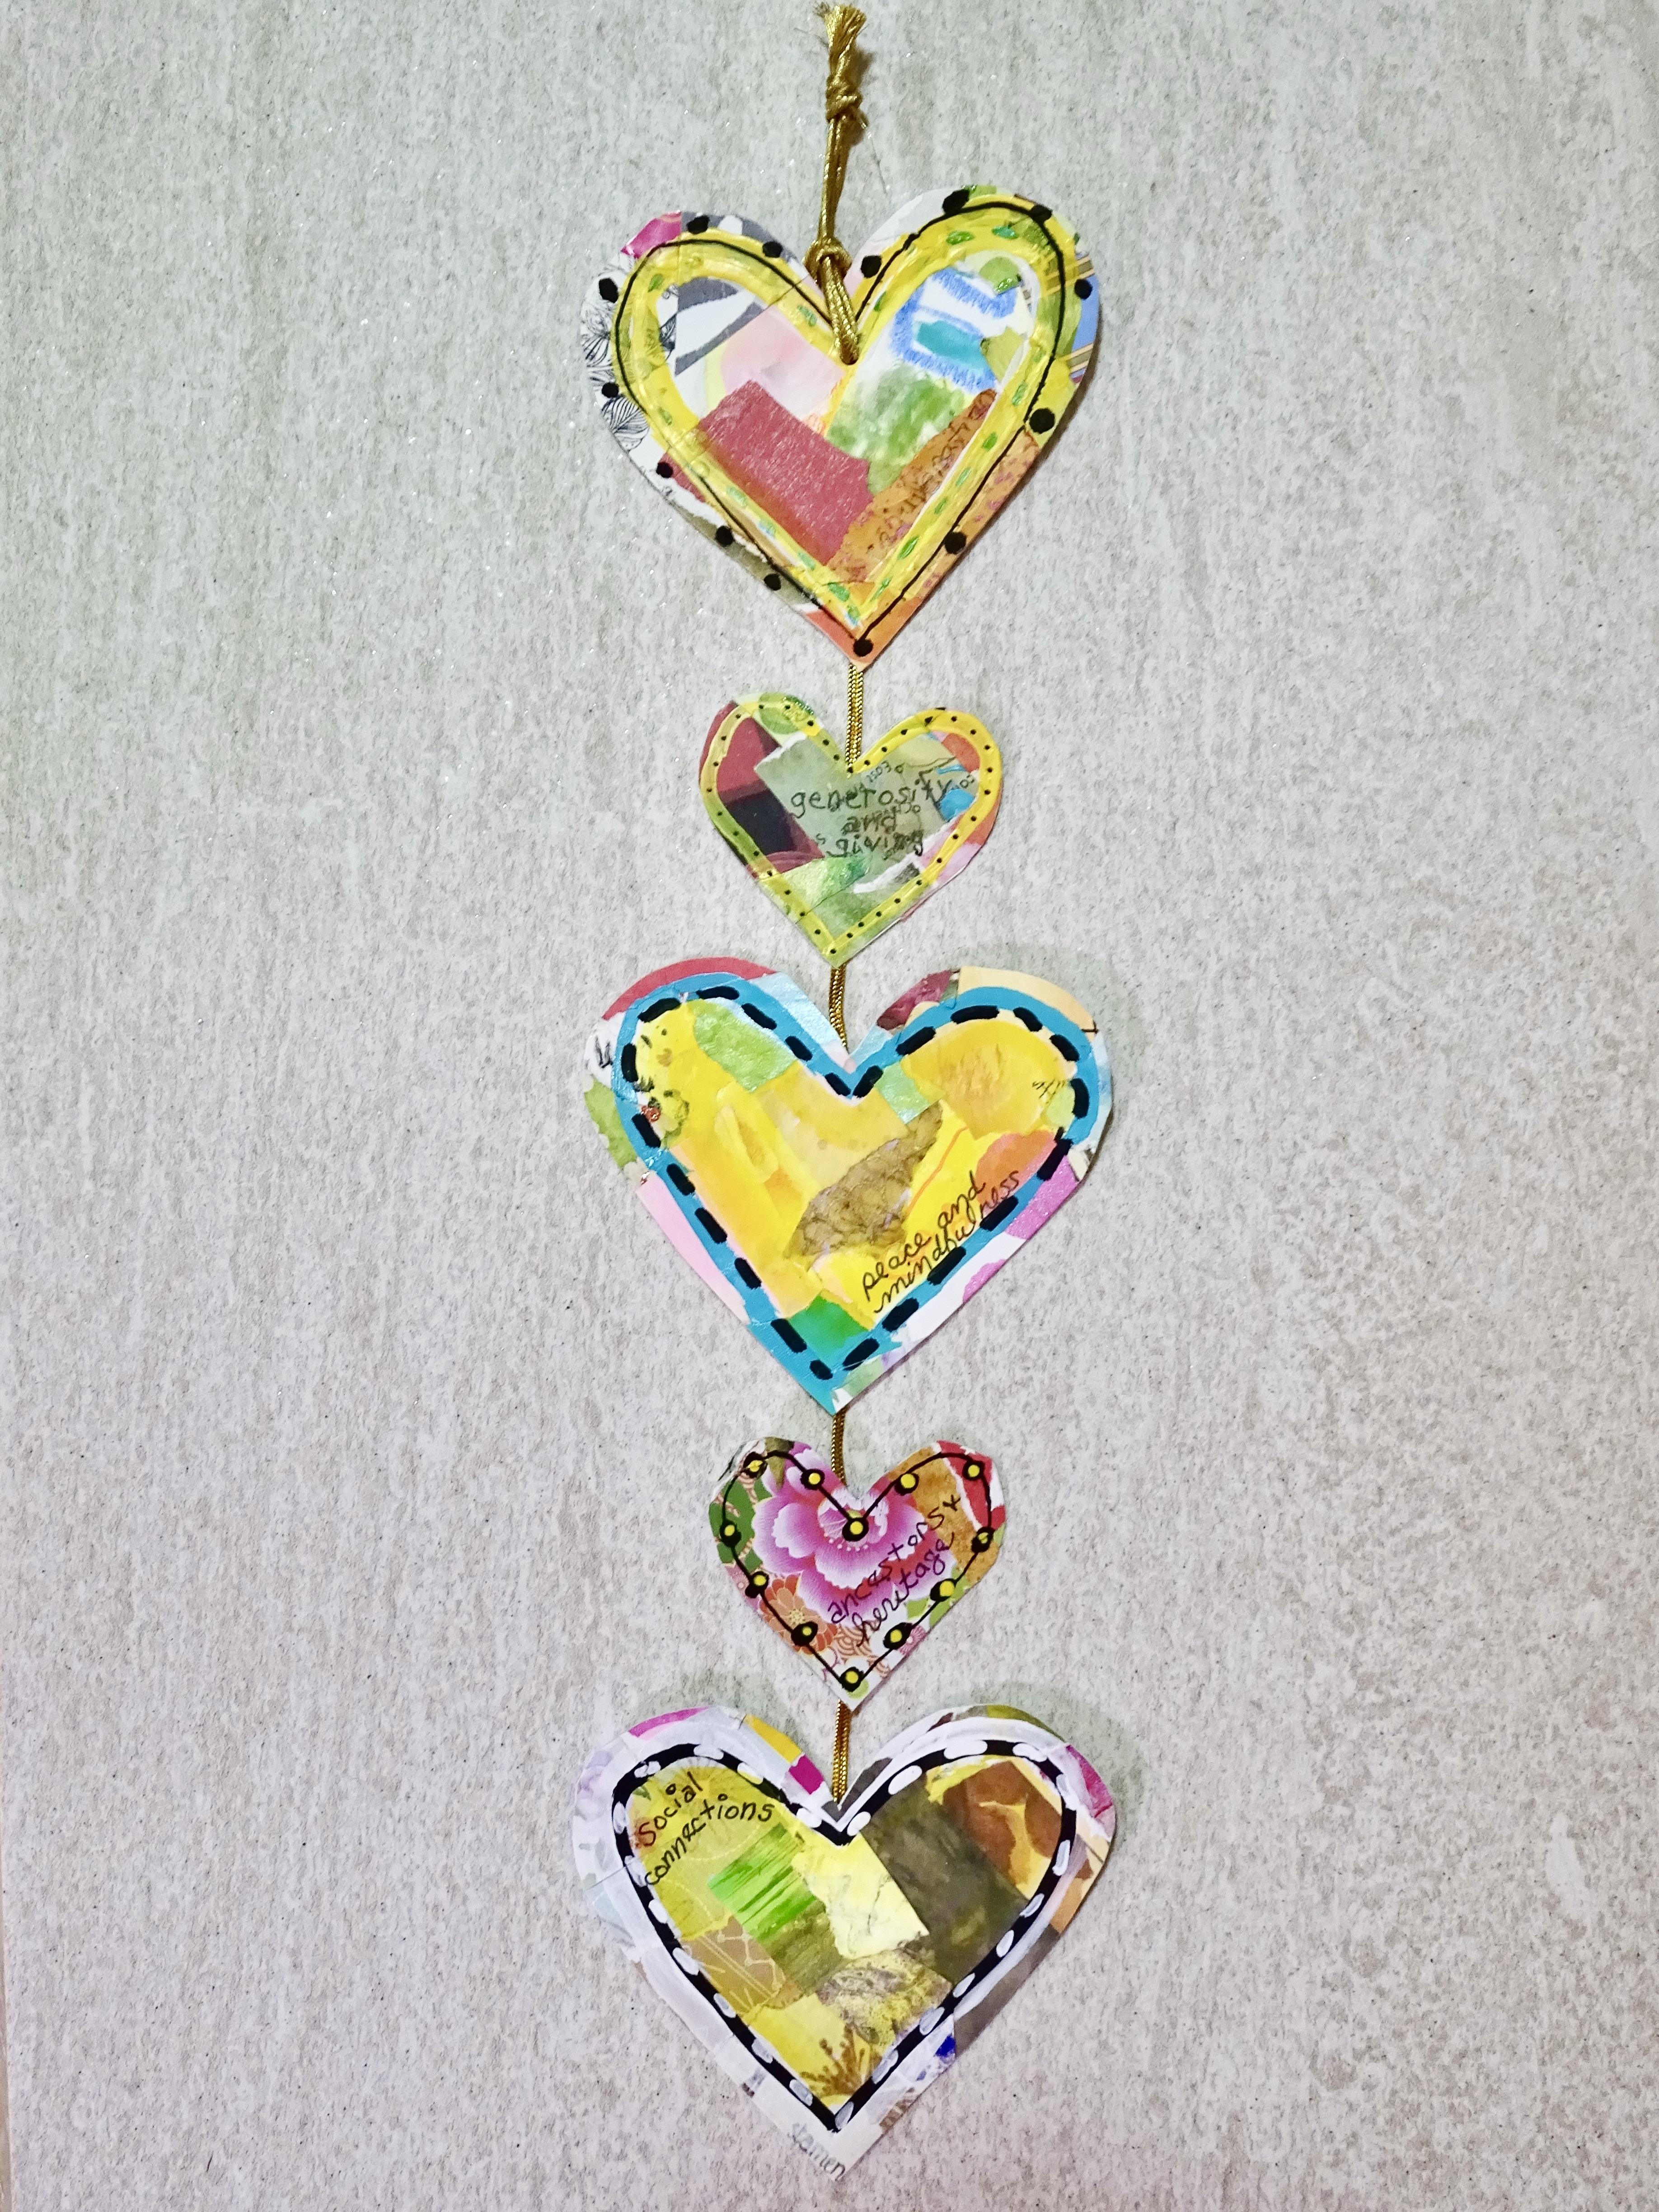
some extra hearts in a little wall hanging. Thanks for joining me on this exciting
adventure of creating mixed media hearts with personalized goals and
intentions written on them. Let's get started and get our
hands on some art supplies.
2. Supplies: Let's take a look at the
supplies for this project. I used mixed media paper. The size that I used
was eight by ten, two sheets of it, the same size, and then some scrap paper
of the same type. To cut out your heart stencils. You can actually use
sketchbook paper, drawing paper for this, or even card stock because we won't be painting
directly onto the paper. We'll be doing a
collage on top of it. Speaking of the collage, you'll need some collage papers. I have two bins here. This one is painted
paper scraps. These are leftover from other
projects that I have done, things that I have
already painted on and we're just too
pretty to throw away. I've got a little collection
of collage papers here. And then my other bin is
scrapbook paper scraps. Any kind of paper scraps. If you don't have paper scraps, you can use junk mail. You could use magazine pages. You could even use
colored photocopy paper. Next is the paint. I used two colors of
paint and white Gesso. Here's the white Gesso. I used fluid acrylic paint, but you could use any
type of acrylic paint, whether it's artist acrylic, craft acrylic, or fluid acrylic. The adhesive I
used was PVA glue. An a glue for collaging
or a gel medium is fine. I used three kind
of paint brushes, one a little bit bigger
for the background, and two for more finer
detailed round brushes. Cup of water and the scissors. Next are paint markers. I use two sizes of black poscas. Alternatively, you could use sharpier black paint that would
go on top of the collage. And marker for
writing the words, something with thinner, finer
tip for writing the words. I also used a unival
signo in white, but it didn't show up
very well on these dots, so I ended up going over
it with the white gesso. The unival signo pen was just for drawing the
stencils of the hearts. Then at the end for
the bonus lesson with the leftover hearts, I used a whole puncher. So fibers or trim ribbons
or yarn for hanging. Then I went with
some gorilla glue. You could use tacky
or e 6,000 to make sure that the fibers were attached to the background. I did use some cardstock tabs on this wall hanging as well. Modify these supplies as you see fit and according to
what you have on hand.
3. Background Collage: Step number one is collage. I have my background
paper laid out, my bin of scrapbook paper scraps and my bin of painted
paper scraps, one in the wrong category. These are the ones that I
painted from other projects. But I'm not going
to get too tied up in the particular
pieces that I'm choosing because a
lot of this will be covered up in the
process with some paint. Your choice if you are
cutting with scissors, or if you are tearing
collage papers. I'm working quickly, not getting
too tied up to each one, being conscious that some of it will not be
seen at the end, and just having fun
with the shapes, the textures of the
different papers, the colors, placing them
randomly in a collage. You can see that I do I do do. Gluing by hand, by finger. My blue bottle is
empty right now. But even when I don't, I just like to get in and
play with those supplies. That's just my way
of doing things. I'm choosing to block
off the corners first, but you go for it with
whatever coag techniques. You. Our goal is to
cover the whole paper. Each collage piece will be overlapping the
papers next to it, and we'll have a nice
dirty textural collage. M Have fun playing with your collage. Enjoy and relax with
this meditative process. Then towards the end, start
filling in the spaces of the collage with smaller pieces that are in the
shapes that you need. Guess what? When you're done, you get to do it
all over again and create a second collage
that's the same size. One will be used for
your background paper, and the other will
be cut into papers. A
4. Heart Templates: After creating
your two collages, let's make the heart template or the stencil that you'll be using to trace and cut out multiple hearts
of the same size. Fold a paper in half so
that the heart will be symmetrical and draw half
of a heart on the fold. Feel free to practice
a few times with different shapes of hearts and also different sizes of hearts. Some hearts can
be big and puffy, others can be long and
skinny. You decide. Then cut it out.
Choose the template or templates that
you like the best. Also be sure to set them
on your background paper. So you can see how much space
they'll take up and to make sure that you have room to trace them more than once
in the next lesson. I chose to make one large heart and one small heart
for a variety. I'll also include a
handout of my templates. So they're available to you if you would
like to use them. It's nice to have a
personal handmade touch of designing your own hearts, but I've got you covered if you prefer to use my
examples as patterns. Fs.
5. Tracing the Hearts: Now that we have our
heart templates cut out. It's time to trace them
on our background paper. First side, which of the two collages
you'd like to use for your project background and
which you'd like to save to cut into some additional
hearts later. I'm choosing to trace
my patterns with paint and a fine tipped
round paint brush, but you're welcome to trace with pencil or marker as well. I'm using the same color
of paint that I'm going to use for my entire background
color in the next lesson. Reason that I chose to trace the hearts with
paint is because the bright yellow color shows up nicely on top of all the
colorful collage papers. Trace your heart templates multiple times onto
the background paper, but don't entirely fell the
background paper with hearts. Leave some space to add additional hearts that
will be glued on later. This is a good time to customize your project with the
placement of your hearts, as well as the angles
that you put them in. I end up tracing one large
and two small hearts. Then I decide that I would
like an e sized heart too. I out another smaller
heart template and I trace a that one
onto the background. Do what looks pleasing to you. You might even feel like using other shapes entirely
of your templates, such as stars or circles or geometric shapes
or something else. Make this project your own with some of your own design
decisions that you like, and we'll be painting the
background in the next lesson.
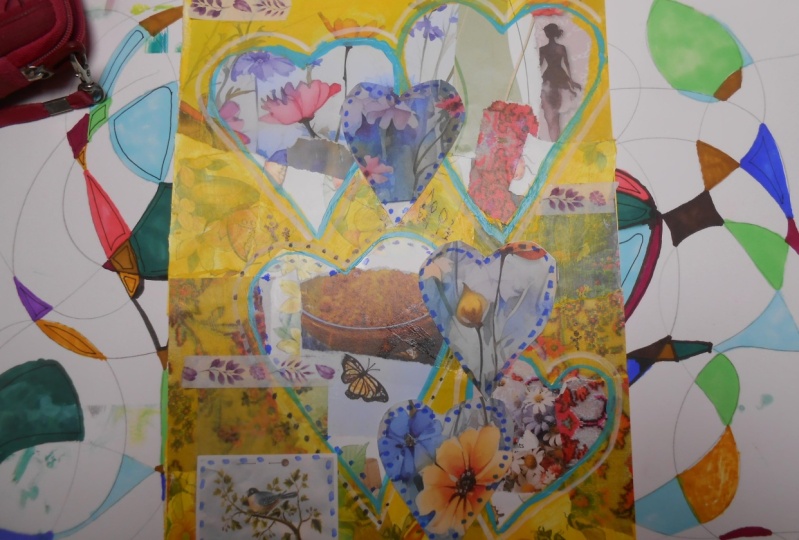
6. Background Painting: S In this list, and we'll be painting the entire background of your paper. But leaving the shapes of
the hearts without paint. It's like resting the
colors and patterns of the background colas showing
up through heart windows. Different types of paint will be more opaque or more translucent. The type of paint and
the color of it will determine how much of the collage papers you
can see through it. Since I'm using fluid acrylic and it's also in
a bright yellow, I'll be able to see features of the collage papers even
when the paint covers them. You can also dip your
paint brush with regular acrylic paint into a touch of water to
get a similar effect. This project would
look good with more opaque
background paint too. Even something dark like black would really make the
heart stand out and pop, or consider metallic background or multiple colors in
the background, do you. I opt in for yellow because it's bright and cheery
and positive looking, but with so many colors of paint and types of
paint available to you, the choices are atless. Be mindful of the direction
of your brush strokes, such as curving them around
the shapes of the hearts, and I'm using a larger
round brush than the one I used to trace the
hearts in the last lesson. Sometimes you might
feel wary about covering up your hard
work of the collage, but for me, layering is
the name of the game and mixed media art and
art journaling pages. The yellow paint on top of the different collage papers
looks really yummy to me. With that said, keep in mind, it's a handy practice to photograph your artwork
at different stages. In that way, you could print out your own collage papers before
painting this background, glazing layer, and you
could use your printouts or digital photographs again
in other art projects.
7. Outlining the Hearts: Looking at our hearts, they're
starting to stand out from the yellow background layer of paint that was just painted. Let's accent them even more, working to have them be eye catching focal points
of the whole project. Start by choosing
a second color of paint that will show up
on the background color. Still using a medium
sized round brush, I'm now outlining the hearts. I decided to leave a
layer of yellow on the inside of the heart and
then to apply my tal layer. Decide if you want to
use more than one color, but hold off on
using white or black because we'll be doing both
white and black painting, patterning and doodling soon. Consider if you want to paint these accent heart outlines after the background
paint is dry, or while it's still
a little wet to get some color mixing happening for a slightly grungy
or textural look. For sure, if your paints aren't
in the same color family, if you don't want them
to turn muddy or brown, then let the first background
paint dry For example, yellow, blue, and green
are in the same family. So if my teal smears a little
into the yellow background, it will look like a good mix. Yellow, red and orange
also blend nicely together as do blue,
red and purple. Colors next to each other on the color wheel are
called analogous colors. They're compatible friends
and are handy to keep in mind when you might want
paint to mix slightly, but not clash with each other.
8. Cutting Out the Hearts: I a Putting this
beautiful background paper to the side to dry. Let's turn our attention to
the second collage paper. Flip it over to the back
side that's plain white. This is where we'll be tracing
extra hearts to cut out. They'll be glued onto
the main project, also, giving our artwork some
three dimensional qualities. Place your largest
heart template close to a corner and
trace it with a pin. You might feel the
bumpy textures of the collage papers
on the other side, so trace slowly and carefully. Tracing on the white side of the paper makes it
easier to see our lines. Next, place the smaller
templates where they can fit on the paper and
trace as many as you can. Most likely, you won't be using all of these hearts
in your main project, but you're welcome to use any leftover hearts
in the bonus project that I'll share the wall hanging or save them
for other projects. I didn't want to waste any of
this pretty collage paper. I snuggled them up close
to one another and turn the patterns in
different directions and was able to fit in
quite a few hearts. Now use the scissors
that's capable of cutting through those layers of collage
and cut out the hearts. There are two ways
to go about this. You could cut all the curves of the heart while it's attached
to the larger paper, but I find it easier to cut
each heart out individually, not exactly on the lines, and then I have a
smaller paper to work with and I can trim around
the lines of each heart. Got pattern scissors. That might be fun to
try as long as they're strong enough to tackle cutting
through this thick paper. I just have to say that I love cutting on
the blank side of the paper and then flipping over each heart for
the big reveal. It's fun to see how the collage papers end up
being positioned on each one. If you're like me, always
thinking about what else I could do
with art materials and not wanting to waste any. Even the leftover scraps from the negative space around
the hearts look pretty. I think I'm going to save
some of the larger scraps for some other future
unknown projects as well.
9. Outlining with White: She We'll now outline the hearts in white after
the project has dried. Saving white paint
for the end of the painting portion
of a project is really fun because it accents your painting in ways
that are really striking. White makes these heart
shapes stand out and pop looking more complete
than they did before. I'm using white
Gesso because I like how the consistency is
thinner and smoother, more watery than a
regular acrylic, but any white paint is fine. I'm switching to the
finer tipped round brush, and I suppose I should say
something about the way I use paint directly from
the bottle to gasp. I don't use a palette
all that often. Same thing as dipping
my fingers in the glue. Now I'm dipping my paint
brush in the paint bottle. Some people might be
horrified and worried about contamination of
colors and rightly so. But here's an example of, Hey, it's okay to use techniques
that feel natural to you, but it's not necessary to copy my exact way
of doing things. I also want to point out that the heart in the lower
right is turning out slightly warped or
wonky because of how it's overlapping
the one next to it. No worries if your hearts
get a little misshapen. I touch mine up a bit and
thicken one side a bit. But when the paper is
filled with all the goodies and details that
are in store next, some minor wobbliness
won't matter.
10. Black Marker Doodles: Before I get in right
into the drawing of black lines and
patterns in this lesson, I think it's a good time to reflect on the project
and where it's going. Here's the background
paper with its hearts, and then we have more
little hearts cut out. The cut of hearts
will be eventually glued in different positions
around the project, sometimes with hearts
overlapping one another. You don't have to plan
this out right now, but I wanted to give you a
visual of where we're headed. What we'll be doing
now is drawing some black lines and
patterns around the hearts, the borders, on the
background paper, as well as on the little cut out hearts
like framing them. The next step in our
art making process is accenting our hearts
with black paint markers. I'm going to practice
on a paper here. You may practice
on your own with some doodles or you can go
right onto your project. Anytime you use a paint marker, make sure you shake it
first to prime that paint, get it nice and flowing, and consider some patterns either on top of your hearts
or around your hearts. There's lines, double lines, dashed lines, dotted lines. What kind of patterns
can you come up with for outlining or accenting around
the edges of your hearts? Consider different
sizes of markers. Come up with some eye
catching bold patterns for the framing of your hearts, but leave the center
of the hearts open for some writing that we'll
be doing later on? When you're drawing on
top of collage itself, just be conscious that your different papers
will create bumps for you and different papers
take the marker differently, whether they have a smooth
surface or a glossy surface. Go nice and slowly. Find some interesting ways to accent the borders
of your hearts. Add your own linear
graphic style here by drawing the borders
with a paint marker. Have some fun doodling
in this step. And in the next step, I'll
share what I came up with for my outlining and
doodling on my hearts.
11. White Paint Doodles: What kinds of black
paint marker patterns and doodles did
you come up with? In this lesson, we'll
be following up the black doodles with
some white accents. I'm deciding to place a cut out heart right
over my large heart, and I'm planning where a couple smaller hearts will be glued on. One slightly off the left side of the paper and
another covering up part of that
wobbly or wonky heart that I mentioned before. I also lined up three hearts at the bottom outside of the
paper because I'm pondering, hanging them off, dangling
outside of the page. I'm attempting to add
some white gel pen dots, but my pen is running out. I end up dipping the back
end of a paint brush into white Gesso and stamping on
white dots that way instead. Include this in the video because I think
it's helpful to see an example of when one thing doesn't quite work,
try something else. I'm now going to be painting more white dots and lines as highlights
throughout the piece. I'm really curious
about how you're making your project unique and adding your own flavor
and style to it. If you ever feel
like replicating a tutorial exactly like
an instructor's example, try doing at least a few
changes of your own, whether that's using
different colors, shapes, materials, design
choices or techniques. If I create something
that looks really similar to someone else's tutorial
that I'm watching, I also like to rewatch it
again and make even more of my own stylistic choices the second time around by
doing a second project, just some food for thought. Now, I'll put on a 1 minute
musical interlude while I'm finishing up some white
accents and highlights. See you in the next lesson. She
12. Gluing the Hearts: Wow, the time has come to glue the hearts onto
the background paper. I decide not to string those three little hearts
off the bottom of the page. I do, however, want to raise up some of the hearts
up off the paper. So I'm going to use a piece
of cardboard to do just that. You could glue your
hearts directly down onto the paper or use cardboard
or other thick paper, like I'm doing, that's cut
into small rectangles. I'm putting glue on the
back of those rectangles, and I'm going to put three on the back of the
main large heart. One on each side of
the top of the heart, and one in the center
on the bottom. Then with an extra dollop
of glue onto the cardboard. The heart is glued onto
the background paper. Smaller hearts need
just one rectangle of cardboard on
the back of them. I used a liberal amount of glue, so I give them one sturdy push and then let them
set into place. Notice how that last one I push, I tuck right underneath the larger heart and it
nestles right in there. Let's look and see how that cardboard trick lifts the hearts up like
they're levitating, just floating above
the background. Can you see that space in between the heart and
the paper? There it is. After that, decide if
you'd like some of the cut out hearts also glued down flat onto
the background. I'm doing a few hearts
like that to add some more dimensions to add some more texture
to the project. I'm getting excited to meet
you in the next lesson where we'll talk about brainstorming
your intentions, goals, and sentiments, the words that we'll
write on the hearts. The main meaning behind the
project. I'll see you there.
13. Personalized Intention Setting: Congratulations on making
it this far in the course. We are ready to create our
personalized intentions. The main heart of the matter. Before putting them on
the actual project, I would like to do
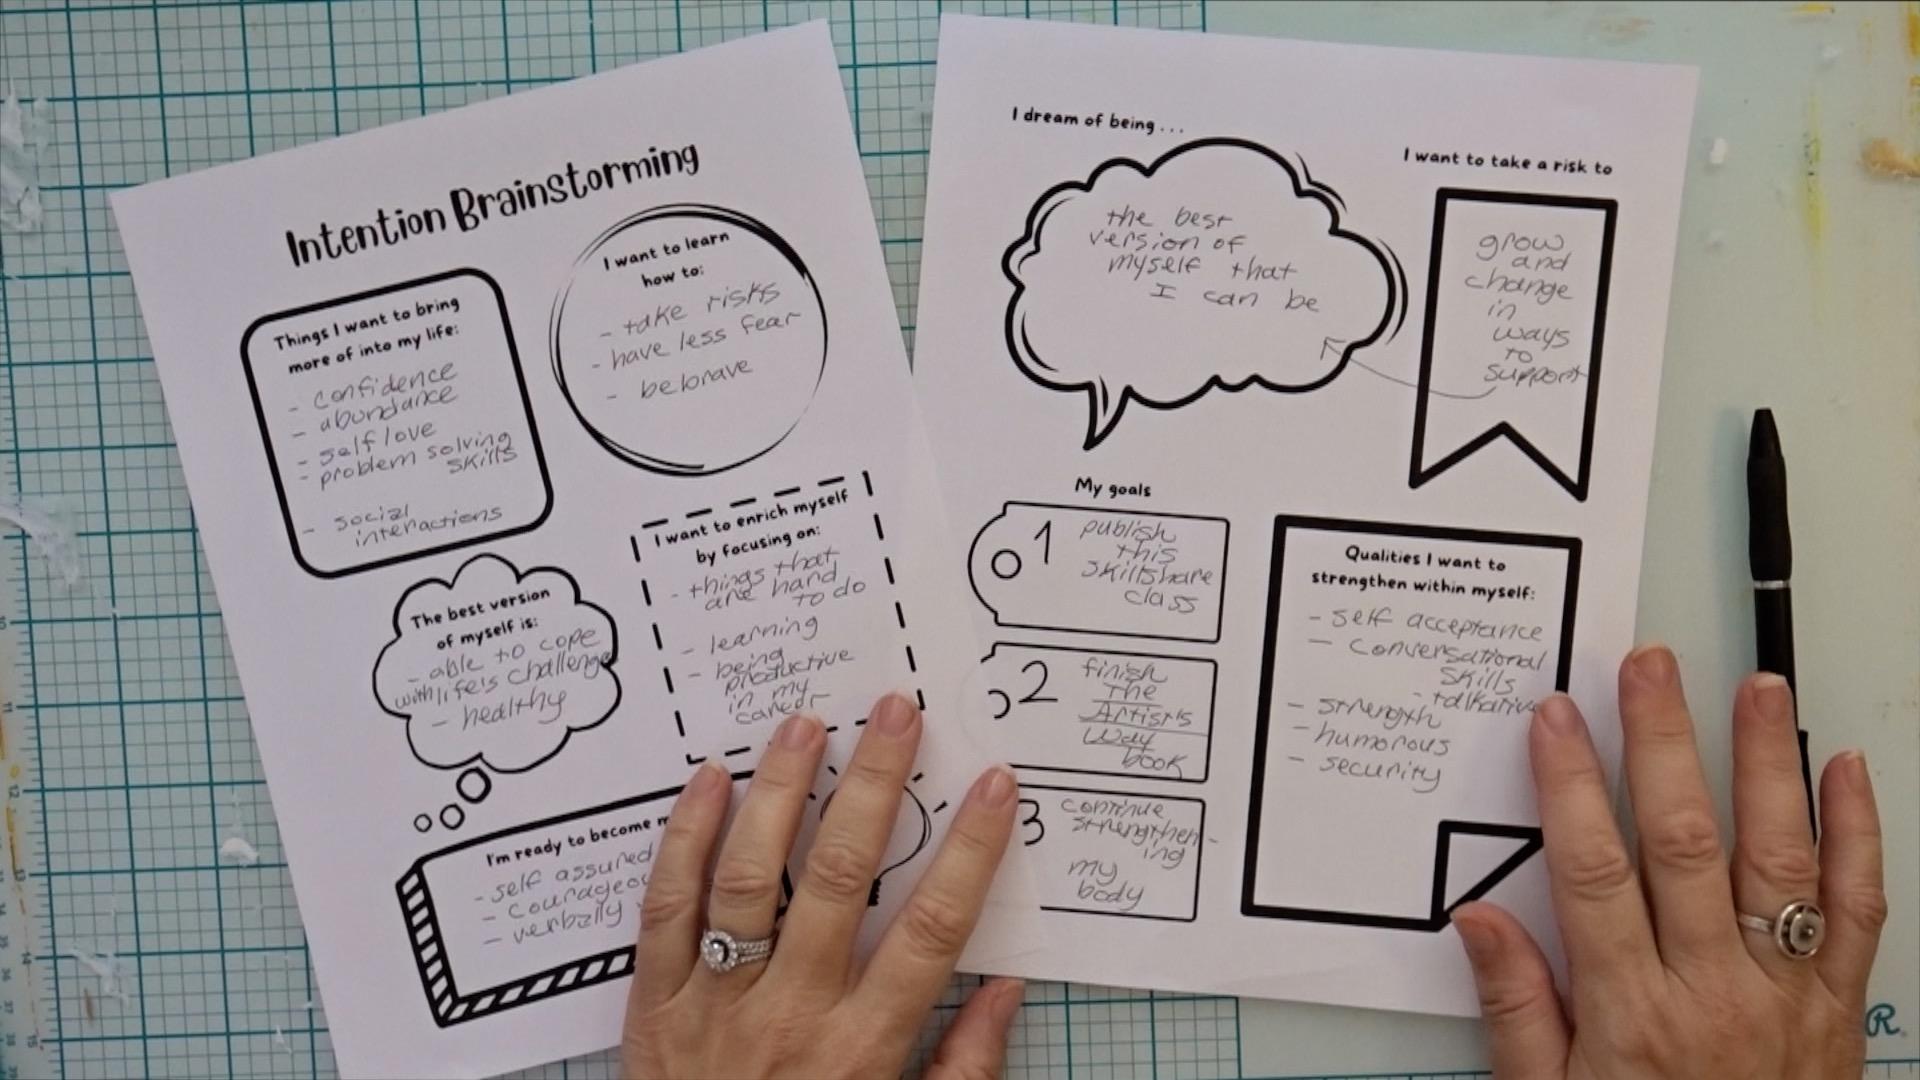
some brainstorming and introduce you to this
packet of goodies, these handouts that I
have created for you. First of all, were
the heart templates. I hope you found them if
you needed them earlier. I had put a little
note about them. There's various sizes. Next, where we are right now in the project is brainstorming
our intentions. This is where the
self growth happens. This is the invitation to learn about yourself
and grow as a person. What do we want this
project to be about? What do you want to
get out of all this? What's the why of why
we're doing this? What's the deeper
meaning for you? Think about the prompts on here, and then just free form journal, your thoughts, your
answers to them. For example, things I want to
bring more of into my life. I would like to bring more
confidence and abundance. Now, you might want to write
actual physical things. Maybe you're looking
for something specific as far as a job, an object, a person,
a concrete things. But for me, I'm going deeper
than that and going to the abstract quality is the
essence of things, self love. I would love to bring more
self love into my life. Go ahead and just continue
with this handout. The other prompts are, I want to learn how to. What is it you'd like to do? I'd like to learn how
to take more risks, and so I'll jet that down. Moving along the best
version of myself is, Wow, if you in your optimal state,
what would you be like? I would be able to cope with life's challenges,
and I'd be healthy. I want to enrich
myself by focusing on, and I'm ready to
become more what? The second page of
the handout is, I dream of being. Wow. What could you dream
yourself into being? I want to take a
risk to do what? Maybe you do have
concrete goals, and I did put numbers
one, two and three. Maybe they're sequential. Maybe they're separate things, specific goals that you would
like to have in your life. Qualities you want to
strengthen in yourself. There's all qualities
that we have already. It's not like you
have to come up with entirely new qualities or
things to bring into your life. Maybe you just
want to strengthen what's already there and
bring it out some more. There's the handout
with the prompts. This is what the one looks like with no prompts written on. Spend some time brainstorming
your personal intentions, and in the next lesson, I'll intro you to some
optional extra handouts in case you'd like to take the
writing step even further. I also have a list of 52
positive personal qualities that I uploaded into the files that can help you with
these writings as well. More about that in
the next lesson.
14. Optional Additional Handouts: She. In the last lesson, we wrote our intention
brainstorming handouts. In this lesson, I'd like
to introduce you to some optional
additional handouts to support your writing and
self growth journey. Perhaps you want to take
this a step further. I like to cover my
bases and give you options for your self
growth processing. So maybe you want to take
those affirmation or take those intentions and actually write them into affirmations. For example, my intention was confidence Iterate that
into an affirmation, I could start with a
sentence starter I am. I am confident and brave. No I want to be, or I'm going to be or
I'm working towards, but say it in the present tense. I am confident and
brave or whatever the intention is that you want to turn into
an affirmation. Affirmation is a
complete standstans, and a sentence that is
showing you possessing, having already those intentions that you were
brainstorming about. This is an extra
piece of the packet. Optional if you want
to take the project in this direction and this way. I also gave you some options for journaling. I
love journaling. Maybe it's hard for you to
come up with the intentions right away or know what you want to write on
your art project. Maybe you like to write
entire paragraphs. Maybe you want to
write a poem on here. Maybe you want to write lists. There's lined paper and lined paper for
intention journaling, and then also
affirmation journaling. Maybe you'd like to
just make a list of, I am confident and brave. I am healthy. I find productive ways to
cope with life's challenges. I am expressive. Then the last handout
that I have for you is 52 examples of
personal qualities. If you are challenged
with coming up with ideas that you
want to write on these brainstormings,
here's a bunch of them. Or since there's 52 of them, you could even plan to journal one about these every
week of the year. Journal about being
adventurous or appreciative, or assertive or authentic, perceptive, reflective,
supportive. I brainstormed a bunch of personal qualities on here that I wanted to share with you. For this step of our project, it is not on the artwork itself, but it is taking a little
break from the art project, and brainstorming
the words, phrases, intentions, goals, things that you're going to want
to in the next step, write onto the artwork. So have some fun, play, do a little self discovery
and see what you come up with for your
personal intention setting.
15. Writing the Intentions: Now that we've done all of the valuable brainstorming of our dreams goals and intentions, let's solidify these
chosen words by writing them onto the hearts
in our vibrant artwork. In this way, we're cementing our intentions as we write them down like a stamp of approval. The written words provide insight into our own
hearts and our feelings. And when we see them
on the artwork, they're a call to action, directing us towards our own personal
development, so powerful. I chose to use a fine
tipped black marker. You might want to
use a large, bold, broad tipped marker
or to write in different lettering
styles or colors, or even to use rubber
stamped letters. It's also your choice if your
words are legible or not. Maybe you'd like
to write all over the background in
entire paragraphs. If your project is filled
with an explosion of colors already and you can't
clearly see your writing. It's always an option
to print words out from the computer or to handwrite them on a
separate piece of paper, perhaps a white one, and
then cut them out and glue them into this already
abundant collage. Decide how you
would like to write your intentions
onto the project. Choose from the words, phrases or sentences that you planned out in
the previous lesson. I chose one or more intentions
to be held in each heart, and when finished, I paused to consider adding even more
hearts to the project. Do you have extra
hearts that you might want to work
into your own piece? Watch the next lesson to find
out what I decide to do, and how to add some
finishing touches to this almost complete
dynamic creation.
16. Finishing Details: Yes, Let's finish our project. This lesson is
where you look over your artwork and ask yourself,
what else is needed? Is there an empty
space somewhere? Does something look incomplete? Is there any way
to pop in more of your own unique style
or extra materials? I'm still playing
with my extra hearts. I had us create lots of hearts, so we would have choices. Now what to do with them. As I mentioned previously, you could hang some
with ribbon or yarn off the bottom
of your project. More could be added to
the project paper itself, including extending
some off the edges of the paper or overlapping the hearts that are
already in place. Excess hearts could be
saved for future projects, used as bookmarks or
gift tags or tucked in side of a card for a special
occasion handmade gift. I decide to complete
three more small hearts. With the same techniques
we've already used. Written intentions, painted
borders, Marker Doodles. You decide if your project
is complete already, and there's nothing more
for you to do in this step, or if you'd like to
work on more hearts, or more writing, painting, doodling, or something
else entirely like a sprinkle of glitter or something else
that you dream up. Spoiler alert. If your project is finished, that you still want to create
another bonus project. In the next lesson, I'll demonstrate how to
create the bonus wall hanging that I shared at the
beginning of this course. Well, I guess it's not a spoiler since I already
told you about it. But it's more like a
celebration of yea, we're there and have almost made it to the end of
the main project already. I'm going to find room for these three little
hearts that I've been tending to on
the project itself. I'll utilize the
additional hearts on the right side of my workspace for the bonus wall hanging. I'm looking forward to seeing photos of your class projects uploaded into the class gallery
and celebrating your cat, expressions,
intentions with you. I feel our connectedness
and support of one another by having
the gallery as a safe, comforting, positive and
uplifting space for all. Now let's find out about that bonus lesson that I promised, and then one short
concluding lesson after that to wrap everything up and remind us what we
learned in this course.
17. Bonus Project: Wallhanging: Bonus time, extra
innings, overtime. Who likes a good free
bonus gift? I know I do. This lesson makes use of any extra heart pieces that you have or that you
might want to create. We'll assemble
them together into a cute wall hanging,
short and sweet, and very eye catching and inspirational to
decorate your home, work space, wherever, or
to give is a unique gift. Decorate the hearts
as before with their background collage papers, painted borders,
and marker doodles. This time, I also used my
yellow background paint to paint in the background
of a heart as well. This ties in nicely with
the main project and could be displayed in tandem with
the main project on a wall. After writing your special
intention phrases, I had a fun time coming up with new inspirational goals for
different areas of my life. After doing that, grab
any kind of a fiber, such as yarn, ribbon, cord, string, lace, or twine. Heavy duty glue, such
as gorilla glue, e 6,000 or tacky will
also be helpful. Make the loop at the top
of the wall hanging first. Punch a hole with a hole punch in the top center
of the first heart. This is where you can hang it on a nail or a tack or whatever. Fold the fiber in half
and insert it into the hole from the front of
the heart through the back. Then pull those loose
tails through the loop. Adjust as needed for a good fit. Hold both tails together
at the top and tie a knot. I end up having to trim the frayed end off
from mine also. This loop gives us a way to hang your wall hanging up
once it's finished. There we go. Arrange your hearts with the spacing that you
want between them and measure out one long piece
of your chosen fiber that's long enough to attach your whole project
strung together. Or you could even use
a different type of fiber or trim between
each heart also. Next, cut a rectangular piece of cardstock that's large enough
to be glued over the fiber. It's like you're making
your own piece of tape only with cardstock
and strong glue on it. Depending upon the type
of fiber that you have, a thinner piece of
paper might do as well. I opted for the
cardstock also to give it a little weight while
it's hanging on the wall. Press the little rectangle
over your fiber and hold it there for a moment to really secure that
fiber into place. If any of your hearts are small, you might need to
snip the corners from your card stock rectangle
so that it'll fit onto the back of the heart and not show from
the front side. Repeat this process
for each heart, joining them together
into a string of hearts. I love the movement
of this piece. When the wall hanging
is on display. This wall hanging is
a nice compliment to our main project, and I hope you enjoy
this bonus lesson in this little extra gift to
finish off our time together. Or perhaps this inspires you to create something
else altogether, like an entire mobile. So fun. I'm looking forward to seeing what bonus ideas you create. Pop a photo into the class
gallery of Any Bonus projects, as well as your main
project, and let's share. So fun to share
this extension with you and thanks for
joining me in overtime. Extra innings of our
mixed media hearts with intentions written on them.
18. Conclusion: She. Thank you so much for spending creative
time with me today. As we made mixed media, collage, and paint hearts and wrote positive intentions on them of things that we want
to bring in our lives. It's kind of like we cemented our goals as we wrote
the words on the paper, sealing the deal as to what we want to be
bringing into our lives. Be sure to hang your project up somewhere where you can see it often and absorb all
that creative energy. Also upload it to
the project gallery. I would love to see it, and I'm sure others would, too. Thank you for following
me here in Skillshare. I'm Kathleen Ela Johnson, and you can find me on
YouTube and elsewhere, social media at Creative
Solace Studios. One takeaway from
this class is to remember to connect art and the creative process with personal growth and
positive mental health. Also, remember to
be an art explorer.
 Kathleen Arola-Johnson, Creative Solace Studios