Transcripts
1. Introduction: Hello and welcome to my
new Skillshare class, where we will be creating cosmic junk channel and
we will also create a first page and Ed
and I invite you to be open and try this out. I find that there are
some very common fears or struggles that every
person that has creative, every artist knows. Common fears like the
fear of the blank page. Don't knowing where
to get started. The fear of wasting
art supplies, the fear of messing up a really precious and
pretty journal, e.g. or feeling stuck in the creative process and
wanting to try something new, but not knowing really
where to go with it. Or maybe you just want to try something new and experienced the bed and do something that
you have never done before, then this class really
might be for you. I have this process. It's a mixed media art
journaling process. It's called cosmic
smash booking. And for me, this has
been the answer to most or all of these fears and struggles that
I mentioned before. If you don't yet know me, my name is Christina Kim. I'm a mixed media artist. I'm super passionate
about art journaling. And I'm also a cosmic
smash booking guide. So what is cosmic smash bookings sounds really fun
and a bit exotic. It's basically mixed media
art journaling and it merges intentional
creativity with this mixed media art journaling. The woman who developed
this process, her name is Cat Z, and I learned from her how to dive into this method and
how to bring it to you. So when I found this mixed
media art journaling process, I was in a place where I was
making are pretty regularly. I mostly did watercolors and
it was fun and I liked it. But it wasn't really deep, it wasn't super fulfilling. I found this process of cosmic smash walking
through an online retreat. It opened the door to mixed
media art journaling. All things that I had
not tried before gave me so much creative
freedom and totally changed my own approach
to making art, to seeing my art. And also the meaning
it helps for me, is much deeper than the things
that I had done before. So for me, this process really
is form of self-care and also a form of self-discovery,
of exploration, creative, and also personally, it helps you to get out of your head and to really get into
your heart and get access to with them that
you have within you. But that is not easily
accessible with our thinking brain that is
worrying, overthinking. And sometimes it's just a
matter of relaxing your bed, doing something for
yourself and it can shift your your way of viewing. So I invite you to try
them out together with me. In this class, we
will be creating junk journal and we
will set an intention, john, and create around that. And I will also show
you as a bonus lesson how to start creating
any new journal. The sounds interesting to you. I invite you to join
me for the next video, where I will give
you an overview of the class project
that we will be making. Then I show you the supplies, most things you might have
at your house already. Then we start with the process and I hope
you will enjoy it. I'm super excited
to bring this to you and I'm sending
you much luck. See you in the next video.
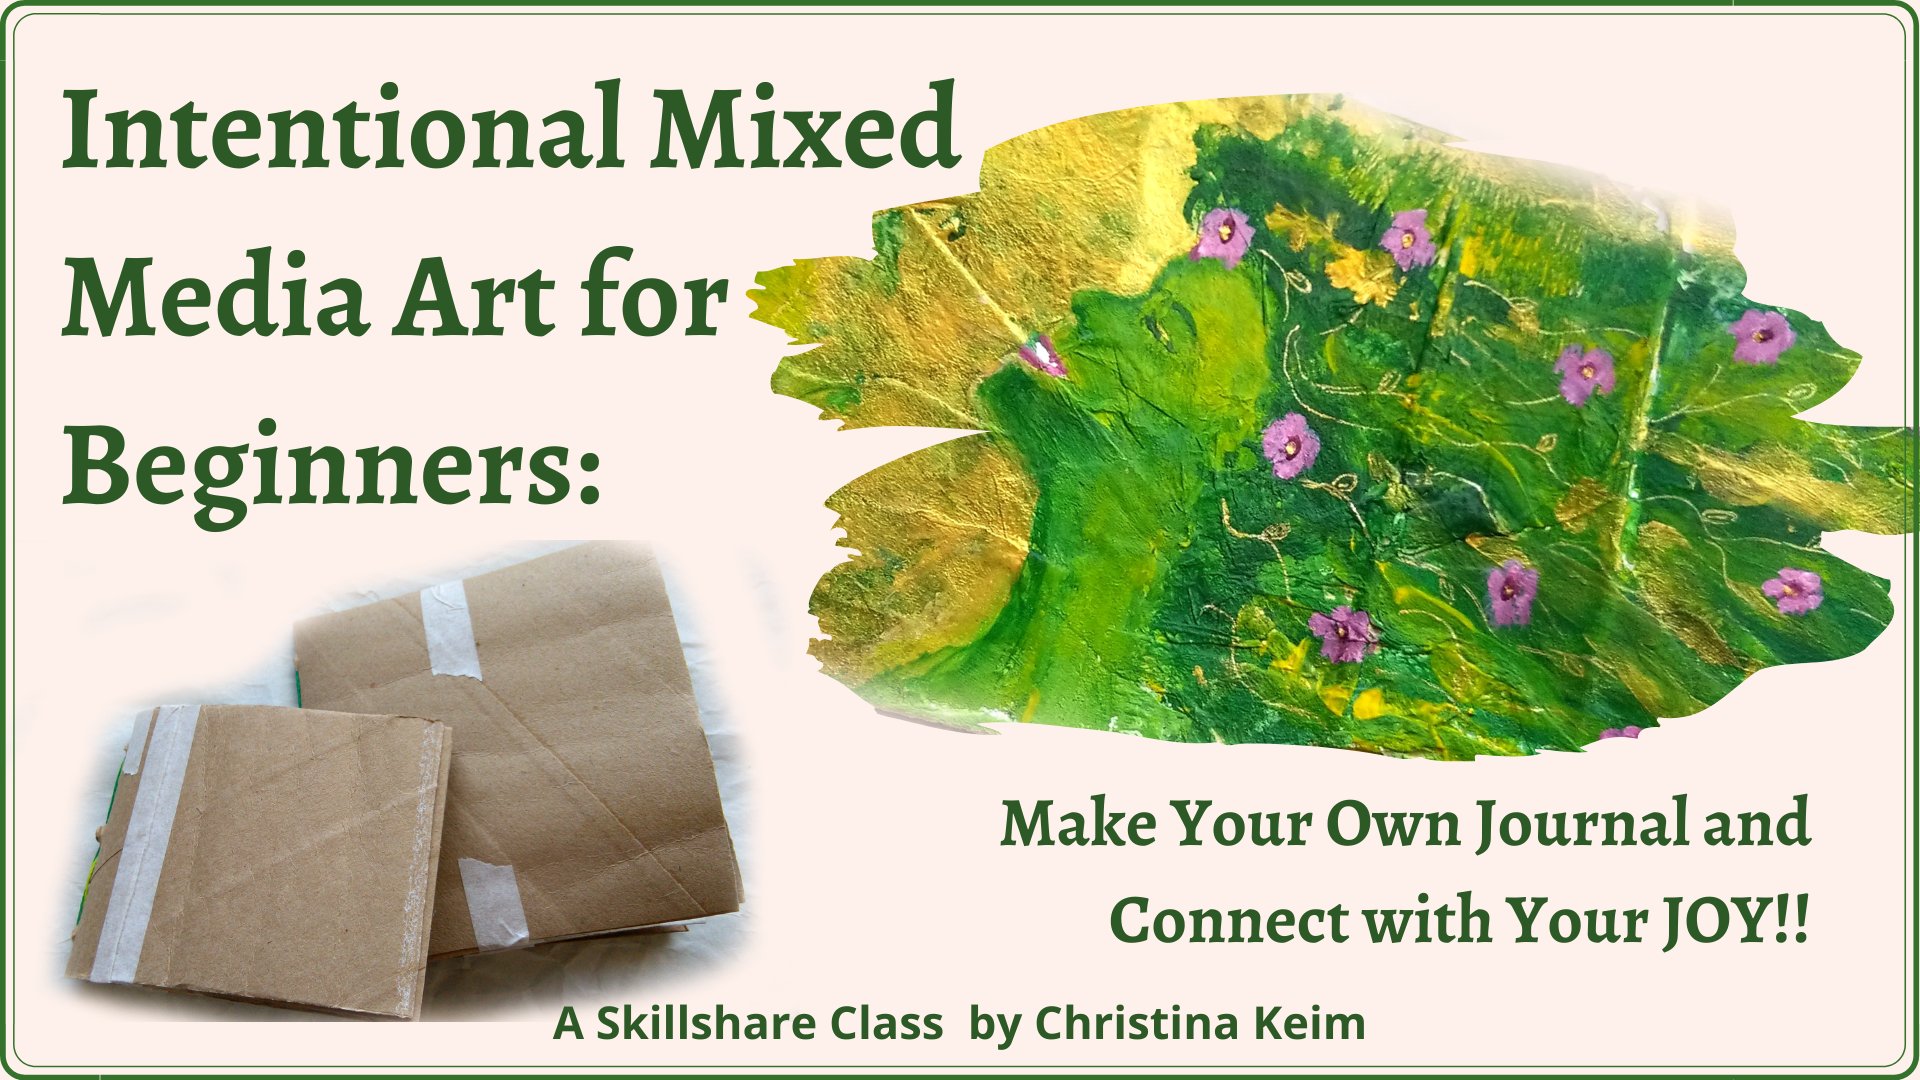
2. Your Class Project: The class project for this
class is obviously for you to create a junk
journal like this one. You can follow me step-by-step as we do the cupboard
declarations. Looks like this and this case. Then we bind a journal from our different papers that has this super nice,
imperfect look. And as a bonus lesson, I invite you to create a first
page and your new journal. Mine looks like this. You can see there's
just a bunch of color and marks
all over the page. And this was a super
valuable tool that you can always use when you feel
upset, when you're angry, when you have negative
emotions and want to let them out of your body, shift your thinking
and your emotions, and let them rest on the page. So another thing I want to say about the
cupboard decoration, mine got pretty long and complicated in a way
that I use many layers to paint this portrait. You can follow along, but you don't have to. So what I want to do is to show you some other covers
that I have created to give you some more ideas that are less complicated
and take less time. You can obviously,
as you can see here, just put color and
collage elements and some as hammock
writing on your cover. I have another junk journal
that's already completed. Also has a portrait, but it also has
some loose flowers. So you can decorate it
in any way that you want to bring all the
elements that you like. Then I have another
similar journal, a bit smaller, that has
stencils and some stamps. It's just also collage
color and these stem cells. Then I have my common cosmic
smash books that I use. These are made from
journals and notebooks. But I show you the covers. This one, e.g. is the one
that I currently use. It also has stencils, lot of color and collage
elements with some writing. And it has the addition of these textile
threads and ribbons. I often braid them together. So I don't know why, but for my junk channels, I don't feel like putting
these on, but if you want to, you can just take some ribbons, wool fabric threads and decorate your
journal in this way. And I also have a
smaller one like this is also from a notebook, journal and it has some all attached and some loose threads. Sometimes I have put bells
and here are little trinkets. They float around. And this one has also
some collage elements, some shapes that came
out of my coloring, some more collage elements. So you see you have really a lot of options to
decorate your cover. And you can make
it as simple or as complicated as you'll
feel like, or one to two.
3. Gather Your Supplies: Let's take a look
at the supplies that I have collected
for my junk, Jonah, and that you would need when you want to make
one of your own. The first thing you will need is something to make a cover. I have this corrugated cardboard
that came in delivery. It's big enough to
fit in a lot of papers and it will
be closed this way. E.g. one ideal thing that you could have
are these Amazon may last way where books that you
might I purchased come in. You can take out the inlay
that protects the books. Then you have an
awesome cover for your cosmic junk journal. Then you need a lot
of different papers. I will talk more about how to prepare the papers
in a later video, but I will show you briefly
what I have collected. So here are some
of my other papers that I use to protect
my workspace. Then there's also some newspaper was a lot of color on them. I have a bag from food
purchase, wrapping paper. These are also some
wrapping papers. This is a paper from a bakery. Then I want to try
something new. I have some envelopes. If I want to include
these and see if these pockets are nice
to store stuff into. These are some pages
from a design magazine. Some old paintings,
watercolor paintings of mine. For the moment, I left
these borders here. And maybe if I like how
they look in the journal, I will leave them like that. Here are some papers
that my kids colored, painted on a just have tons and tons of these
and I keep them in piles. And then when I make Jonas, I always include some of those. Some maps that come
with paper for school. These are some of the
things my daughter made. Here's a trial and swatch
paper from some art I made. Then I have some brown paper and I have some card stock with different patterns
printed on it. Yeah, that's what I have
collected for my journal. And you'll see you can just go around your house and select papers that you would
otherwise thrown to the trash. And so you can repurpose
these for your junk journals. I don't know if I will
use all of these. My journal will have two
signatures of 12 papers. So I get 48 pages in
the end in my journal. And I will just
select from this. Then for the cover decoration, I will surely use some just saw. This is white just saw. And acrylic paints. I have acrylic paints
that come in these jars. And I also have some of
these that are very cheap. And really it's not a question
of super fancy materials. Just grab what you
have at your home and you can make a
beautiful cover with that. I may also include some watercolors and some crayons. These are water soluble. These are some I
like to use a lot, and I often include them together with these
other materials. If you have and you
want to use them, you can also use markers, colored pencil, oil pastels, watch pestilence,
whatever you have, and if you have magazines. You can look for images
that speak to you later. Once we set our intention
for the journal, then you can look for
images that speak to you or use other collage papers
to include on your cover. Then obviously you
need some water, some brushes, maybe
a palette knife. If you want to glue on
images, you need some glue. And we will also do a
little bit of journaling. So some writing utensil might be useful when it comes to preparing the paper
for your journal. You might need a ruler. You might need scissors. You might also need some glue. Any glue will do. Once you prepare your papers, you can use some of these clips to hold the
signatures together. They are really handy
but not super necessary. This is not super
meticulous work. It's more like eyeball
everything and make it come together as
it wants to come together, then you need something
to punch holes. If you are familiar
with bookbinding, you will probably have
an all and bone folder. So these are obviously
very helpful tools. I have nice tool to punch holes. And as a bone folder, I usually use this
part of my scissors. And for the binding, I have this big
needle that I use. And I buy my journals
with waxed thread. I just grab these three colors. Maybe I will use
them or some others. So I use usually two of these
threads for my binding. Once this is done, I want something to
close my journal and I usually use a little bit of this velcro fastener that
I have and I just kept it a little bit and I
stick it on the journal cover with super fast
blue that I have. This one is one that's
been sold to glue shoes. So it's super strong. And I use it for
this purpose to glue the virtual fastener
to my journal cover so I can close it
and to keep it shut. That being said, just
look around at your home, see what you have, see what you would like to use. You can also put fabric all
over your cover or get really creative and use something else that you find at your home. This is really a process
that should make you happy. You should enjoy
the ideas to create a journal that is
precious to you, but not in the way
of being expensive. And it's not necessary to
buy any fancy stuff for it. So I would say, let's
dive in and set our intentions for this
cosmic junk journal that we're about to create.
4. Get Present & Set Your Intention: Now that you know
what it looks like, what people be creating and
also the supplies you need. I invite you to join me for a brief breathing exercise and a short meditation in order
to get really present, to settle into this moment and opening the door for
these creative process. I also invite you, if you have, you
can light a candle. I have a standard candle
here to set up the space. It smells nice. And then I want to just
invite you to close your eyes for a moment and take some
deep breaths together with me. I just invite you to
settle into your chair. You're sitting, you can wheel around a bit to get comfortable. And I invite you to just
feel for a moment how the air is passing in
and out of your body. I invite you to think
about everything that came before this moment where
you started to take off, everything that wants
to occupy your mind. I invite you to take
a deep breath in. Hold it for a moment. When you breathe out, let it go. Now I invite you to
think for a moment, everything that lies ahead in your day that
you still have to do to pull you out of this
moment and to the future? Take a deep breath in for a moment and let it go. And with third deep breath, I invite you to really get into this moment right
here, right now. Breathing in for a moment
and letting it go. Now that we settled
into this moment, established a
connection ourselves. What's I want to invite
you to imagine or thinking about why it is that
you want to create. What is something that I want to have more off in my
life that I want you to create more about
why it is that you feel you need or
that is missing in your life that you
want to get to, that you want to uncover. Just keep breathing and pay attention to some ideas
that might pop up. This might be a word
being or feeling. E.g. I want to invite more
creativity into my life. I want to invite more
connections in my life. I want to invite new ways of expressing myself into my life. I want to explore. Pay attention what
comes up for you? Word, phrase, quote. Then I want to invite you to pay attention again
to your breathing. How the air is parsing
in and out of your body. And then gently
start moving a bit. Your fingers, your toes, your shoulder is feeling how you are coming back into your body. And when you're ready, I invite you to open your
eyes and we're back again. And now is the moment
to start creating our journal with the intention that we have been discovering. And if there hasn't been anything that came
up, don't worry. You can just take a moment. Now when you start
creating your cover to riot or journal
about this question, what do I want to bring
more of into my life? And then go with
whatever comes up, a word, a phrase, as I said, and go with what
comes out first. Because generally,
that is the way of our subconscious or our
inner wisdom to show up, go with the first idea
that pops up in your head. So now that we have
everything together, we can come to the fun
part of starting to decorate our cover
and make our journal. See you in the next video.
5. Cover Decoration: Create a Background: After the brief
meditation we just did, I will decorate
first the cover of my journey because
I find it easier to handle it this way
when I can spread out the whole cover without the
signatures already attached. If you want to leave
that step for later, you can also bind the journal first and then
decorate the cover, but I just find it easier
to handle it this way. So this is the part that will be in front and the
back of the geode. And it will close
with this, like this. So I will keep that in mind, that this would be my front,
this will be my back. Just if I choose to
include images later. For the moment, I will start
with a bit of writing with some words and things that
came up in the meditation. And what came up for me that
this journal wants to be about stepping into new territory. File. Come Marie,
about new worlds. So I'm just writing all over my camera things that came
up in the meditation, what this journal
wants to be about. I will cover this up, but this way it gets infused with the intention
that I'm setting. You can write as much or
as little as you want. You can also grab a
pencil or a marker or a ballpoint pen and
write all over this. Just as you feel like writing journal as much or
as little as you want you. If nothing comes
up for the moment, you can just go
to the next step. I will grab another color. That is what we call the prayer. It's not a religious thing. It's just the invitation to open up to the wisdom
that this journal, the pages that you create one
to share and the prayer is just something like,
please show me, guide me, teach me, Hold me, support me. Thinks that coming up for me. Now, I will just start to
put color on my cover. I just feel like
scribbling a bit. These are water-soluble crayons. So when I laid target to the other steps,
these will activate. The college will mix with
whatever I put on top. And I think for my next step, I will just grab some of my collage materials and glue some piece of stone in order to
create some texts trip. So these first steps
are just to get into the flow to start doing
something without overthinking. So these are just some
things that I grabbed from my collage Order. Draw grips. So blue mixed with
a bit of water. Just start to decorate my cover. With these random bits
and pieces of paper, you can see I've
covered almost all of my surface of the cupboard. Different papers. And especially these
tissue papers are like transparent or semi-transparent
and they crumble soapy, make a beautiful texture. Now I will put on a
code of just saw white just so to cover this up a bit and also to
prepare a surface where I can easily paint on because the JSR has
a certain grip. So later the colors stick
better to the surface. So I just grabbed my
palette knife and hover so far with my chest. So I'm just applying a thin layer. So part of what I did so far
keeps being visible that, and that's the beauty of mixed media and
working in layers. Because everything you do there keeps being
visible parking. But you can always
change and you can always cover up things
that you don't like. But still everything you do. Gifts. The piece that
you're working on, texture and body and presence
has its own purpose. And before I let this dry, I will also include some
colors that I grabbed from my drawer for my
acrylic color a drawer. Just something that I felt
like using in this moment. And that also reminds me stepping out into the
world, into new territory. Let's say just something
that I wanted to use this moment and this
is how you do that. You just grab what do you
feel like in the moment and use that and see what happens
and where it leads you. With the understanding that
if you don't like something, you can always cover
it up or change it. Put some colossal talk. Being, just being curious, what happens if I do this? What happens if I do that? I really feel like
doing X, Y, or Z. So just try it. You can always come back with white or black and paint all
over it. And start again. I'm feeling quite happy
with these first layers. I will let this sit to dry and come back
later and see where else I will go with this new
territory journal cover.
6. Cover Decoration: Create a Foreground: The next thing I feel
like doing with, or for my cover declaration
is leaf through some magazines to
see what images there might come up or words
that I feel fit my theme of new territories and stepping out into the unknown,
things like that. So I just grabbed
some magazines. And I will see what
catches my attention. I'm not really looking through
these like page by page. I'm just leafing
through and see if there's anything that I might
want to have on my cover. And then later I will see
when I arranged them, which one will get on the cover and which
one I might use later. Okay, let's see what I've found. I found an open door. I don't know if this really matches what the
intention of my journals, so I will see the storm. I'm only going to
play a bit with these images to see There's
a composition that I like. Which one I will include. I found this one, have fun. Not forget to have fun. While stepping into
new territory. I found this girl stepping up. I really, really like this image of a woman
carrying the moon, but I'm not sure if it
fits what I want to say. So maybe I will
leave it for later. This one, a very intense life. I do like this one because I feel like this new territories and stepping out of my comfort zone is not really about traveling somewhere
and going somewhere. It's more like an
internal journey, like being journey of
getting out of my head. So maybe this fits really well in there with
the bird flying out. I just thought maybe it would
be fun to take this one and draw a face here. So she would be hopping
over the head of someone. Like it would be also
like getting out of getting out of
the head and Jump, jump into the heart
and into the feeling. Intuition and things like that. I like this idea. So I would have this
lady hopping over someone's head that I
could draw or paint. That would be fun. Have fun. Yeah, the space
they have fun would stay. So let me see. So this would be the cover. So if I drew. Nice here that would
fit and it would not be below this this part that
would overlap here, the cup. Yes. I think that's
where I will go. Was a bit hesitant
to include a face. But I feel this would be
the way to go and later I will see what else I
may include from these. Maybe this one can
go on the back. Something like this. I really like the open door, but I think it's not, it does not fit here. And we'll see about the
adventure and the intense life. And if not, I would maybe
include something I wrote on a page a year ago, make the unknown your home. Maybe would be something to go here on the
backside to the face. That feels good to me. So here you can see
how I go about it. I have images that
speak to me and then I tried to arrange them and see what pops up in my head. I don't overthink that. I just go with what feels
right in the moment. As for the haze, I grew up, my water-soluble pencil.
Here's some nice. Just make my lines a
bit more visible by, by using a water brush. To see what I got here
in terms of a phase. When I paint faces, I'm going more and more into a really rough
approach to faces. And I use a lot of layers, so I will speed this up. I'm layering and painting this face so you can
see what I'm doing. But as I said, you can do totally
your old thing. You can take what I'm showing you and go into a totally
different direction. But when I approach faces, I just tried to keep it simple. S4 there. The main features. And then I'm layering on top. As much as I feel necessary. I often will use a
mix of acrylics and water-soluble crayons to include all the different colors. I will take a break here
and then come back later to get out the
details of the face. I had promised
myself to not make a super complicated
by the unknown. You never know
with these things, what comes up and what
wants to be or the covers. So that's the way it goes. This was almost finished. Now I'm just using here some
leftover white paint from my tablet should integrate the collage elements a bit more. For my page. Make the face. And the last thing I
will be doing to finish the cover is cut out
letters and put the words, the quote, make the unknown your home on the backside
of this journal cover, and that would be it. And with this mic covers
finished, as I said, I just put on the court
make the unknown your hole. And then with Posca marker, I scribbled and journaled a bit more about
my intention for this journey and
what it means to me, what I want to explore in it
and what I want to receive. And with this, the
covers finished. In the next video, we are going to
prepare our papers and our signatures and then get to the journal binding.
I hope you had fun. And I see you in the next video.
7. Prepare Your Papers and Signatures: After finishing the cover, I will now prepare my
papers and my signatures. So I take my stack
of papers and we'll select 24 papers and prepare them for two
signatures of 12. And I have my cover
here to see if they are too big or if they are okay. E.g. this brown paper, It's good in height, but I think it is too long here. So what I will do that I take my ruler and I will
just rip off the part. This way. I will also have a nice irregular had torn edge. And what I do is I prepare roughly the same papers
for both of my signatures. Then I will build two
piles. On this side. When you select your papers, the thing you have to take into account that you will have different
thicknesses of papers. So if you have a cardboard e.g. you just need to
get the size right, and then it's good to go home. And if you have newspaper
or printer paper, then it's always good to have some more and to
view them together. And then when you
created in it later, you can basically throw it at whatever you want
and it will hold up to whatever you throw it. Here. I have. So then I have these maps, these are like printer paper. And so I think I
will just go ahead and also glue to
insert together. I have some old practice colors of mine and these are thick. I just fold them. And they are good to go. And the same goes for these. They are the center but taking off to do a mixed
media art on them, this card stock paper, and they think they
should go in there. Okay. Surprisingly, first I have
she was stacks or prepare it. Papers, 12th each. And I still have a pile of paper left
to make more journals. Will now assemble
the signatures. I think it would be fun
to start with this one. So when I opened my journal, I have this combination
to start creating. I do create over
the whole spreads, so I will probably at
one point decorate this inner copper tube and
merge it with this one. Just go ahead and
assemble these papers. And I would just say I will
just keep the order they come in for now and if I wanted
to change something, I will do that later. Yes, I actually want
to change this one. So I won't have the newspaper together with this one
over the same spread. Just separate them a bit. I think I want the envelopes
also somewhere else. Maybe between the top
of the discard stuff. So I will do the
same and my other that would leave me
with this brown paper. And I think I will want
this to be the same size or a bit smaller. Not have the innermost page. Stick out so much. So I will go ahead and make this a bit smaller
and then put them in. Okay. And now I already
have two signatures, so look through them. I like the order in
which the papers come. I think I'm pretty
good with that. Let's look at the other one. No, my full thick lips come in handy to keep these together. And what I will do before I
start binding is I will take my scissors and fold the papers. Like drew it over
the Extrasolar the world for the better. So the crease becomes
more pronounced. If you have a bone folder, me, that would be the
moment you use it. Then I do the same with
the other stack of papers. Once I'm finished with that, we come to the journal
binding proper apart. In the next video.
8. Bind Your Journal: Now that we have our signatures
and I'll cover ready, we come to the journal
binding itself. I have my binding materials prepared and the
first thing I will do is measure and my cover
and punch some holes. The binding technique
that we will use is called three whole
pamphlet stitch. And it's super easy. As the name says, we have three holes
per signature. I will prepare for these
holds on my cover. This one will be my
journal spine and I will measure how long it is. 28 cm, measured in centimeters. If you have a ruler with
interests, just measure. And then the first hole
would be in the middle, which would be at 14 years. I will make a pencil mark. Now I need to because
I have two signatures. So this is 3 cm wide, my spine from here to here. So I will make it really easy, divide in three parts and make my two holes at 1 cm, 2 cm. What I have in my signatures, the shortest paper would
probably be this back here. So I measure this, it's 20 cm long. And I want to make sure that
this also has three holes. Probably if I miss
the measurement, it won't be dramatic. But I would like to go all through the
papers that I have. So that would mean that I can probably go
from on each side, 9 cm for each host. So I will take my ruler again, place it at 9 cm. And I will punch one hole
here and another one at 18. And the same on the other side. Now, I will go ahead with my
punching tool and just punch these holes into my
cardboard spine. Now, I will punch same three
holes into my signatures. Now I will measure again. These are these papers
altogether, arbitrager 27 cm. So this time my whole for
the middle would go at 135. Then from there, I measure
the same distance, 9 cm on either side. And I use this clip to hold
the pages together and I will punch a hole all
through these papers. Then I will do exactly
the same thing with my other signature. Okay, great. Now let's see if these line up. I will use actually two
colors of waxed thread. They match some of the
colors on my cover. So I think I will
just use these two. And I will measure for each
signature a thread that is twice the length of
the spine of my papers. And I will give it
a bit more room. Threat to my big needle. And know the big moment. So I will go first with
my long needle through the hole in the middle of my signature from
the inside out. And I will pull the
thread through. In order to avoid pulling accidentally all thread
through the hole, I have a little
trick that I use. I will use a bit of these, this tape to hold
my thread in place. So now I will bind this signature on the backside
of my journal covers. And I do that by going first. The middle hole also
from the inside out. Now you can, from
the outset end goal, either sue the upper
or the lower hole. And I go first through
the cover only and then through all my papers. Can be a bit tricky because
the paper is smooth. Maybe the holes are
not exactly aligned. So you just have to
wiggle around a bit. Then you can pull your
needle all the way through. Pull your string tight. So now we go all the way inside the journal to the hole on the bottom and put a
needle through this one. Now, you can already feel
that the holes will align. More. Papers are
already hold in place. And once times
through my signature, I feel from the inside out. And then the last step is to go from the outside in again
through the middle hole, through the cover and
cooled through signature. And this time it's
already much easier. Now you're pulling
your thread tight. And take care to have the low threat here in the
middle of these threads. So, you know, just
tie these together. I make a double naught. This is waxed thread. I will copy and off. And later I will, I will take a lighter
and I will burn these. So the wax melts and it
makes it a little bomb, and it holds everything
together so the NADH will not open and your signatures
won't come loose. And here I have my first
signature in place. Now I will do exactly the
same with my other signature. Two times the length off the papers and I
give it a bit more room. Because my needle is long. If the thread is too short, it will be difficult to
get through all the holes. There we have it. Our cosmic junk journal. It looks fabulous, I love it. So what's left to do? And in order to be able
to close my journal, I will put a little bit of the Velcro here.
For the purpose. It will cut a bit short. Strip off my velcro. As far as I learned, you have to take care to
to put them the site with the little hooks on the like down here and the one that will open
as the more fuzzy one. So this would go on the side. See where to put this one will go here. I will use my super glue. If you have a
really strong glue, take care to not get it on
your fingers. If possible. I think it will actually
this down here, it will be perfect together. Put the glue down on top. Let's see if that works. And then close the
Chelmno Christen down and let it dry
for a few minutes. Delete this line up and
become more from the colors. I will just switch the
colors around here. Once this part is dry, I will also put the little, some of these lines here. So to give it more of
a sense of continuity, Let's try it. I can't open this. I can firmly in place. Great. I will let
this dry completely. And you can join me for some final thoughts
in the next video. And then as a bonus lesson, I will show you one of the tools and
one of them ways we create pages in
our cosmic junk, Joanna, that will also allow you to shift your energy to let
things rest on the page. And it's a very useful tool in this realm of cosmic
smash booking.
9. Some Final Thoughts: Here we are with our new
journal in our hand. I'm so happy you
enjoyed this class. I hope you enjoyed it very much. I know I did, and I love my new journal and I can't
wait to start creating in it. I invite you to post pictures
of your finished Journal of your cupboard
decoration or any part of the process that
you have been doing, gathering your supplies,
everything you want, share it in the project section. Let me also know if you want to watch your experience
is with this class, with this process, what you discovered or what the
intention for your journalists, anything that you want
to share would make me very happy to read or to see and to witness and to give
you feedback or some, some thoughts that
may occur to me. If you haven't already, you can check out the
resources for this class. There is a step-by-step PDF where you have a
list of the supplies. And you have also a step-by-step
process pictures with brief descriptions to remind you of this different
steps of the process. So you can repeat it
whenever you want without having to look
again for this class. And you can apply it to
other creative projects. If you have any questions, just send me a message or leave me some
feedback and I will get back to you and help you
whenever you need something. I also want to invite you to leave a review on the class and tell other people how you experience in what
you think about it. I wouldn't be very
happy on this way. Other students or new
students can find this class after this
final thoughts and video, there's a bonus lesson
where I will show you how to create a first
page in your journal. And I invite you to
check this out and learn about the super
valuable tool resting page. And if you want more and
create more together with me, if you liked it, I
invite you to go to my website, bonfire
minus arts.com. There you can subscribe to a free mini course where we also create a page
and a junk john. Well, that has to
do with shifting emotions and with diving
into the process and with making a mess and just enjoying what you're
doing and then changing out of the
mess and create something valuable and
meaningful and beautiful to you. Then I invite you also to
stay tuned for my channel. I have more page
creating lessons coming up in the near future so you can build up
your confidence, build up your creative
repertoire in your junk journal, and get more ideas for pages. Because I know it takes awhile until you may come up
with your own questions, your own ideas, and
your own intentions. So I want to provide you with a bundle of tools
and ideas for pages. And then invite you always
to make your own pages, to ask your own questions, set your own intentions, and just use this process for
you to discover new things, to go new ways, or change your
point of view about something and grow
also as a creative, as an artist and as a person. Because that is my experience, what this process
does over time, it can really change
a lot of things, or it can change your view about things or help you discover certain things that
will help you, not only in your
creative process, but we'll expand into your life. With that, I'll
close this class. I hope you enjoyed it. I'm super happy to bring this to you and I hope to see you soon. In the meantime, I'm sending
you much laugh. Bye.
10. Bonus Lesson: Create Your First Page: In order to create
a resting page, generally you just
start to write what, whatever's in your head, whatever is bothering you, leave it on the page. But you can also ask some questions once
you've got the worst out, let's say you can
ask yourself, okay, how can I see this
from a different angle or how can I shift out of this and then
leave this question on the page and then you
just cover it with paint. I will show you how to do that. In generally, it takes only
a few minutes until you feel that you're really
letting something go, feeling a bit lighter,
breathing deeper again. And then, you know, it works. It's getting you out
of your head and you can go on about your day. When I start creating
pages in my journal, I usually just go to
some random page. I don't create them
chronologically. And for the resting page, I start with writing
everything out. That is bothering me around. The thing that I'm overthinking, getting into being mad about. And I just put it all to
the page so it gets out of my head and I just can
let it rest somewhere. Okay. That was intense. That was intense. And as always and
cosmic smash booking. After the writing, we
put a prayer on our page to open us up for the possibilities and
to get the messages. So I will write, please show me, support me. Me. Know, I know it will
probably make a mess here, so I will protect my journal
a bit and my surface. So I put some paper between the pages as they
are all different sizes. I feel this protects better than just protecting my
surface below the true owner. And I want to I think
I would just throw some color on and move it
around to get the energy going. And getting the snot out of my My thoughts. These are some diluted acrylics
that I'm mixed myself in, old acrylic plastic bottles for different colors in and
diluted them a bit was water. I think. I just want to move that around. I need to move into this weird energy,
worrying energy. Then when you come to a
point where you here, you start to breathe deeper. That usually comes after a few minutes. You
know, it's working. You're getting out of
your head and opening up to whatever place
to come through. I don't know if you are a
fan of finger-painting. I am. It will do that. I think this will be it for now. As you can see, I
made a terrible mess. I started to breathe deeply. And I, for gods, or shifted my thinking around
what I was so upset about. Now I can leave us
here on the page. I can let it dry. It can arrest here. I can go on with my day. And you can totally leave this background as it
is in your journal. Or you can add something on top. You can use this
as a background. And in fact, every
customer smudge book page that you create can start
out as arresting page. And then you add on top that is something that often
happens to me. I start creating and I just
throw everything around. I feel my thinking shifting. And then I'm already
two receive and to put on the page to dig deeper and find out what
it wants to tell me. But you can also just
leave it like that and let your abs sadness, rest on this page and
move on with your day. And that was it I hope you enjoyed to create
your first page. And I will have more coming up very soon and I
will see you then. I hope you enjoyed it. I hope you keep creating and
I'm sending you much love. Bye.
 Christina Keim, Discover Art as Self-Care Practice!!