Transcripts
1. Welcome!: Hi there, and welcome to this
mixed media study class. I'm Holly, and I've been preparing classes
for you since 2020. My background is in
surface pattern design. And my favorite
ongoing collaboration is with creative journey. And I also love creating
ditzy and wildflower designs. So today we're doing something
a wee bit different. Do you fancy joining me in
this singy mixed media study? It's going to be brimming with
bright sunflower yellows, mosrose pink, and spring greens. I'll be showing you
how to create texture and layers whilst
developing small bud, leaf, and stem details. We're going to be trying
out a new rolling method with our pastels, and I just happened on this technique as I
was playing around. So there's always something
to learn from these studies. Techniques we'll be
covering in class include choosing a very
bold color palette, dropping bleach into
the initial layers to create softly
granulating texture, adding loose floral
shapes with a mock brush, double loading color, and creating striking centers
with our soft pastels. Before we launch into the class, let me just remind you
that it's possible to share your project with
the Skillshare community. It's a really lovely
way of showcasing your work and also sharing
tips and feedback. You can find it underneath the class in projects
and resources, and then on the right,
you'll see submit project. I look forward so much
to seeing you work. So let's get started
with our class. Oh
2. Materials: Let me start out by
saying you don't need to have the same
materials as me. So just choose your
favorite sketchbook, and that can be hot
pressed or cold pressed. And if you don't
have ink or guash, you could use all watercolor. First of all, I have a
sketchbook by my stationery, and it's hot pressed. And I know some of you use
a Paul Rubin sketchbook, and I'd be perfect
for this, too. Then I have a gorgeous
ink made by Tom Studio. It's actually calligraphy ink, and it's called sunflower. Then I have one of my
favorites seven A Moss Rose. And this is doctor PH Martins. I have a gouache in
ultramarine blue, but you could choose your
favorite blue in watercolor. My favorite pink,
which is rose madder, that's a watercolor
and green gold, which is my favorite green, and that's also a watercolor. I used washy tape just to
create some nice neat edges. This is my favorite dark green. It's brush a pigment
powder in olive green. Very easy to use. You just water it
down into an ink. We're going to be splashing in just a little bit of bleach, and this is 40
bleach, 60% water. I'm using zero Raven by
Jackson's mop brush. We use this in my rose
watercolor class. You could also use a Filbert for this class or a round brush, whichever you feel
most comfortable with. We have a pencil. This is 07, and it's a mechanical pencil
by Faber Castell. And these are Jackson's
soft pastels. I'm beginning to
really love these. So have a white, a mid green, and a bright green. I'll leave a list of all of the materials in
our A section. I
3. Practise | Background, Bleach, Floral & Foliage Shapes: So I've got the
ultramarine blue, which is the gouache and
green gold in watercolor. So let's mix up a
lovely teal blue. This is such an easy
mix, and it's gorgeous. Just adding a bit
of water there. And this is going to be the
beginning of our abstract. We're just going
to drop in water. And when we add the green gold, we know that it's
going to travel. Now for our water down bleach, I never, never tire of this. It's so enjoyable. And that will
granulate even more. Gorgeous texture. Then we could also bring in
a little bit of blotting. That in itself brings texture. This brings a little
bit more complexity to the background rather than just doing one wash. Now we're going to do
our trick that we did in joyful florals, where we do a line
of green gold, just neat green gold, and I have the moss
rose there in the well. Now, I'm taking just a
little bit of the water off, but not a lot and then going to jump up and down on
the base of the brush. And the tip goes
into the moss rows. And then what we're
doing is keeping the heel of the
brush in one place, pretty much, and moving the
tip of the brush around. Just practice making the
shapes and practicing the brushstroke rather
than feeling you have to complete
the whole flower. So this is the sunflower yellow. I'm going to bring
this in as well, using nice bold colors
for this mixed media. Let me show you more slowly. So this is the bouncing
and moving around. And this is the rolling method. I do like the rolling of the
brush because you can get broken lines along
the top of the petal. And I think it'll
be really effective to use both of these strokes. There's the broken lines. So back to our background wash. Some of the areas are still wet, and that's what we want, really. W a little bit of merging
in of the flowers, but not so it takes
over the whole wash. So we've got the blotted
areas which are dryer, and we've still got the areas where it's collected a
little bit of water, and it's very shiny. And this kind of gives us
a slightly uneven effect, which I think is lovely where
it merges really well with the watery areas and more
defined in the drier areas. Running out of green gold. I That's the rolling, Love that. And then we can drop in ink or watercolor or guash
to the petals. I had planned for a
warm and a cool pink. So we've got the moss rose, which is tending
towards the cool. And then rose madder, which is a very warm pink. I'll love mixing those
two pinks together. So your choice of
dark green now, and I'm using
brusho olive green. Just because I just
don't feel I can find this color anywhere
else. I just love it. But your favorite green for this could be watercolor,
gouache, or ink. And then we're using the same brushstroke as with the petals. And let's move over to
the other page now. So here we are just
rolling the brush round, and it creates these
gorgeous leaf shapes, keeping the heel pretty
much in the same position. You get these lovely dry
brushing effects, as well. So how about just pressing into the page and printing
with our brush? That's such an easy
leaf shape to make. No movement necessary just
using the shape of the brush.
4. Practise | Pencil, Teal Leaves & Pastel Stems: Let's pick up our pencil now, and I'm using my mechanical
faber Castel pencil. And then what we're doing
is moving the paint. So actually, the pencil on its own merit, isn't
really showing up. And that's what we want. I'm looking for a device to move the paint around and create
these lovely, pleasing lines. But we can also incorporate
the pencil itself. So here you can see
the pencil and here it's just made a
furrow into the paint. Just mixing up some more
ultramarine with the green gold. I put too much green in there, so I'm going back
for some more blue. I just wanted it on the
bluey side of teal. Then let's just practice
merging these colors together. And again, just practicing
our brush strokes. And we might as well
just keep going. We've got lots of
blank page here. And that's a kind of a print and slight twist to the brush, which brings up this
lovely textural surface. And this is a very
simple brush stroke. You probably use
this many times. It's kind of a more conventional
use of brush where you would put the tip of the brush down and then
bring it towards you. This is my favorite, however, and this is the side stroke. We're actually using
the broad side of the brush and then
coming up to a tip. So the whole brush is in
contact with the page, moving it to the left and slowly bringing
it up to the tip. And there it is to the right. I'll have a practice with this because you
might find it easier to create those marks
moving away or toward you. We'll be creating a second
layer in our project. So we're going for a
deeper color, less water. I'm going back to our
twisty petal shapes. And you can get some
beautiful edges on your petals with
this technique. I've just got a bit
of scrap paper, and this is actually Fabriano
students hot press paper. Just doing a wash there, but I think it needs
to be a deeper color. So I'm going to bring in my brusho pigment
powder in olive green. So I'm just soaking
up that paint, and let's do a quick wash. So any dark green. Whilst it's still wet, what we're going to do is roll
our pastel into the paint. This works also when it's dry. And isn't this a lovely
way to do branches? I just did it by accident and then discovered
how much I loved it. And towards the
end of our class, we might bring in some of
these white flowers or buds. So I'm pressing
quite firmly into the page and just rolling it in a circular or oval movement to create these
gorgeous white blooms. And the other thing, of course, you can do is do some
little outlines of leaves. You could also use
these stems to run up to your main
flower motifs. So when you're ready and
you've had a good practice, let's move on to our project.
5. Class Project: Part 1 | Creating Our Loose Watercolour/Gouache Background: You certainly don't have to, but I'm going to tape
off my sketchbook. This is low tech washy tape. I mean, it doesn't
advertise as that, but I just know it is because the paper that
I'm using in this my stationary sketchbook
is quite soft and it often peels away when
I go to remove the tape. I have details of this washy
tape, so I'll leave those. Just taking off the
extra little bits. So I'm starting off
with green gold, and you could choose
any bright green or you could add yellow to
a darker green or a blue. That's French ultramarine. And then I'm using a kind
of a sunflower ink here, and it's actually Tom's studio. And as I will have mentioned, that's a calligraphy ink, but I just love it so vibrant. And some of the
sevena moss rose. I wanted to bring in a
different pink, as well. So I have some rose madder here. And that's wood colour. So let's start off
by splashing in some water and just
creating some shapes. Just moving that water around. That washy tape is
not going to lie, so I'm just going to
get a different one. It won't match, but it'll
do the job, hopefully. I got these in a huge set
of different sizes as well. So sorted. Very handy. So, whilst that's
still very wet, I just want to mix
a lovely teal, and this is the French
ultramarine and green gold. And it's a gorgeous color. I just want it a
little bit more bluey. Can you see what I mean there? So pretty. And we're just
going to drop that in, watering it down
just a little bit. And again, not thinking
of any shapes here, just dropping in the paint, and that's it in various places. Just rolling my brush. And now a little
bit of green gold. Now, what we know
from past classes is that green gold travels. It's quite bossy and it barges in to any
neighboring color. But I'm using that as an advantage because I want
the colors to mix quite well. It creates a very
interesting effect. And then just some pure water pulling those shapes
out a little bit more. Now we're going to drop in
some water down bleach. And this has its own
explosive effect, as well. And then blotting with
the clean tissue. Just gets us started, really, so that we're not working on a completely blank
canvas as it were. I
6. Class Project: Part 2 | Adding Floral & Foliage Layers: So what I'm doing now
is I'm going to create a line of the green gold. And this is a technique that
we used in joyful florals. We're going to bounce up
and down on the neat green. And I really should
have added some water to that rose madder
before I did this, but it's created a nice kind of orange color, which I love. And then we're just rolling and scrunching our brush around. So let me just now pull
that out properly. I love rose madder. And then jumping up and down, and it's just on the base of the brush and the tip
into your colour. I just going over those
bits a little bit. It creates a lovely effect, and it means that it's
much more organic looking than if we were trying
to paint in the centers. It's a beautiful technique, and I think it's one that
you might continue to use. I certainly will. Not too
much paint on that one. I wanted a little
bit of texture. Where it's running too much, you can just mop up a little
bit with your tissue. Adding neat paint on
the tip of the brush. Bouncing up and down, back into the rose madder. And then that movement
that we practiced. A good kind of roll around. Finally, I just want to drop in some bits of color into the
top areas of our flowers. And we want all of
those luscious colors to merge in with each other. I particularly love
on the right page, the middle bottom where
the French Automrene and almost like a blush color from the rose
madder are merging. So now shall we put
in some leaves? I am going to get out
my favorite green, which is actually pigment
powder. That's brusco. I'll leave details about brusco if you're not
familiar with it, but it's just a pigment
powder and you mix it down, and it tends to mix into
an inky consistency. It's a very deep color. So I'm going to go in carefully. I don't want to, uh, take over the page
or this color. So I've added enough
water, I think, for it not to be too invasive. Now we're just
dragging our brush, doing a side sweep. And you can see I'm
not really thinking of a particular leaf shape. I'm just dropping in paint, rolling it a little bit
and not overdoing it at this stage because we
are building up layers. It's very easy to overpaint
with watercolor and inks. So I've picked up my
mechanical pencil, and I'm just pulling
out some of that paint. What I like about pencil is you can use it
to move the paint, but it also obviously
acts as the pencil, so we get varied marks there. I love this technique
we get uneven lines. And the results can
be unpredictable, which is, I think, great. These are slightly of a lighter
value than the left page, so I'm just going
in dropping a bit more of the olive green. A little bit more of that
teal blue that we mixed, allowing that to
merge in in places. This is very much an
abstract painting, so we're not too worried about the formation of the
leaves or flowers. So I'm just going to dab
in little areas here, lift some of the paint.
7. Class Project: Part 3 | Sunflower Yellow & Moss Rose Flowers: With this layer, we're using slightly less
water in our mix. So we've gone from very watery and now a little bit
more pigment to water. I'm creating another
line of the green gold, bobbing up and down
again on the green gold, just on the base of the brush. And then I'm going to go into that gorgeous sunflower yellow, which is the Tom's
ink. Ah, gorgeous. Such a lovely and easy technique for gorgeous watercolor
and ink flowers. So just to show you, you can almost see
the imprint of it on the palette before
you put it down. Lana, just rolling
the brush around. I love this pink teal and
sunflower yellow together. At the moment, they can look
a little bit disparate, but once we carry on, everything will merge
so well together. And just adding some they're
coming into the page. You can see how the
bleach has worked now. It's allowed the teal color
to granulate in places. Adding some more green
up and down on the base, and this time using that
luscious moss rose. It is a really happy
mix of colors. And remember when you're
placing them just to push down right into
the heel of the brush, and then we pick up the green. A bit more blotting.
And you can see it all now coming together and all the colors kind of
supporting each other. I
8. Class Project: Part 4 | Soft Pastel Details: Having that blue background
also creates depth because blue recedes and
warm colors move forward. Now, I haven't really
used pastels a lot, so this is a learning
curve for me. But I'm just going to put some centers into these flowers. Now, the paint is still wet, but I quite like the effect of the scribbles
in the wet paint. Quite wet there, so it doesn't always take
up if it's very wet, but I'm really loving
this pastel for centers. And this is a light green. And again, I'll leave details
in the about section. But these are Jackson's
soft pastels. Bringing in a
slightly darker green now and just going round where I've placed
that pale green. Still a scribbly movement. And I thought I might just
add some pastel to a few of the leaves or create
some new ones. So, I love that. This I've never done that movement
before. I love it. So what I'm doing
is just rolling the pastel and allowing it to kind of just move
the way it wants to. So I'm not directing
its movements. And that is so effective. I'm just going to add some
little leaves off the stem. But that's a real
breakthrough for me because I love it as stems. You're going to be seeing
that a lot in my artwork, I think, in the future. I've got to do more. Just
adding some leaves there. And then I'm to roll here. Adore adore this move. How neat is that, and
how much like a stem, a branch does that look? Love, love, love. I just want to do this all
over the place now. I'm having to be restrained. And I particularly
like when it's over a color underneath, much more effective
than just on the white. So now just going to scribble some leaves over that mid green. And maybe a few more marks in
the centers of the flowers. Who knew pastels were so
much fun? I didn't know. We're total convert now. I'm just creating
some little marks on some of the leaves
here, as well. Oh, this is just right. I'm so happy right now. I purposely started out on this class with not much
planned in my head. And I really feel it's paying off because
sometimes when we just launch into something
in a more intuitive way, we do kind of break boundaries
and discover things. And to me, that's the most
exciting part of making art. So I have white. I bought this as a
little set of my own. I don't think it was
a three pastel set. I just chose those colors. And now putting in some little highlights
of white in the center. It's so nice, just for
little highlights, but also for sepals and dmons. I'm persevering there,
'cause it's still quite wet, but I love the white
over that dark, kind of pinky magenta. So another flower center there. I still doing scribbly
movements there. That suddenly just
become something else with the pastels added. And oh, love it. Love it. And what I'm doing is just
pressing into the page now, and it creates these
delicate petal shapes. So more petal shapes. That's still a scribble, but I am placing more weight on the pastel really
pushing down into the page. So I'm just going to add some
to this little branch here. Try not to do too many. I do love it over
the darker colors. That's so effective. And I'm doing a mixture of the two there rolling and pressing
quite hard into the page. And I can imagine those
making gorgeous daisies. It's definitely something
I'll use again. So where I've got little
white spaces or light spaces, I want to just go in and
add a few more stems. And some more florals
in the white. They each have a
little character of their own, these two pages. A little bit more of that mid green and a couple more flowers. I can't wait to try
this with some daisies. So now just slowing down, having a look, seeing where
I want to add things. I think some smaller leaf
shapes would be nice in areas. Very organic shapes. Not really sure how
they're going to turn out. I just want to fill in that
little white space there. Turn it upside down. Always a good technique for seeing things from a
different perspective. I was going to add
some more stems going over to tie those
pages up a wee bit. I'm not keen on that white
space in the center, so I'm just going to add
a little bit more pink. Have a good old look at it. And if there's anything poking out that you'd like to
change, now's the time? Last minute finishing touches. A little bit more white. And I think that's it. I'm just going to take
a photograph of it now, as I've suggested
with other classes, see it through
your phones image, and that will give you a good idea of what
else you'd like to do.
9. Class Project: Part 5 | Little Florets & Final Reveal: As the last detail, I thought I might add some
of the sunflower yellow. I'm just using the tip of the mop brush and just
dotting in some extra color. And going over the
white pastel in places. Now, let's reveal our work
by removing the washi tape. It's done quite well, actually, to maintain crisp edges, considering it's from
an inexpensive set. And the final reveal. Lovely. And there we have our
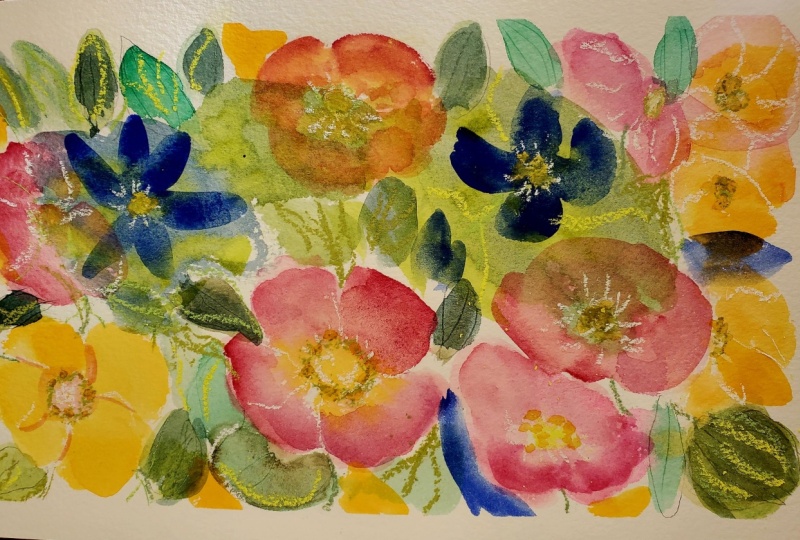
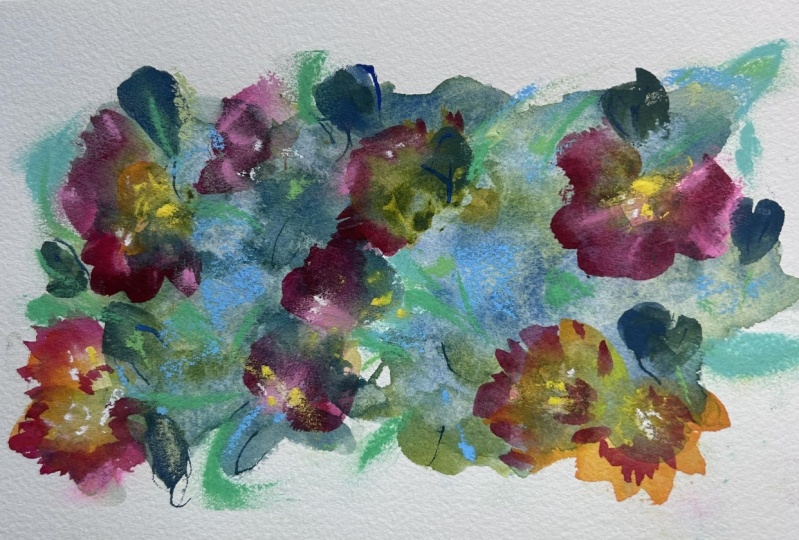
completed mixed media study.
10. Thank You!: Well, we've reached
the end of the class, and we've gone through quite
a few techniques today, including our bold color choice, using bleach to create a lovely texture in
our background layer, creating loose florals with ink, gouache, and what colour. And we've also continued to practice the double load method where we have one
paint at the base of the brush and a tip
in a different color. We've also added lots
of pastel details. We've created centers, leaves, and discovered a
whole new technique together where we roll the
pastel across the page, and it creates these
gorgeous stems. So thanks again so
much for joining me. I'll see you over in
discussions or on Instagram. Take care. Bye bye for now.
 Holly Tomas Art, Watercolour | Gouache | Mixed Media | Scotland